Advanced Reaction Time Tester
Want to test your reaction time more reliably? Want to test other modes of reaction? Build this to be able to test both your auditory as well as your visual reaction time more accurately. This project uses TypeScript ONLY.

YOU WILL NEED
- 1 x micro:bit
- 1 x ADKeypad (Available in Tinker Kit)
- 1 x Potentiometer (Available in Tinker Kit)
- 1 x Micro:bit breakout board (Available in Tinker Kit)
- 1 x Buzzer (Available in Tinker Kit) (Optional: You can still use the visual testing if a buzzer is unavailable)
- 1 x 128x64 OLED screen (Available in Tinker Kit)
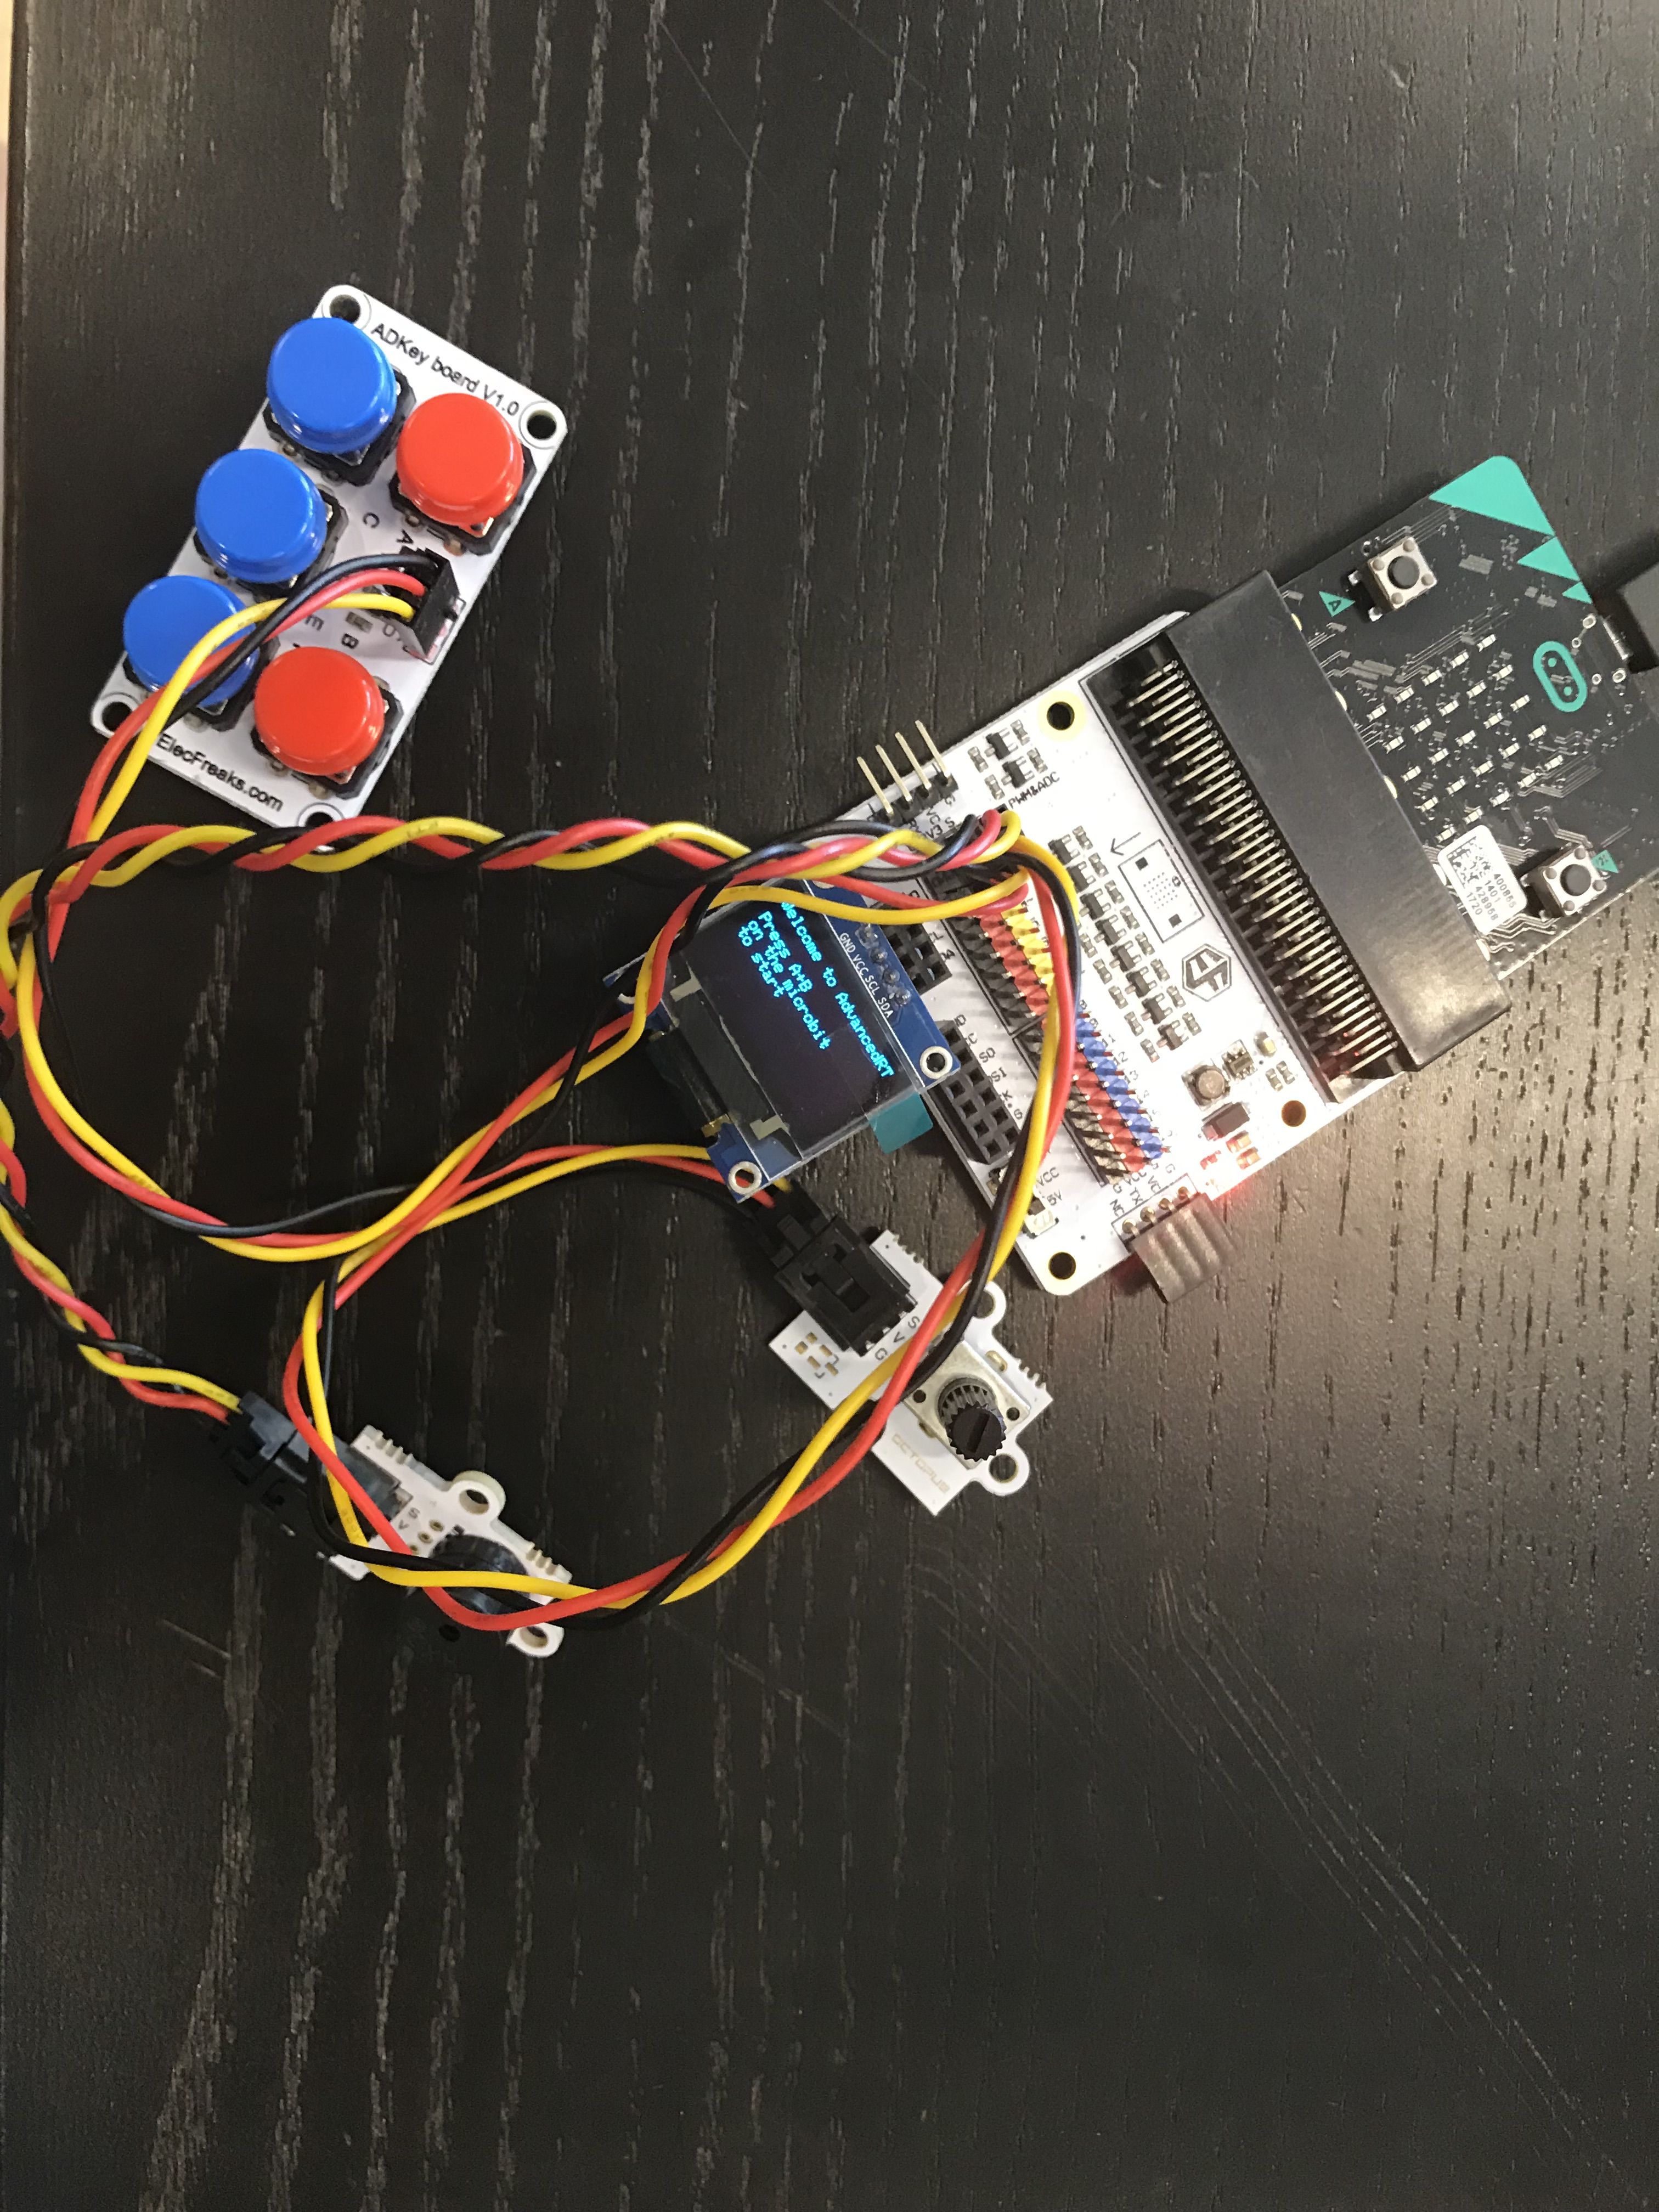
STEP 1

Start off by connecting the micro:bit to the breakout board. Ensure that the orientation is correct.
The side with the 5x5 LED grid should be inserted such that it faces the same direction as the breakout board's front
Attach the buzzer to Pin 0.
Attach the potentiometer to Pin 1.
Attach the ADKeyboard to Pin 2.
Important: THE BUZZER MUST BE IN PIN 0 FOR IT TO FUNCTION
As for the rest of the components, the potentiometer has to be attached to a pin with a ~ symbol on it (analog I/O pin)
Attach the OLED to the I2C pins. Follow the orientation of the pins on the OLED as well as what is printed on the breakout board.
Materials
1x micro:bit
1x breakout board
1x ADKeyboard
1x Potentiometer
1x Buzzer
1x 128x64 OLED screen
STEP 2
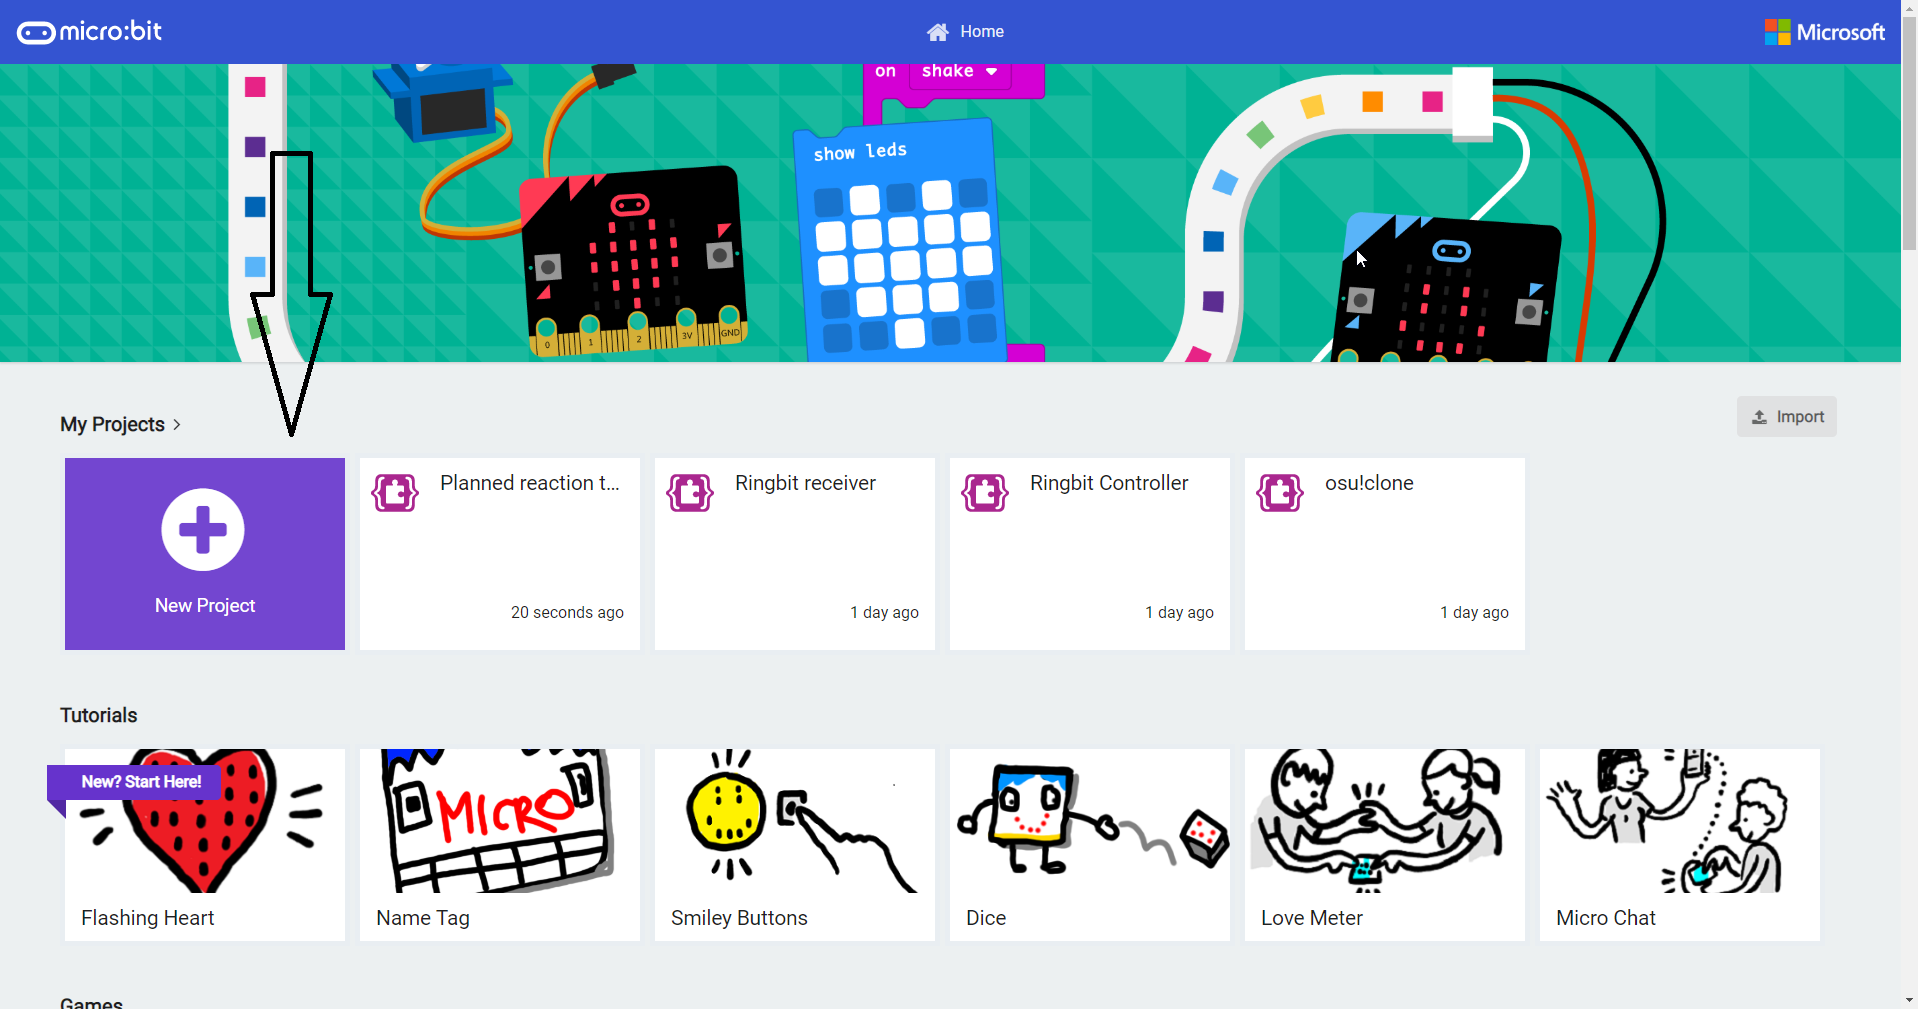

Access the Microsoft Makecode Editor here
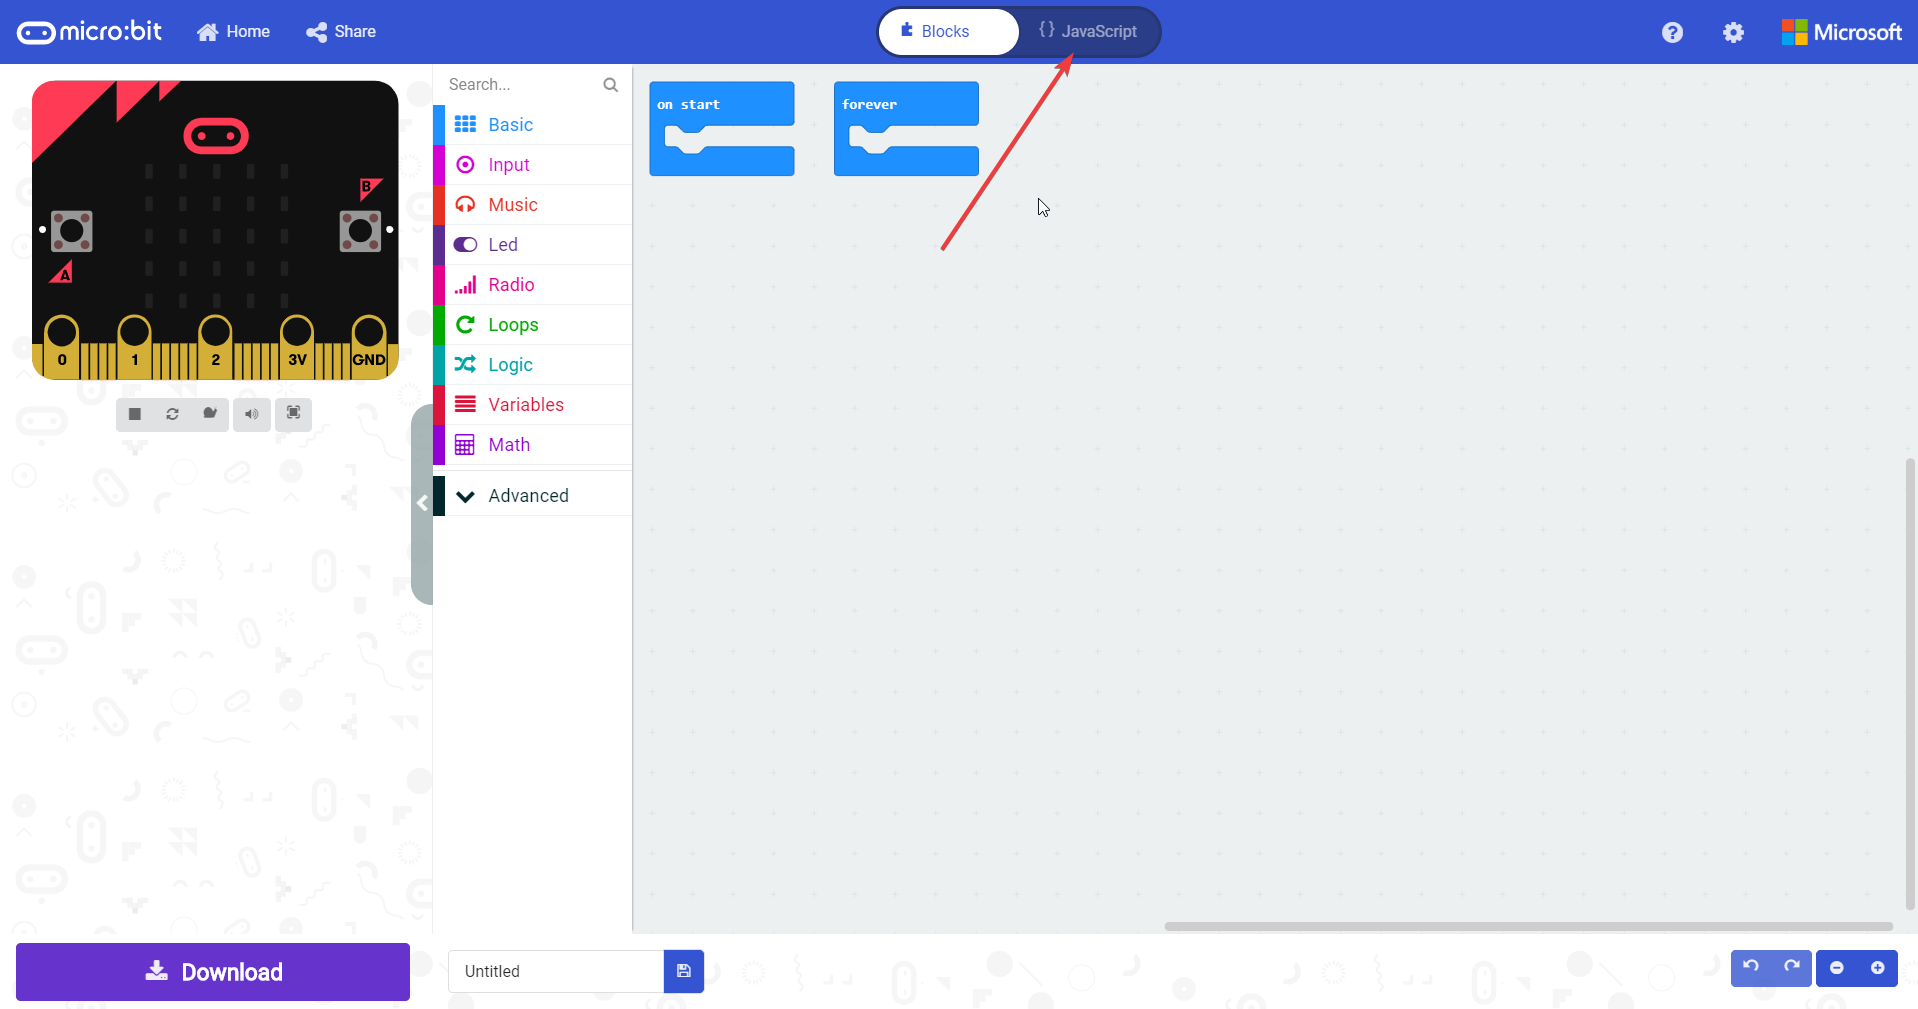
Create a new project, and select the JavaScript Editor
Note: We will not be able to use the blocks editor due to the use of more complex functions which Makecode cannot automatically convert into blocks
Materials
A computer with internet access
STEP 3
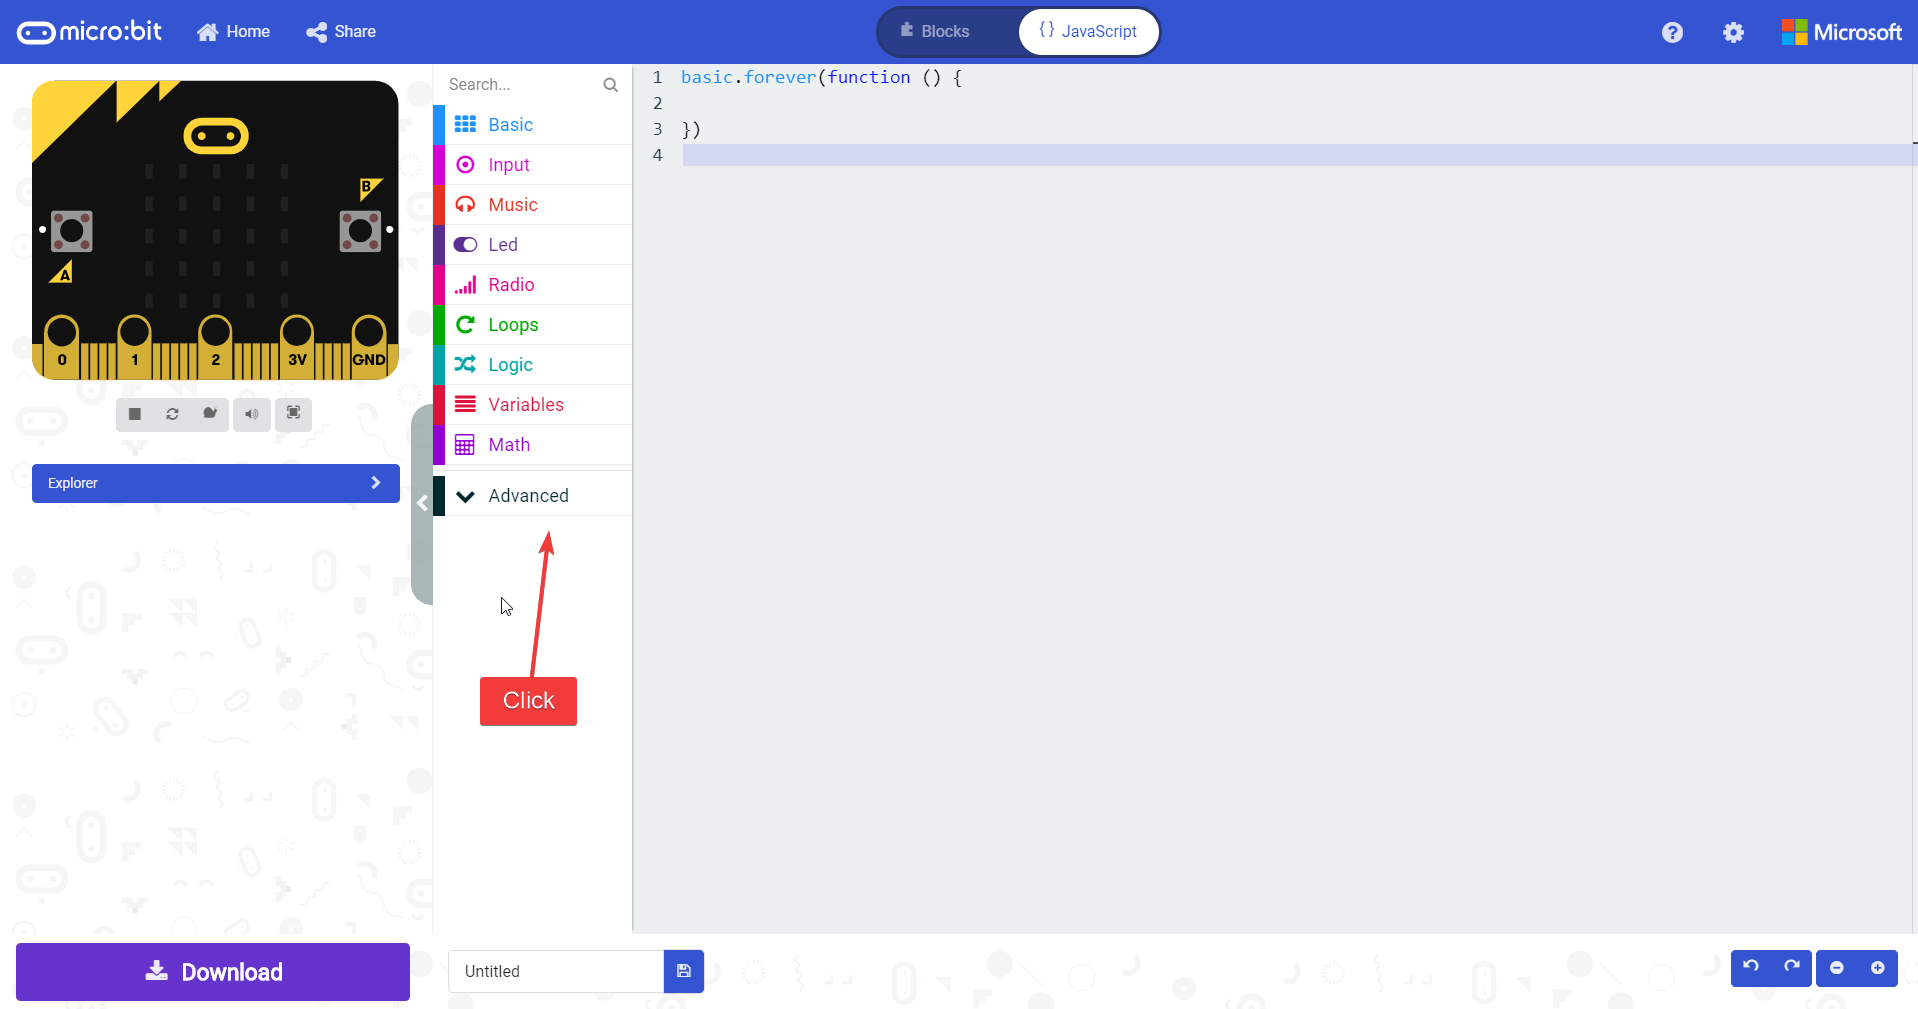
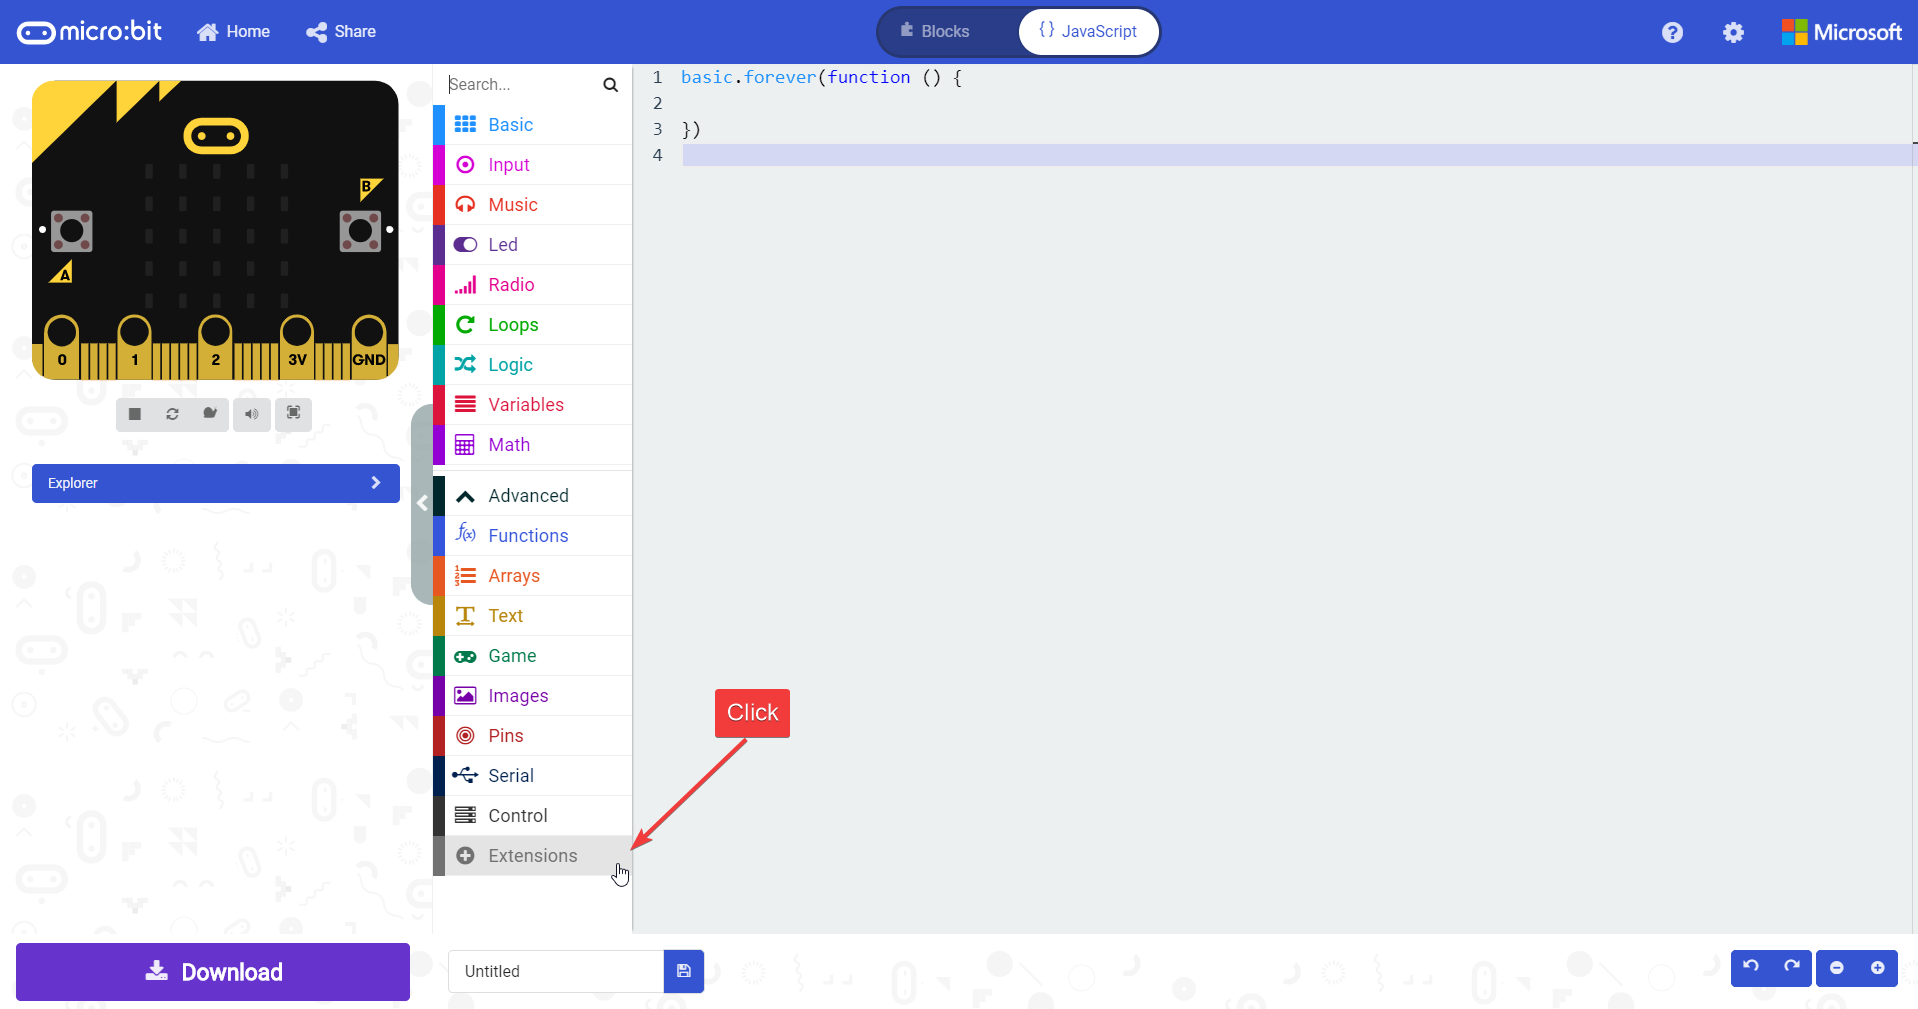
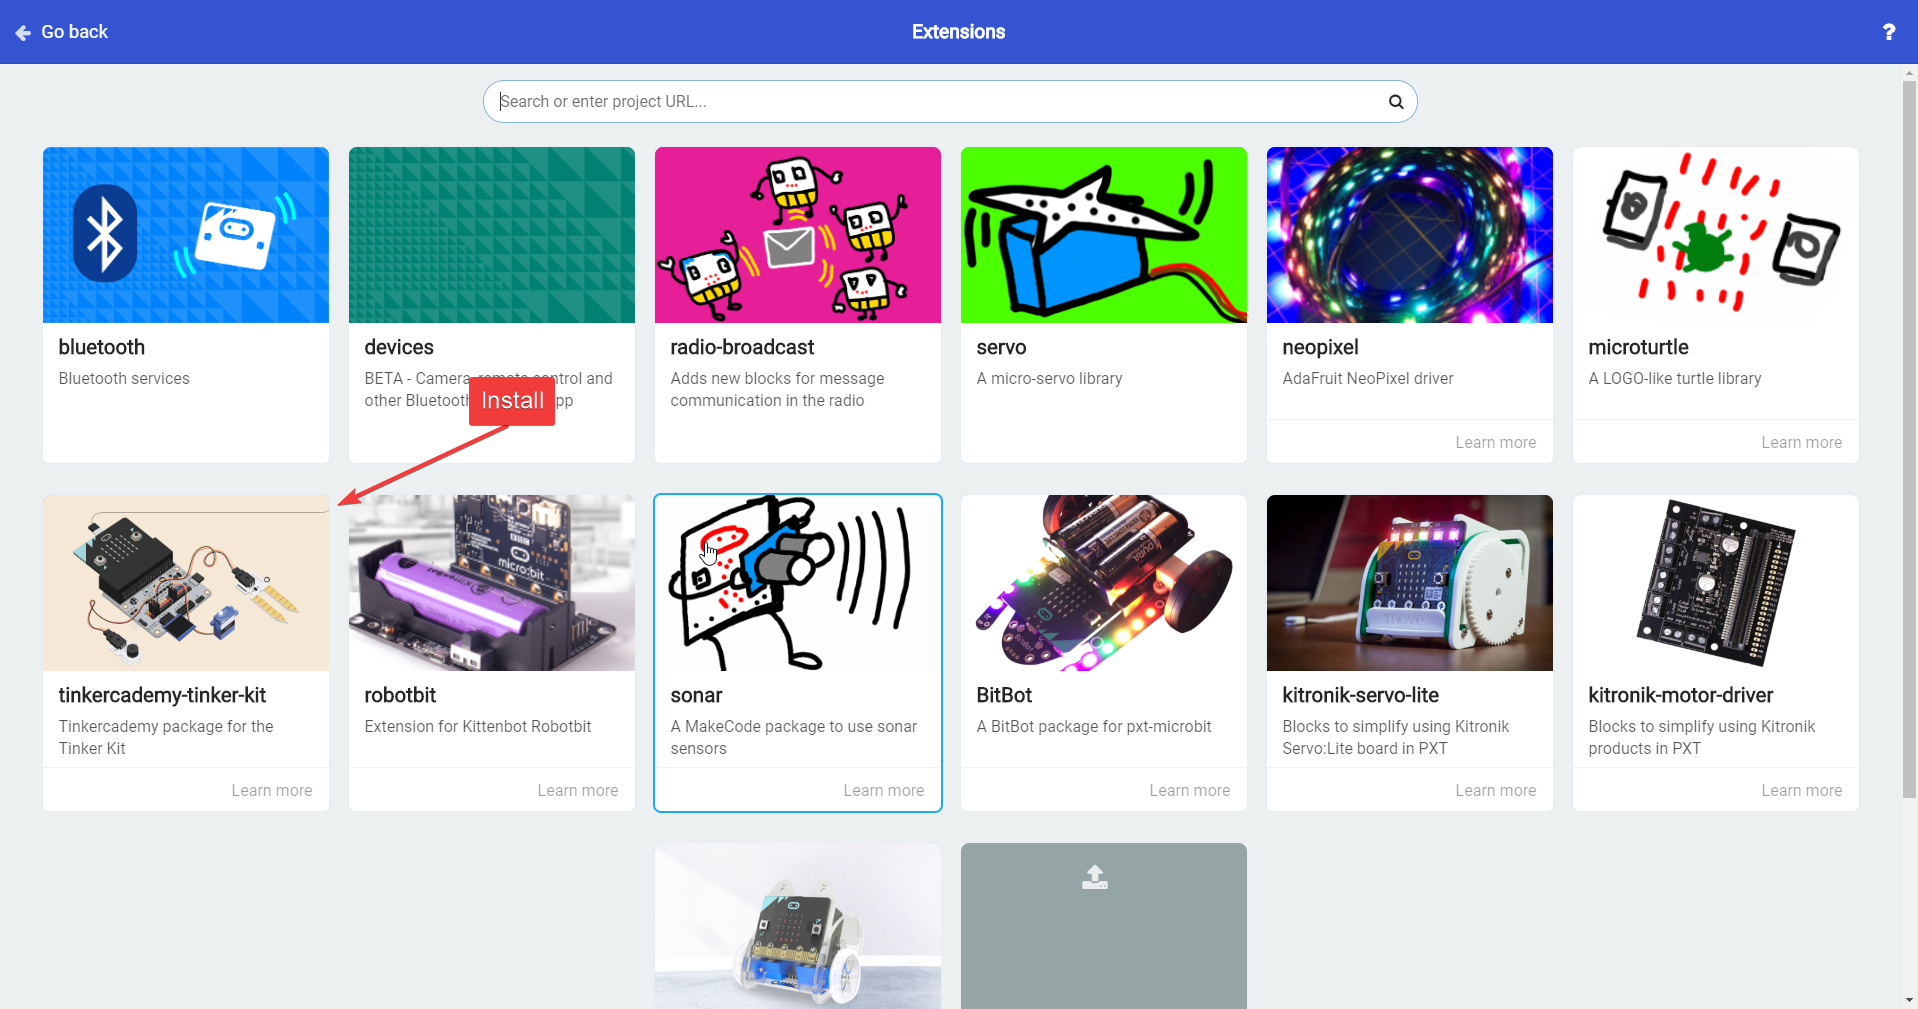
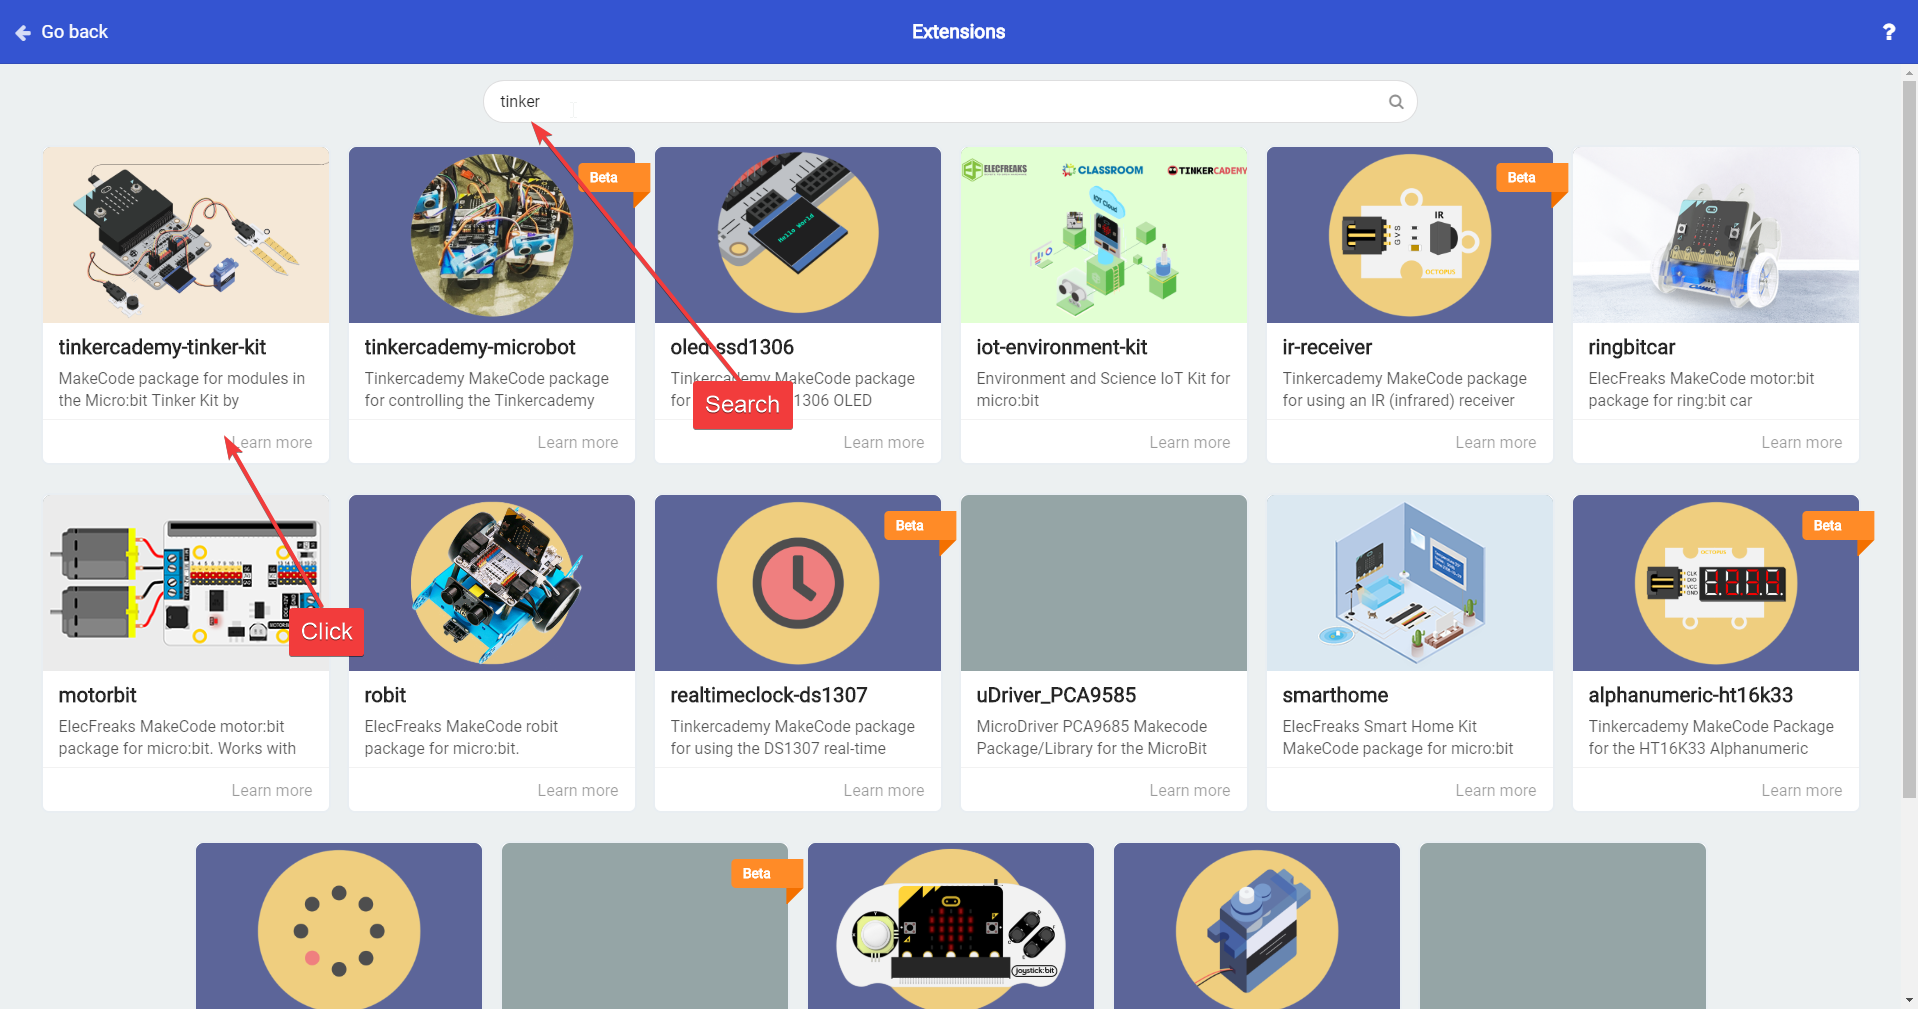
Install the tinkercademy-tinker-kit extension from the MakeCode Editor (Located under Advanced > Extensions)
STEP 4
You do not need to copy the code exactly as it is, but you do need to be able understand the logic behind the code if you would like to re-implement it yourself.
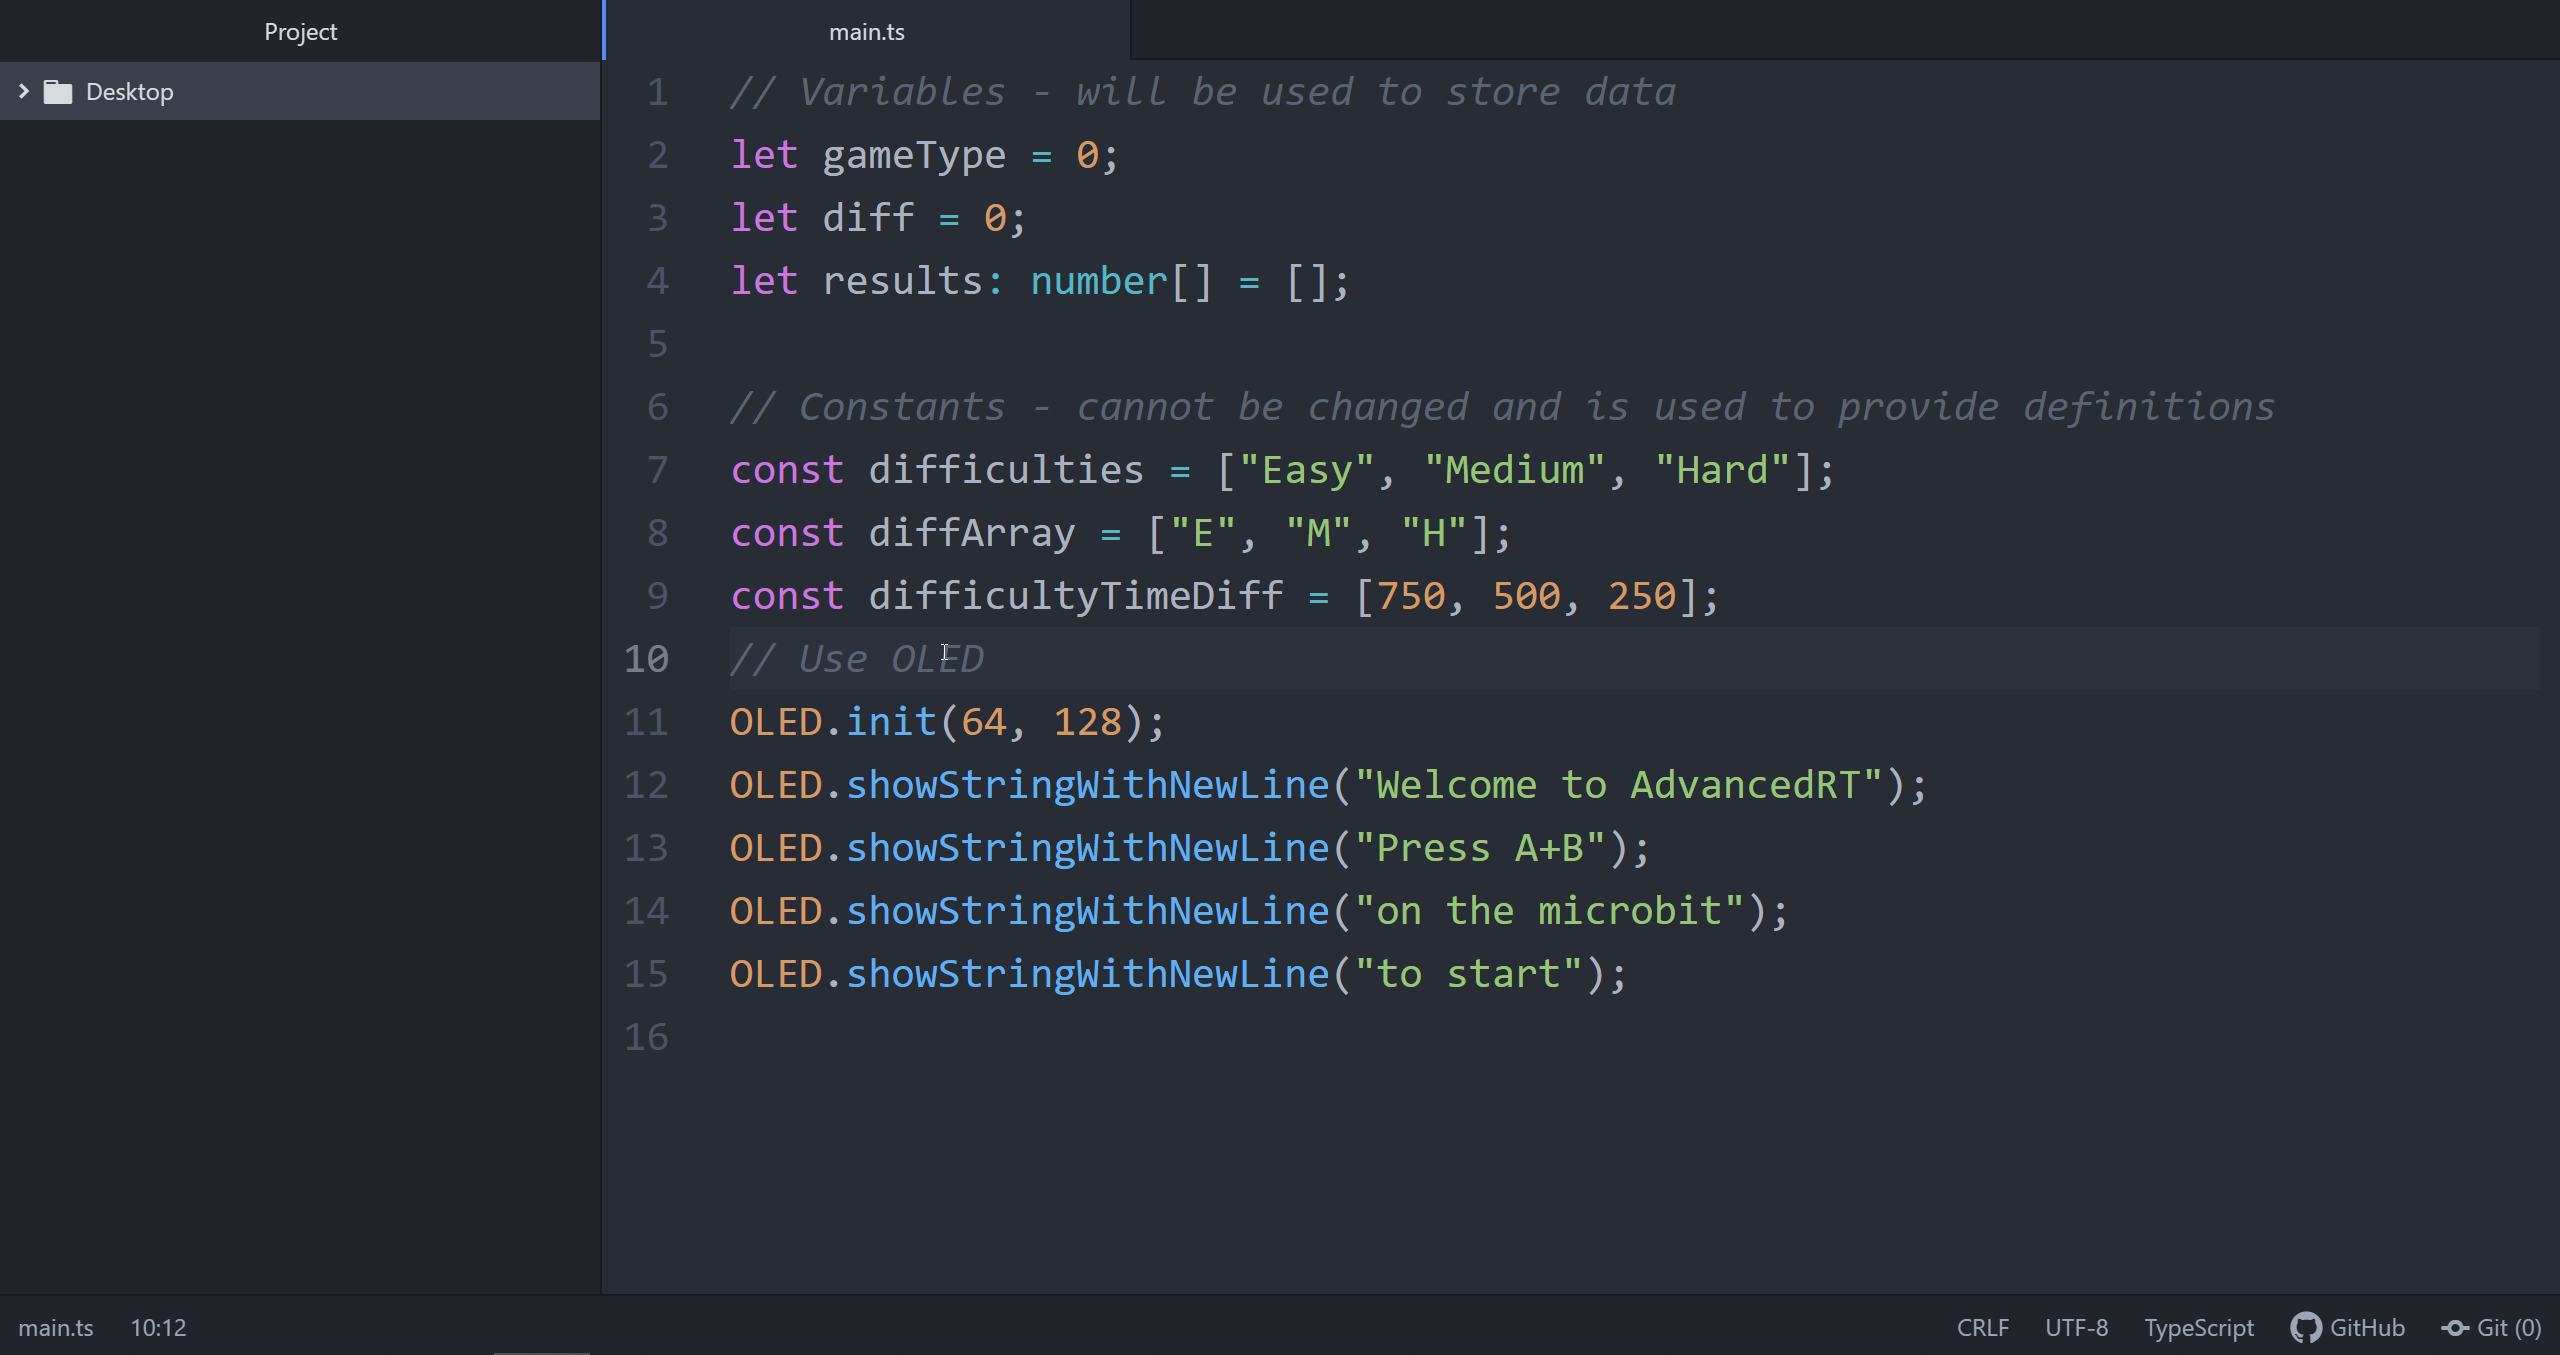
First, we will set up some variables to store player data, as well as some settings for the actual program. The let keyword is used to defined a variable, which can be changed by the program. The const keyword is used to define a constant which cannot be changed by the program. const types are often used to store predefined information and specifications about how the program will operate.
Next, we will show a welcome text on the OLED display to ensure that everything is working.
STEP 5
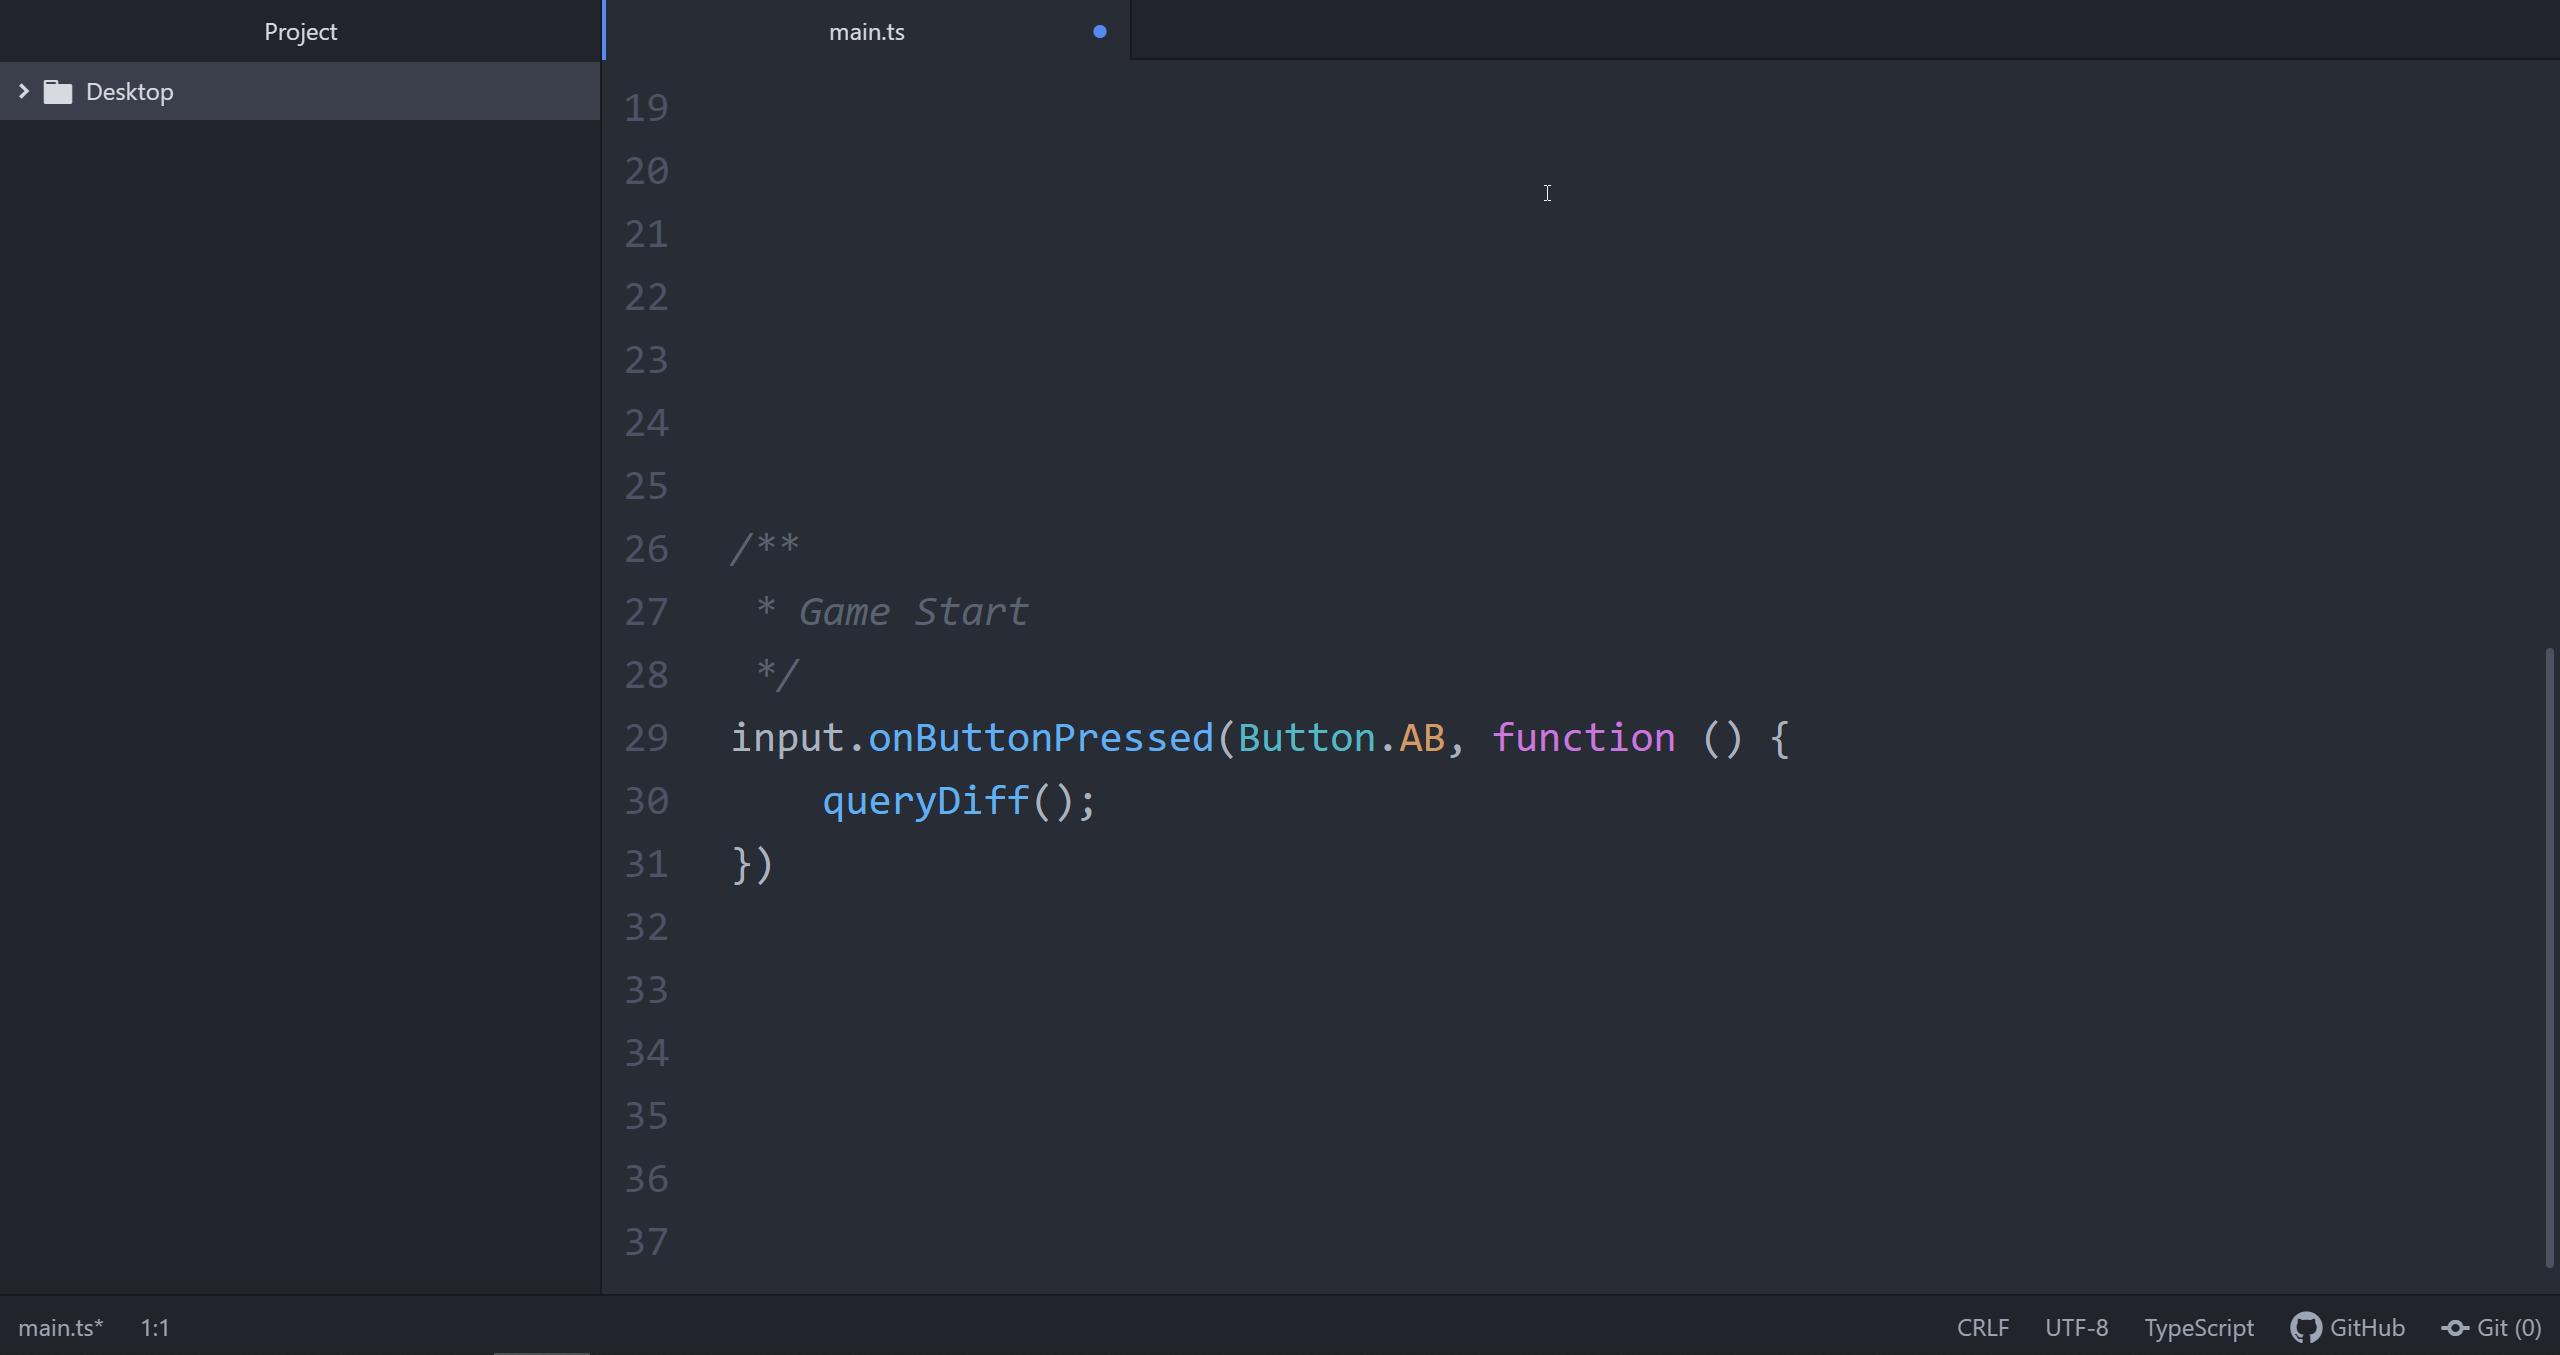
Next, we will implement the logic to start the game. This short bit of code tells the micro:bit to ask the player for information about the difficulty when they press on both buttons A and B on the micro:bit.
STEP 6
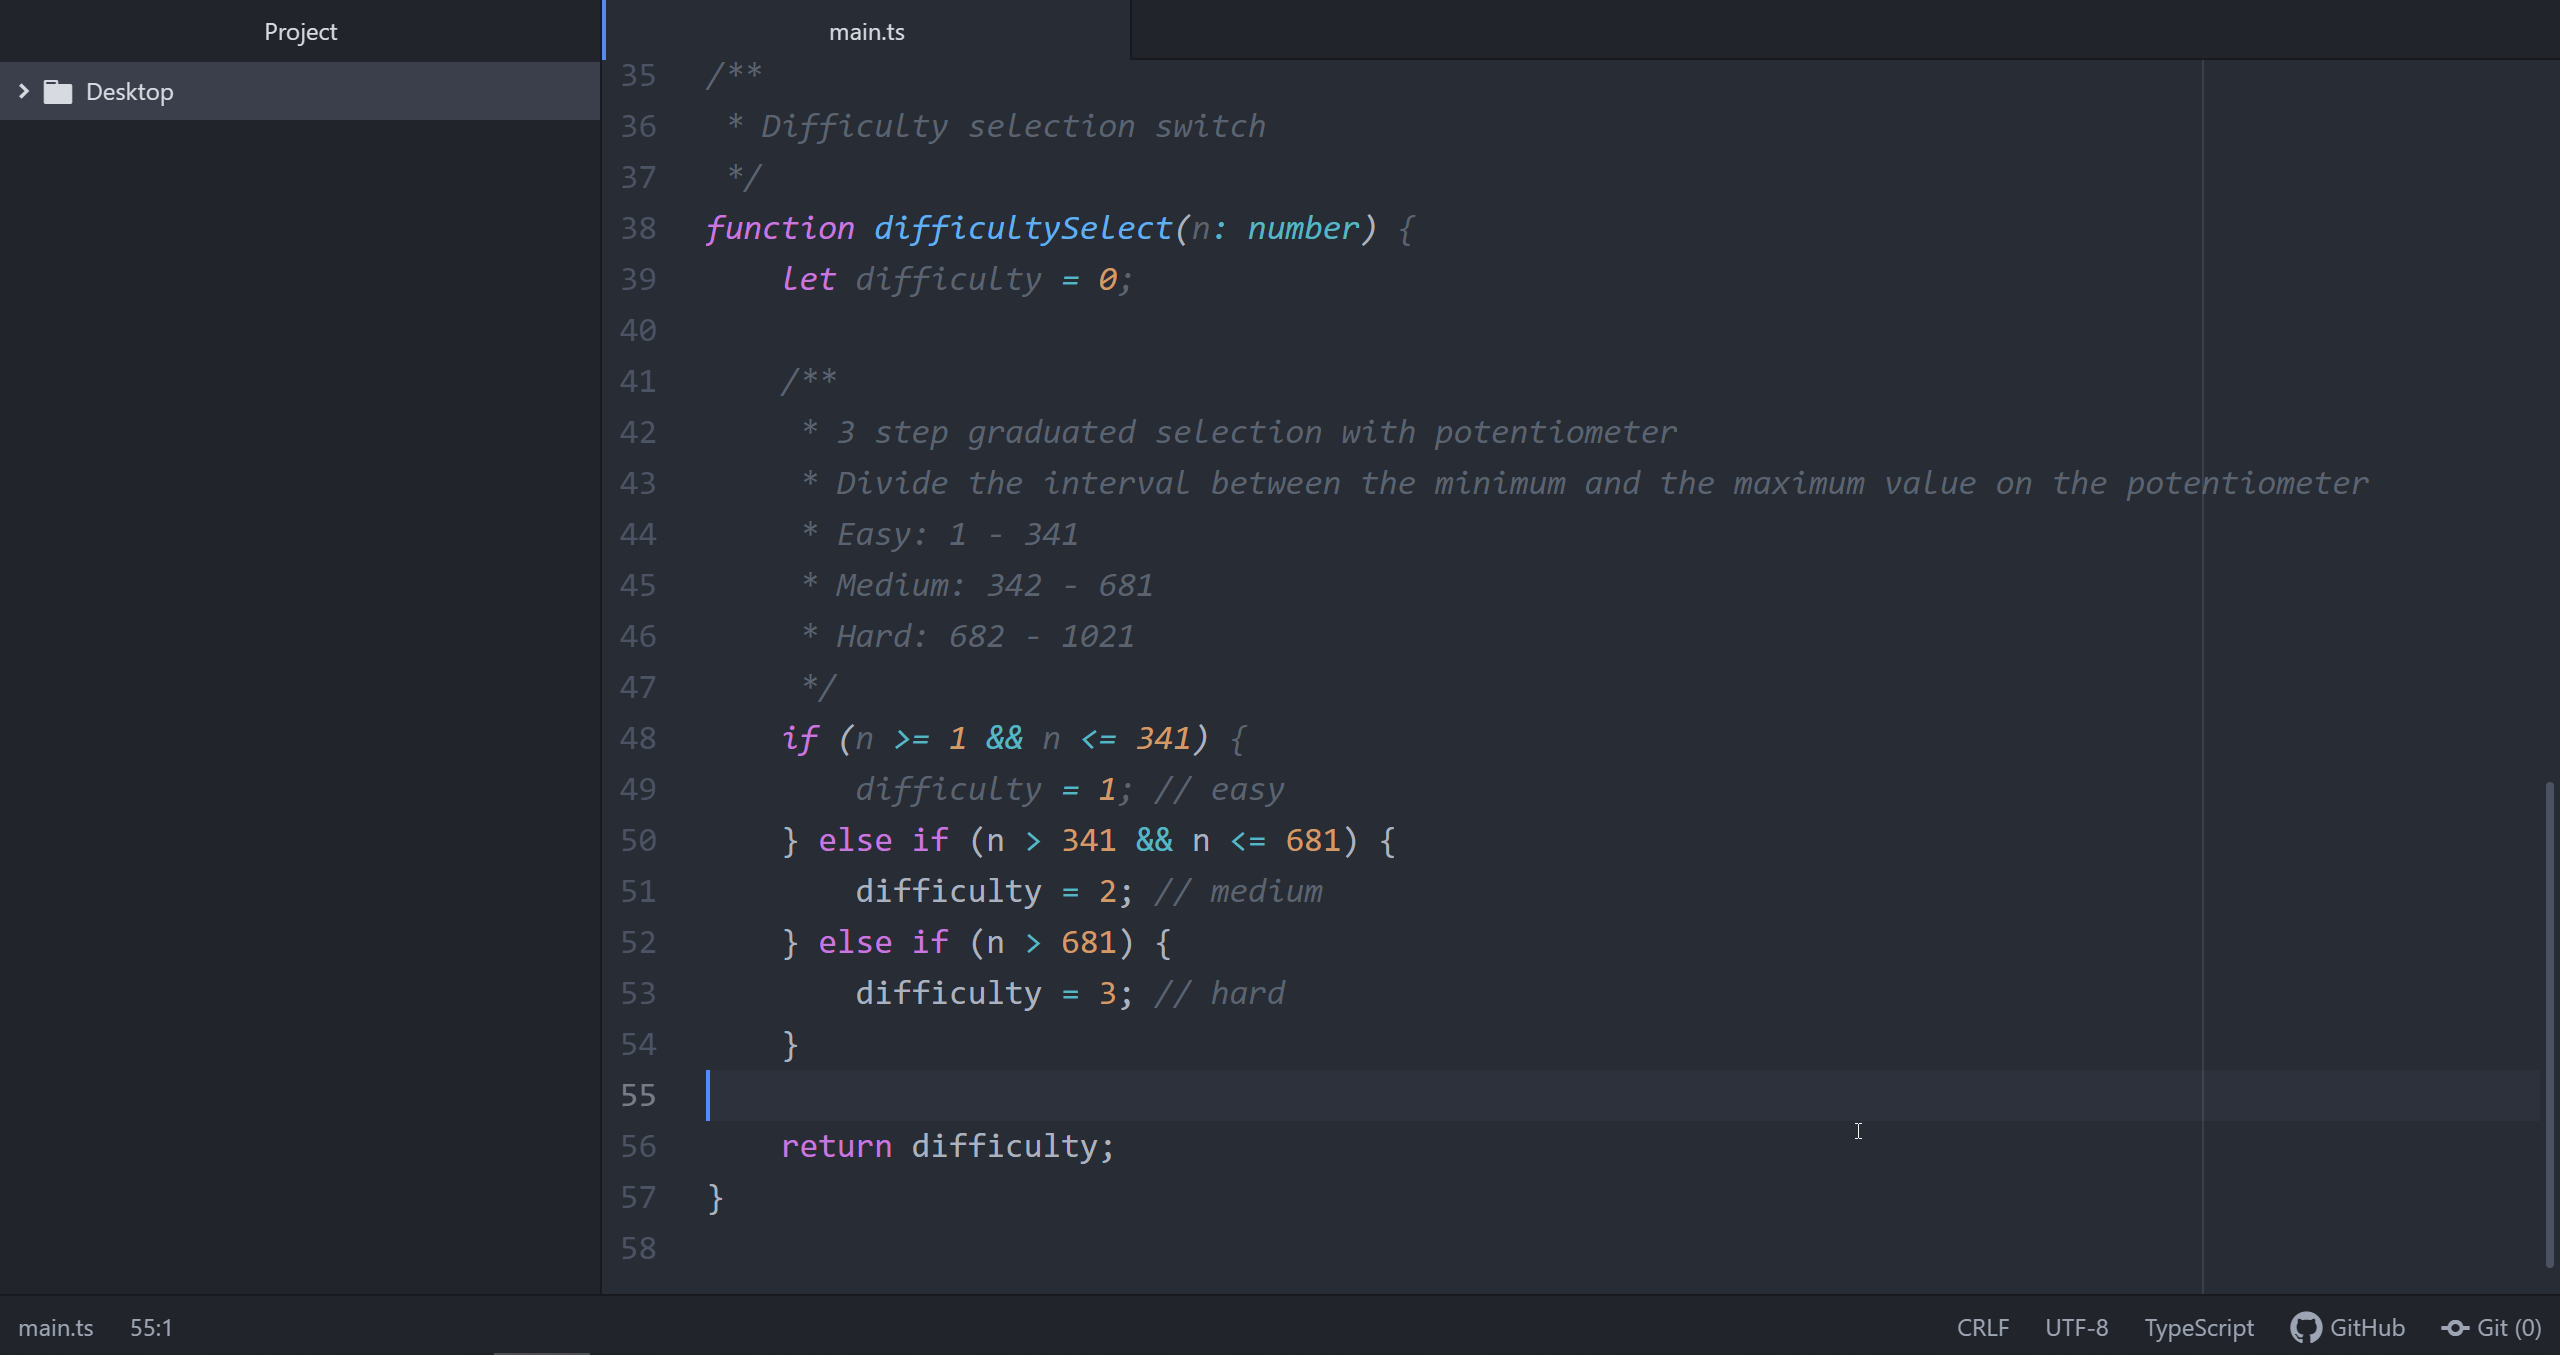
We will now build the difficulty selection logic. This bit of code takes a numerical input, which will be the value read from the potentiometer, and sets the difficulty based on how much the user turns the potentiometer.
STEP 7
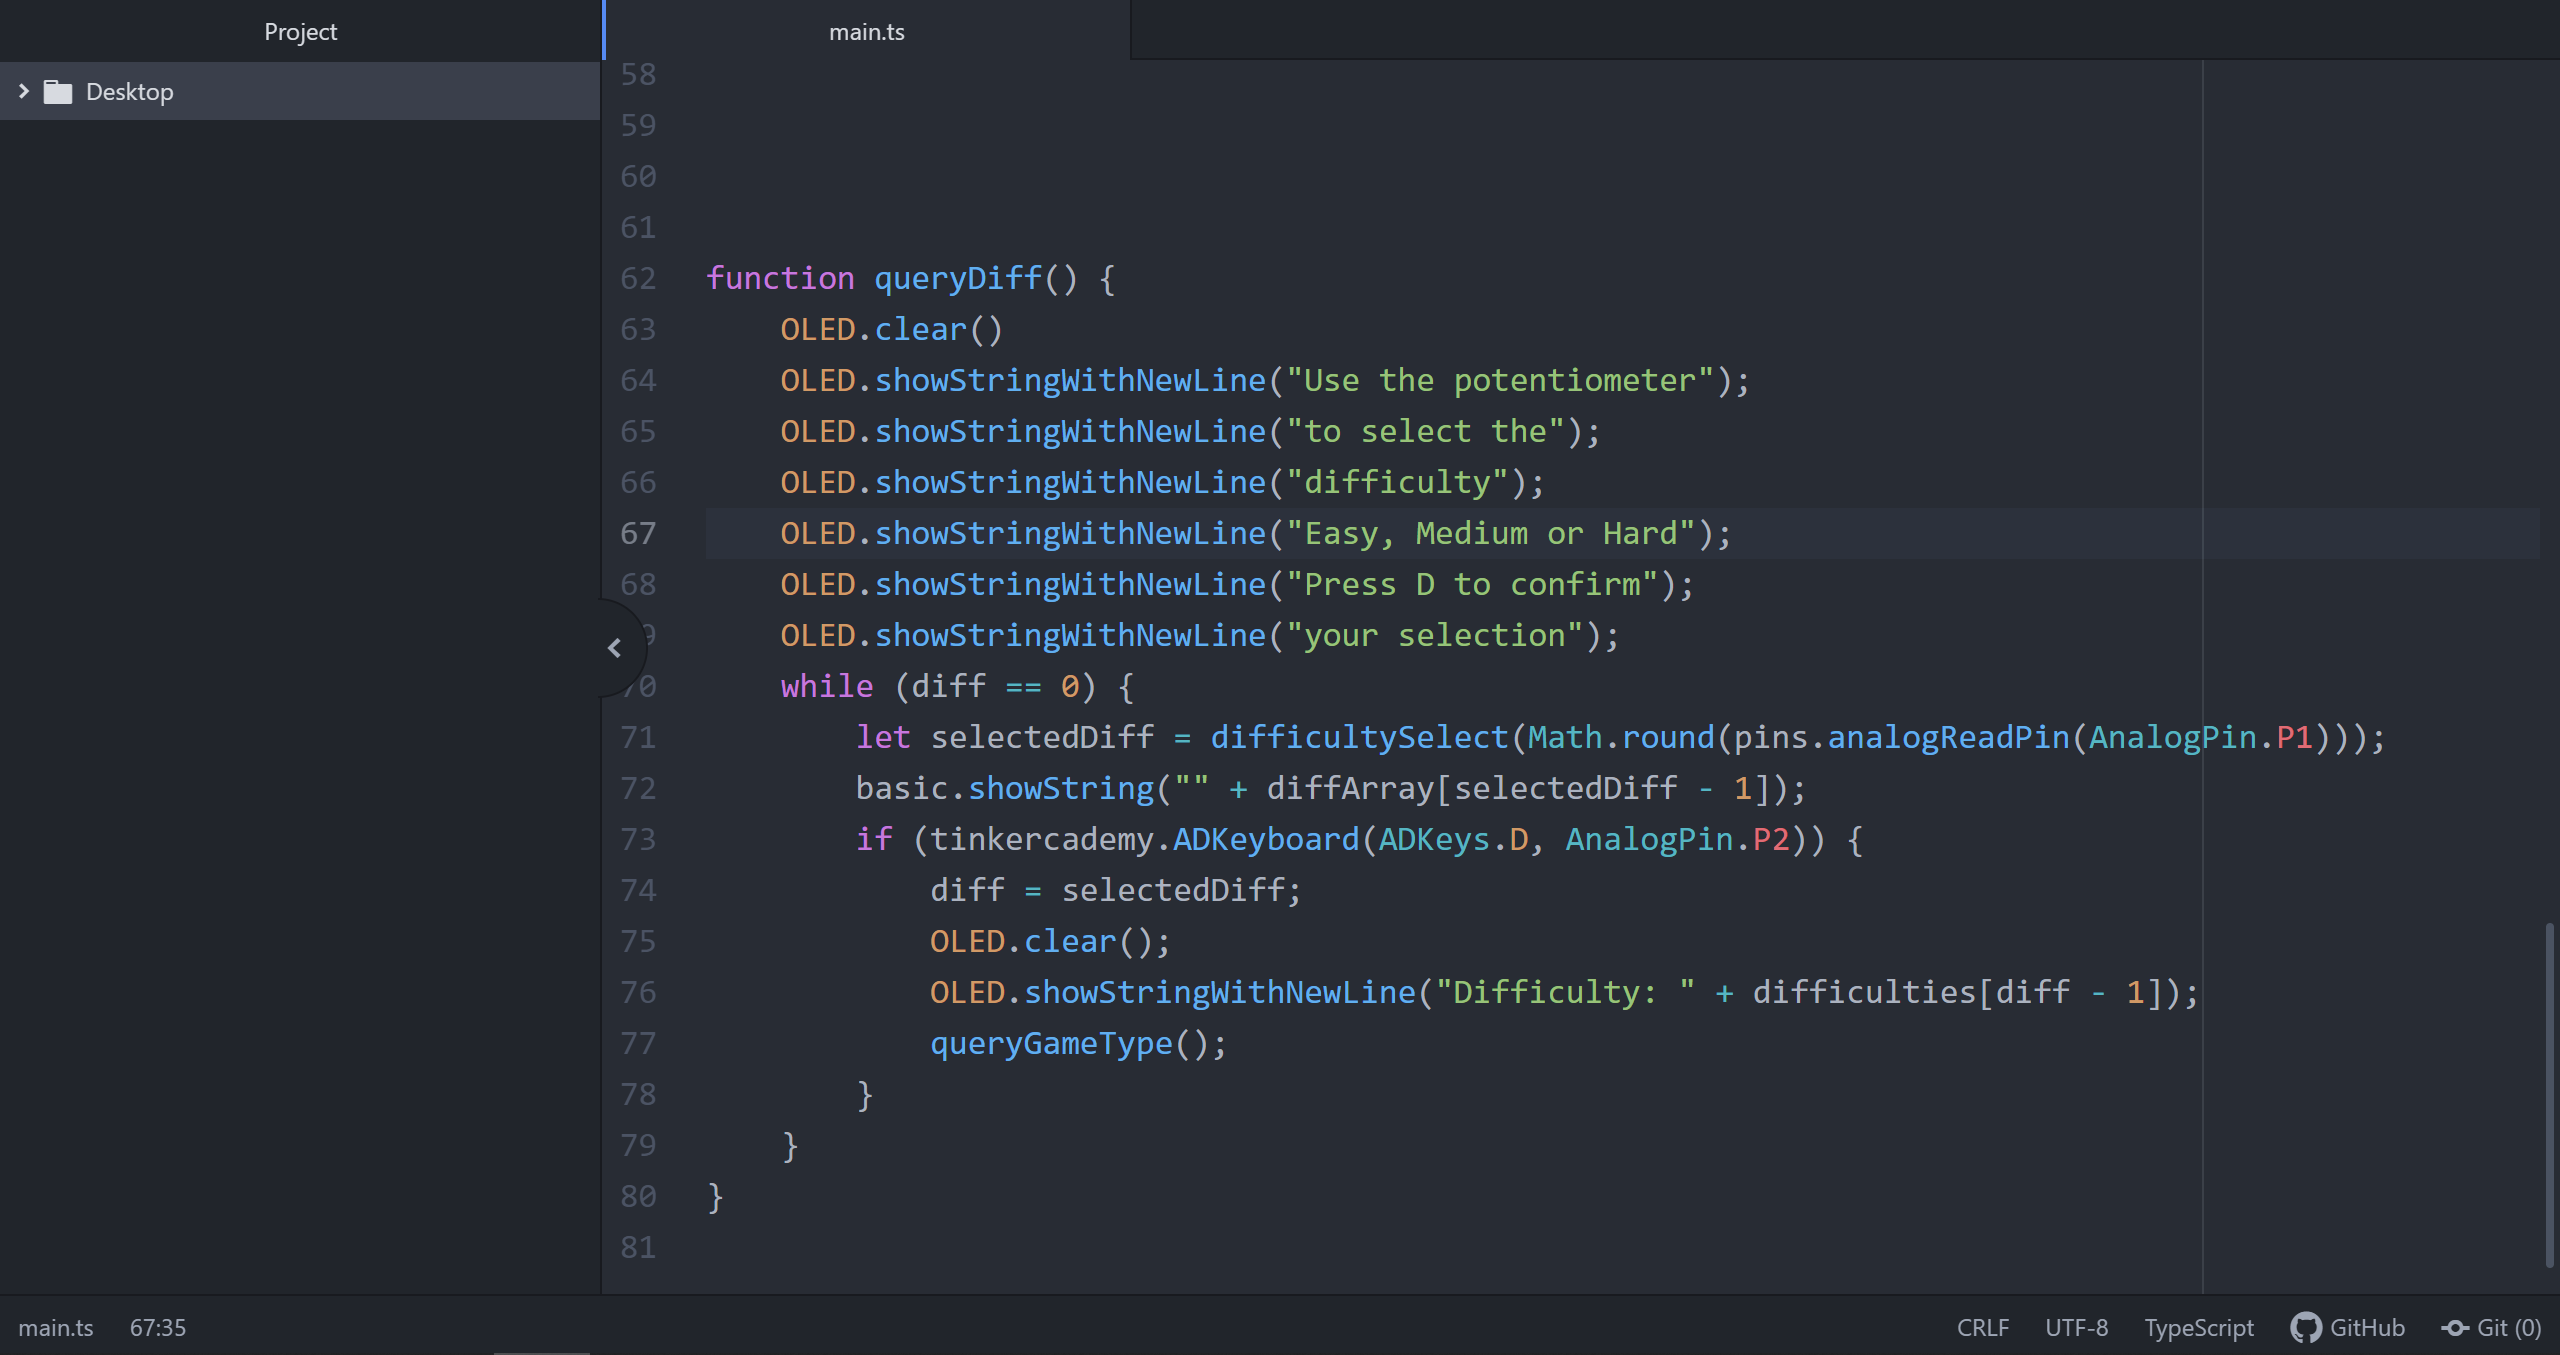
Now, we will create the logic to physically ask the player for their difficulty. We will display a message on the OLED display to provide them with instructions on how to select the difficulty. We will also show the difficulty level on the micro:bit's 5x5 LED array (E, M, H) based on what they select on the potentiometer, and they will use the D button on the ADKeyboard to confirm their selection
Remember the const we defined at the start, diffArray?. The letters in that array are being displayed to the player on the LED array based on the difficulty they chose
Some basic explanation
Math.round(): Rounds the number to the nearest whole number
pins.analogReadPin(AnalogPin.P1): Reads the value of the potentiometer attached to pin P1
difficultySelect(): The function we built earlier to allow selection of the difficulty based on the value of the potentiometer
selectedDiff - 1: Arrays start at 0
queryGameType(): Function that we will build in the next step
STEP 8
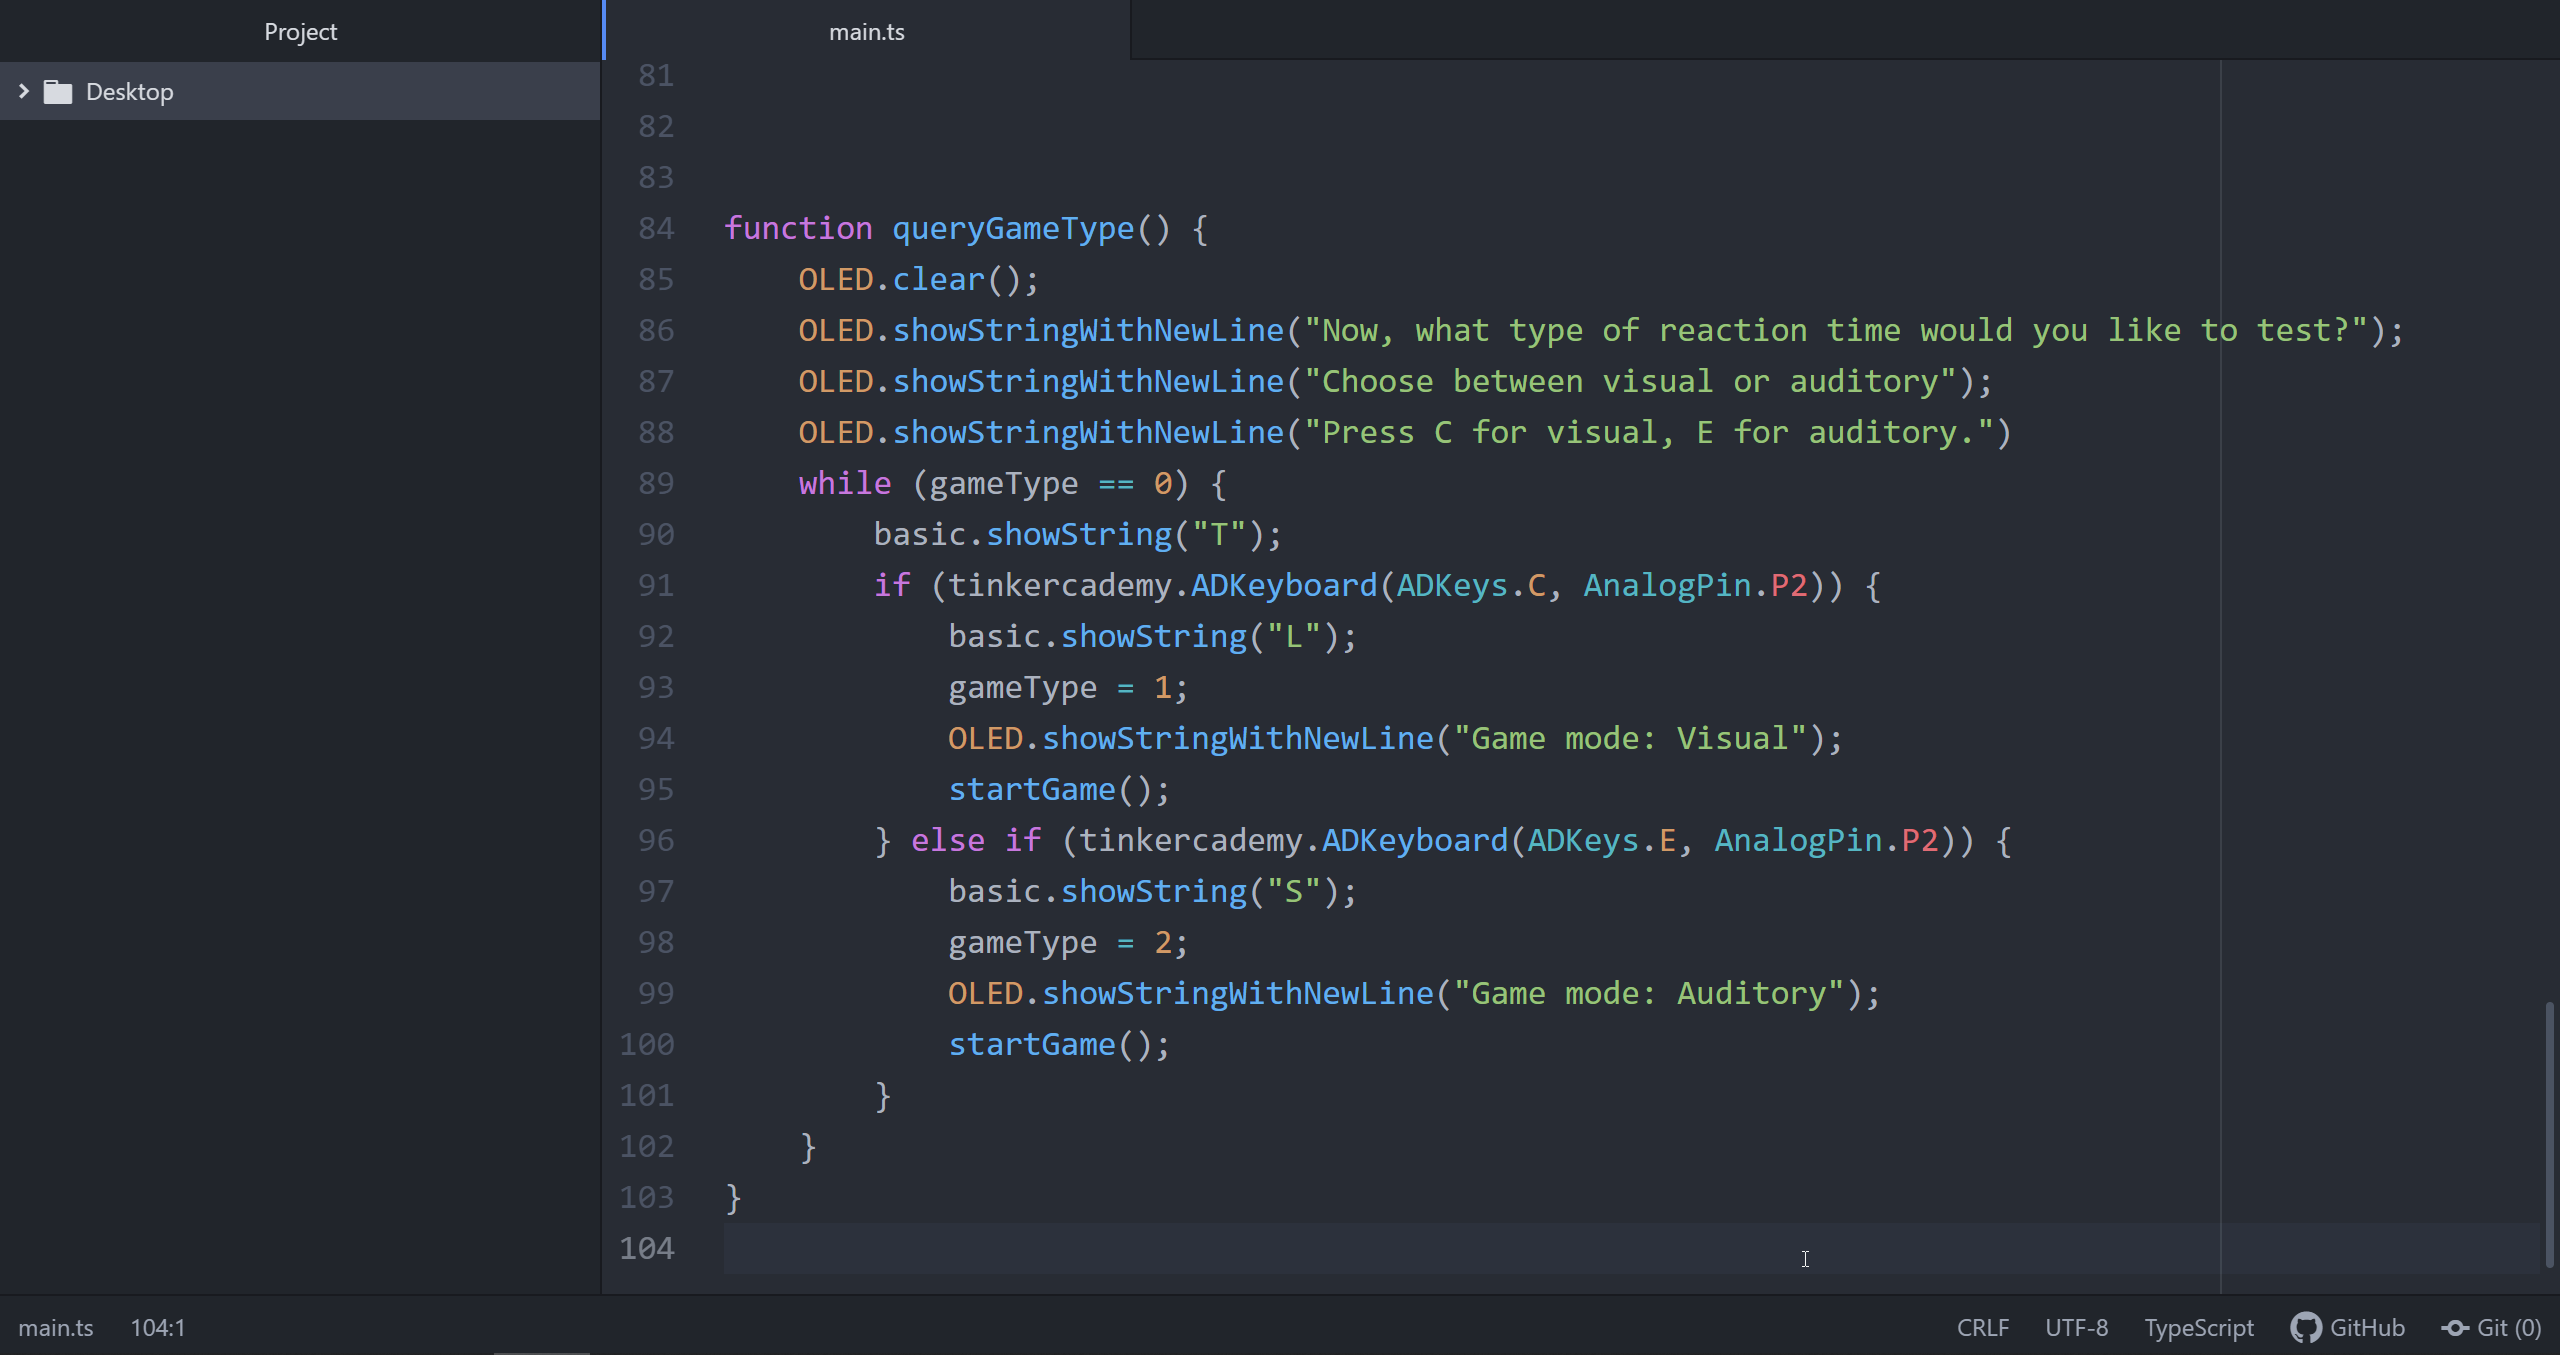
We will build the function to allow the user to select their game type. If the C button on the ADKeyboard is pressed, a visual based reaction time test is selected. If the E button on the ADKeyboard is pressed, a auditory based reaction time test is selected.
Some explanation
The function will wait for user input while the game type is 0 (not defined) until the user provides an input, at which the game type is defined, and the game is started.
STEP 9
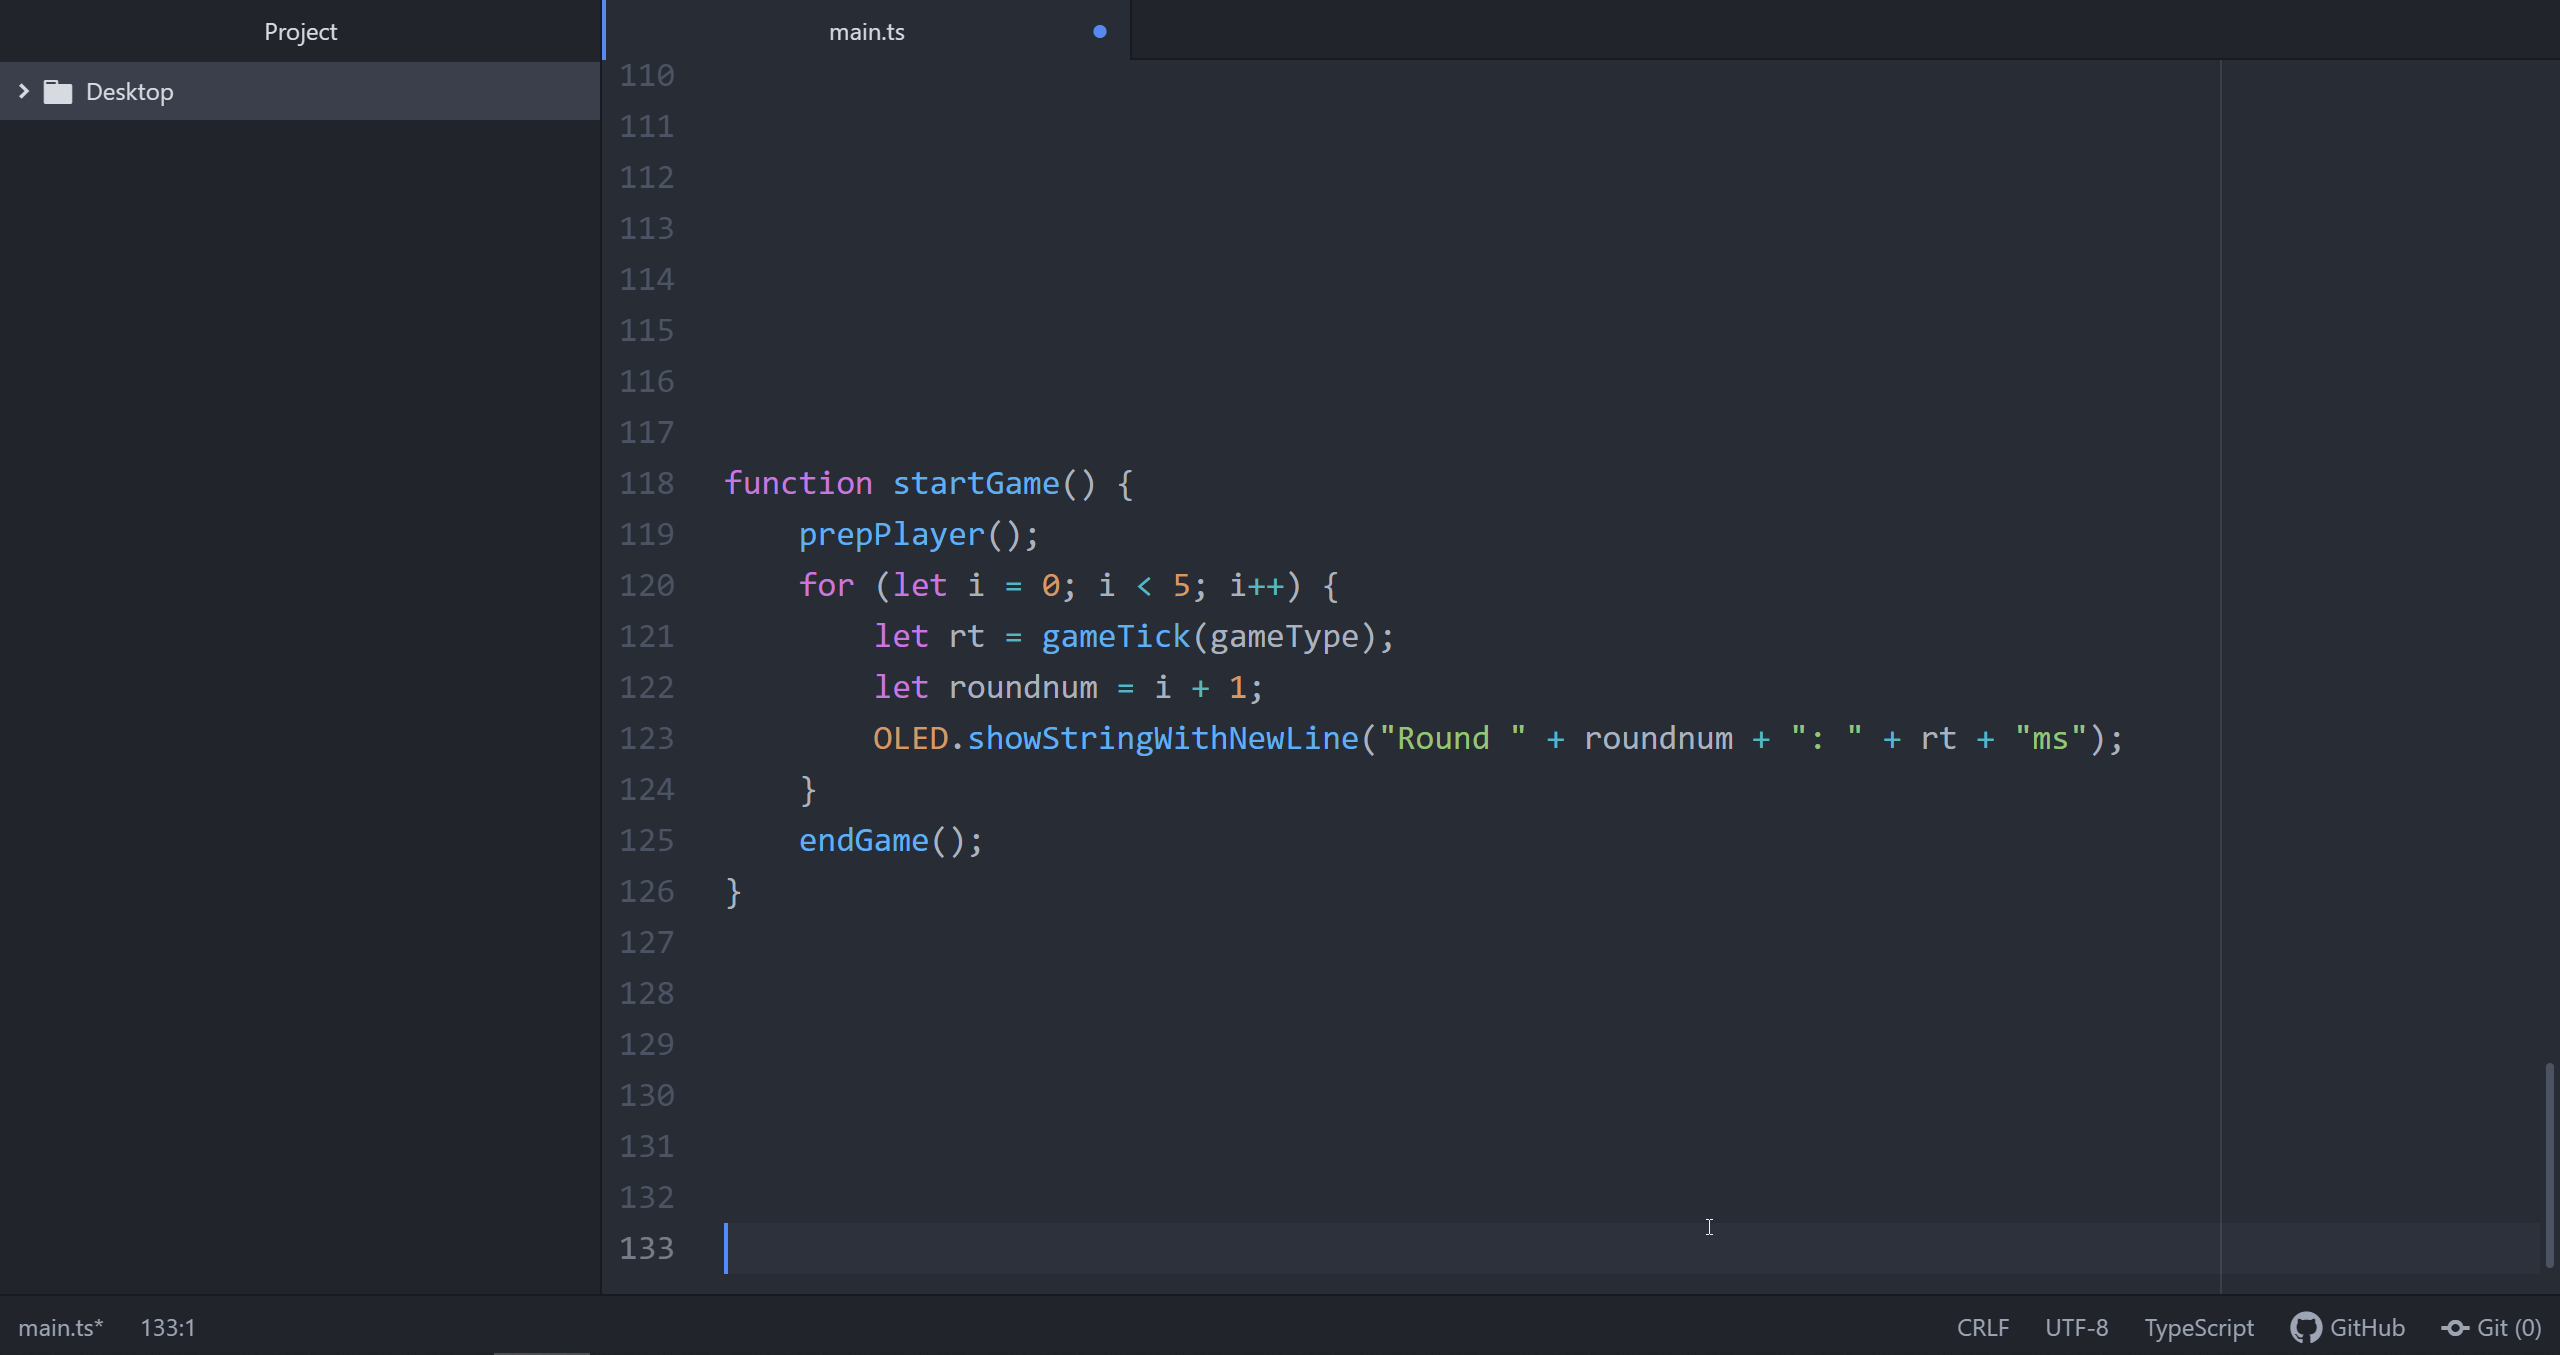
This is the function that we will use to start the game.
Some basic explanation
We will call the prepPlayer() function to prepare the player
We will then test the player 5 times for their reaction time with the use of a for loop, and we will show the user the reaction time they obtained for that round in milliseconds. We get the reaction time from the player with the use of the gameTick() function
Upon completion, the endGame() function is called
STEP 10

We will build a function to get the player ready to have their reaction time tested. We will show a countdown for the player on the 5x5 LED array on the micro:bit.
Some basic explanation
basic.pause(x): Pauses execution of code for x milliseconds (1000 milliseconds = 1 second)
STEP 11

We will now build the main game logic. This is the most important step of all, and the most complex step.
The function starts off by defining some variables. The startTime is the time in which the indicator is displayed to the player. The endTime is the time in which the user presses the button on the microbit. The deltaT is the time difference between startTime and endTime, essentially it is the user's reaction time.
We will pick a random amount of time to wait based on the difficulty of the game, and we will pause execution of code for that time. We will then get the time of how long the program has been running, and display a visual or auditory stimulus based on the type of reaction time being tested the user has selected.
We will start an infinite loop to detect if the user has responded to the stimulus. As soon as the user responds by pressing either button A or button B on the microbit, we will get the time in which the user pressed the button, and display an indicator to them that the time is recorded. The reaction time is calculated by subtracting the time in which the stimulus was displayed from the time in which the user responded to the stimulus. An additional 250ms is subtracted due to processing overhead on the microbit. This value can and should be changed as the overhead on the microbit can be different for each microbit.
Finally, after obtaining the result, we will insert the result into the results array we defined at the start of the game and we will exit the infinite loop, and return the value of the reaction time, which lets us display to the user like in step 9.
STEP 12

After the player finishes the game, we want to display their results to them. We will compute the average reaction time from the 5 times they attempted the game. This is accomplished through the use of array.reduce(). In this case, it sums up all the numbers in the results array.
We will display the average reaction time to the user on the OLED display, and wait if the user wants to retry the game. If the user presses button E on the ADKeyboard, we will restart the game for them.
The resetGame() function is used to clear all the results from the current game and queryDiff() starts a new game.
STEP 13
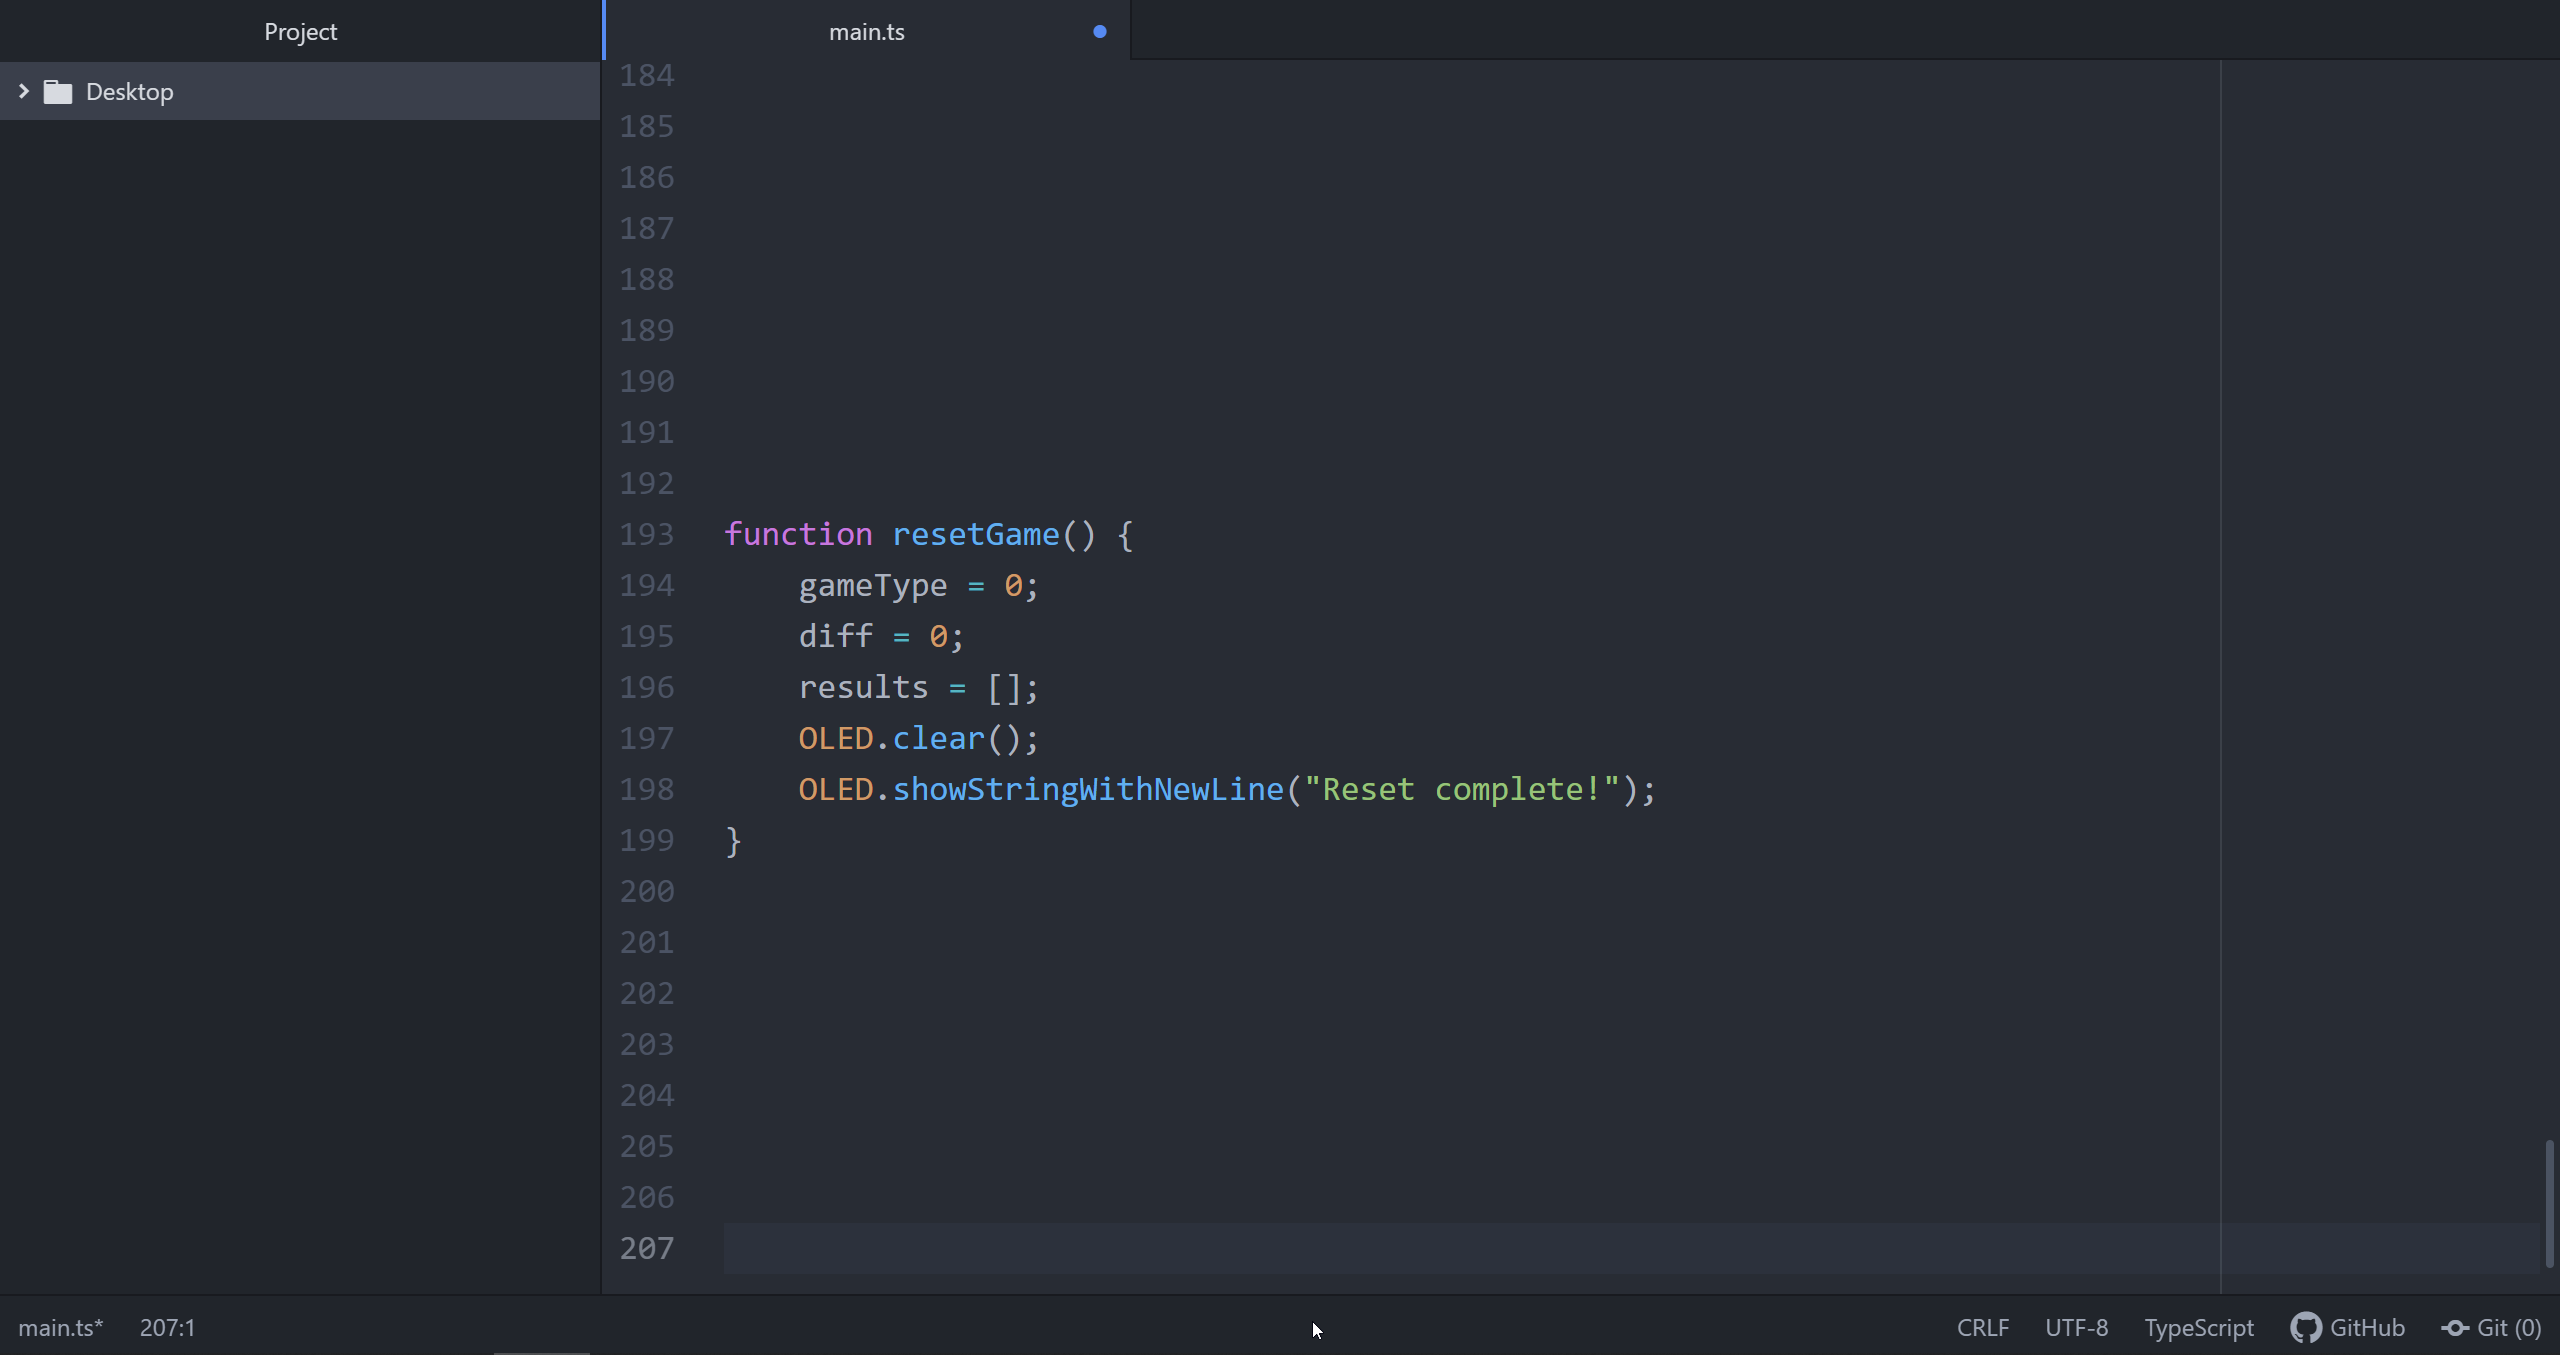
The reset game function is very simple. It clears the variables that were changed by the program to store the player's results and informs the player that the reset was completed.
STEP 14
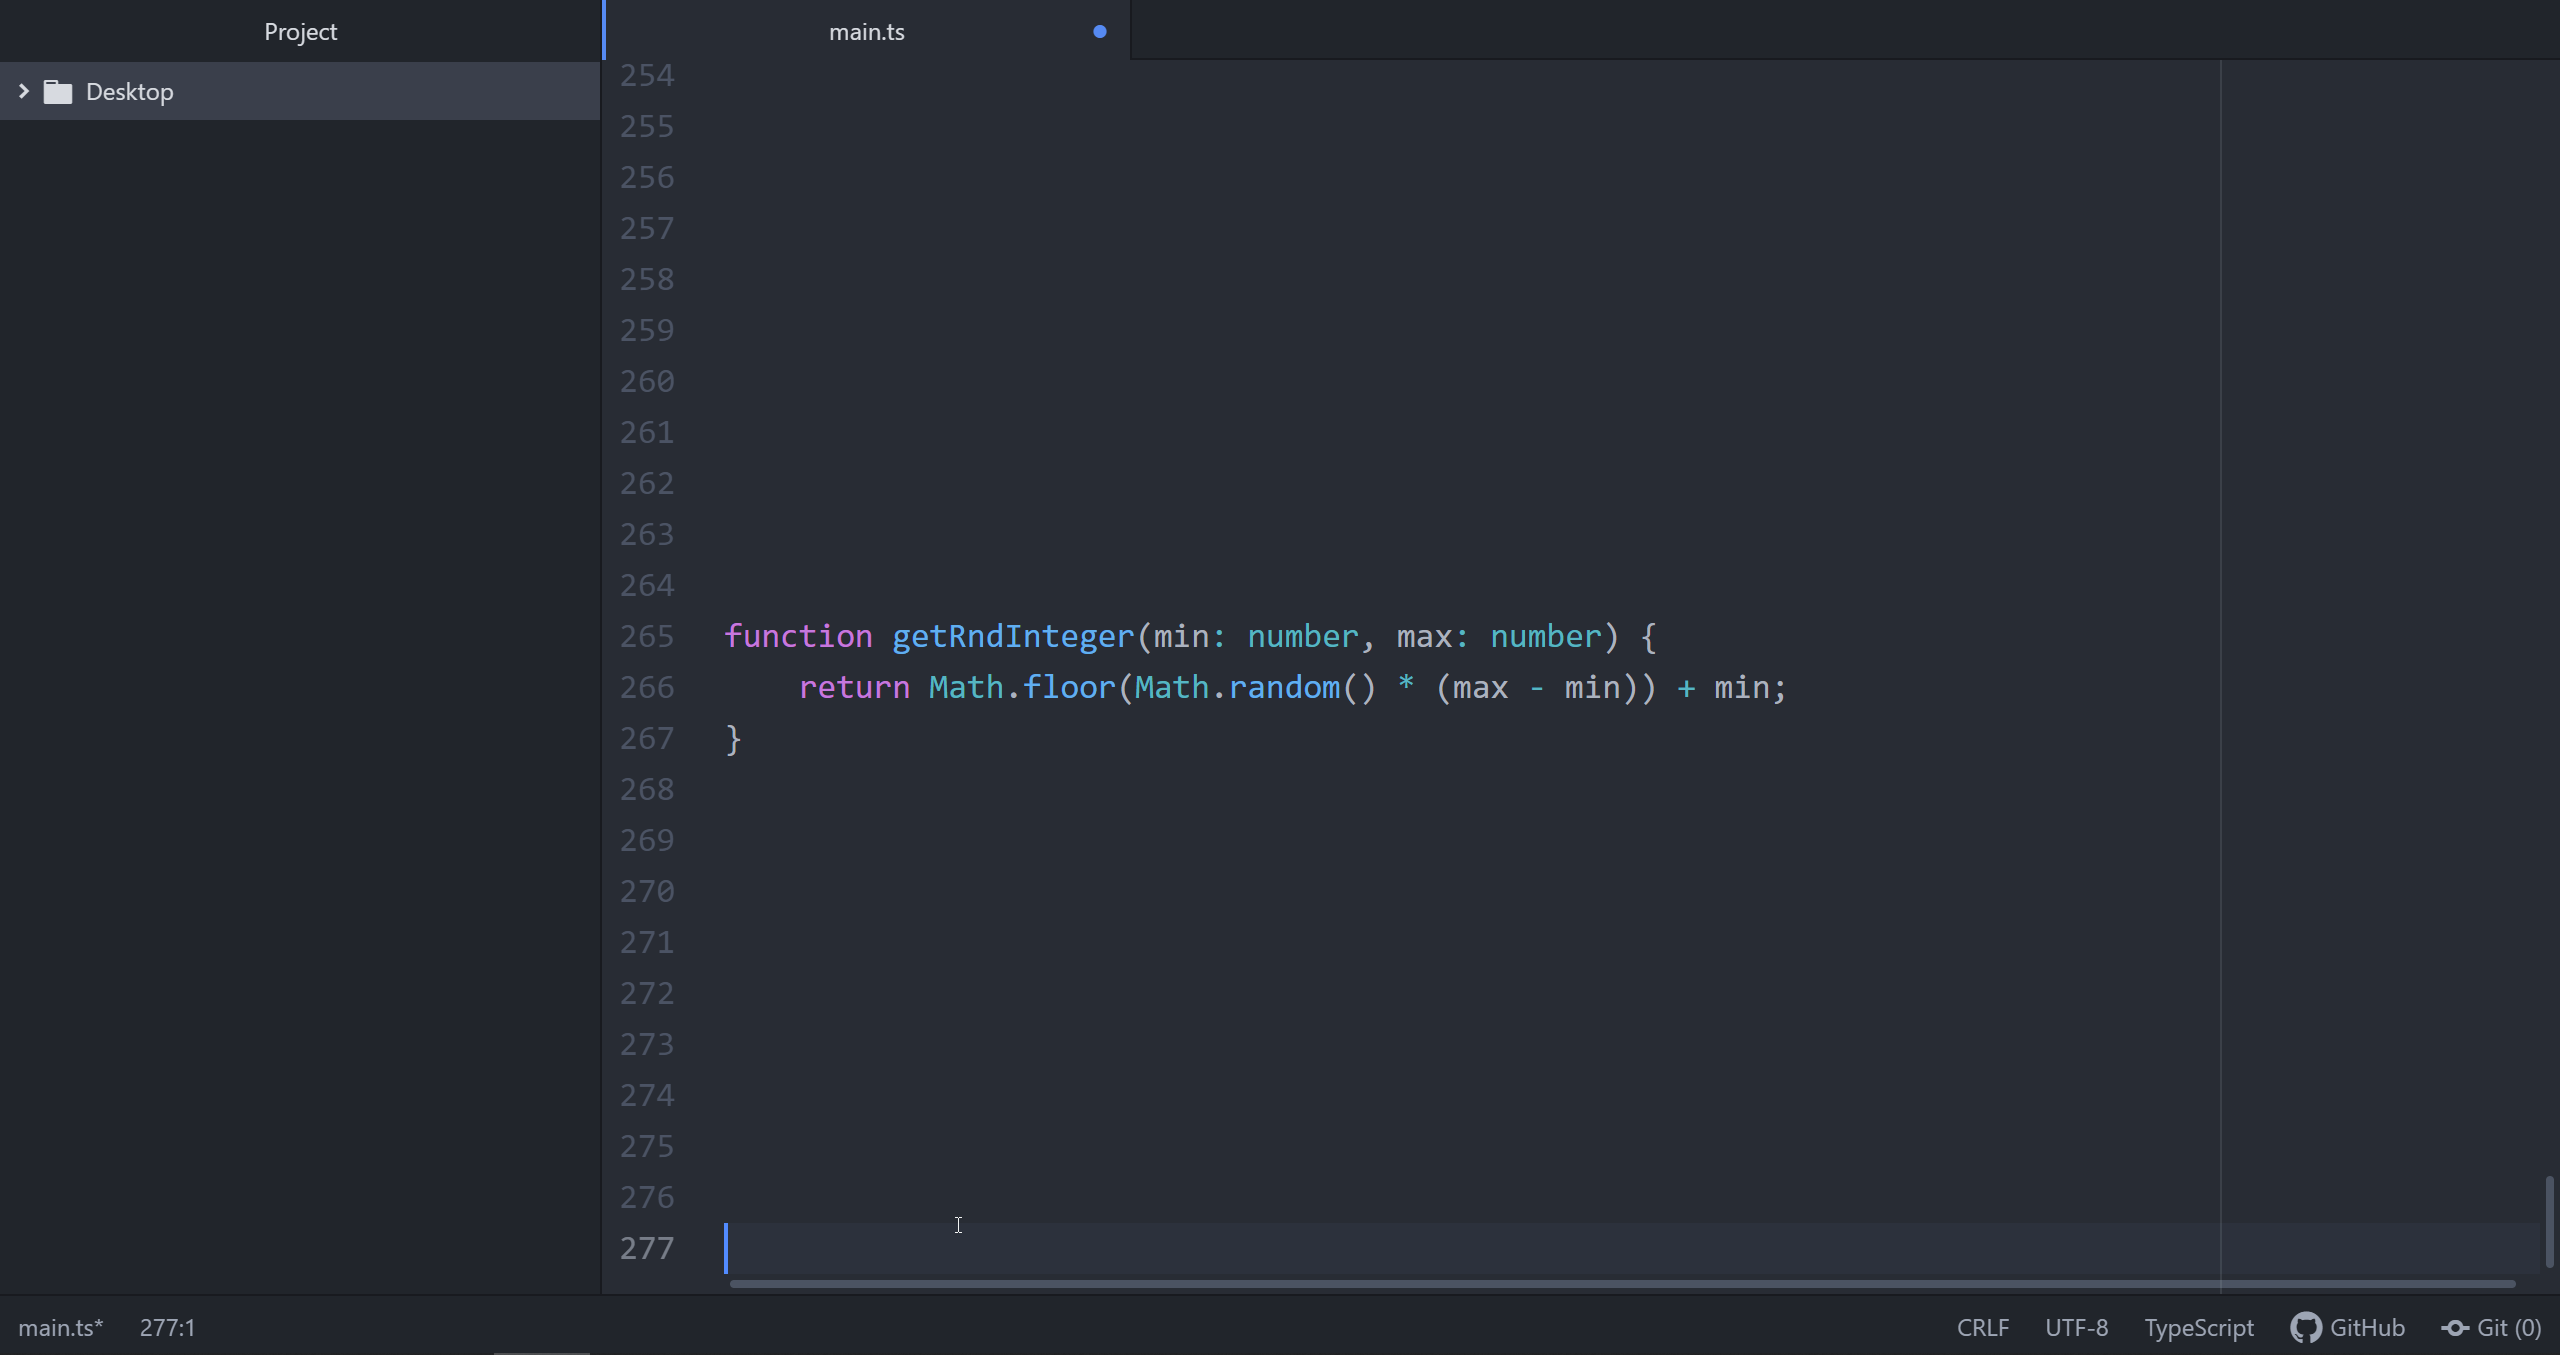
Finally, the random integer function we are using. It takes a minimum and a maximum, obtains a random floating point number between 0 and 1 (Math.random()) and multiplies it by the range and then is rounded down (Math.floor()) to return an integer equal to or less than the number obtained from multiplying the random floating point by the range. This number is then added to the minimum to obtain a random integer that fits exactly within the minimum and maximum range
You don't need to understand how this works
STEP 15
That's all! Load the code onto the micro:bit. Then, press buttons A and B simultaneously to play the game.
Code and References
Made this activity? Good Job! Now spread the word. Share a photo of your creation on social media with #letsgethacking #AdvancedReactionTimeTester