Ang Bao Collector
Build an Ang Bao collector that keeps count of the number of Ang Baos you have!
YOU WILL NEED
- 1 x Micro:bit
- 1 x Tinkercademy Breakout Board
- 1 x HC-SR04 Ultrasonic Sensor 1 x Buzzer 1 x micro-USB cable
- 4 x Neopixel LED Strips
- (Optional, depending on Neopixel LED Strip) M-M / F-F / M-F Jumper Wires
- (Optional) 1 x Battery Holder
- (Optional) 2 x AAA Batteries
- 1 x Tissue Box / Shoe Box
- Red Colour Paper
- Glue
- Double-Sided Tape
- Scissors / Pen-Knife
STEP 1
Wrapping the Box
(a) Find a rectangular box, about the size of a tissue box or shoe box.
(b) Use glue to wrap all its sides up with red coloured paper.
Materials
- 1 x rectangular box
- Red colored paper
- Scissors
- Glue
STEP 2
(a) Cut a rectangular opening at the top, to insert the Ang Baos.
(b) Cut a rectangular opening at the back to fit the HC-SR04 Ultrasonic Sensor behind.
(c) Cut an opening below the opening in (b), to fit your hand through later to thread the Neopixel wires through the box.
(d) Cut an opening on the left, to extend the buzzer out, from inside the box.
(e) Cut 2 openings on the left, and 2 on the right, to thread the Neopixel strips through.
STEP 3
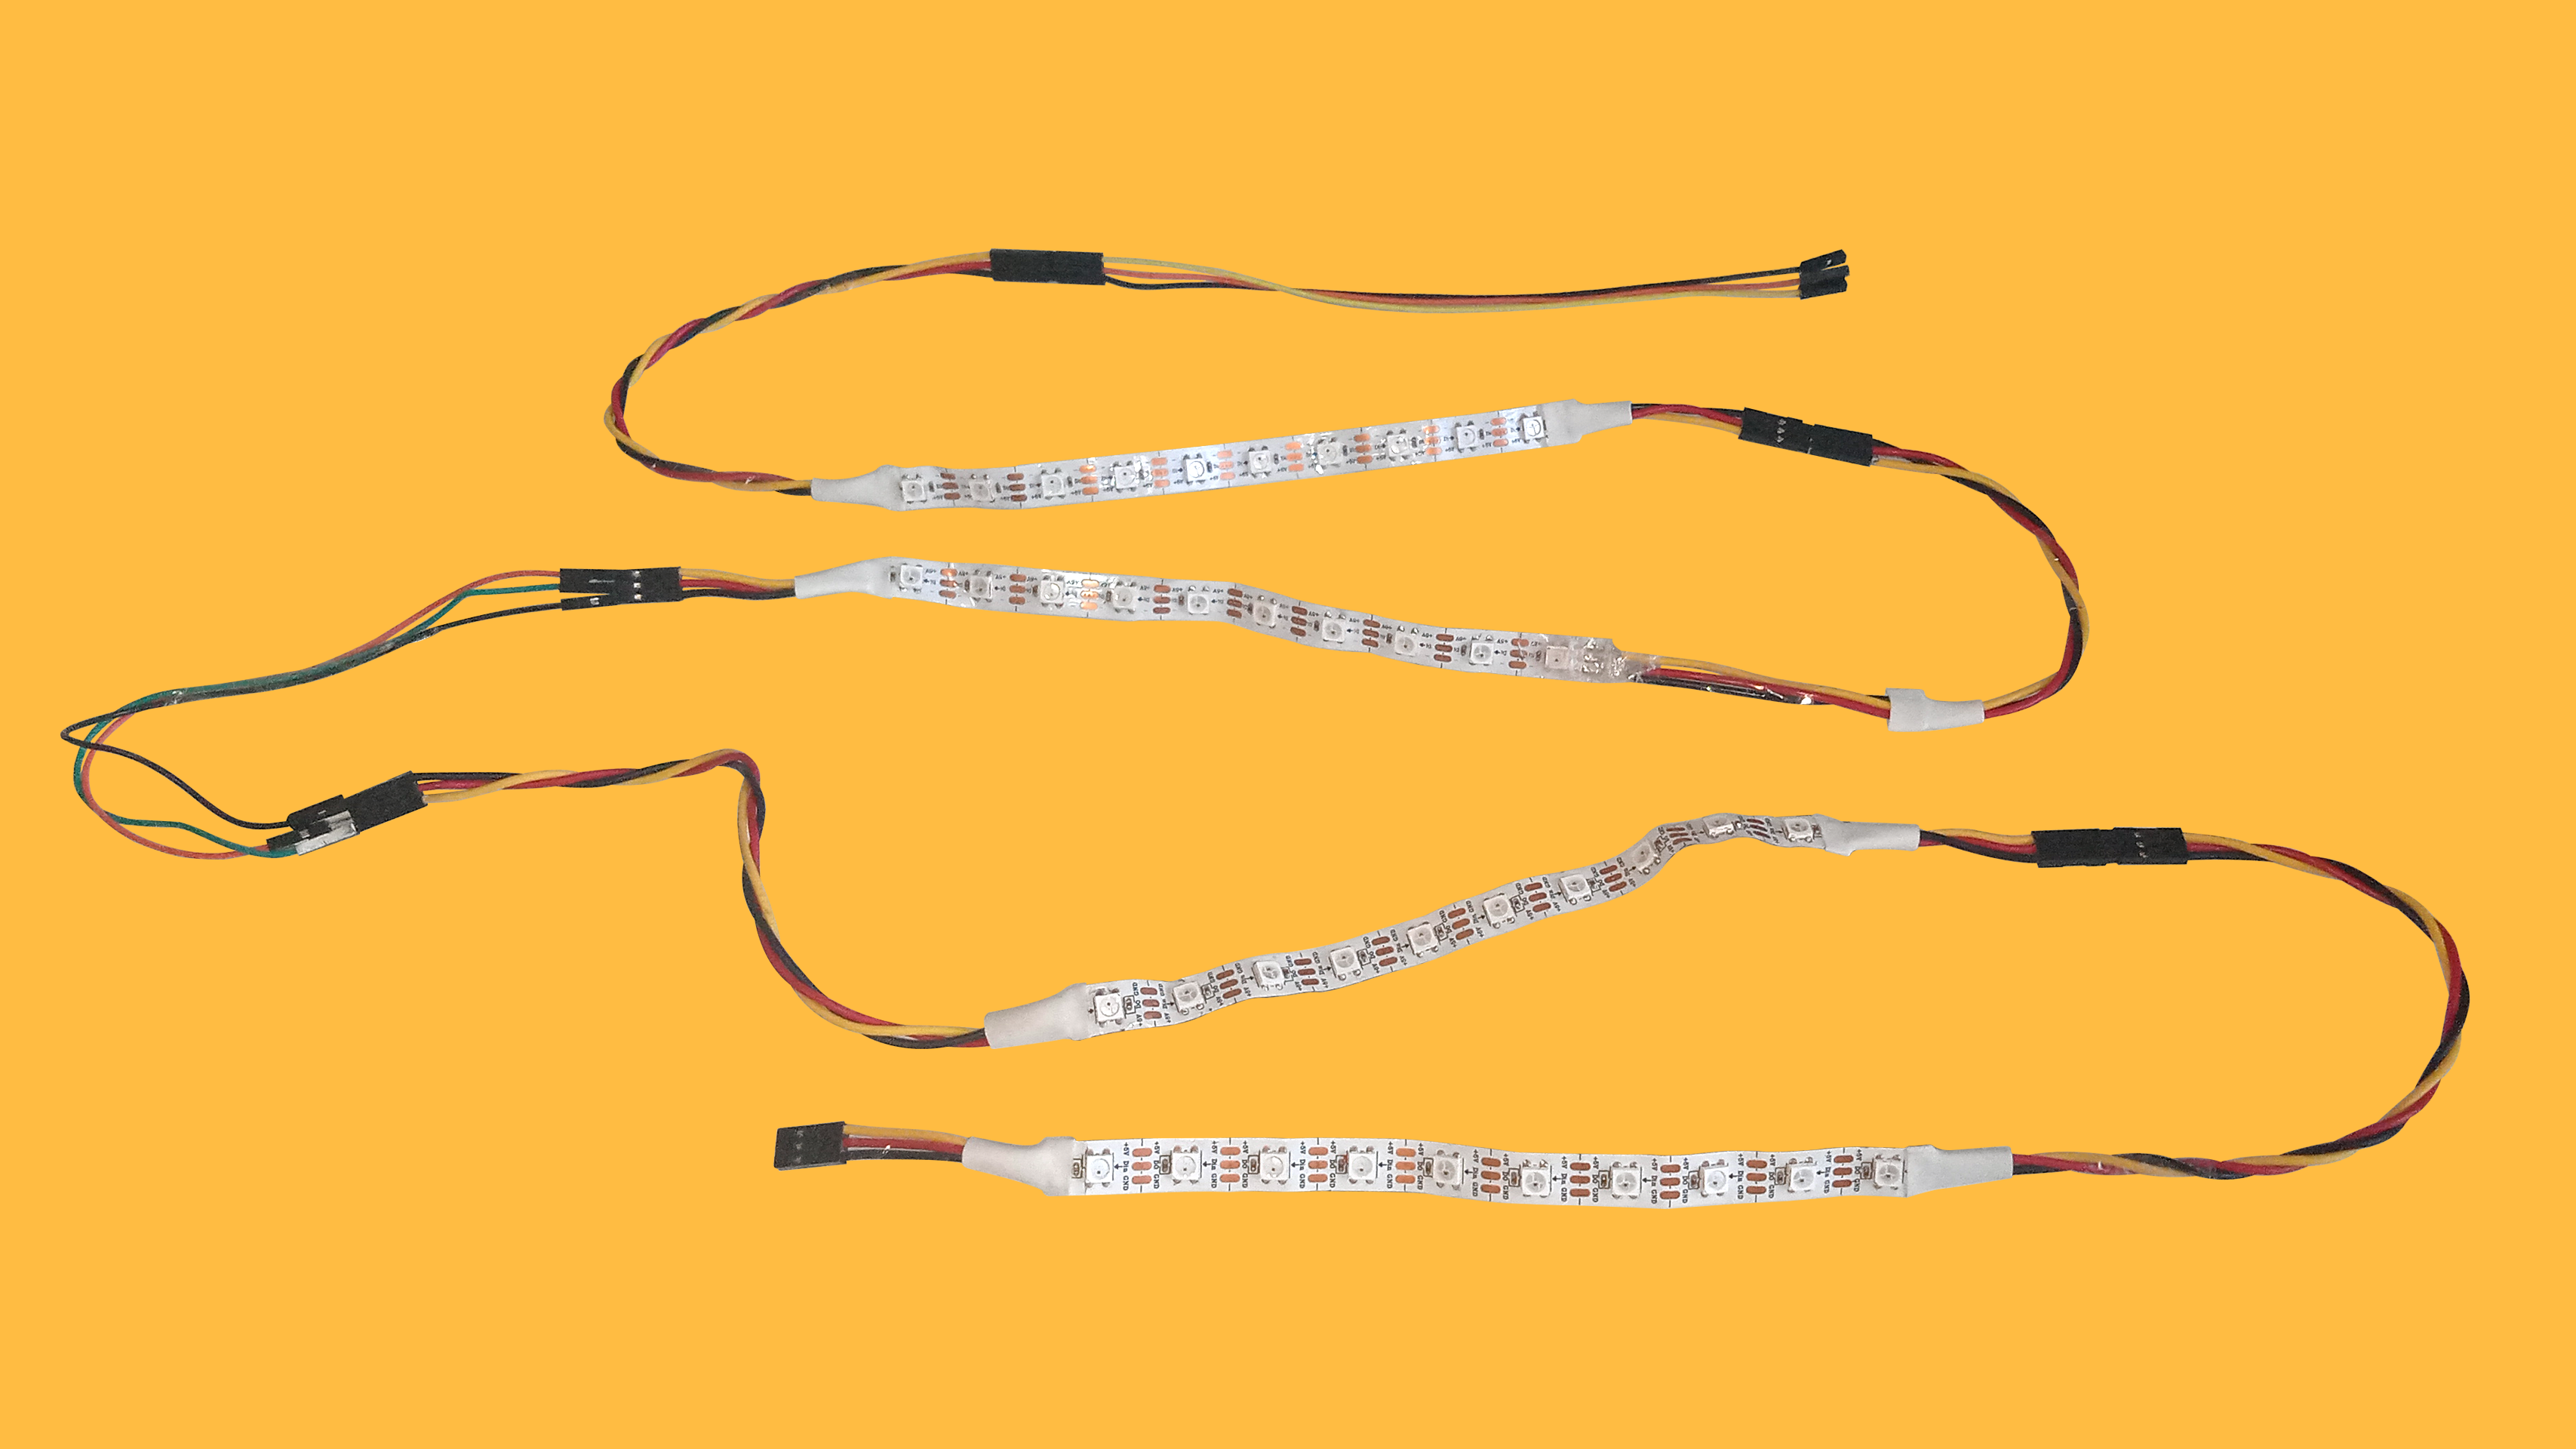
Connecting the LED Strips
(a) Connect 4 LED strips together.
(b) Make sure the arrows of connected strips all point to the same direction, and the colours of the wires match.
(c) Depending on the Neopixel LED strips you are using, you may need to use M-M / F-F / M-F jumper wires to connect some of the LED strips together.
(d) Here, we used 2 F-F jumper wires - 1 to connect the first Neopixel LED strip to the breakout board, and 1 to connect two LED strips with male ends together.
STEP 4
Threading the LED Strips
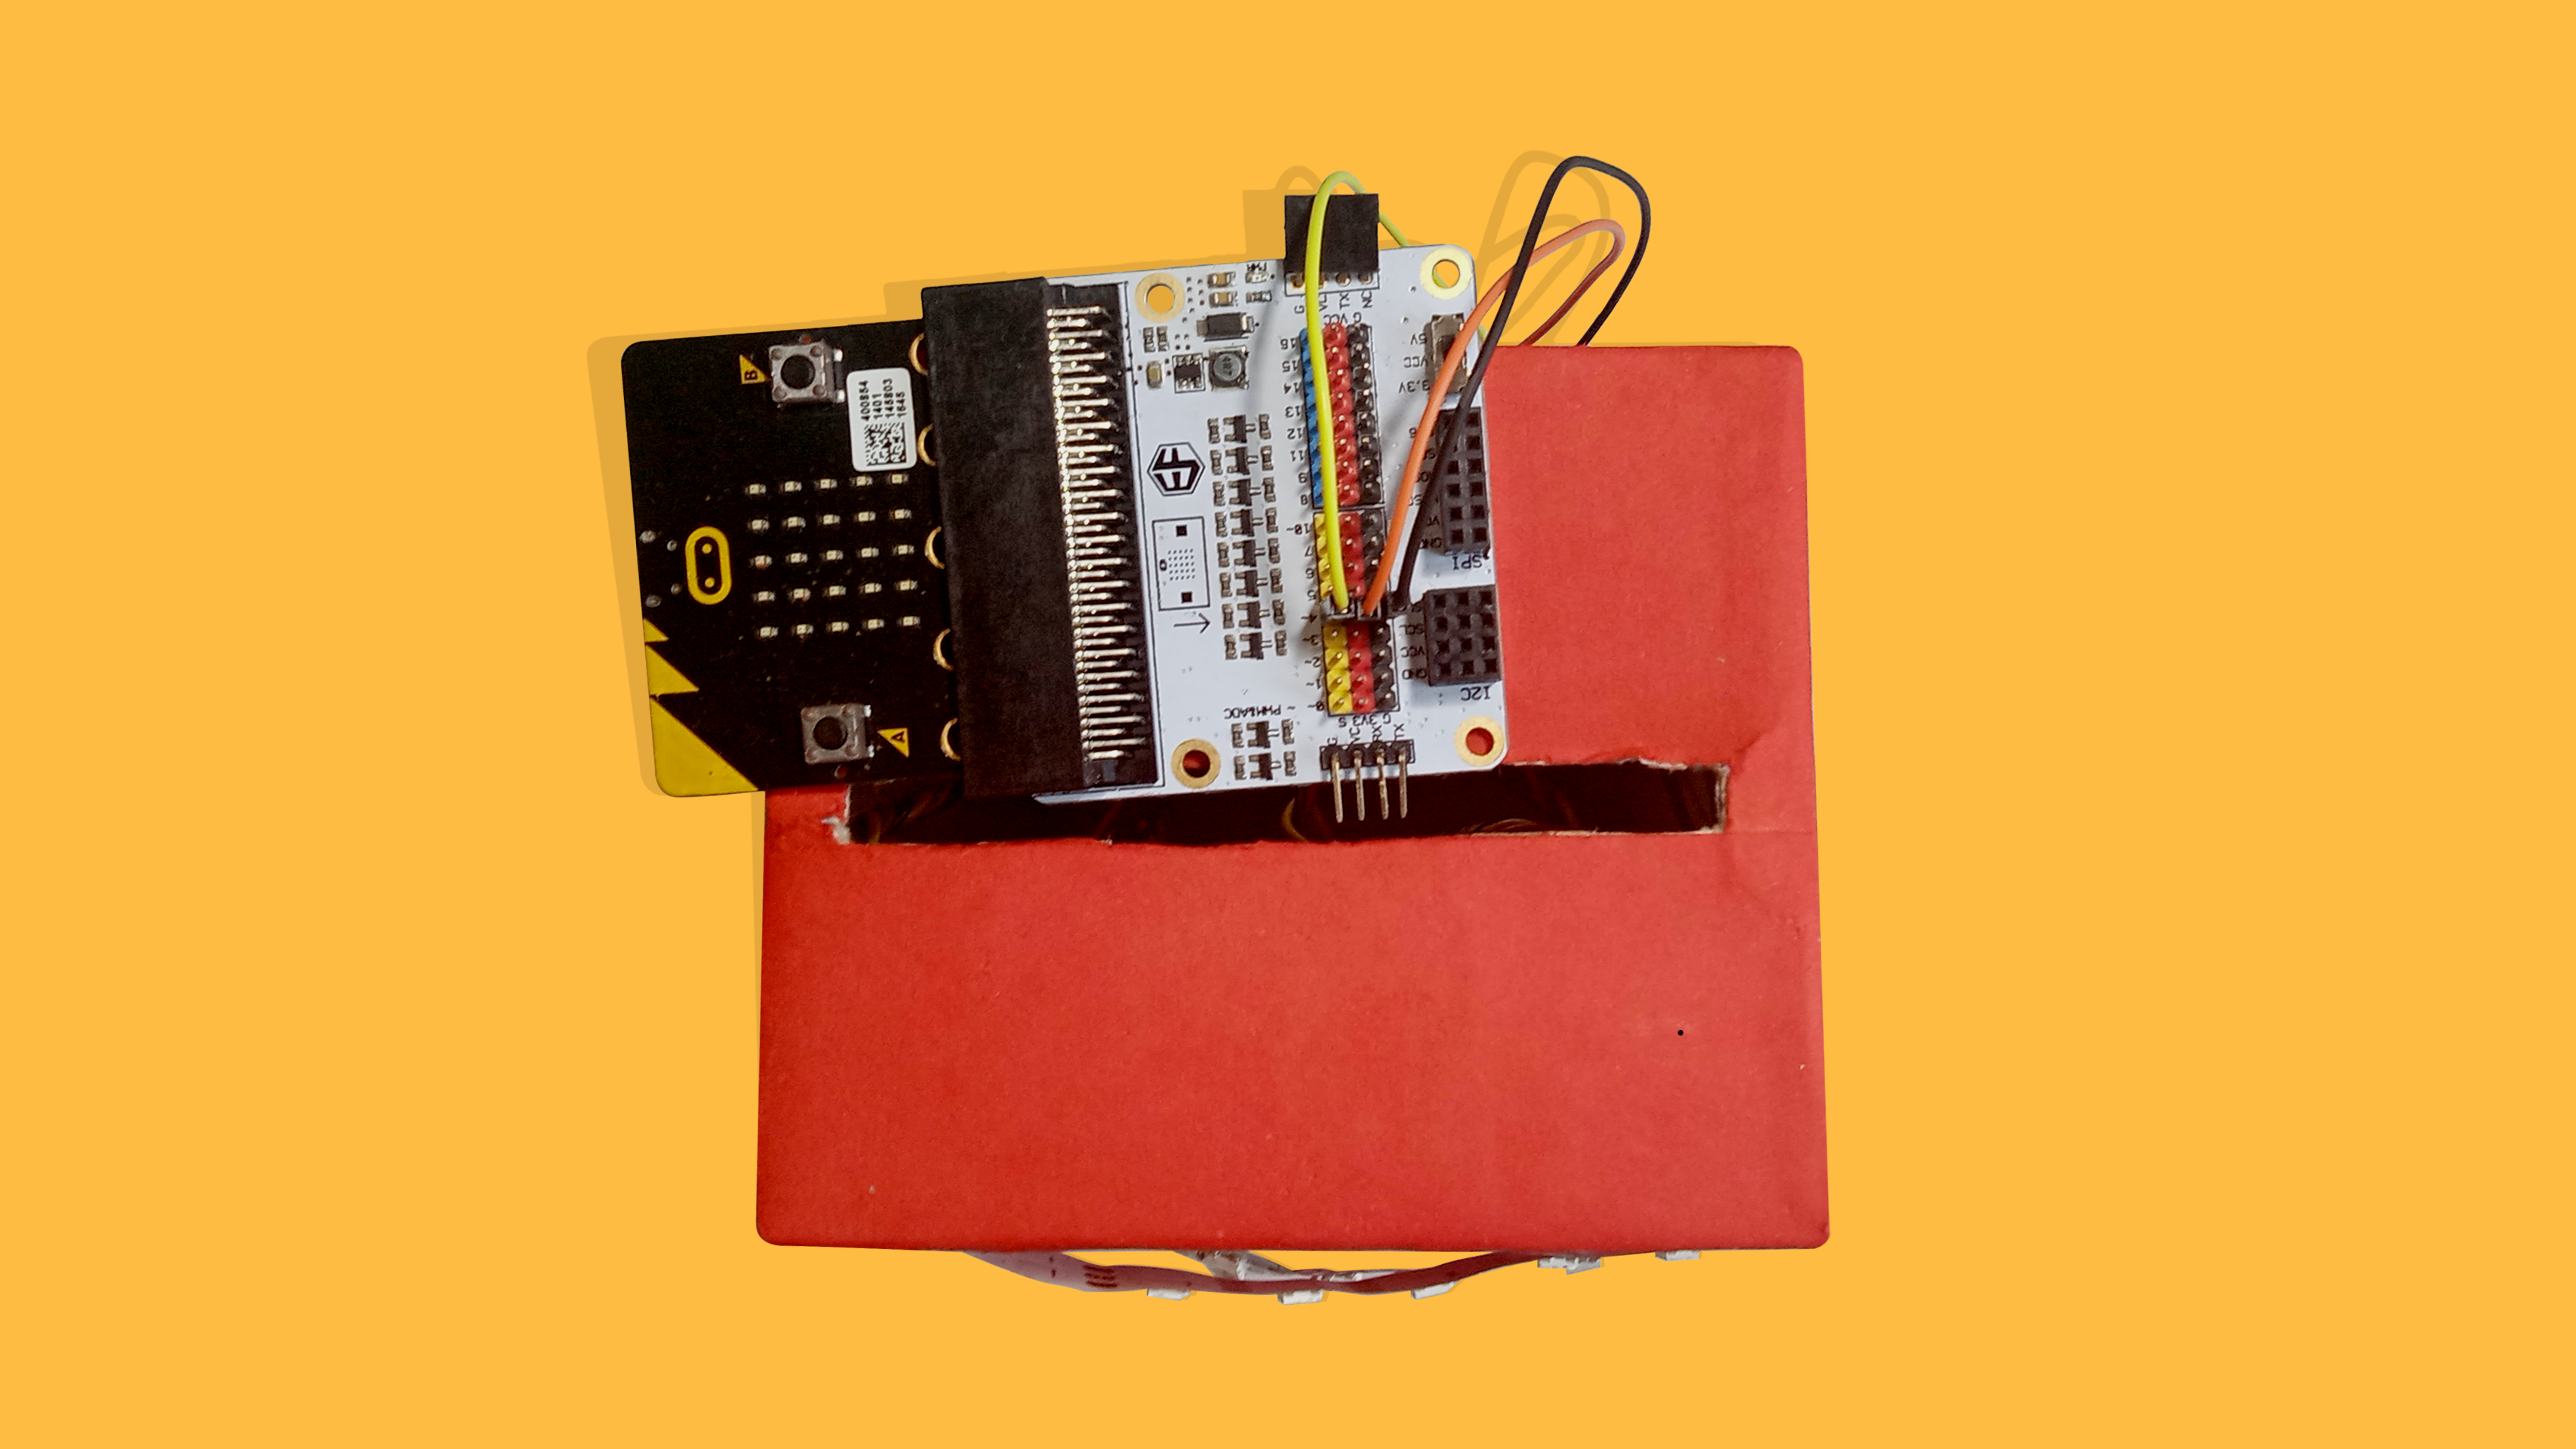
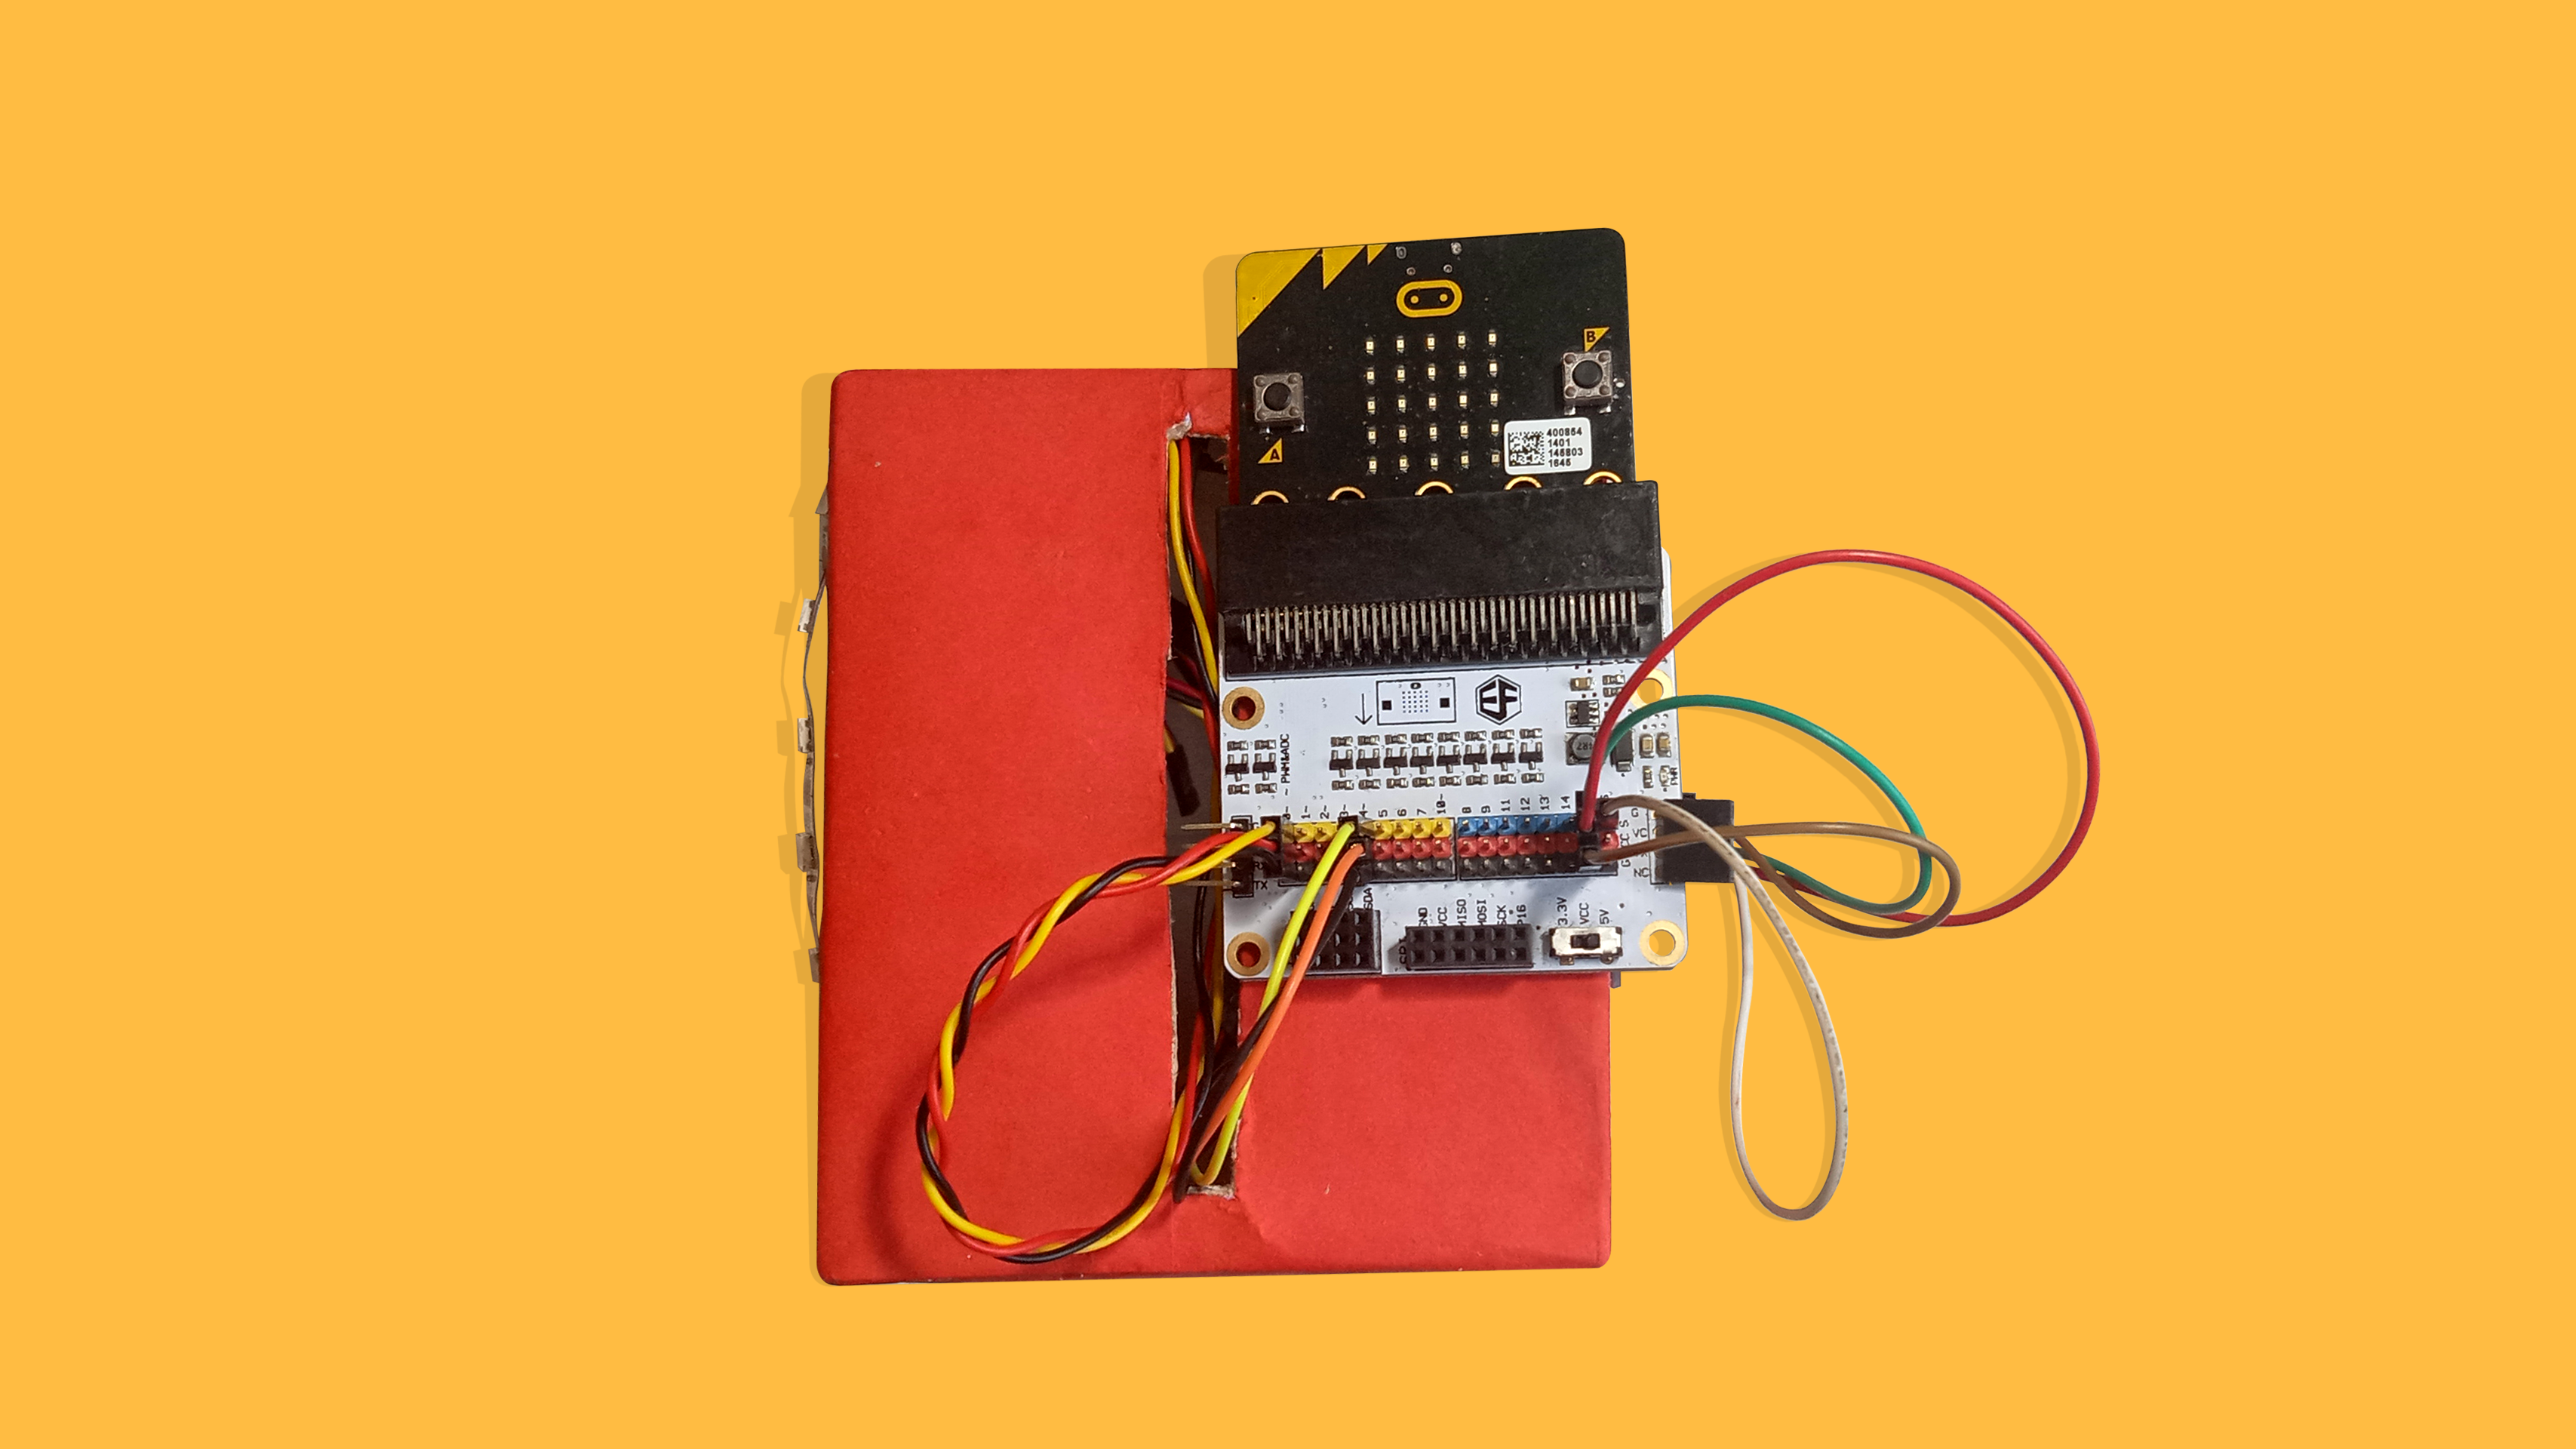
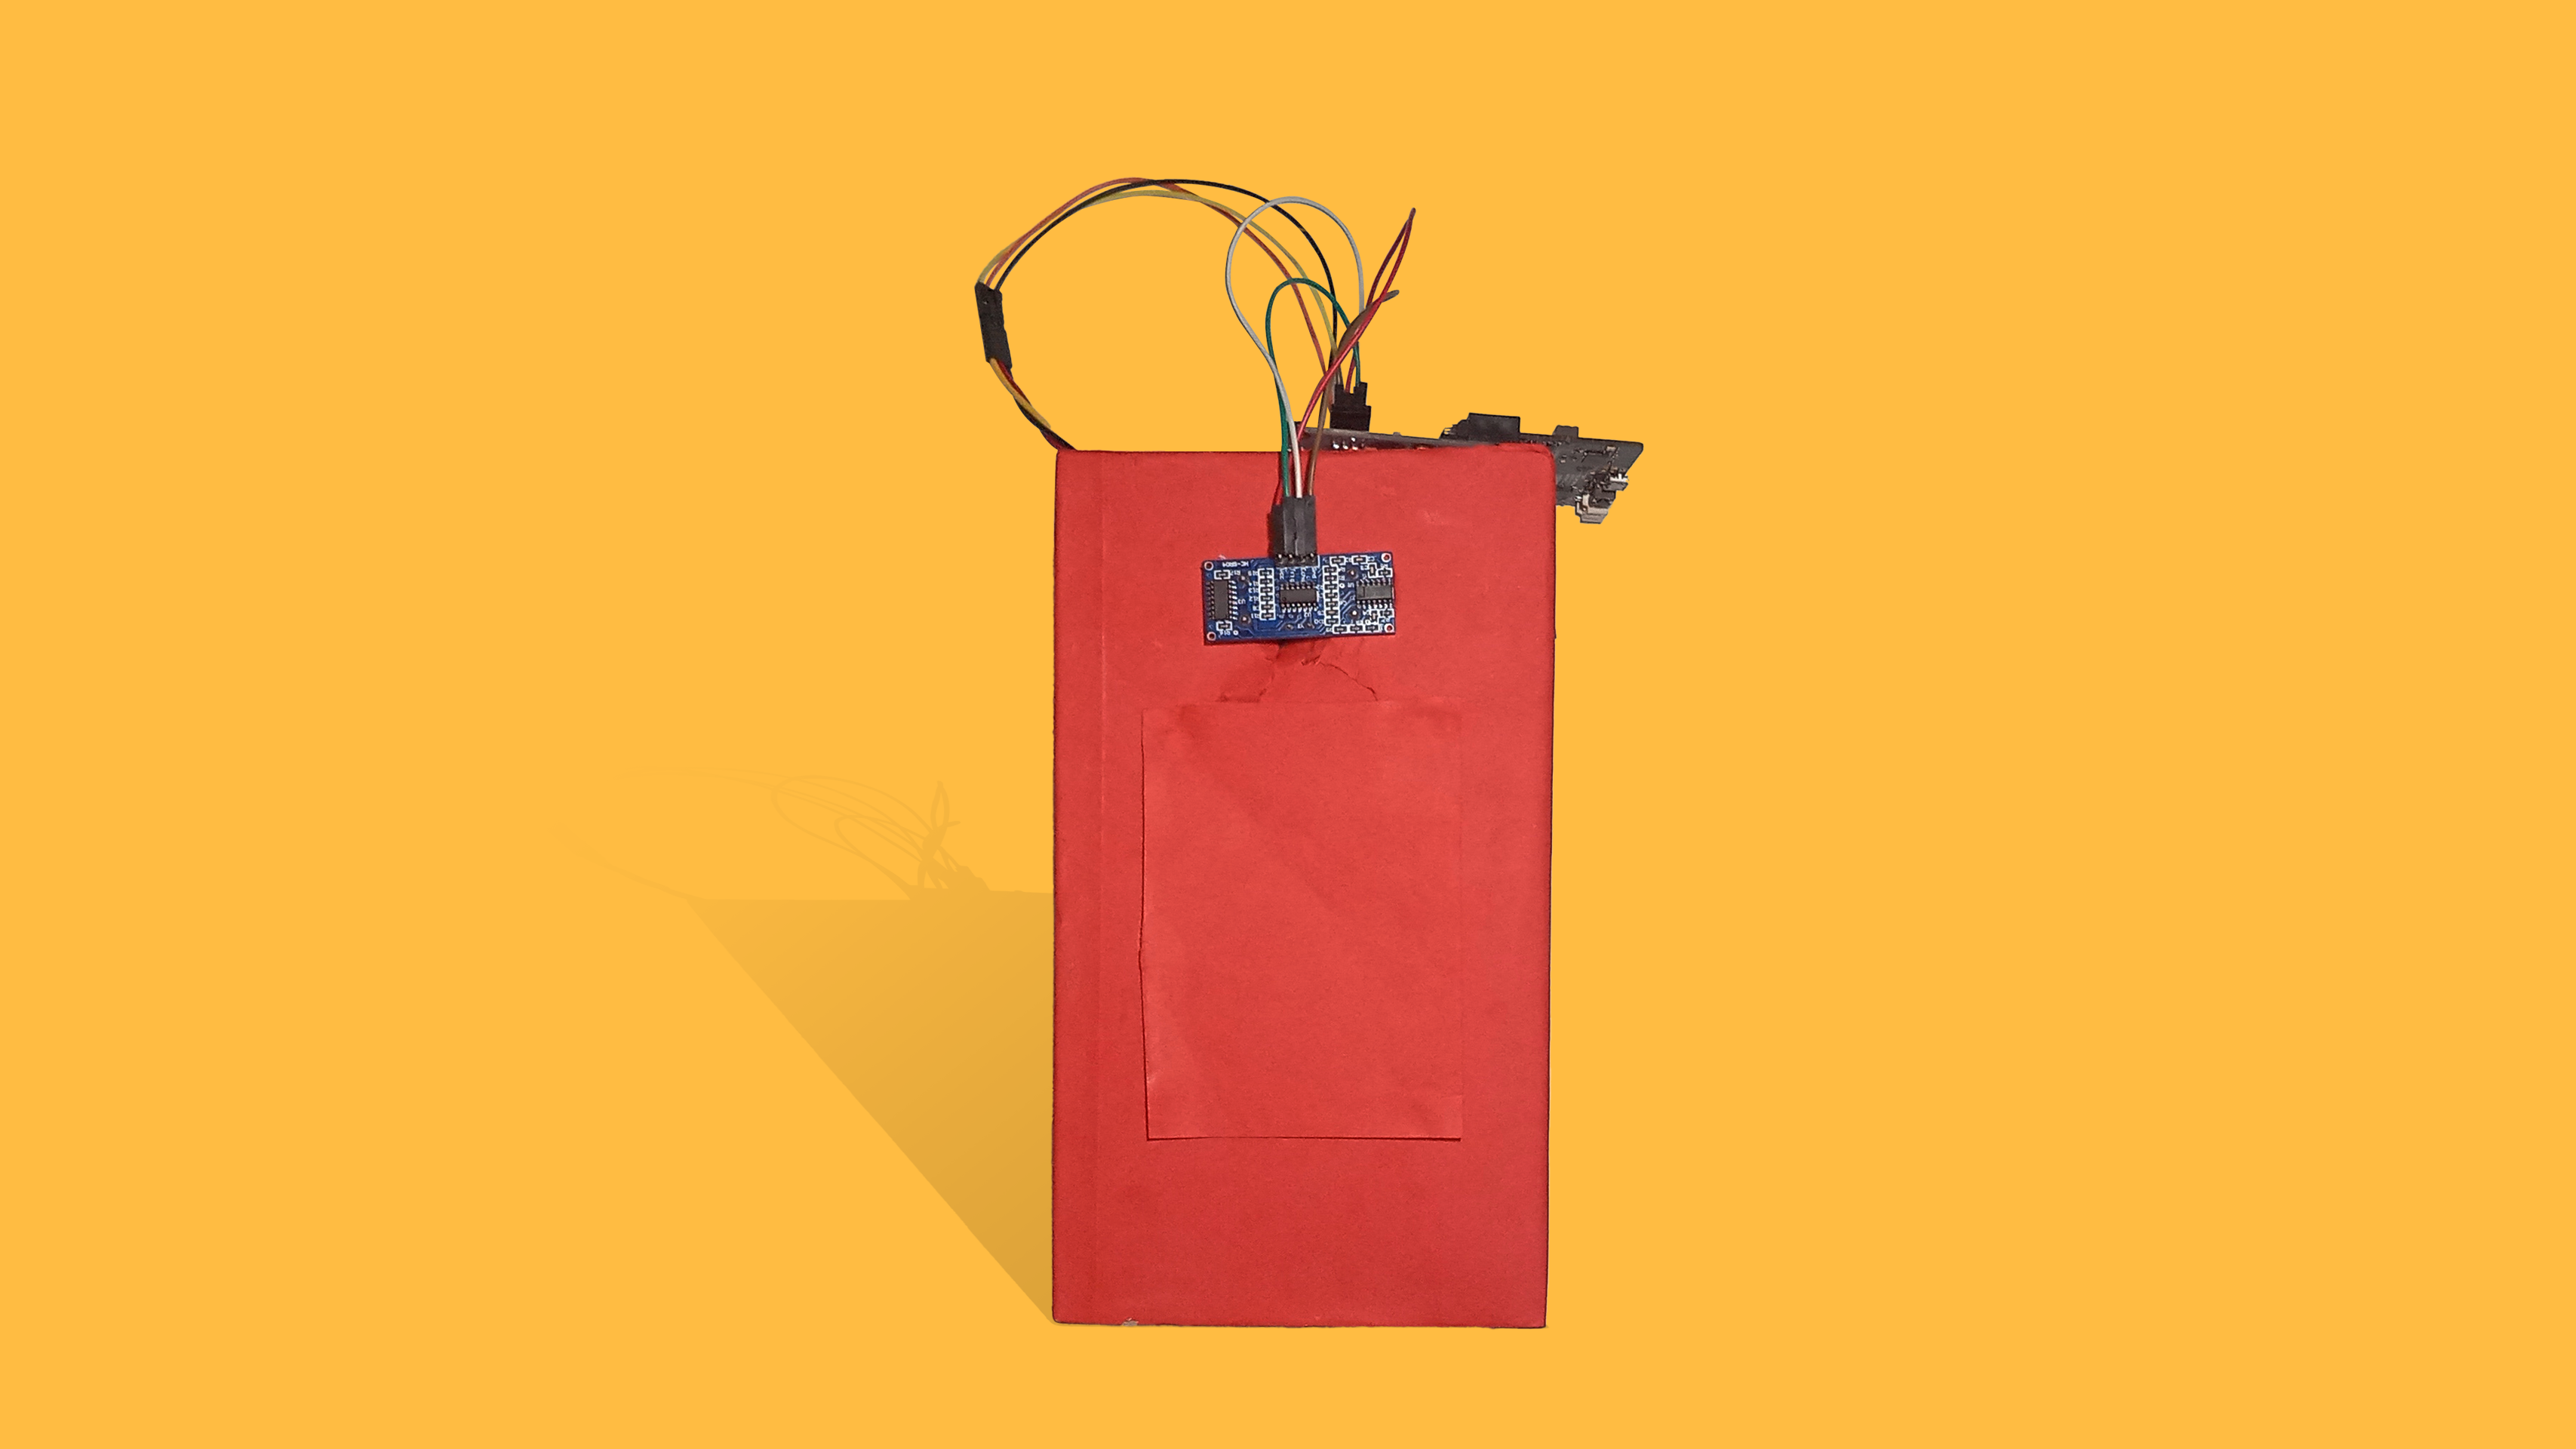
(a) Slot the micro:bit into the Tinkercademy Breakout Board. Place them on top of the box, above the rectangular opening for the ang baos.
(b) Connect the LED Strip to pin P4 of the Tinkercademy Breakout Board. The arrows on the strip should point away from pin P4.
(c) Thread the rest of the LED strips through the 4 openings on both sides of the box. To make this easier, you can reach your hand into the large opening at the back to adjust.
STEP 5

Other Components
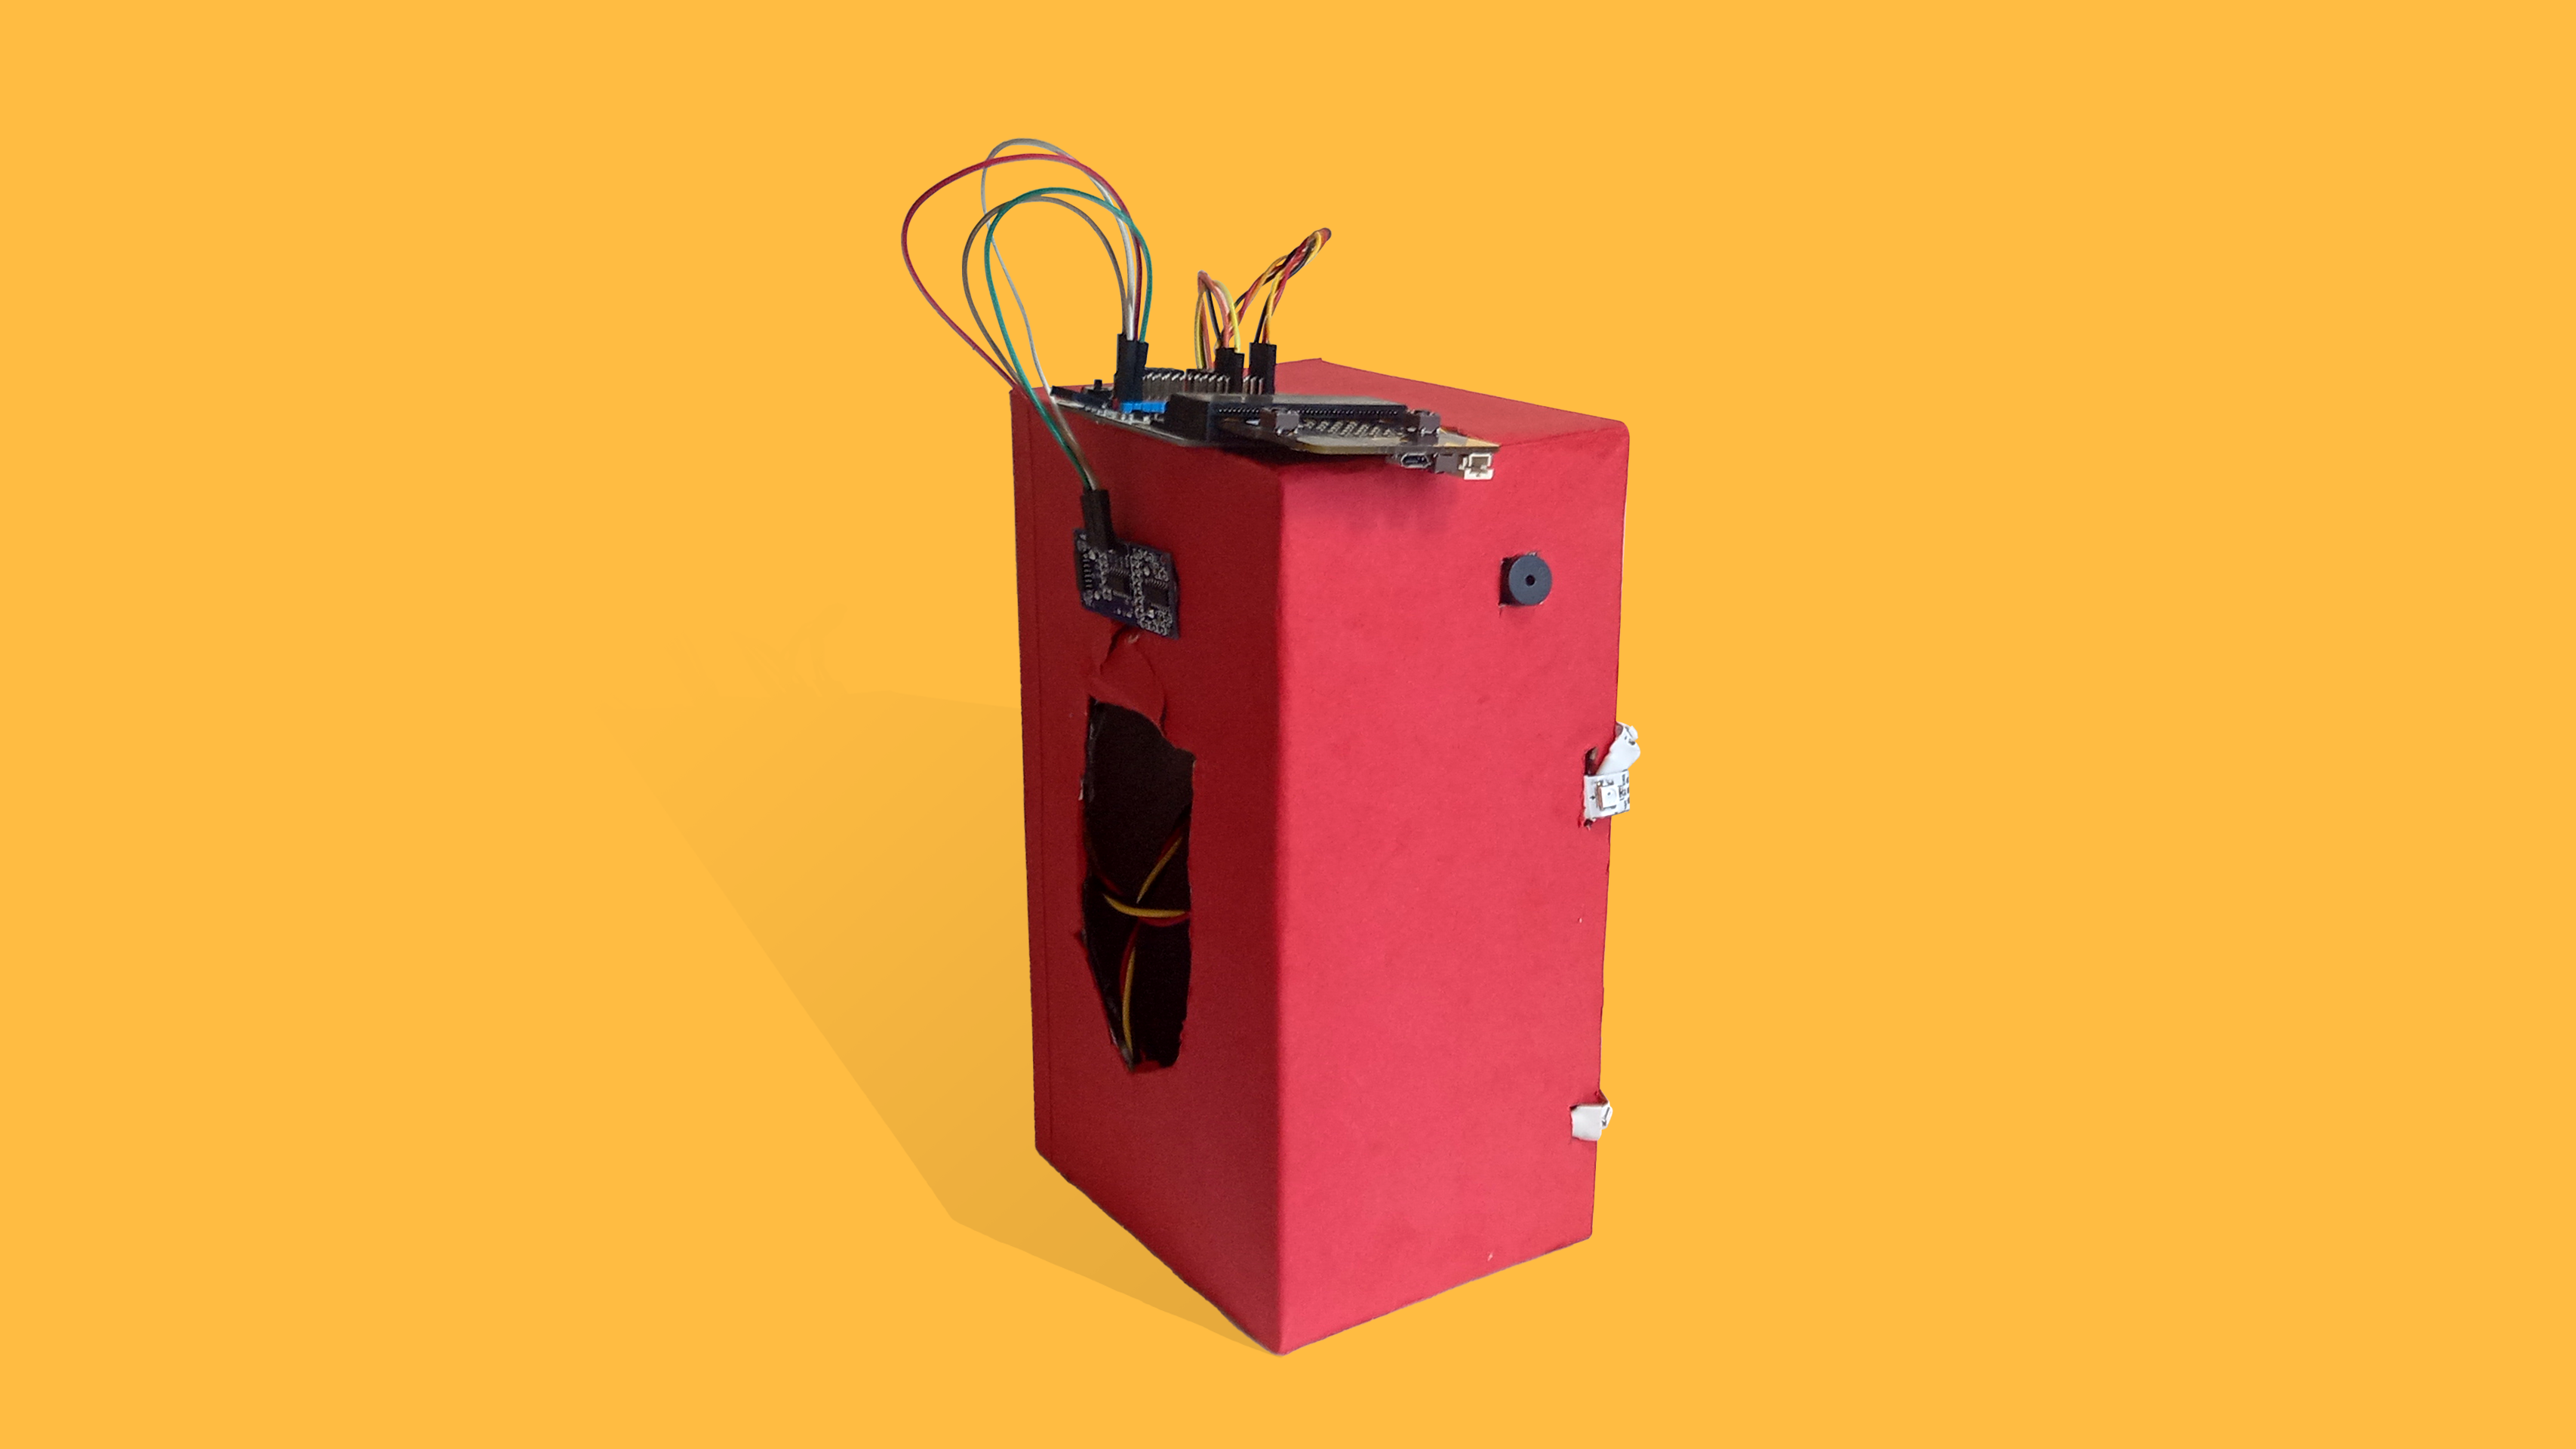
(a) From the back of the box, push the HC-SR04 sensor into the rectangular opening on the back.
(b) For the HC-SR04 Ultrasonic sensor, connect ‘Trig’ to the yellow pin on P15, and ‘Echo’ to the yellow pin on P16 of the Tinkercademy breakout board. Connect ‘VCC’ to the red pin on P15, and ‘GND’ to the black pin on P15.
(c) Connect the buzzer to P0. Insert the buzzer into the box, and stick it out from the opening on the left of the box.
(d) You can use double-sided tape to secure any loose components.
STEP 6
Setting Up the Micro:bit
(a) Tape the Micro:bit down to the top of the tissue box to secure.
(b) Cut a piece of red colour paper, slightly larger than the size of the opening on the back of the box cut previously. Glue it over the large rectangular opening at the back.
(c) Using a micro-USB cable, connect your microbit to a power source. Or, you can connect it to a battery holder with 2xAAA batteries, and place them on top of the tissue box.
STEP 7
Importing Extensions
(a) Go to http://makecode.microbit.org, and select ‘New Project’.
(b) Scroll down to the ‘Advanced’ drawer on the left, then select ‘Extensions’.
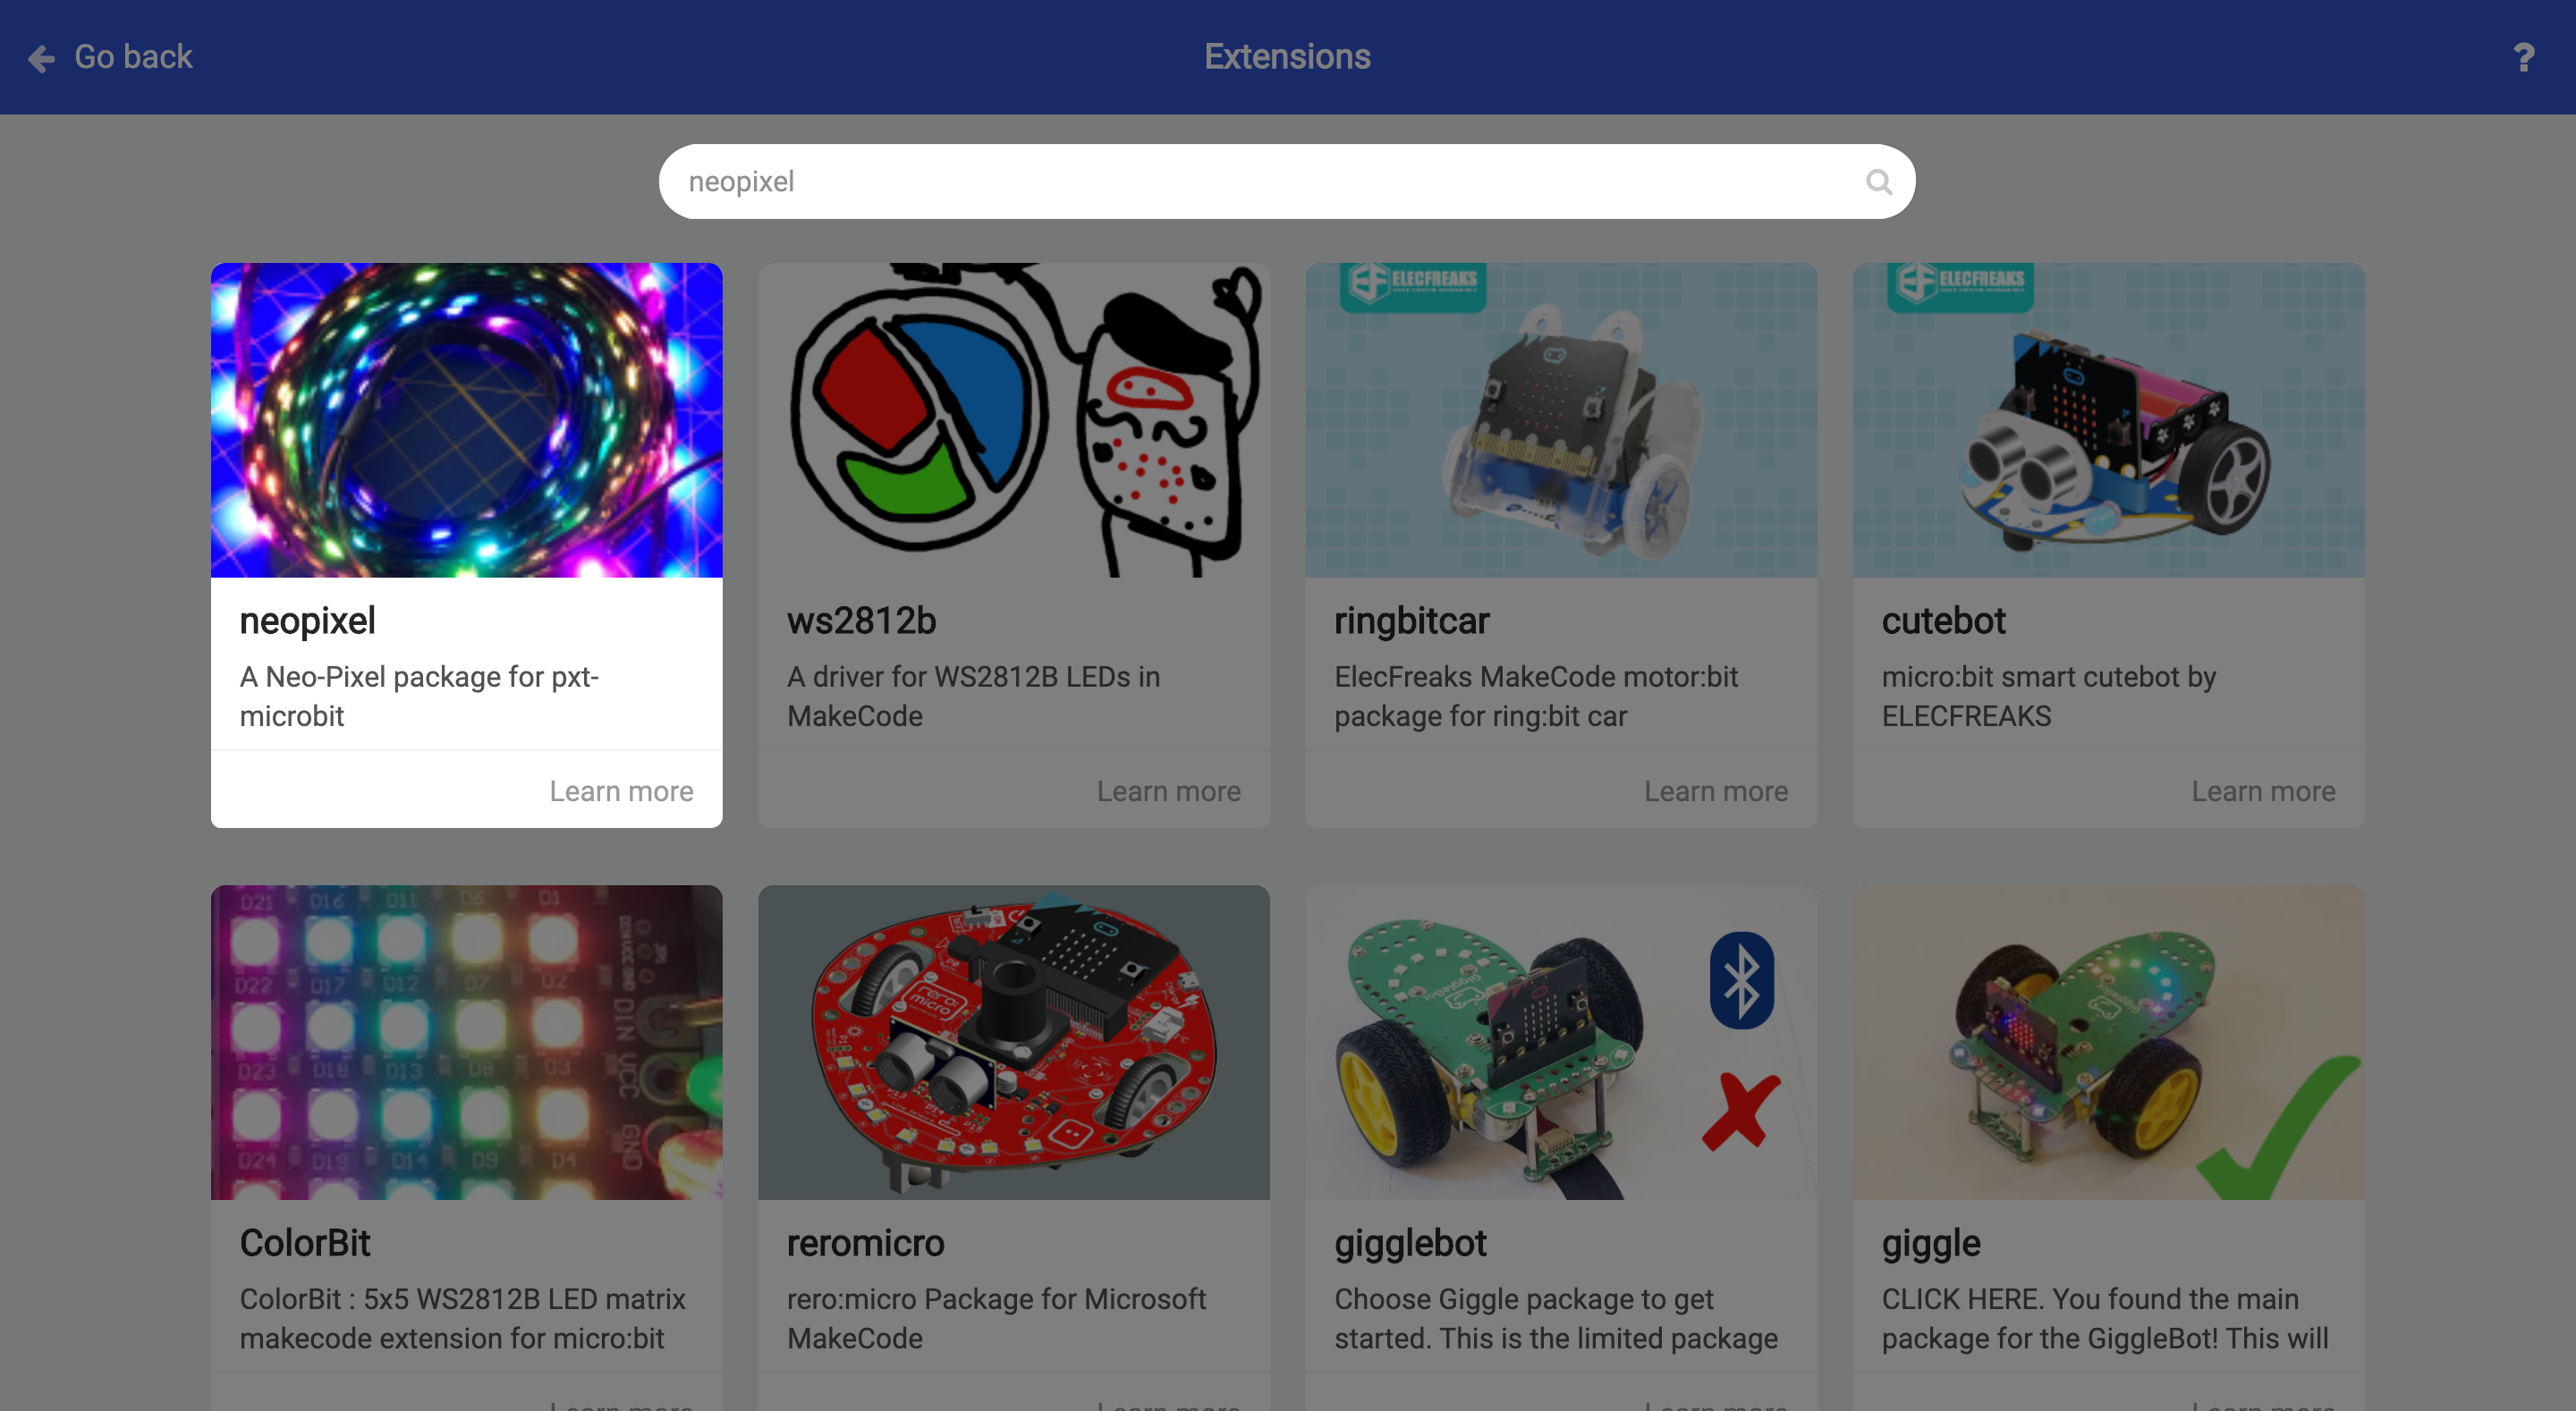
(c) Search for “neopixel”, and select the “neopixel” extension. This will allow us to control the 4 Neopixel strips.
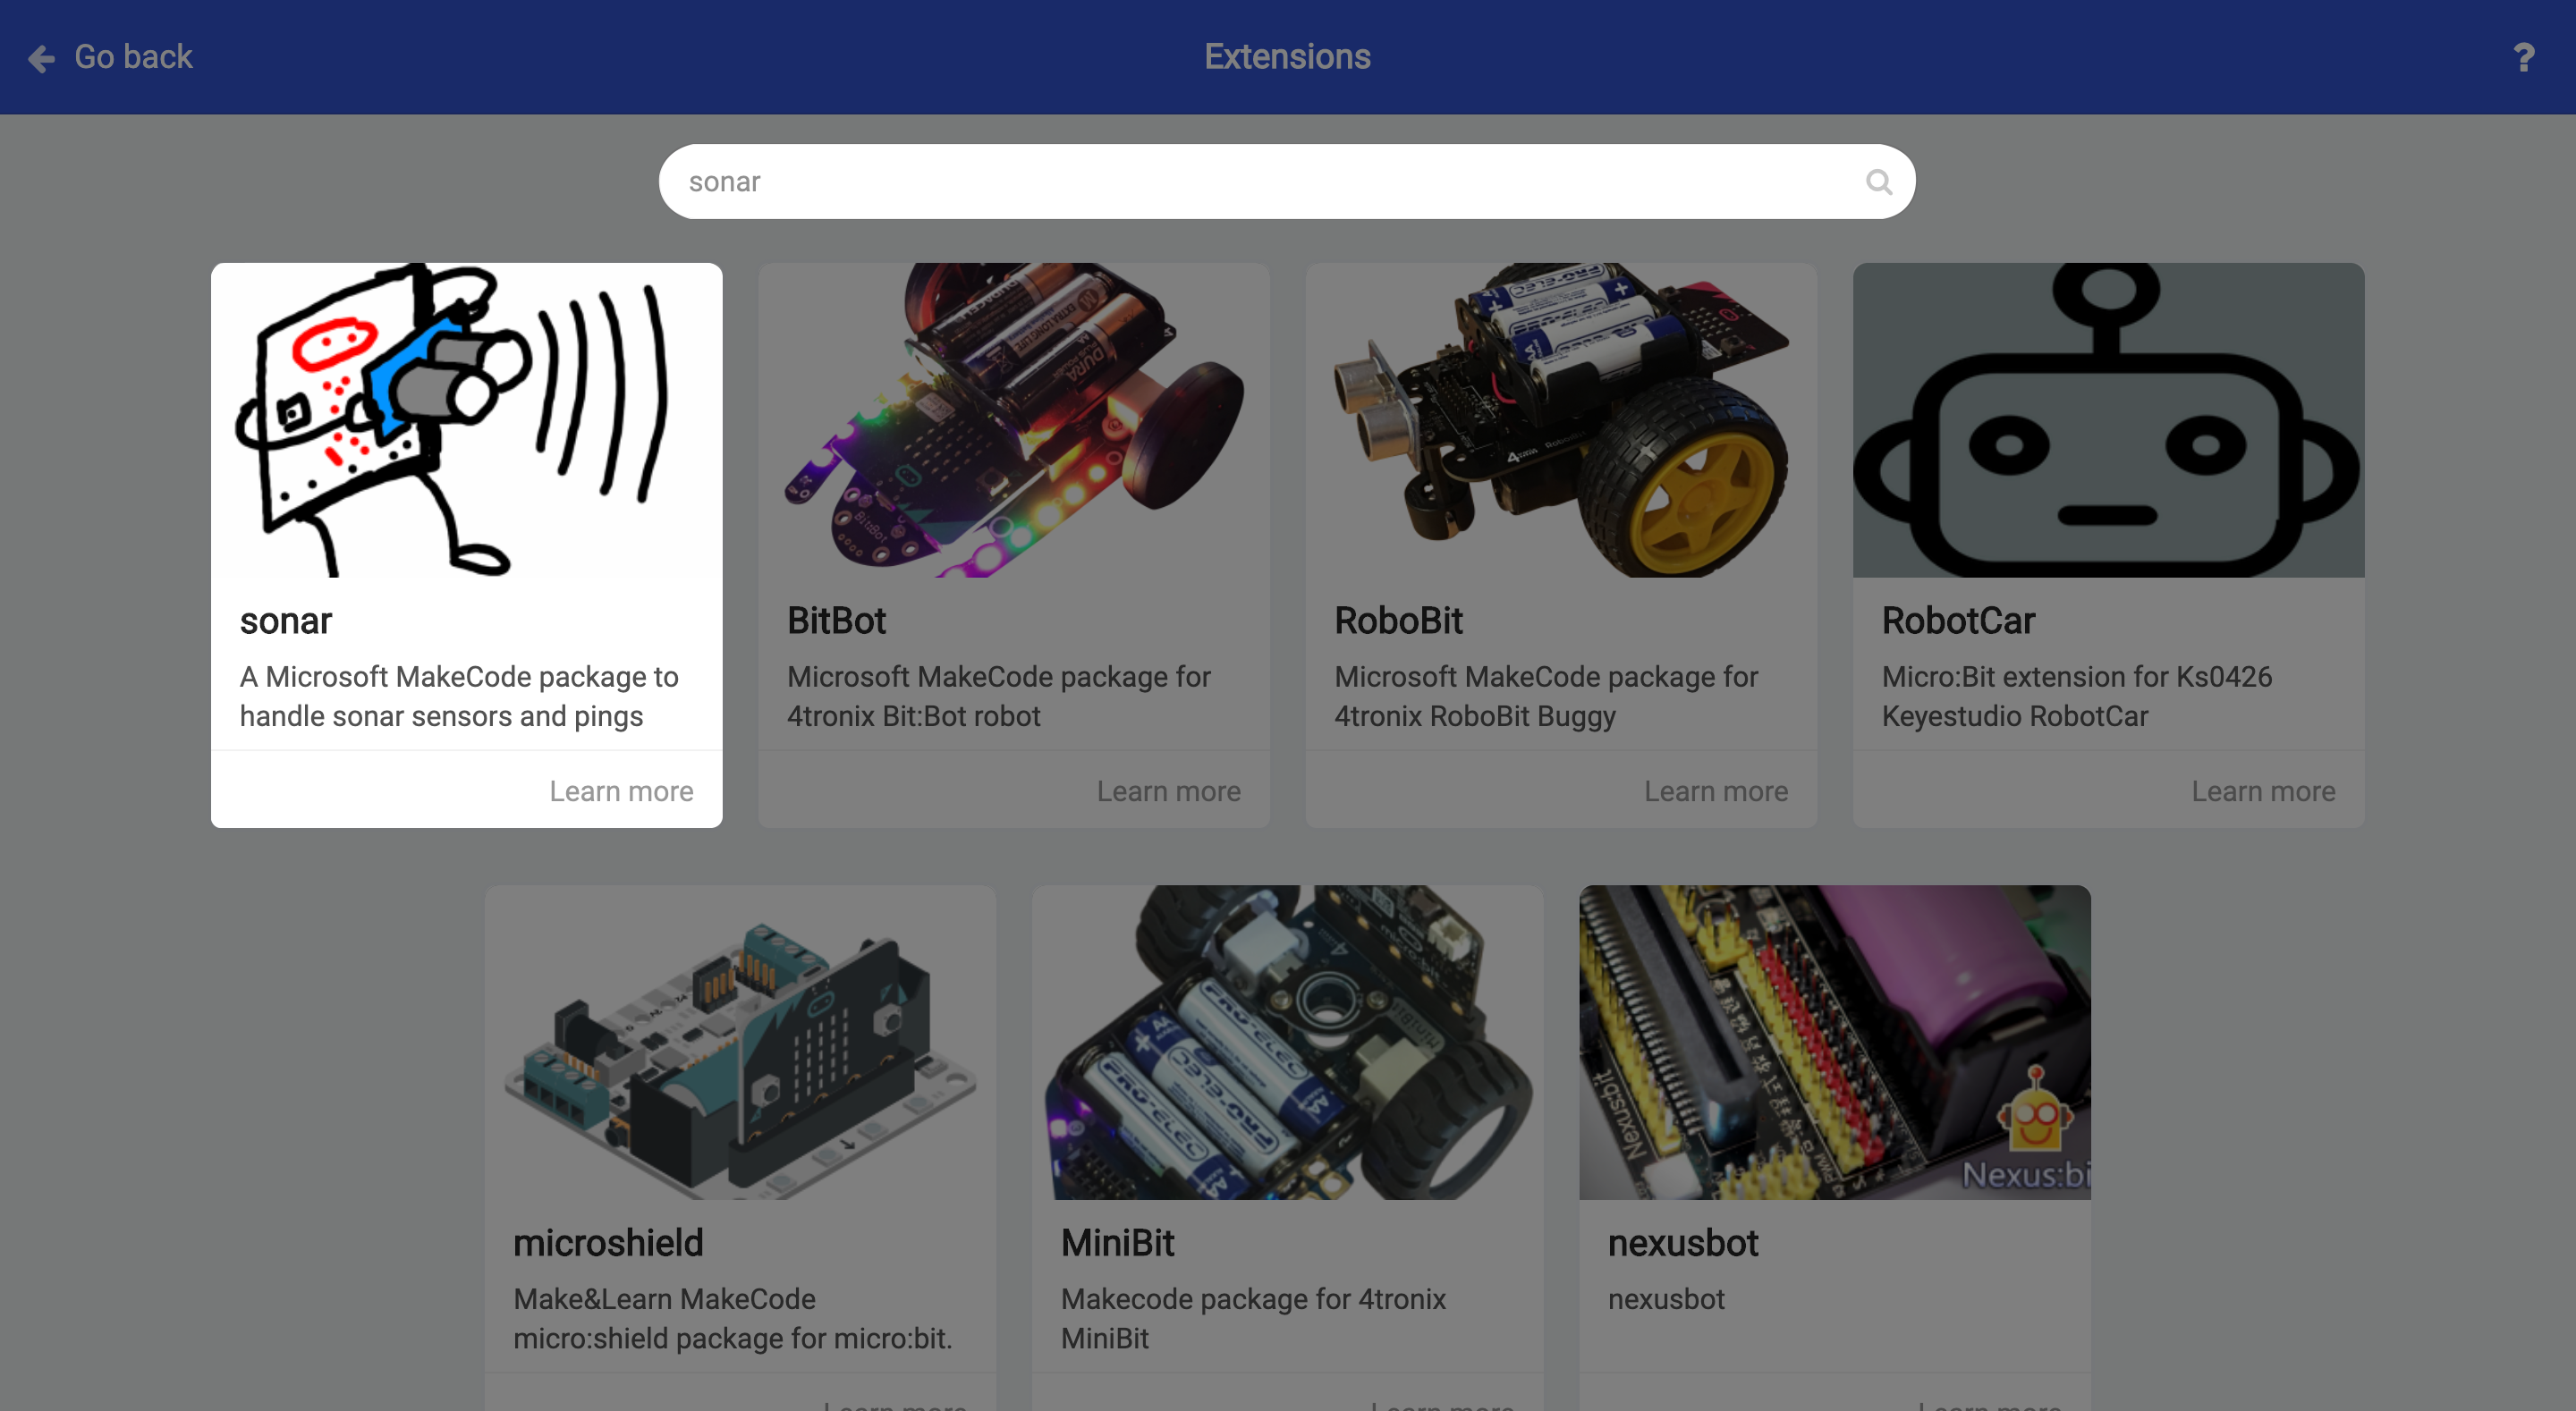
(d) Search for “sonar”, and select the “Sonar” extension. This will allow us to control the HC-SR04 sensor.
STEP 8
Programming the Micro:bit
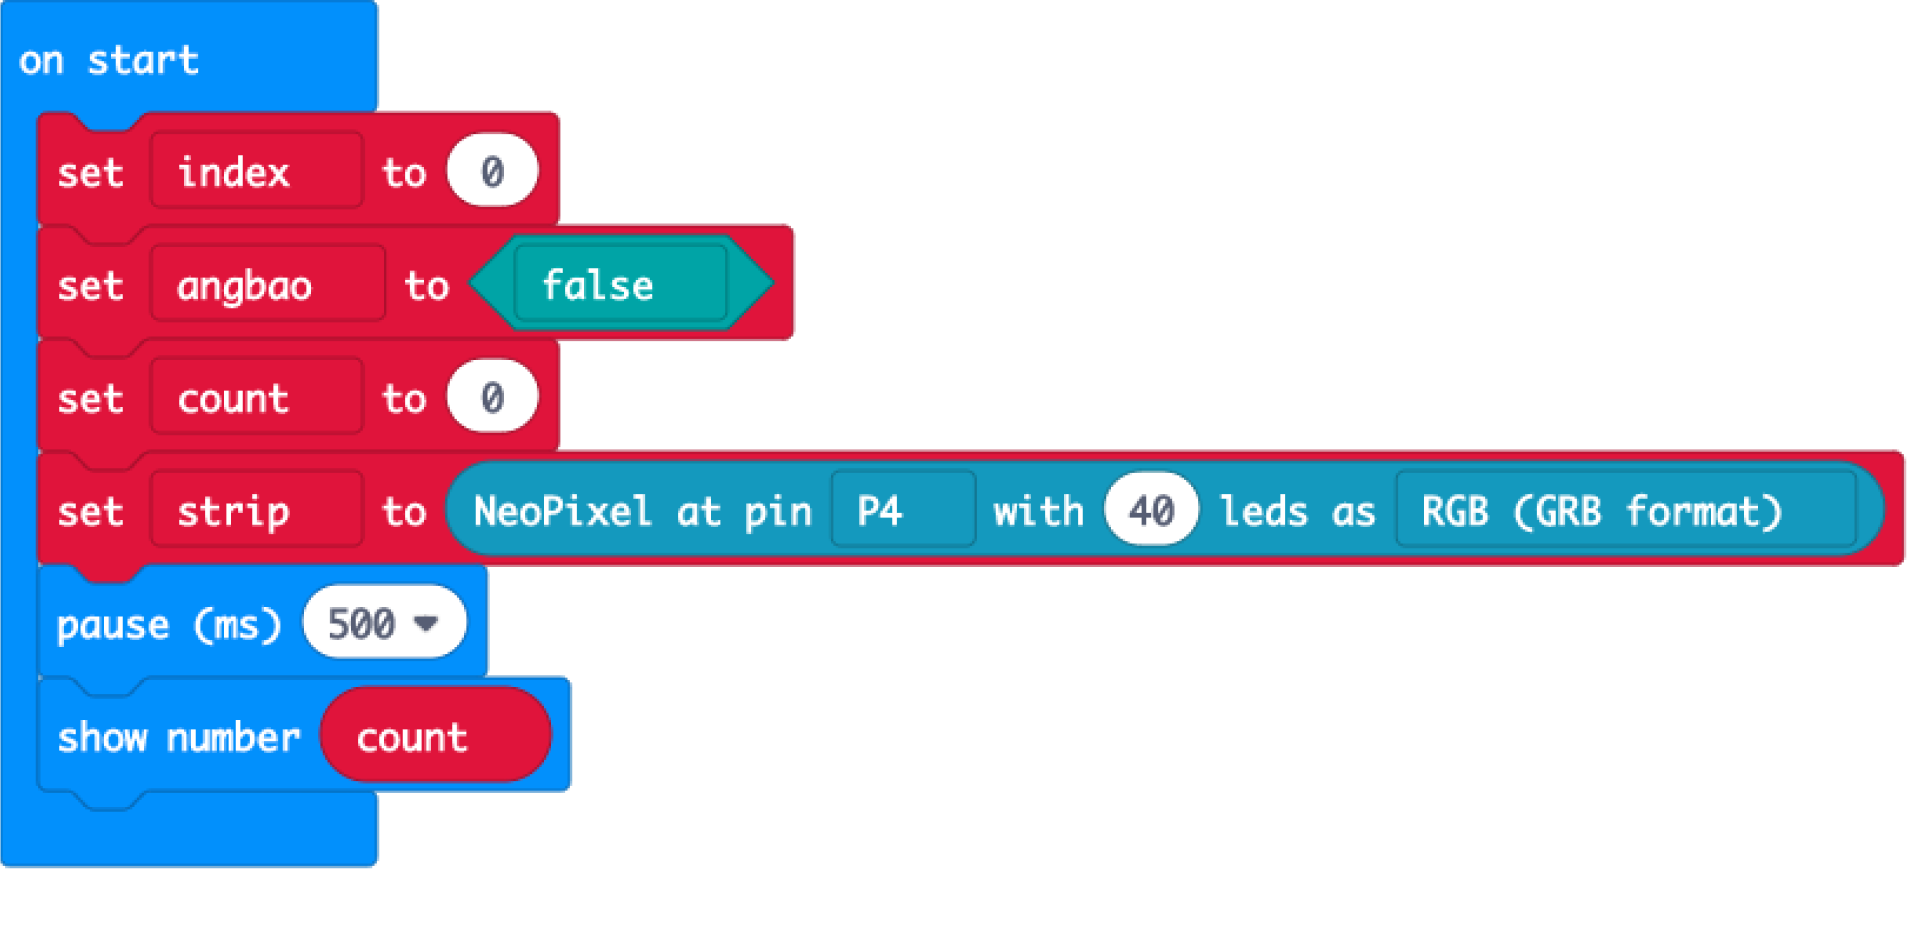
(a) At the start, we initialize the variables we will be using and the Neopixel LED strip.
(b) Then, create a “Music” function to play “Gong Xi Gong Xi”.
(c) If the HC-SR04 sensor detects an object, it will turn on the Neopixel LED lights and simultaneously play “Gong Xi Gong Xi” in the background.
(d) The programme keeps count of the number of Ang Baos received, and shows the tally on both the Micro:bit LED display and the Neopixel LED Strip.
STEP 9
Congratulations, we’ve completed the ang bao collector!
(a) Don’t forget to connect your micro:bit to your laptop with the micro-USB cable, and click ‘Download’ on MakeCode!
(b) After inserting the Ang Bao, the LED strips will light up and music will be played from the buzzer.
(c) The number of LEDs that remain lit and the number on the microbit LED display will indicate the number of Ang Baos collected. You can now keep track of the number of ang baos you’ve collected!
Code and References
Made this activity? Good Job! Now spread the word. Share a photo of your creation on social media with #letsgethacking #AngBaoCollector