Arduino Fairy Lights
Fairy lights that light up when the PIR sensor is triggered!

YOU WILL NEED
- x 1 9V battery
- x 1 9V battery case
- x 1 Arduino Uno
- x1 PIR sensor
- x 1 Fairy lights
- Jumper wires/Connecting wires and wire stripper
- Soldering iron
- USB cable
- Working laptop/computer
STEP 1

Making the Connections
Use the soldering iron to melt the solder that connects the wires to the battery pack and switch. Remove the battery pack and switch, you won't be needing them for this project.
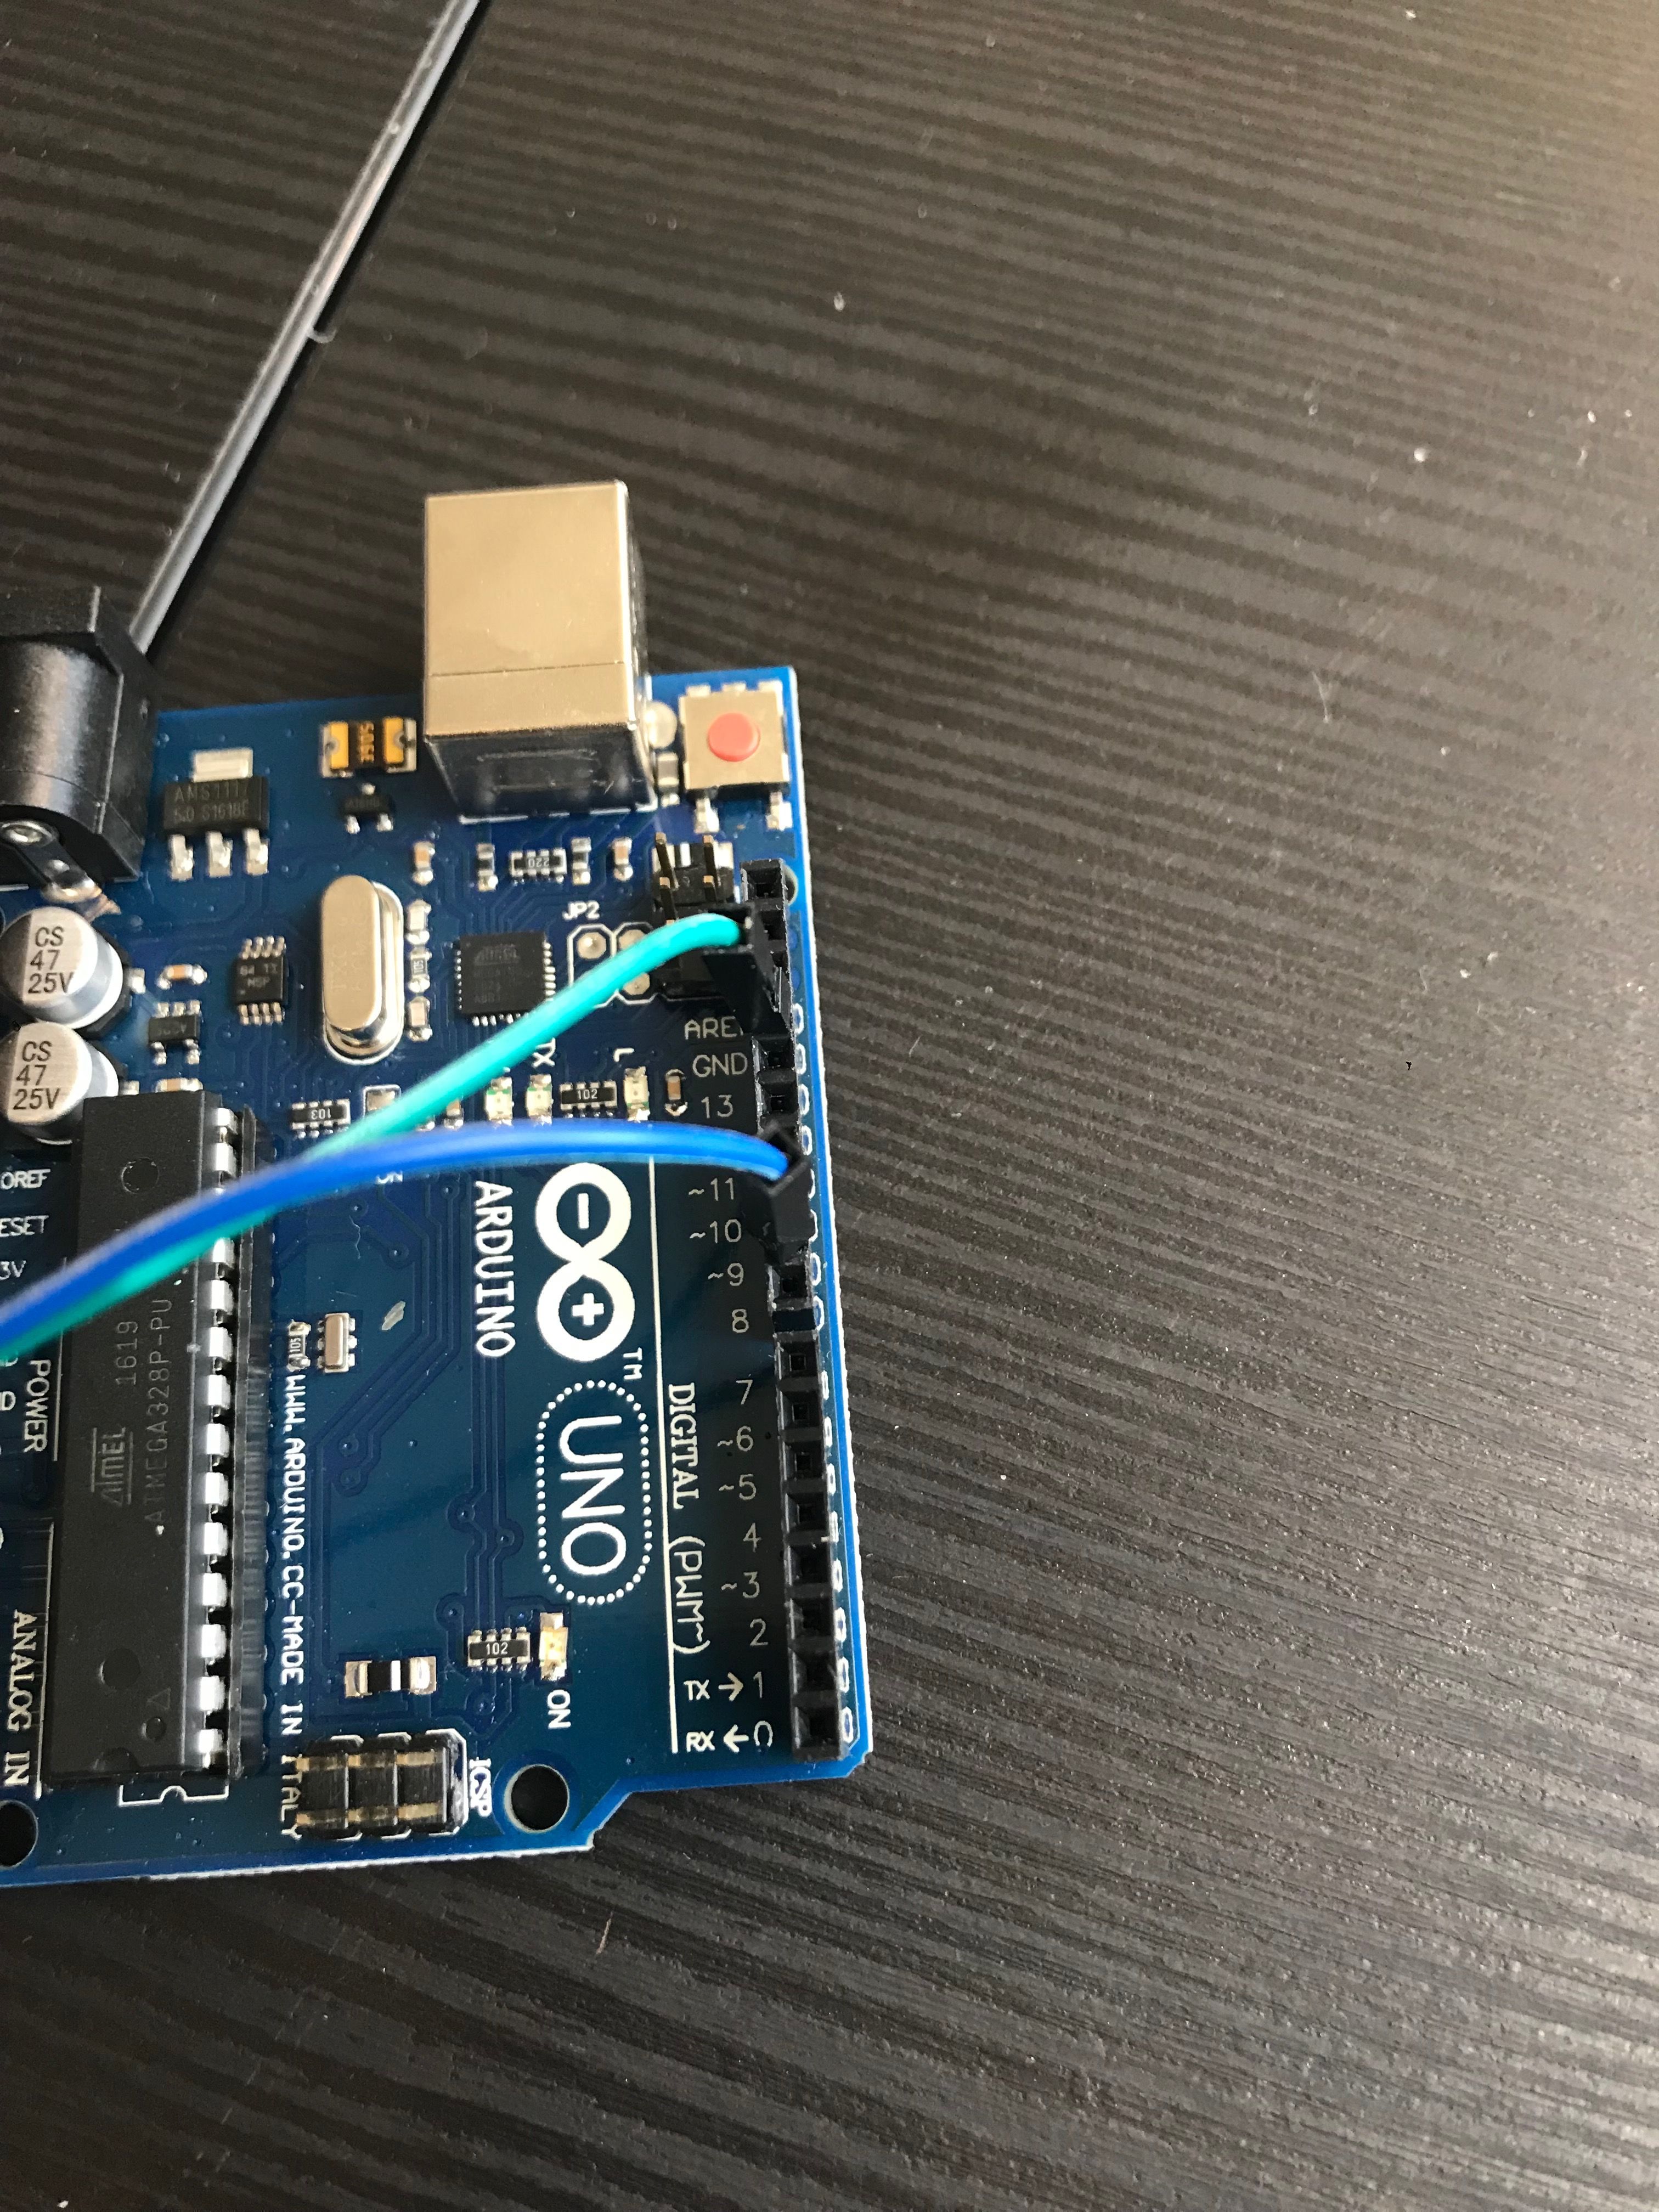
Using the wire stripper, remove the ends of the wires of the fairy lights. Solder the end of each wire to a jumper wire. Connect one jumper wire to Digital Pin ~9 and the other to Ground (GND) on the Arduino.
Materials
- Fairy lights
- Arduino Uno
- Jumper wires
- Wire stripper
- Soldering iron
STEP 2
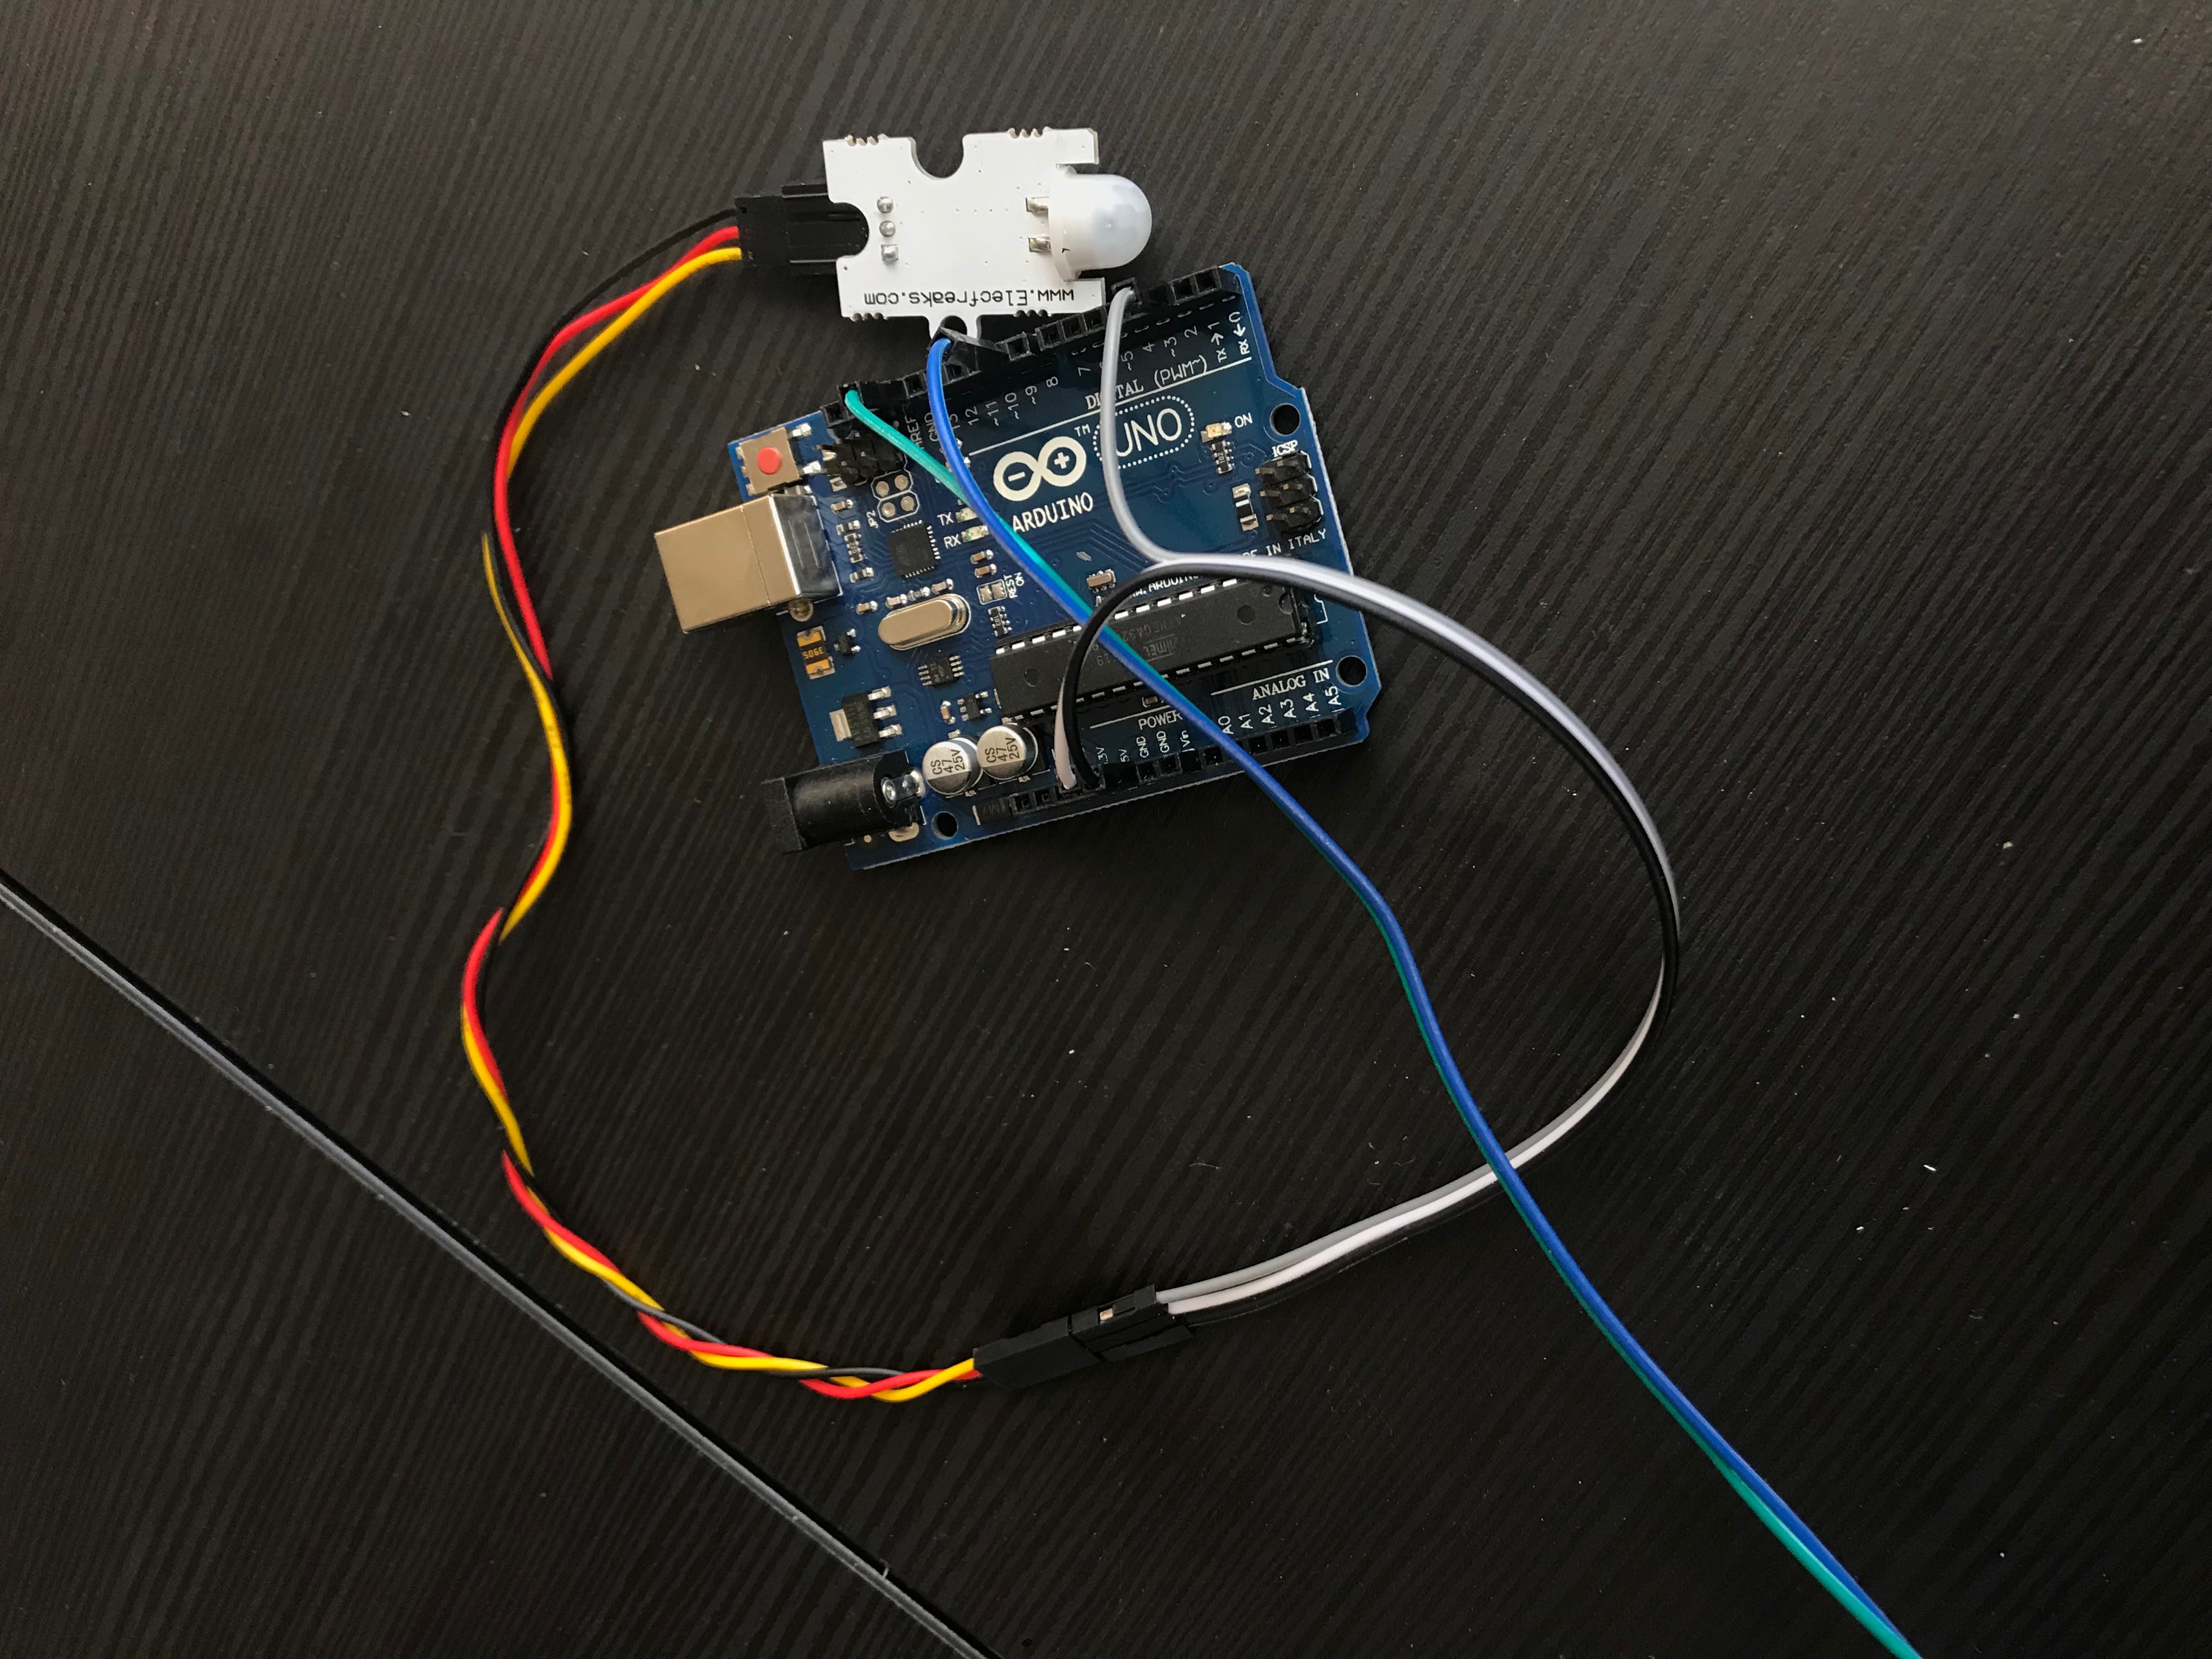
Connect a jumper wire to each of the 3 ends of the PIR sensor. The red wire on the PIR sensor should be connected to the 5V pin on the Arduino. Connect the yellow wire to Digital Pin 2 (PWM~) and the black wire to Ground (GND).
Materials
- PIR sensor
- Arduino Uno
STEP 3

Writing the Code
Download the Arduino software on your laptop/computer here. Make sure "Board: Arduino/Genuino Uno" is indicated under Tools, and plug your Arduino Uno board into the laptop/computer with your USB cable.
Now you're ready to start coding!
Materials
- Arduino Uno
- USB cable
- Working laptop/computer
STEP 4
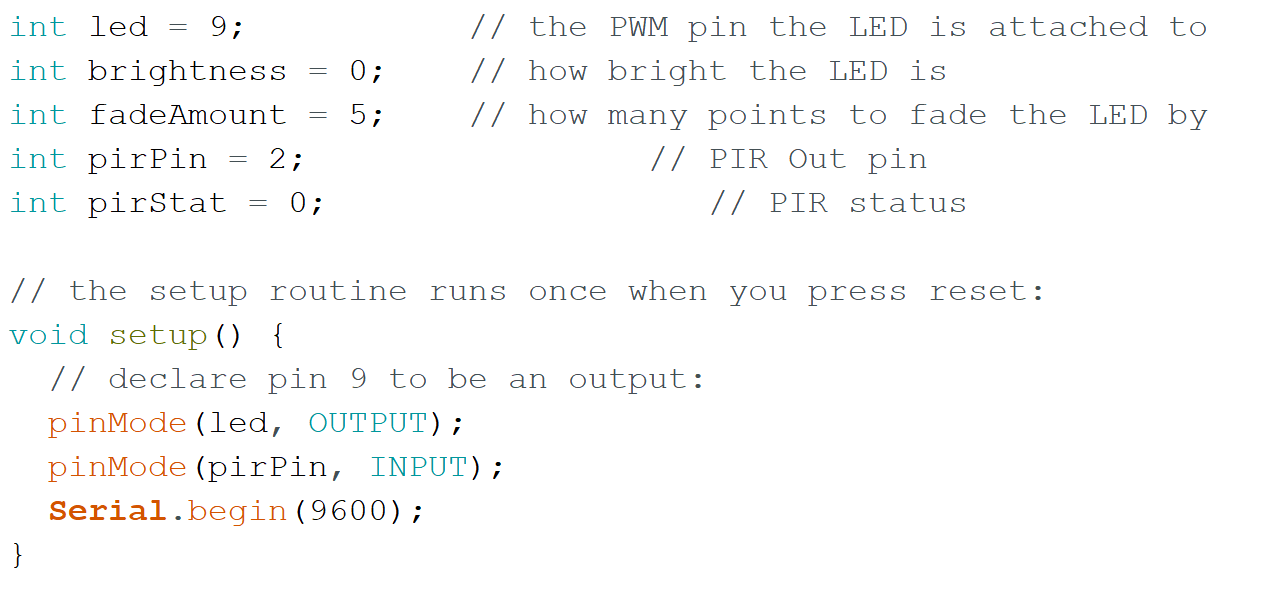
Define the following integer values for the LED fairy lights and the PIR sensor. Set the PIR pin as input, and the LED pin as output.
Materials
- Arduino Uno
- USB cable
- Working laptop/computer
STEP 5

Code for the LED fairy lights to light up for 6 seconds and then turn off when the PIR sensor is triggered. If the PIR sensor is not triggered, the LED fairy lights should remain turned off.
You're done with the code now! Upload your code onto your Arduino board, and unplug it from your computer.
Materials
- Arduino Uno
- USB cable
- Working laptop/computer
STEP 6
Finishing Up
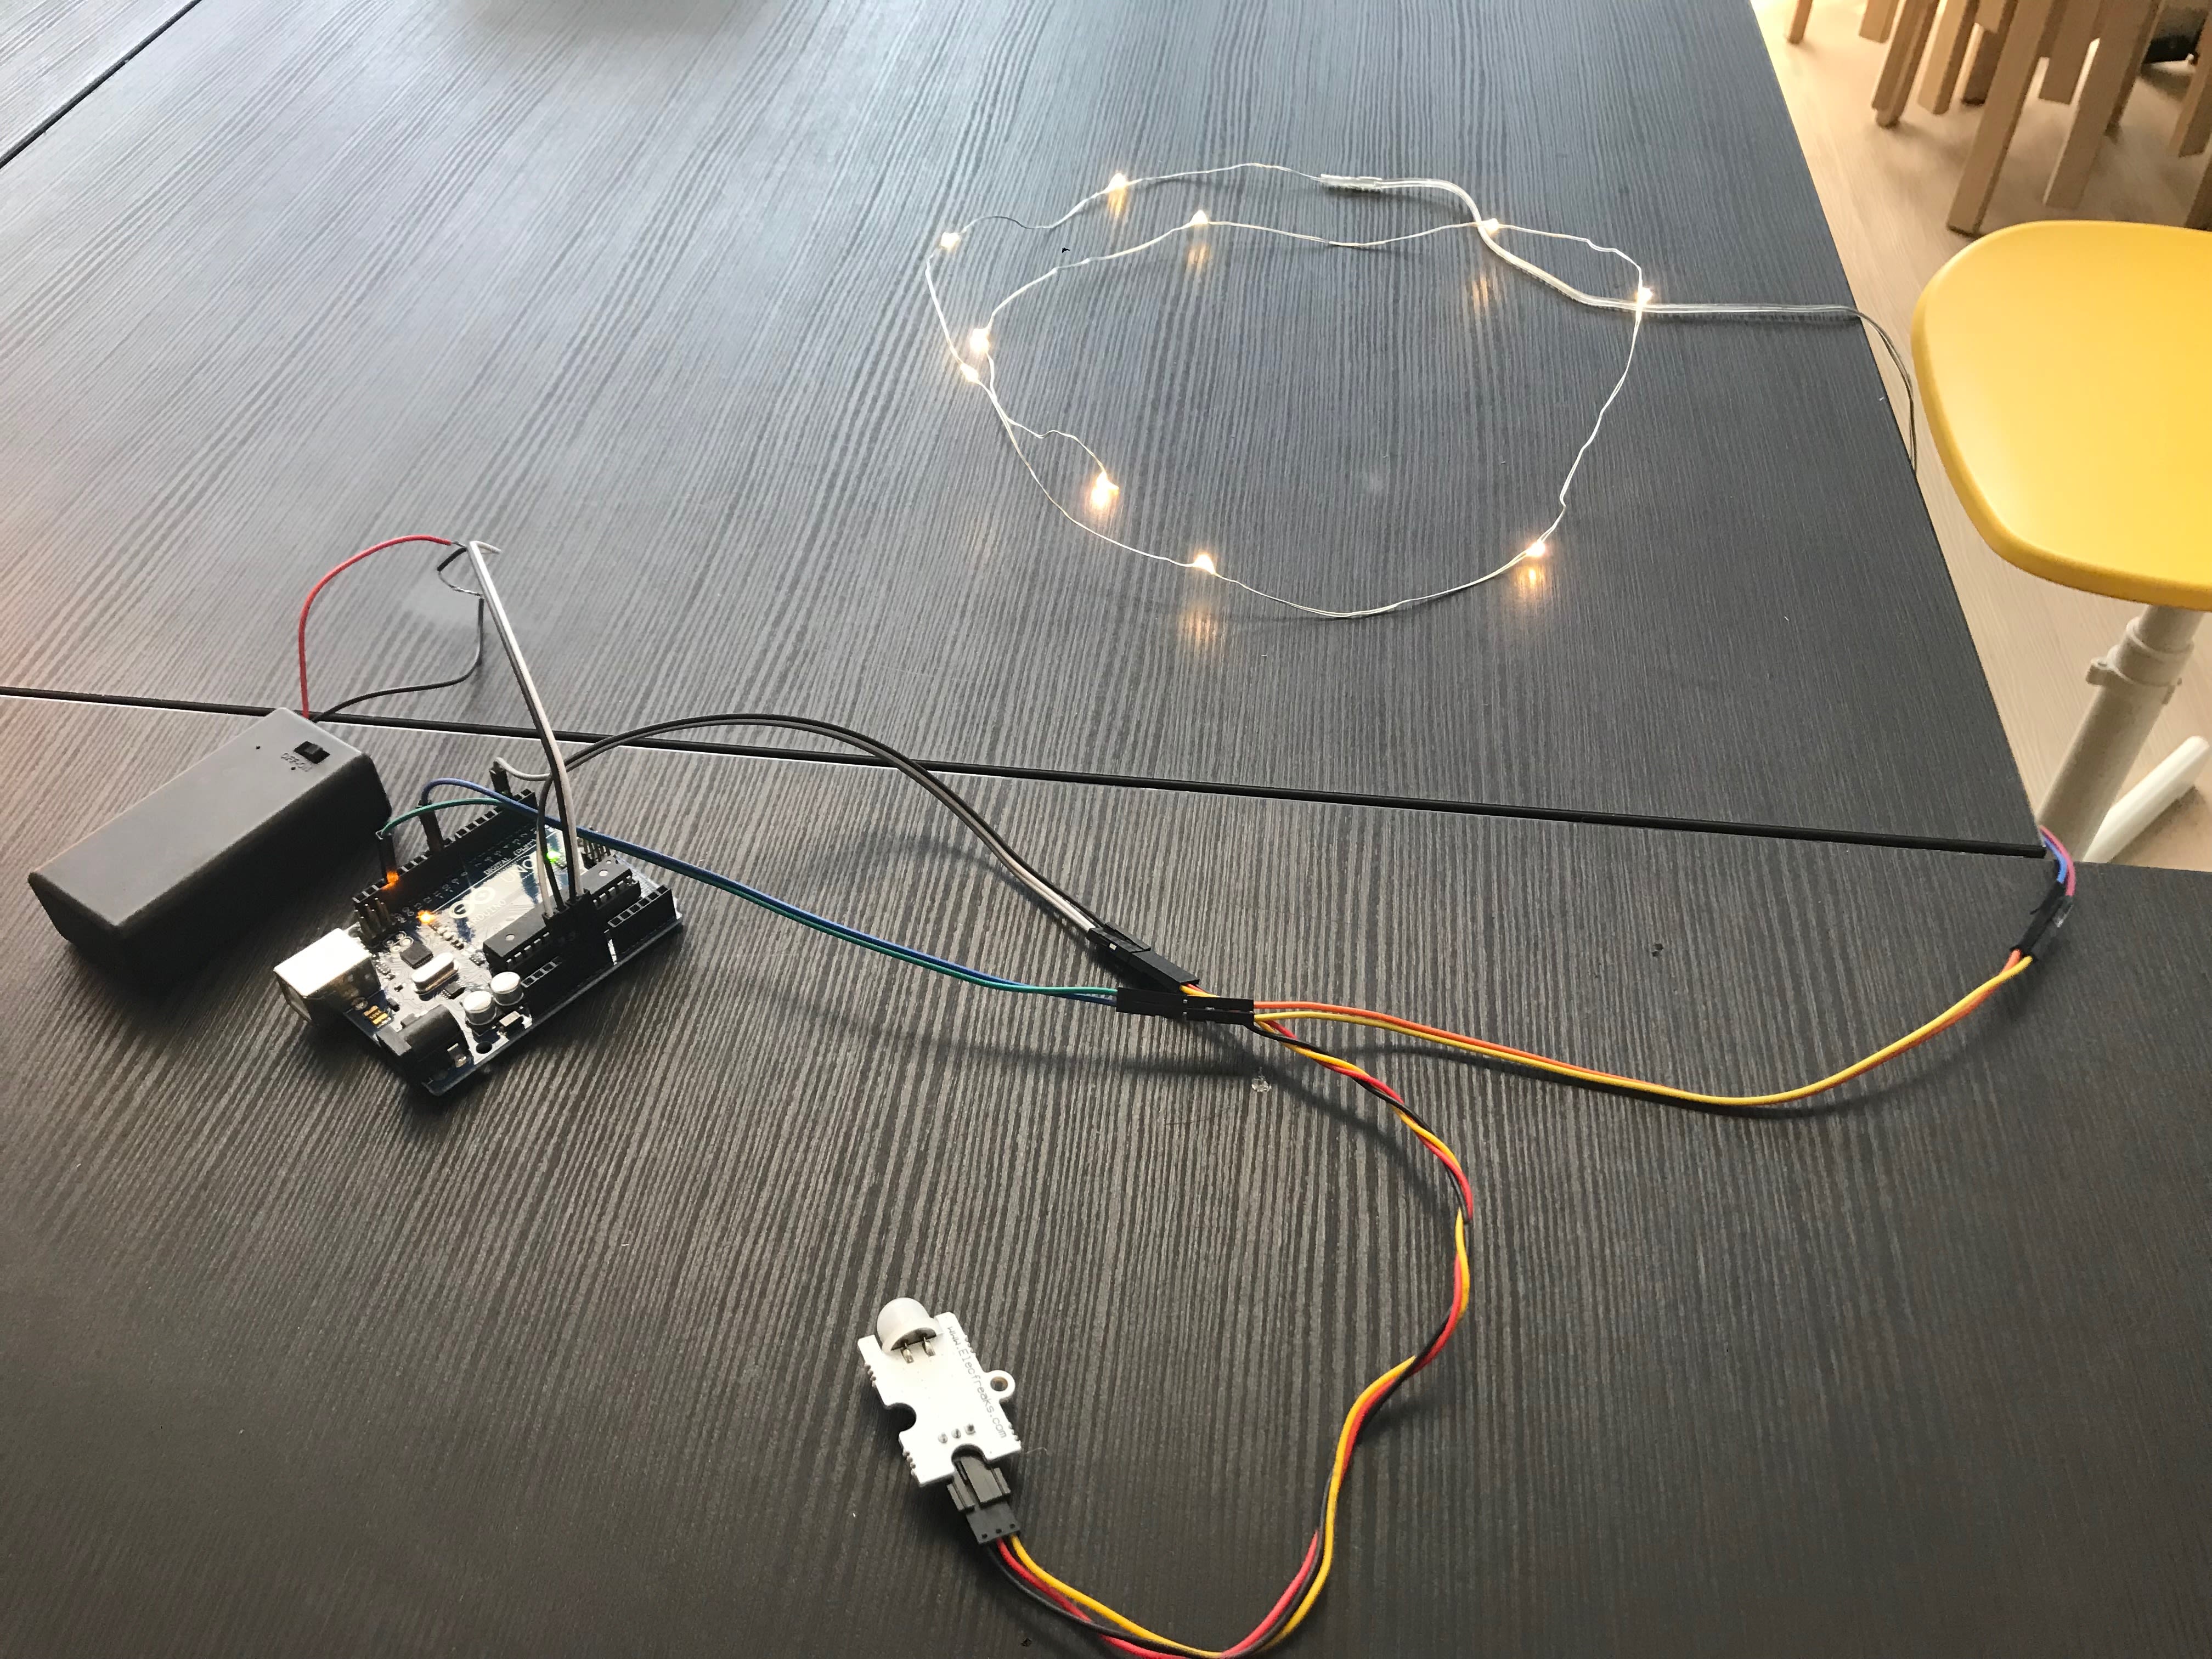
Place the 9V battery in the battery holder. Solder the wires on the battery holder to a jumper wire each. Connect the black wire to Ground (GND) and the red wire to the VIN pin.
There you have it, the ultimate room decor.
Materials
- 9V battery
- 9V battery holder
- Jumper wires
- Arduino Uno
Code and References
Made this activity? Good Job! Now spread the word. Share a photo of your creation on social media with #letsgethacking #ArduinoFairyLights