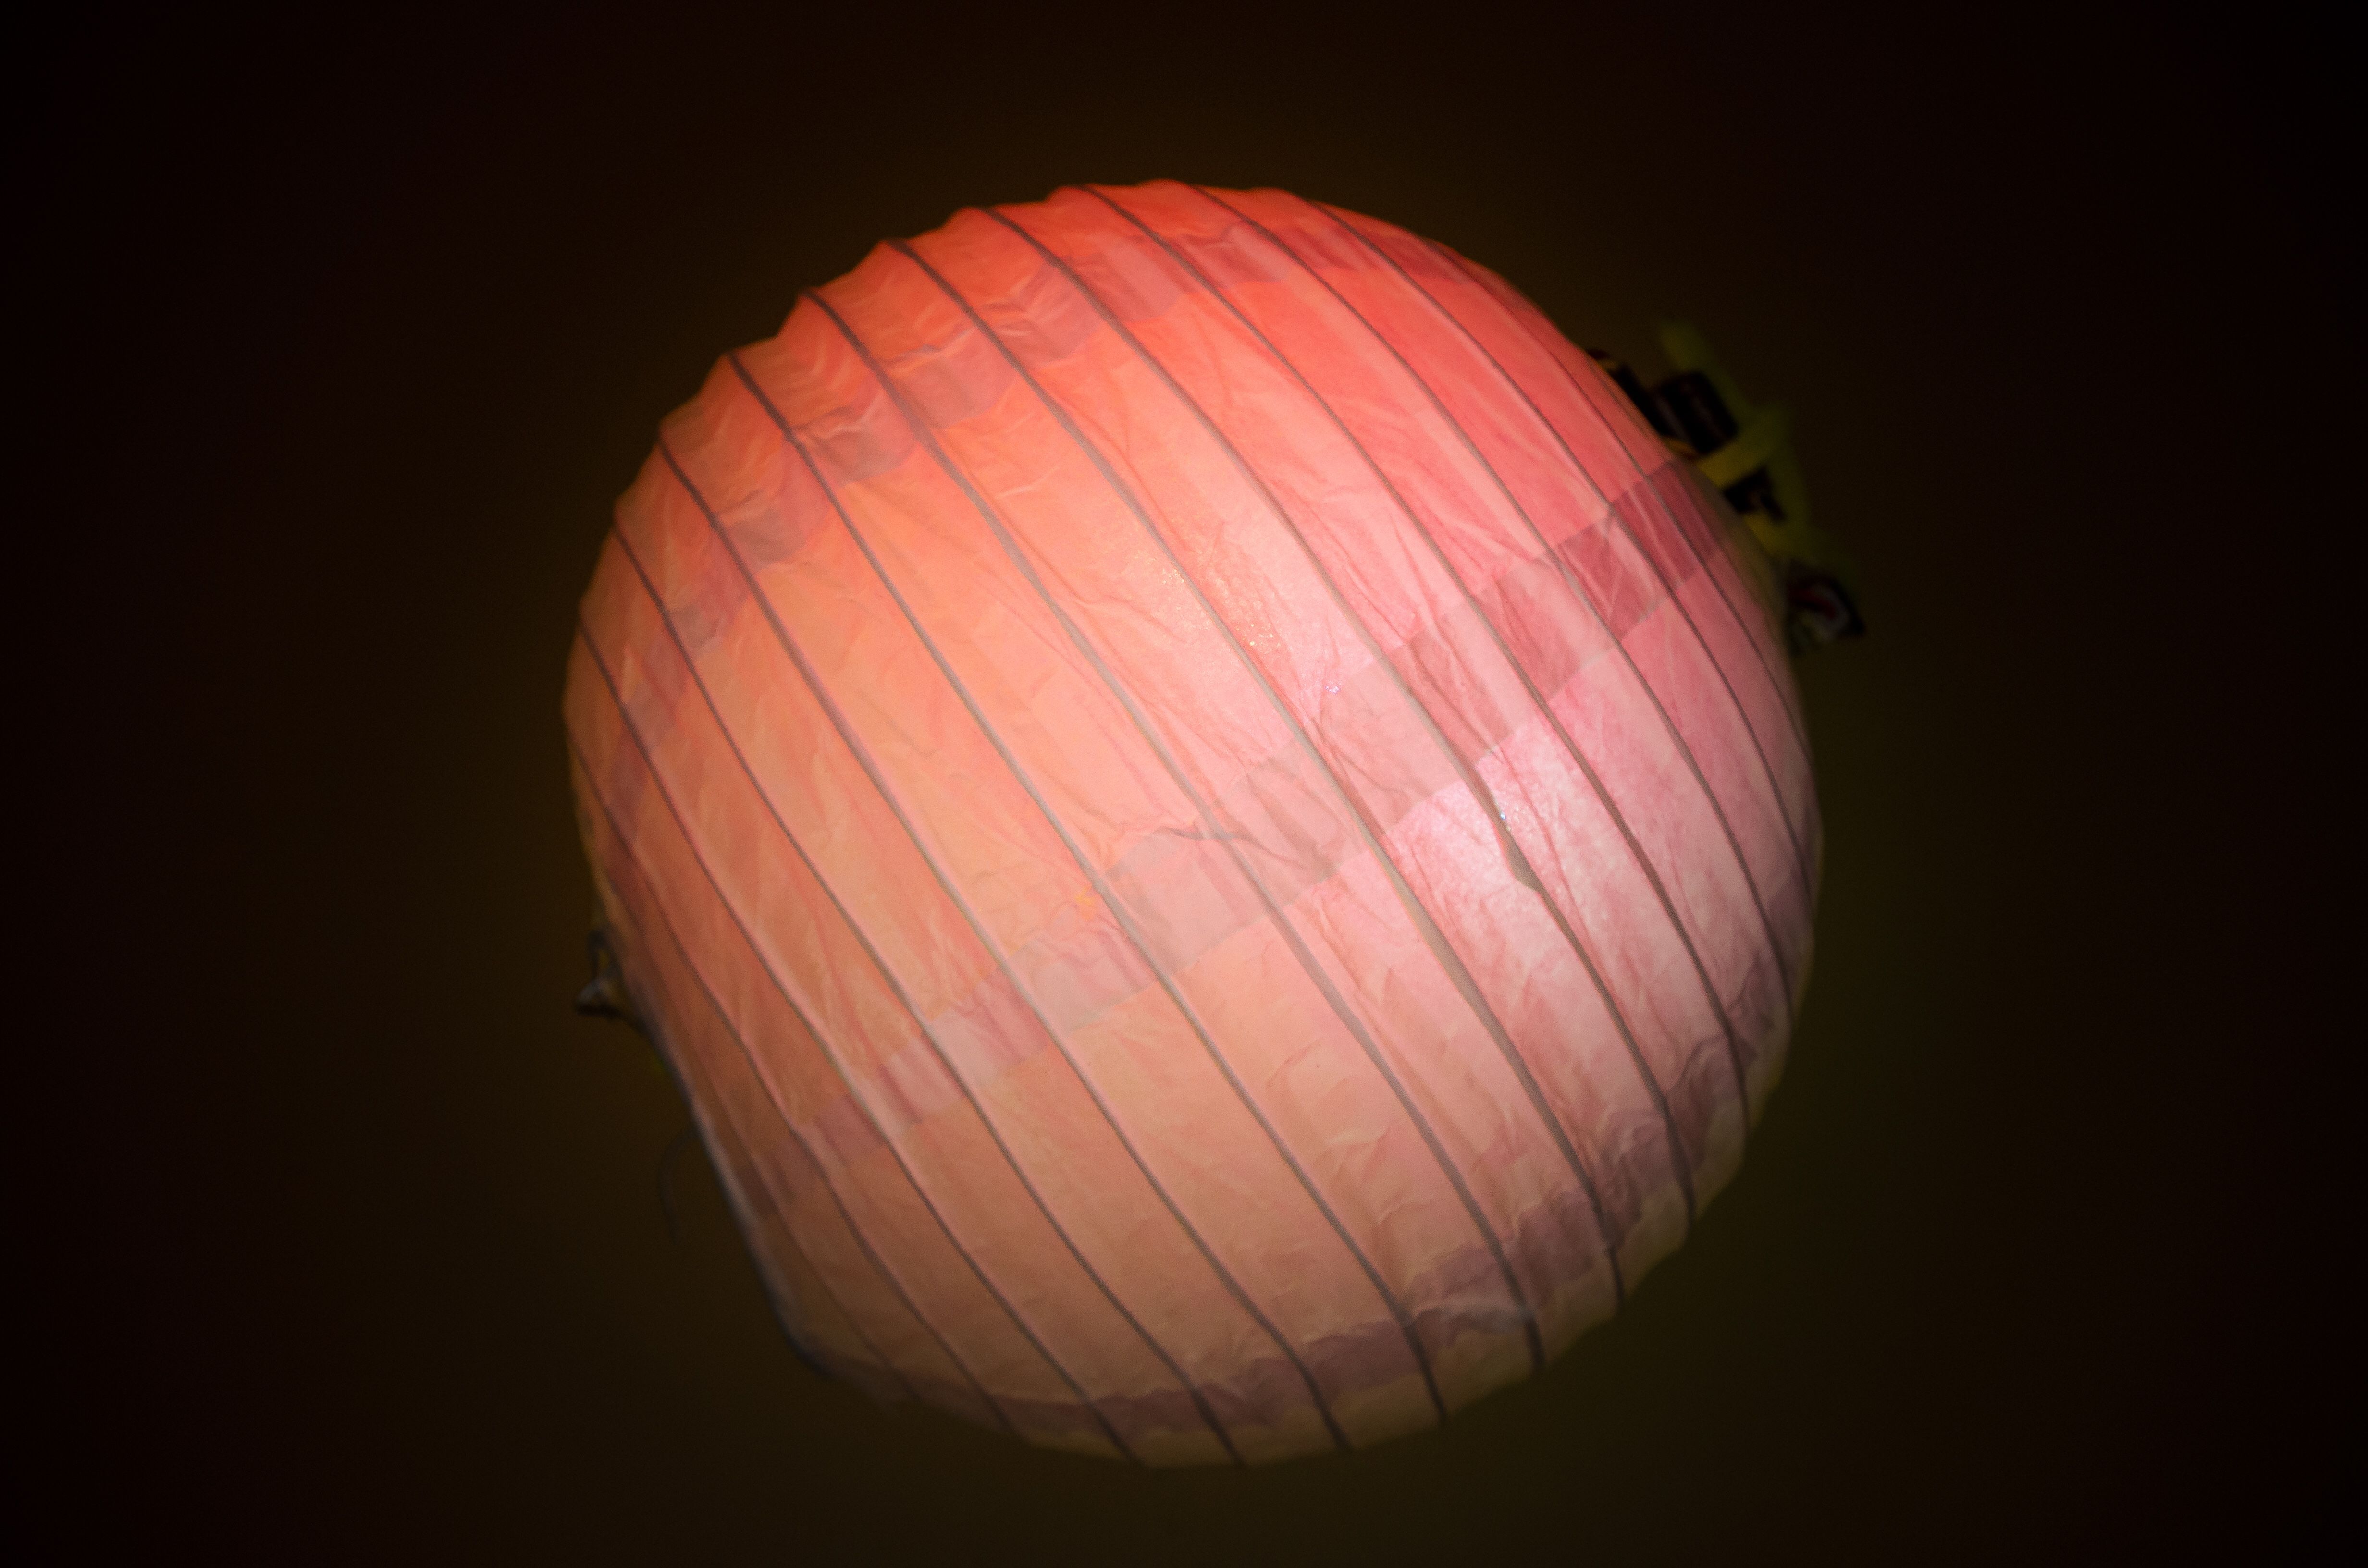
Automatic Lights
Create a light that turns on when the other lights in the room are turned off
YOU WILL NEED
- 1 x Bamboo lantern,
- 1 x Microbit,
- 1 x Neopixel LED,
- 1 x Pipe Cleaner,
- 2 x AAA Batteries,
- 1 x Battery Holder,
- 1 x Tape
STEP 1

Attach the basic:bit breakout board onto the microbit. Ensure that the "G" of the basic:bit lines up with the "G" of the micro:bit.
Screw in all the screws after the micro:bit has been lined up properly with the basic:bit.
Materials
1 x Microbit
1 x basic:bit breakout board
STEP 2

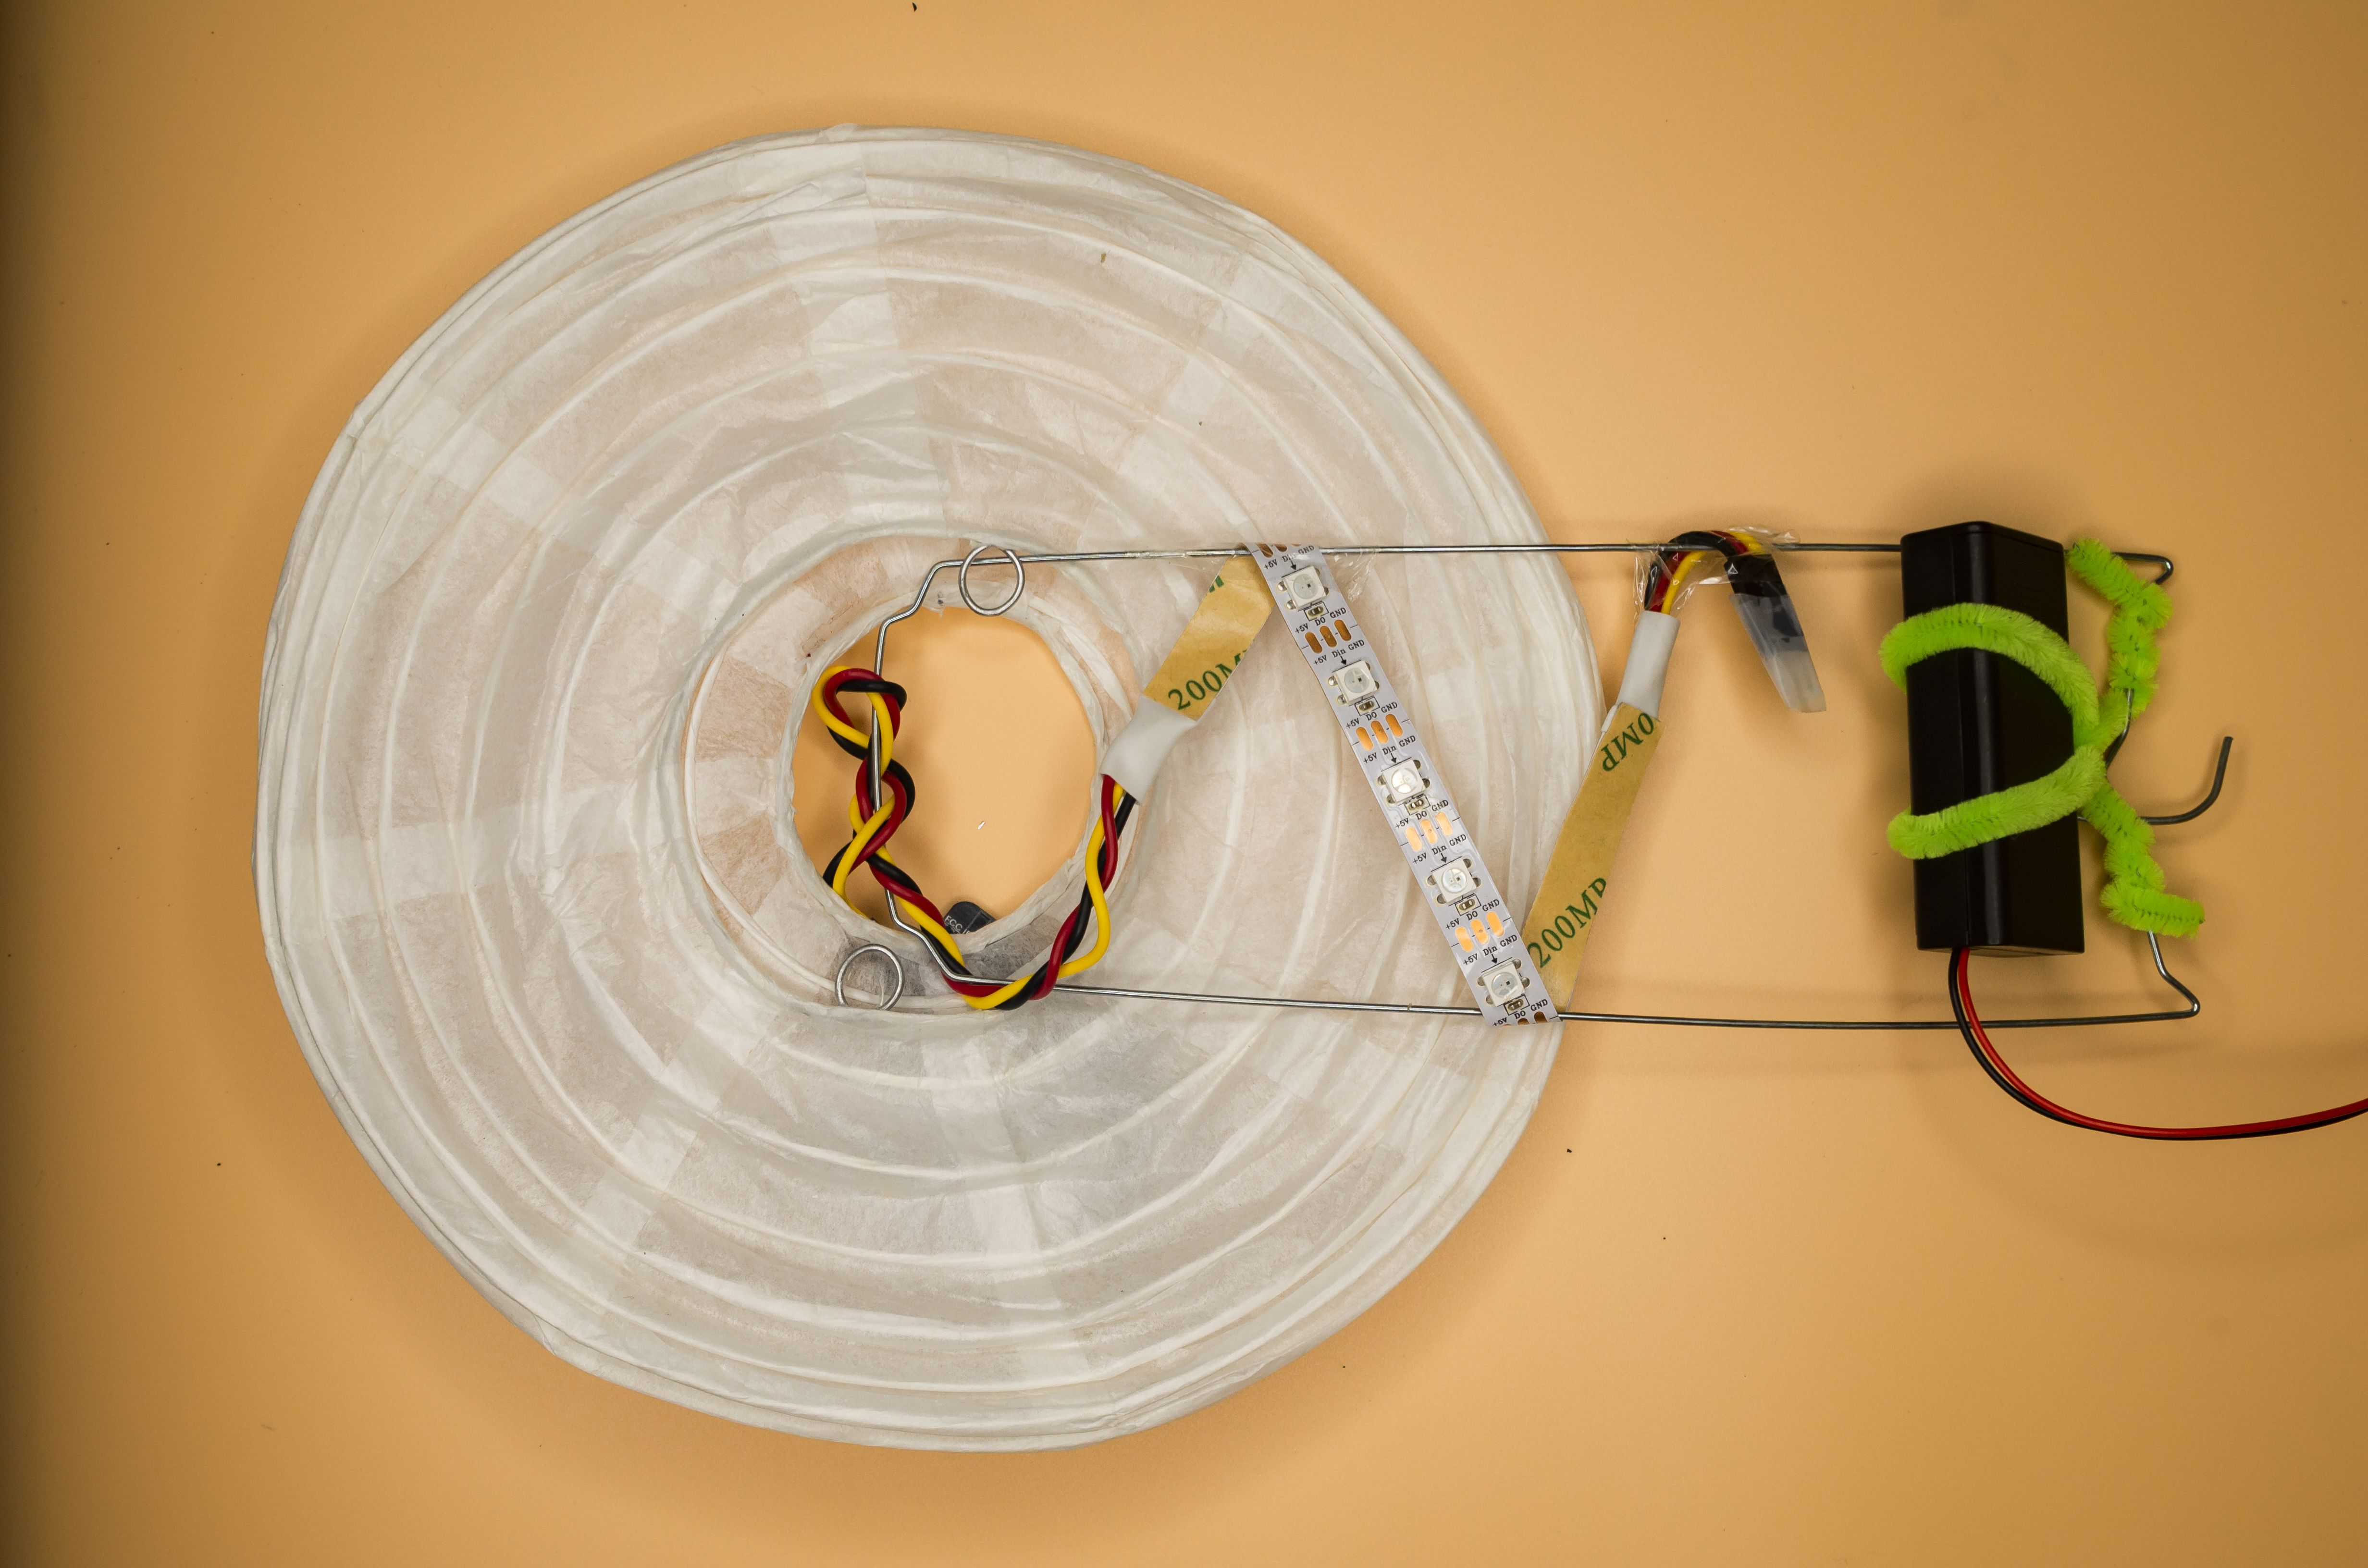
Connect the Neopixel LED Strip to Pin 1 on the basic:bit. Ensure that the black wire is connected to “G” and the red wire to connected to “V”.
Materials
1 x Neopixel LED strip
STEP 3
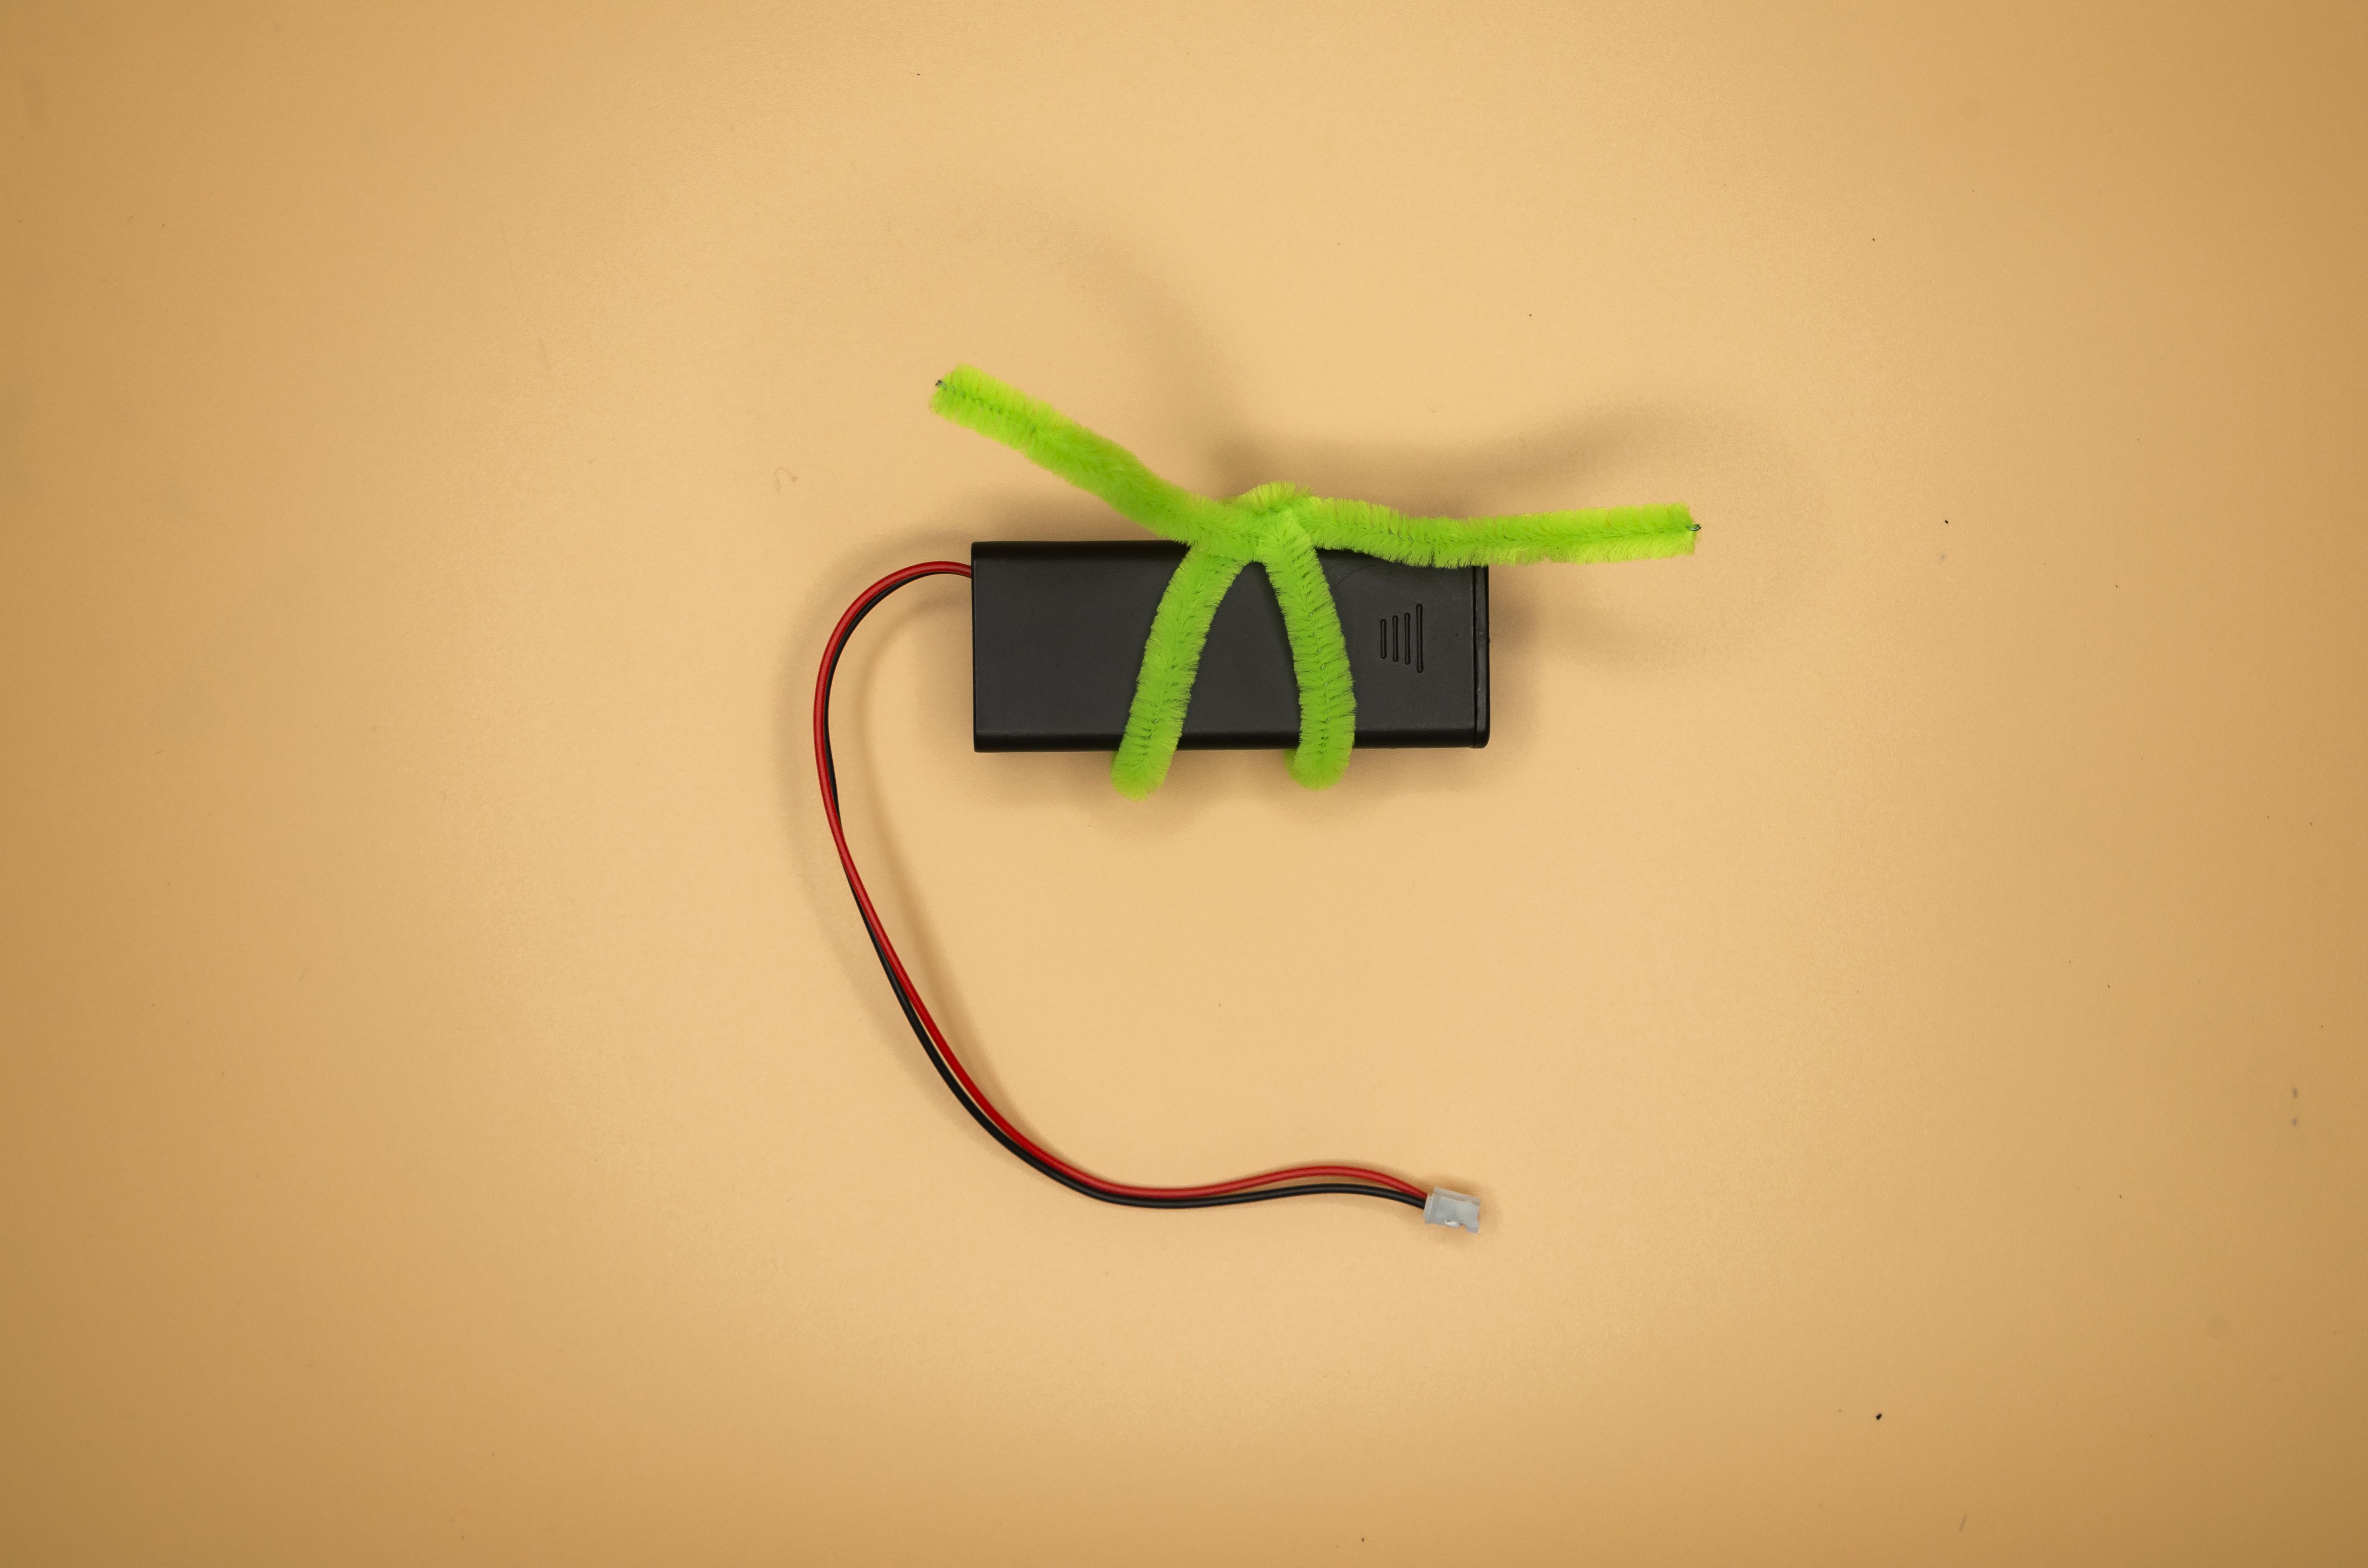
Wind the pipe cleaner around the battery holder as shown in the picture.
Materials
1 x Pipe Cleaner
2 x AAA batteries
1 x Batteries Holder
STEP 4
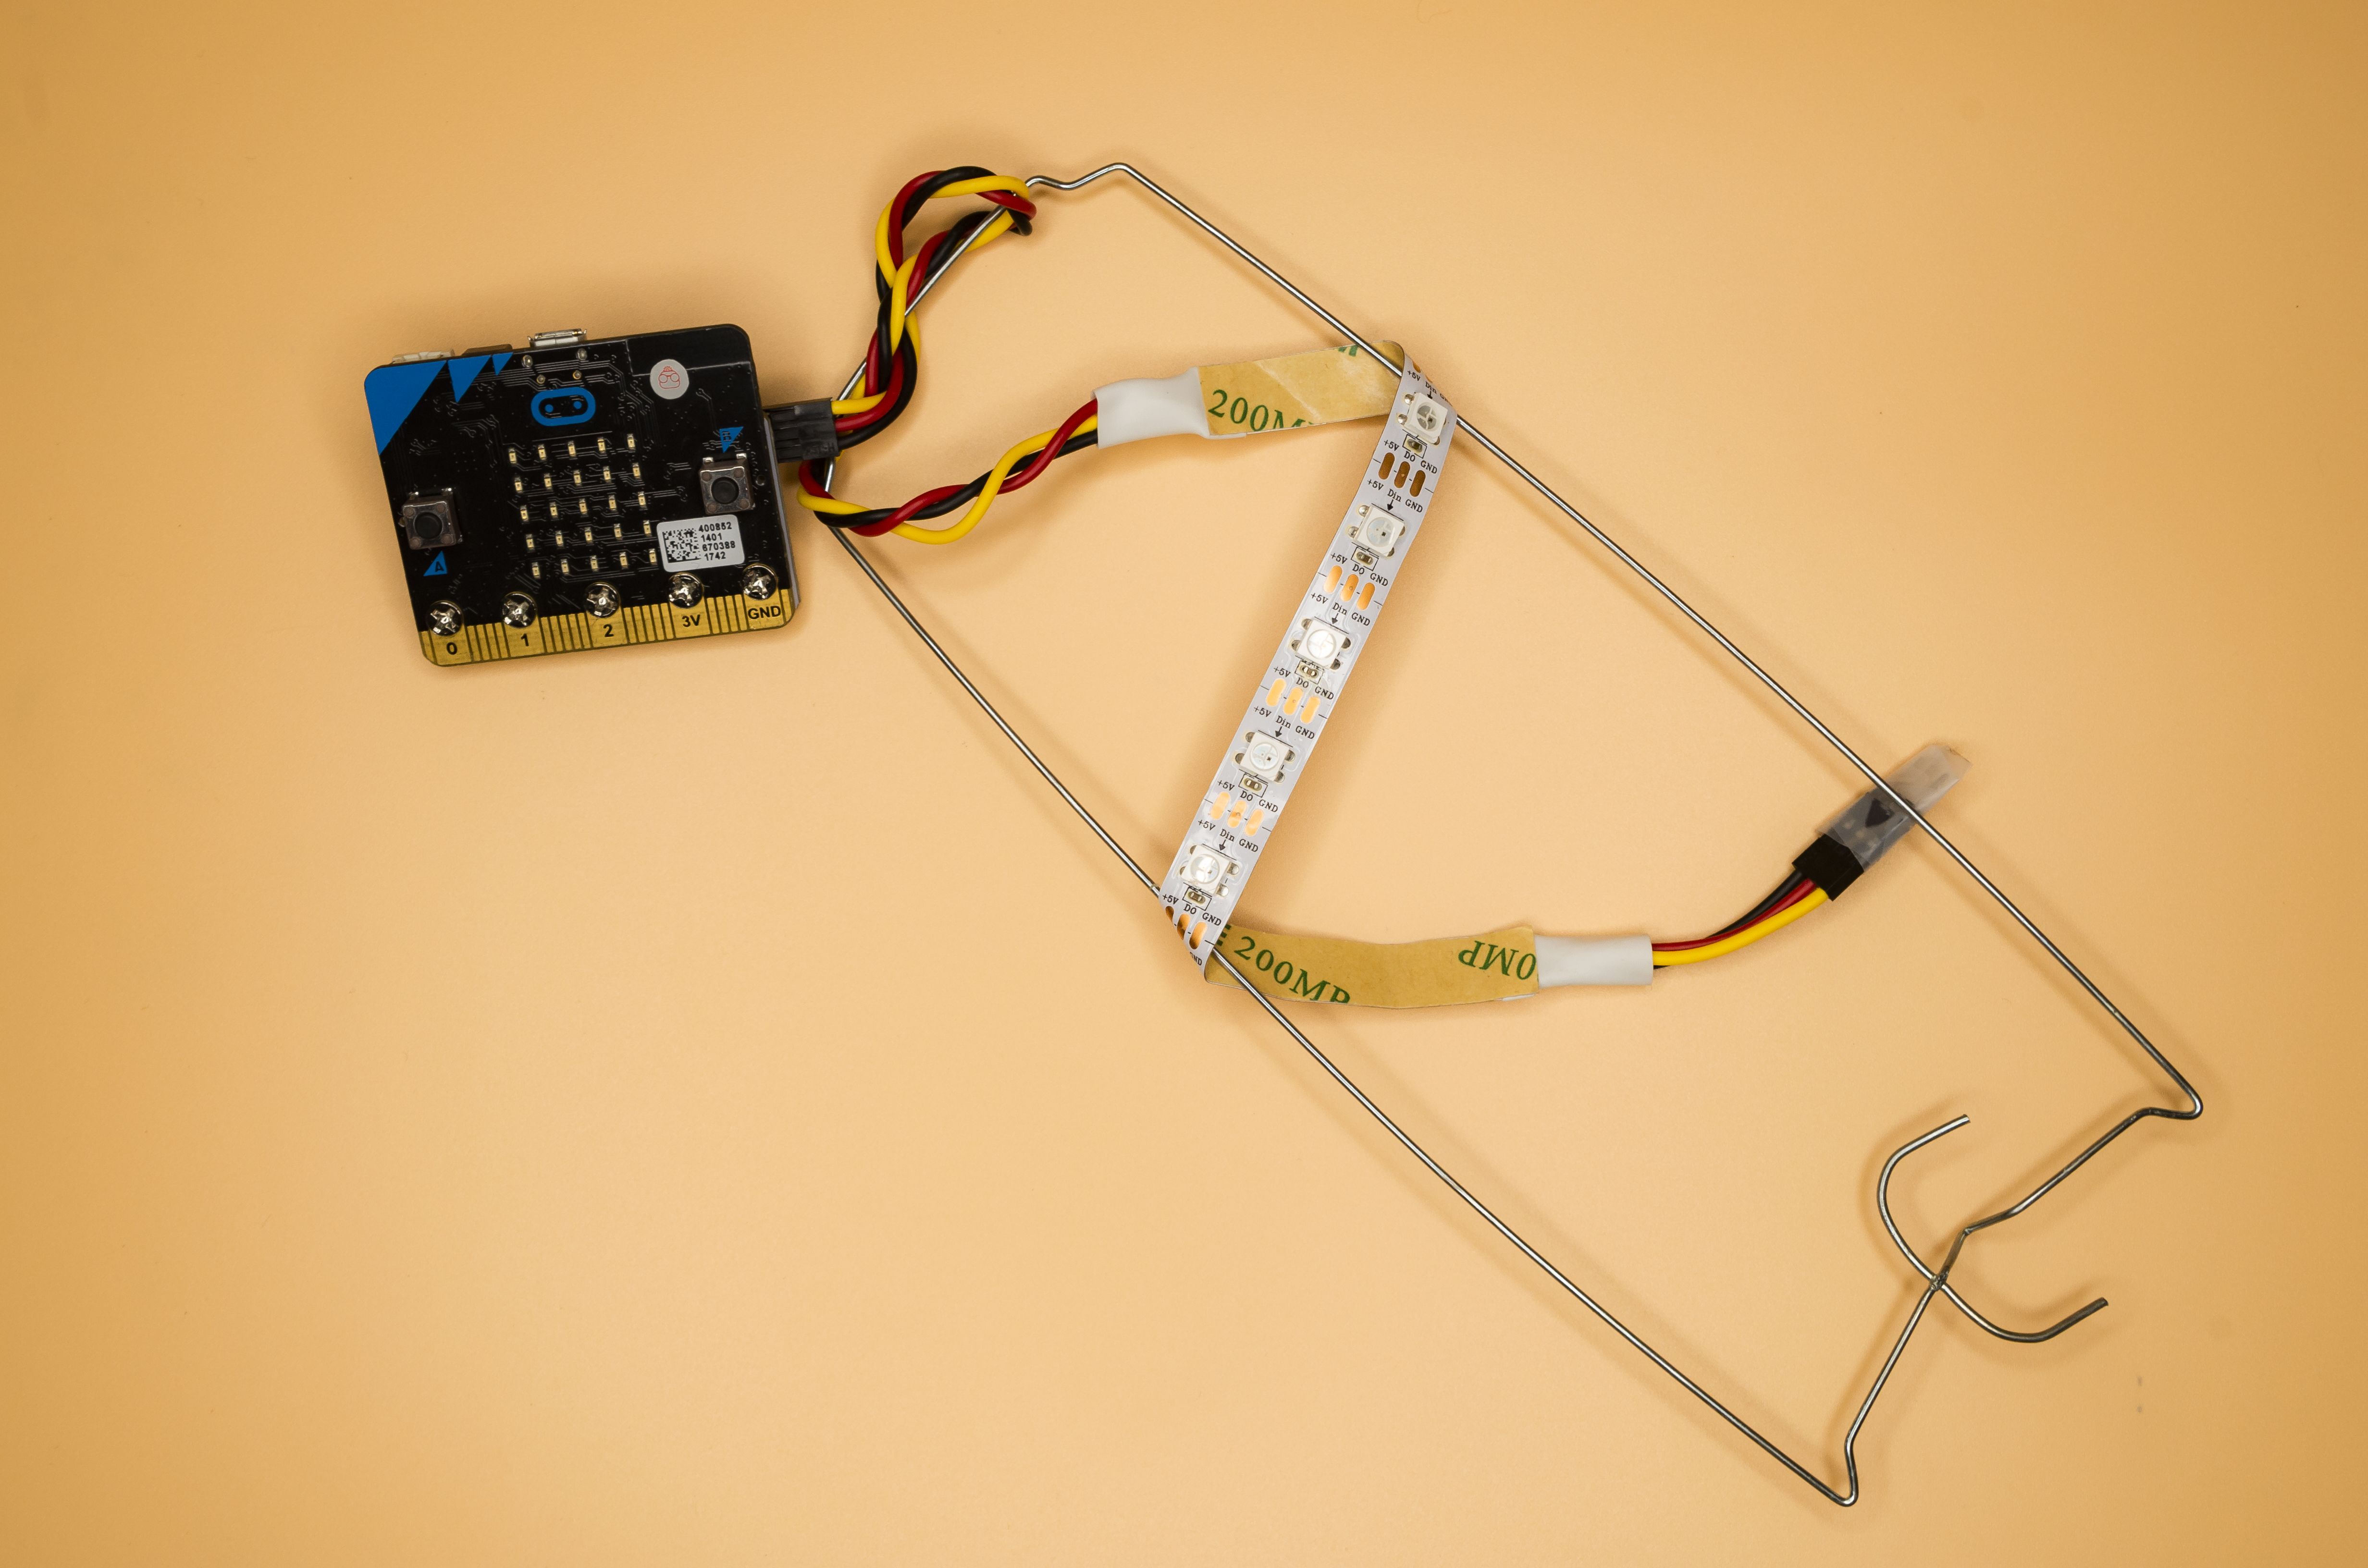
Coil the LED strip around the metal frame of the lantern as shown in the picture. Tape the LED strip near the top of the metal frame to secure it.
Materials
1 x Metal Frame
STEP 5
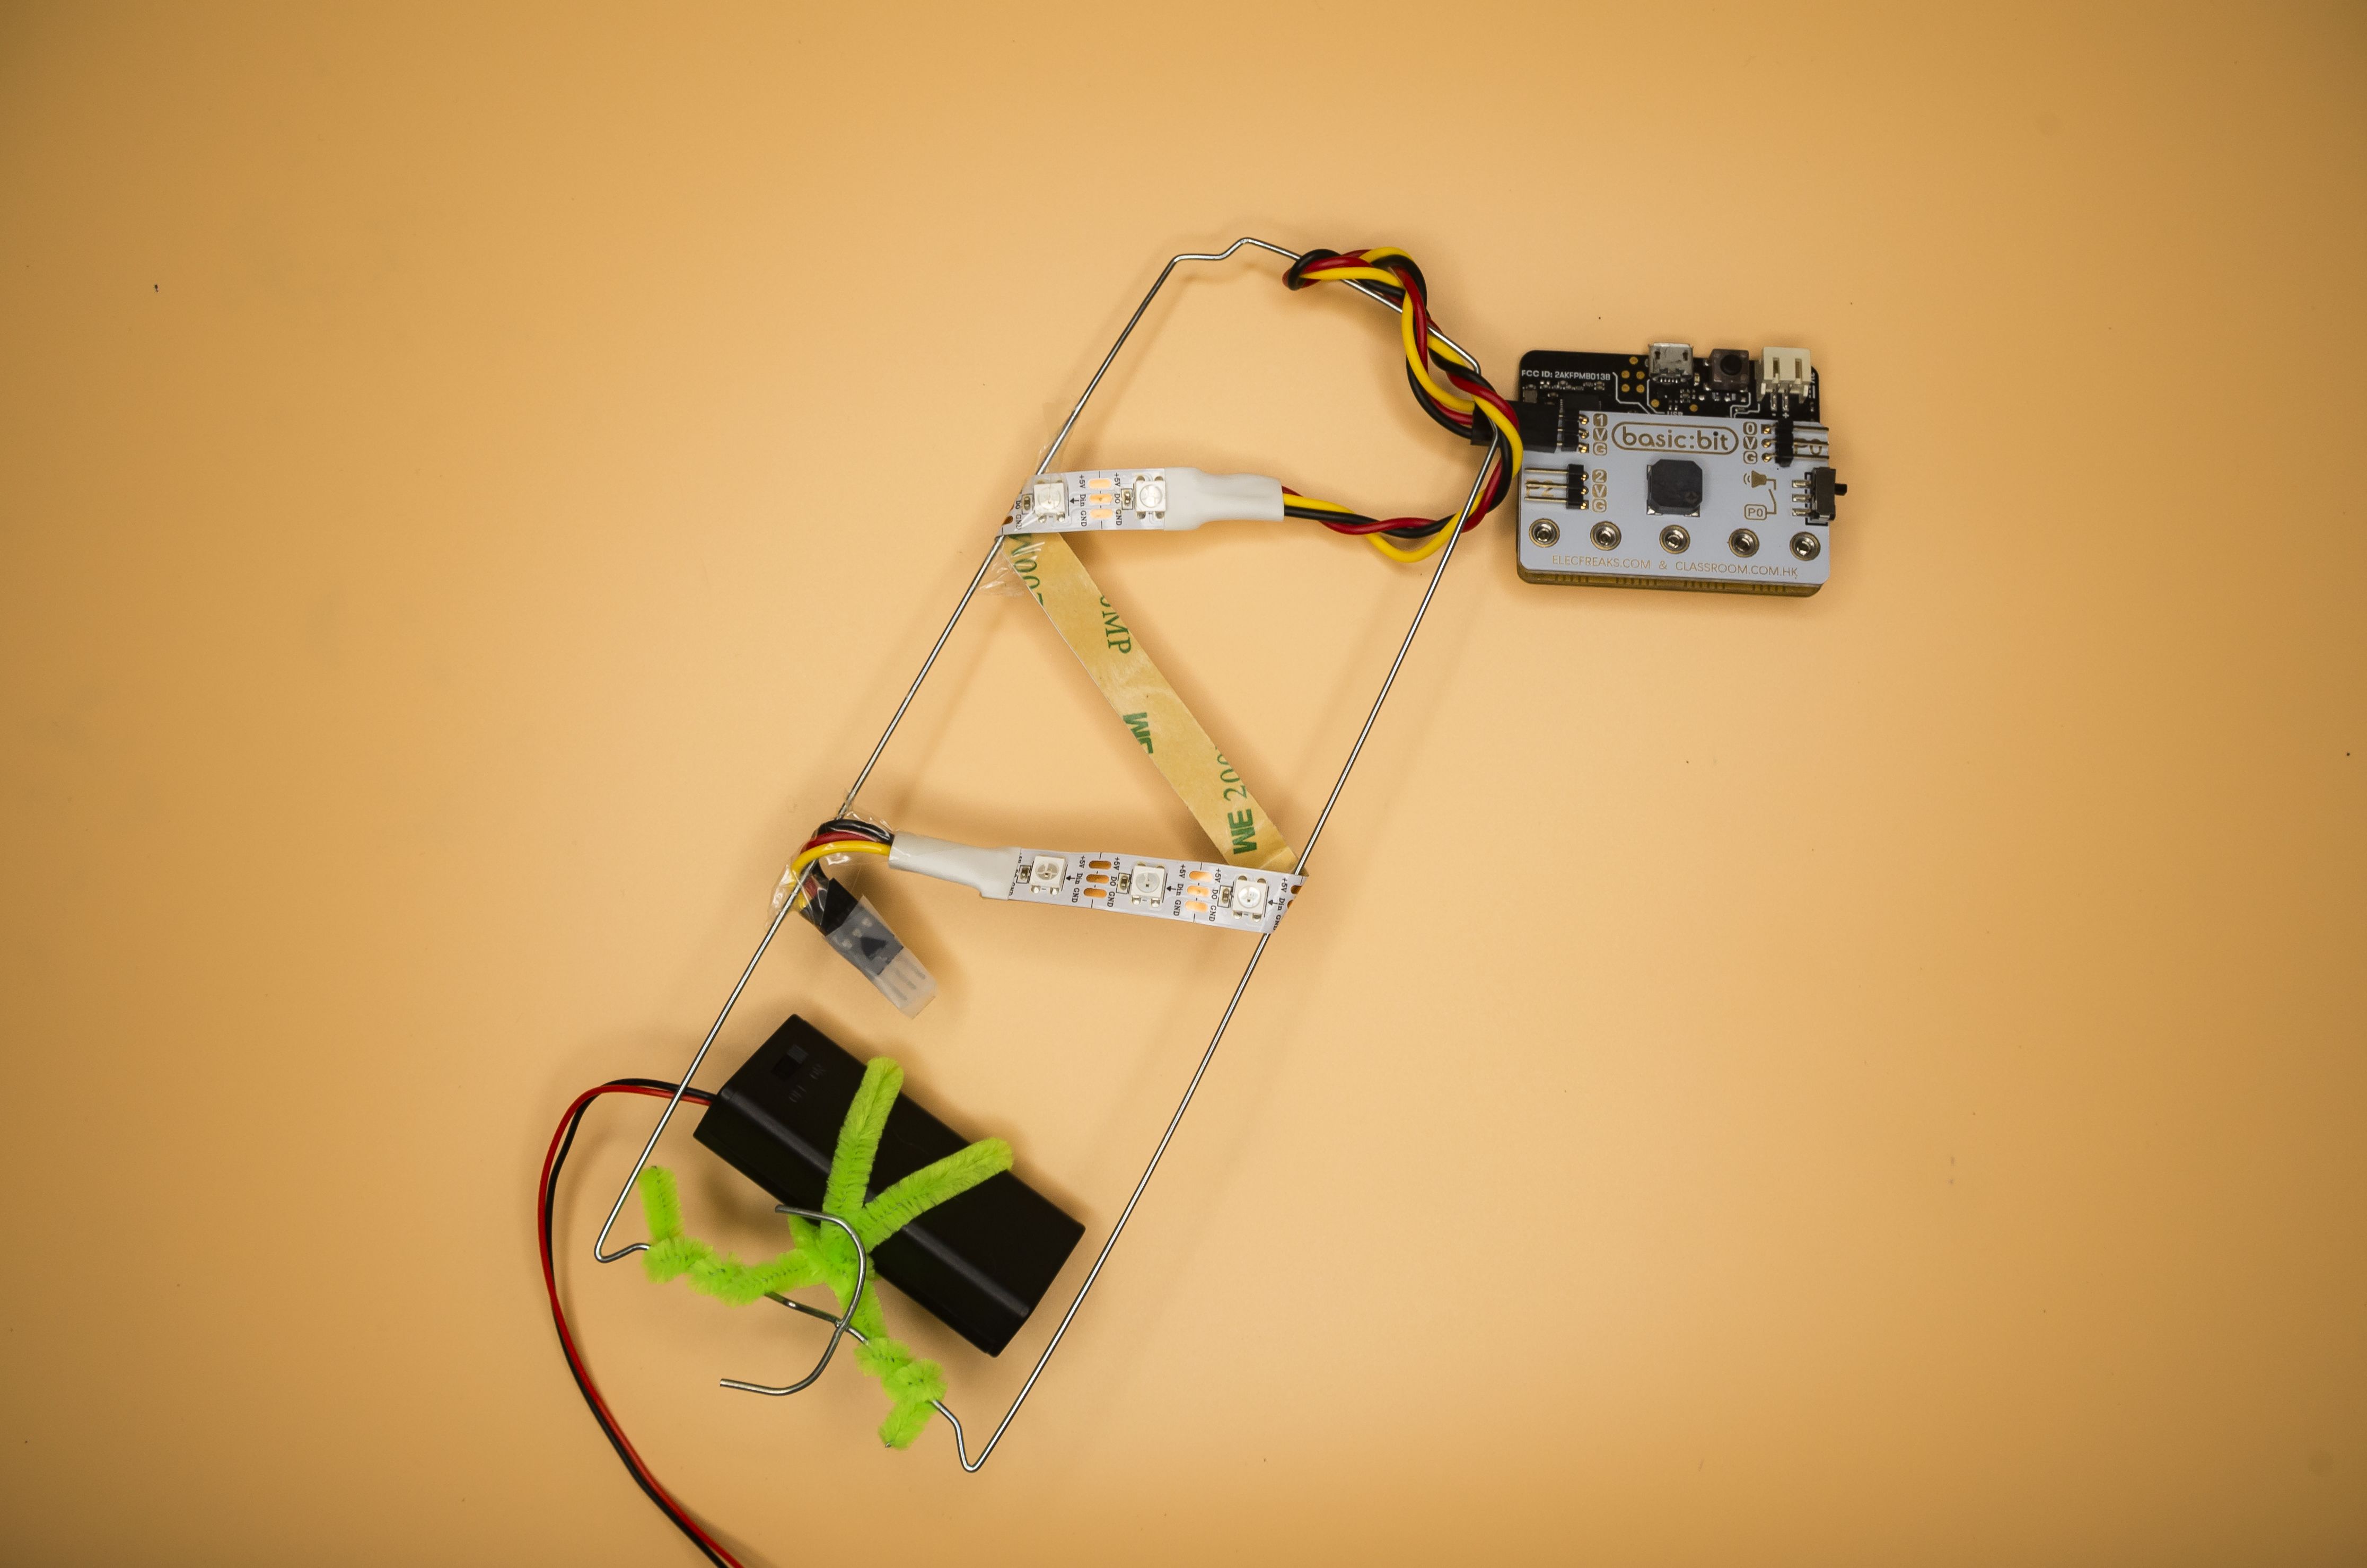
Attach the battery holder onto the top of the metal frame using the pipe cleaner.
STEP 6
The narrower end of the metal frame should be placed at the base of the lantern.
Materials
1 x Bamboo Lantern
STEP 7

Lift the top of the lantern up while the metal frame remains in contact with the base of the lantern.
Picture: Halfway there
STEP 8
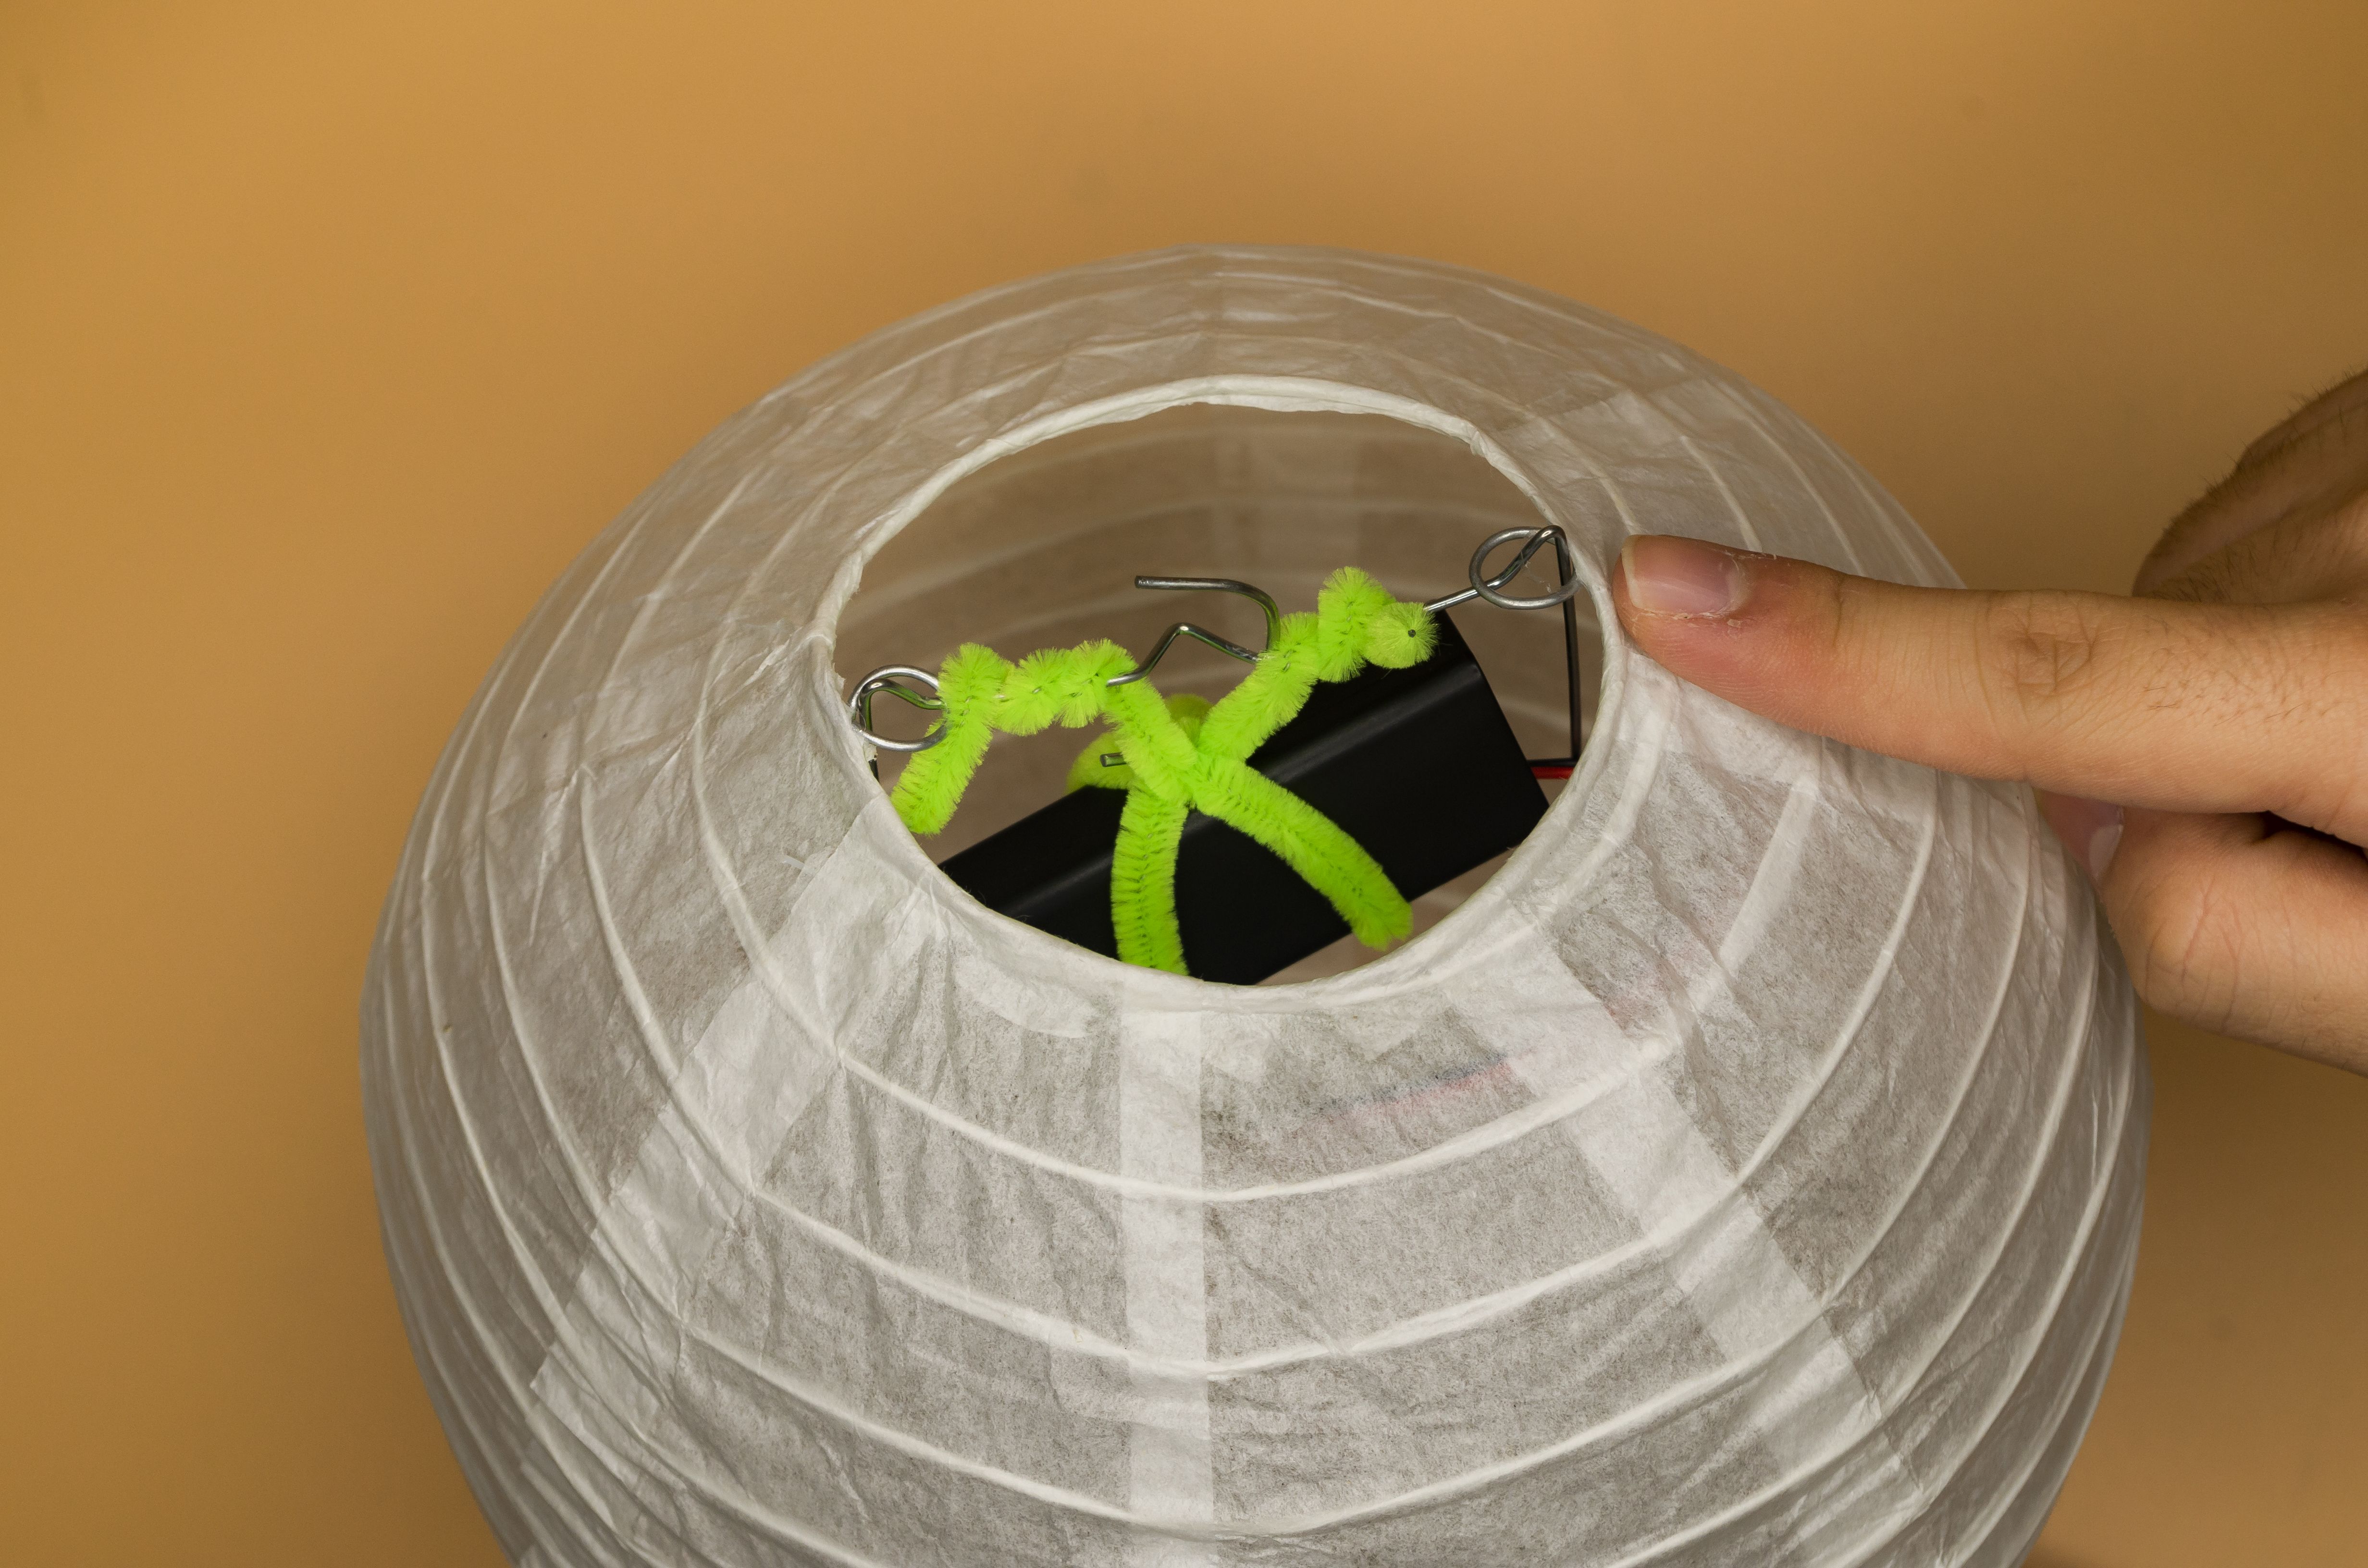
Now hook the rings at the top of the lantern to the pointed edge of the metal frame as shown.
STEP 9
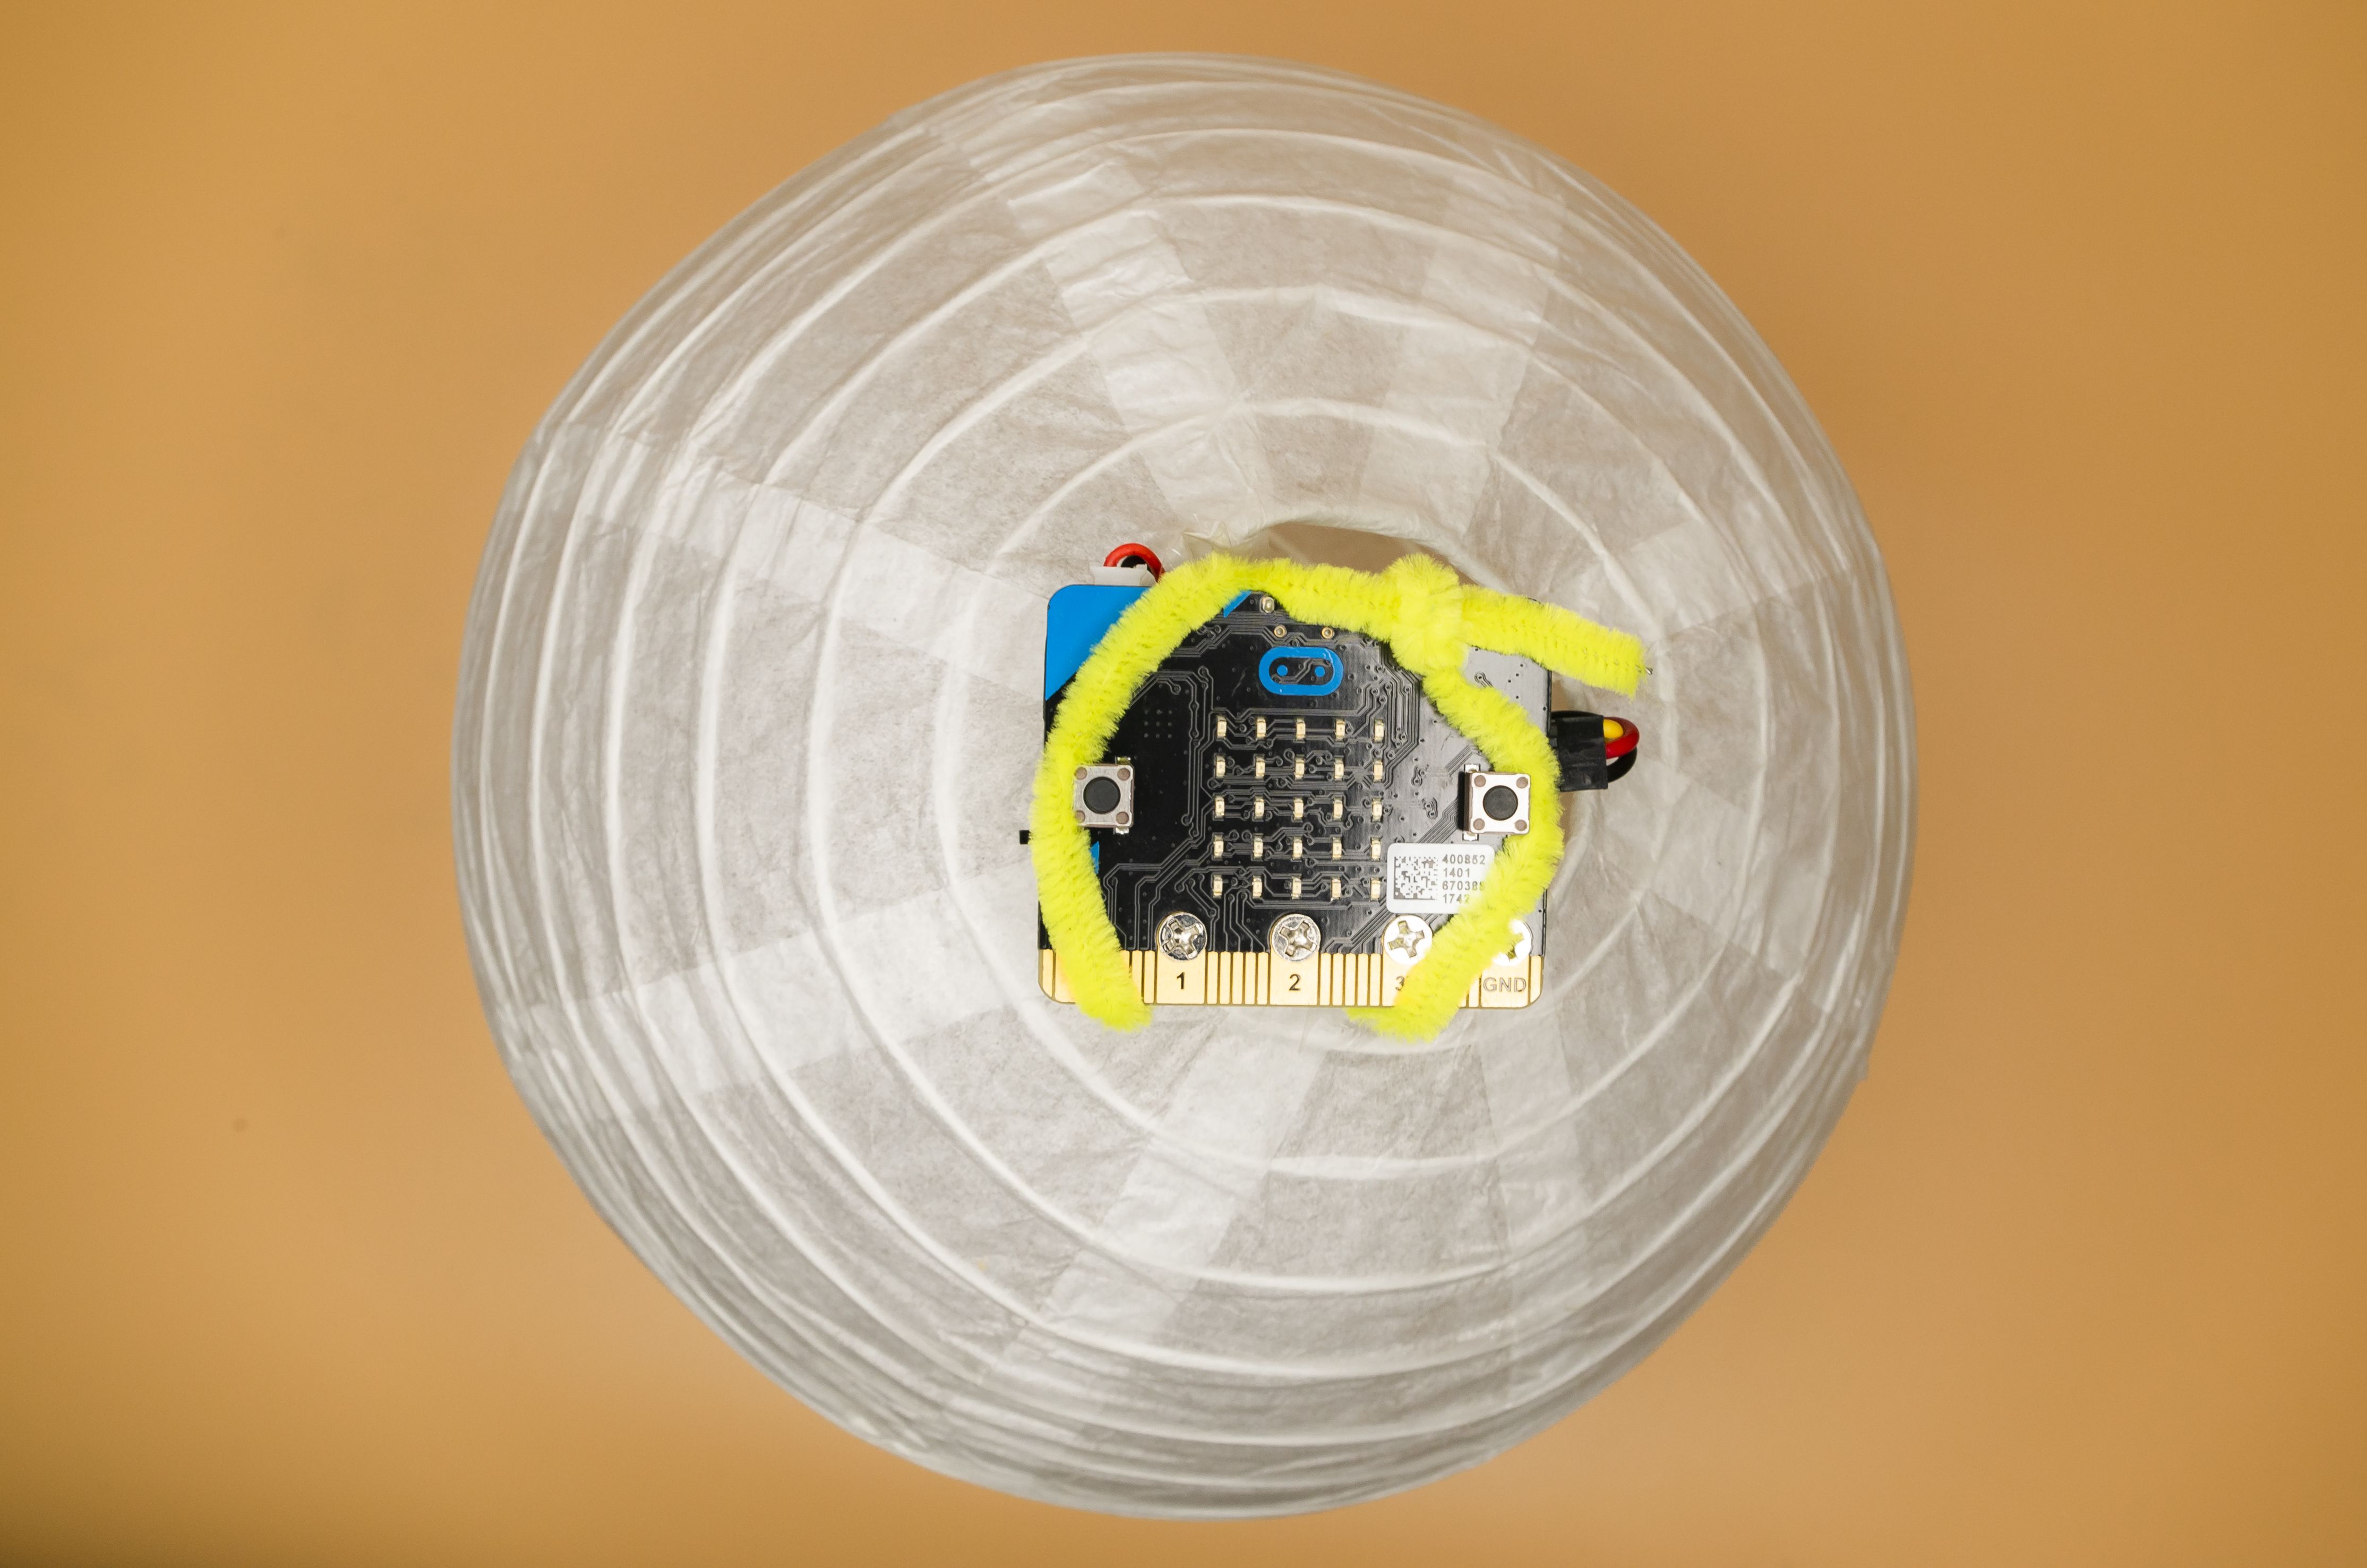
Connect the battery to the microbit. Secure the Microbit to the base of the metal frame using a pipe cleaner. Ensure that the LEDs of the microbit should be facing outwards and are not blocked by the pipe cleaner.
Materials
1 x Pipe cleaner
STEP 10
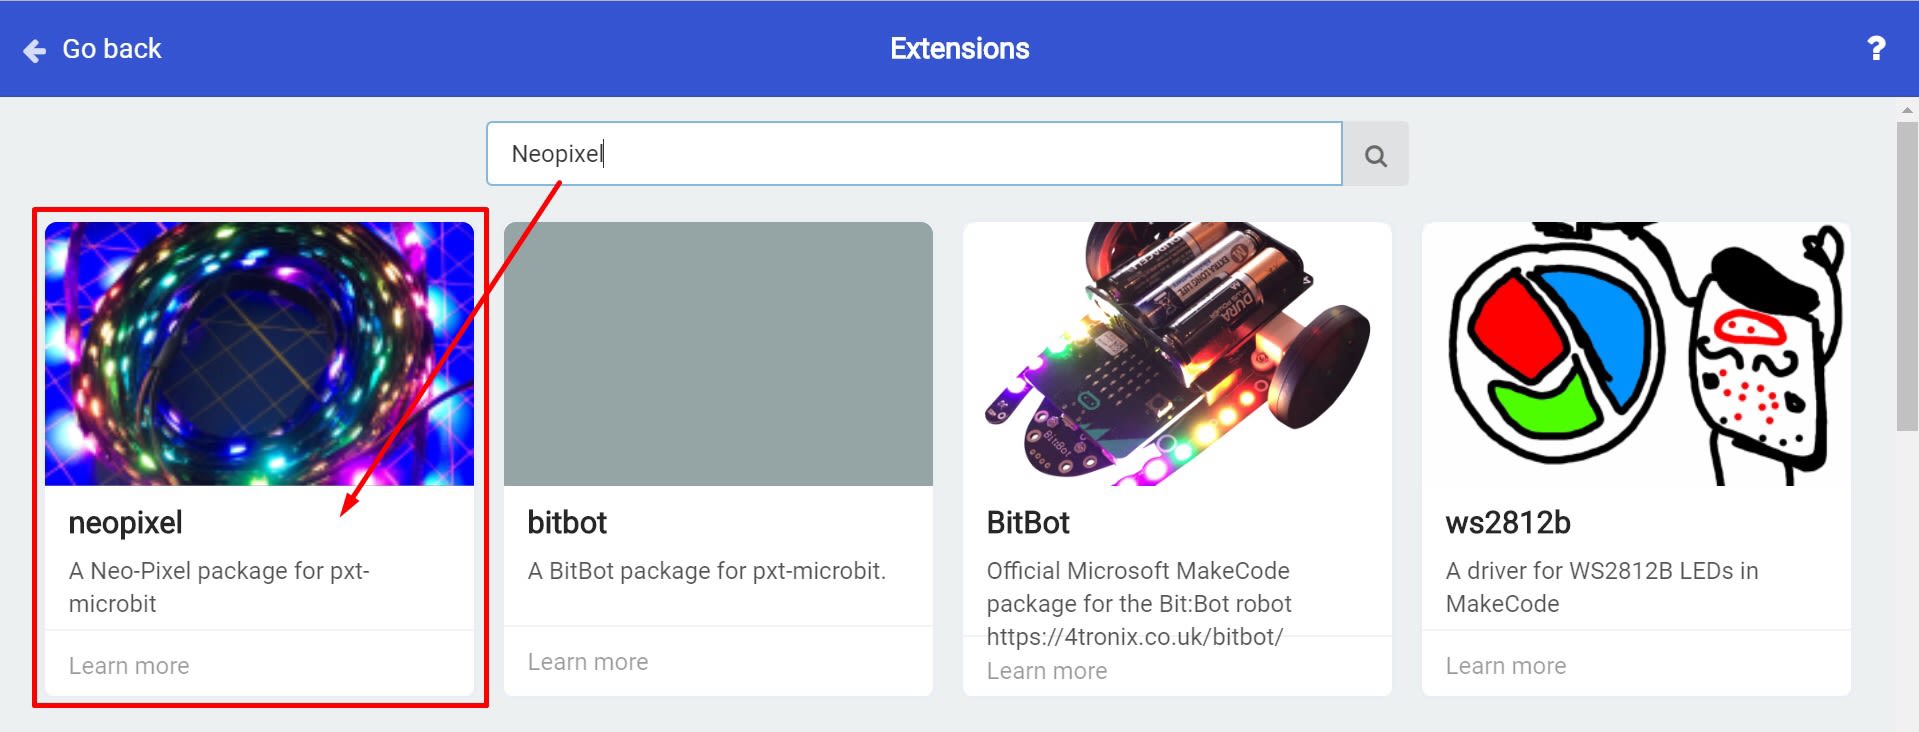
To use the Neopixel LED, we will need to add a package to the code editor. Click on “Advanced” in the code drawer and select “Extensions” Search for “Neopixel” and select the package.
Materials
Neopixel Package
STEP 11
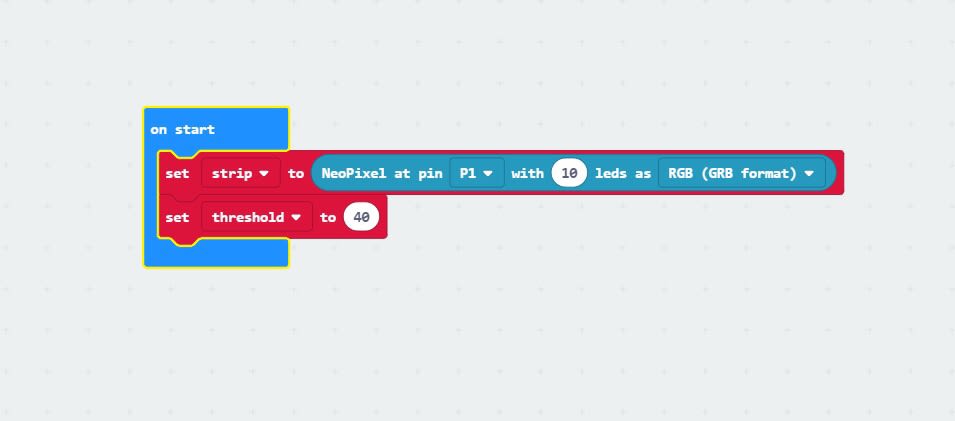
Initialise the Neopixel LED at the start and set a suitable threshold value.
Note: Threshold Value refers to the value used as a benchmark for comparison. In this case, the value set is used to determine the light level in which the LED will be turned on. You can play around with the value to find a suitable value for your project. For us, we found a threshold value of 40 to be ideal.
STEP 12
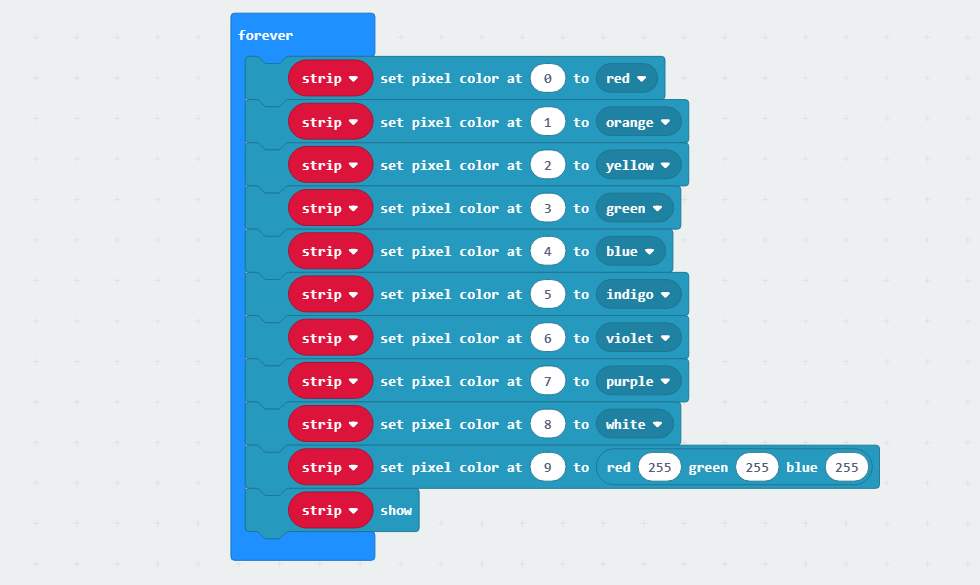
In a forever block, set each pixel to a different colour to make a rainbow. (Find this block in the ... more drawer of the Neopixel drawer)
You can even play around with the RGB settings to make your own custom colours.
Remember to show your strip after setting all those lights!
STEP 13
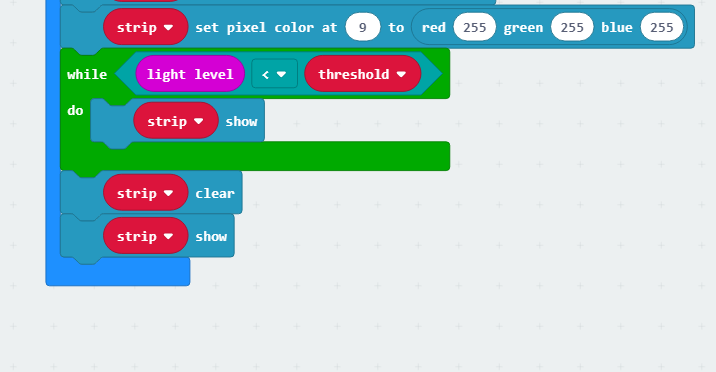
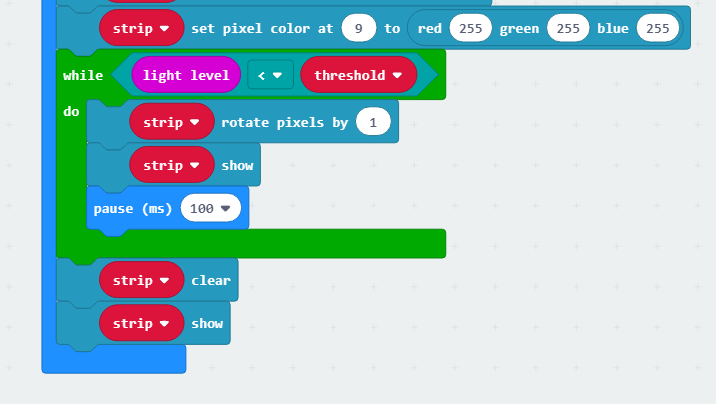
To make this project automatic, we want to turn on the lights only when it gets dark. We can measure that using the micro:bit's inputs and checking if our light level is below the threshold value.
Use a while loop (Loops) and a comparison block (Logic) to show all the lights in their set positions. Once the light level drops below the threshold value, the strip will show!
And if the light level goes above the threshold value again, you should clear the strip and show the cleared strip.
Can you figure out how to animate the lights when it gets too dark? Scroll right to find out how!
STEP 14

Extra Challenge!
Can you figure out how to make the threshold level adjustable? So if you end up in a room that's naturally dimmer, your threshold level might have to be lower.
Hint: use your A and B buttons!
Code and References
Made this activity? Good Job! Now spread the word. Share a photo of your creation on social media with #letsgethacking #AutomaticLights