Bling Bling Bracelet
Let's make a beautiful bracelet!

YOU WILL NEED
1 x Micro:bit,
1 x basic:bit,
1 x Felt Strap,
1 x GVS LED Strip
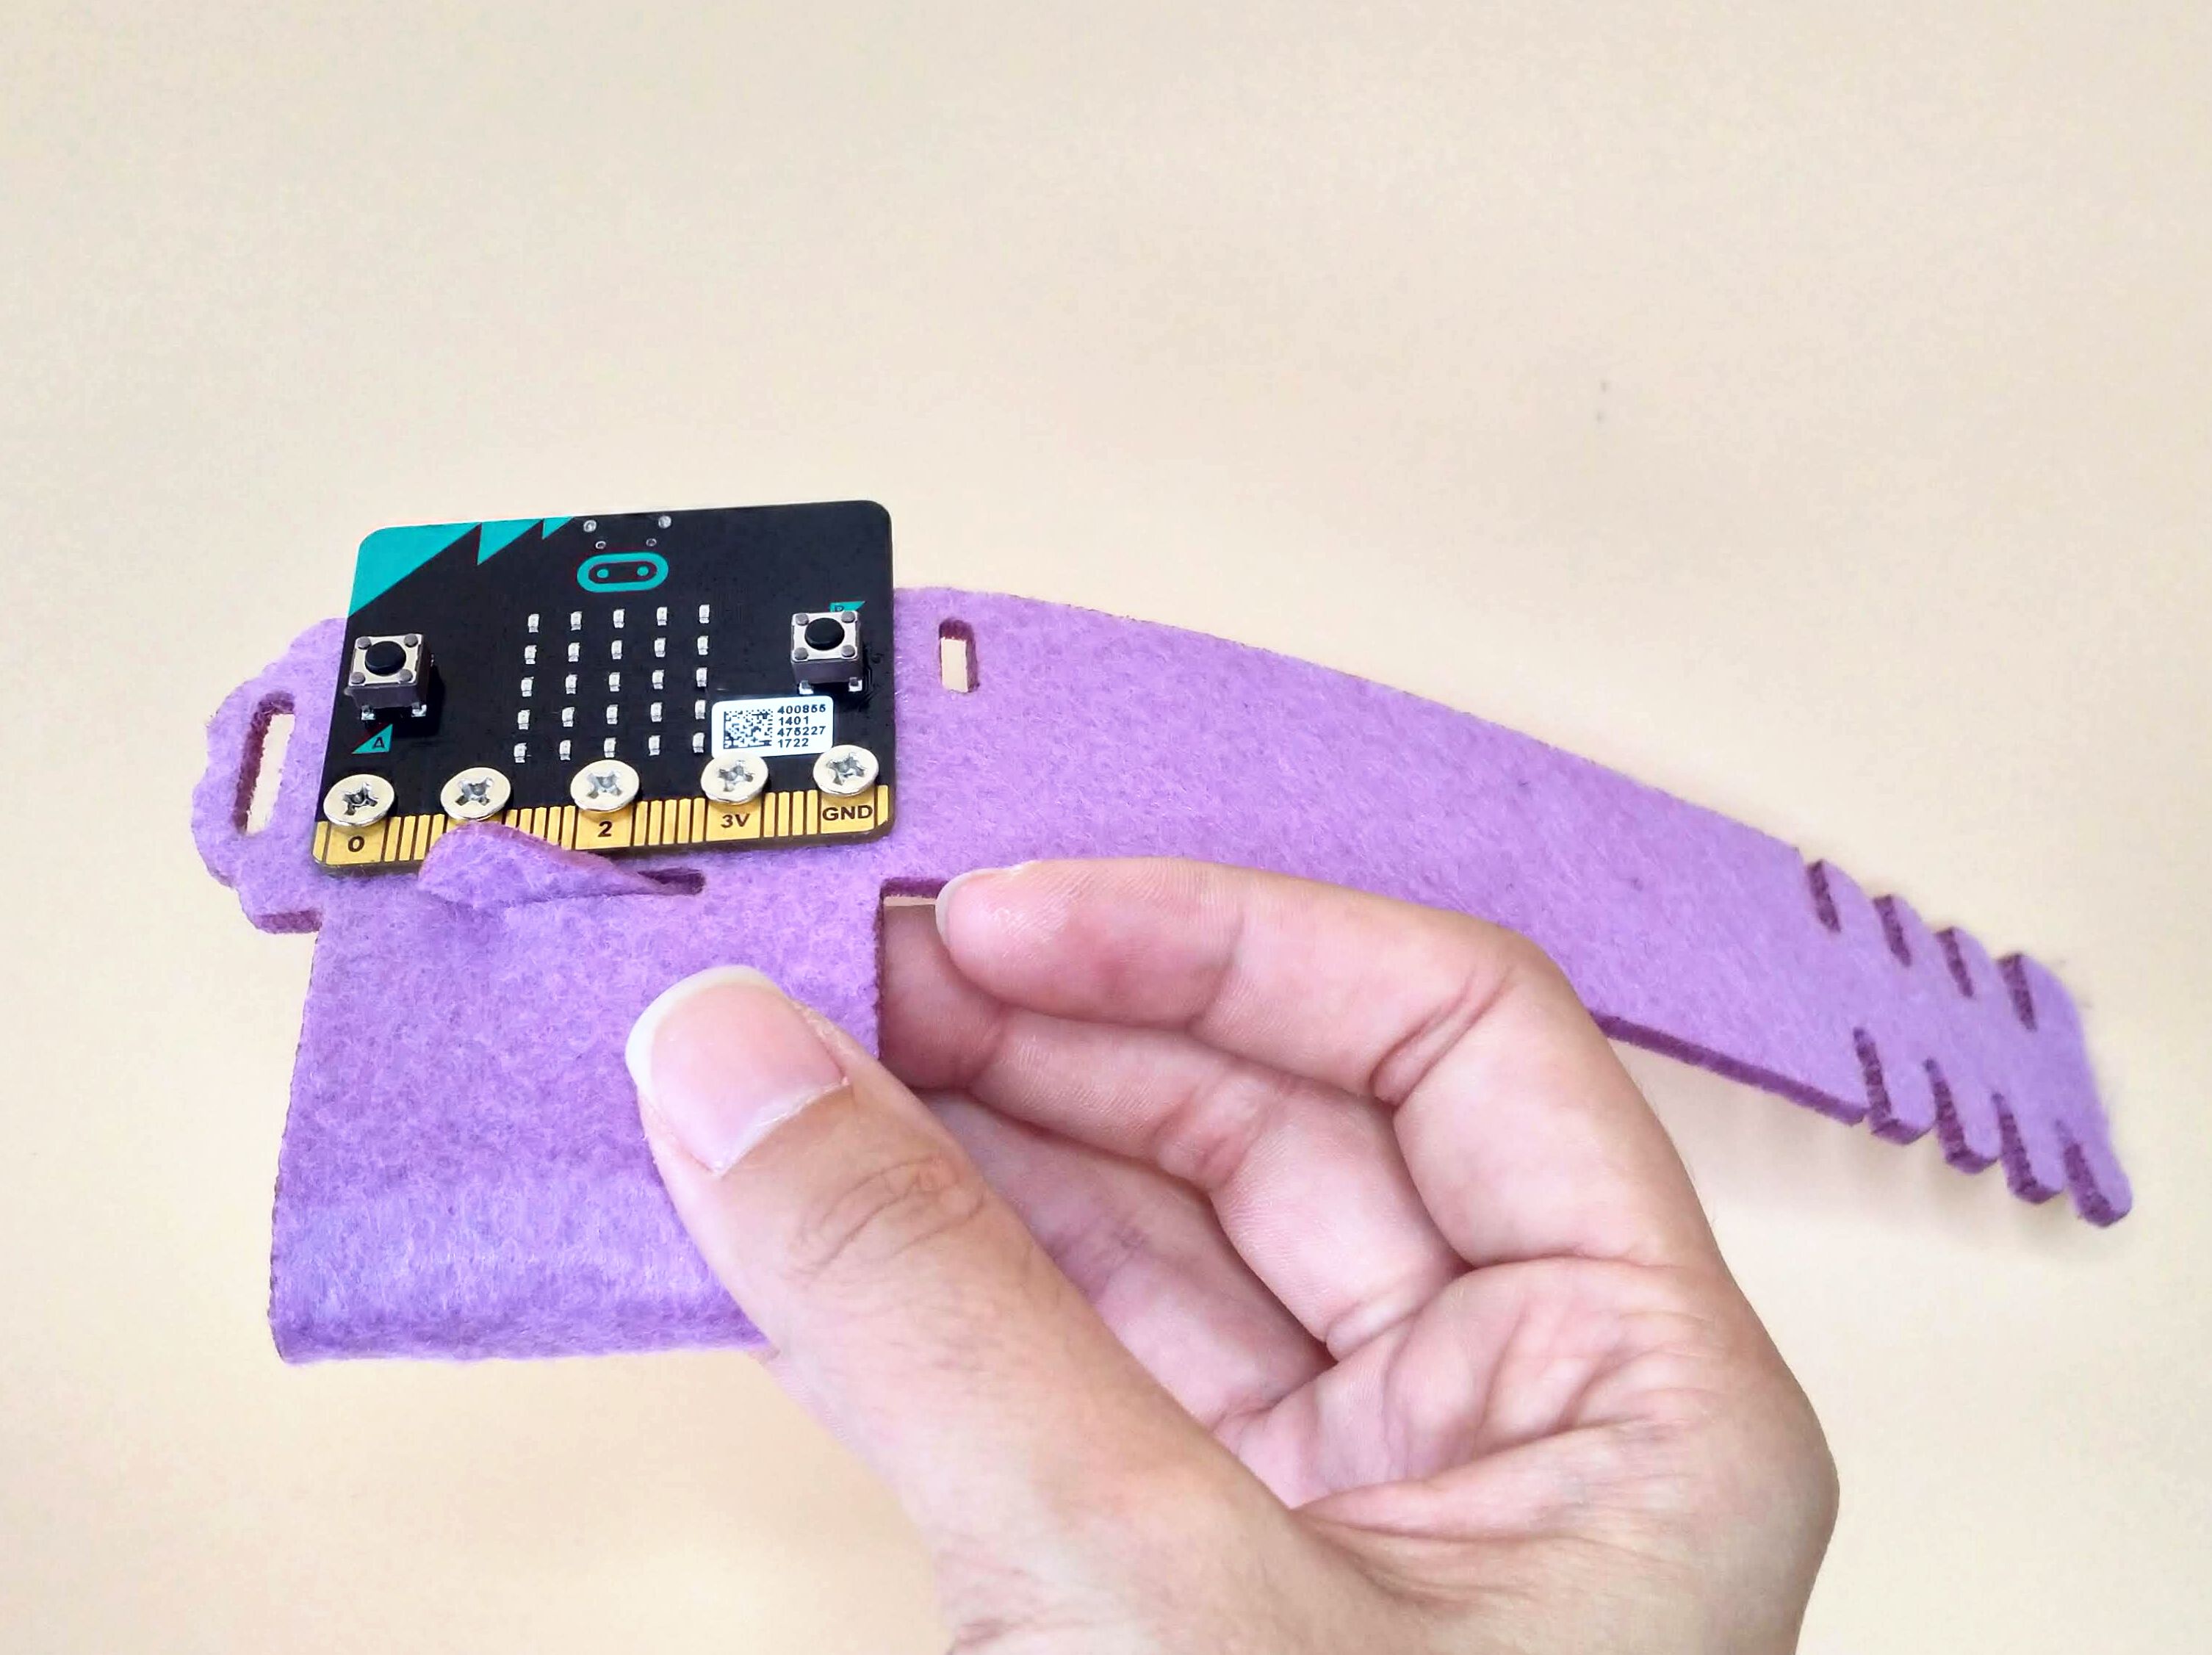
STEP 1

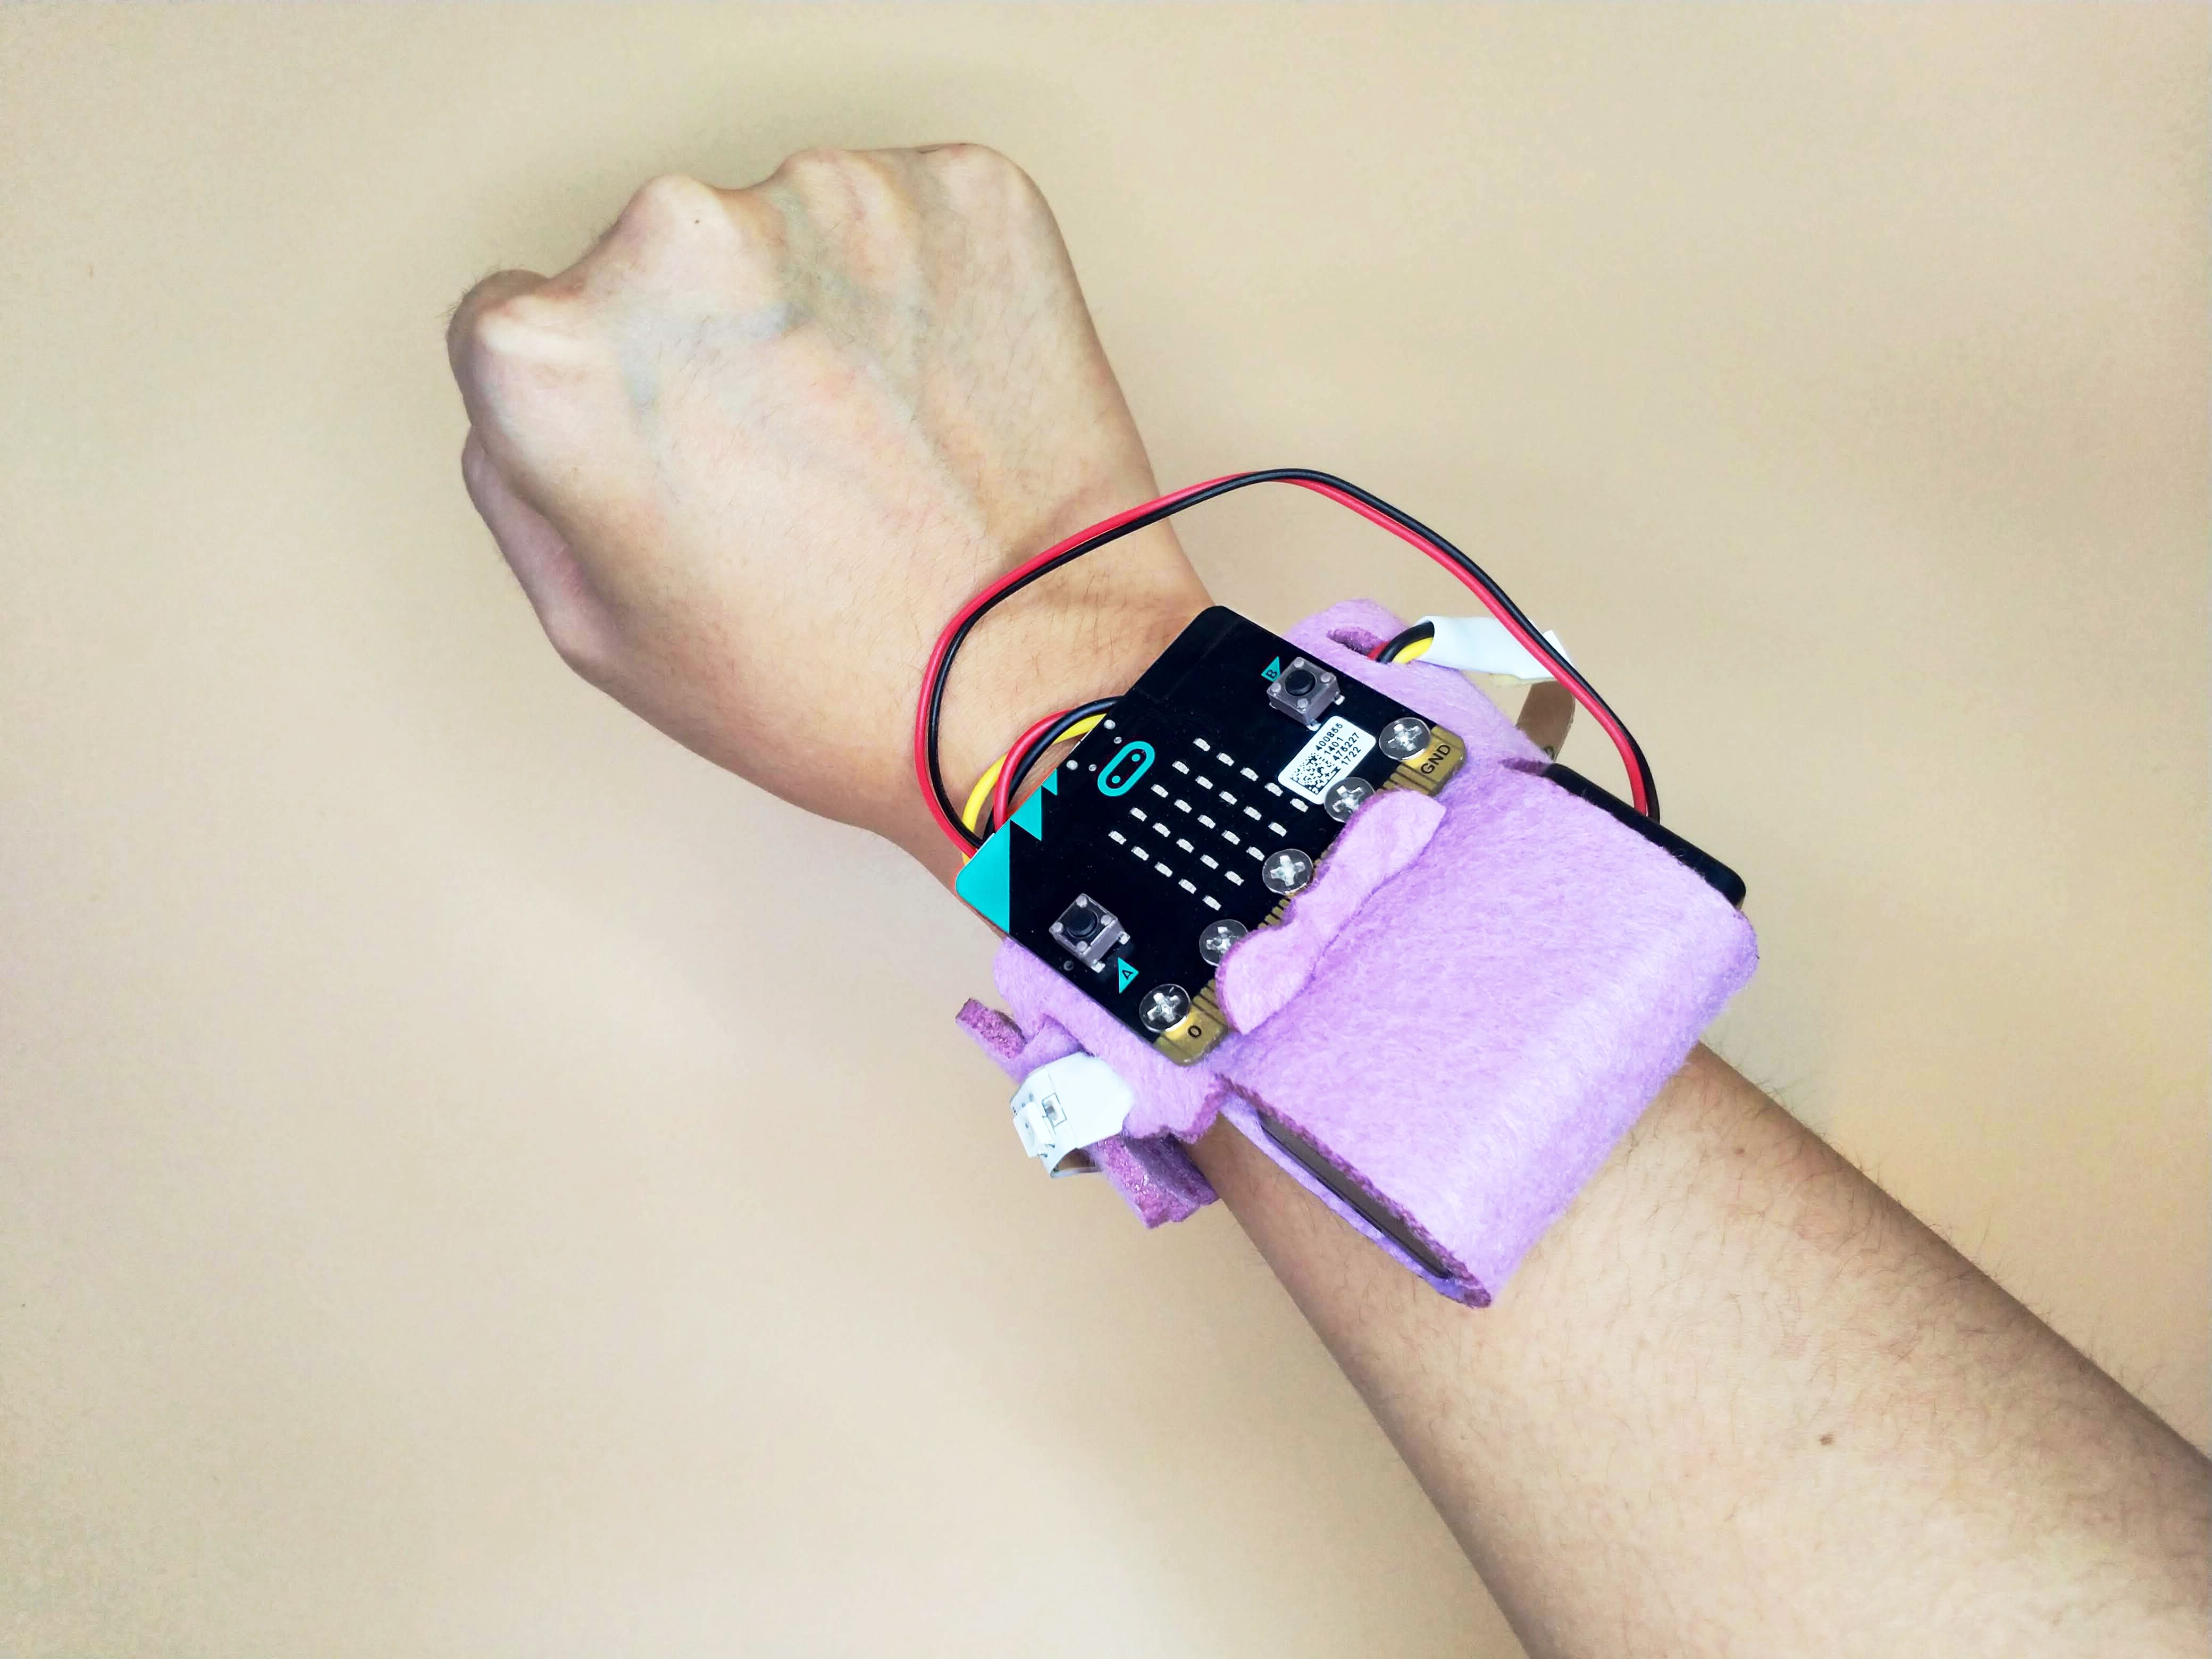
Place the basic:bit as shown in the picture with the felt in between it and the micro:bit
Materials
1 x Micro:bit
1 x basic:bit
1 x Felt Strap
STEP 2

Place the micro:bit above the basic:bit and ensure that the 'G' of the micro:bit lines up with the 'G' of the basic:bit. Screw all the screws in after they have been aligned properly.
Materials
1 x Micro:bit
1 x basic:bit
1 x Felt Strap
STEP 3
Fold the strap as shown in the picture.
STEP 4
Fill your battery pack with batteries and slot the battery pack into the loop you just created.
Materials
1 x battery pack
2 x batteries
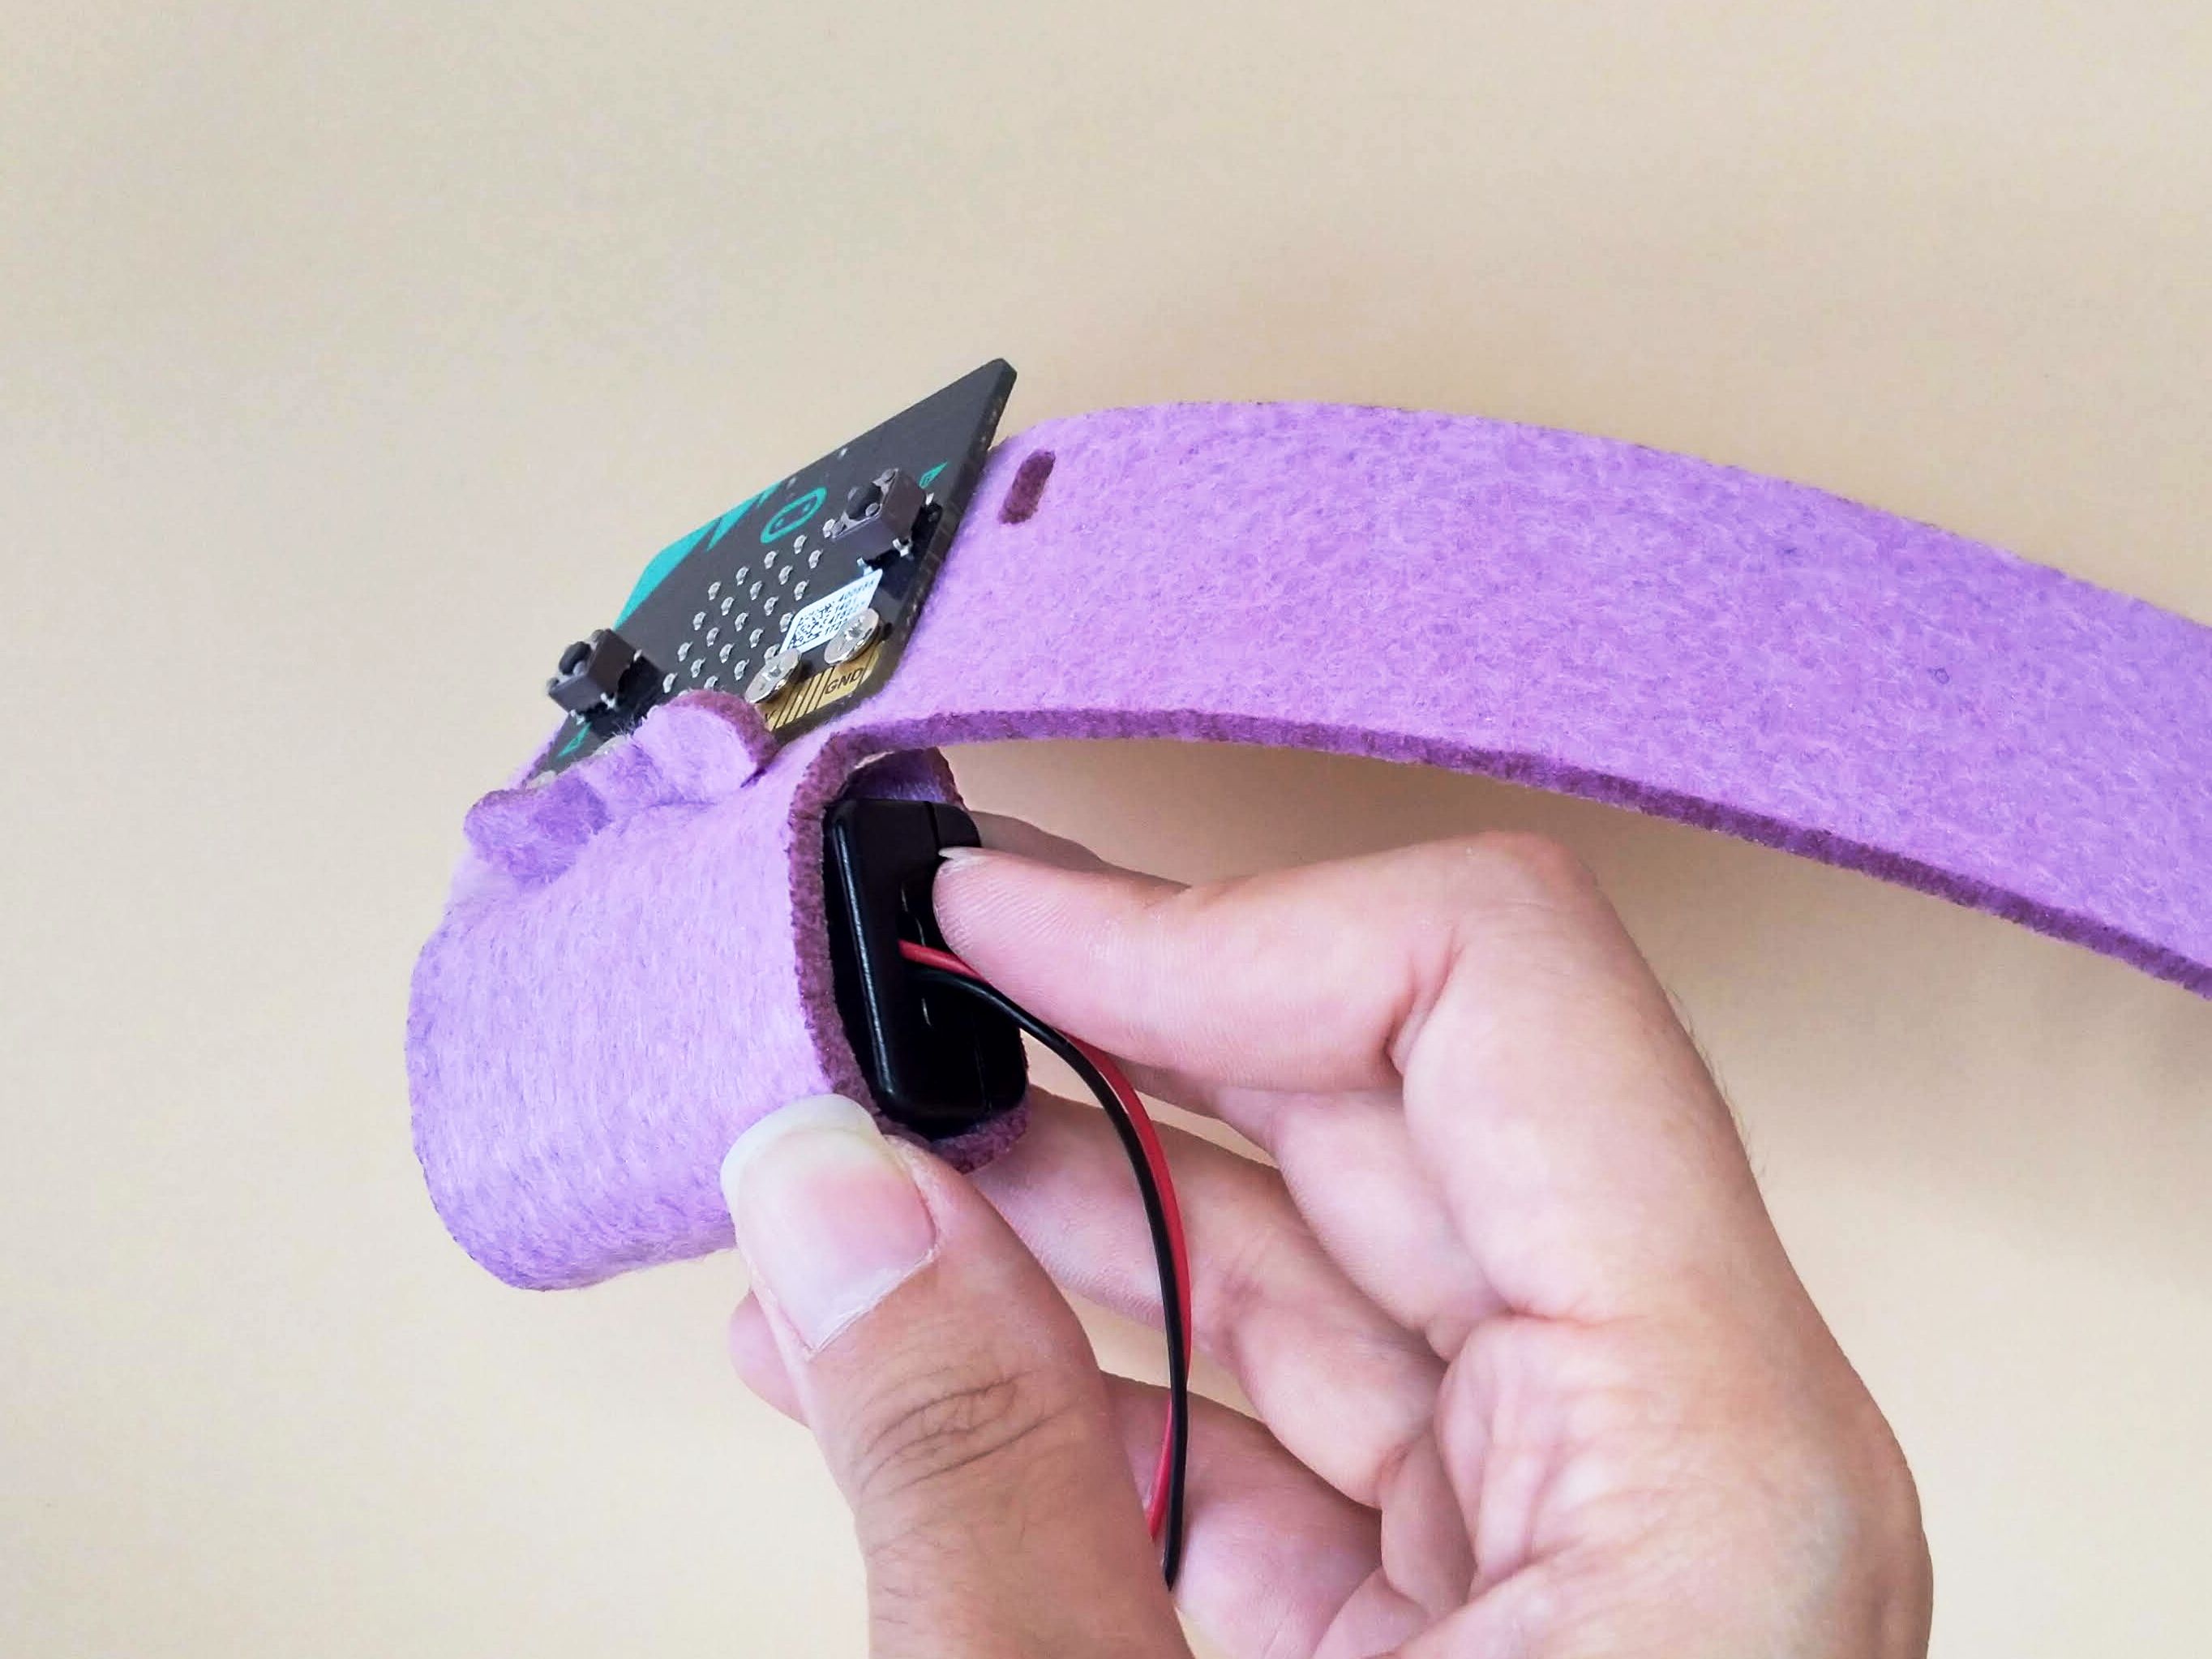
STEP 5
Connect the battery pack to the micro:bit.
STEP 6
Insert the female end (the end that’s not pokey) of the LED strip into the slit next to the button B of your micro:bit. Pull it all the way in until only the white area of the LED strip remains outside the slit.
Materials
1 x GVS LED Strip
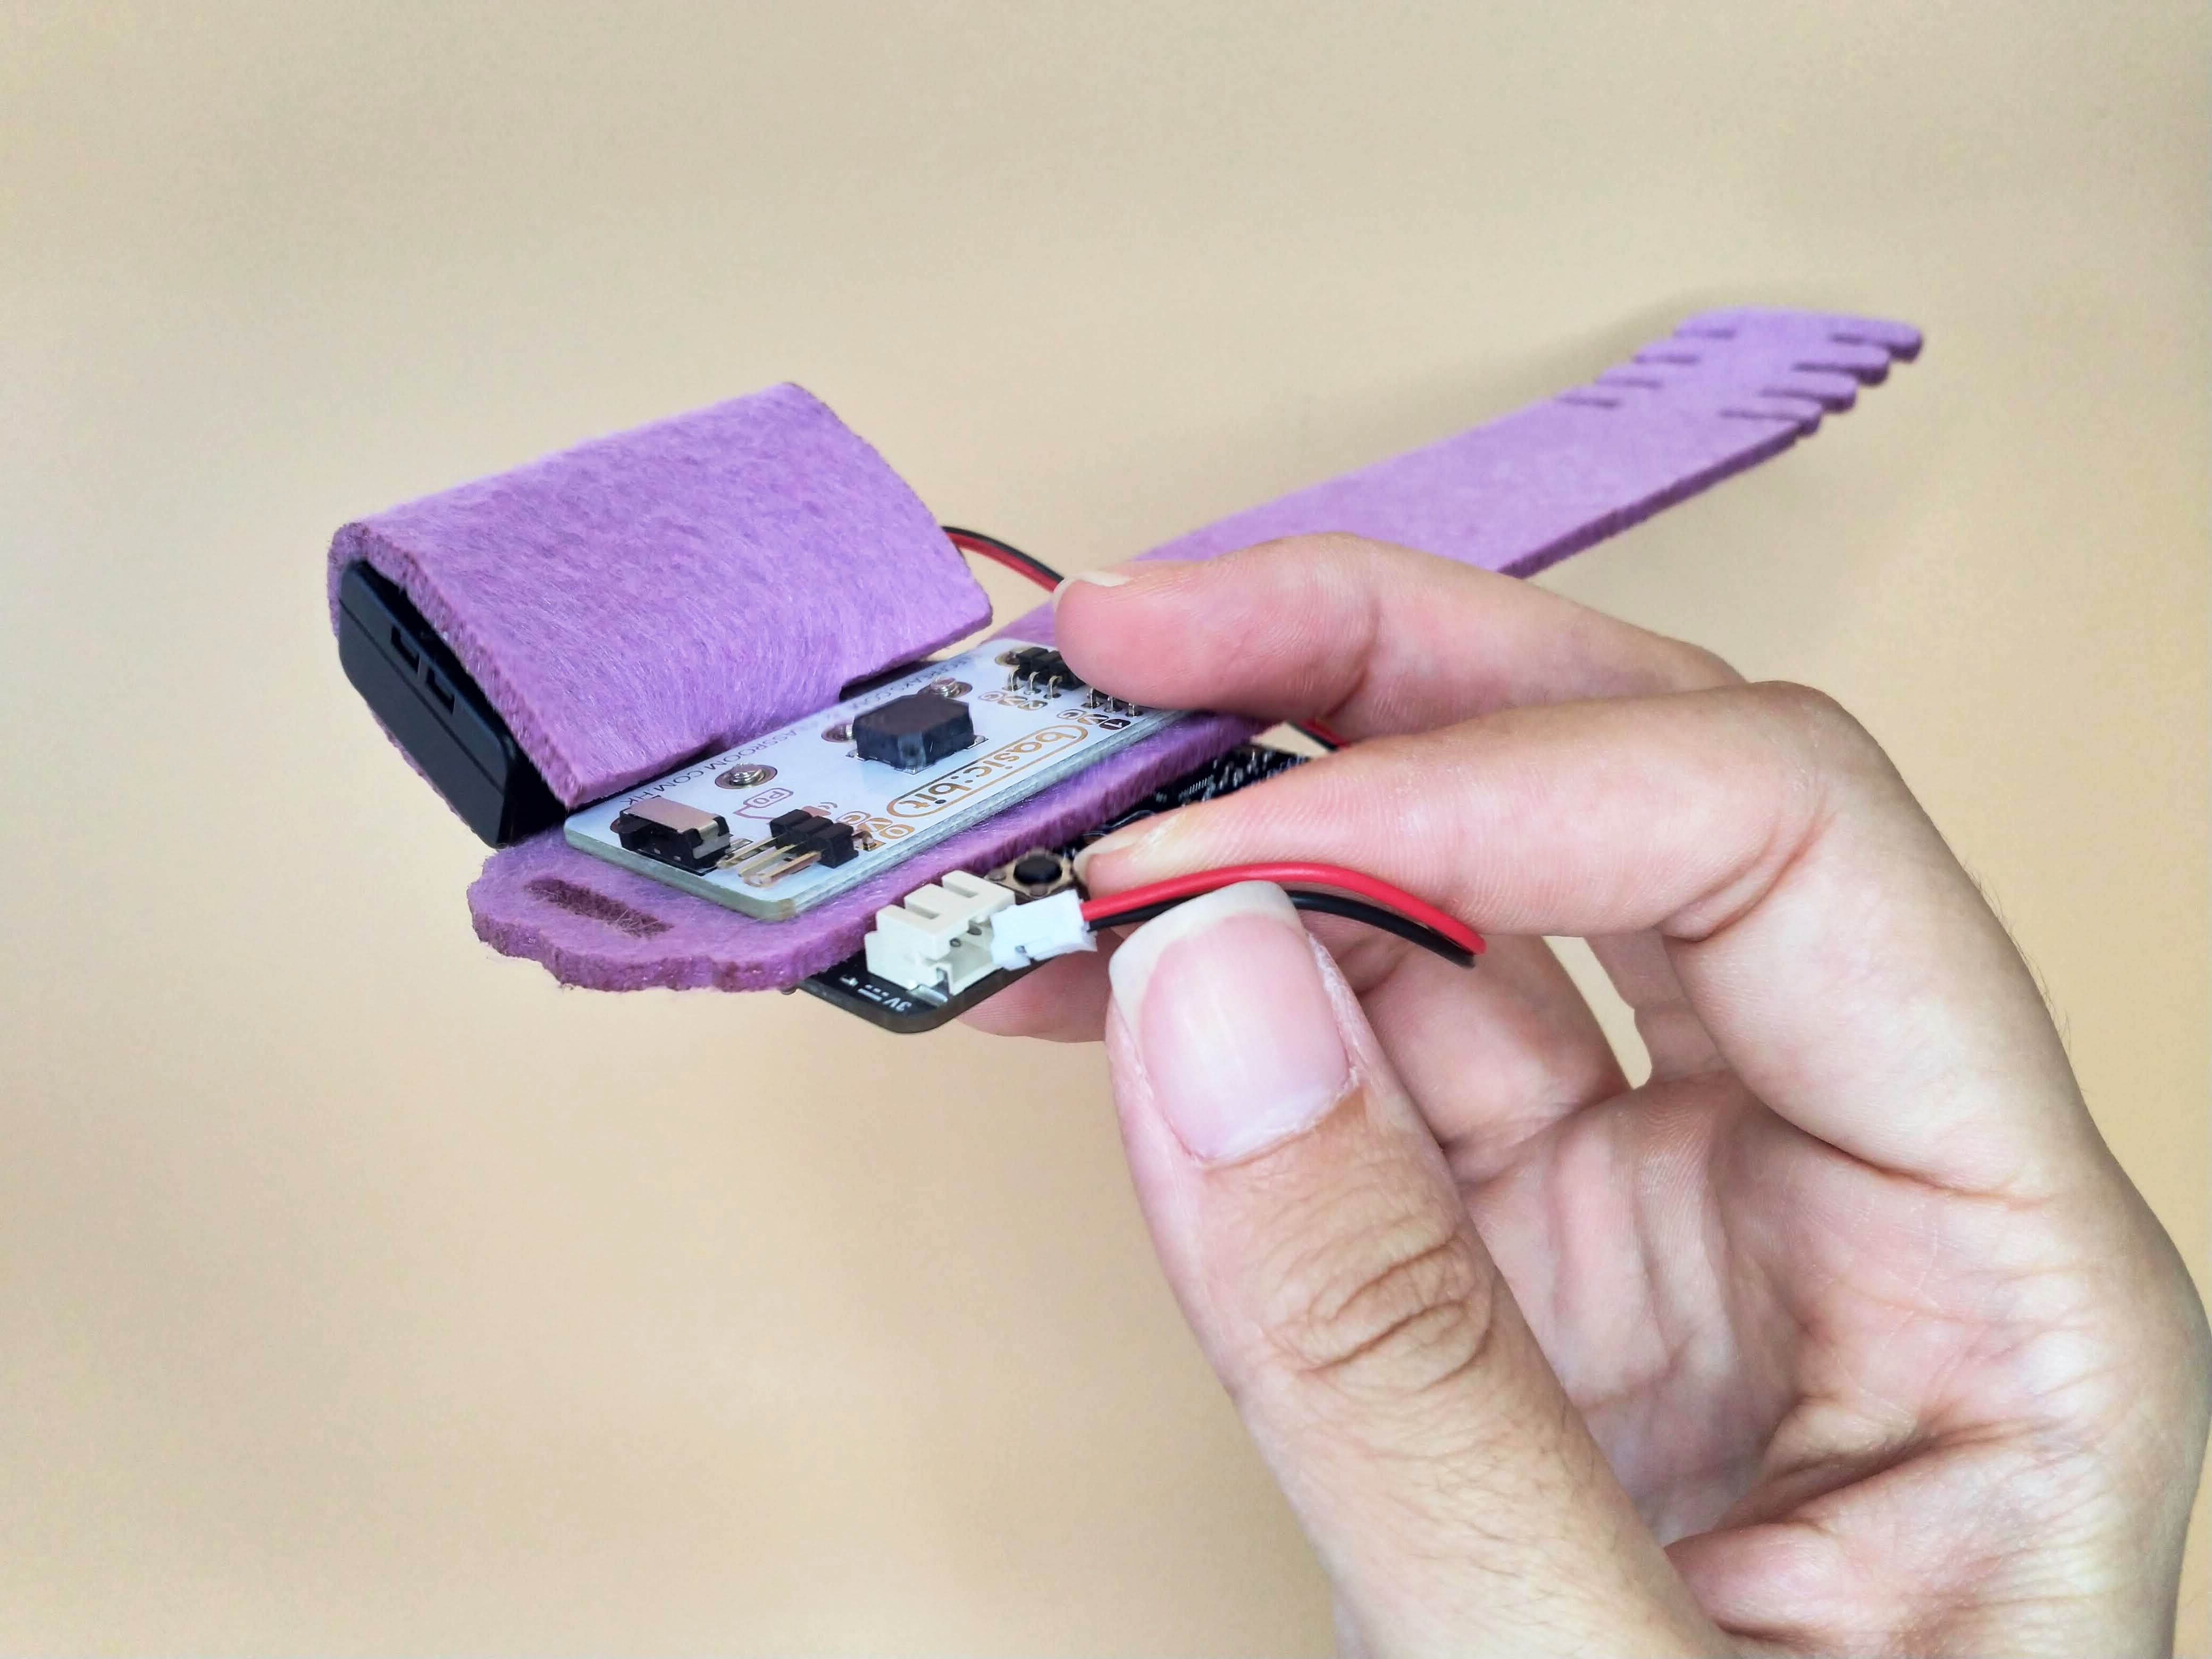
STEP 7
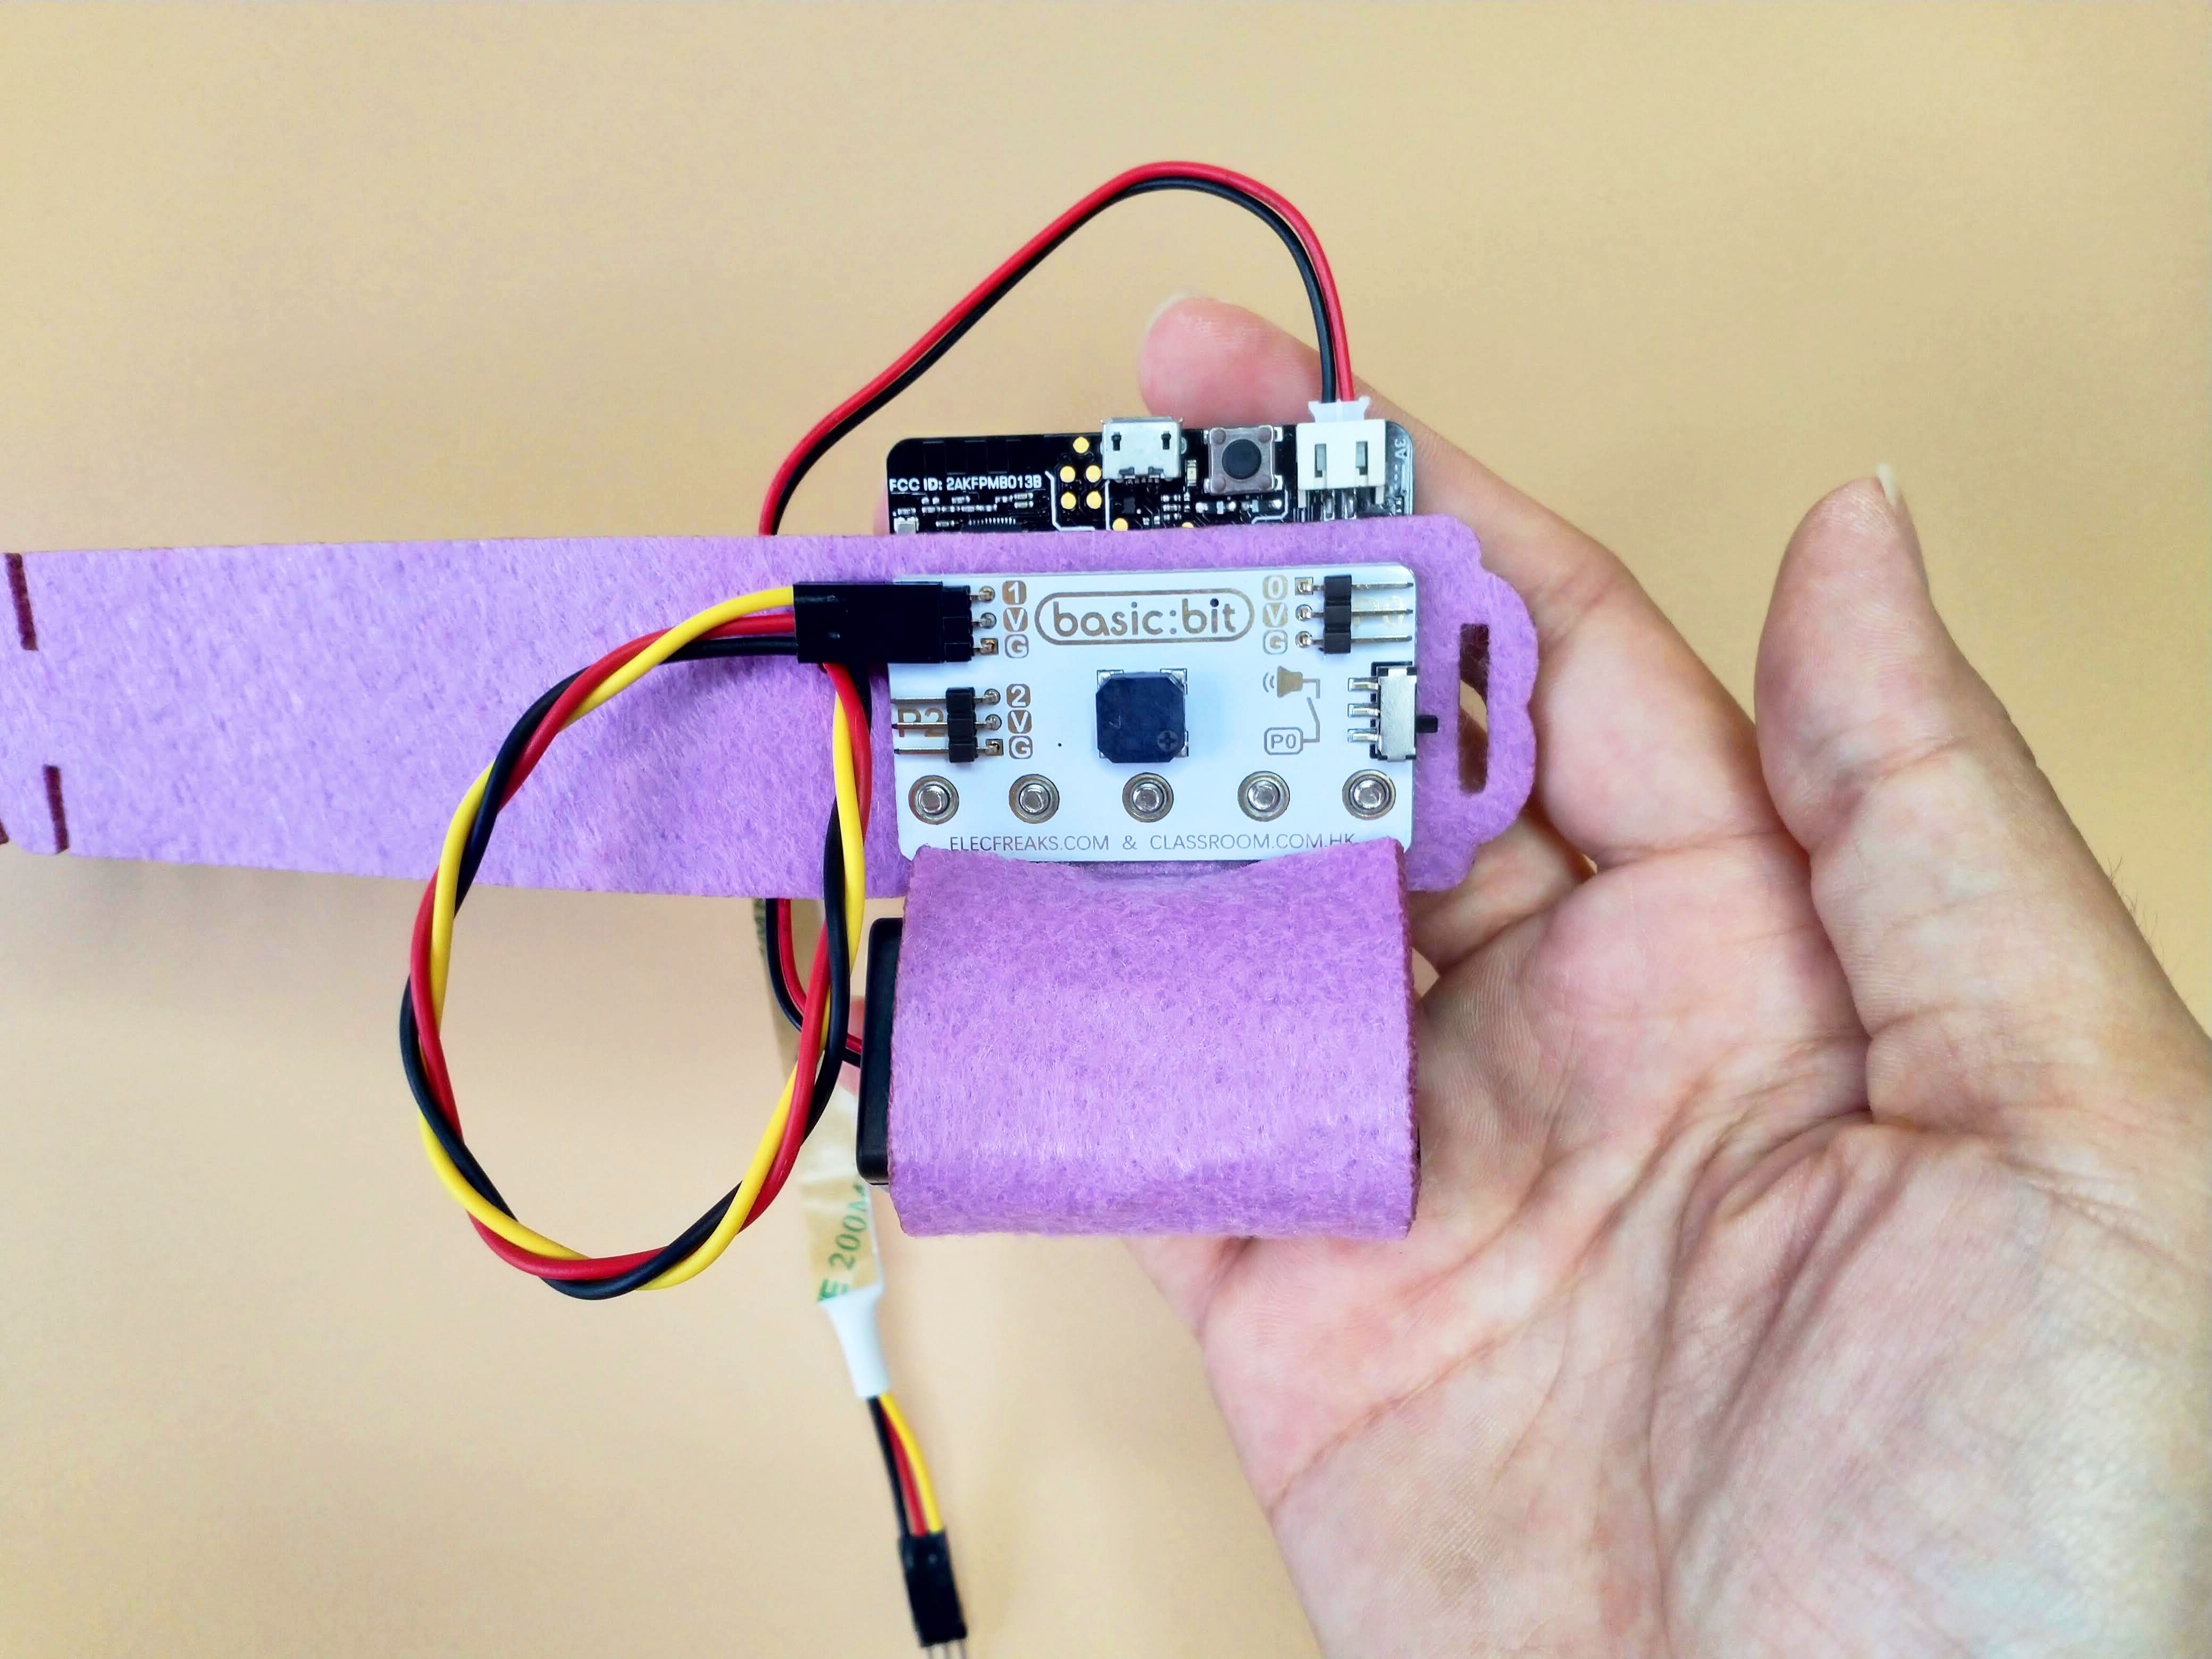
Connect the LED Strip to Pin 1 on the basic:bit. Ensure that the black wire is connected to 'G' and the yellow wire is connected to '1'.
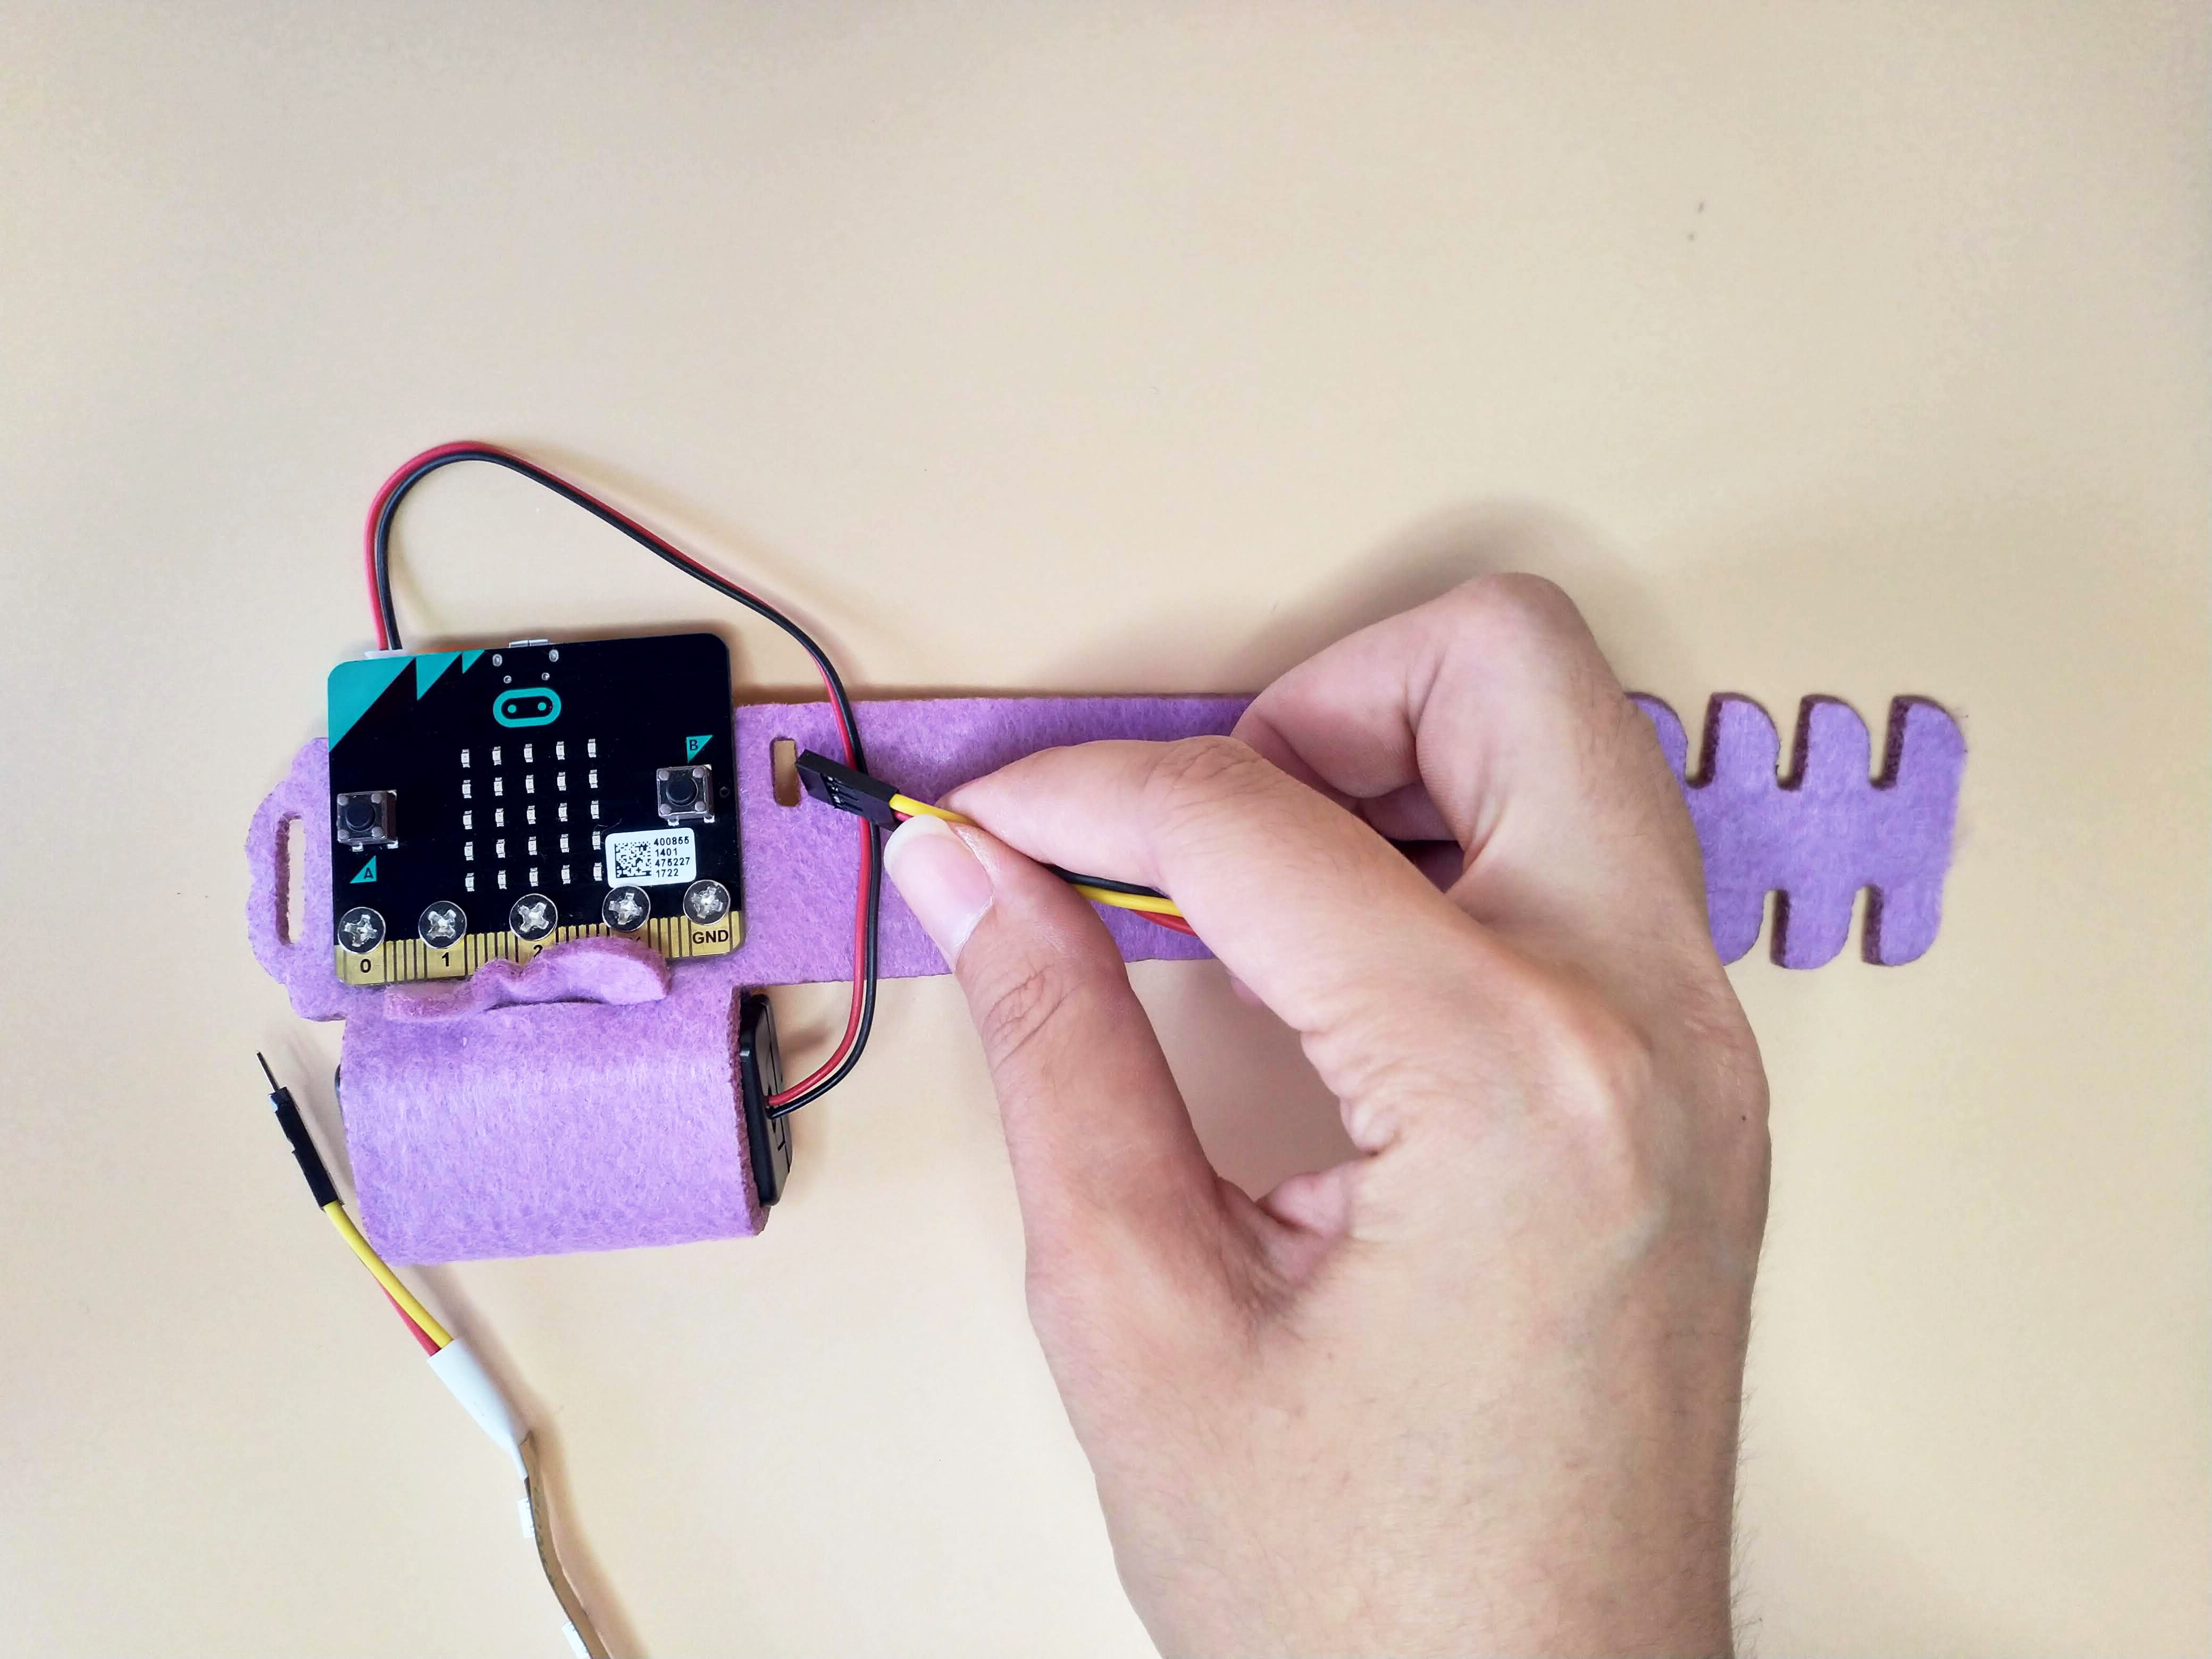
STEP 8
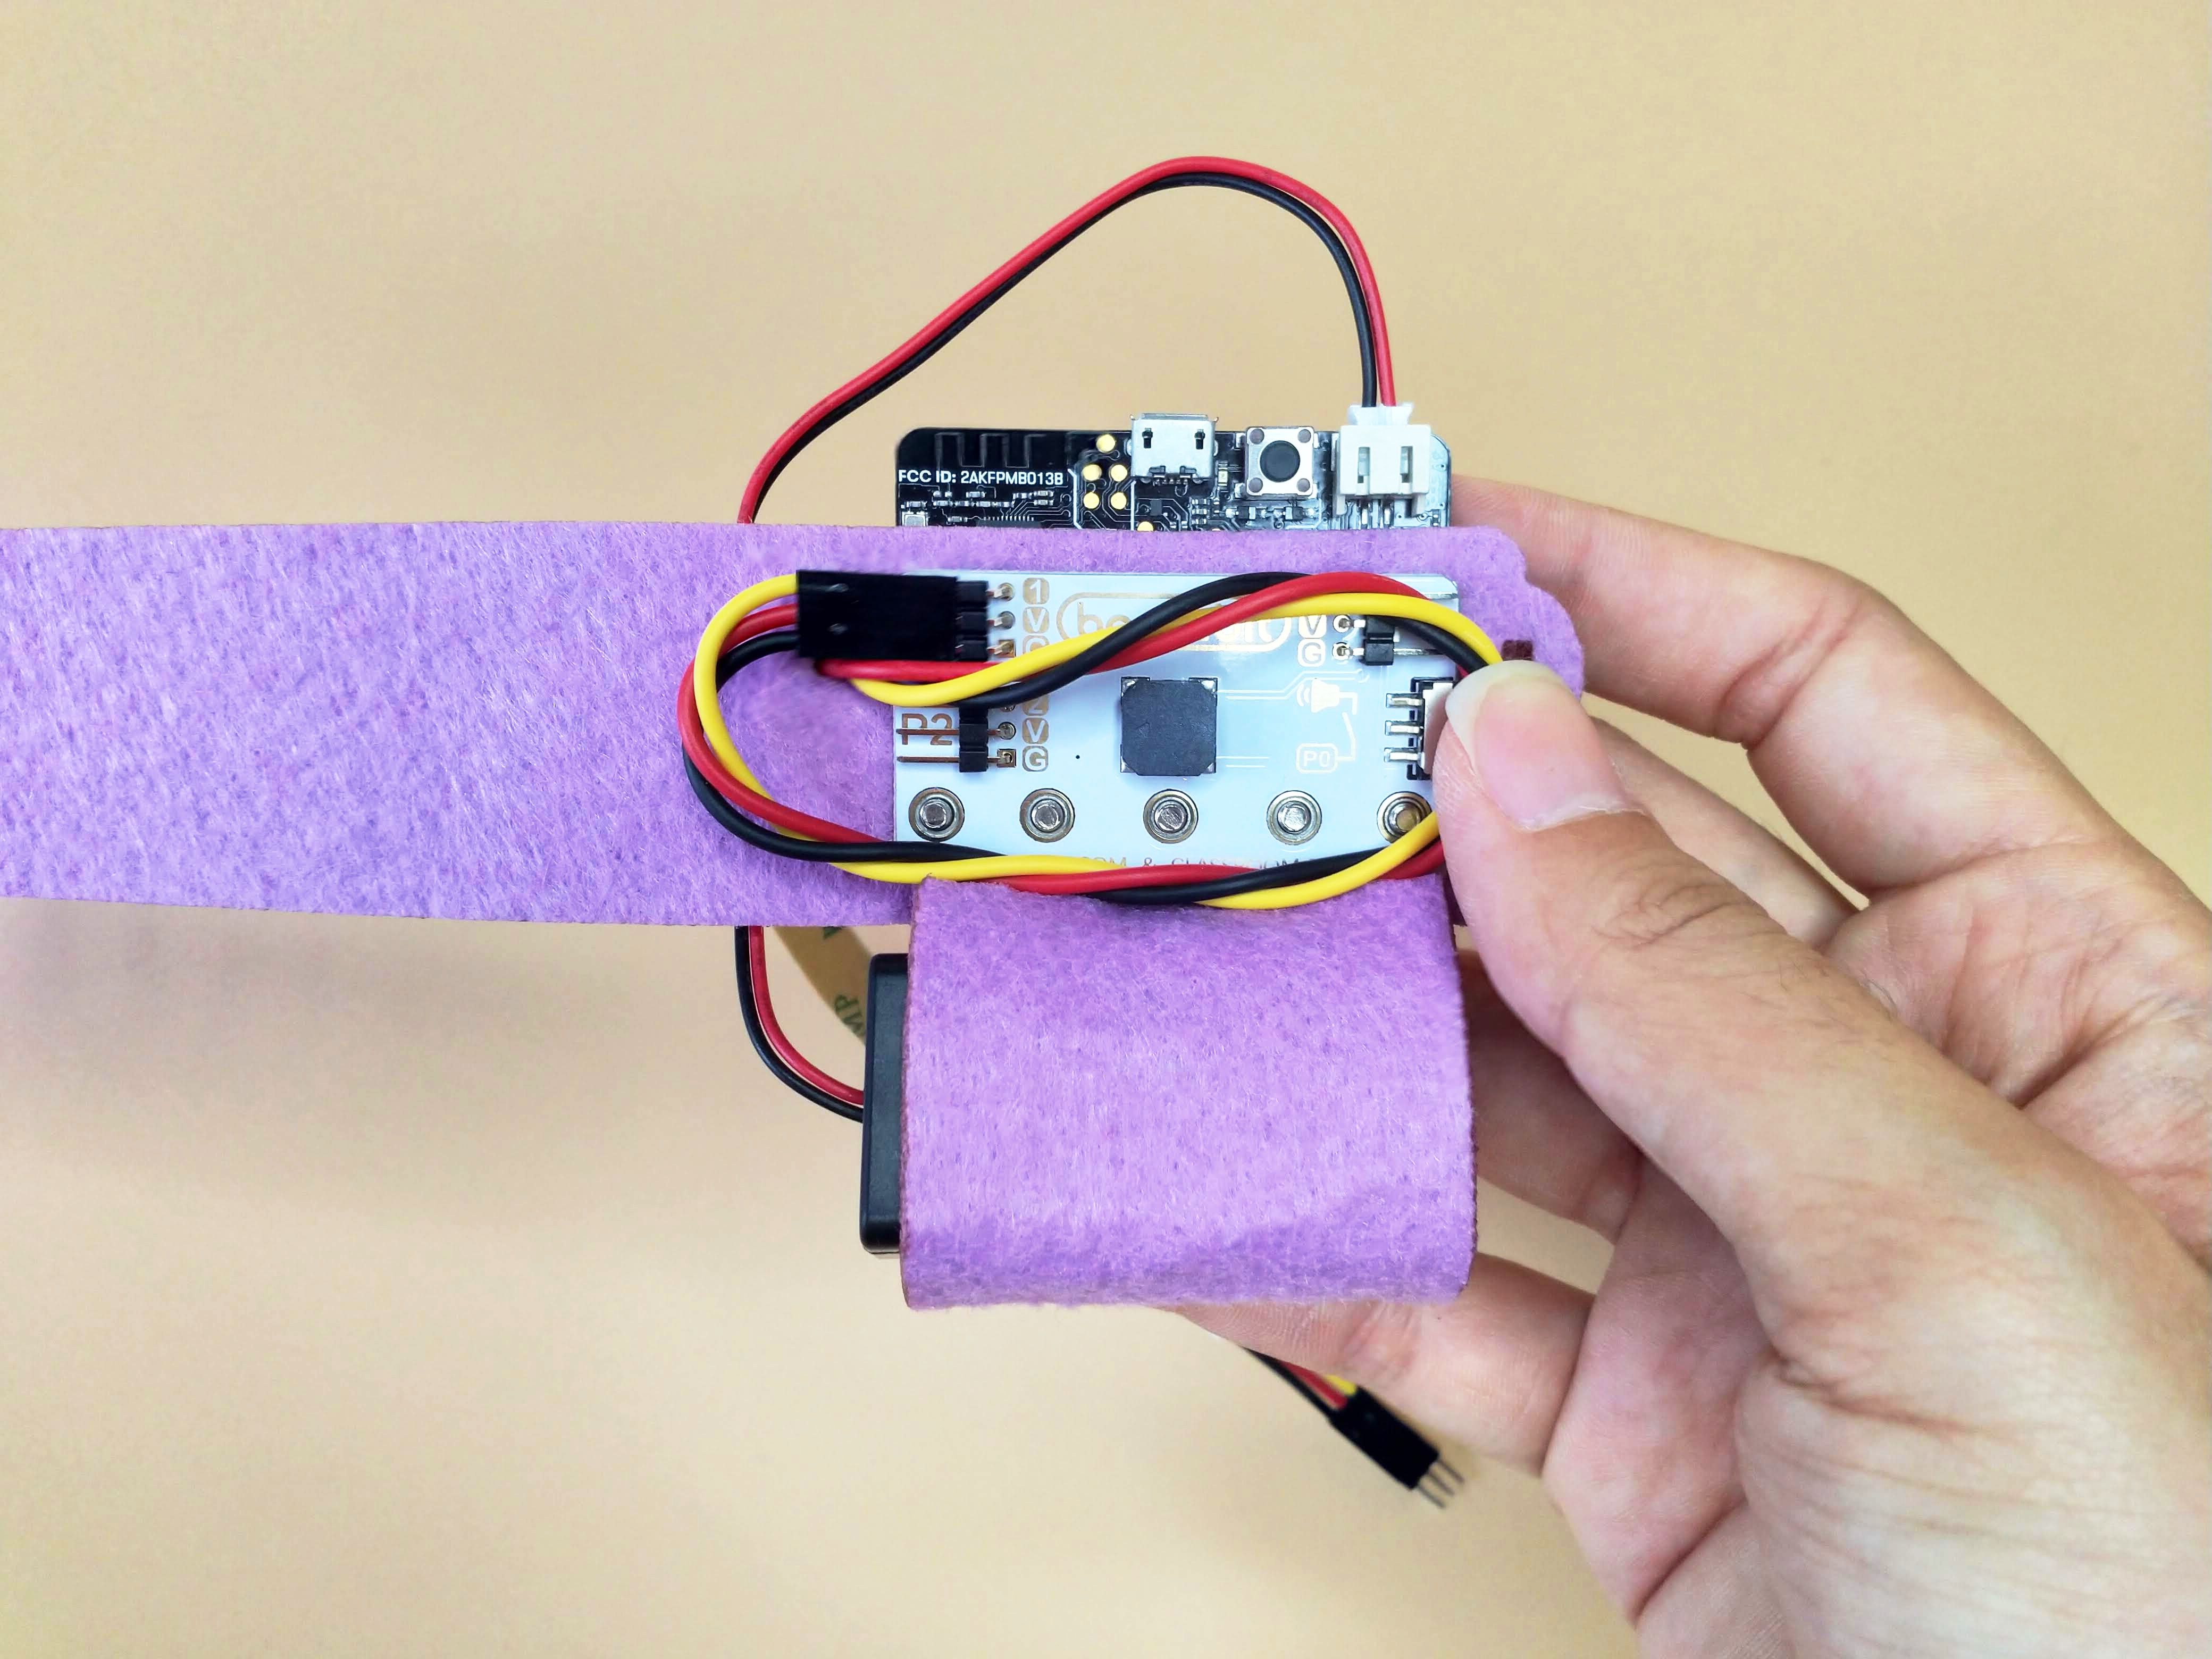
Loop the excess wire flat against the back of the basic:bit.
STEP 9
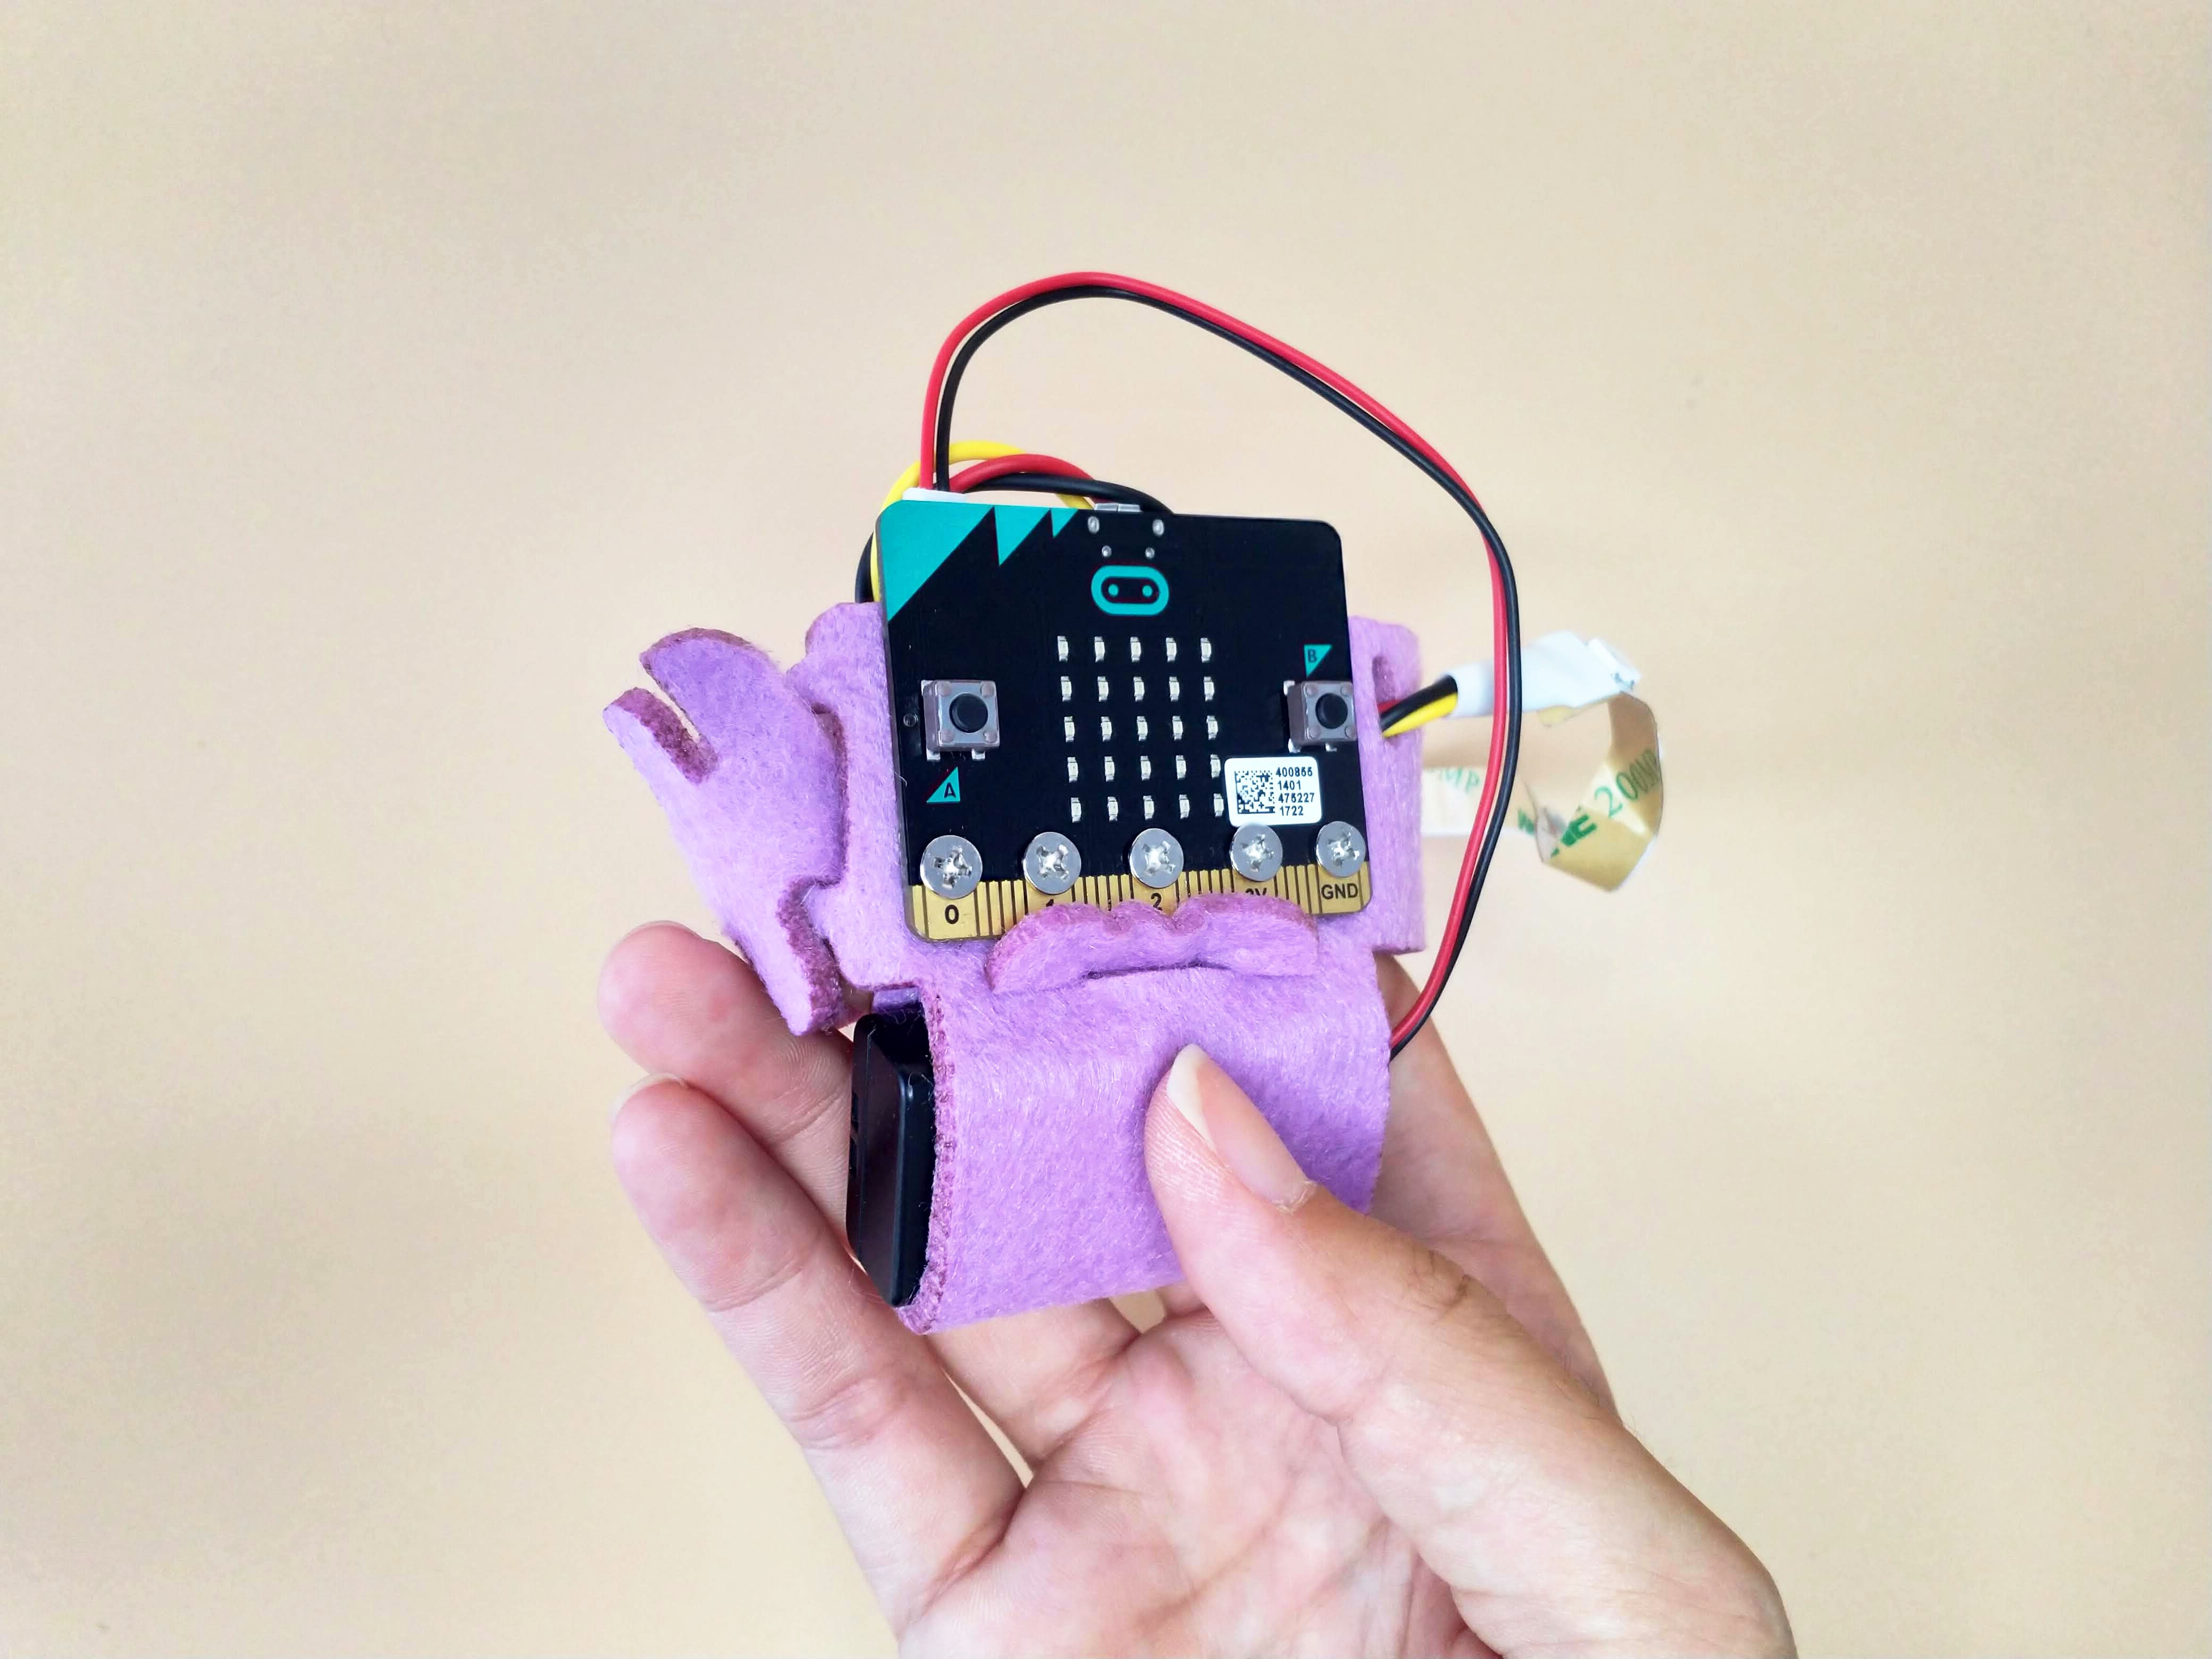
Now insert the hanging end of the strap into the slit on the other end of the micro:bit. Pull the strap through till you reach a suitable size.
STEP 10
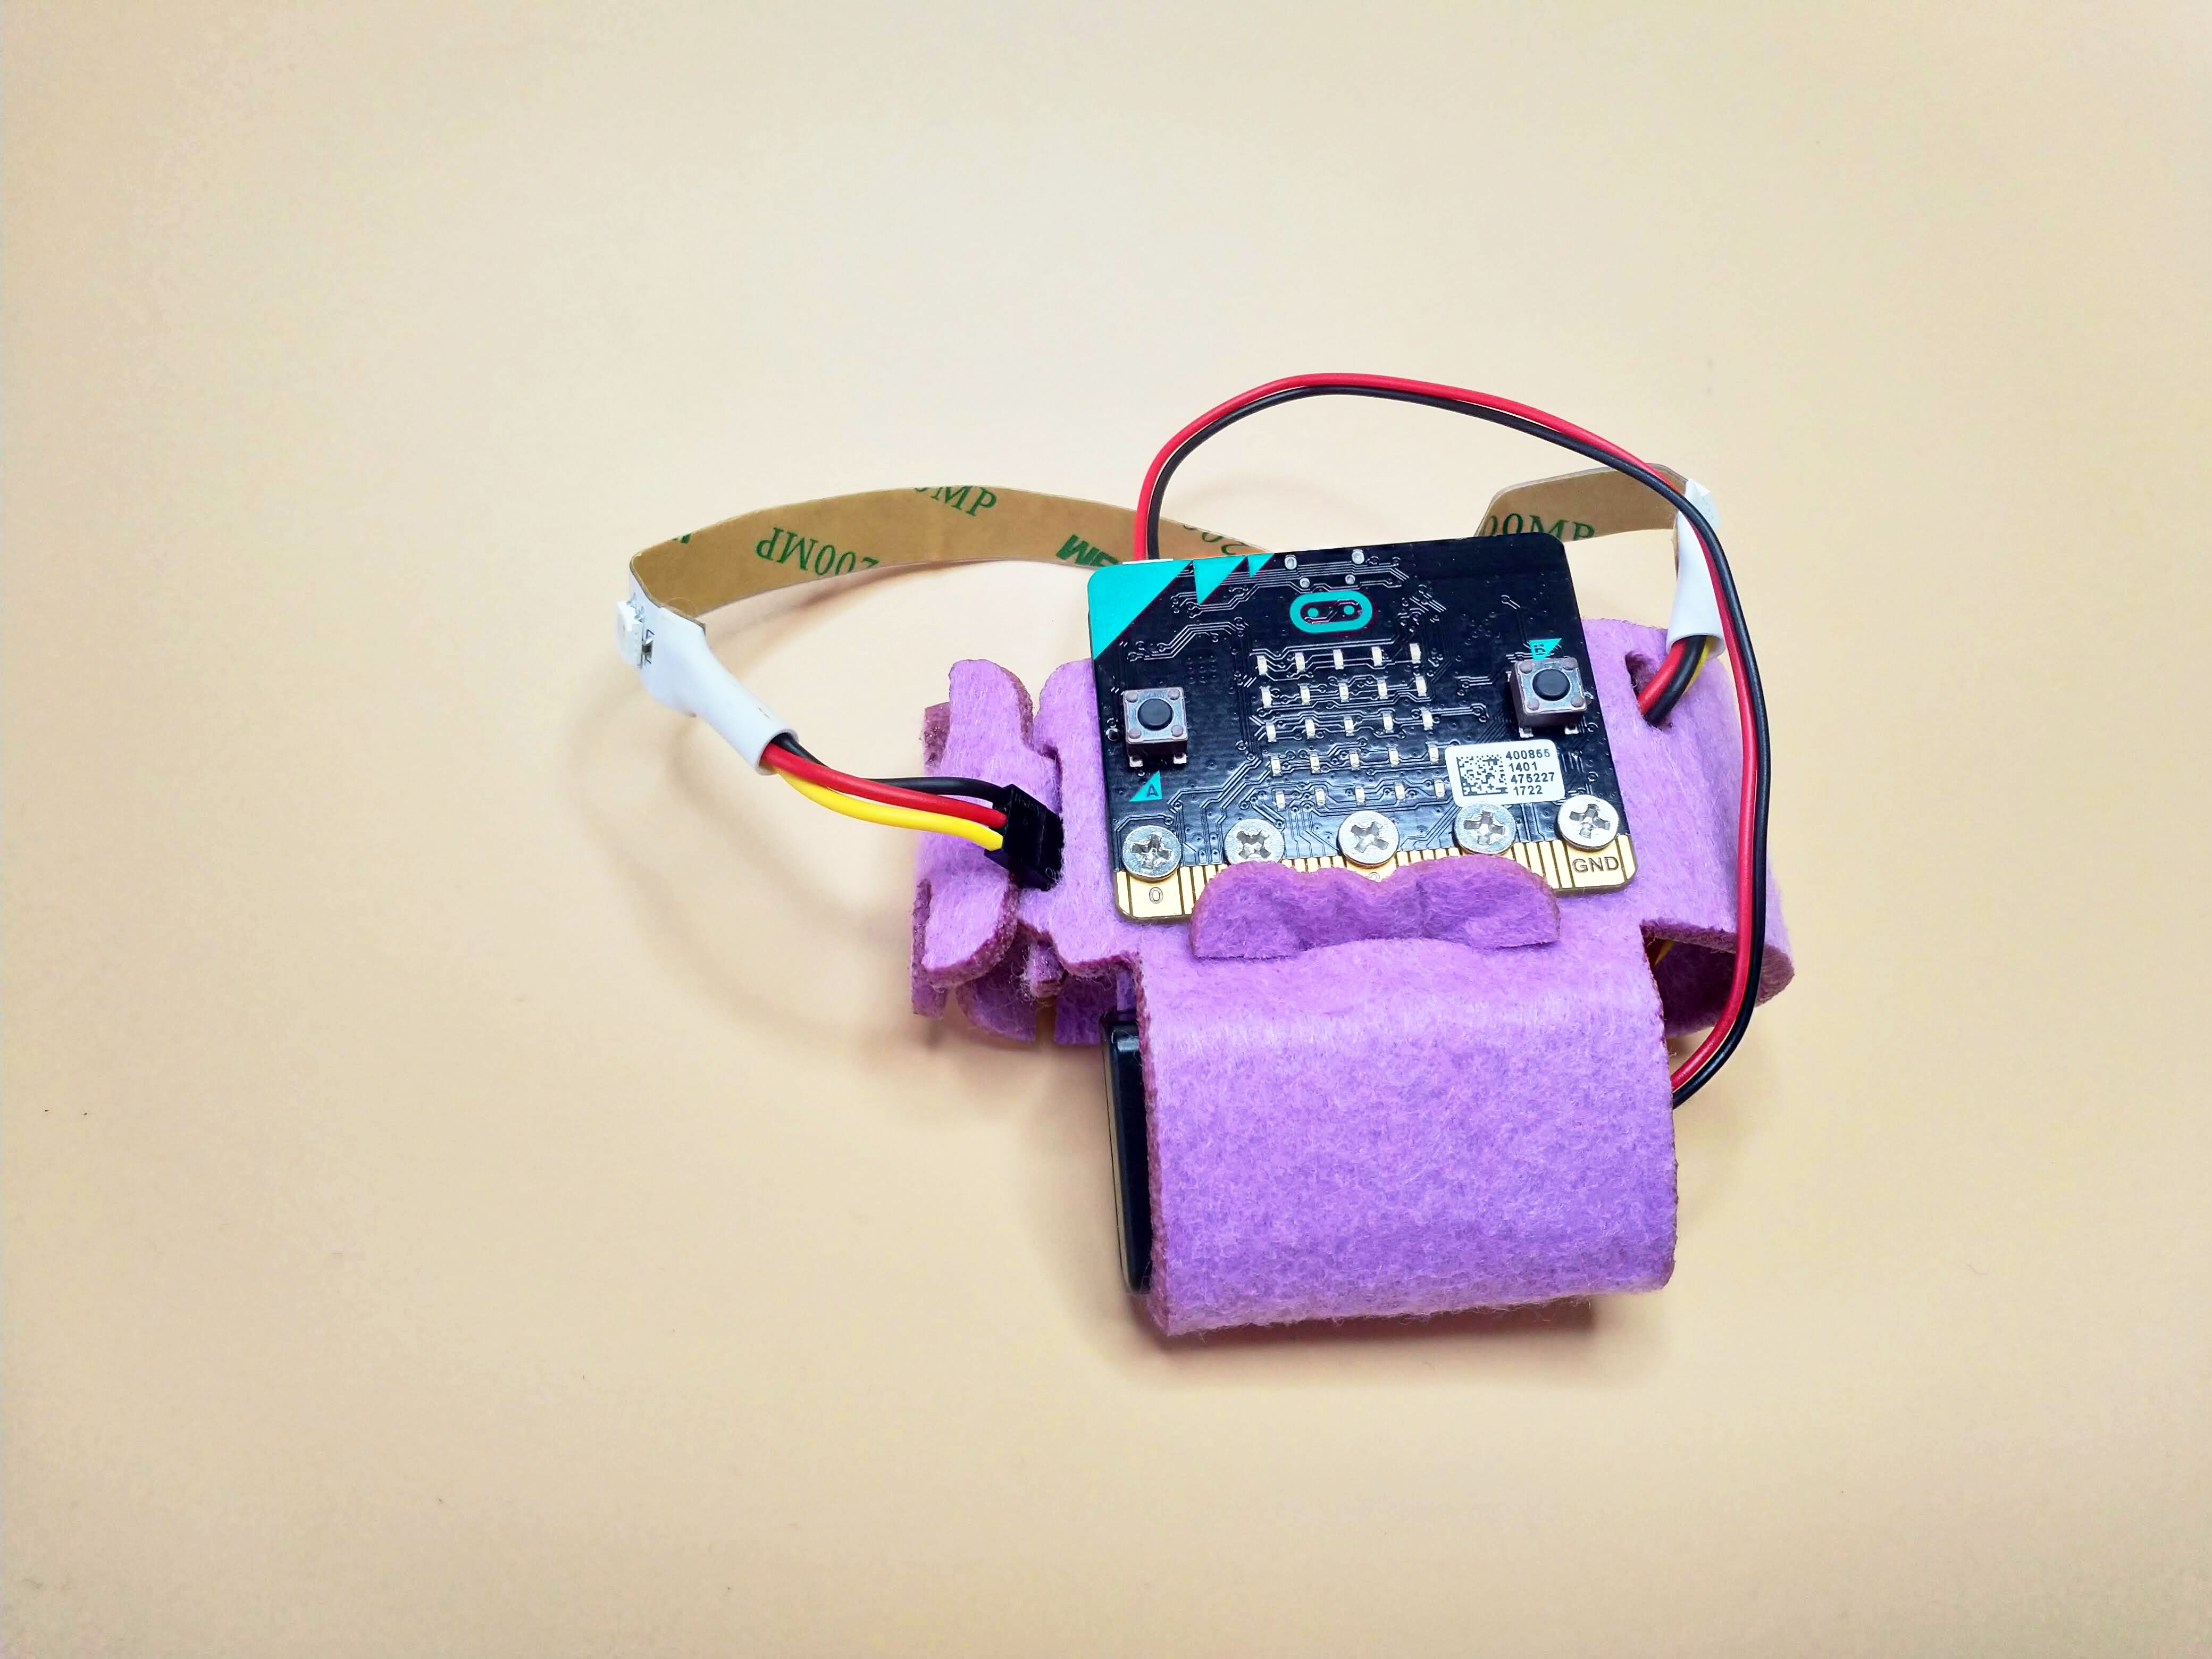
Insert the loose end of the LED strip into the slit as well. And pull till the LED strip is secure against your bracelet.
STEP 11
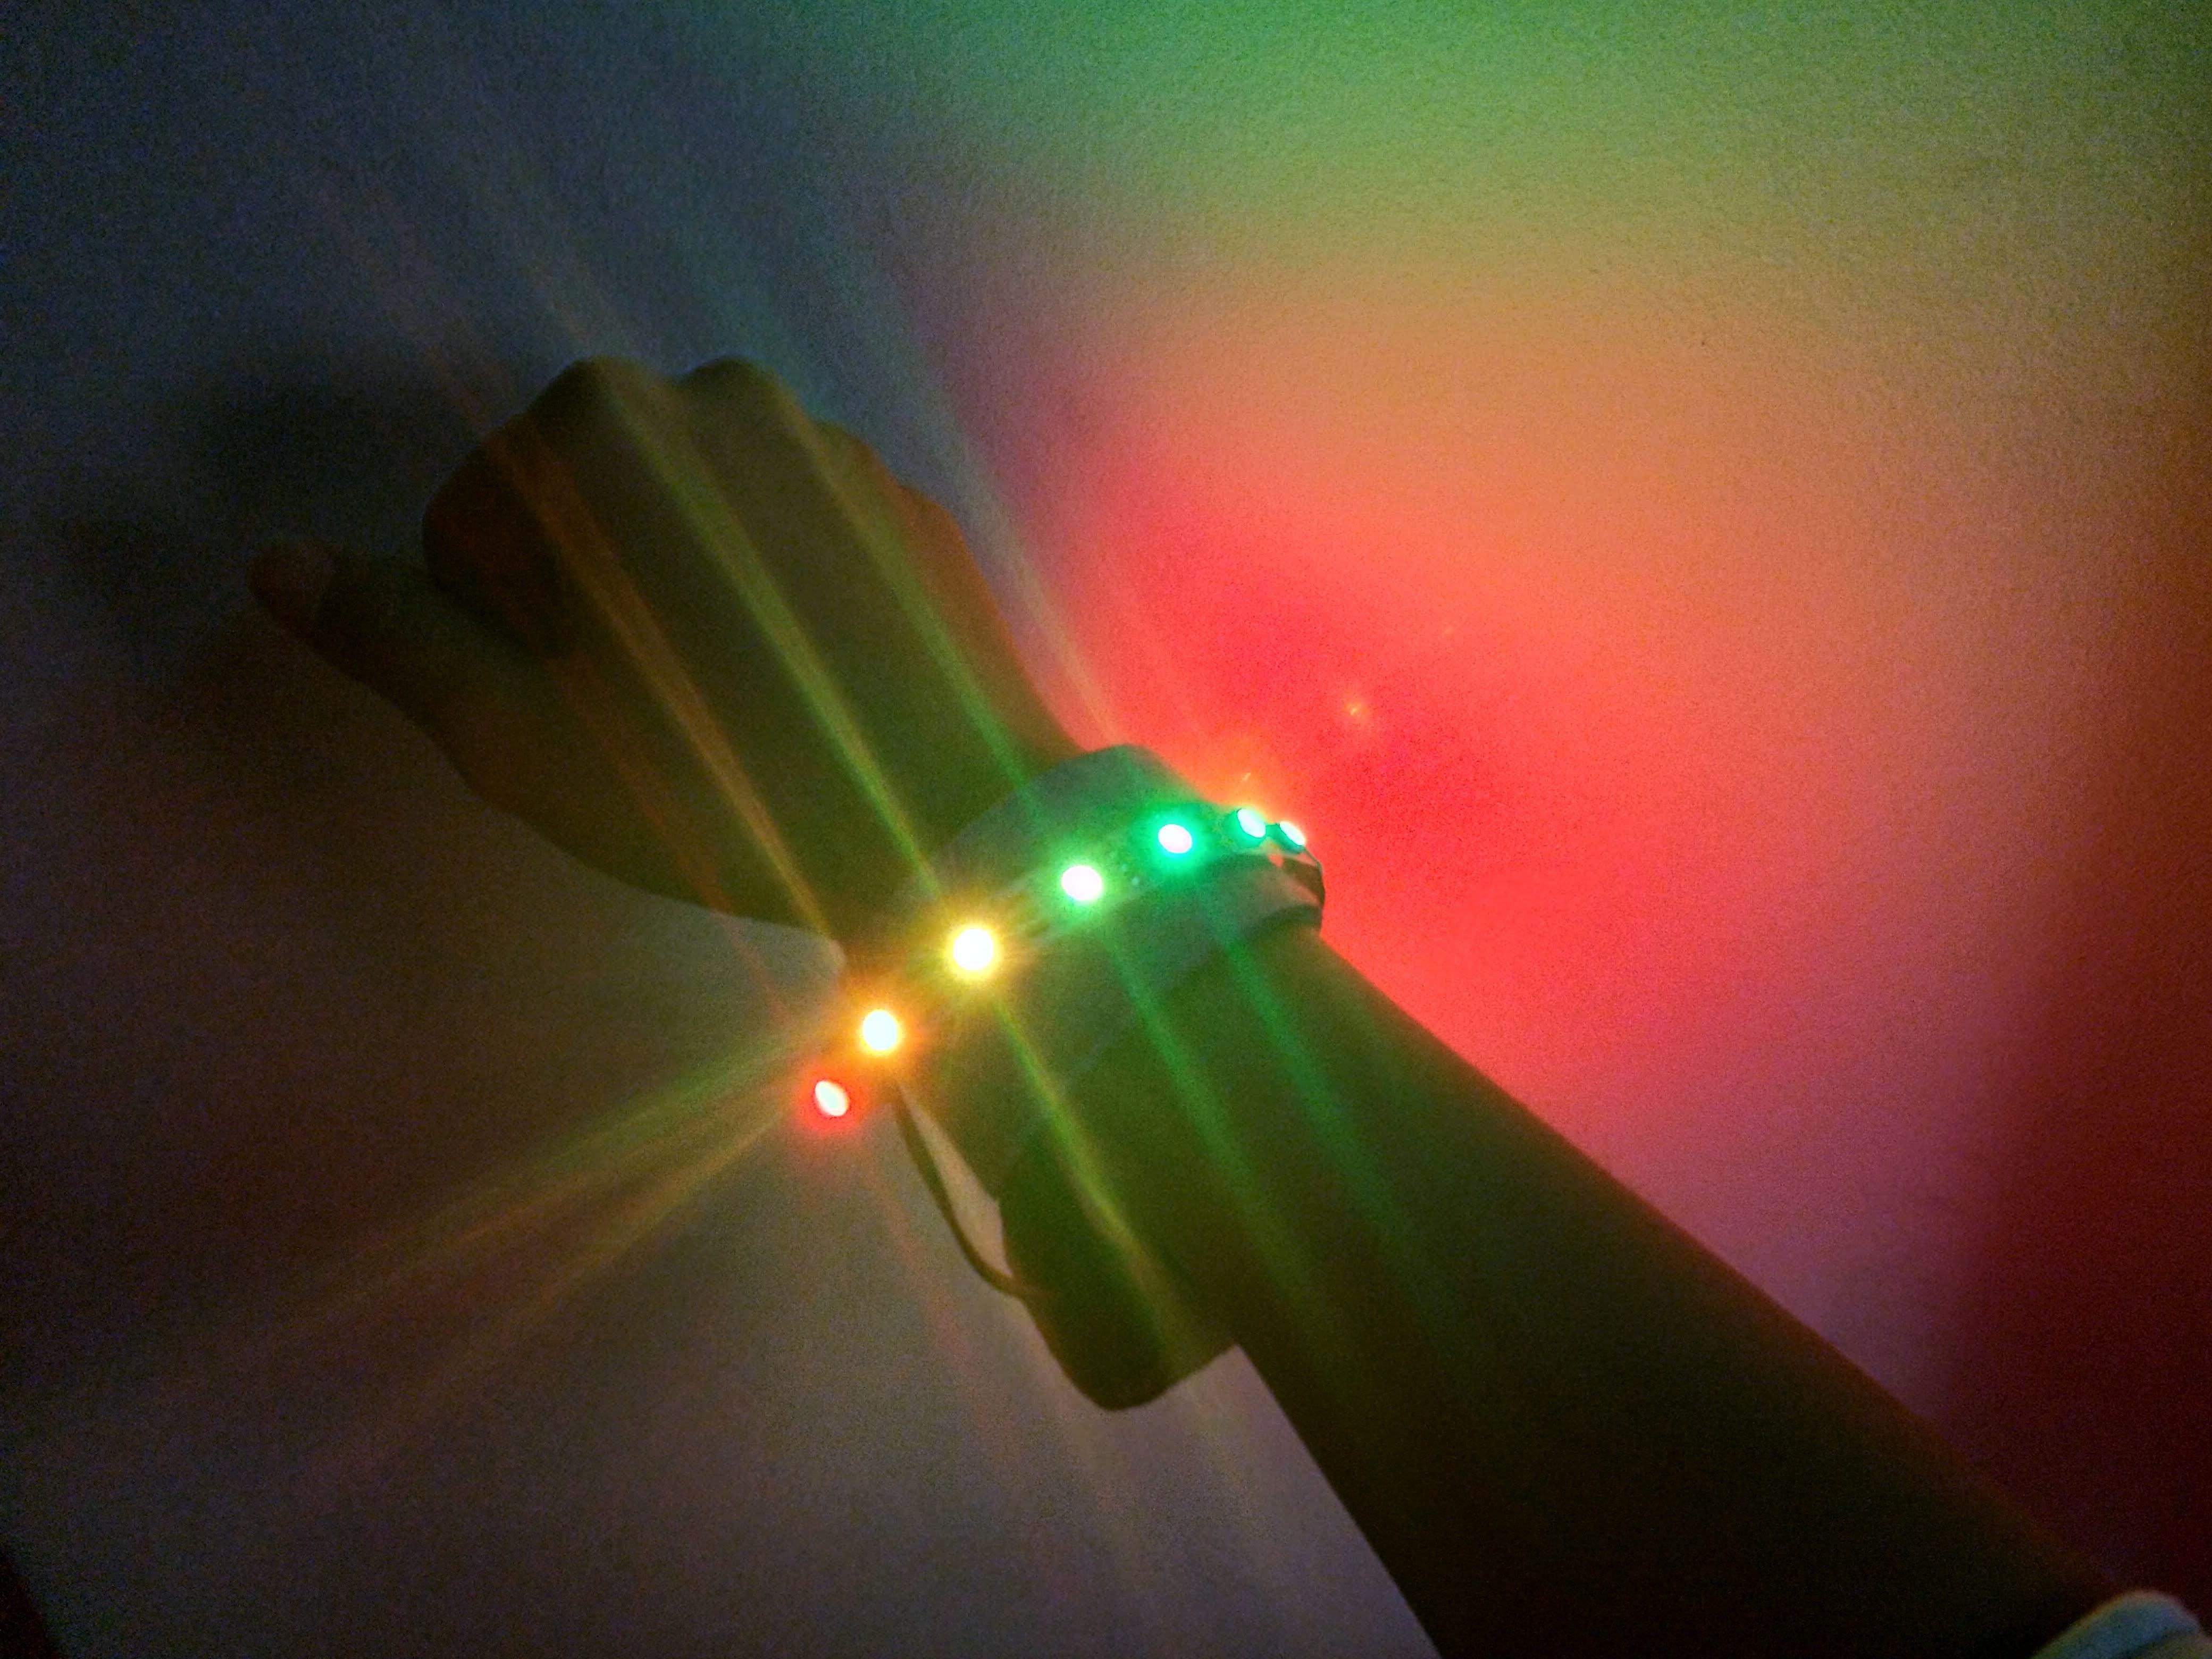
Code your bracelet and slip it on!
STEP 12

Play with the strap and watch what happens to the LED. Add music and more to your fancy bling!
STEP 13
Now you’ve gotten it all together, it’s time to code! For beginners, follow steps 15 through 18. For more challenge, follow steps 19 through 23. For advanced coders, follow step 24. Have fun, folks!
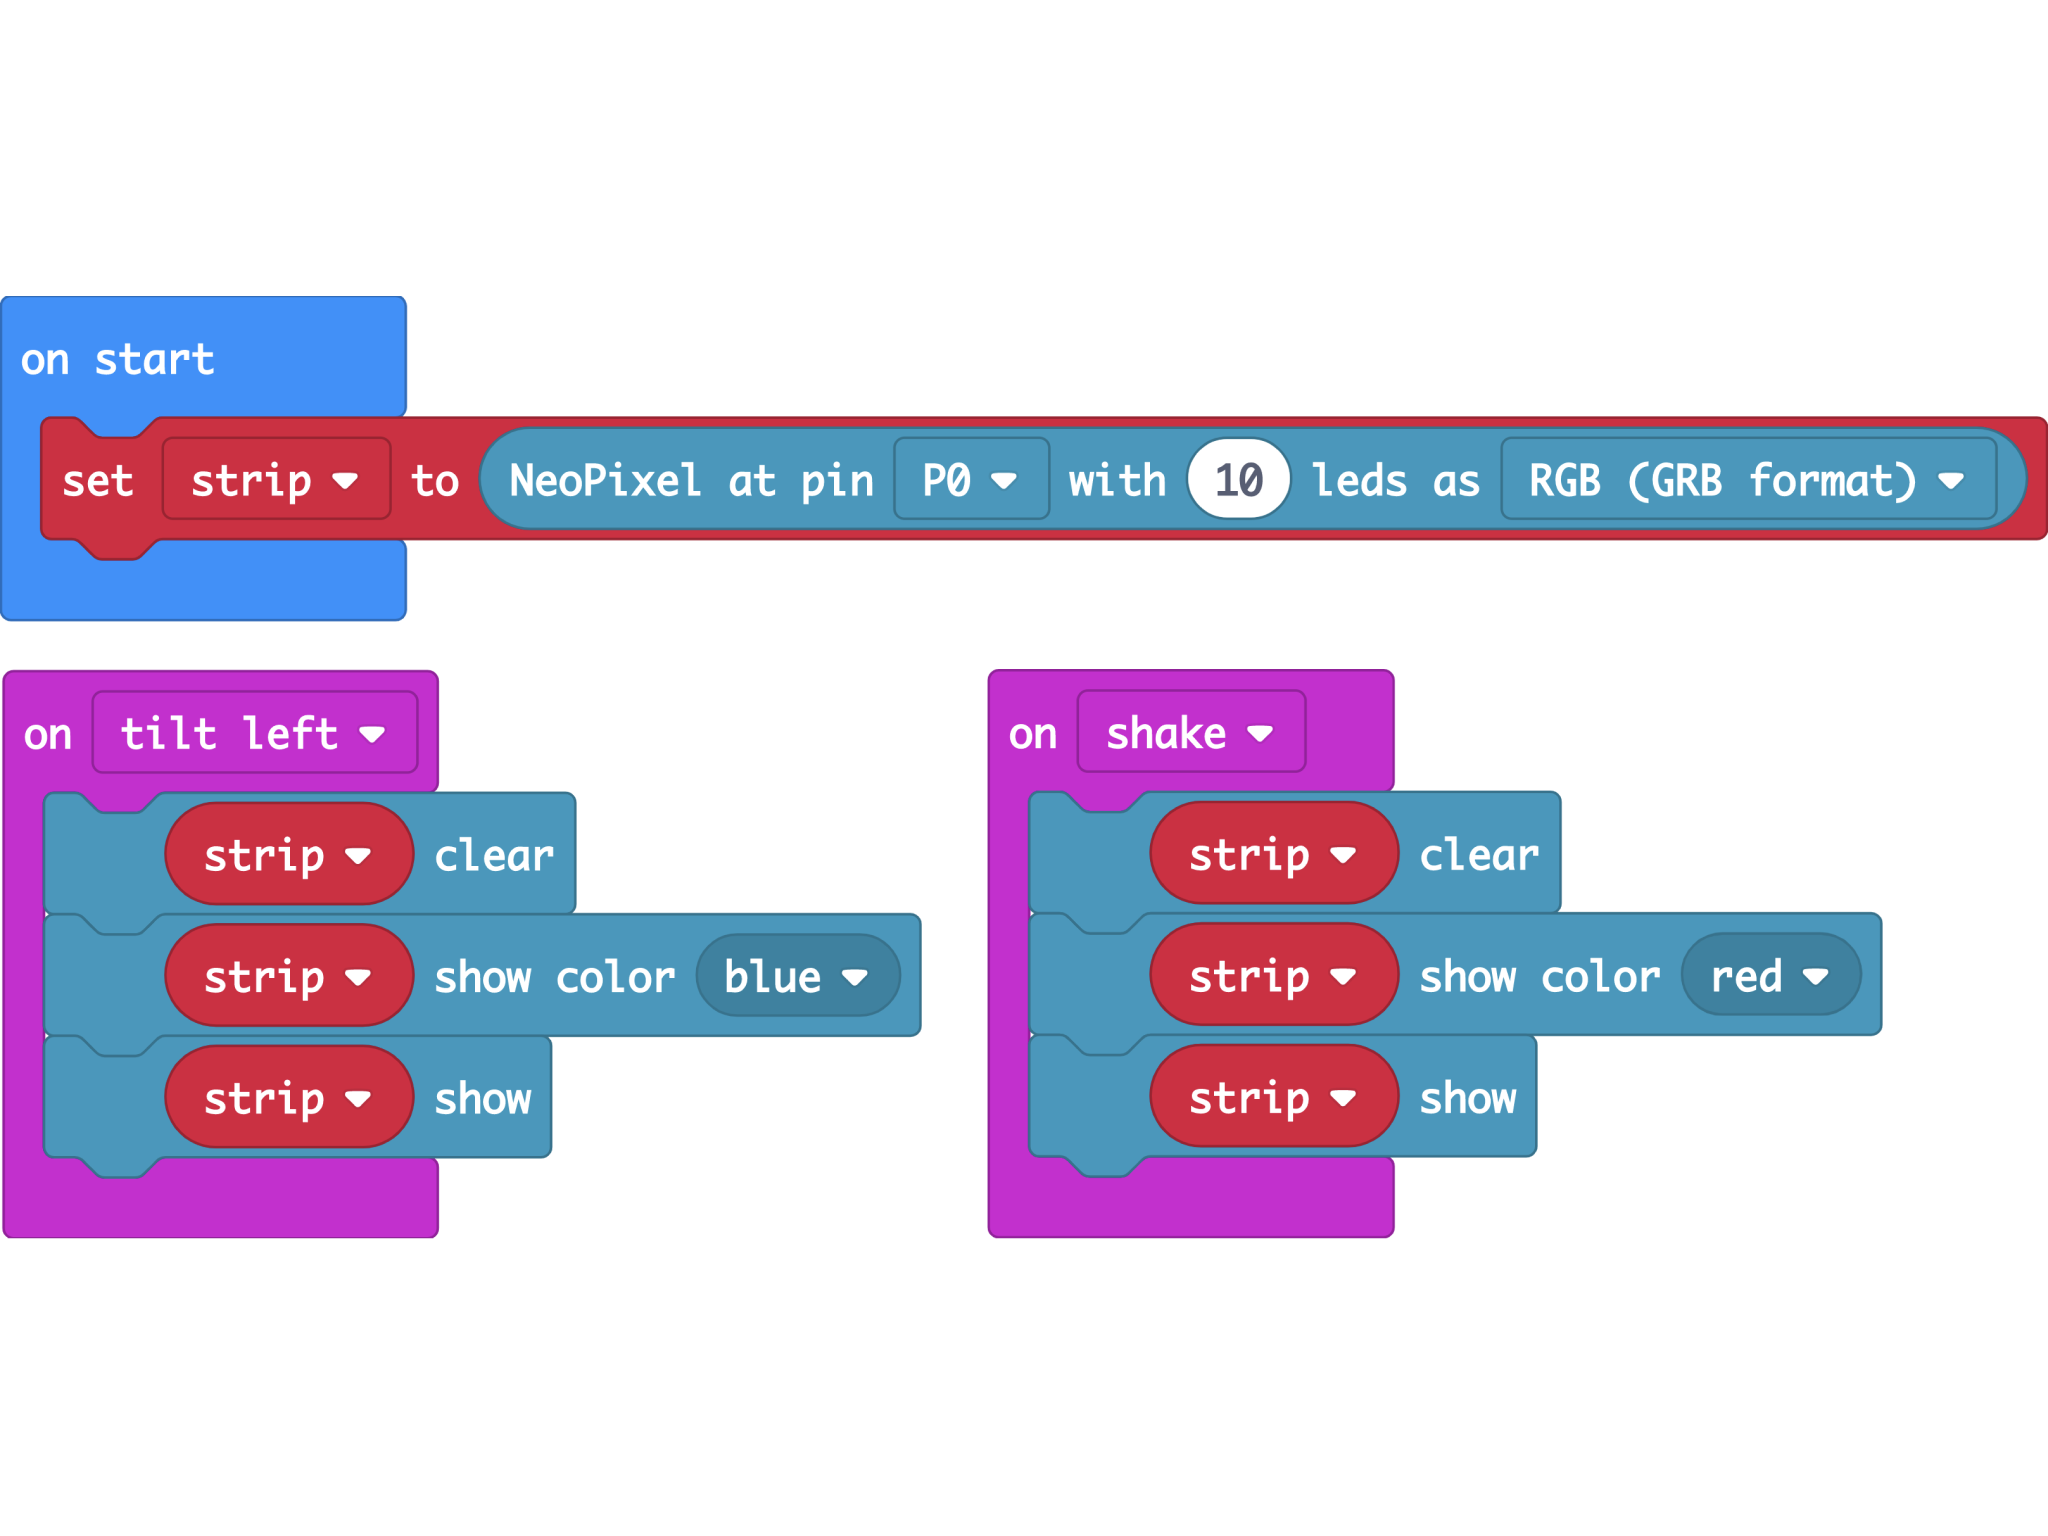
STEP 14
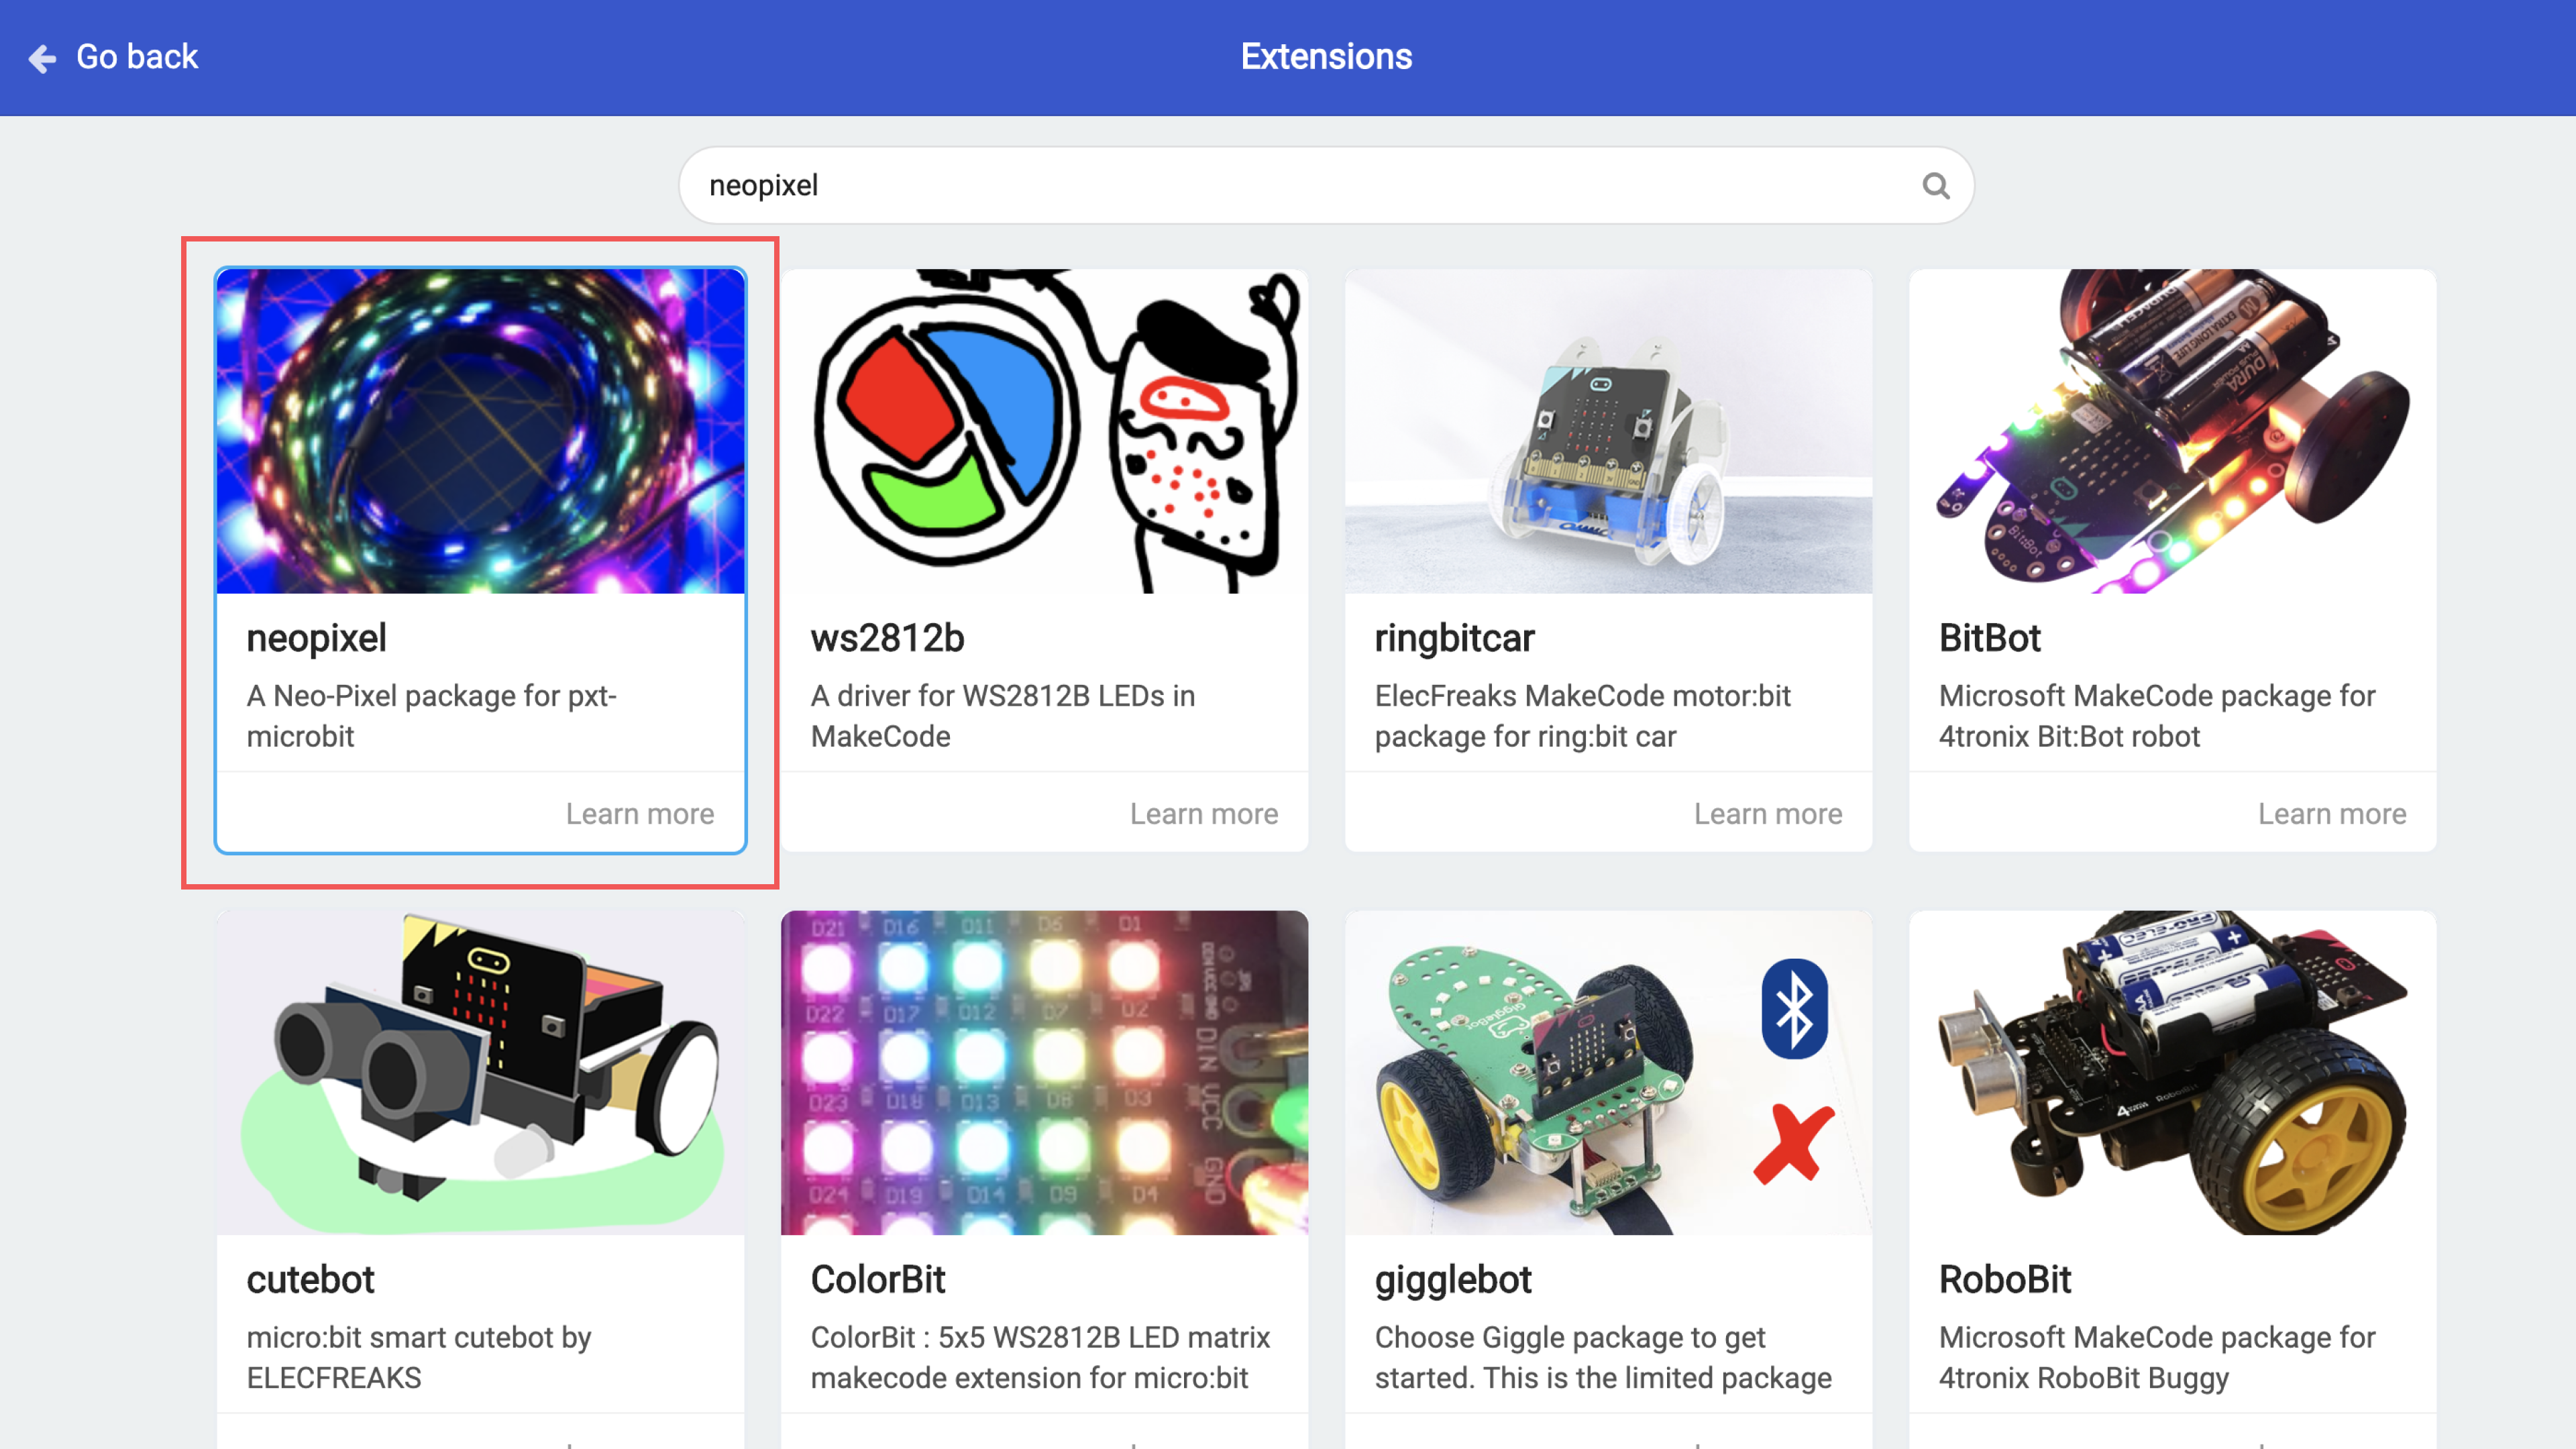
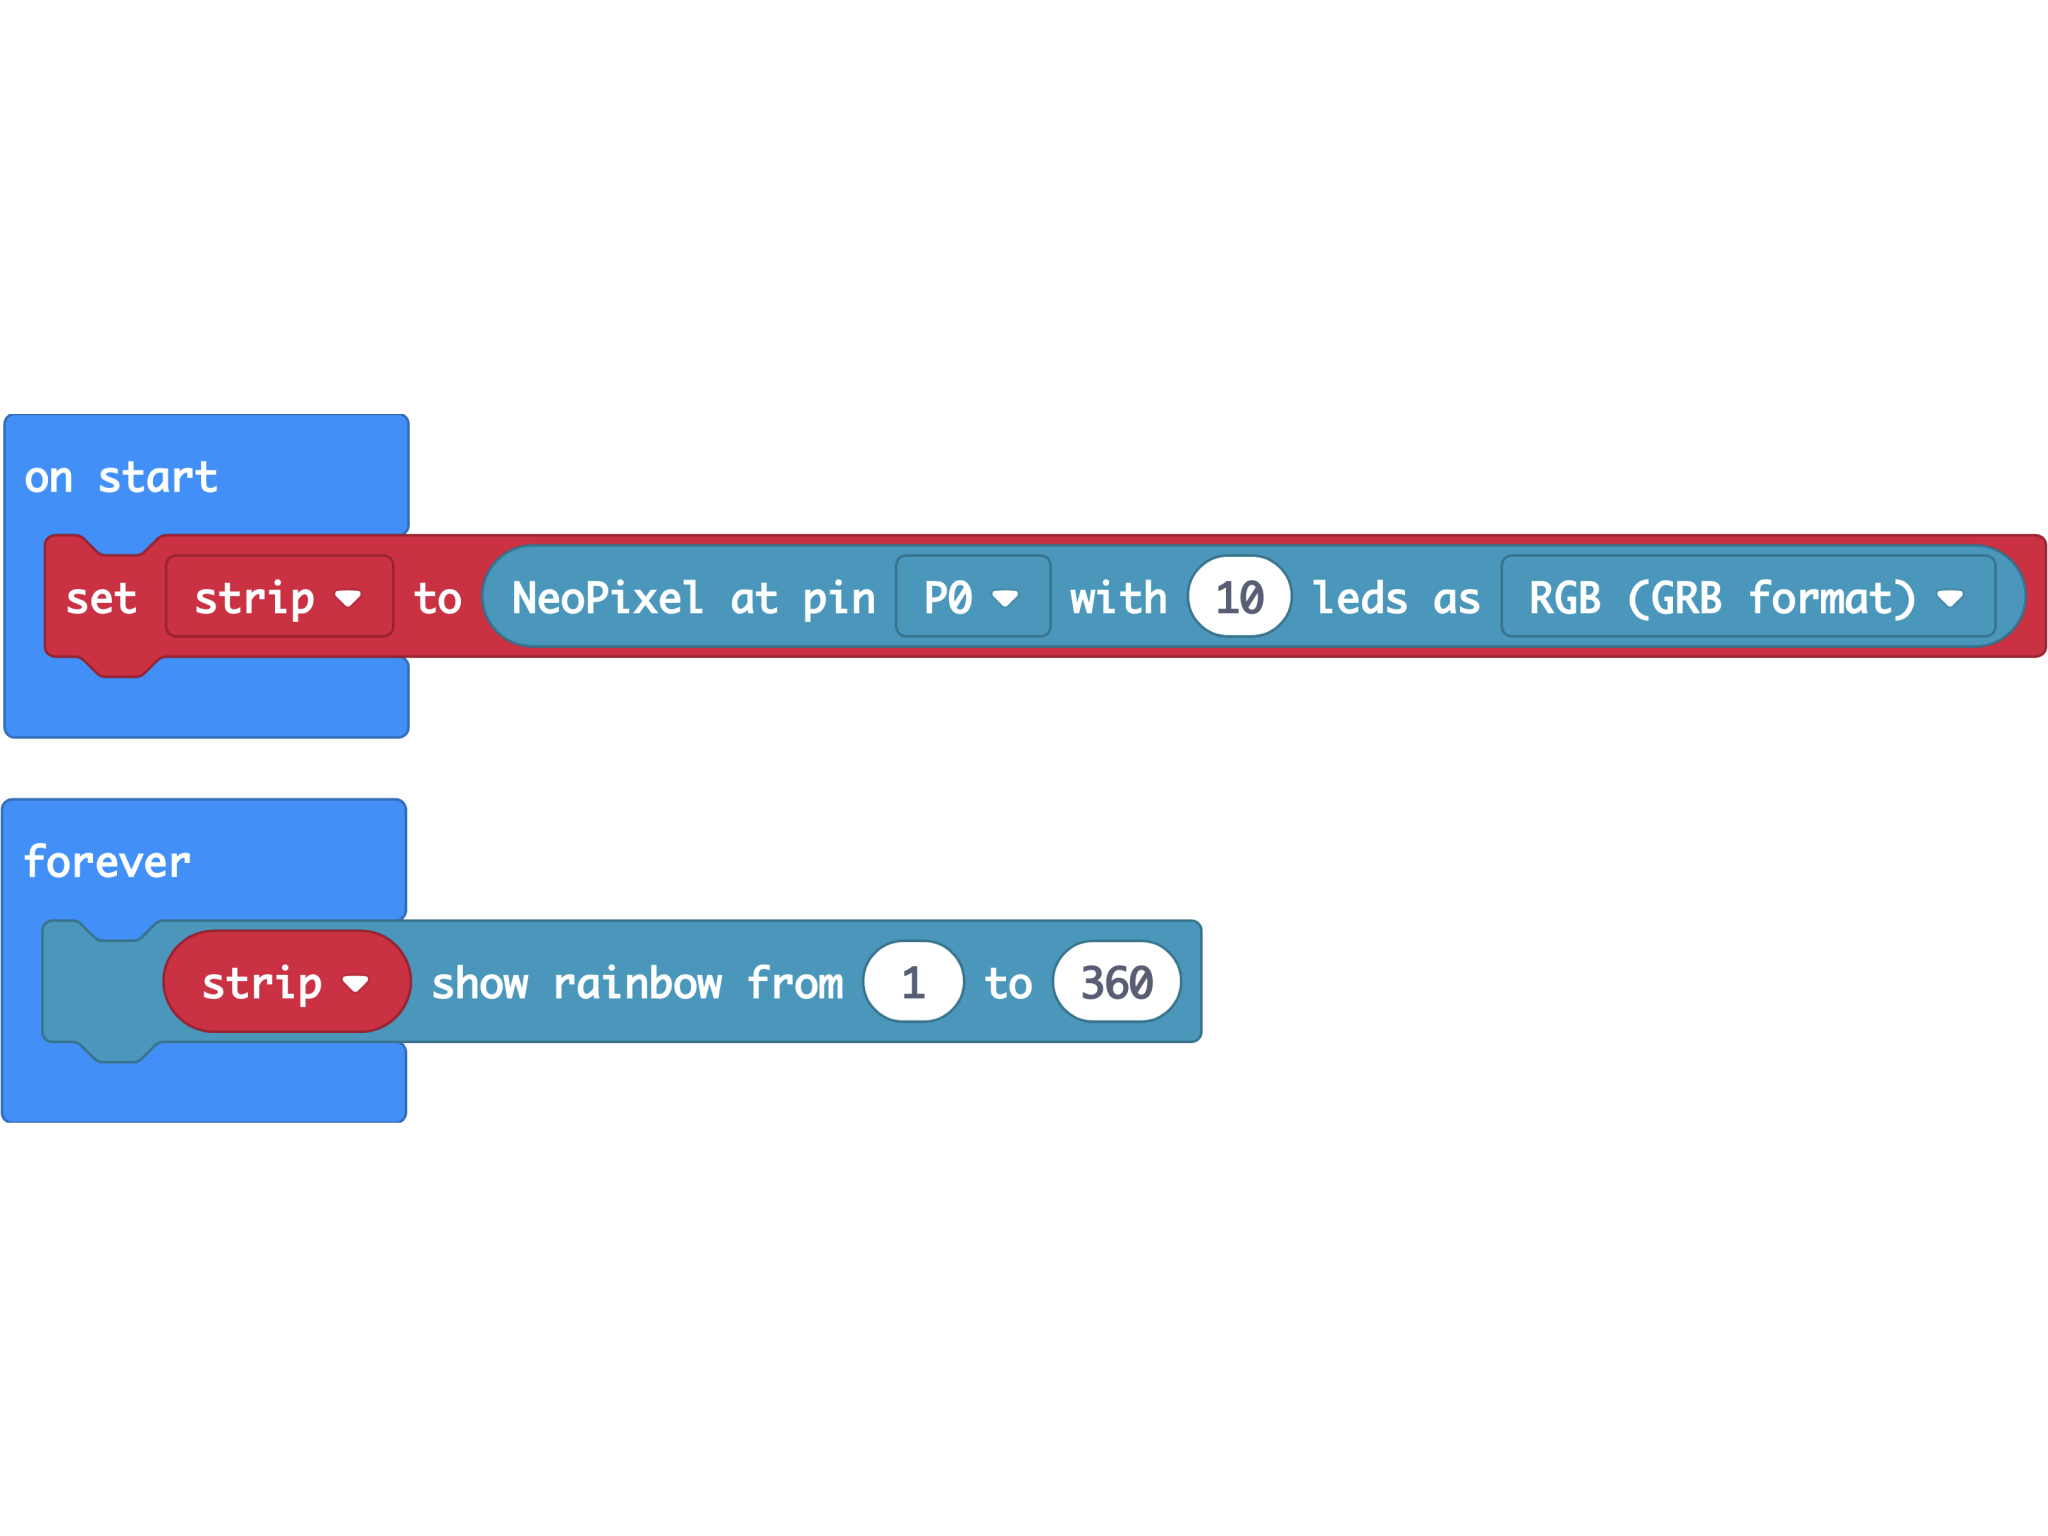
First off, we need to import the blocks for the neopixel light strip. To do so, click on Advanced > Extensions. Type in “neopixel” and select the first search result.
STEP 15
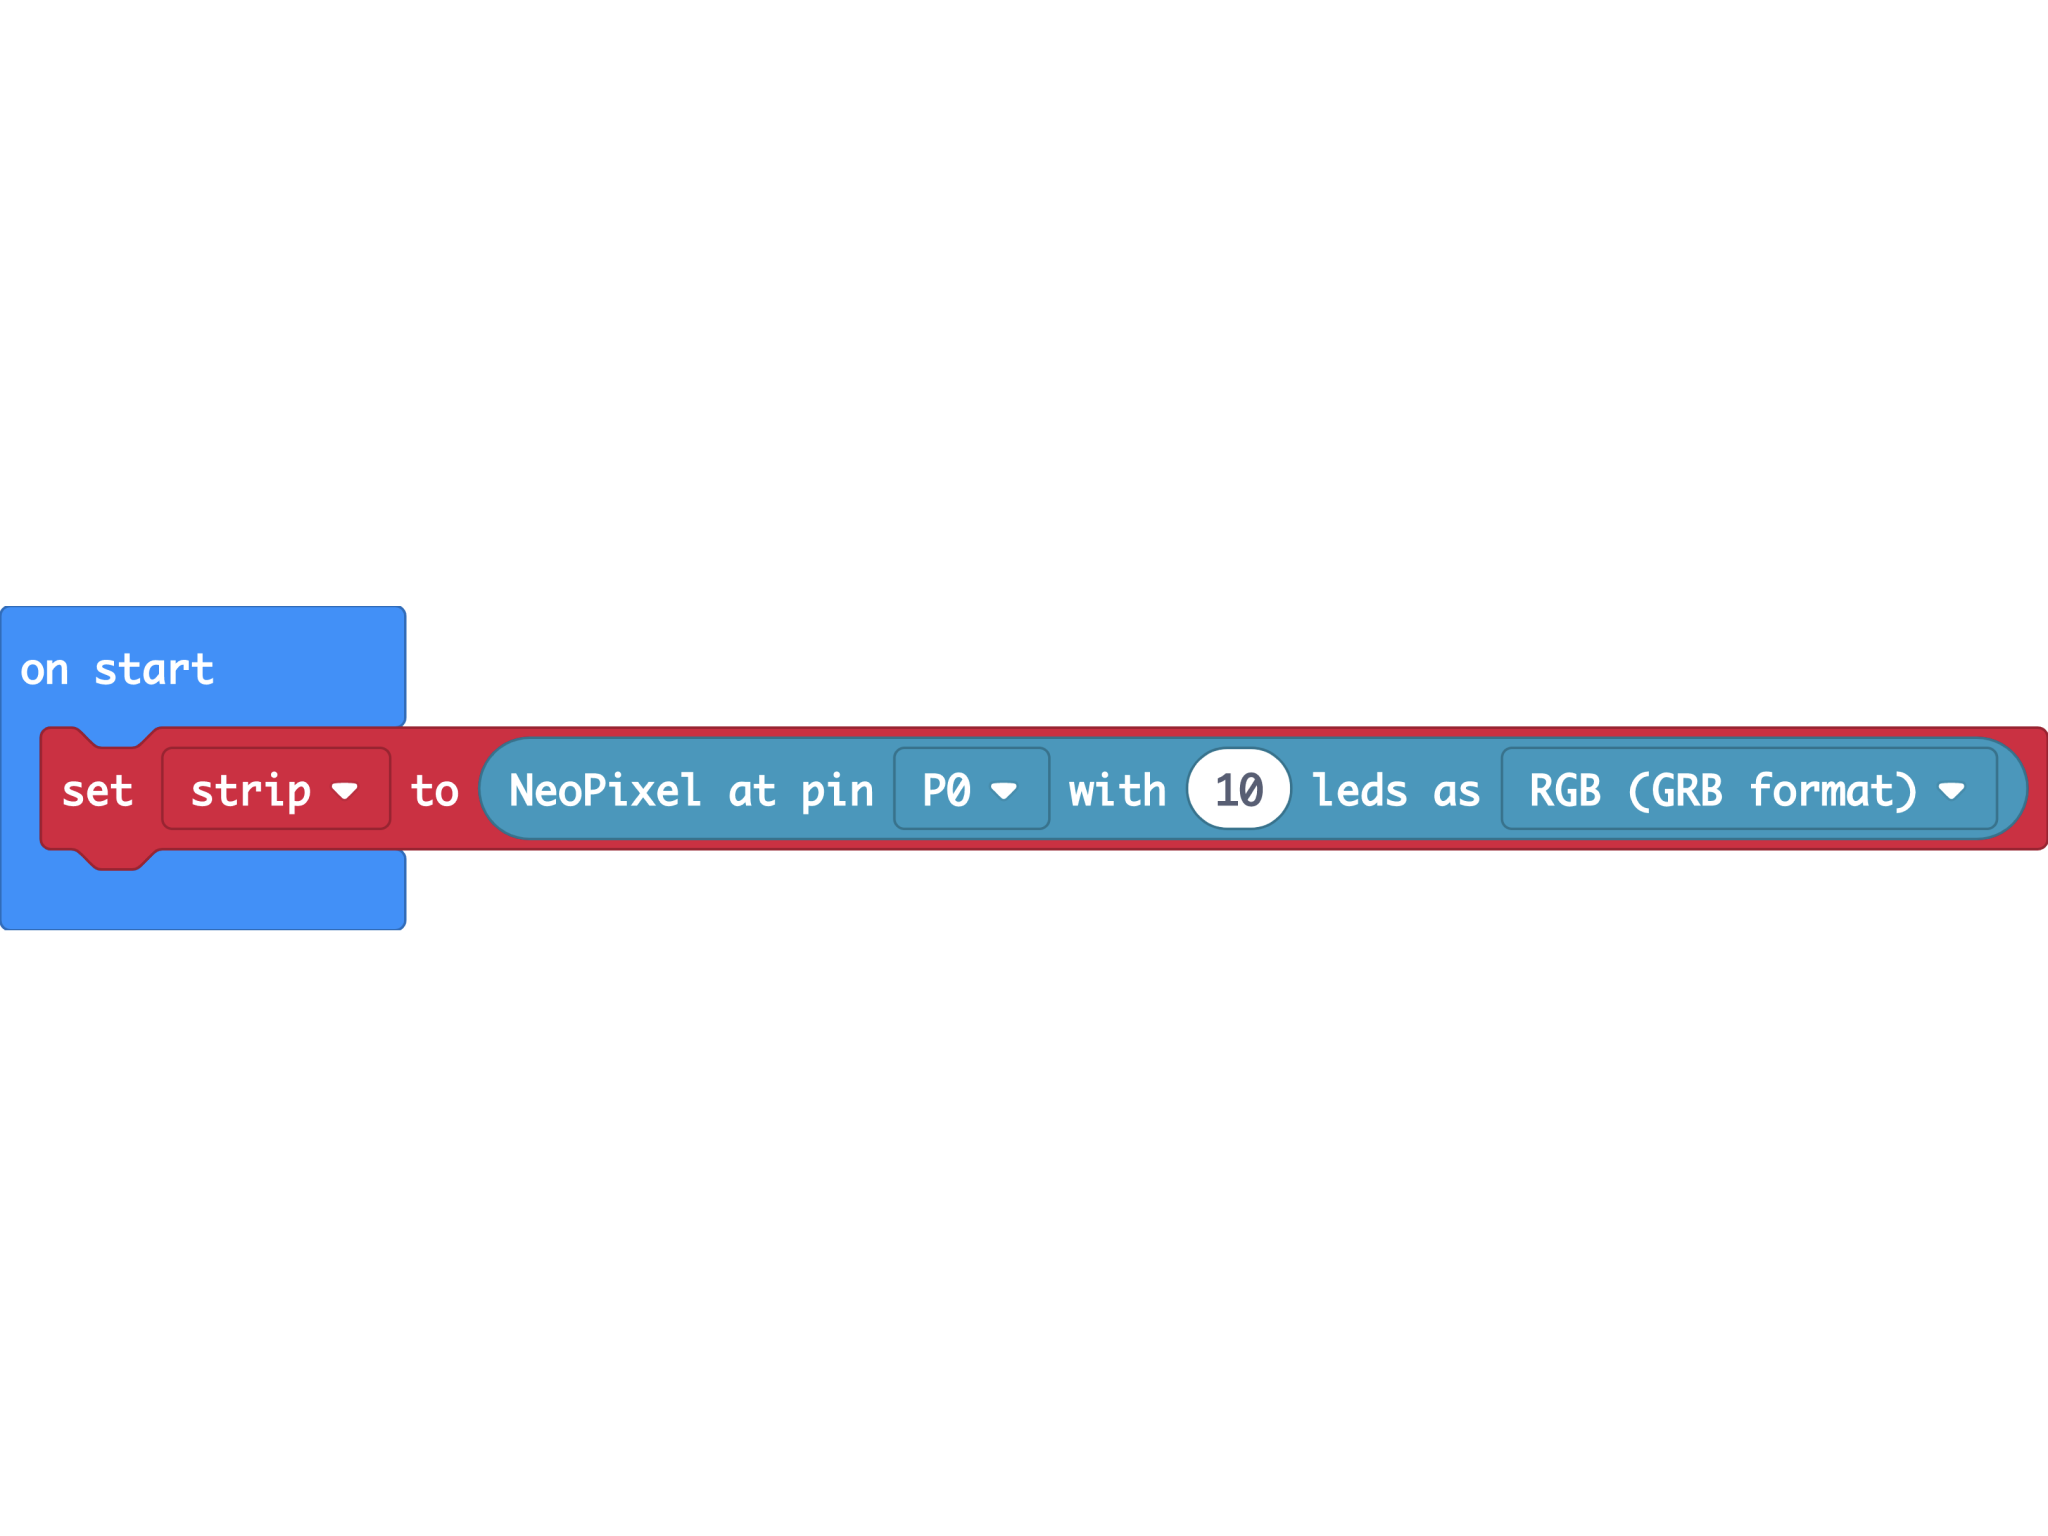
To initialise the light strip, go to the neopixel drawer, drag out a “set strip to neopixel....” block. In the block, we have to make several changes. First, change pin to P0, or to whichever pin you’ve plugged in. Second, replace “change with 24” to “10”.
STEP 16
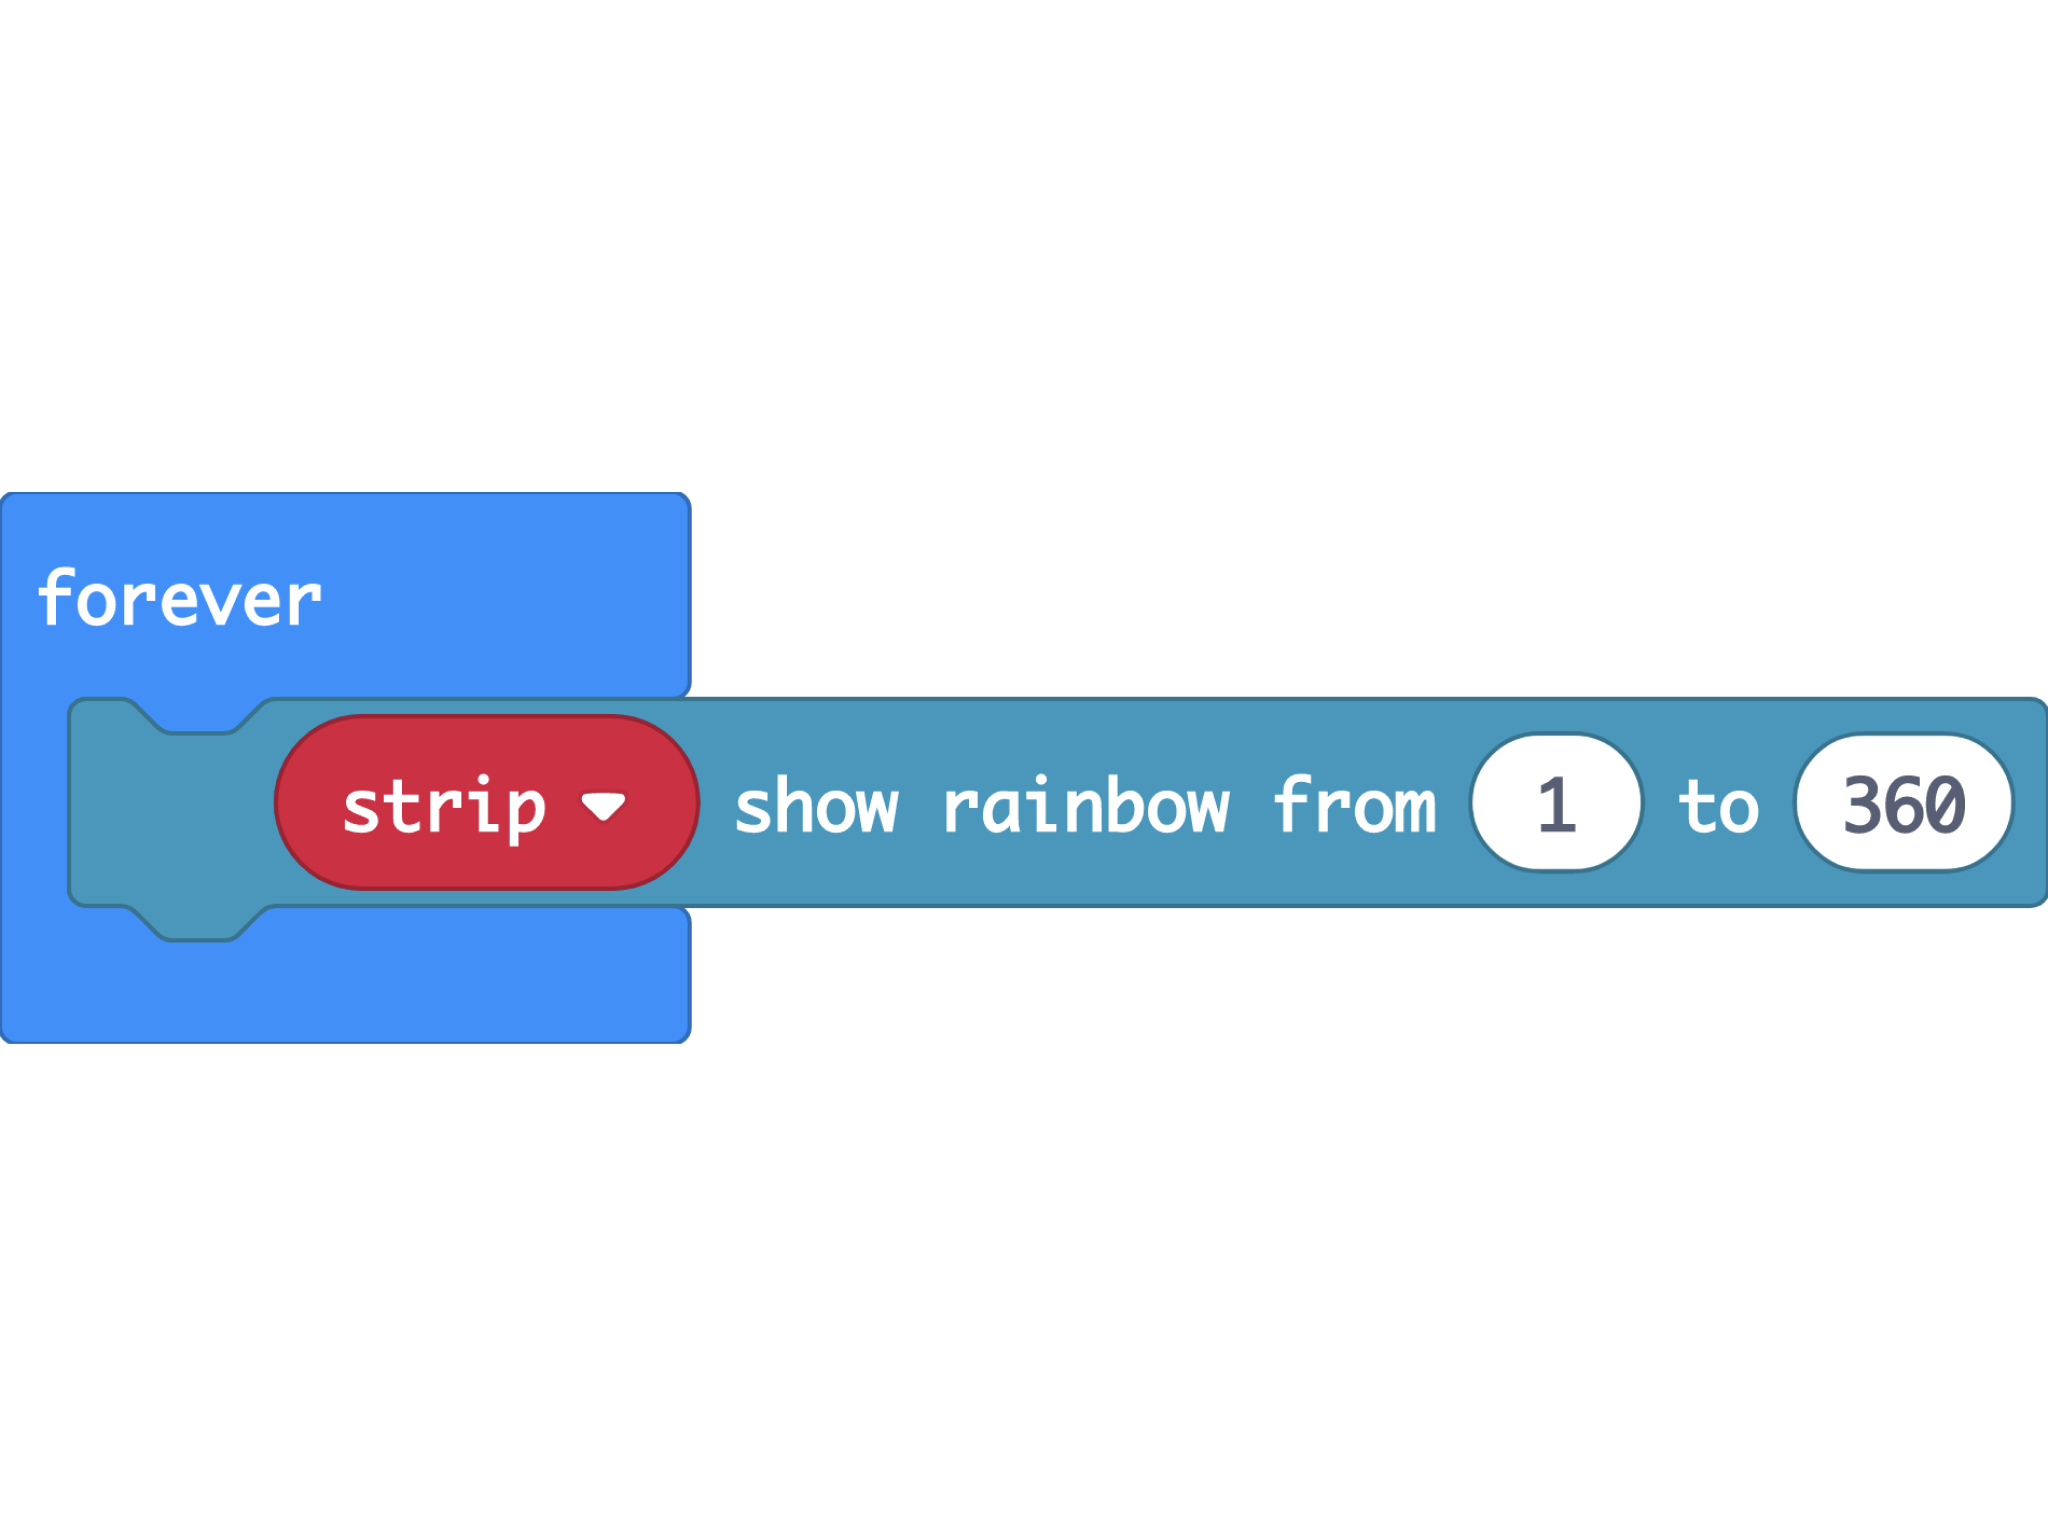
To display rainbow color, from neopixel drawer, drag a 'strip show rainbow...' and place in a forever block.
STEP 17
You are done for this beginner level! Download and see the rainbow lights appearing on your light strip!
STEP 18
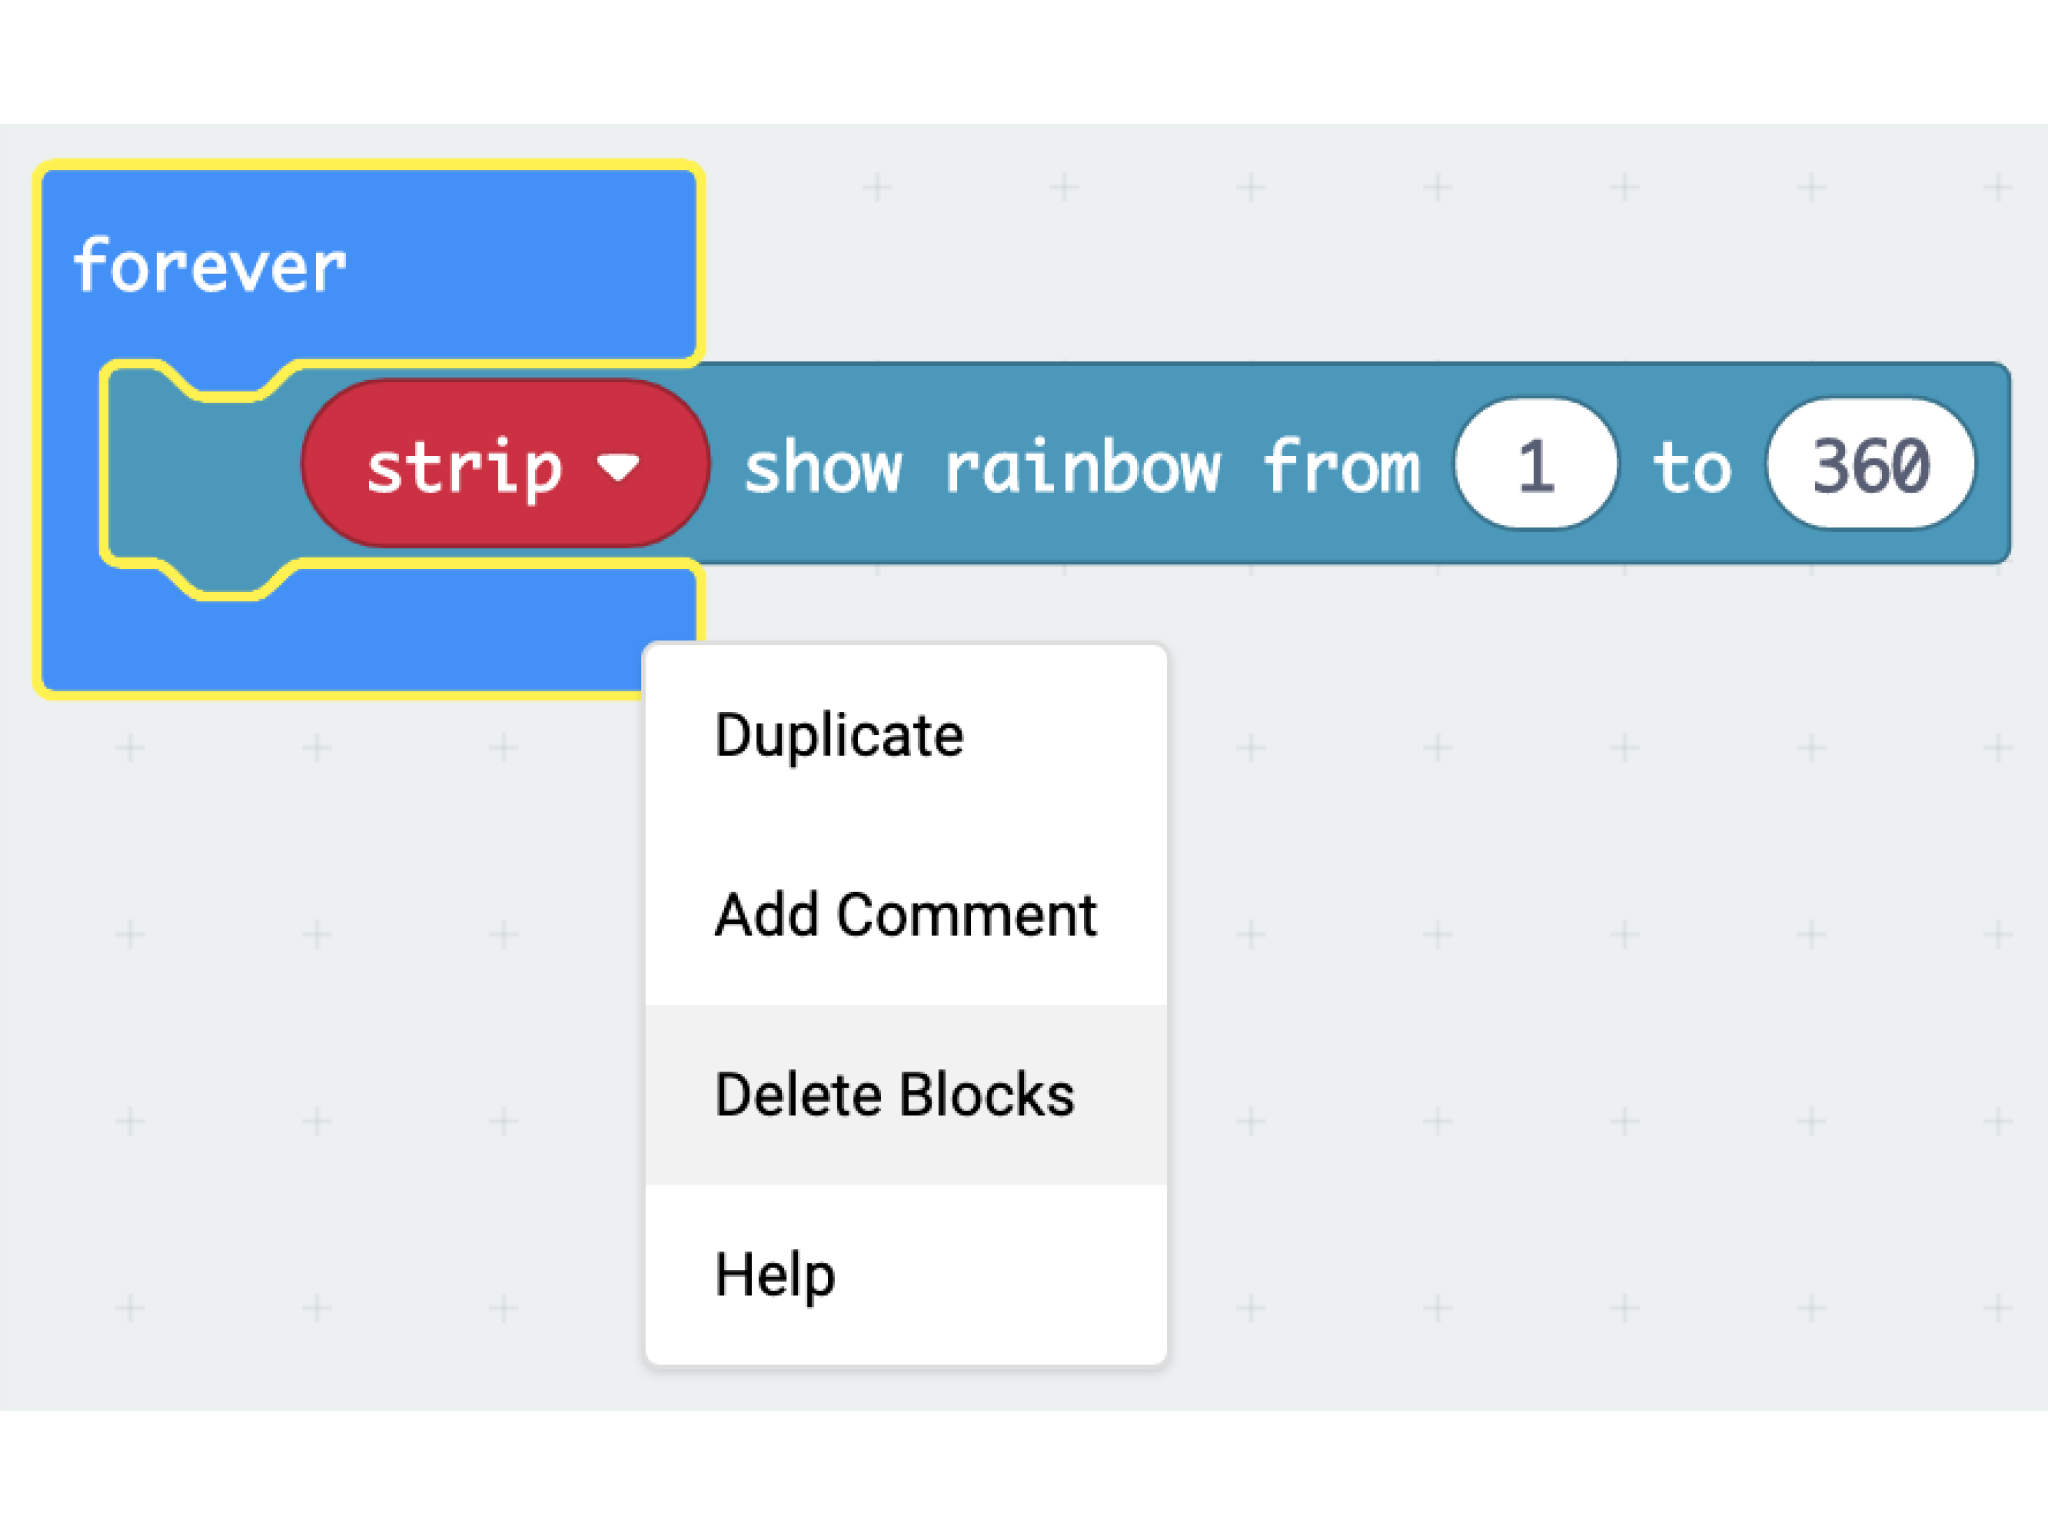
If you are still here, congrats! You’ve successfully displayed rainbow colored lights on the light strip! Now, let’s add code some event handlers to change lights whenever we shake the micro:bit. First off, delete the forever block containing ‘strip show rainbow...’.
STEP 19
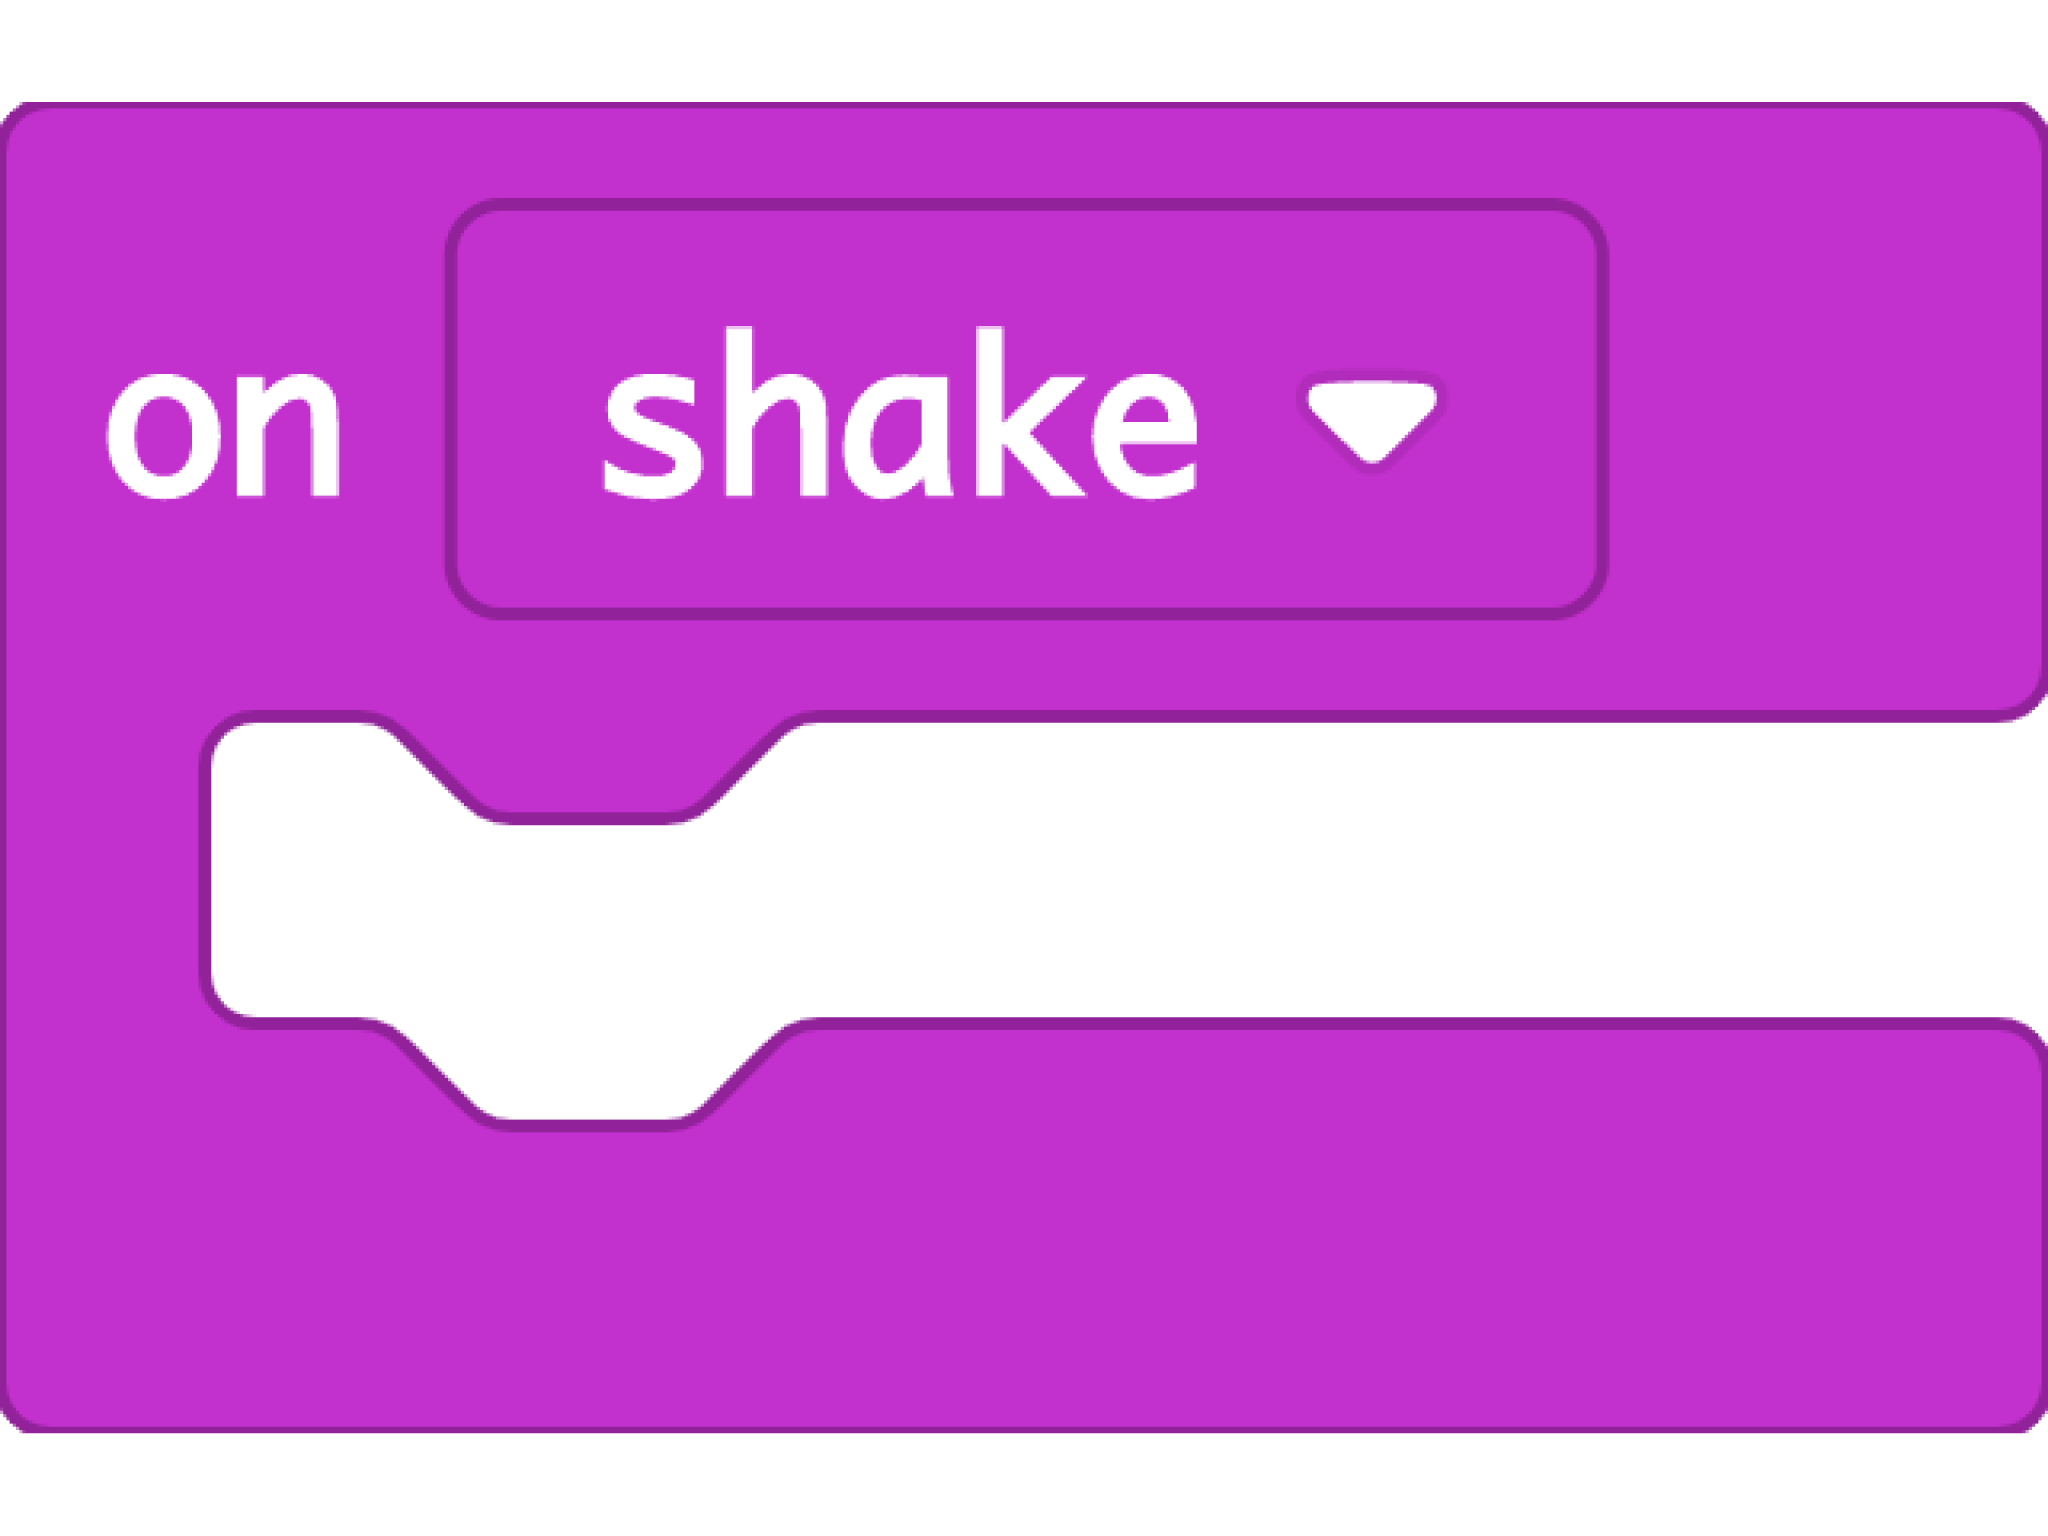
From the input drawer, drag in an “on shake”.
STEP 20
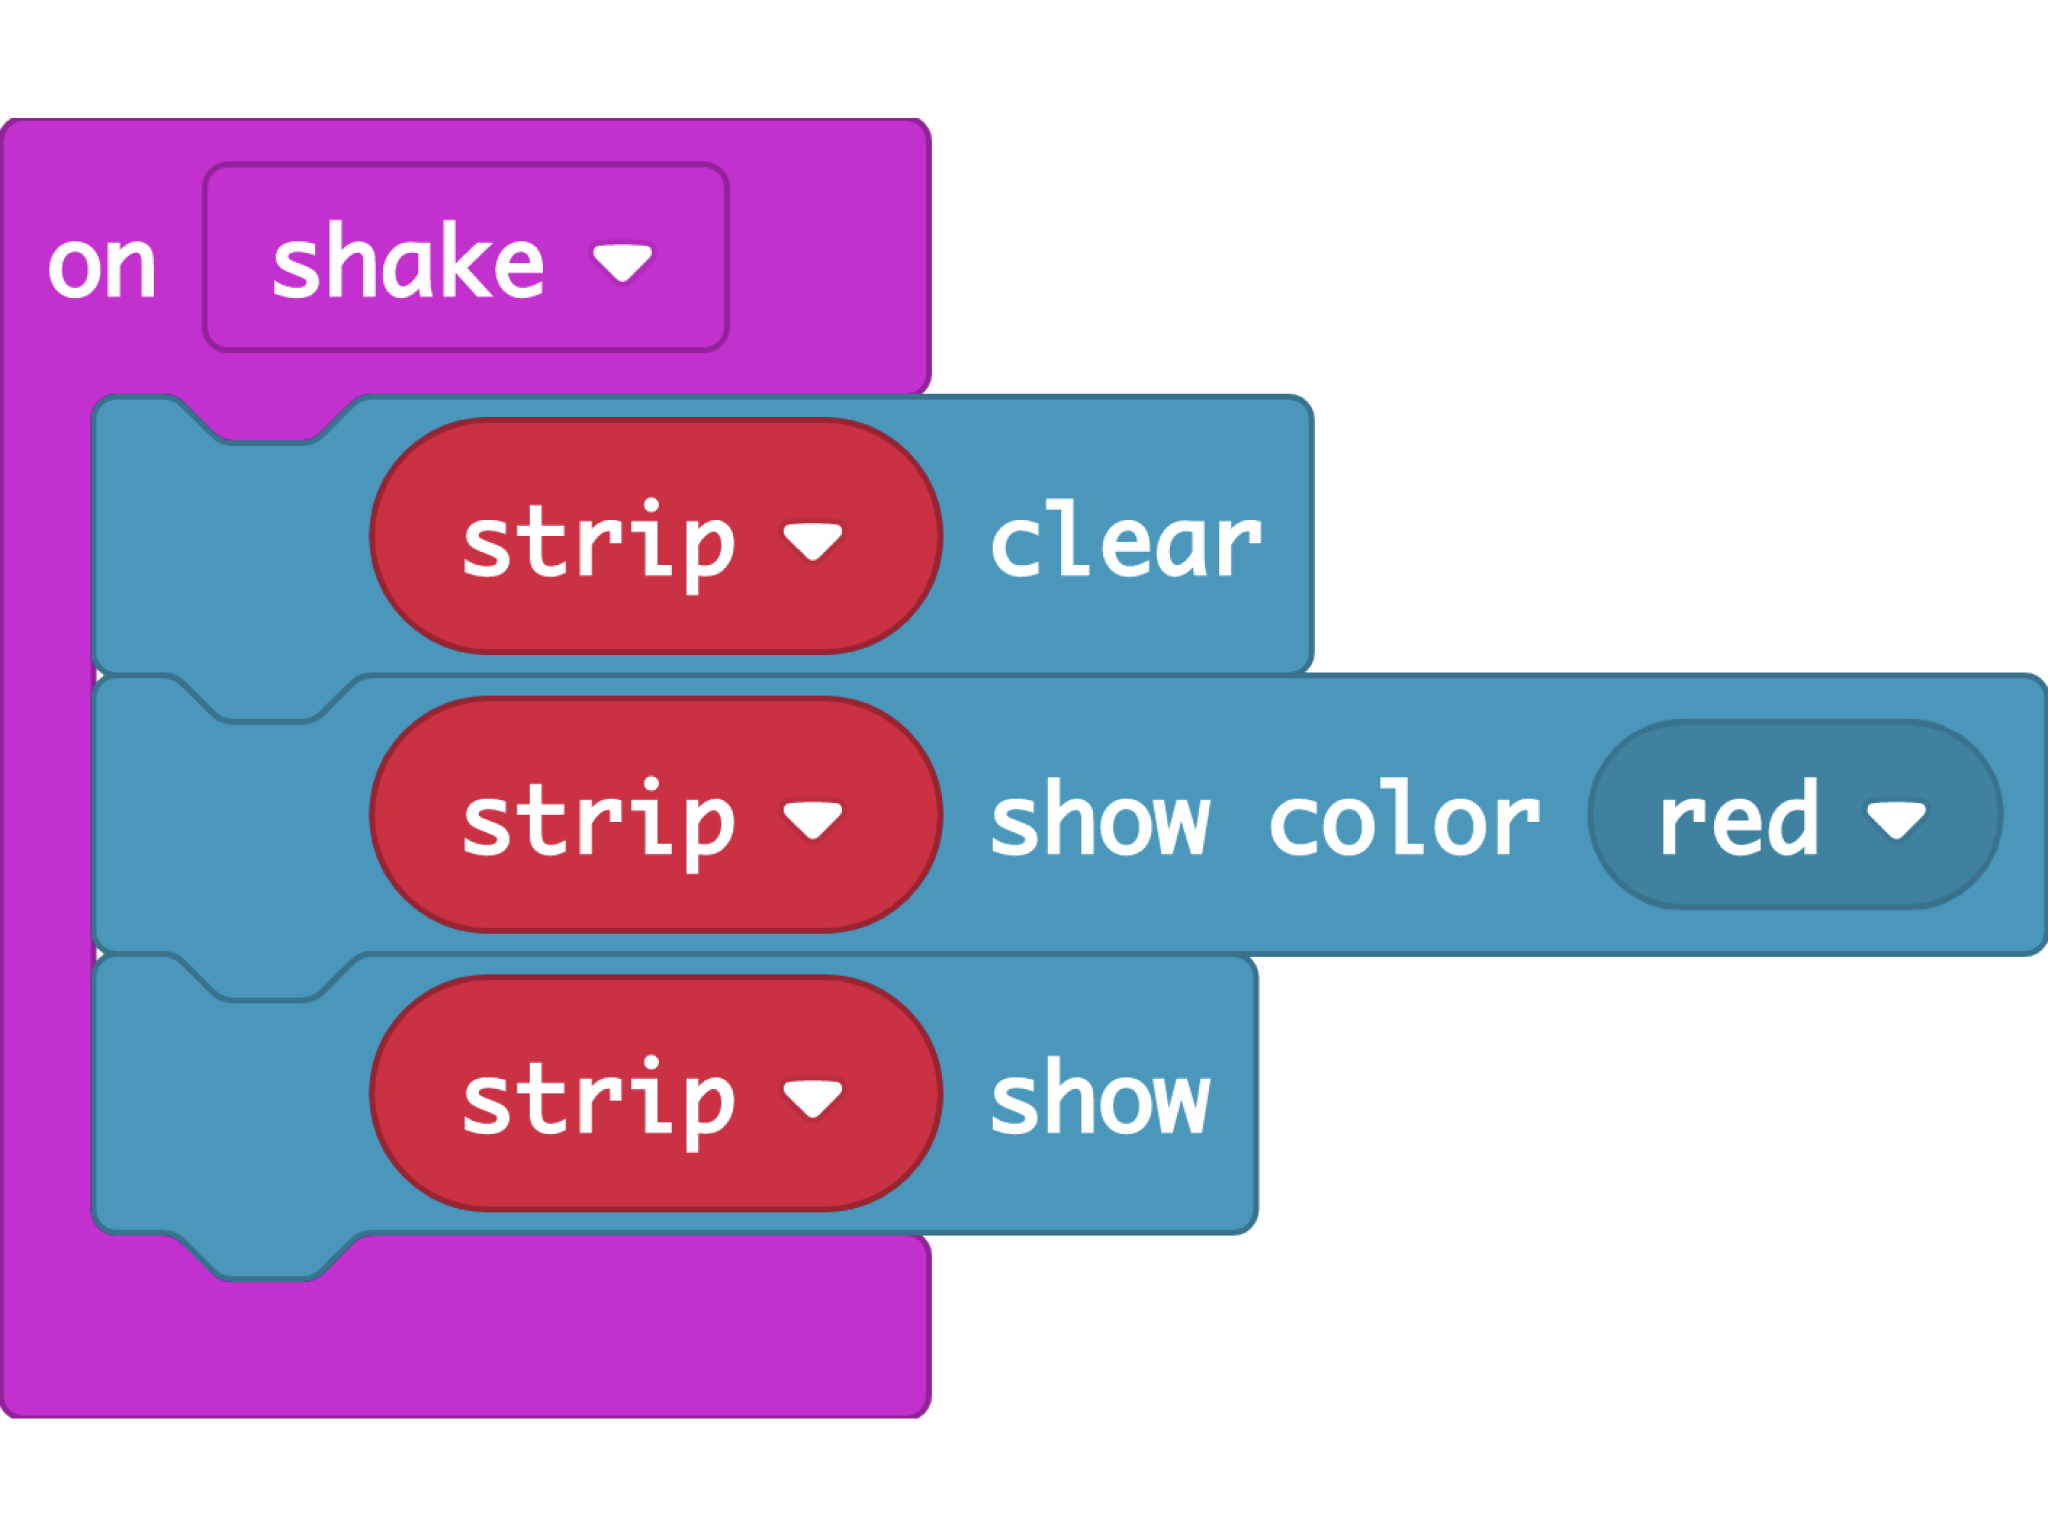
From the neopixel drawer, drag in a 'strip clear' block, 'strip show color...' block and 'strip show' block.
STEP 21
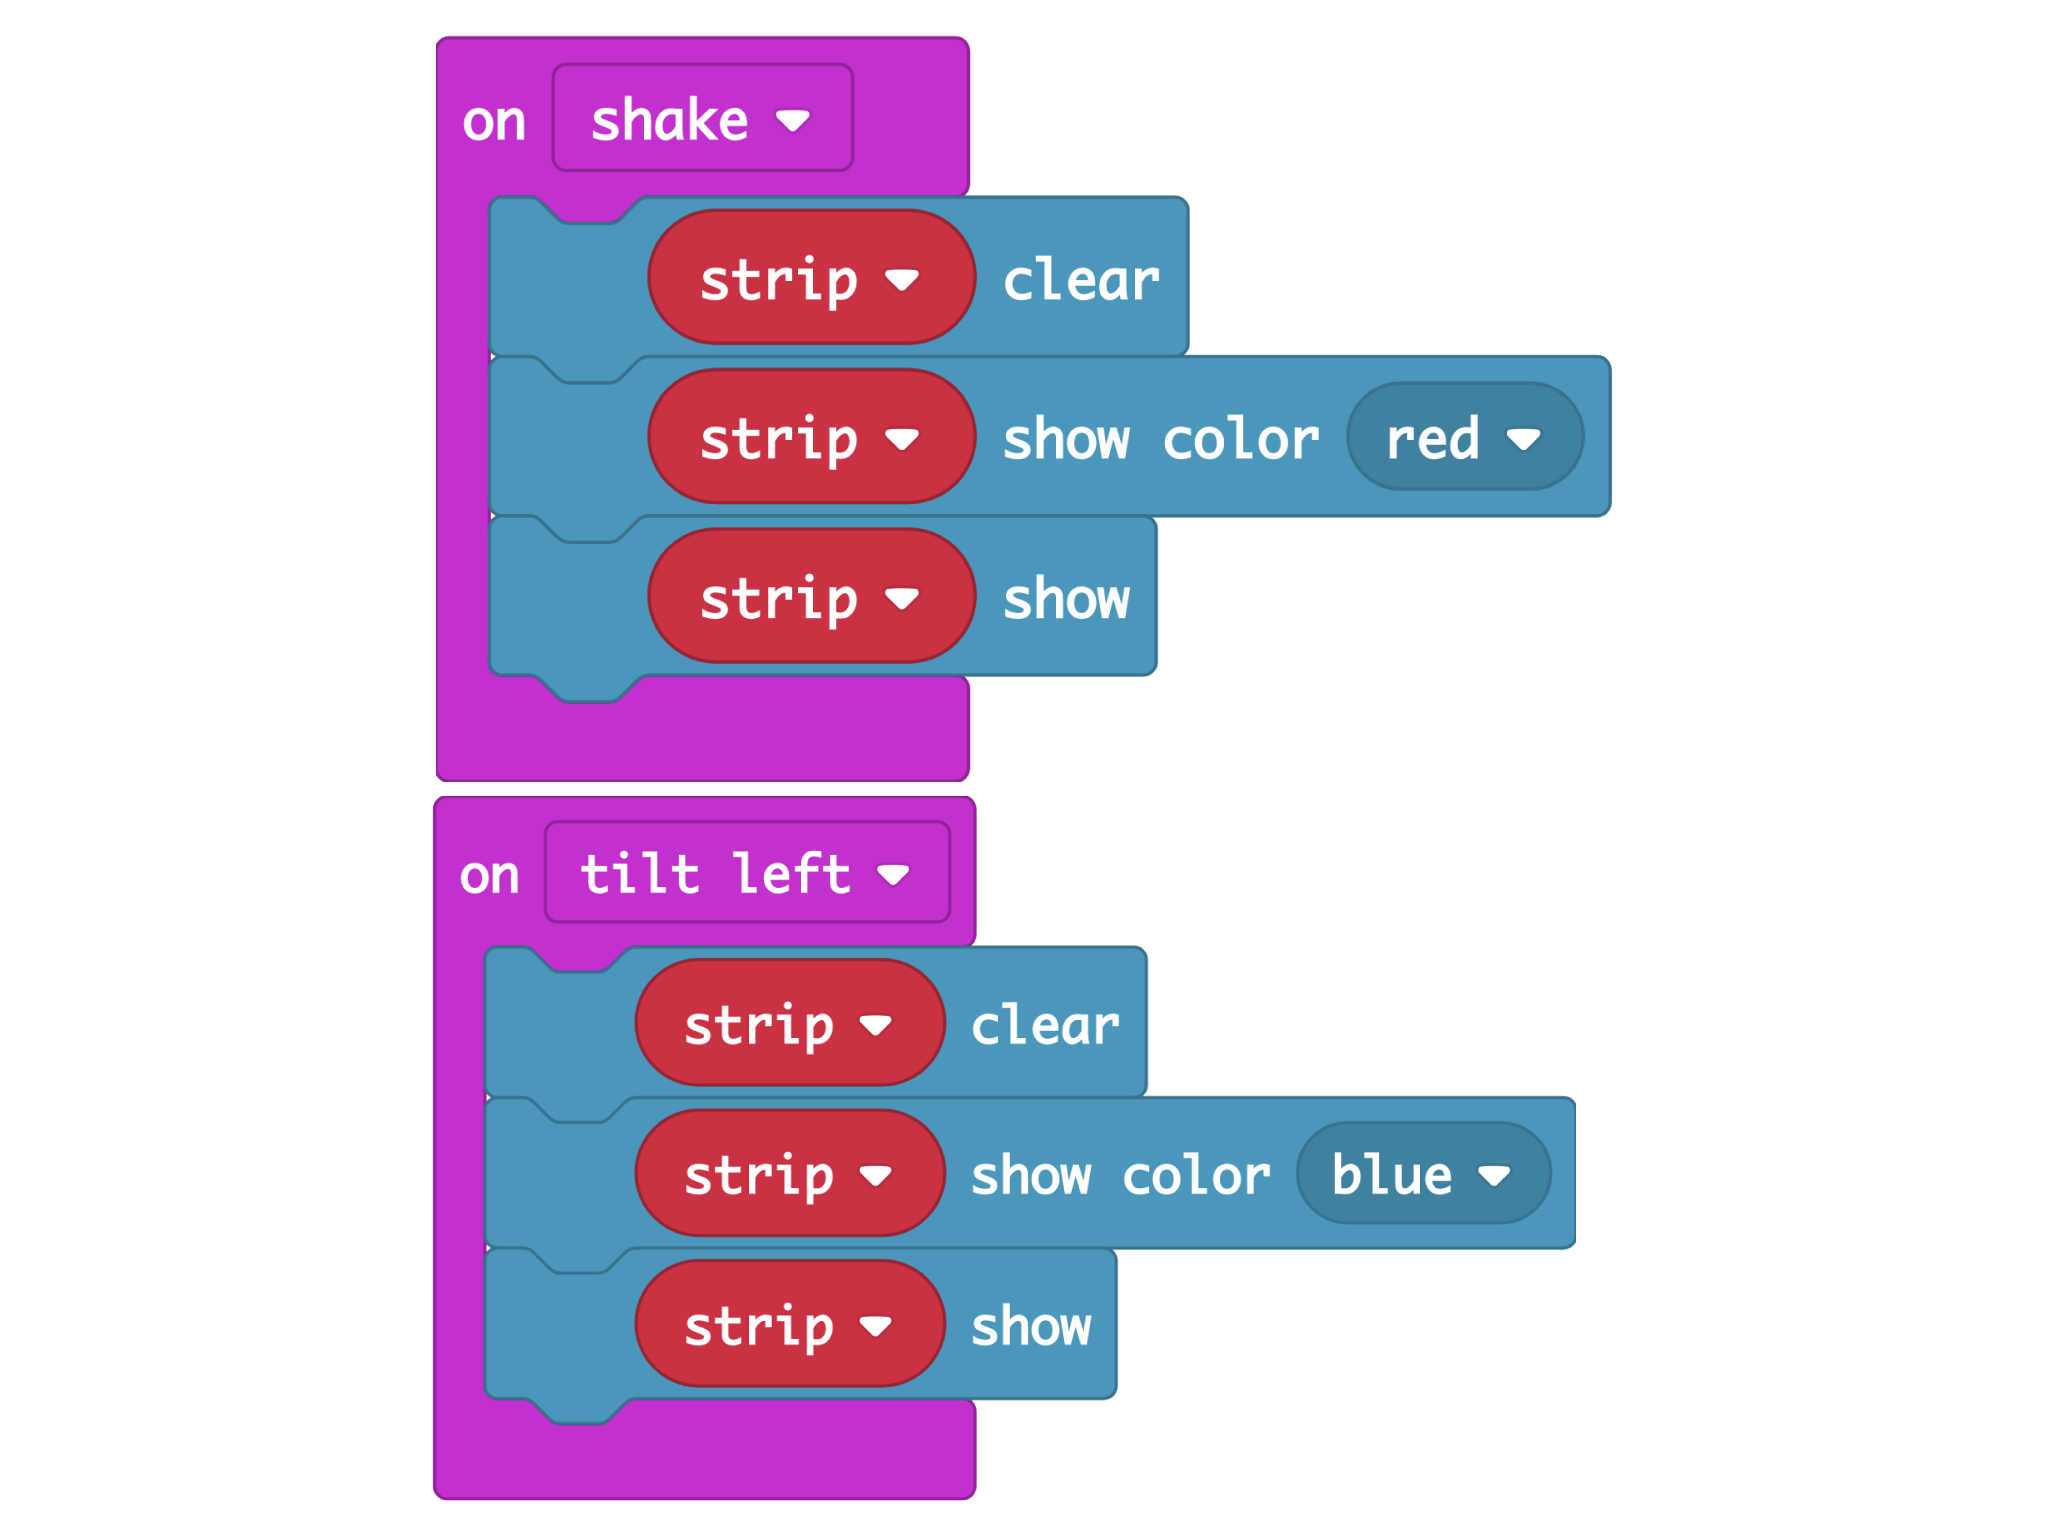
Duplicate the ‘on shake’ block and change the gesture to ‘tilt left’ and change ‘show color’ option to a different one.
STEP 22
Now, you are done with the intermediate level! Download the code and shake away!
STEP 23
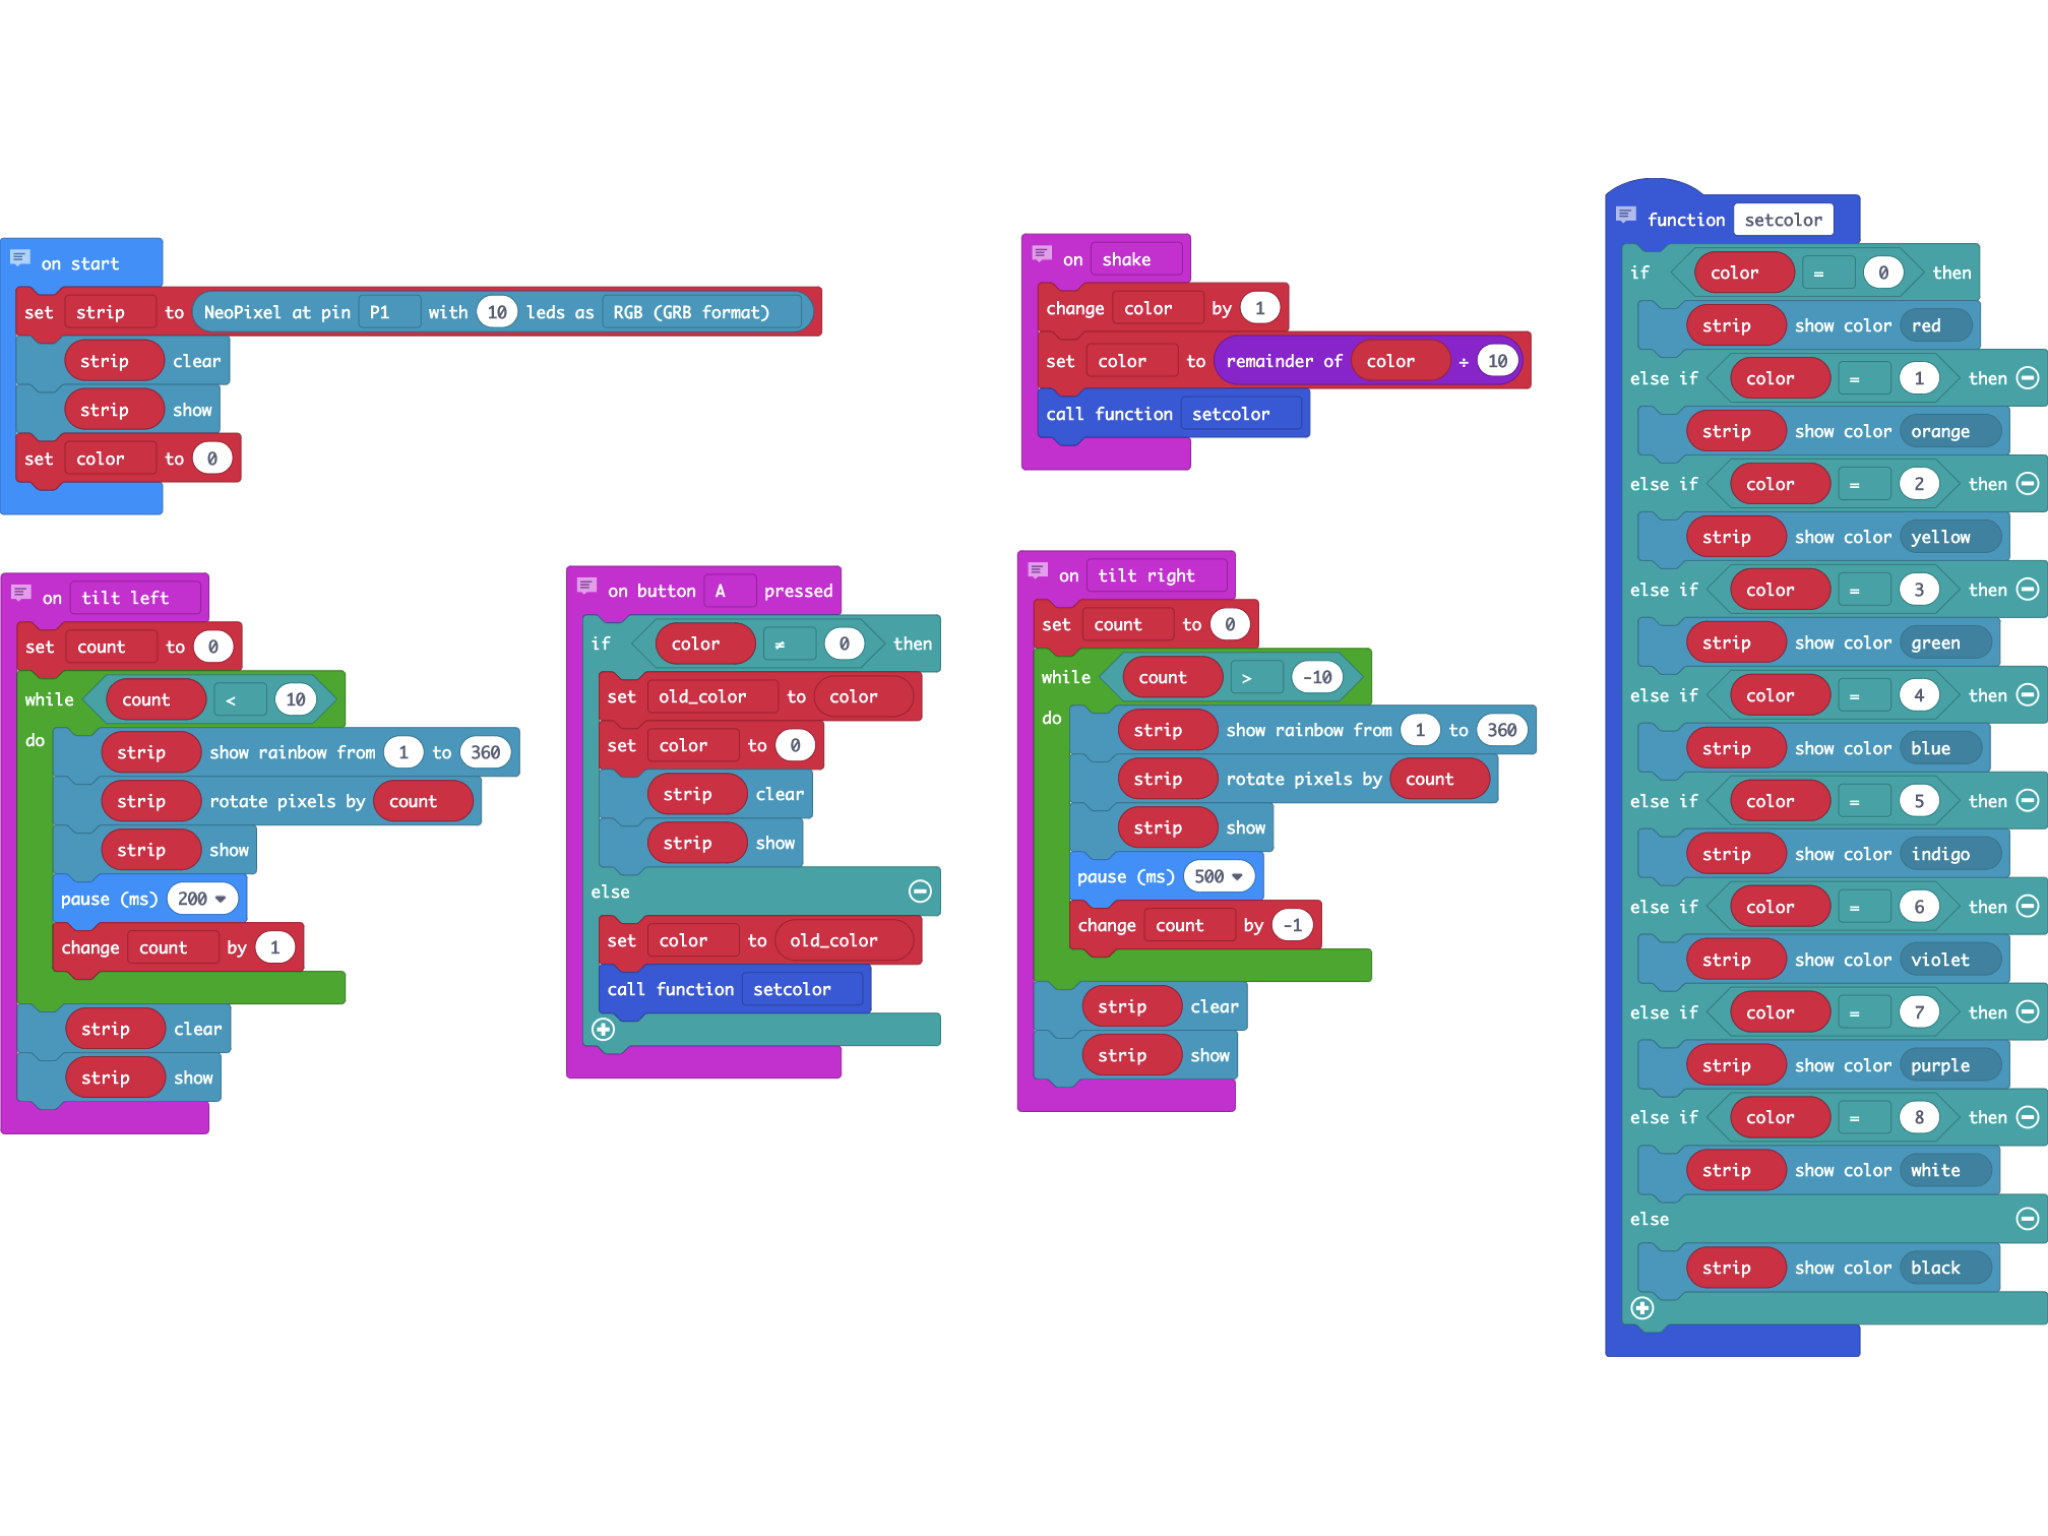
Ready for more advanced stuff? Head over to tk.sg/bbb now!
Code and References
Made this activity? Good Job! Now spread the word. Share a photo of your creation on social media with #letsgethacking #BlingBlingBracelet