Cardboard Car
When you think of motors, you’ll likely think of the motor…car! In this project, we’ll make a fun cardboard car, and say “stick” a lot.
YOU WILL NEED
Electronics
• BBC Micro:bit
• Motor:bit
• battery pack (6V-12V)
• 2 x DC gear (“TT") motors
• 4 x big wheels
• 4 x M-M jumper wires
Craft materials
• Cardboard
• Small skewer stick
Stationery
• Small flat head screwdriver
• Tape
STEP 1
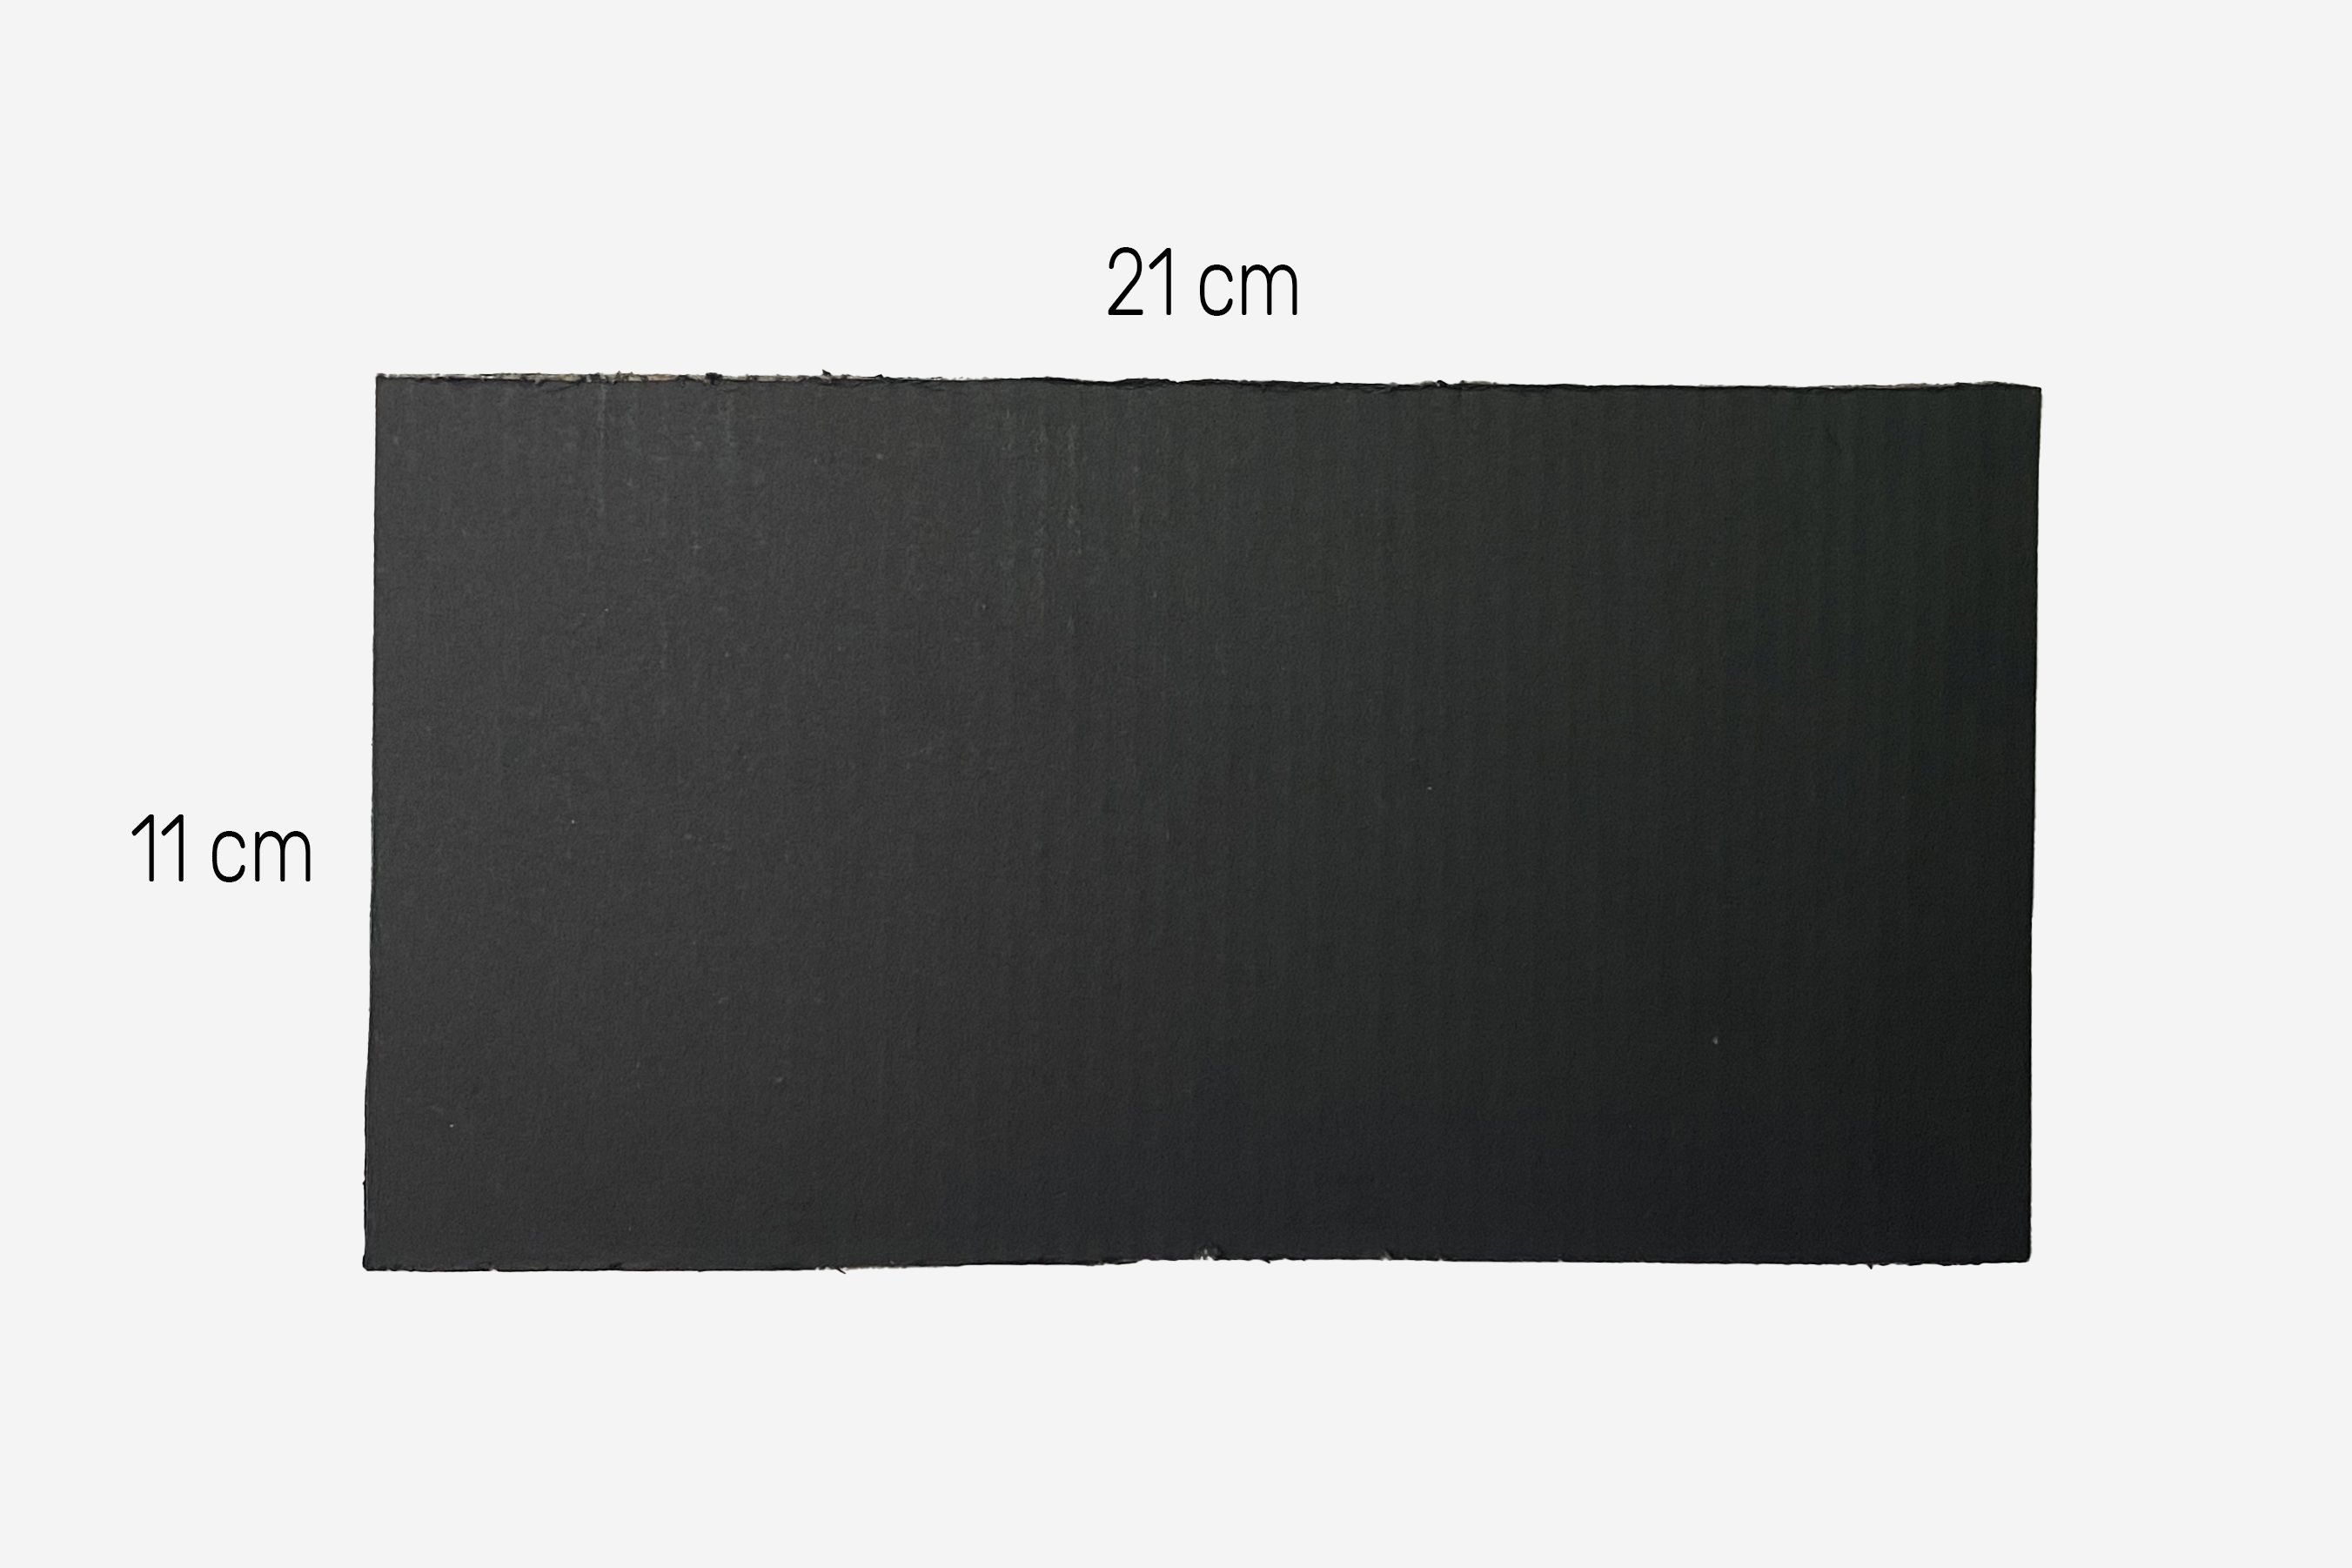
Cut your car-dboard
To start, we cut out out 3 pieces of 21cm by 11cm cardboard. These will form the base and sides of the car.
STEP 2
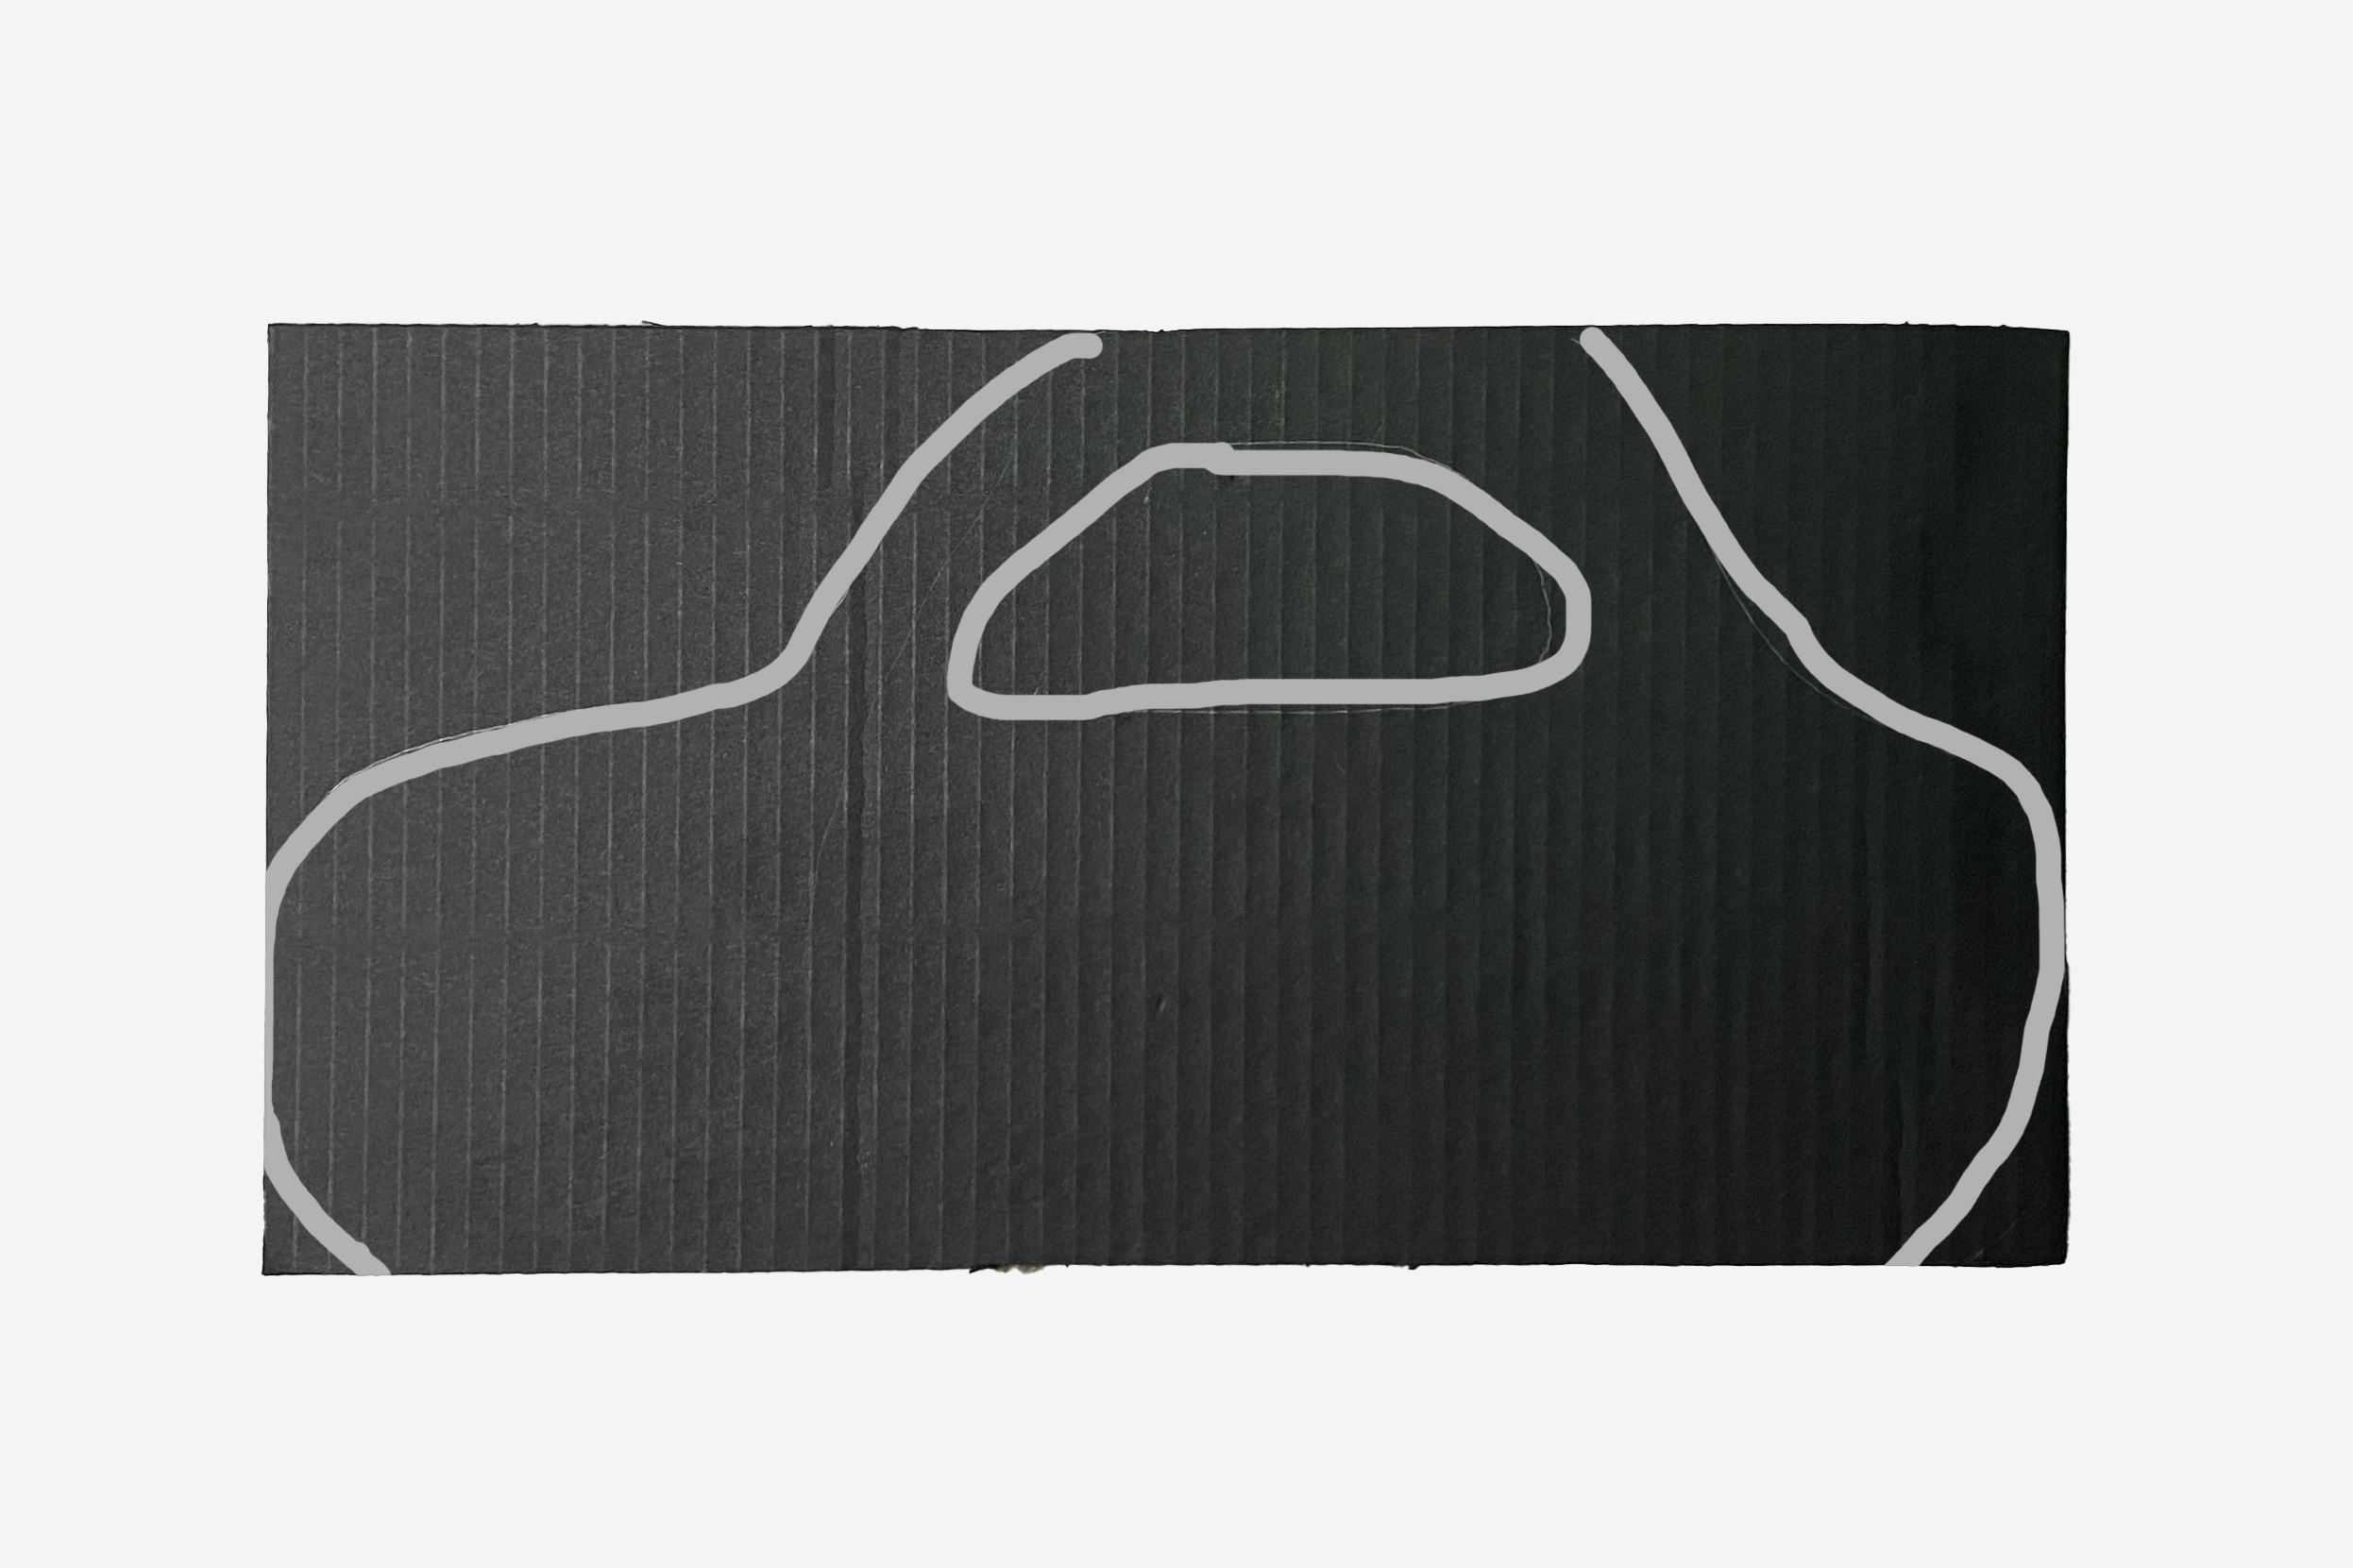
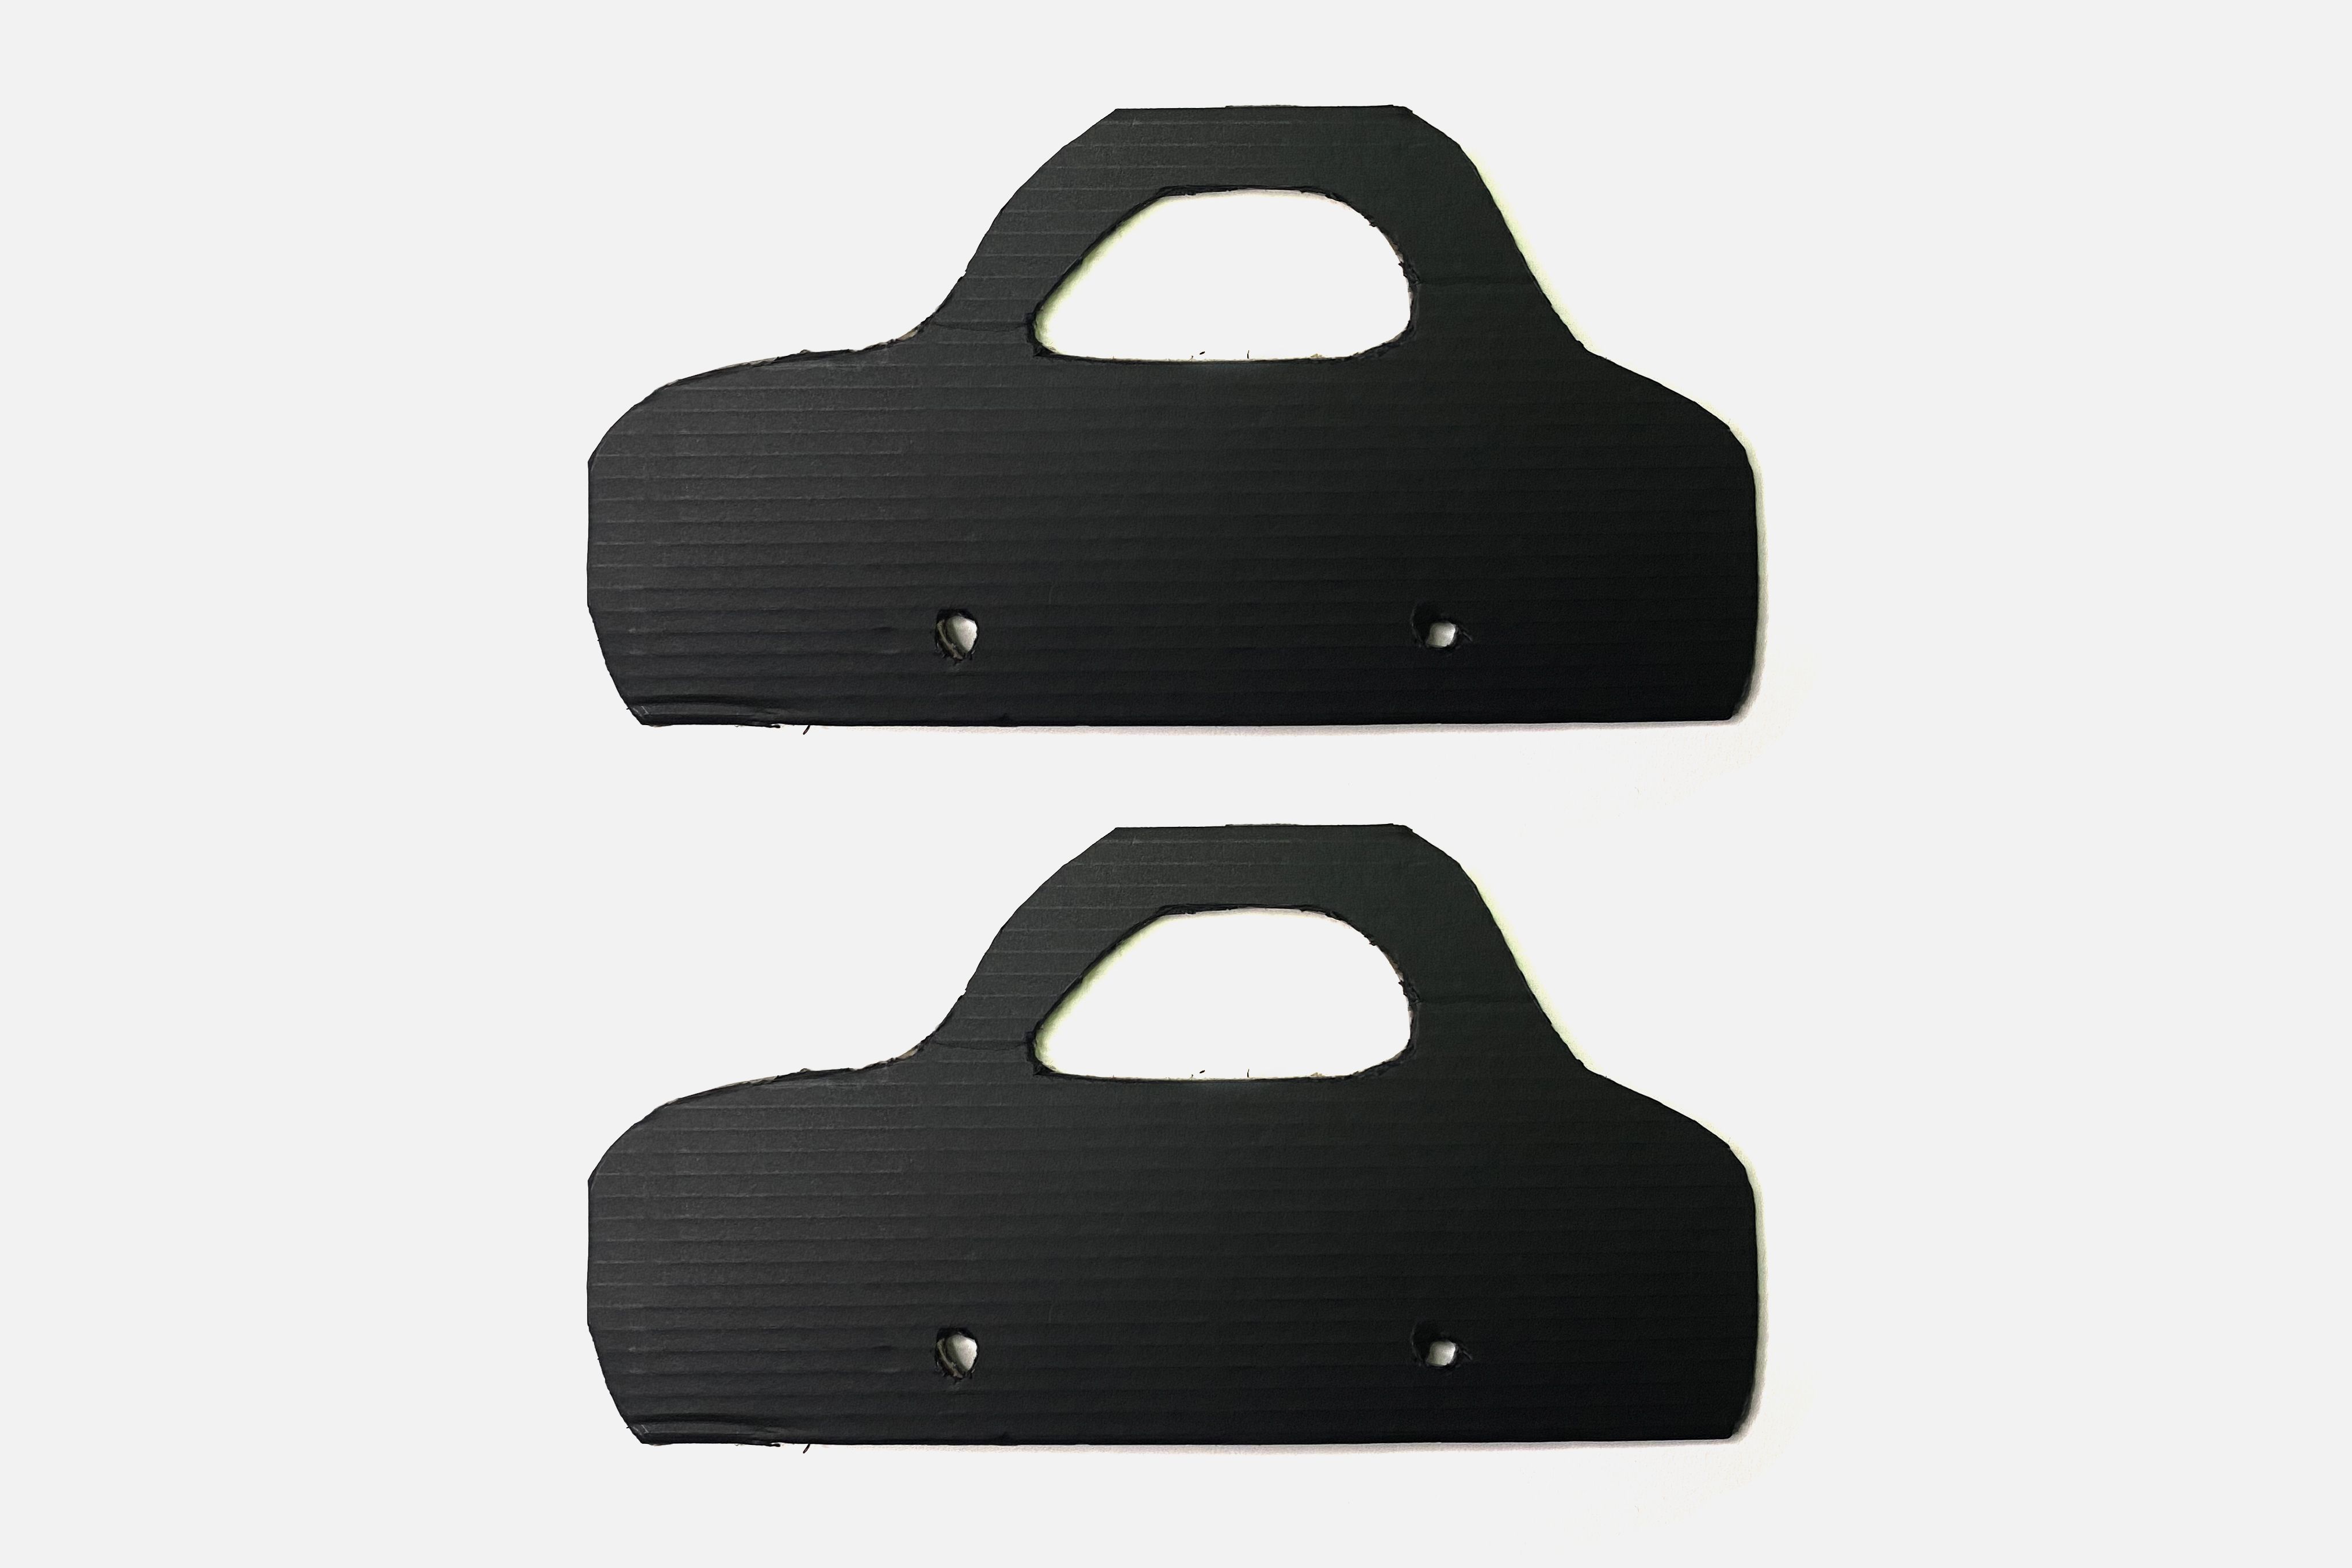
Make it less one dimensional
Draw an outline of a car on the two pieces of cardboard, and cut them out, making sure they’re identical (or mirror images), so they can form opposite sides of the car.
STEP 3
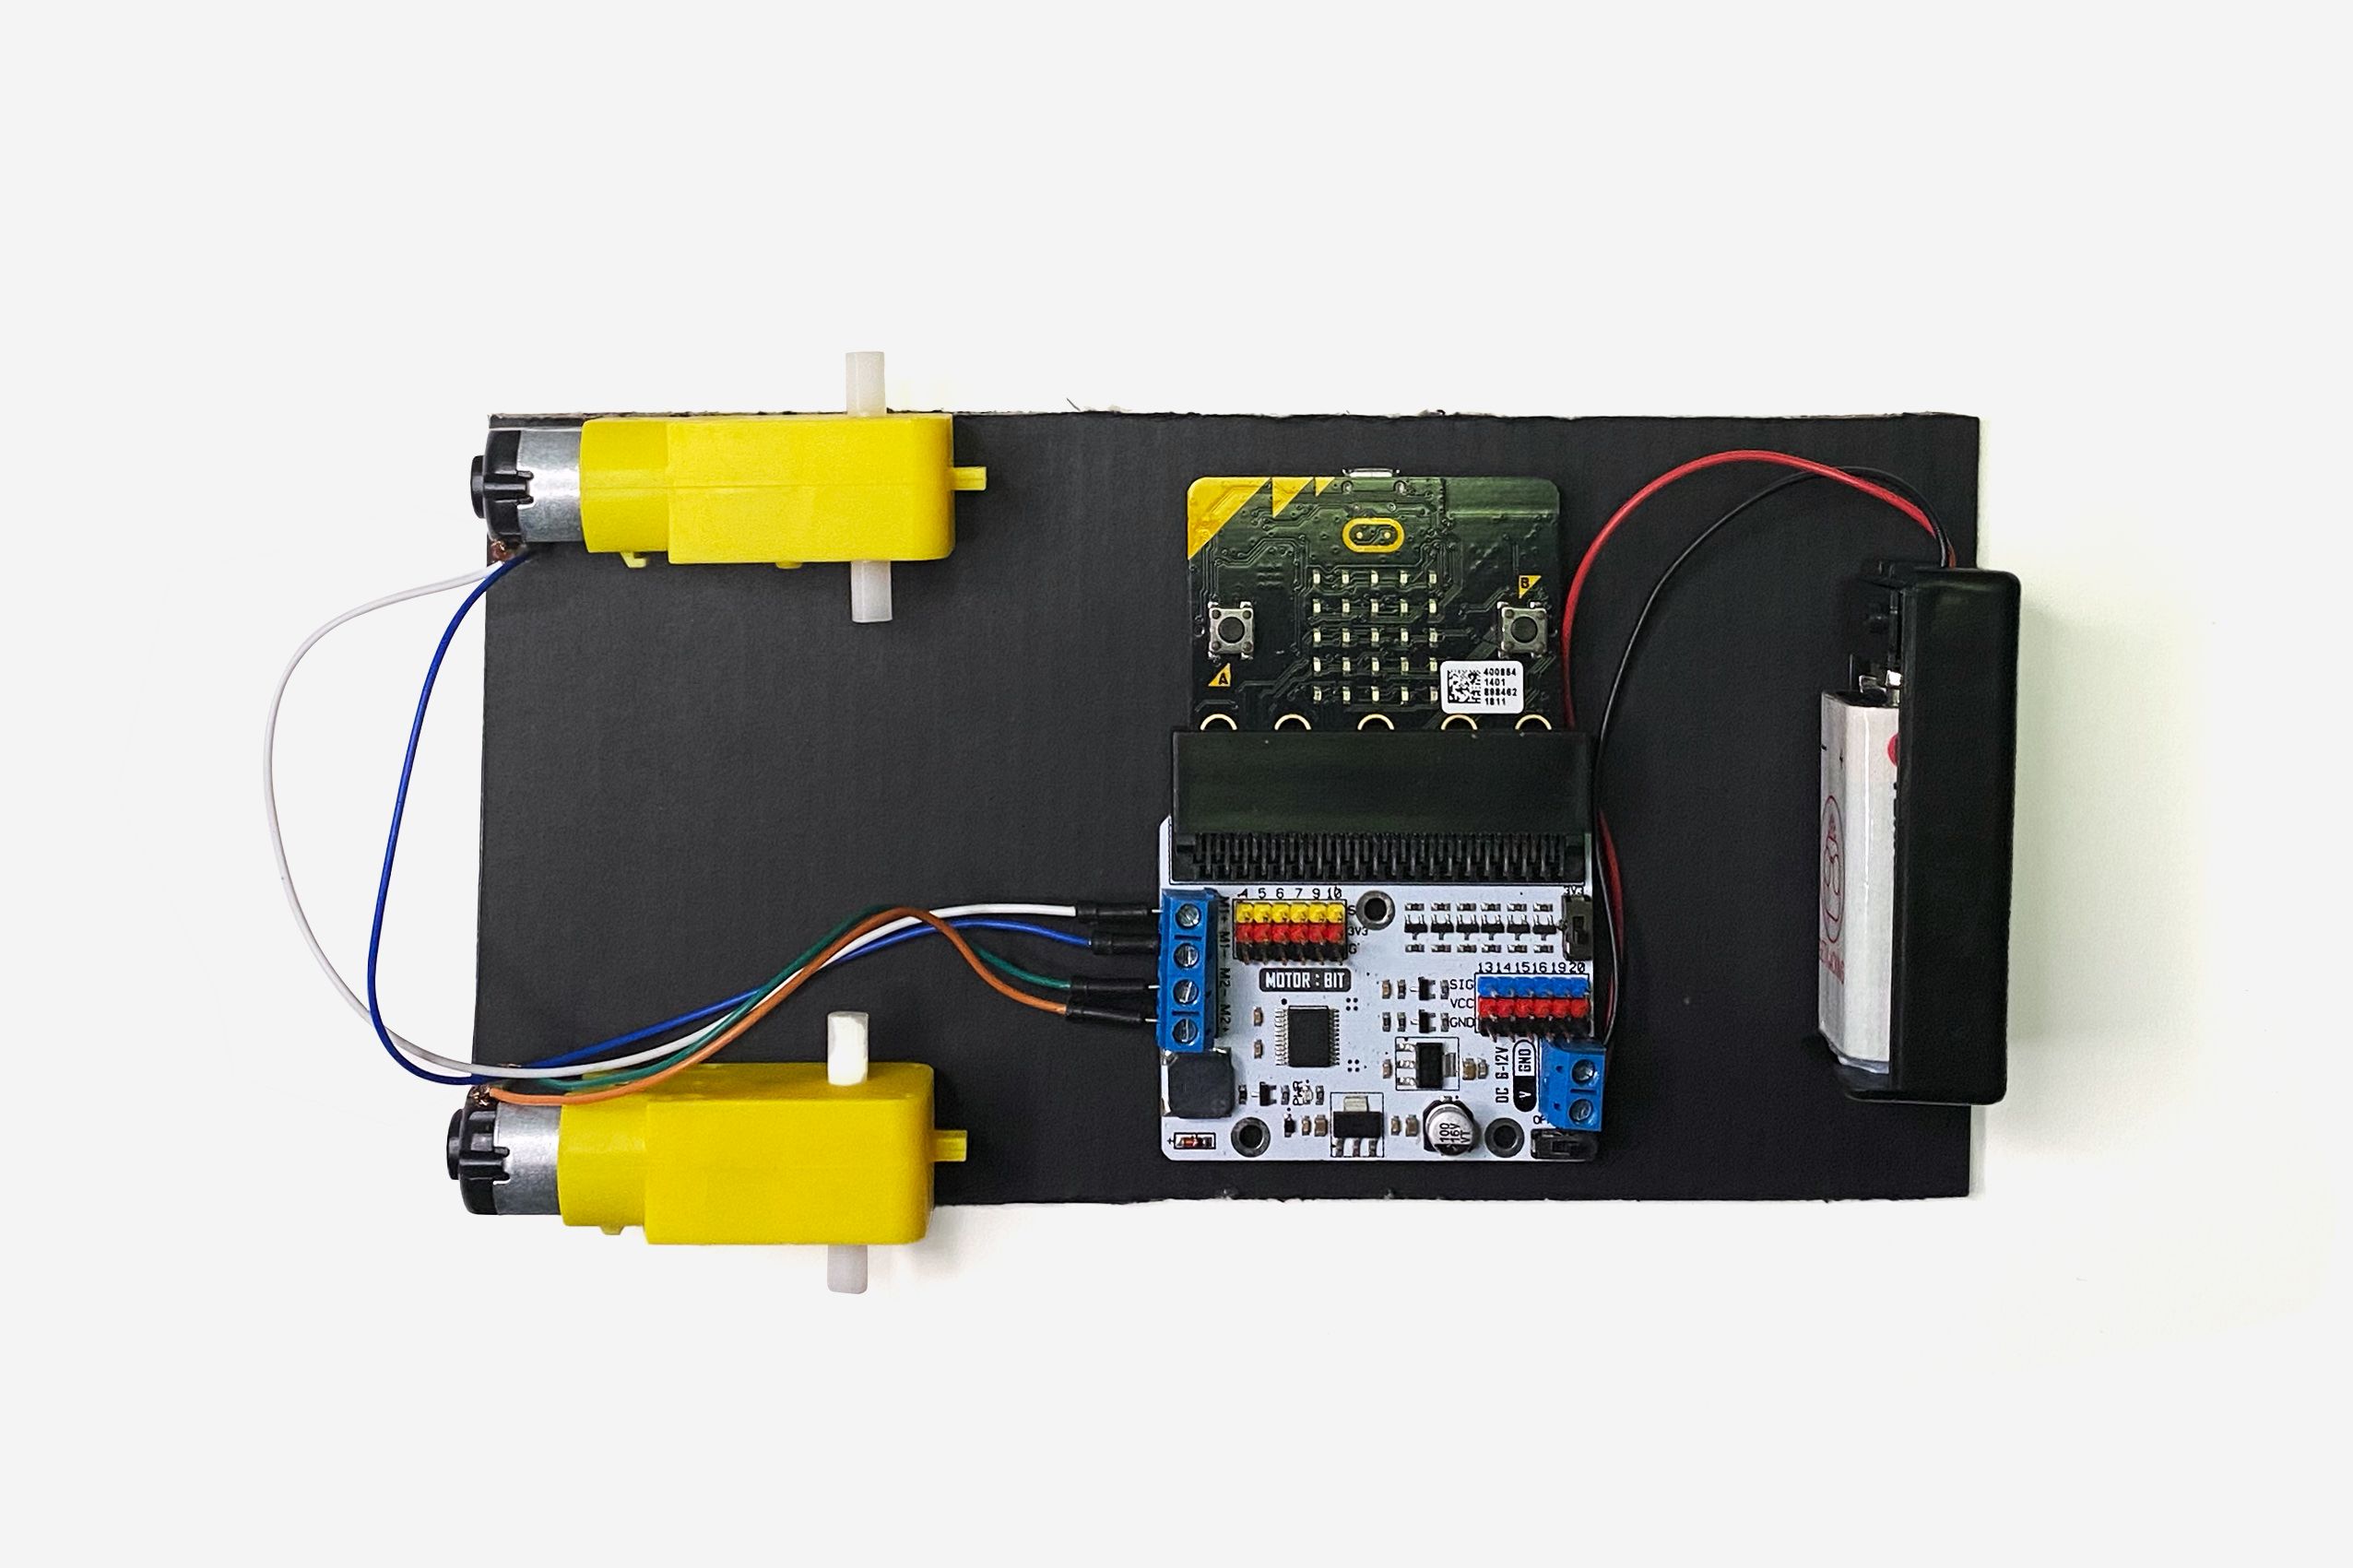
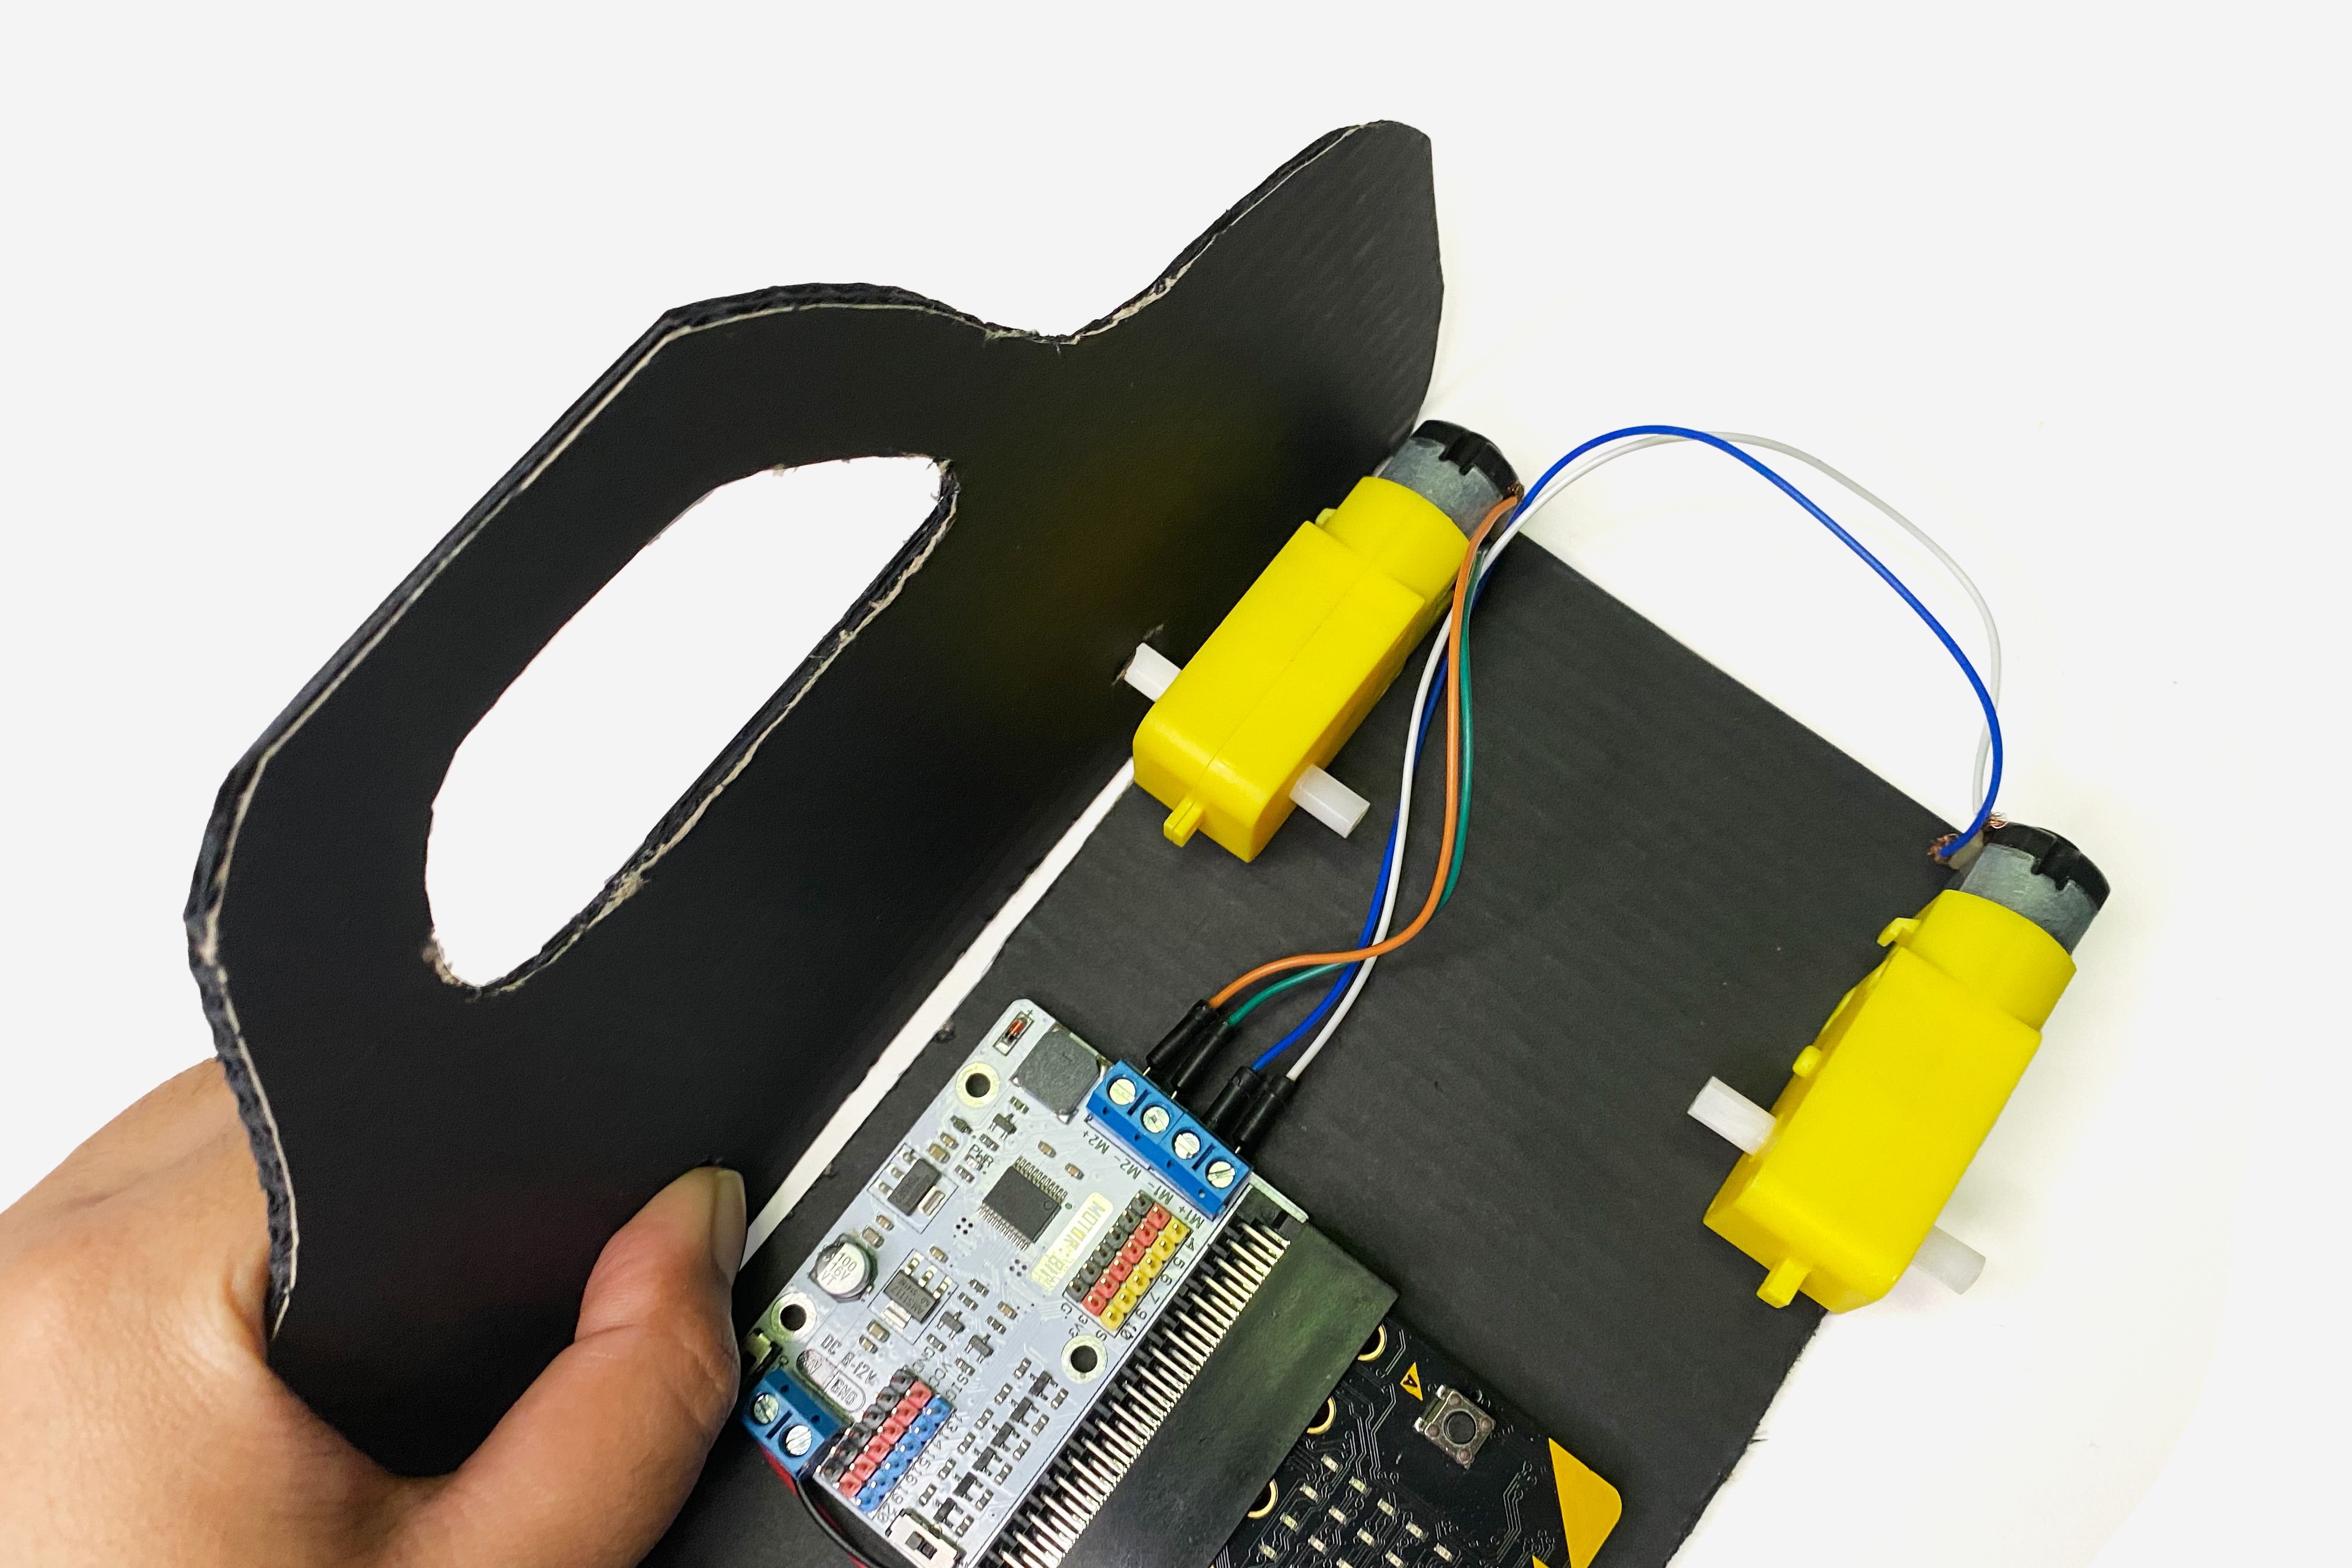
Stick on the components
Next, attach the TT motors, motor:bit, micro:bit, and battery pack on the third piece of cardboard with Blu Tack. We will use hot glue to secure these components later on, once we finalise their position.
STEP 4
Poke poke poke
two holes for the motors.
STEP 5
More poke poke poke
a hole for each back wheel, making sure they are at the same height as the ones from before.
STEP 6
Stick for the components
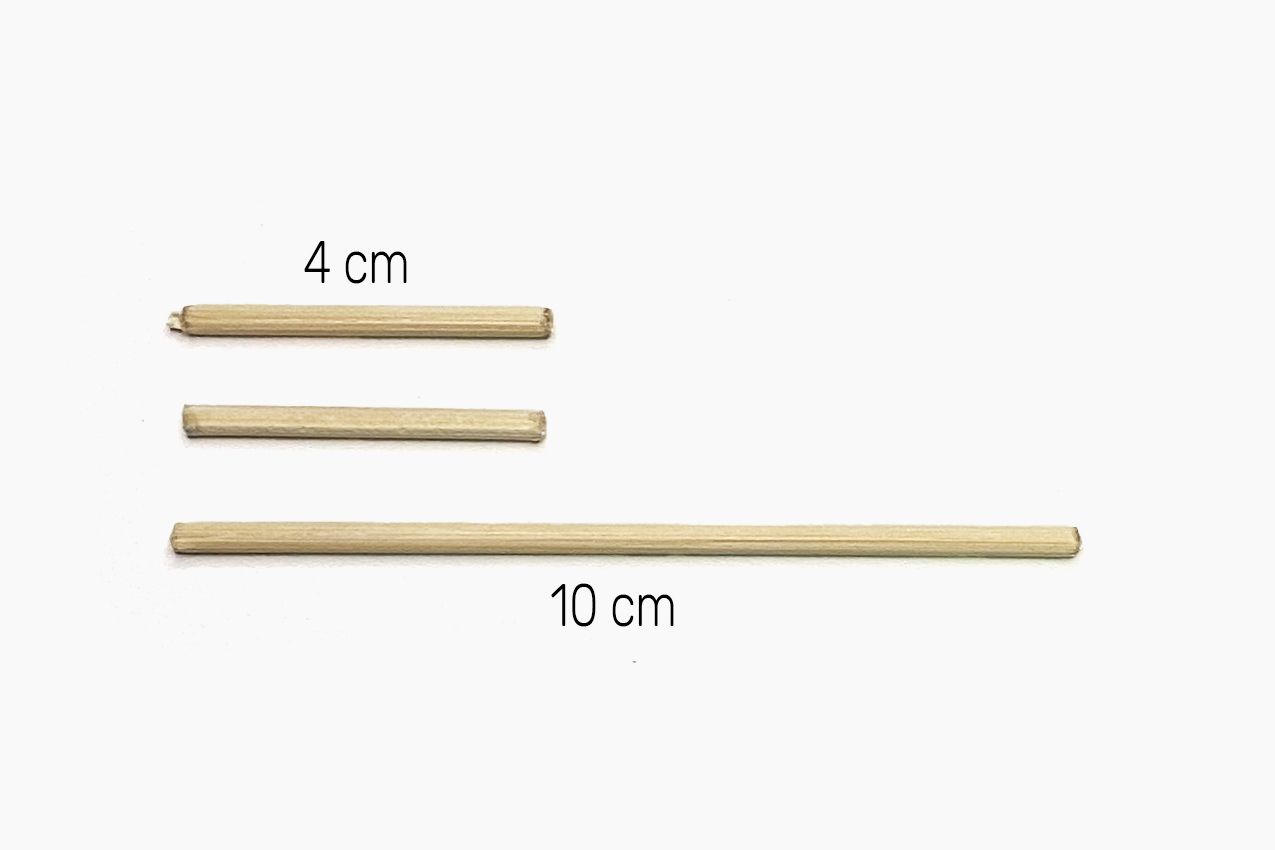
Cut a stick (if you’re in Southeast Asia, a satay stick) into:
• two 4cm pieces
• one 10cm piece
STEP 7
Stick the sticks
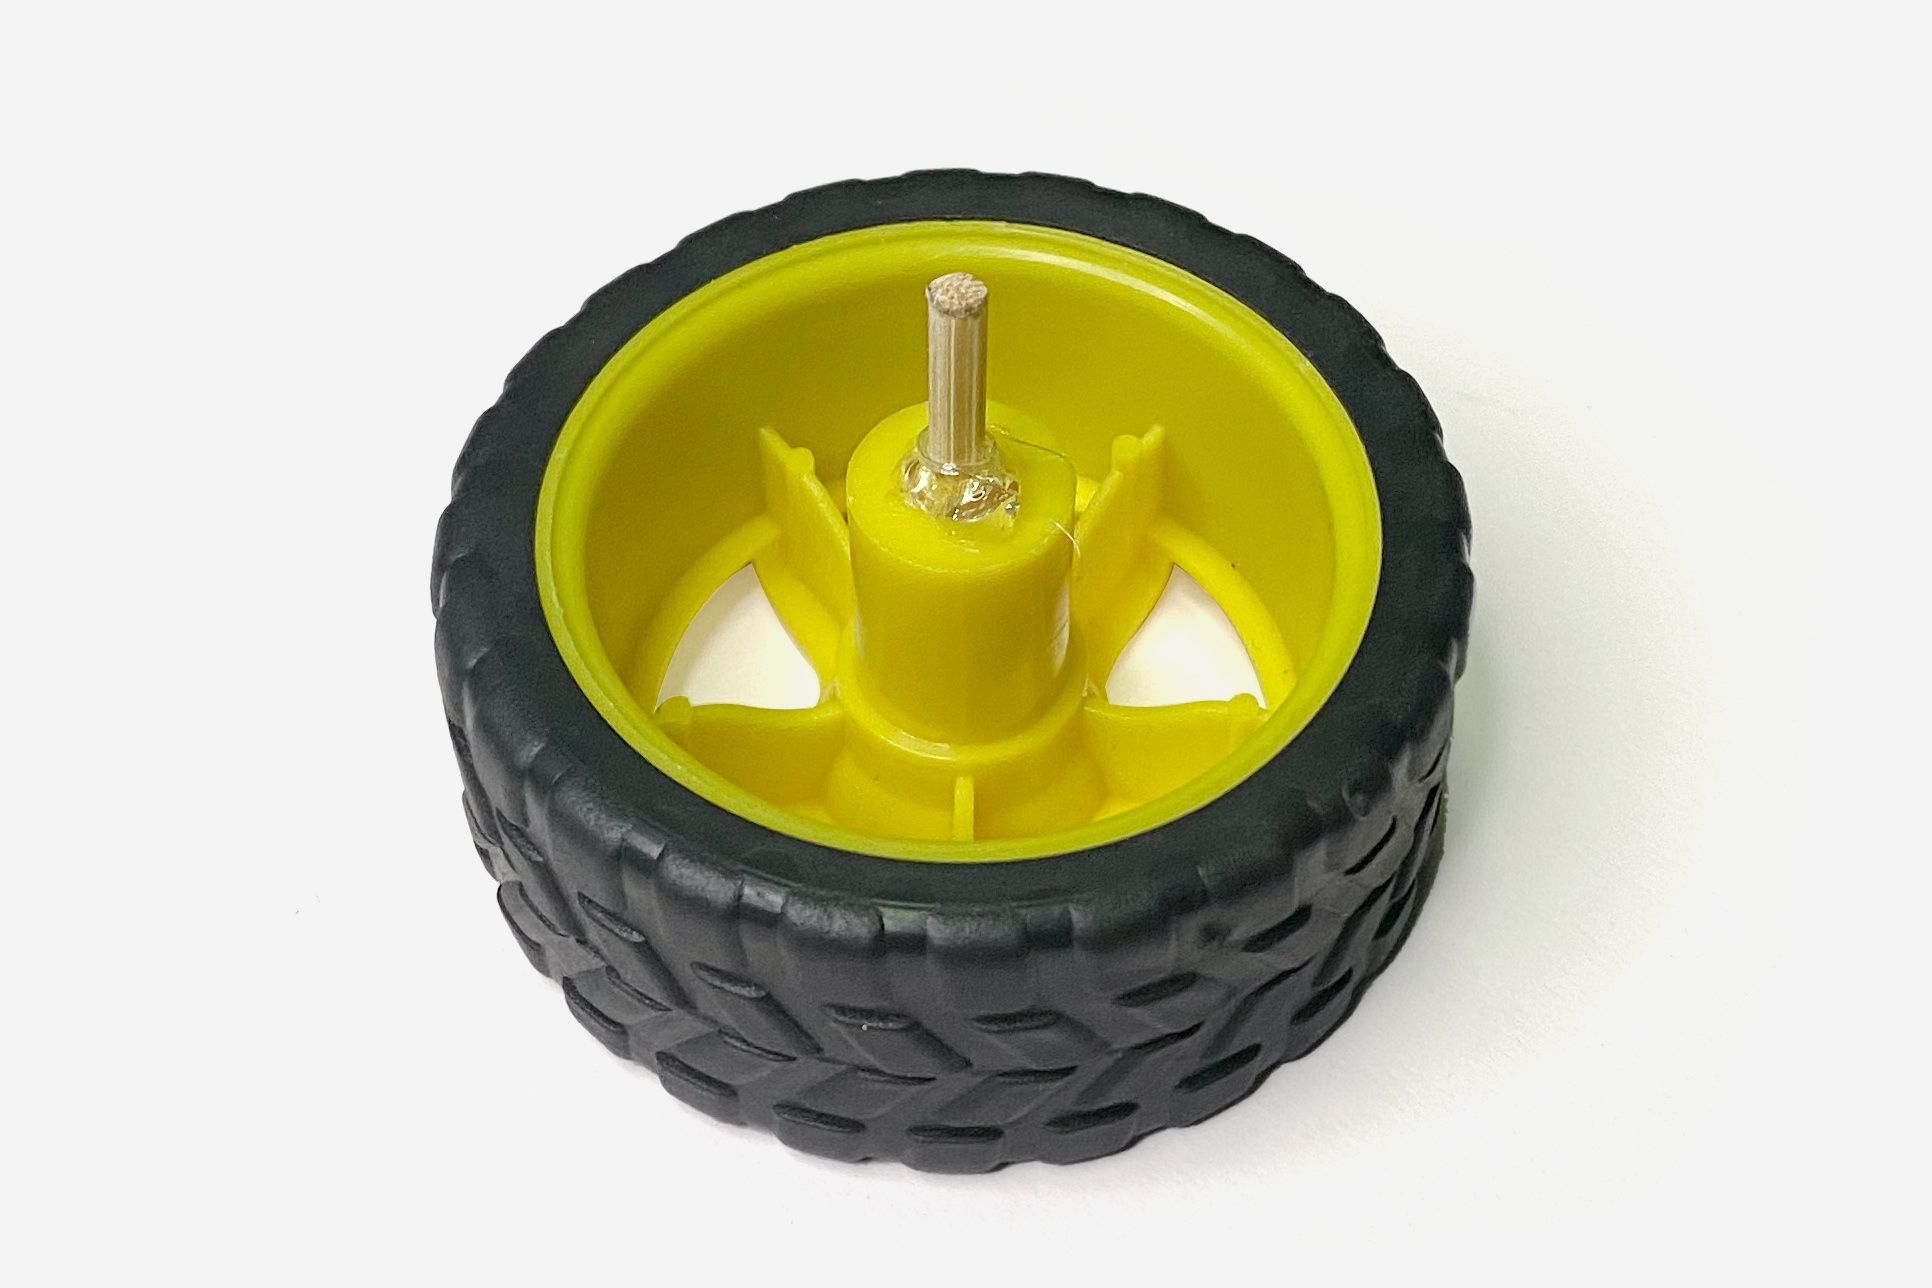
Insert one of the 4cm sticks into the wheel. Use hot glue to secure them. Do the same for another wheel.
STEP 8

Two-dimensional car
Attach the car’s side pieces.
STEP 9
Four-wheeler
Attach all four wheels, making sure the ones with satay sticks are at the back.
STEP 10
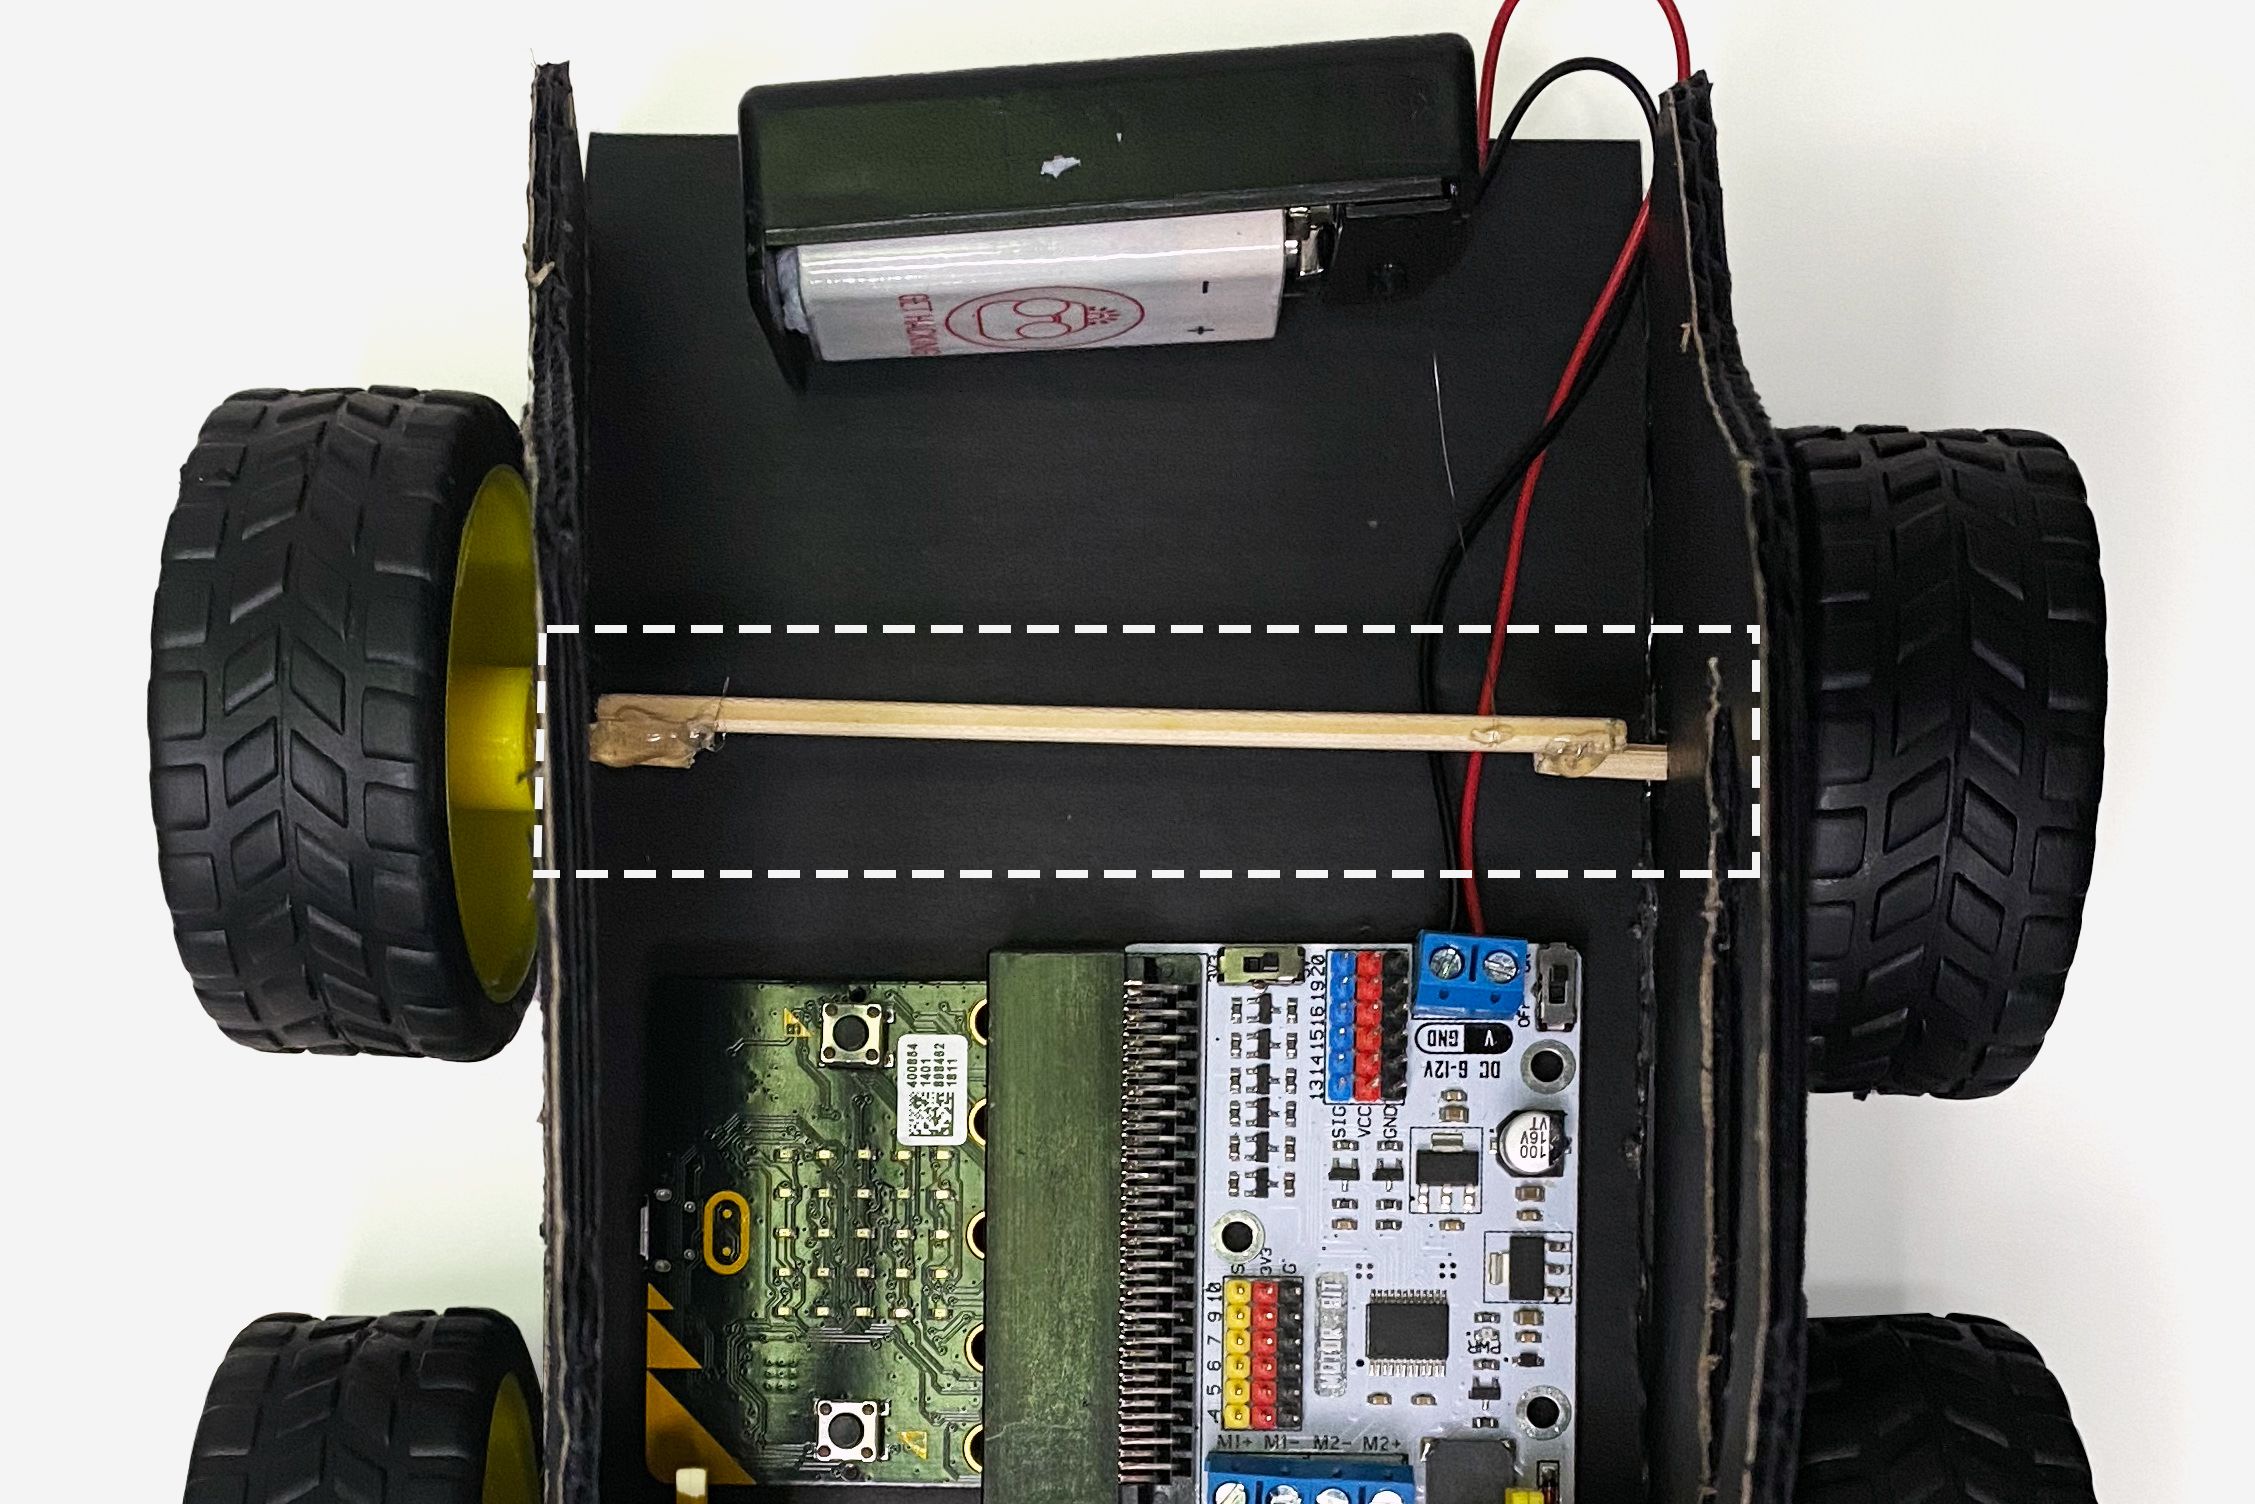
Stick Stick to Sticks
Attach the 10cm stick to the back wheel using hot glue.
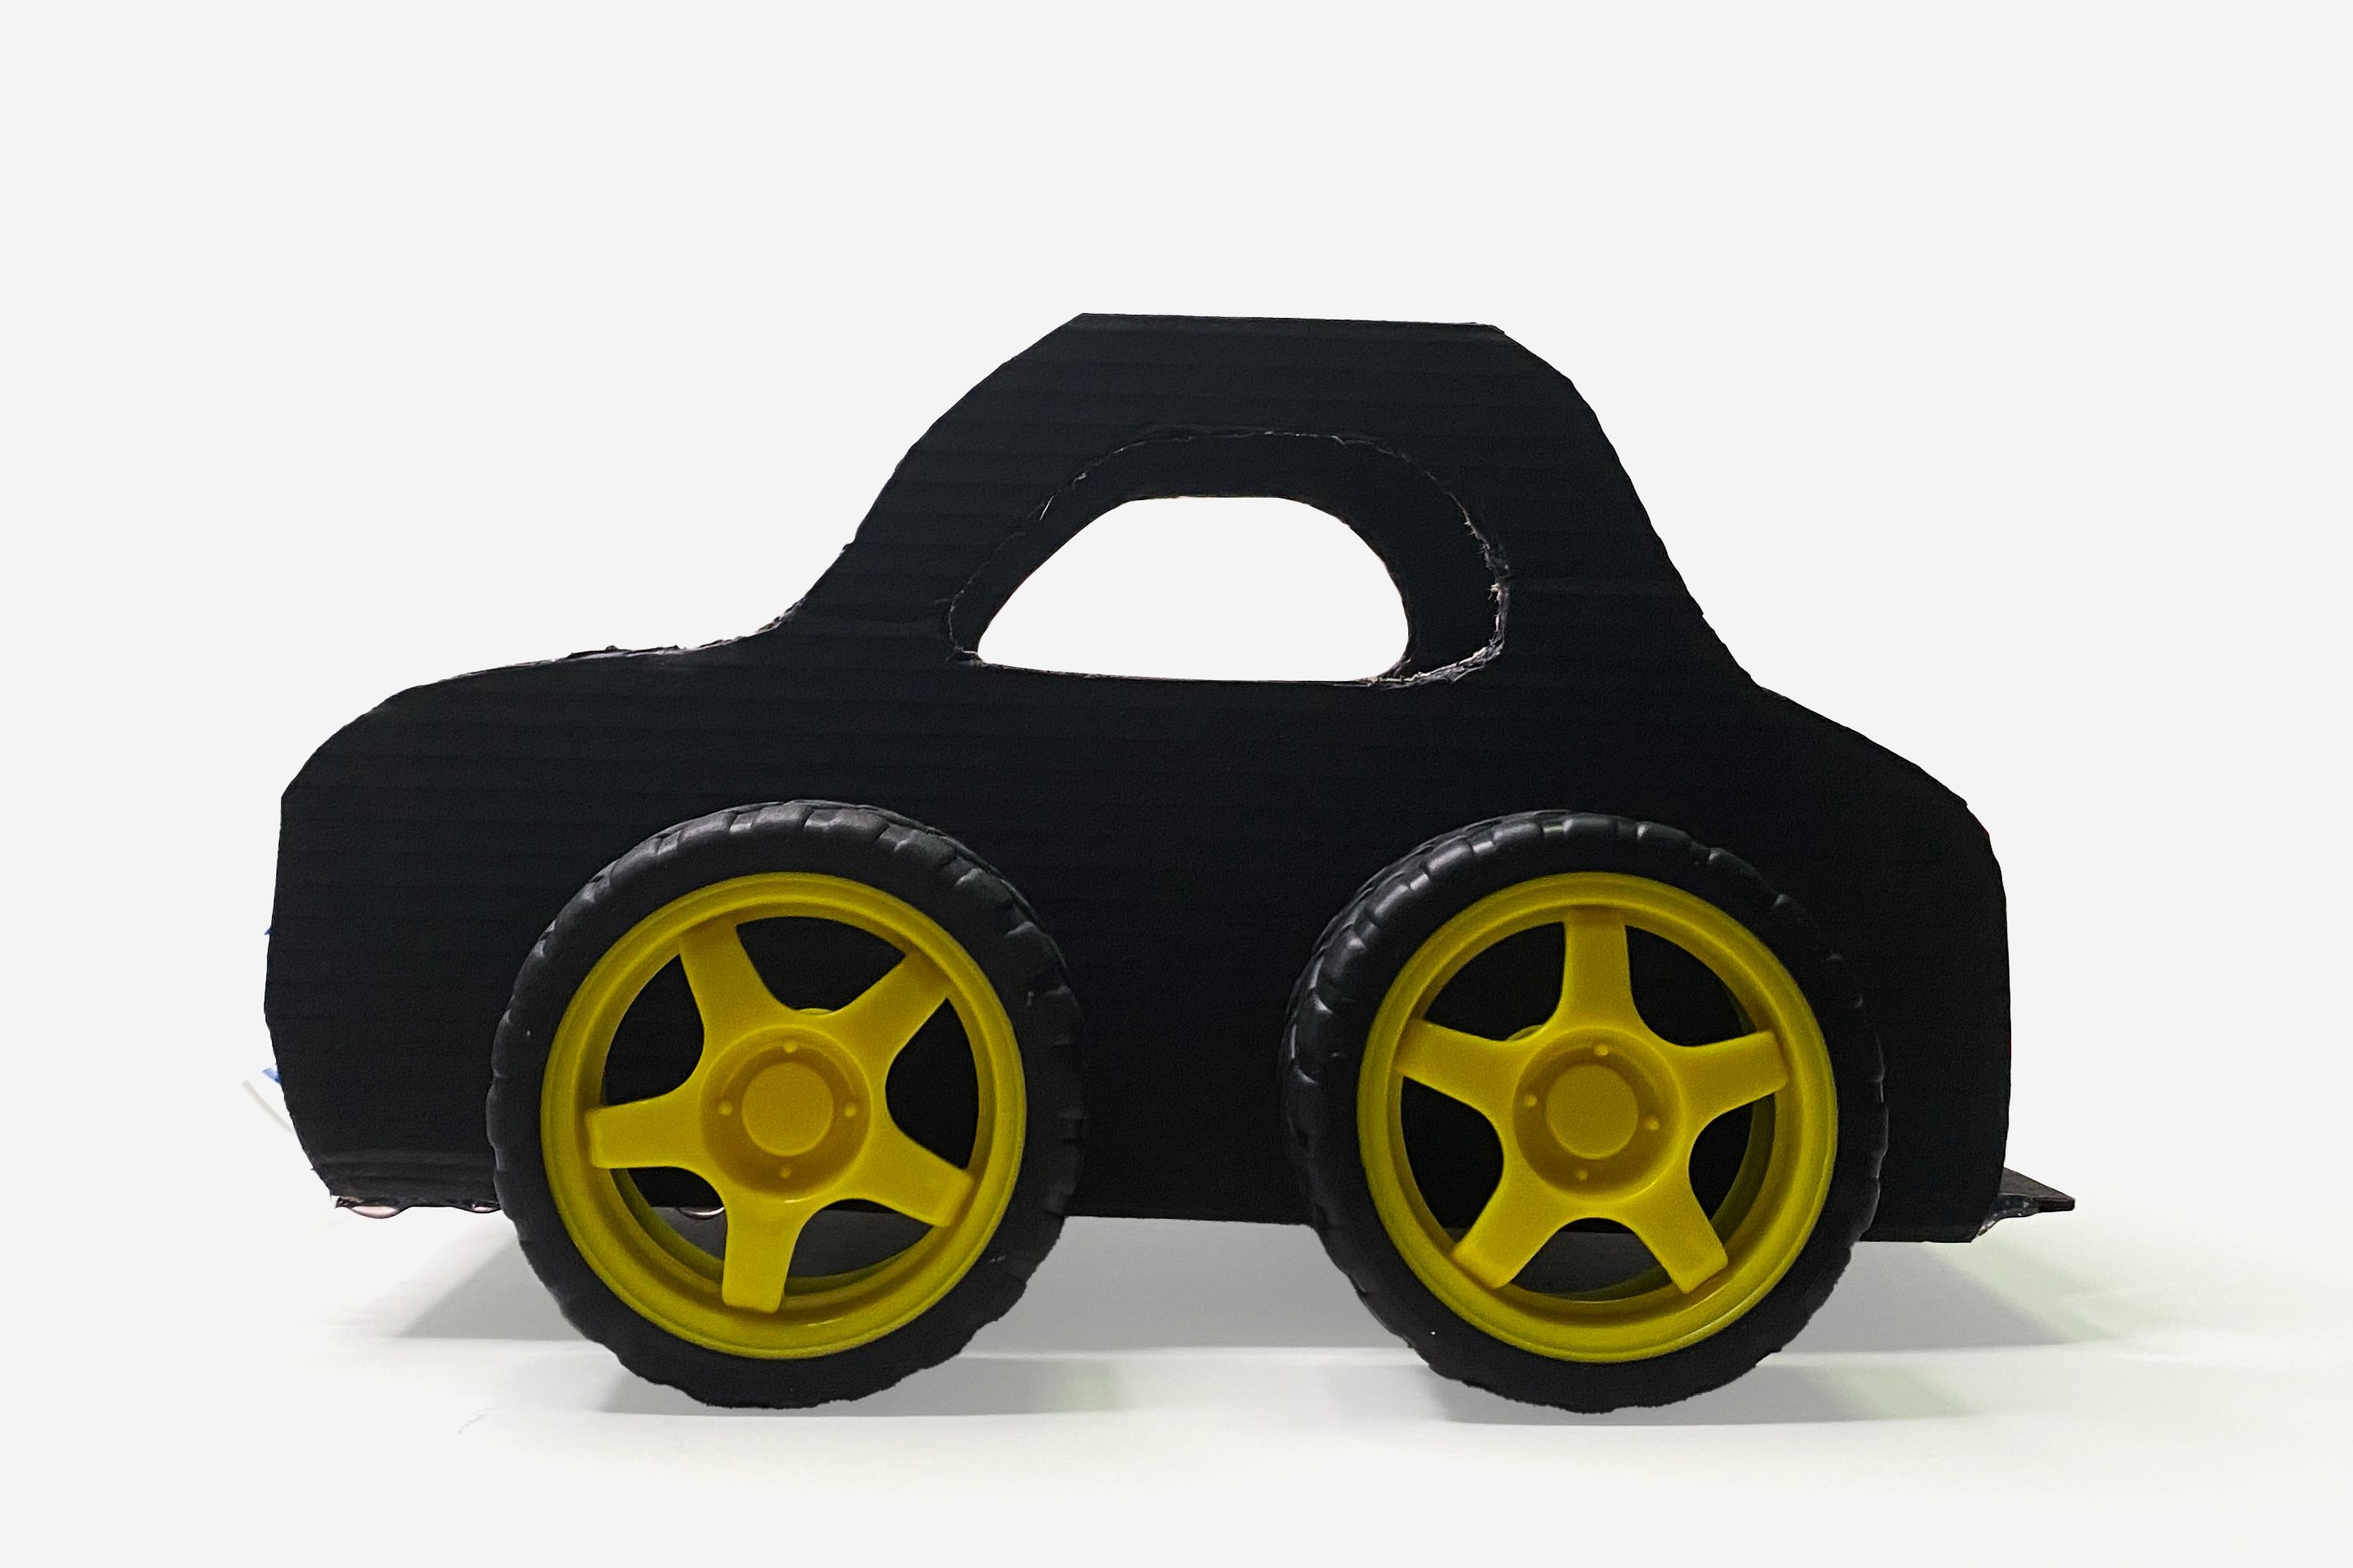
STEP 11

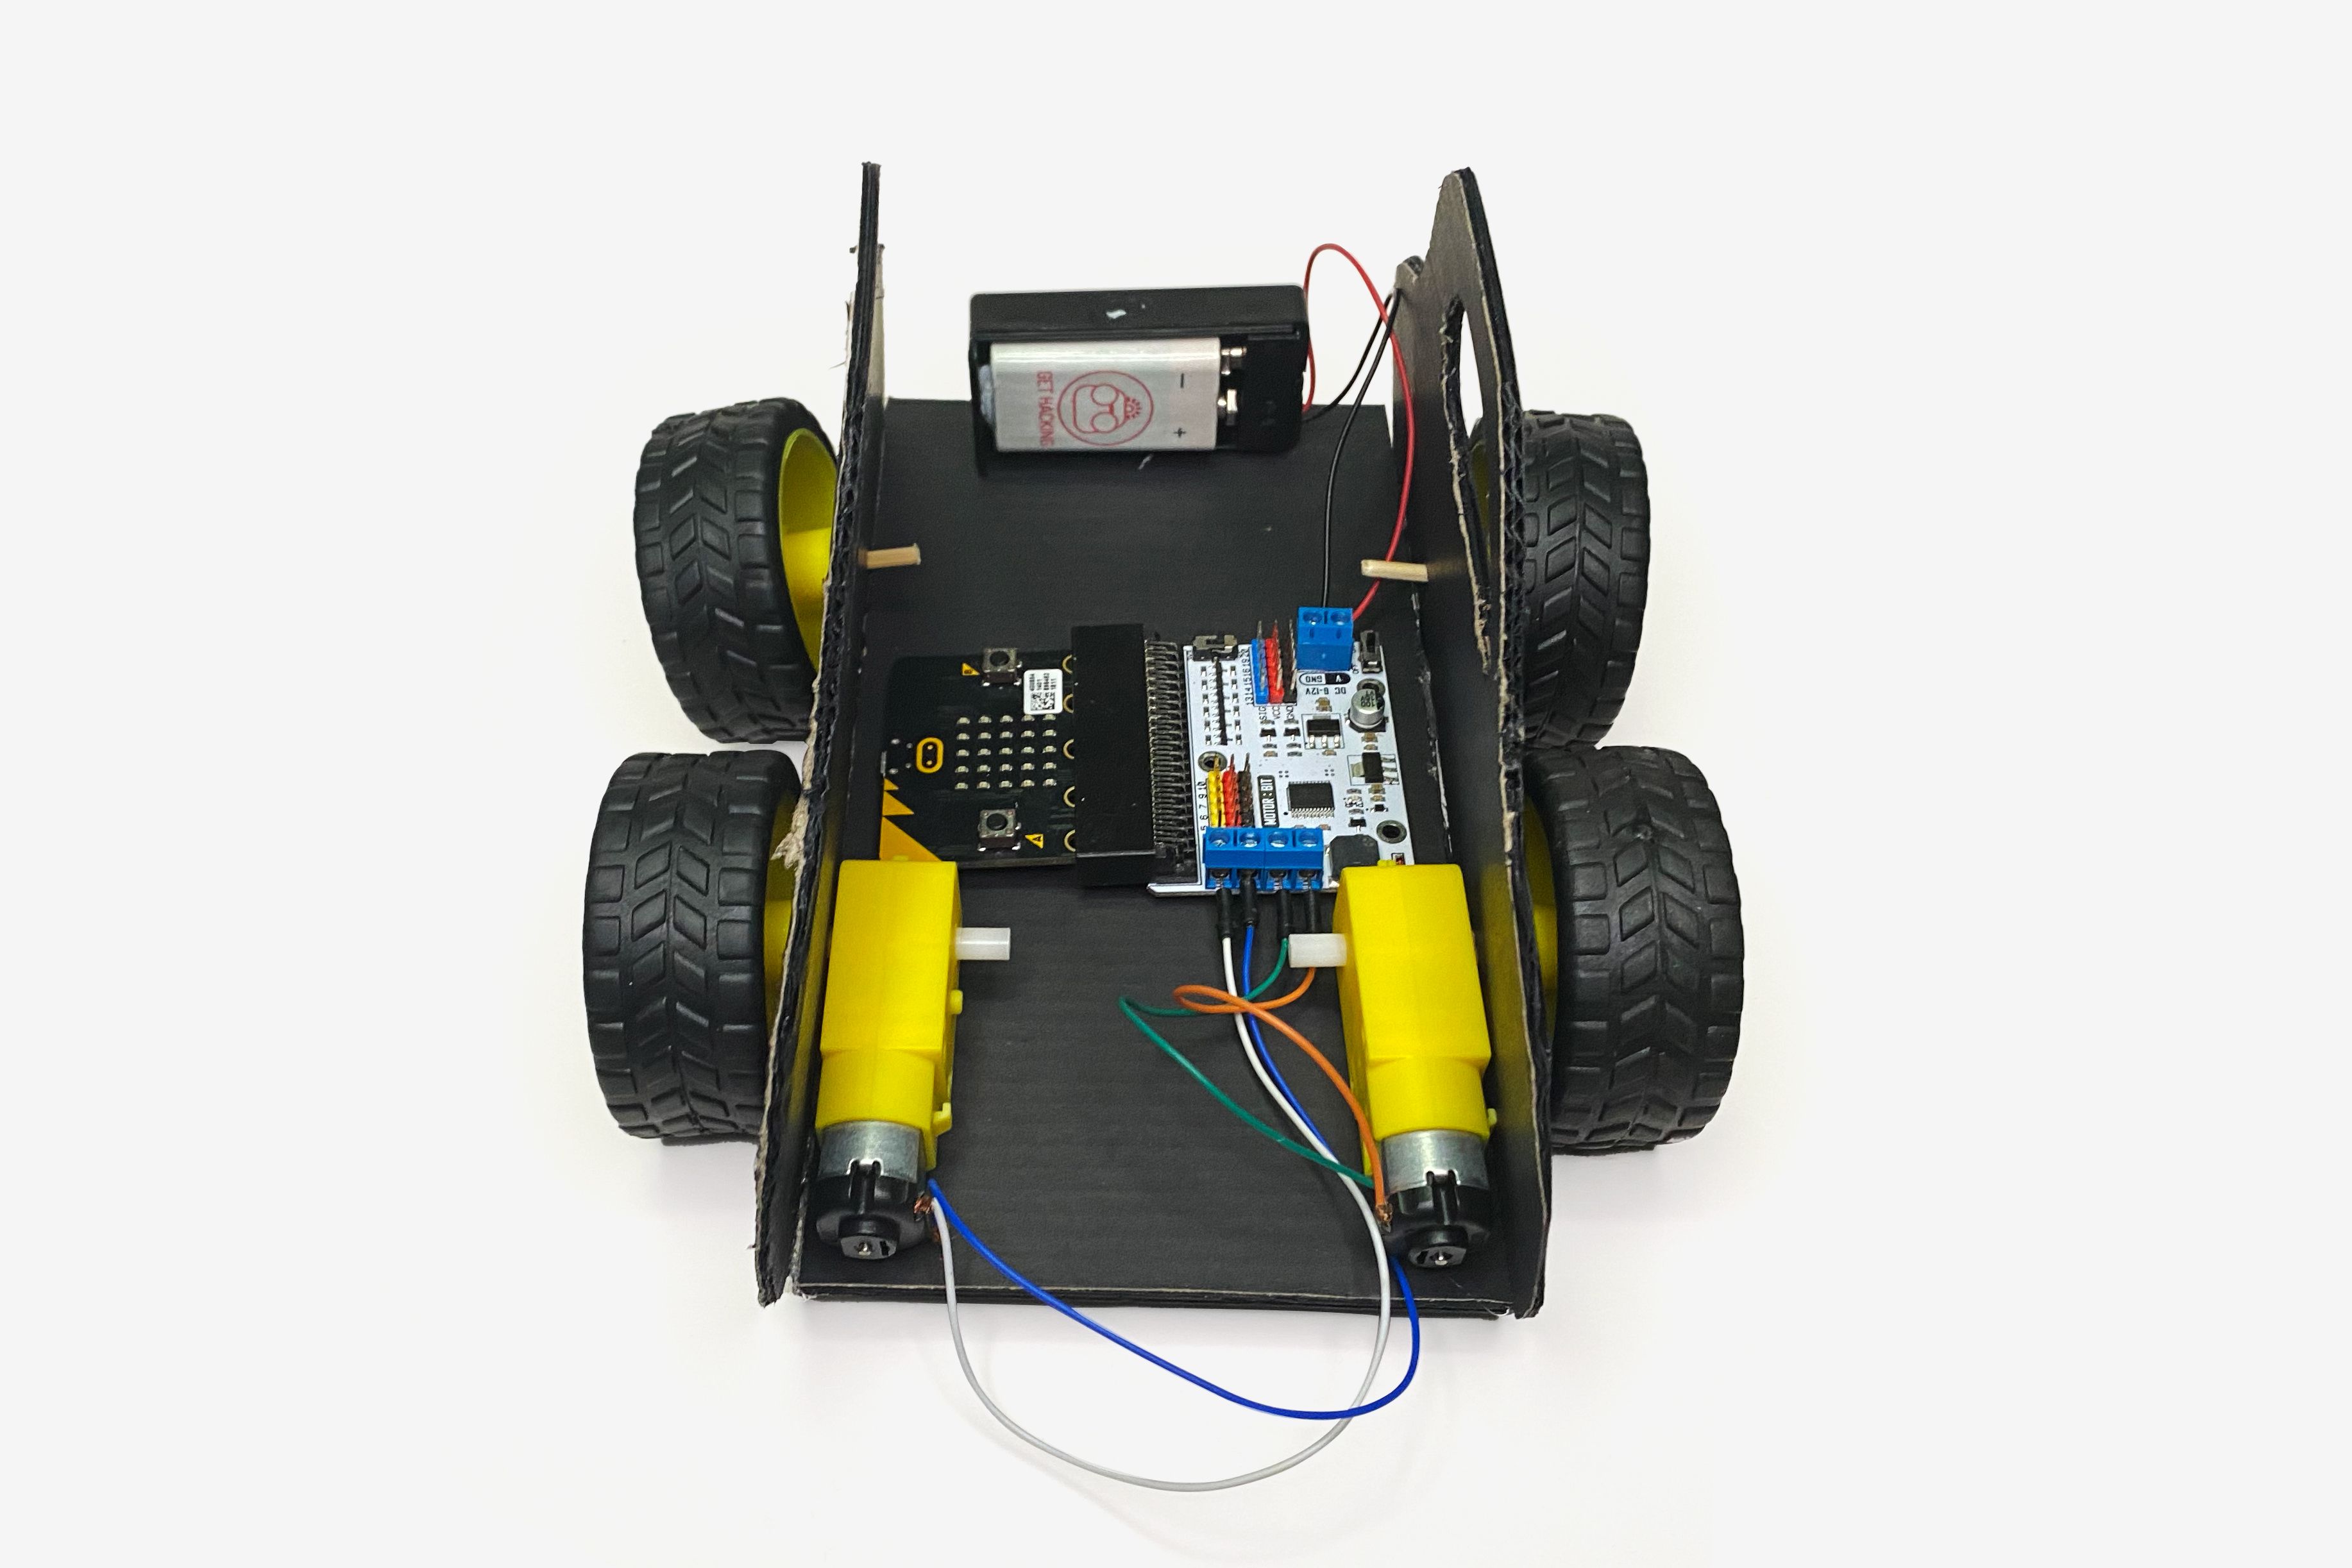
Car!
The completed car. Code it up and see it run!
Code and References
Made this activity? Good Job! Now spread the word. Share a photo of your creation on social media with #letsgethacking #CardboardCar