Daisy chain LED strips
Learn how to chain multiple LED strips together!
YOU WILL NEED
- 1 x BBC micro:bit
- 1 x Tinkercademy breakout board
- Neopixel strips
- Pin connectors
STEP 1
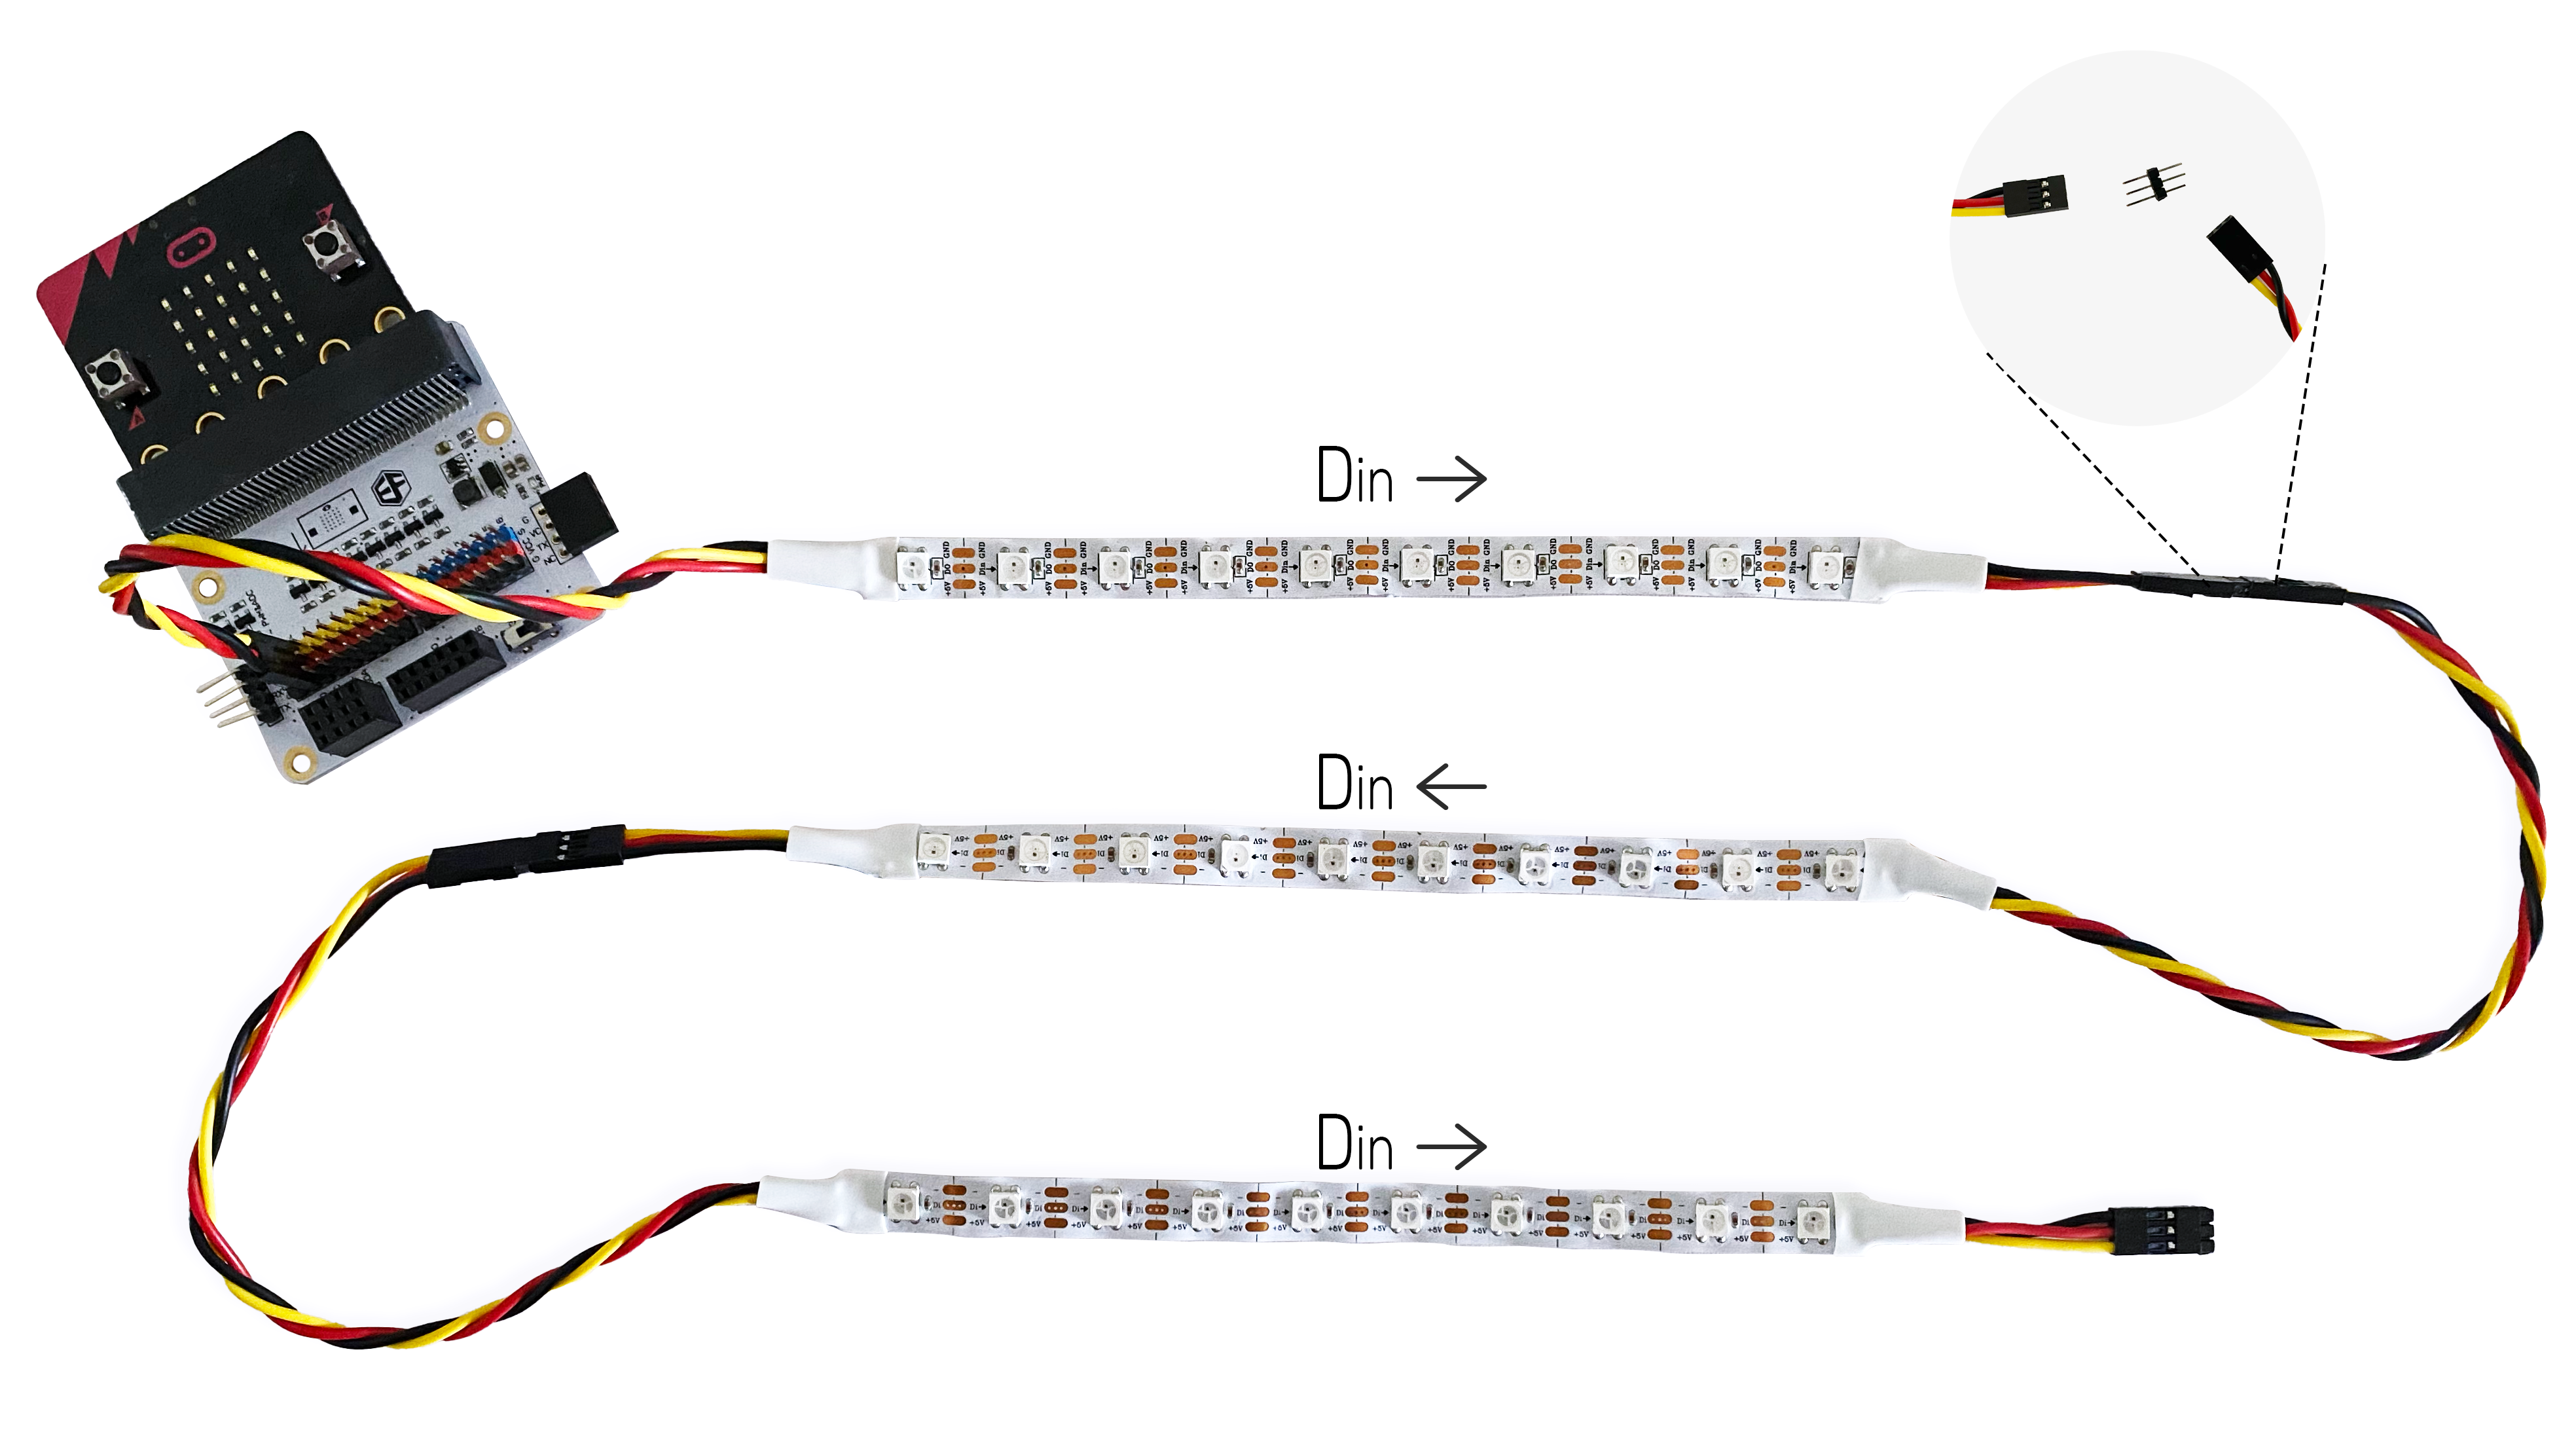
Connecting the components
(a) Slot a BBC micro:bit to the breakout board
(b) Plug in a neopixel light strip to PIN1
(c) Using a pin connector, start chaining the rest of LED strips. Do ensure that the direction of Din flows!
Materials
- 1 x BBC micro:bit
- 1 x Tinkercademy breakout board
- Neopixel LED strips
- Pin connectors
STEP 2
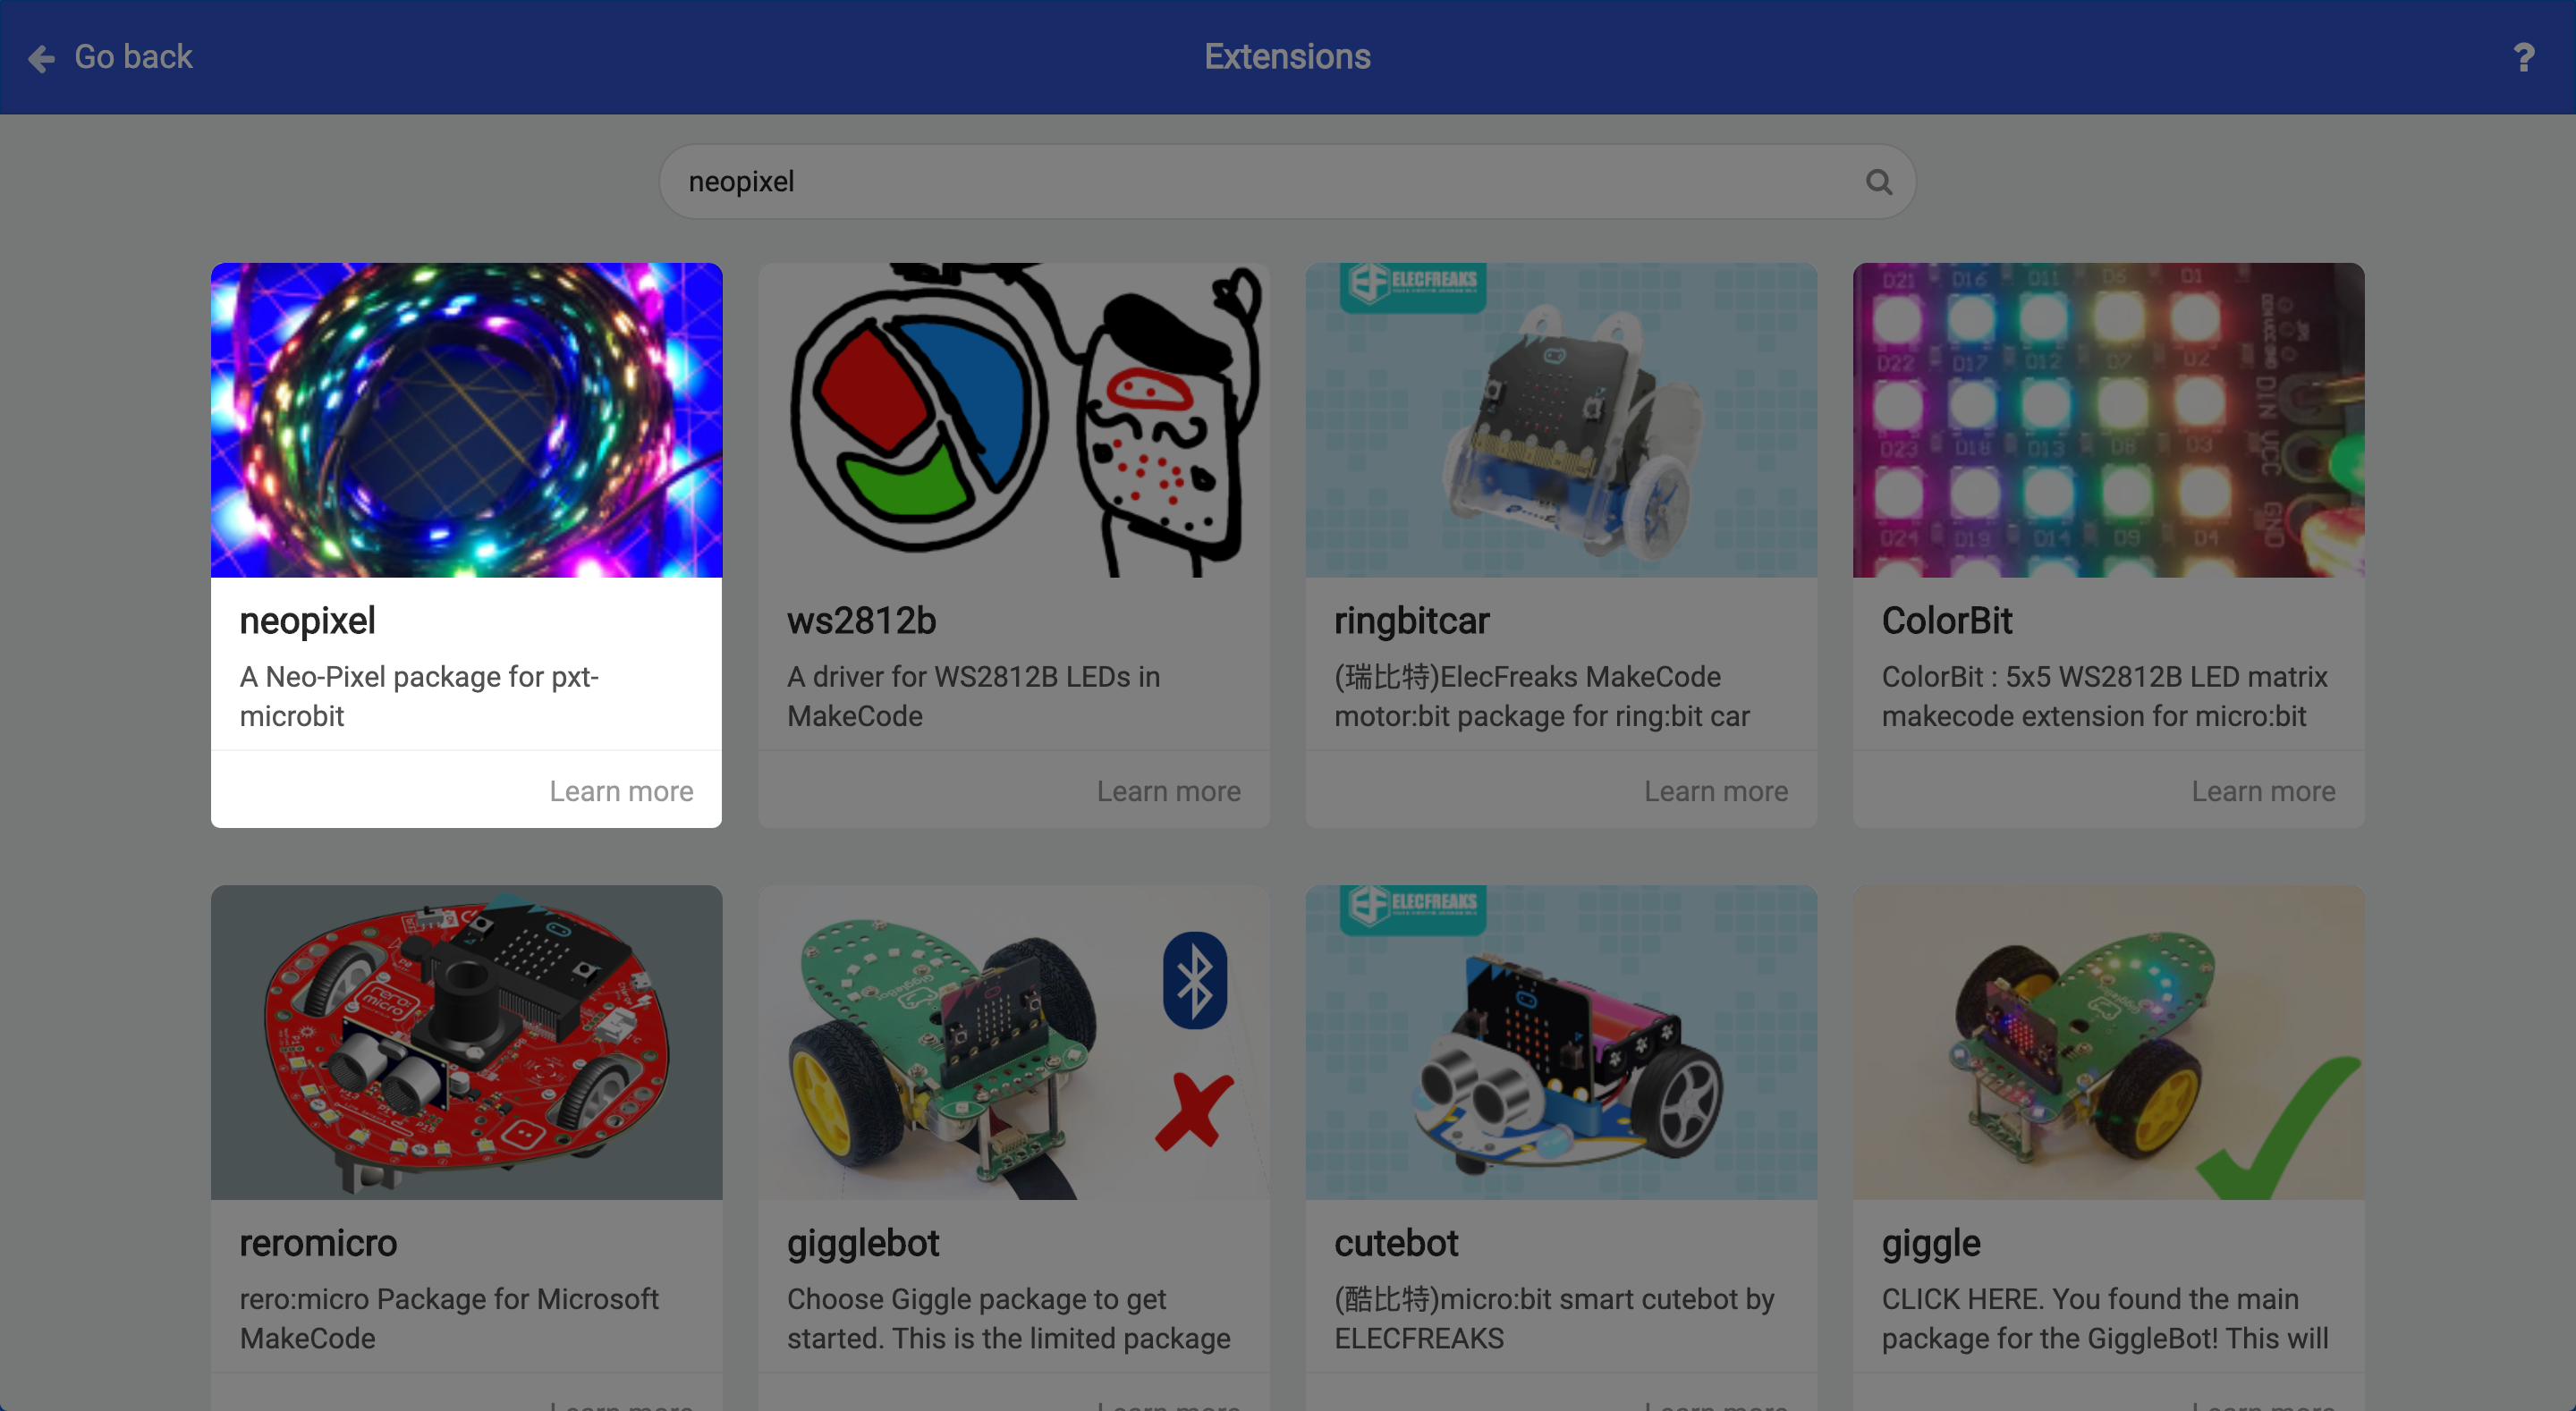
Importing Extension
To connect a neopixel LED strip, we need to import a special package in MakeCode.
(a) Click on the ‘Advanced’ drawer, select 'Extensions'.
(b) Search for ‘neopixel’ and click on it to import.
(c) You’ll need to re-import the extension again for new projects in the future.
STEP 3
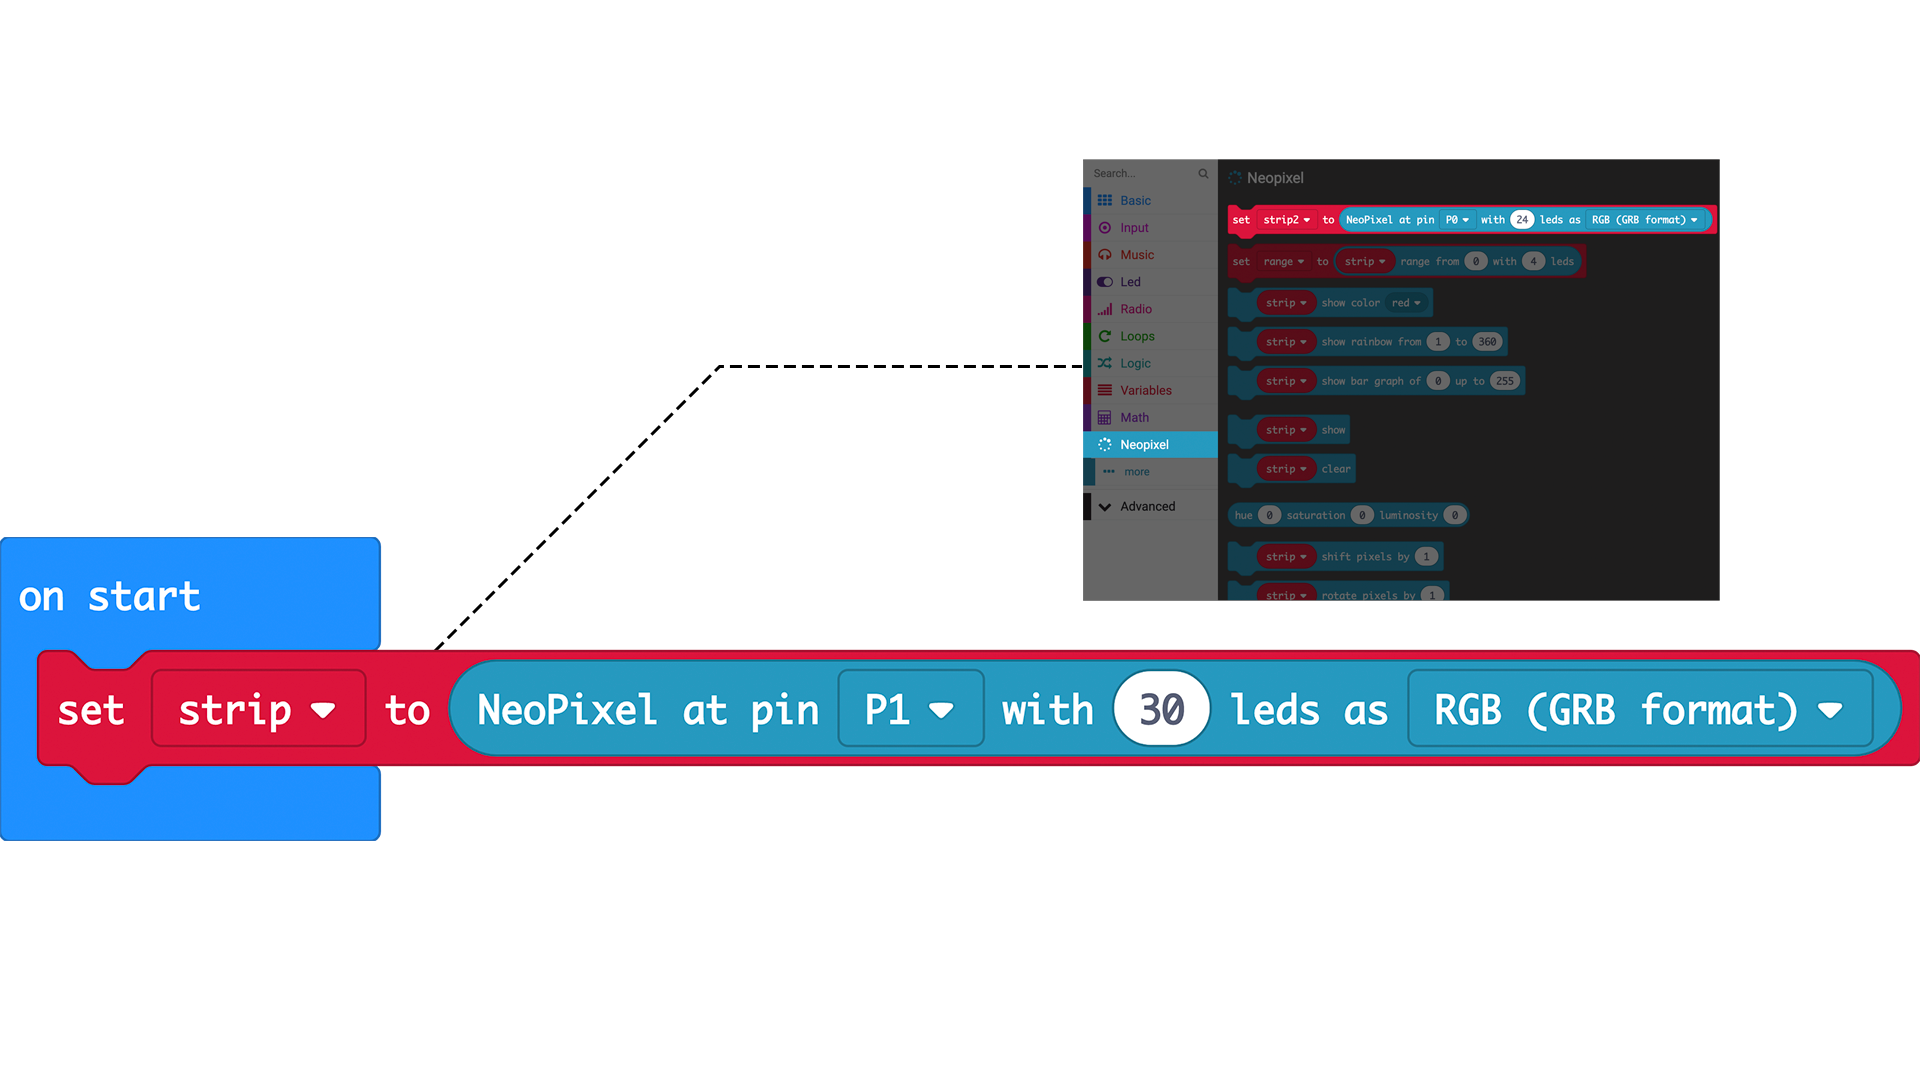
Initialise LED strip
Before coding for the LED strip, we need to initialise it.
(a) In the Neopixel drawer, drag a 'set strop to...' block into on start.
(b) Change the pin number.
(c) Change the number of pixels. In this tutorial, we have chained 30 pixels altogether.
STEP 4
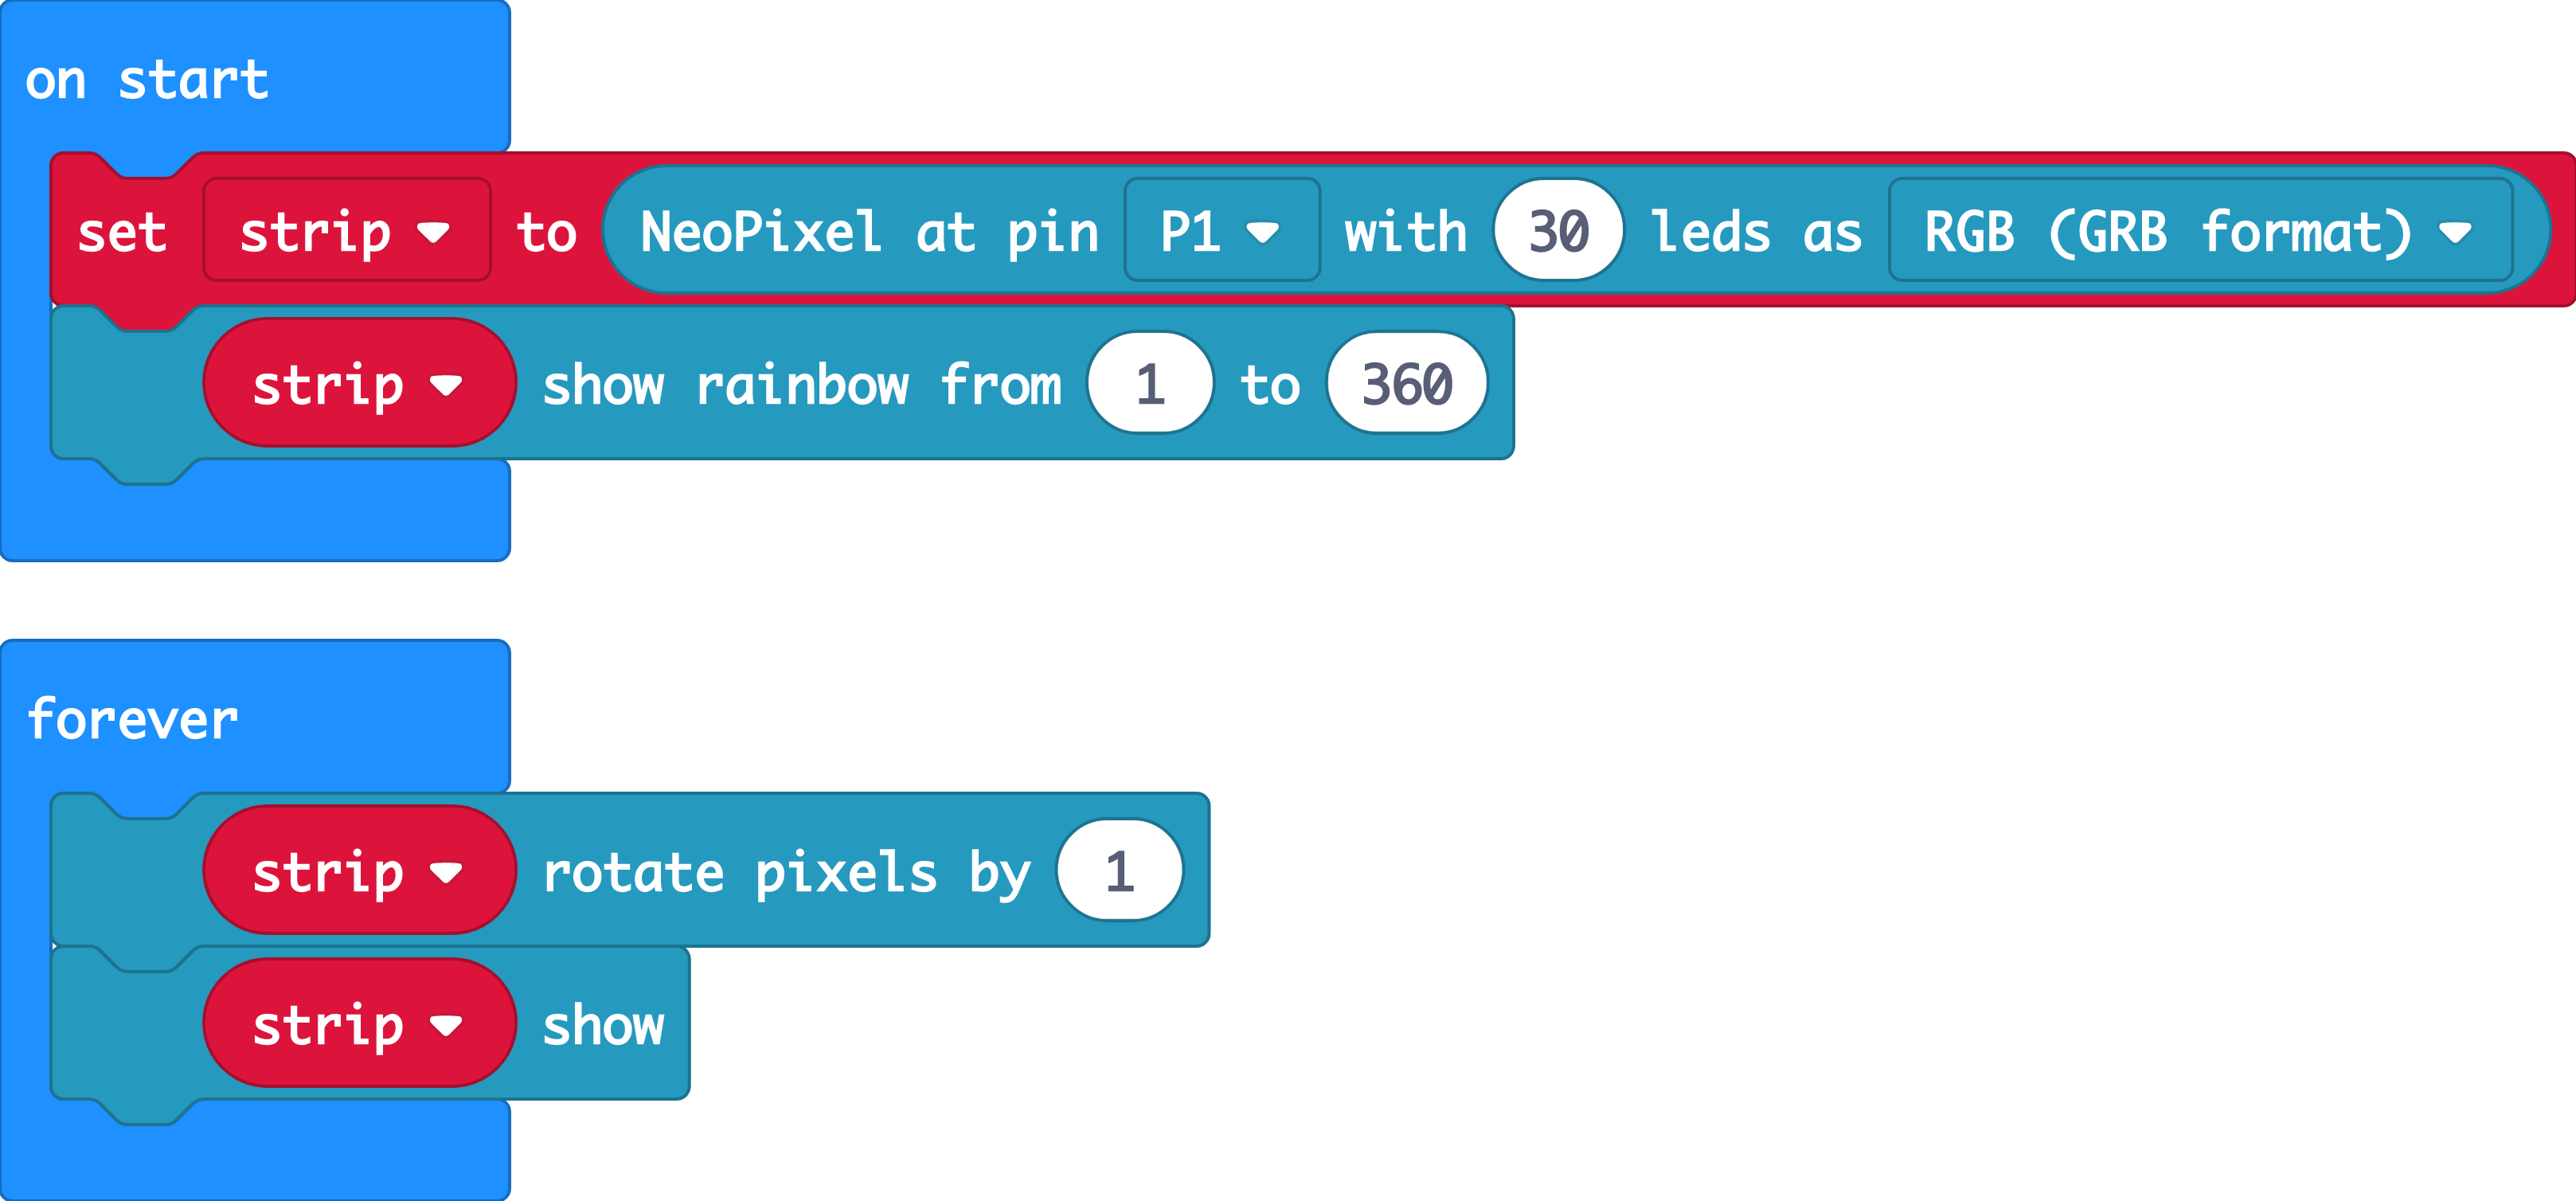
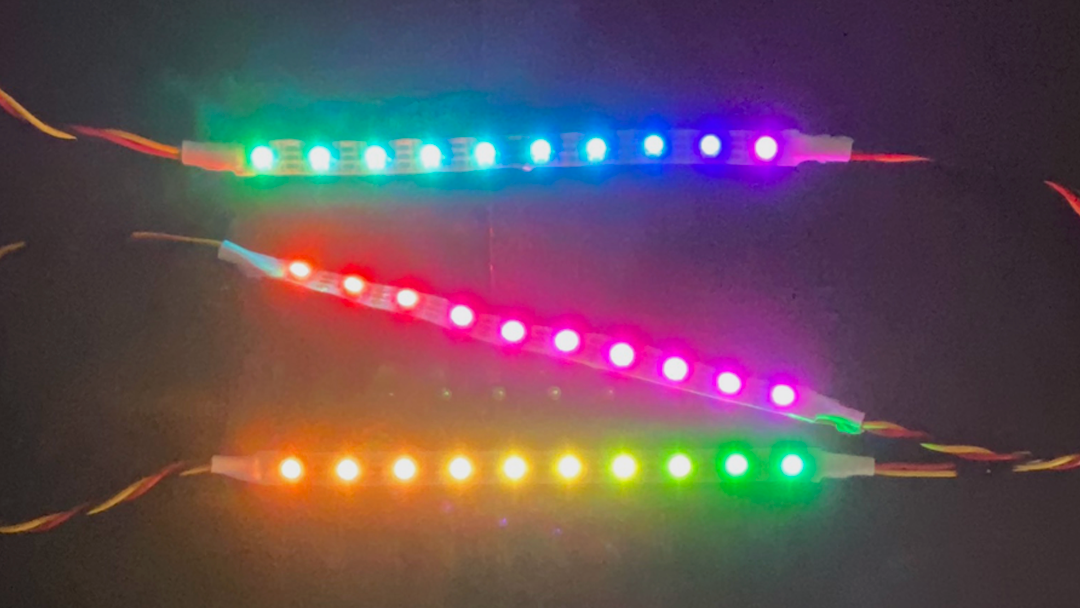
Show rainbow
(a) Right after the LED strip initialisation block, drag a show rainbow block.
(b) To make the colors rotate, in a forever block, drag a 'strip rotate pixel' and a 'strip show' block.
STEP 5

Congratulations
You’ve successfully chained multiple LED strips together. Don’t forget to plug a micro USB cable from your laptop to the top of your micro:bit, and click ‘Download’ to download the code to your micro:bit.
Code and References
Made this activity? Good Job! Now spread the word. Share a photo of your creation on social media with #letsgethacking #DaisychainLEDstrips