Electro Theremin
Get down to the funky sounds of electric ‘analog’ music
YOU WILL NEED
- 1 x micro:bit
- 1 x micro USB cable
- 1 x Tinkercademy breakout board
- 1 x Buzzer
- 1 x Potentiometer
- 2 x F-F Jumper Wires
STEP 1
Assemble the electronics
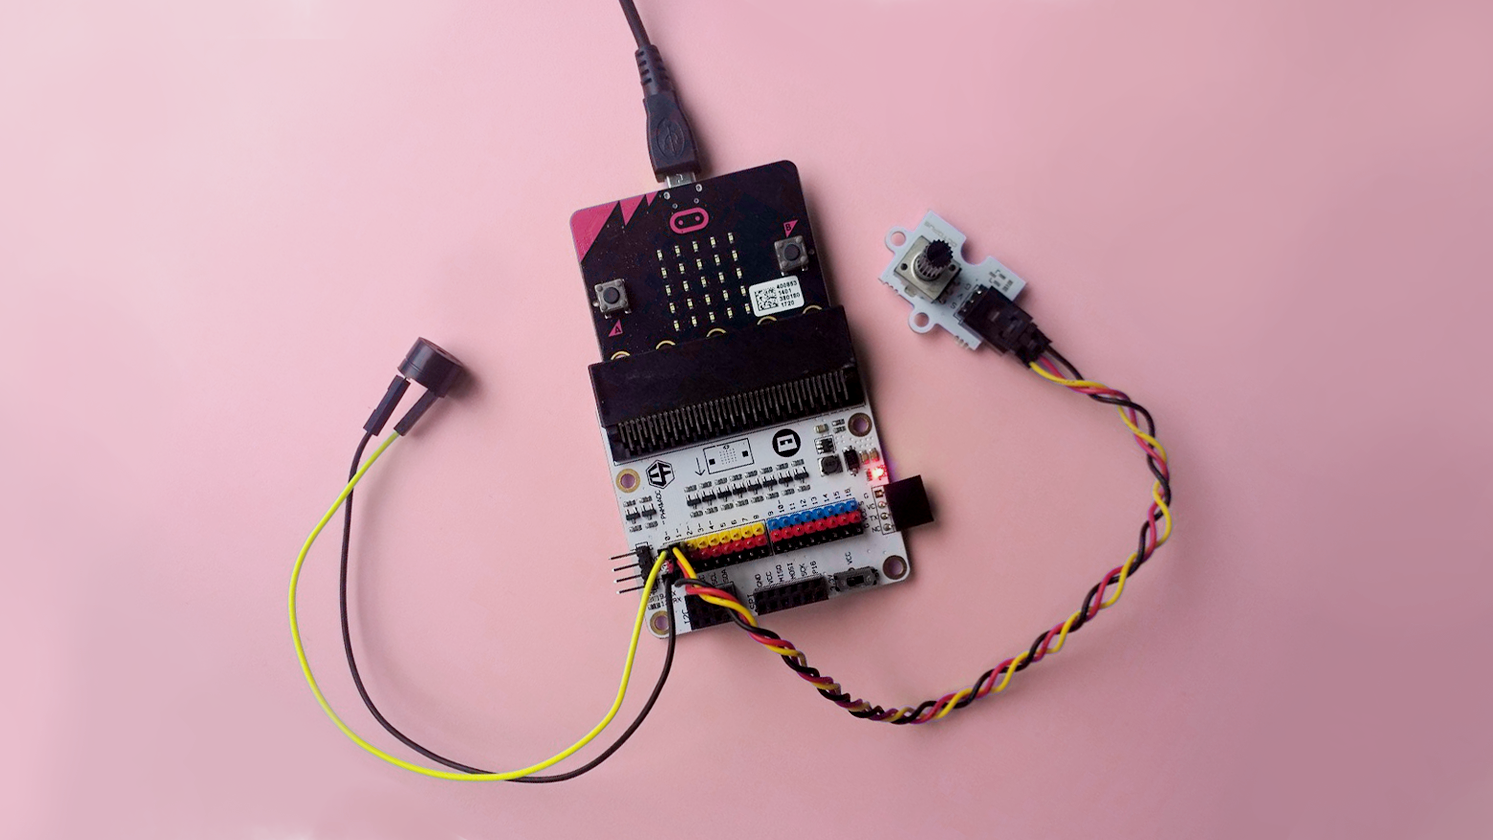
(a) Slot in a micro:bit into the Tinkercademy breakout board.
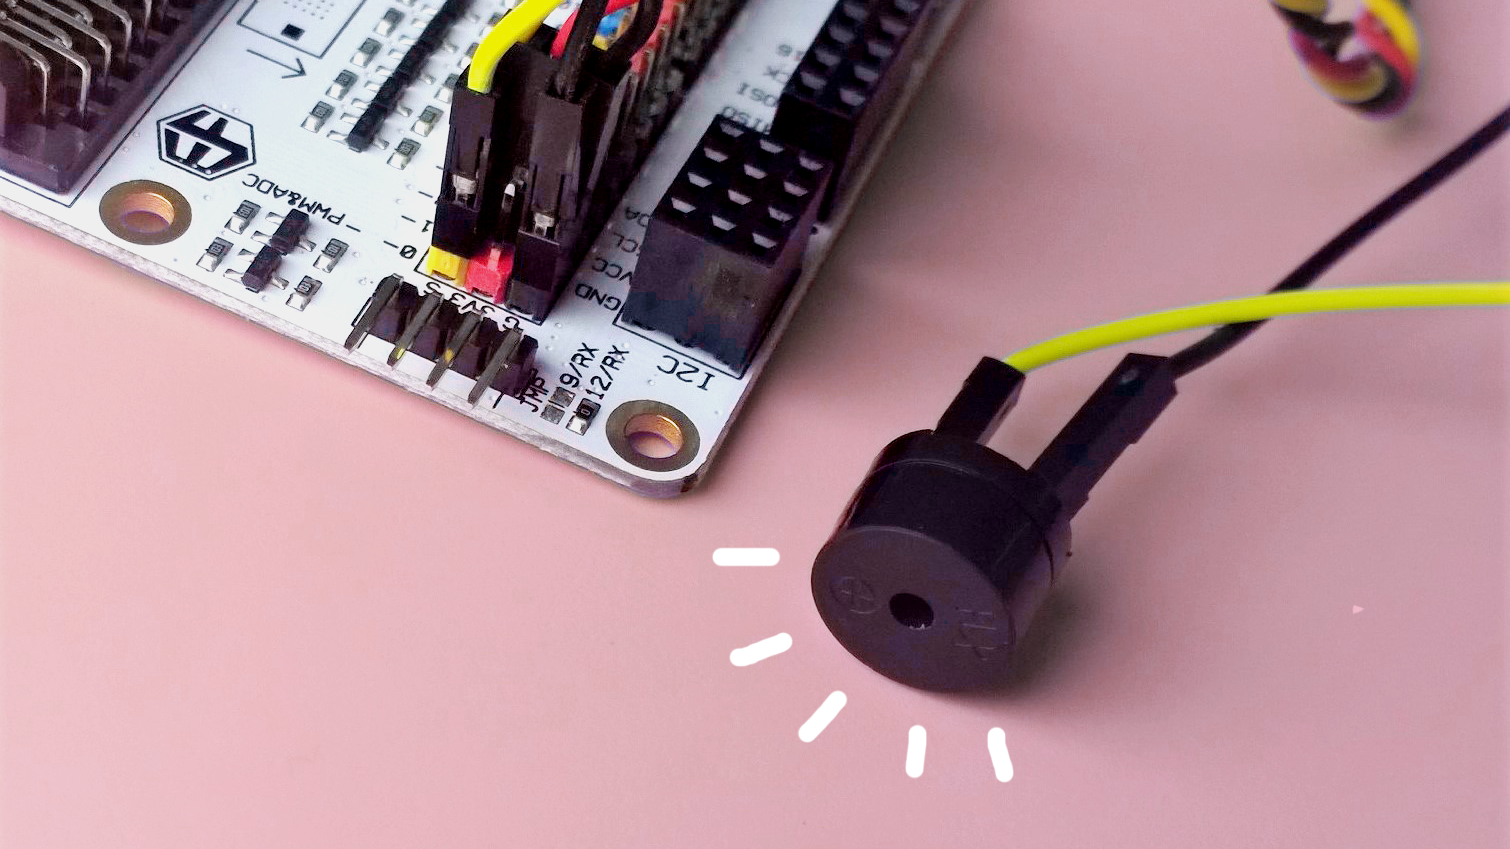
(b) Plug in a Buzzer to Pin0, making sure the positive lead is connected to the yellow signal pin and the negative lead is connected to the black ground pin on the breakout board.
(c) Plug in a potentiometer to Pin1, Match the colours of the wires to the ones on the breakout board!
Materials
- 1 x micro:bit
- 1 x Tinkercademy breakout board
- 1 x Buzzer
- 1 x Potentiometer
- 2 x F-F jumper wire
STEP 2
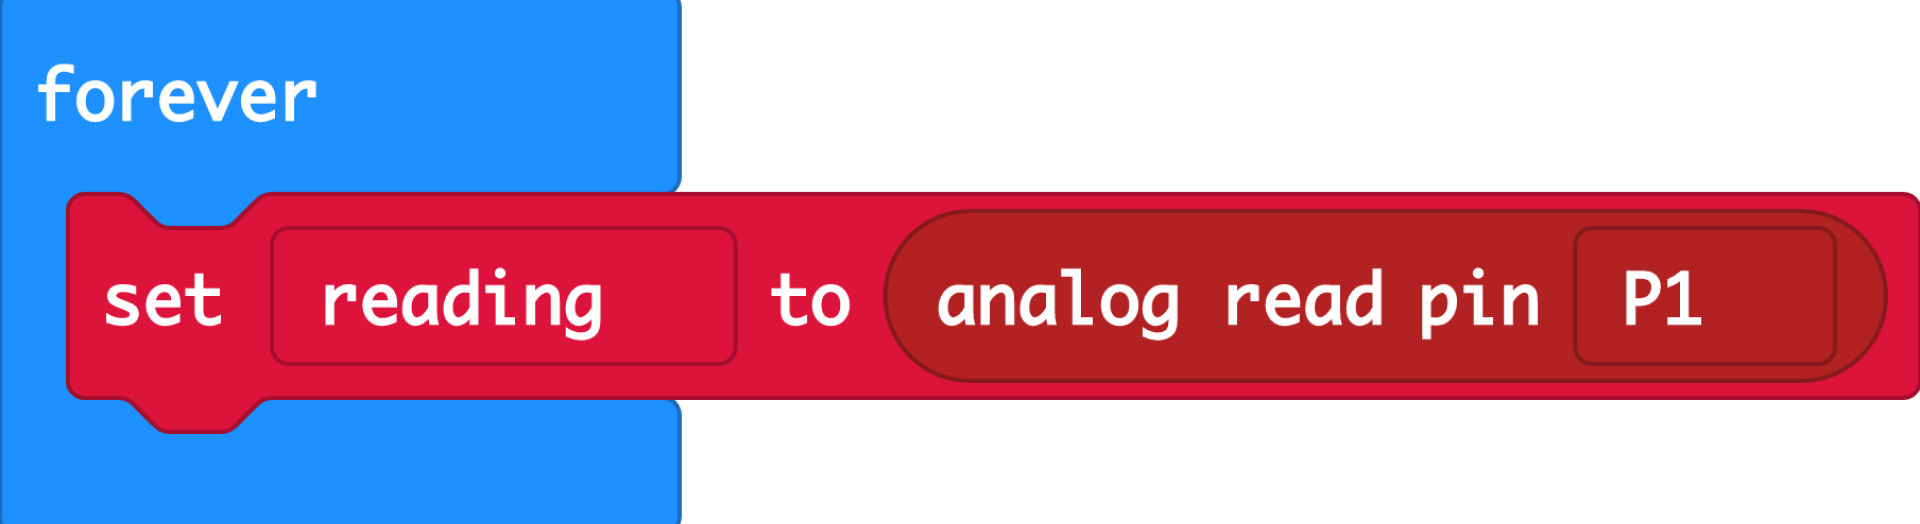
(a) We'll track the potentiometer value using a variable. Variables are like buckets that can hold changing values.
(b) Make a new variable called reading (or anything, really) from the Variable drawer.
(c) We want to constantly set our reading variable to the analog value of the potentiometer, instead of digital. This allows us to access a range of signals from the potentiometer, instead of just a digital 1 or 0. Find this block in the Pins drawer.
STEP 3
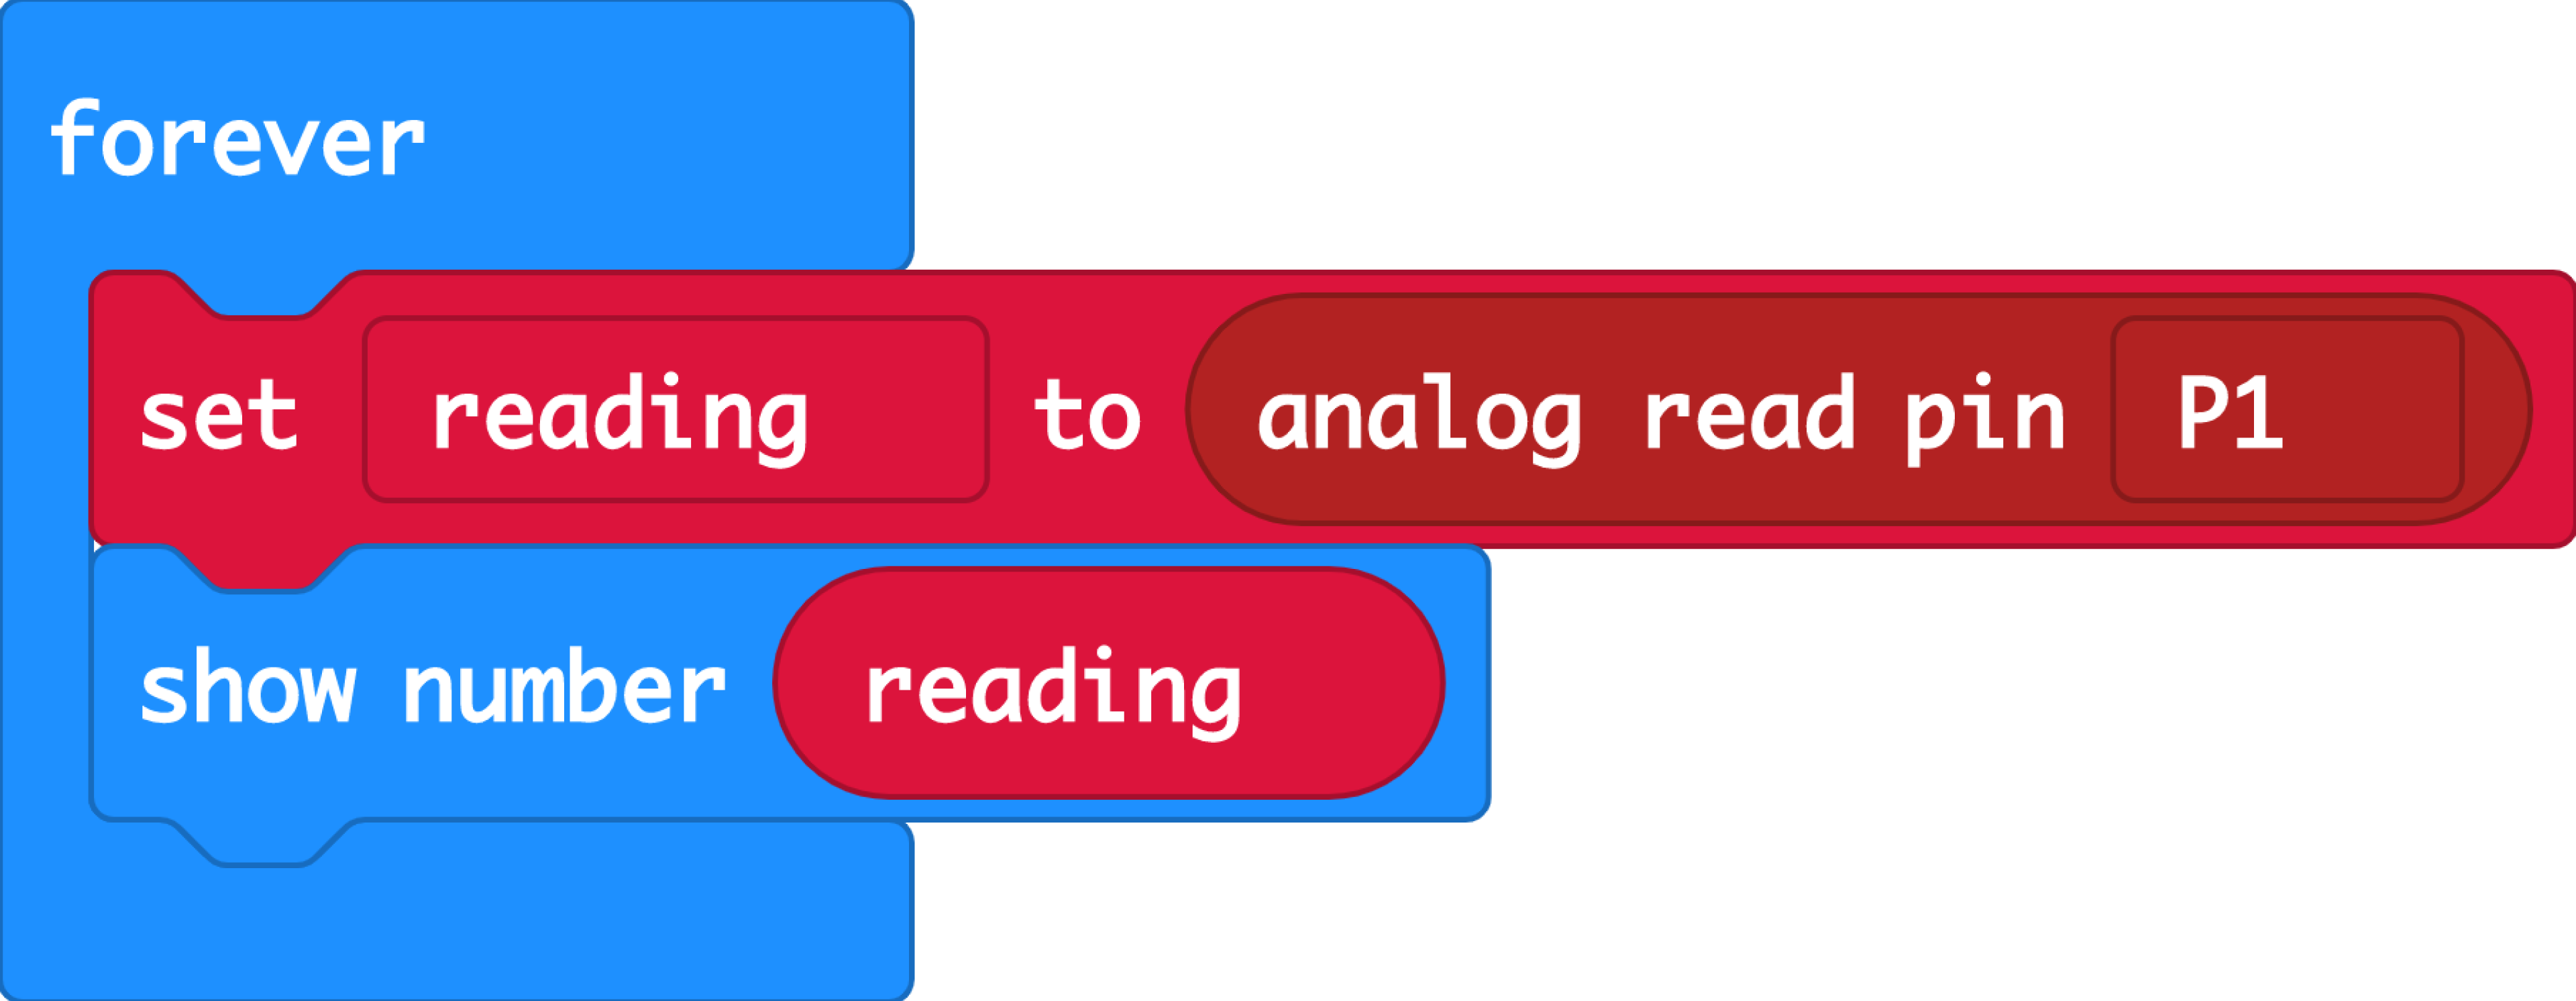
(a) Check your minimum and maximum values for your potentiometer by showing the number of the reading variable. Turning the knob anti-clockwise all the way gives you the minimum, and clockwise all the way gives you maximum.
(b) Notice how the values jump? That’s because the micro:bit takes some time to scroll a large number across the screen. By the time you read a new value, the potentiometer would be way ahead!
STEP 4
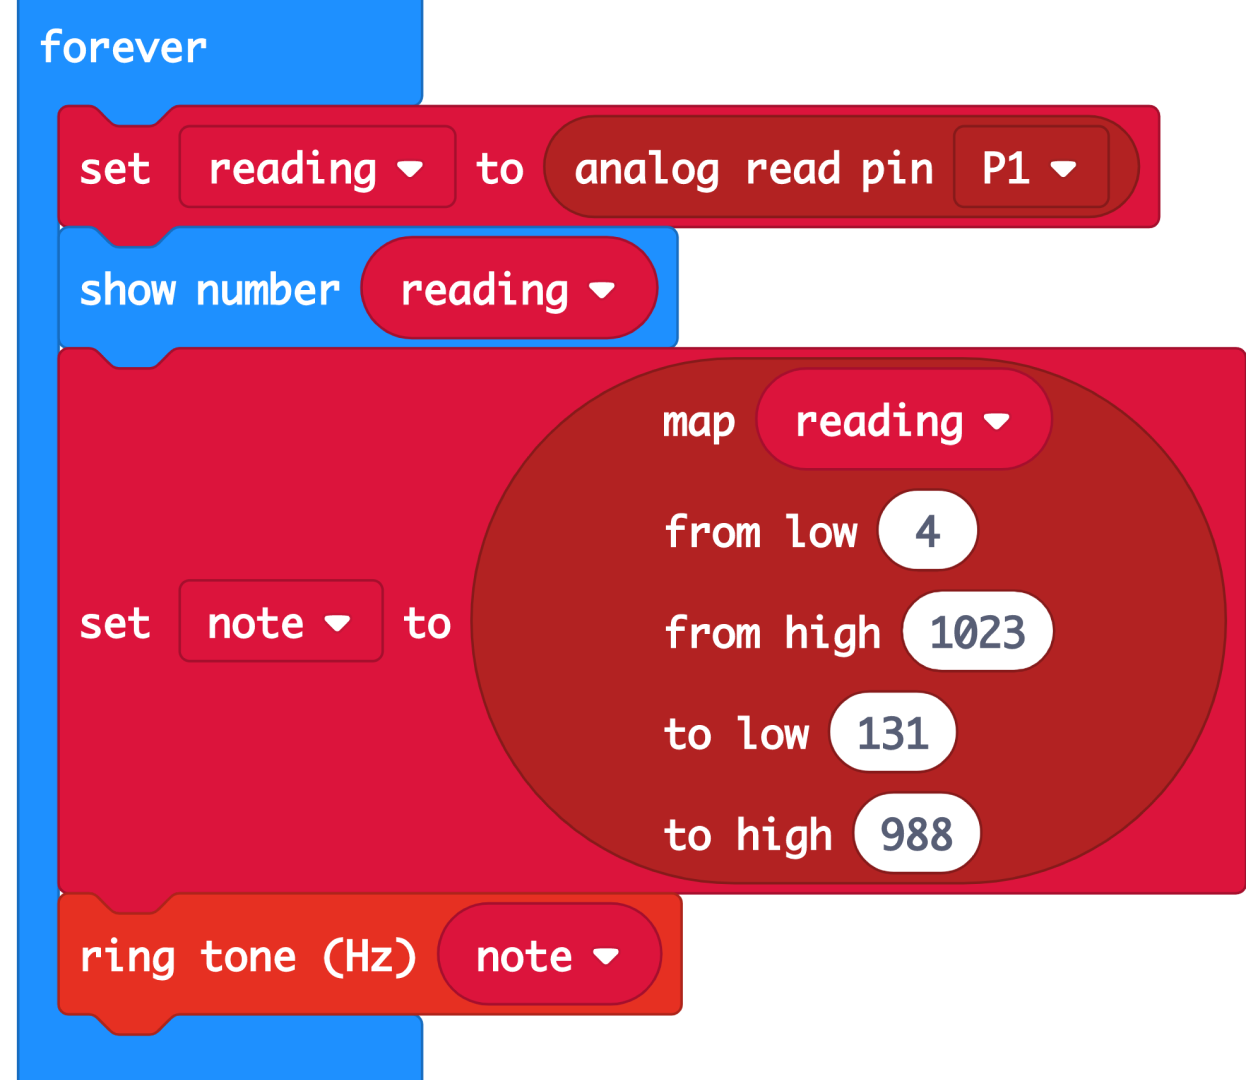
(a) Now we’re going to use those values you just read from your potentiometer to map out your notes!
(b) Our music blocks may not have as wide a range as your potentiometer. Here, we want to make sure the highest potentiometer value still corresponds to the highest note we can play.
(c) Check the value of the lowest and highest notes in the micro:bit piano keys. Use the map block from the Pins drawer to key in all the values.
(d) Create a new variable called note and set it to the map block.
(e) Ring the tone using the note variable.
STEP 5

Upload it all into your micro:bit. You are now ready to make some noise!
Now you’ve learned how to play around with the potentiometer, you can try using it to control LEDs, servos, and other components! And if you get your hands on another analog sensor, you’ll know just how to use it!
Made this activity? Good Job! Now spread the word. Share a photo of your creation on social media with #letsgethacking #ElectroTheremin