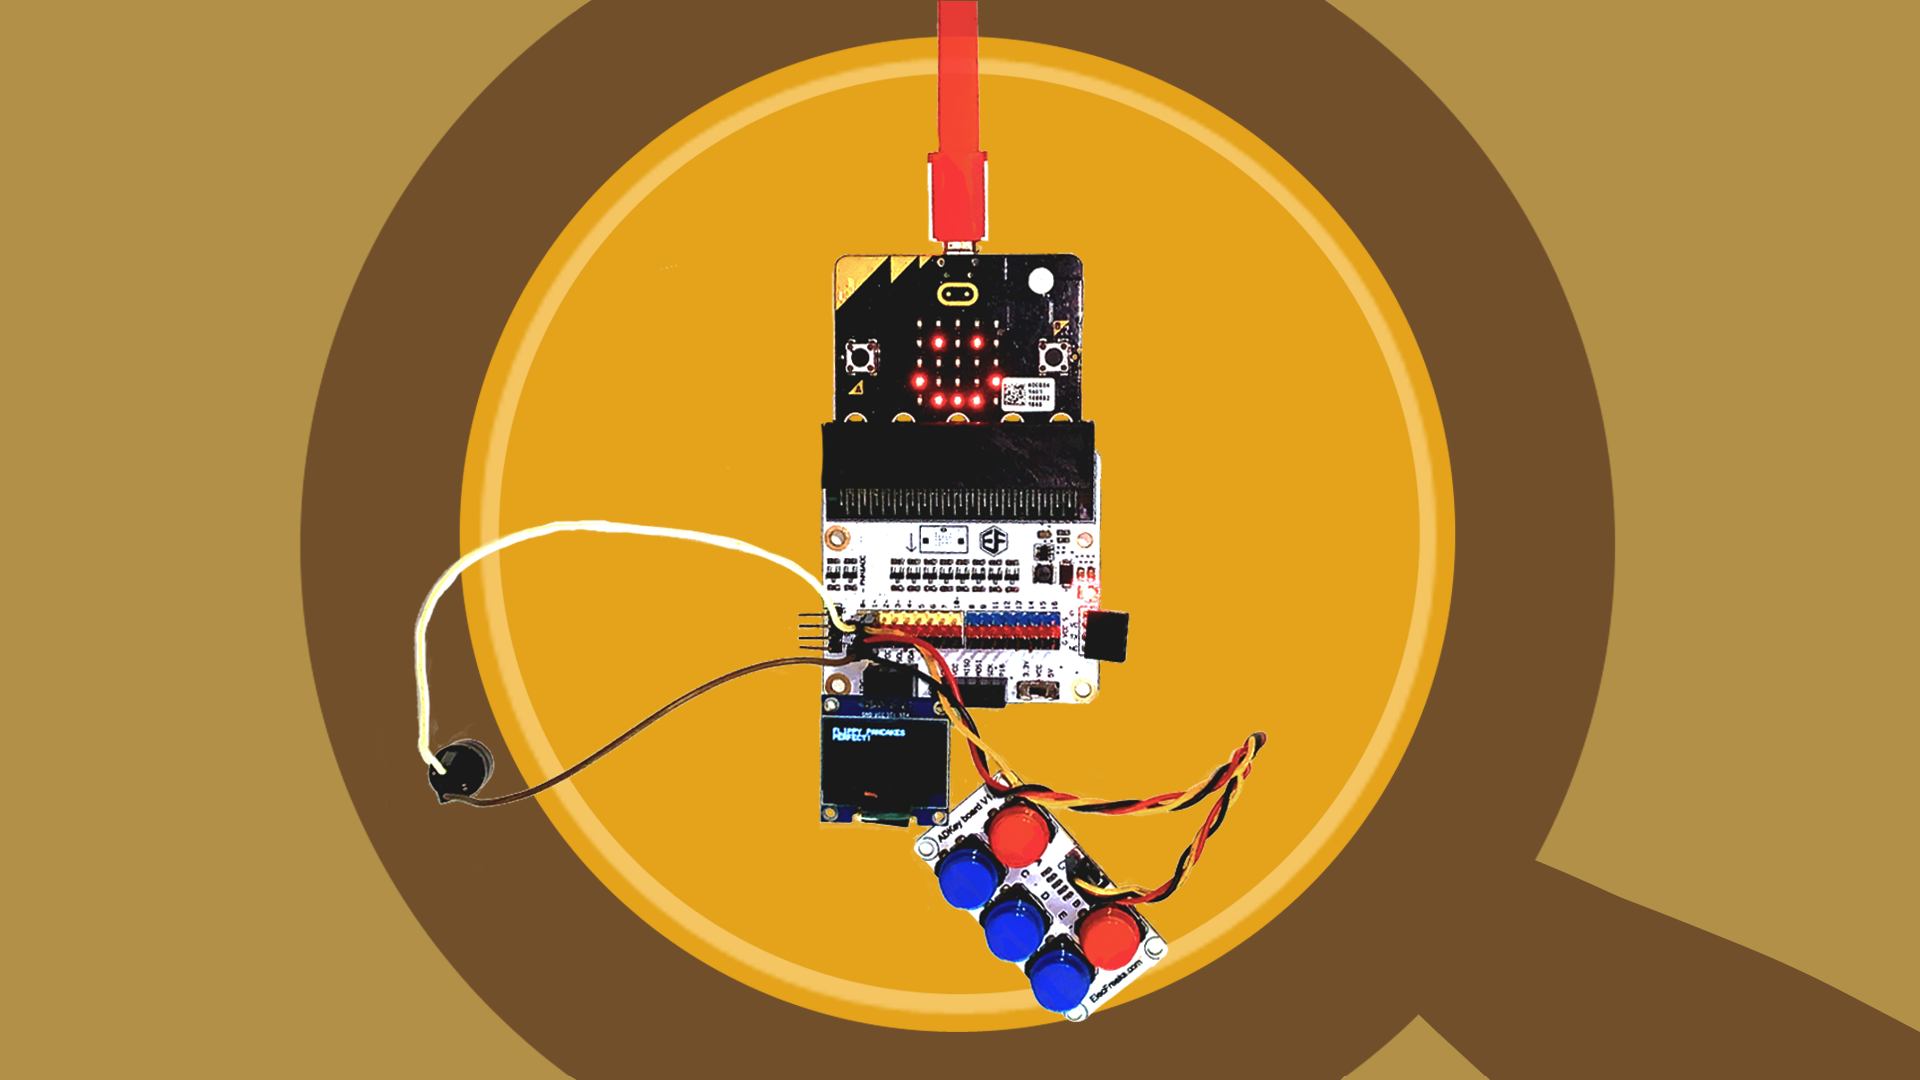
Flippy Pancakes
Create a pancake-flipping game where you must flip the pancake at the perfect time. Too fast and your pancake will be mushy. Too slow and it will burn!
YOU WILL NEED
- 1 x BBC micro:bit
- 1 x Tinkercademy Breakout Board
- 1 x Micro USB cable
- 1 x Buzzer
- 1 x ADKeypad
- 1 x OLED display
- 2 x F-F Jumper Wires
STEP 1

(a) We’re going to create a pancake-flipping game where you must flip the pancake at the perfect time. Too fast and your pancake will be mushy. Too slow and it will burn!
(b) You’ll learn how to…
• Connect external components to the Tinkercademy breakout board, to use with a micro:bit
• Use if-else statements to evaluate conditions.
• Create your own function on MakeCode.
• Customise your game!
STEP 2
Connecting the Components
(a) Slot the micro:bit into the Tinkercademy breakout board.
(b) Connect the external components to the Tinkercademy breakout board.
• Using 2 F-F jumper wires, connect the ‘+’ end of the buzzer to the yellow signal (S) pin, and ‘-’ end to the black ground (G) pin.
• Connect the ADKeypad to pin1, matching the colours of the wires to that on the breakout board pin.
• Insert the OLED display into the I2C pinouts.
Materials
- 1 x BBC micro:bit
- 1 x Tinkercademy Breakout Board
- 1 x Buzzer
- 2 x F-F Jumper Wires
- 1 x ADKeypad
- 1 x OLED display
STEP 3
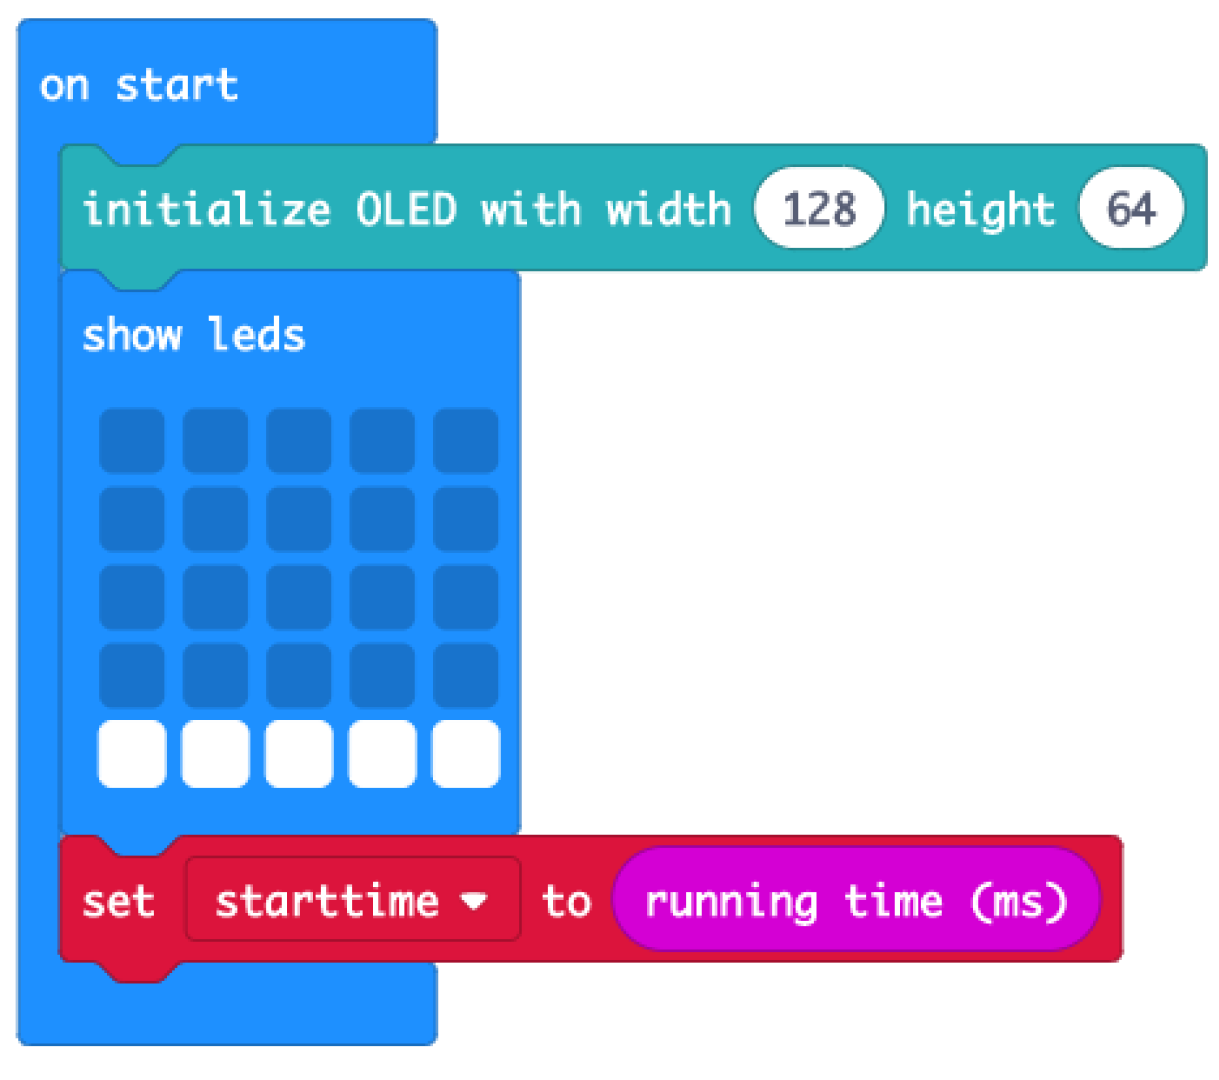
Initializing
(a) Go to makecode.microbit.org and create 'New Project'.
(b) We’ll code a timer that starts running when the micro:bit is powered, to calculate the start time, end time, and total game time.
(c) From the 'Variables' drawer, create a variable 'startTime'.
(d) When the micro:bit is powered (on start),
• set 'startTime' to ‘running time’, ie. time micro:bit has been running
• display a flat pancake on the micro:bit LEDs
• initialize the OLED display, to show text messages on it later.
STEP 4
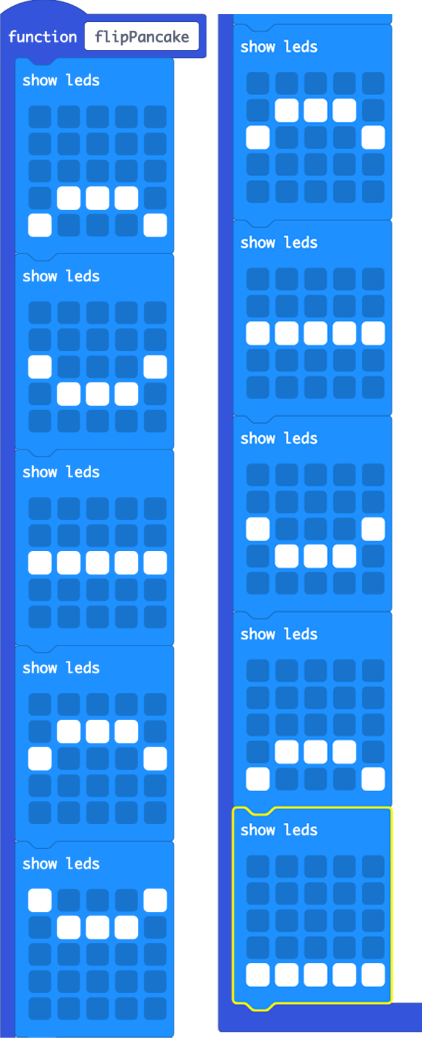
Coding the Animation
Let's code the game to play a pancake-flipping animation on the micro:bit when 'A' on the ADKeypad is pressed. We'll store this animation sequence in a function.
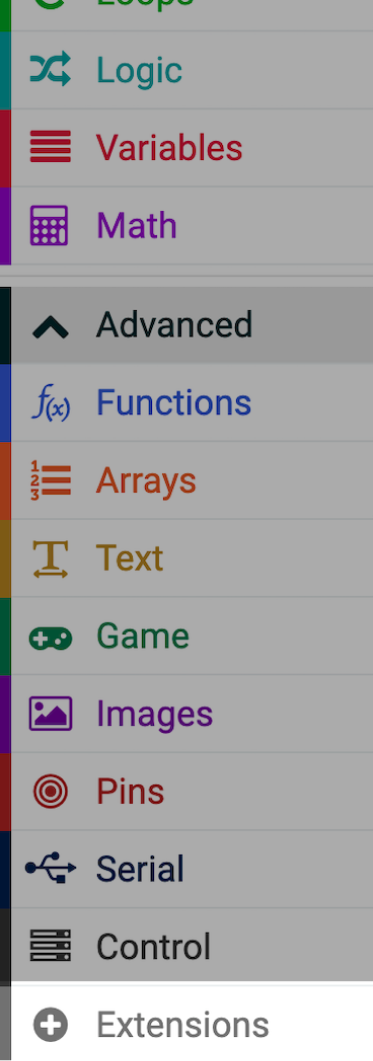
(a) Click on the ‘Advanced’ drawer, and select 'Functions'. Create a new function ‘flipPancake’.
(b) Define the function by adding multiple LED blocks inside it.
(c) We created an animation of the pancake being tossed and wobbling as it falls down. Feel free to customise your own pancake-flipping animation!
STEP 5
Pitch Briefing
To detect button presses on the ADKeypad, we need to import a special package in MakeCode.
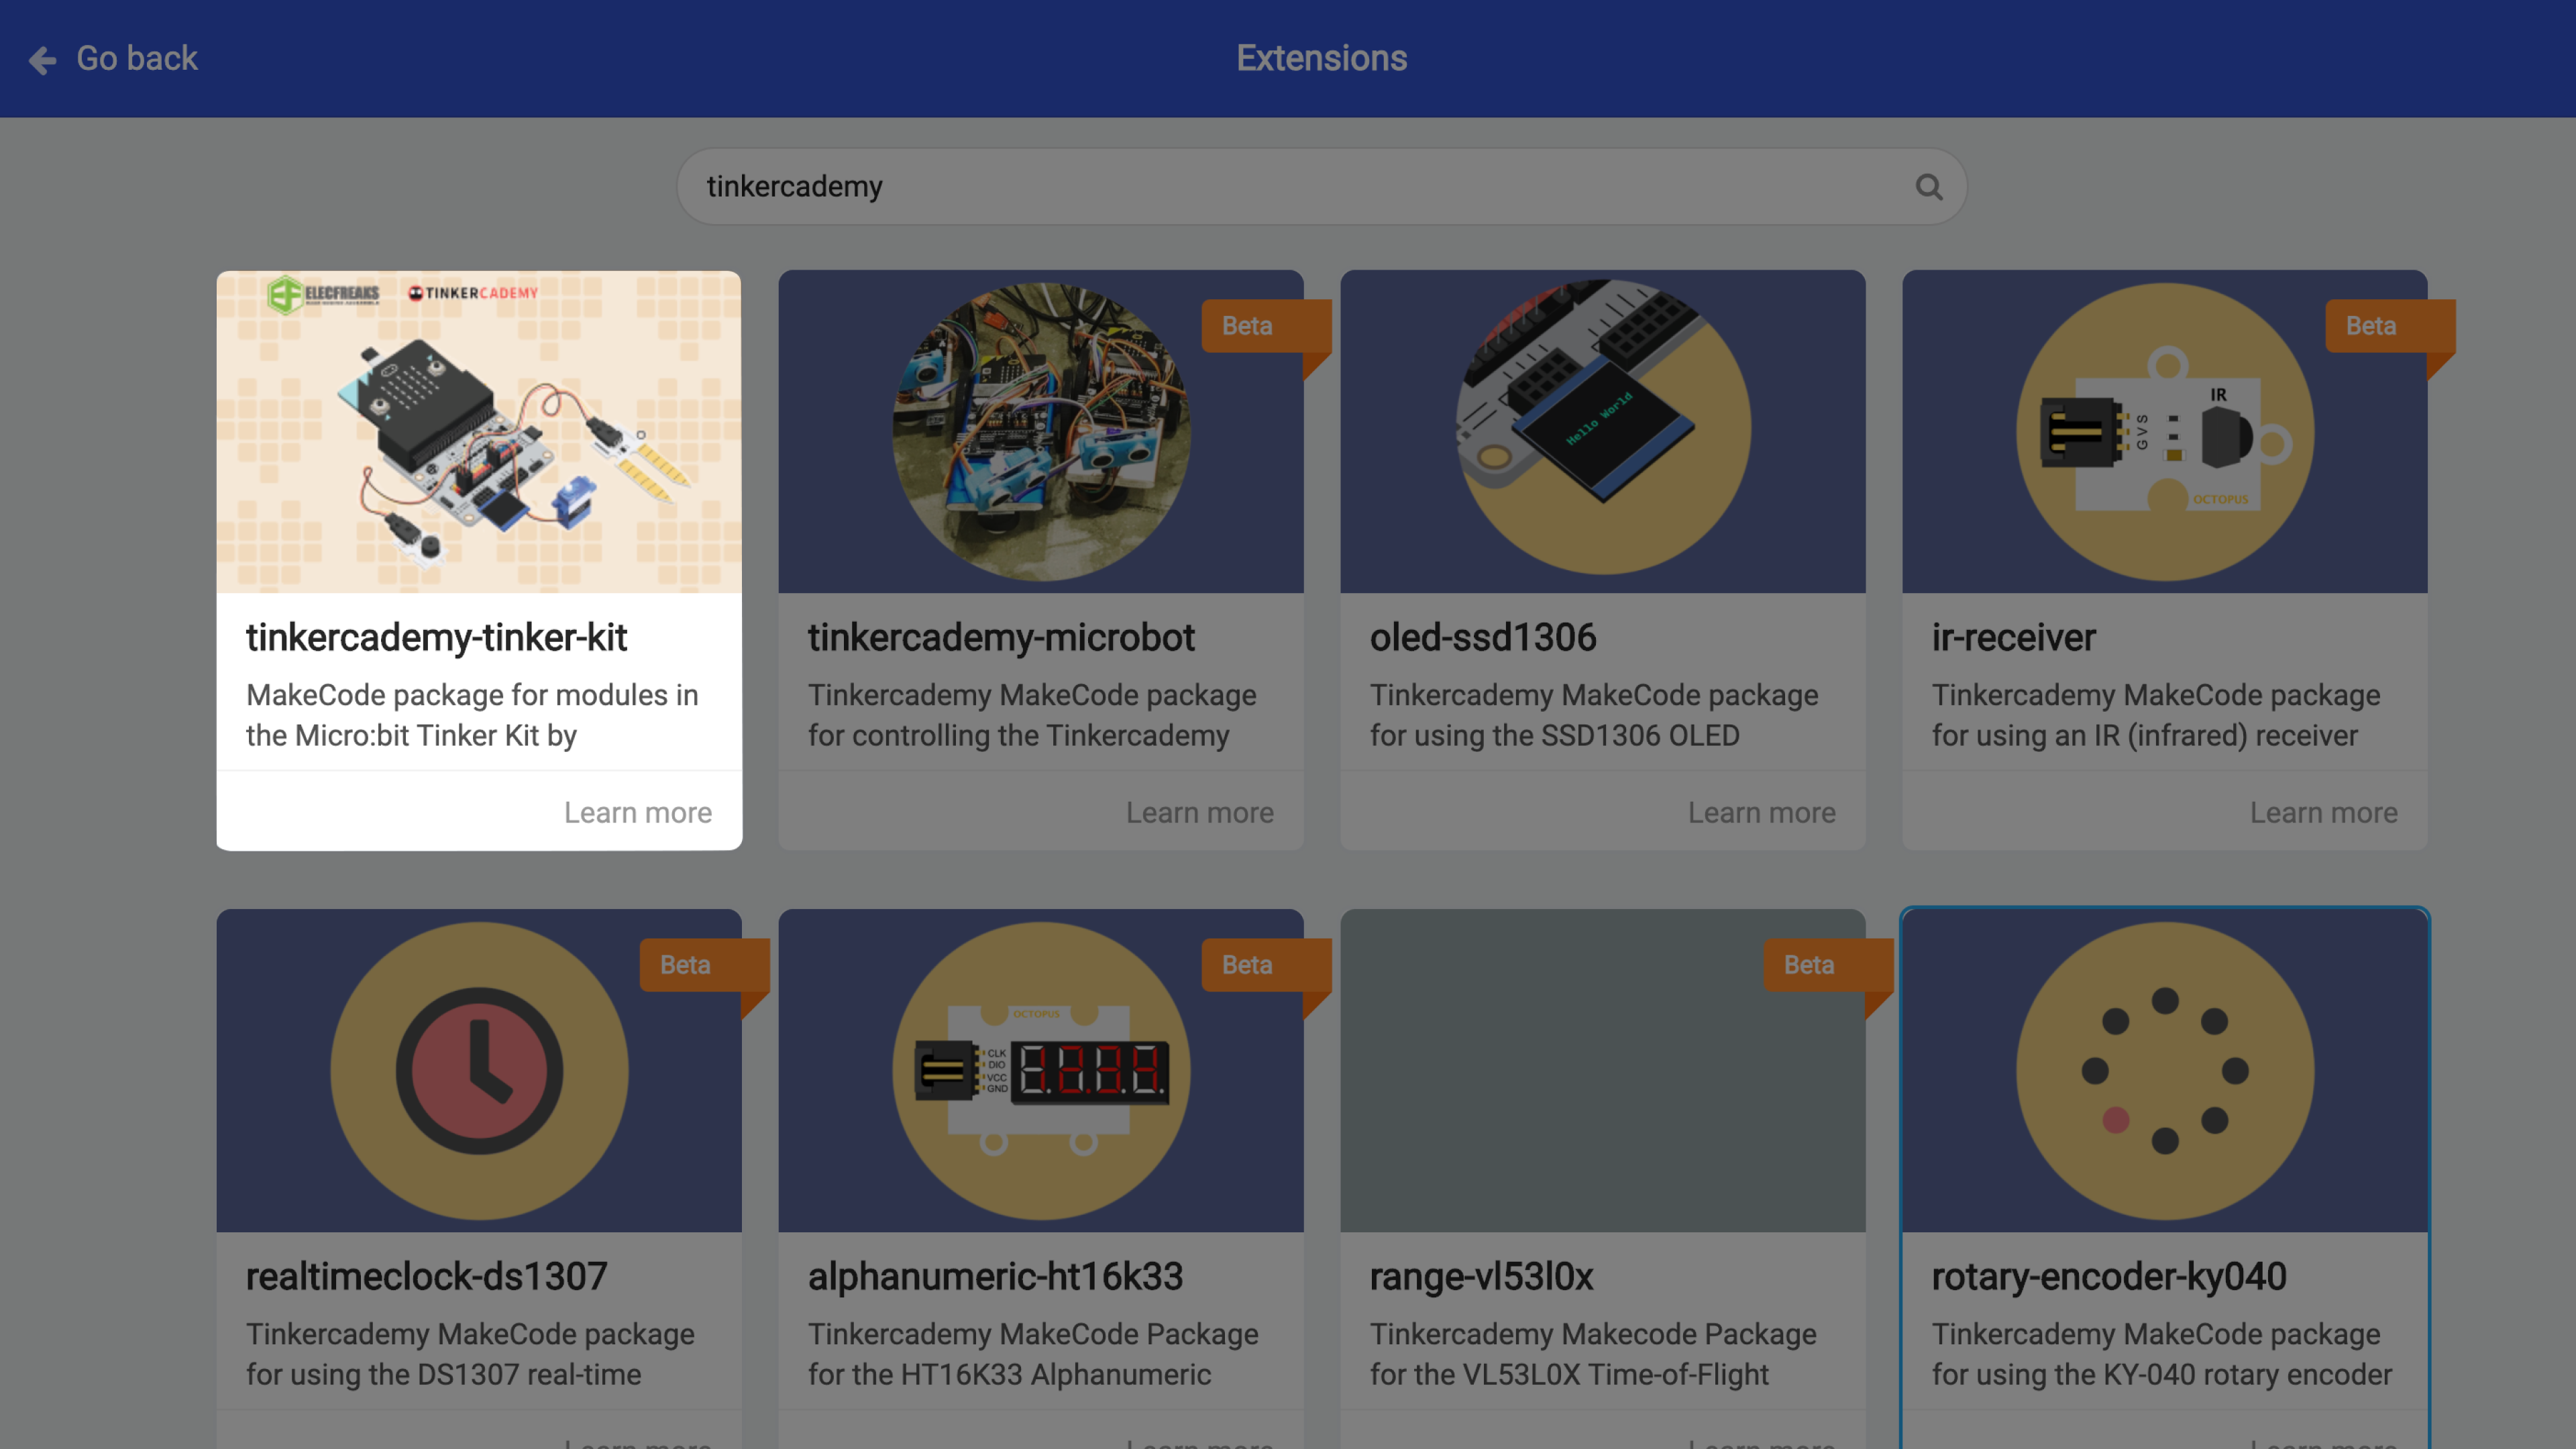
(a) Click on the ‘Advanced’ drawer, select 'Extensions'.
(b) Search ‘tinkercademy’ and click 'tinkercademy-tinker-kit' to import the required extension. You will see 2 new drawers on Makecode - ‘OLED’ and ‘Tinkercademy’.
(c) Note that importing this package only happens for the current project. For new projects, you’ll need to re-import it.
STEP 6
Detecting Game Start
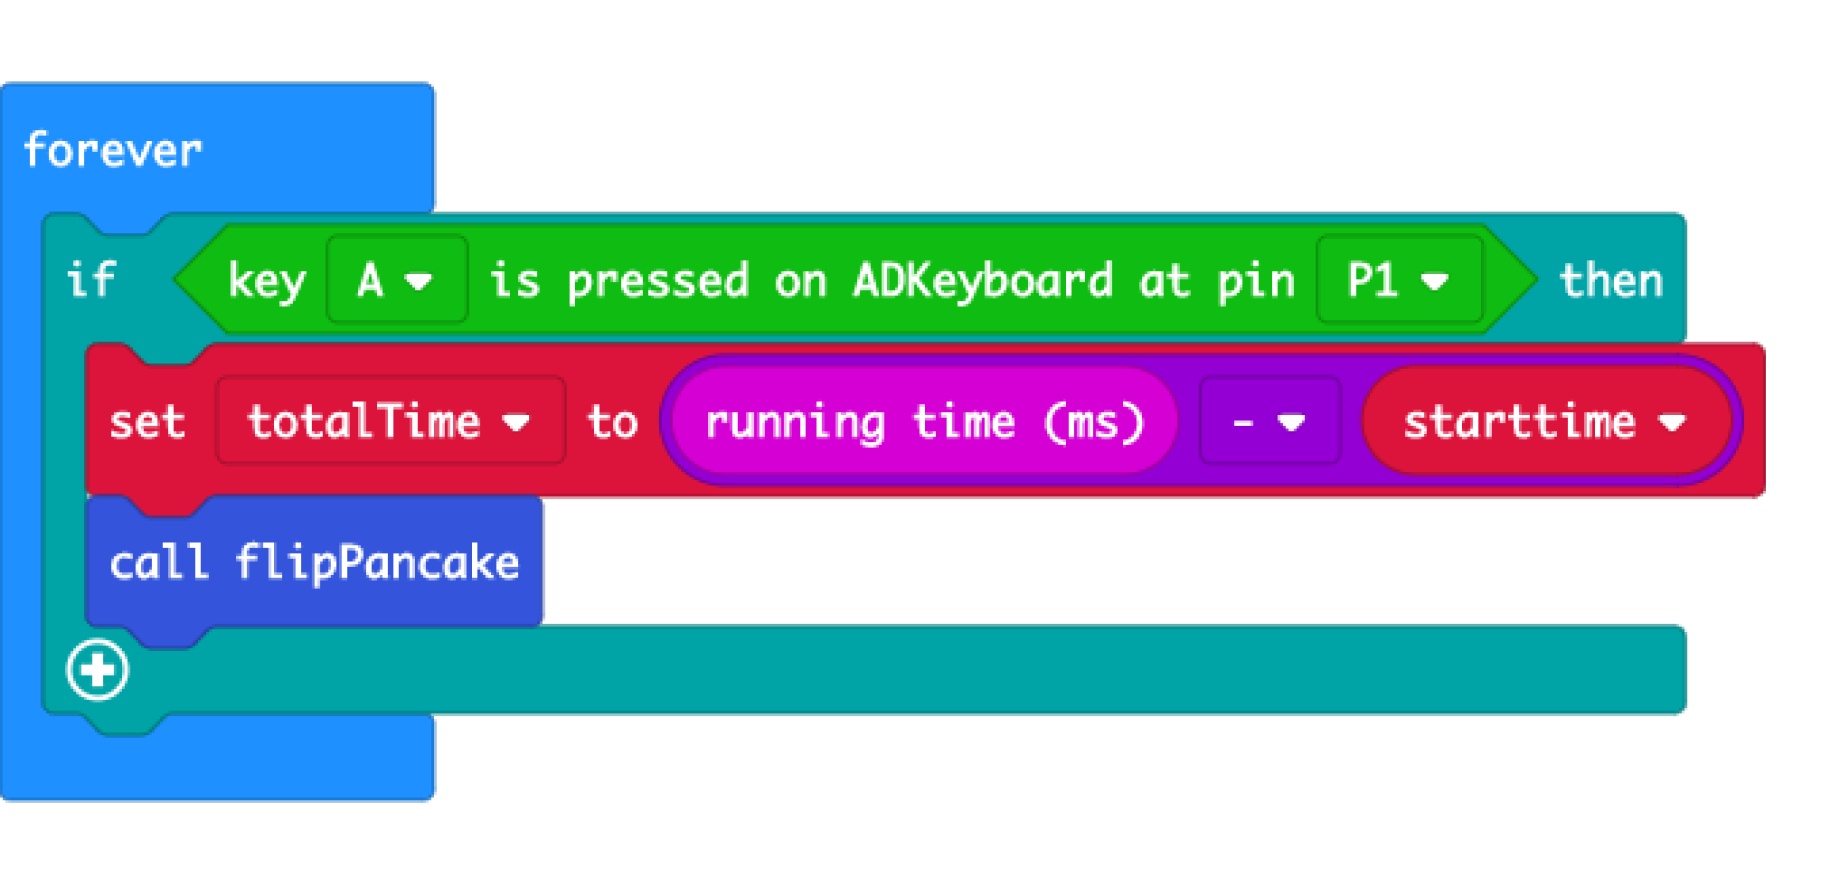
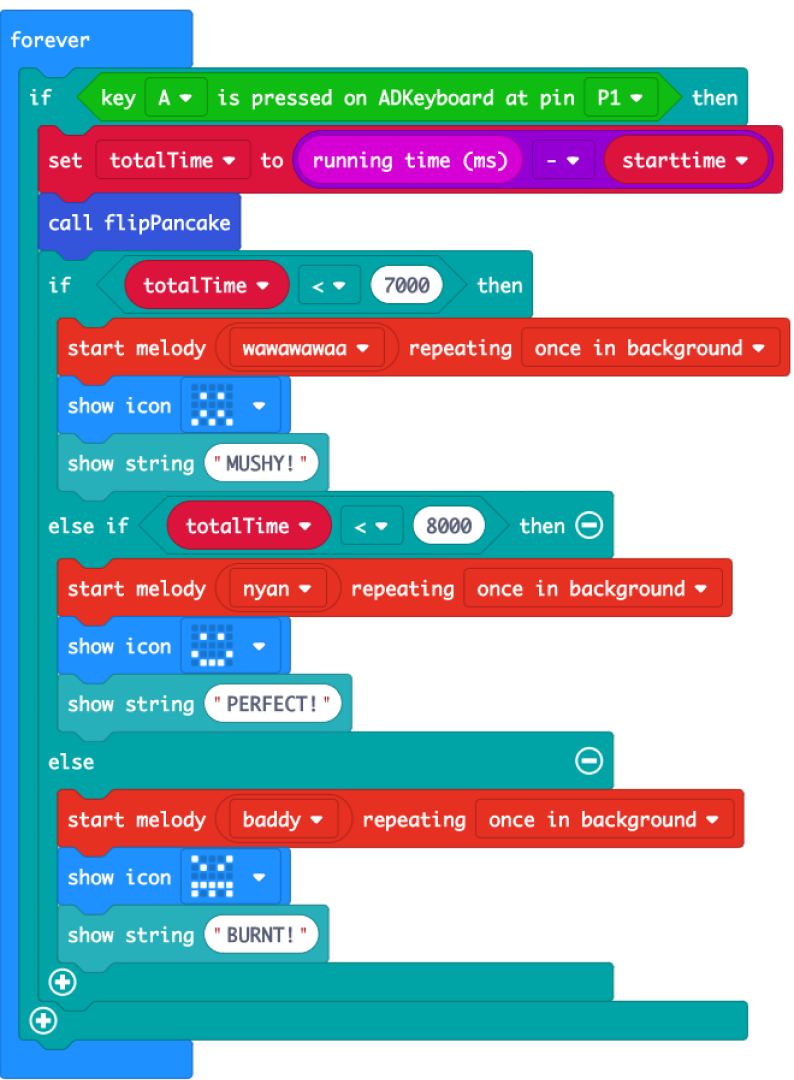
(a) In a forever loop, check if button A on ADkeyboard (connected to pin P1) is pressed. If it is, the game has started and the pancakes will start flipping.
(b) Create a variable 'totalTime' to store game time, time the game has been running for. This is equals to the current 'running time' minus 'startTime'.
(c) Call the 'flipPancake' function to start the pancake flip animation.
STEP 7
Determining Pancake Readiness
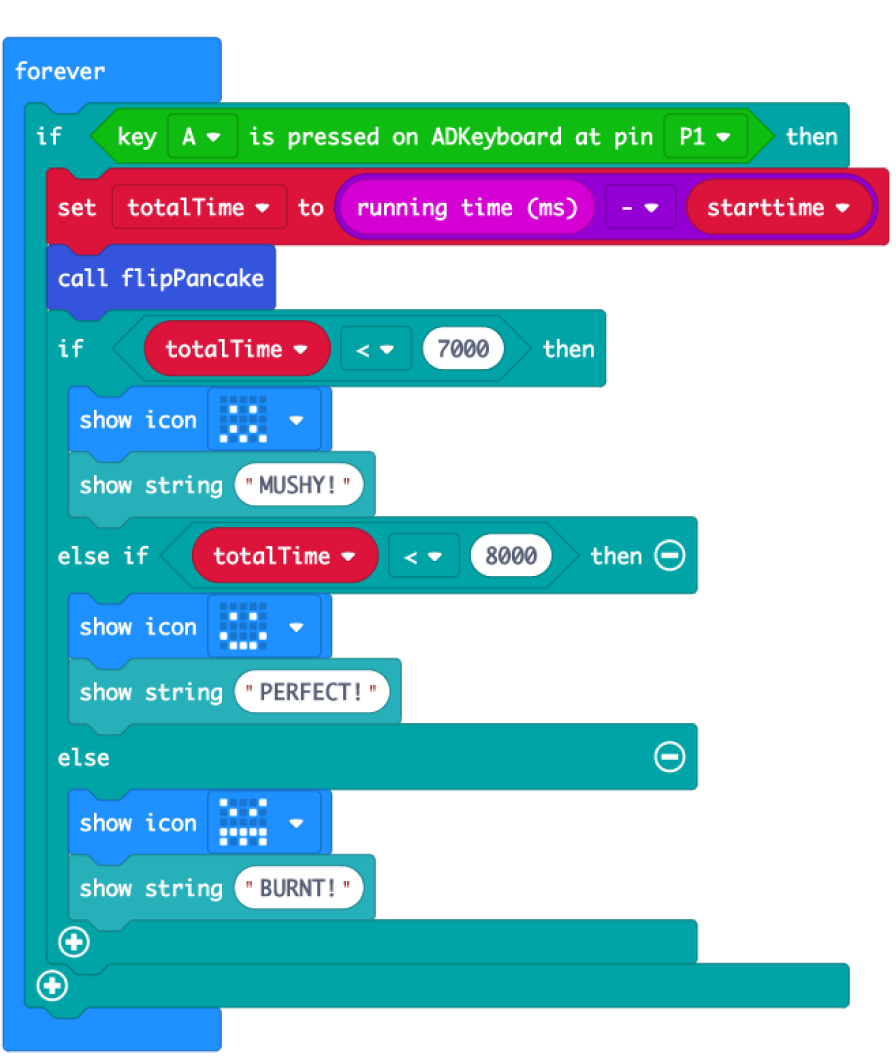
Based on 'totalTime', determine pancake readiness (mushy / perfect / burnt). Display different icons (on micro:bit LEDs) and messages (on OLED screen) accordingly.
(a) As ‘totalTime’ is calculated only when the game has started (ie when button A is pressed), add the following if-else conditionals under the ‘if ... then’ block from step 5.
(b) If 'totalTime' < 7000ms (7s), the pancake is mushy.
(c) If not and 'totalTime' < 8000ms (8s), it is perfect.
(d) Otherwise ('totalTime' > 8000ms), it is overcooked.
(e) Drag the ‘show string’ blocks from the OLED drawer, so the messages are displayed on the OLED screen instead.
STEP 8
Reset the Game
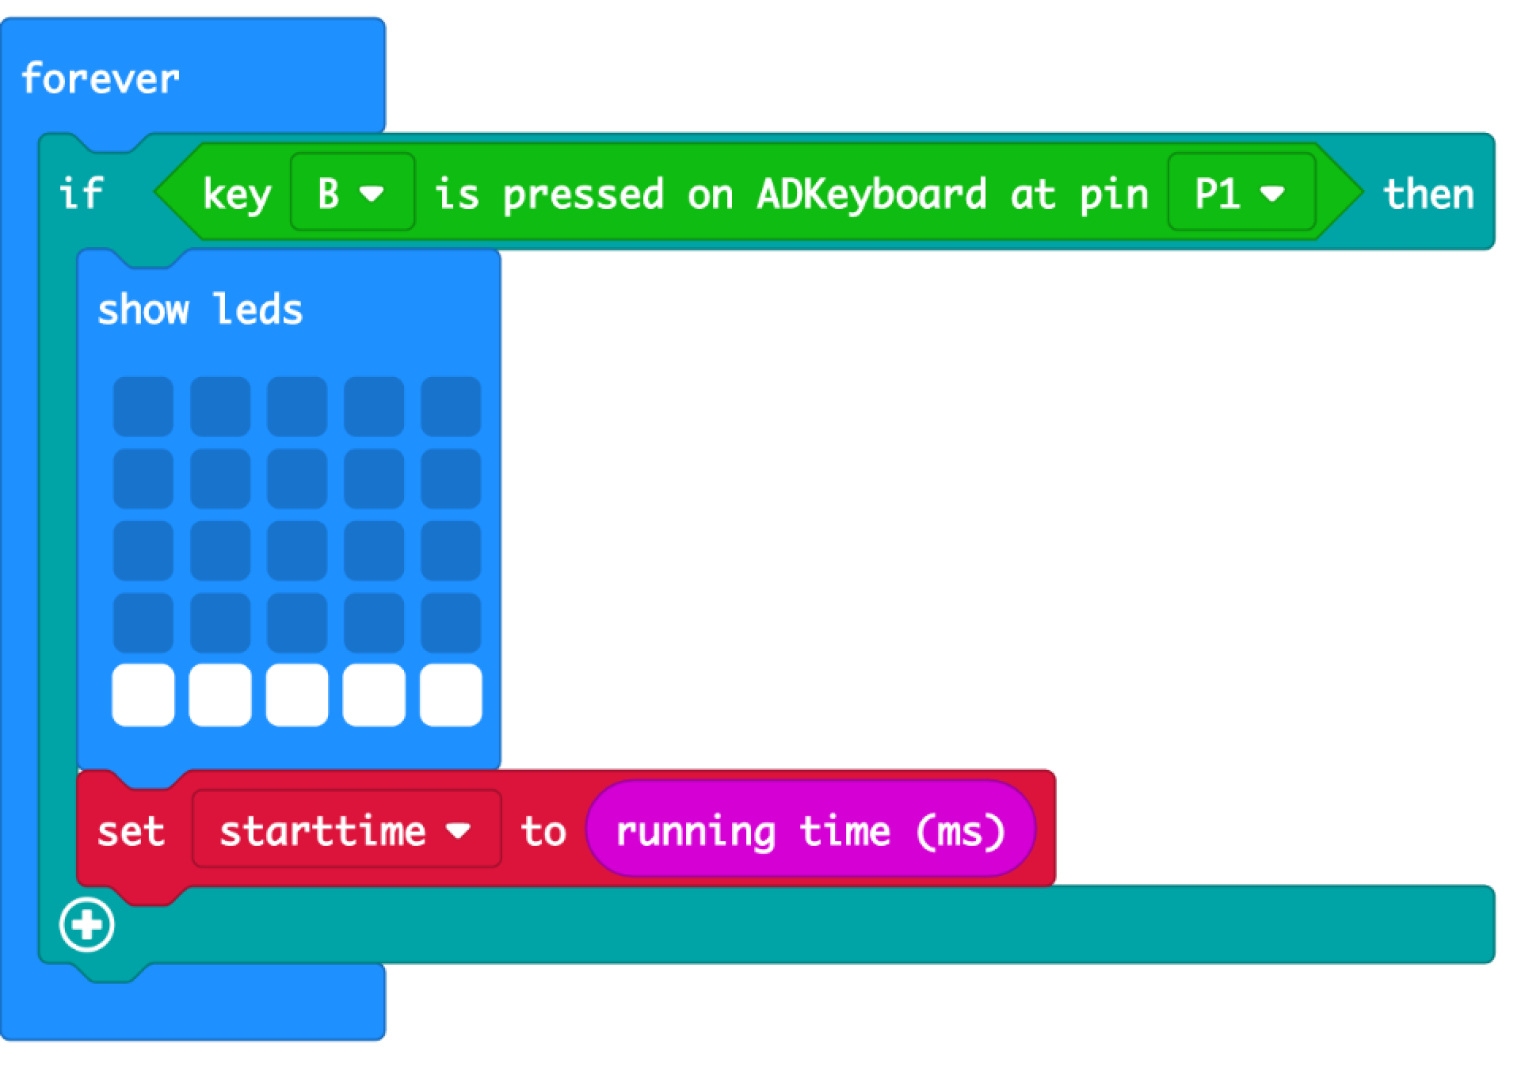
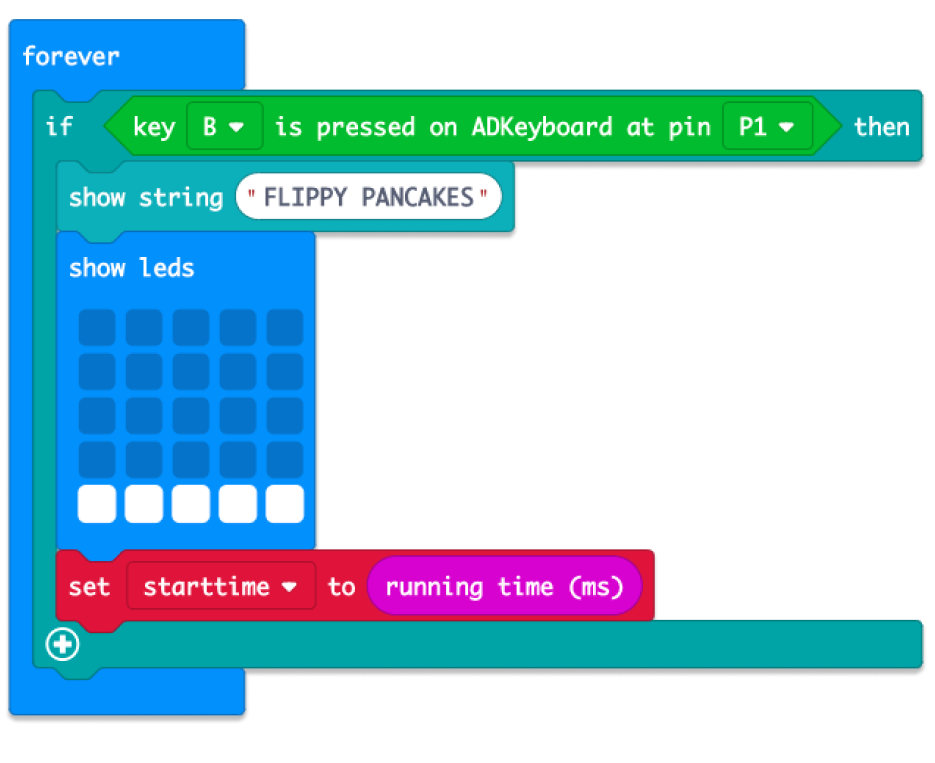
Now, let's allow players to reset the game when button B is pressed on the ADKeypad (which is connected to pin P1).
(a) In a forever loop, check if button B is pressed.
(b) If yes, reset the game by
• displaying a new flat pancake, and
• resetting starting time stored in 'startTime'
STEP 9
Playing Music
Now, let's incorporate music to add more fun to the game! The buzzer will play the music.
Adding on to the code from step 6,
(a) Add sad melodies ('wawawawaa' and 'baddy') for mushy (<7000ms) or burnt (>8000ms) pancakes.
(b) Add a happy nyan-cat melody for perfect pancakes.
(c) Set these melodies to play ‘once in background’, so the game doesn't pause until they have finished playing.
(d) Feel free to also customize the melodies!
STEP 10

Starting Music & Message
Finally, let’s add starting music and message to greet us when we first start up the micro:bit.
(a) Adding on to the 'on start' block from step 2,
• Play a melody 'once in background'.
• Display the name of the game on the OLED screen. Remember to use the ‘show string’ block from the ‘OLED’, not ‘Basic’ drawer.
(b) Don’t forget to add the same ‘show string’ block to the reset code from step 7 too!
STEP 11
Complete!
(a) Congratulations, you've finished coding your flippy pancakes game!
(b) Don't forget to connect the top of your micro:bit to your laptop using a microUSB cable, and click 'Download' on MakeCode.
(c) We hope you've learnt about the external components, conditionals and functions, which you can also incorporate into other projects. For example, you can use the ADKeypad to control LEDs, servos, and other components!
(d) Have fun playing!
STEP 12

Extension: Scoring
What’s a game without healthy competition? Add a scoring system to compete against your friends!
(a) Simply add the variable ‘score’ under the ‘on start’ block.
(b) ‘Change score by 1’ whenever you get a PERFECT pancake.
Have fun cooking up new ideas!
Made this activity? Good Job! Now spread the word. Share a photo of your creation on social media with #letsgethacking #FlippyPancakes