Ice breaker game
“Break the ice” with someone you just met!
YOU WILL NEED
- 1 x BBC micro:bit
- 1 x Tinkercademy Breakout Board
- 1 x Micro USB cable
- 1 x ADKeypad
- 1 x OLED display
STEP 1

(a) We’re going to create a game that allows you to “break the ice” with someone you just met. The 25 LEDs on the micro:bit represents the virtual ice and you would have to press the buttons on the ADKeypads to play the game.
(b) You'll learn about
• Using the ADKeypad and OLED screen with the micro:bit
• Creating a project with these external components
• If-else conditional statements
• Functions
STEP 2

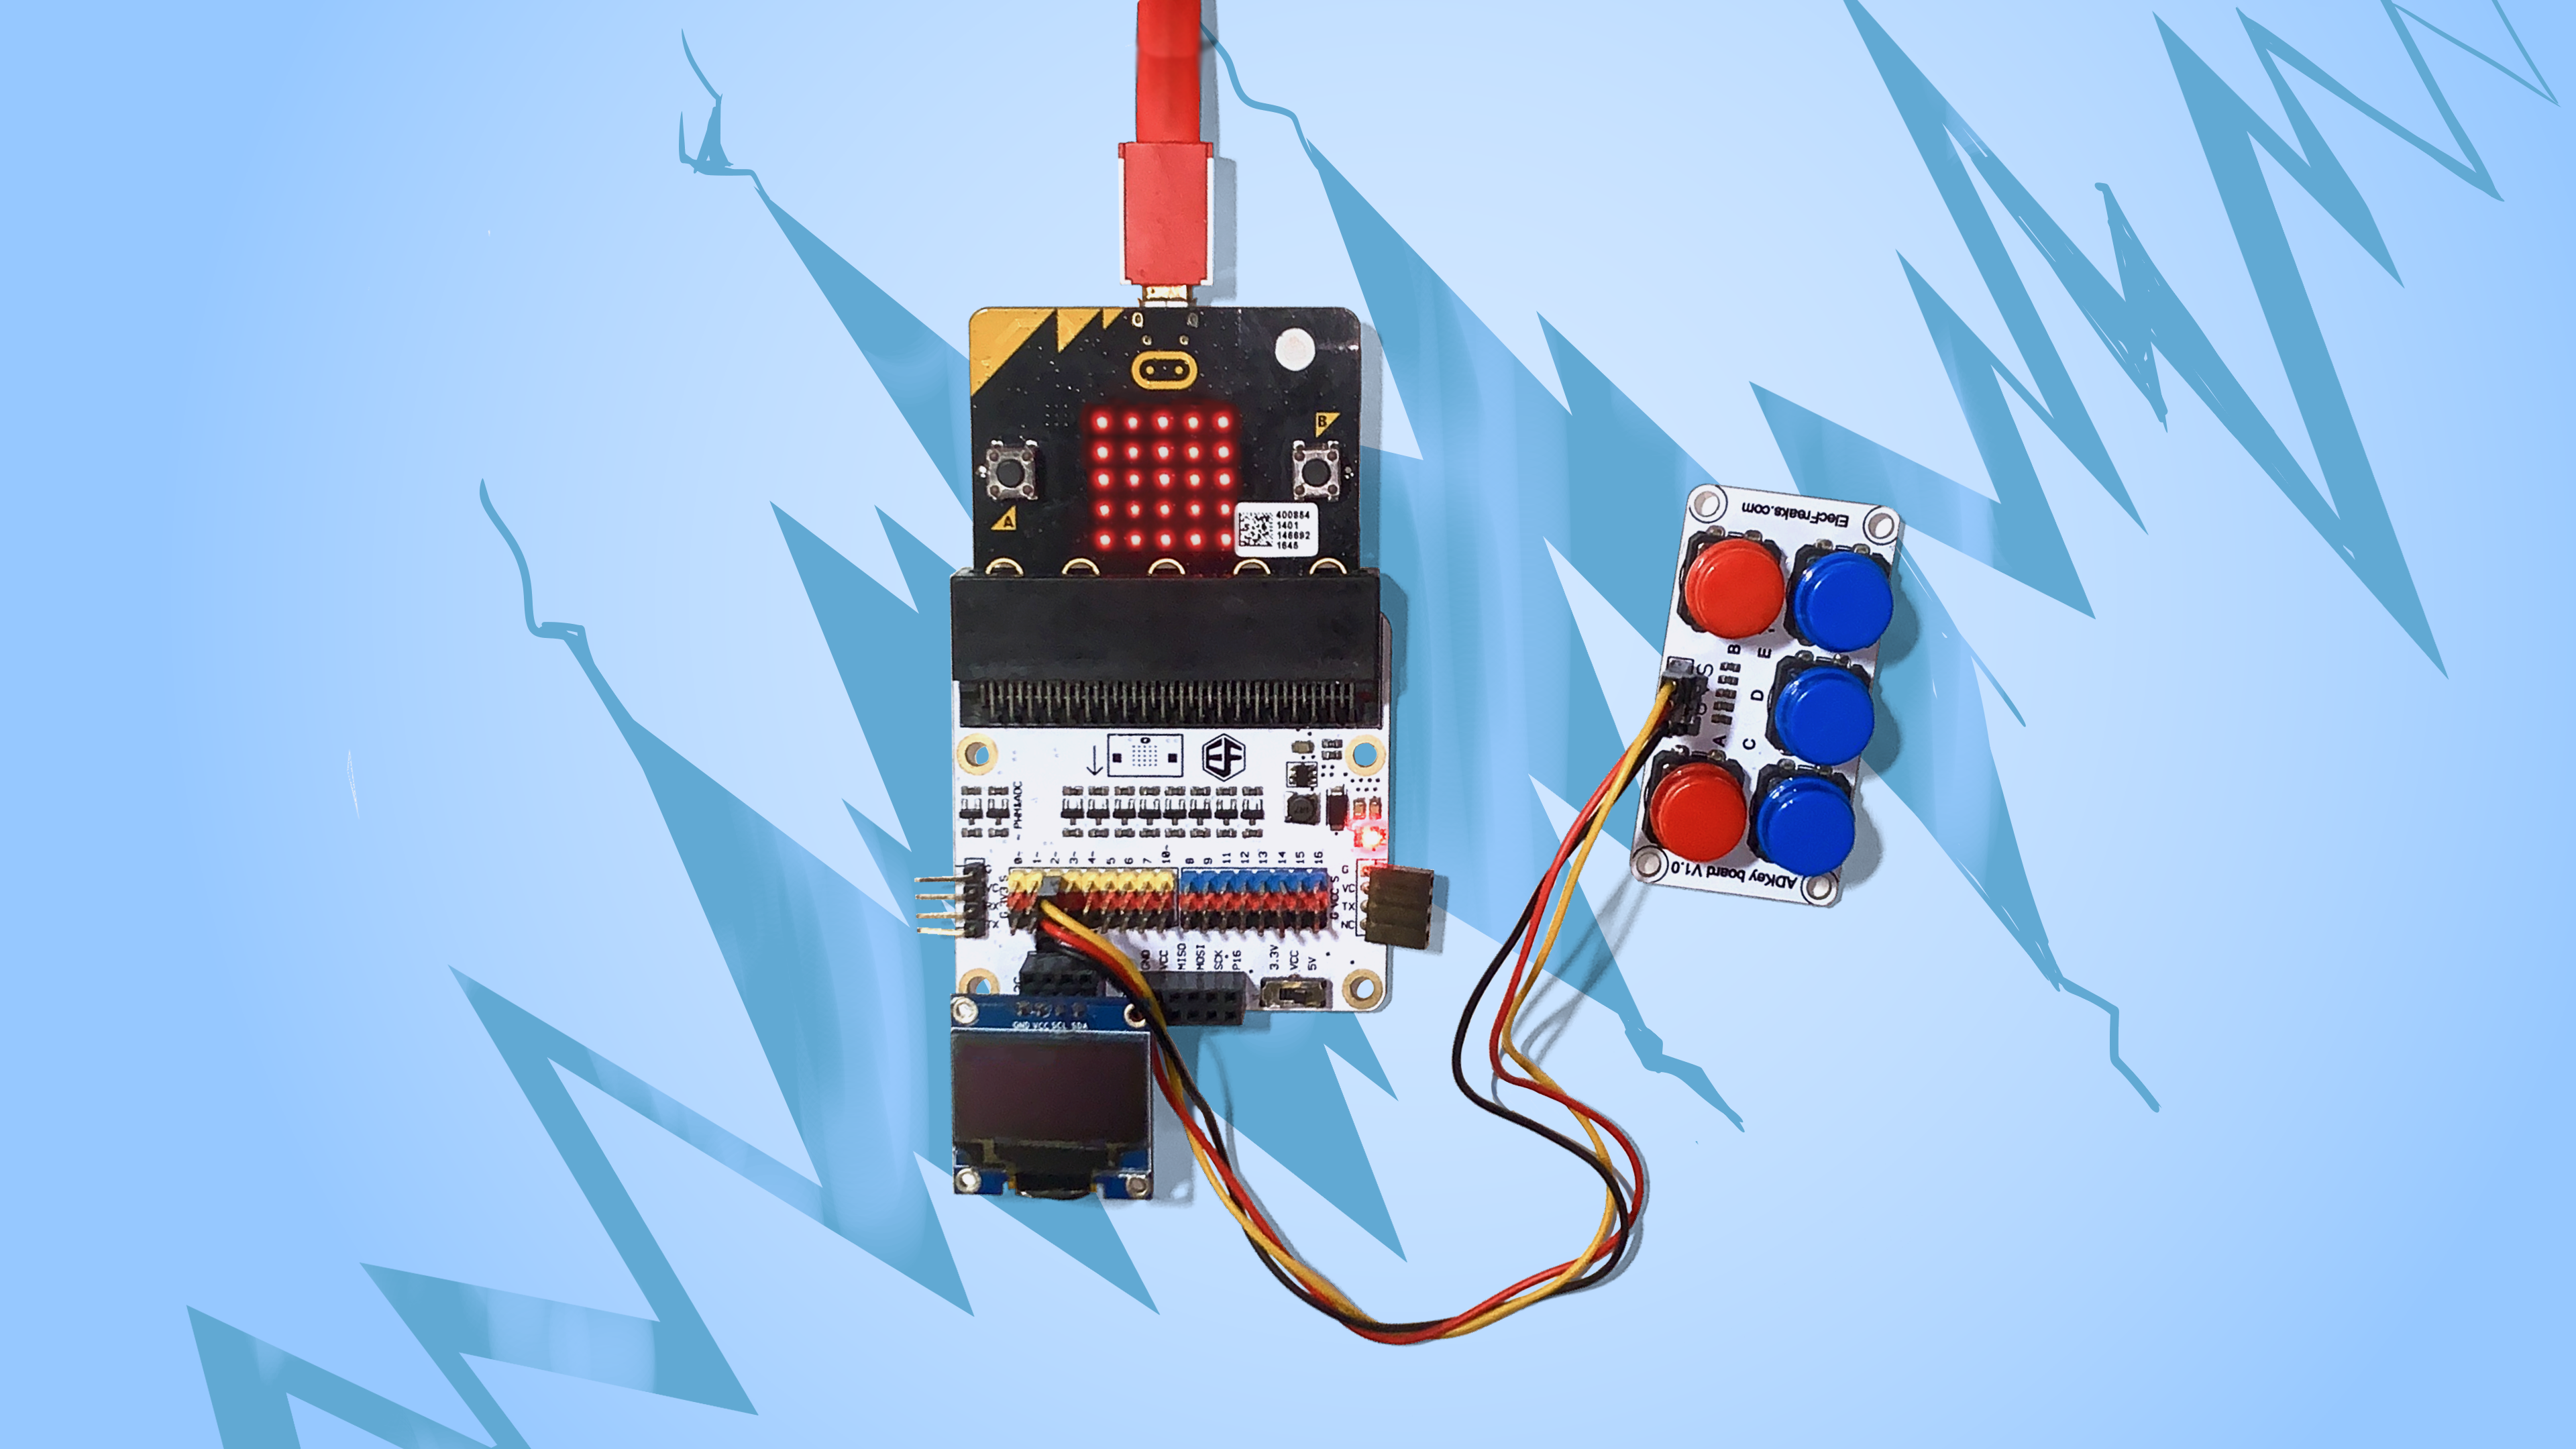
Connecting the Components
(a) Slot the micro:bit into Tinkercademy breakout board.
(b) Connect the external components to the Tinkercademy breakout board.
• Connect the ADKeypad to pin2. Match the colours of the wires to that on the breakout board pins.
• Insert the OLED display into the I2C pinouts. Any row will do.
Materials
- 1 x BBC micro:bit
- 1 x Tinkercademy breakout board
- 1 x ADKeypad
- 1 x OLED display
STEP 3

Importing Tinkercademy Extension
To detect button presses on the ADKeypad and display messages on the OLED, we need to import a special package in MakeCode.
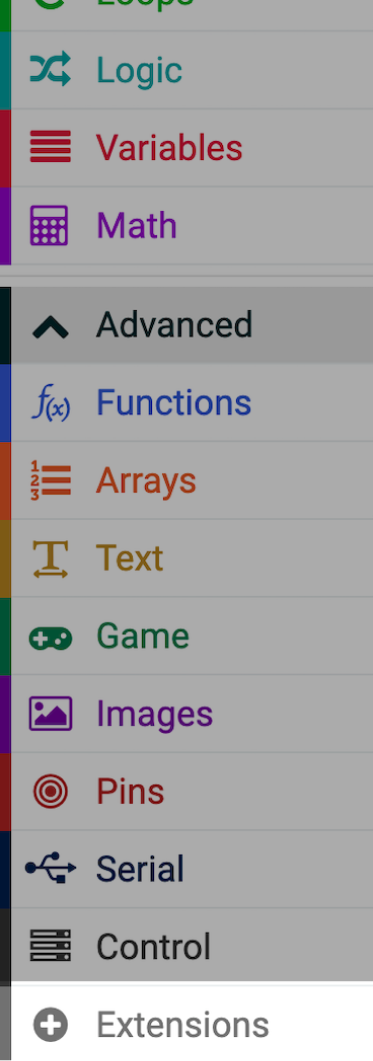
(a) Click on the ‘Advanced’ drawer, select 'Extensions'.
(b) Search ‘tinkercademy’ and click 'tinkercademy-tinker-kit' to import the Tinkercademy extension. You will see 2 new drawers - ‘OLED’ and ‘Tinkercademy’.
(c) You’ll need to re-import the extension again for new projects in the future.
STEP 4
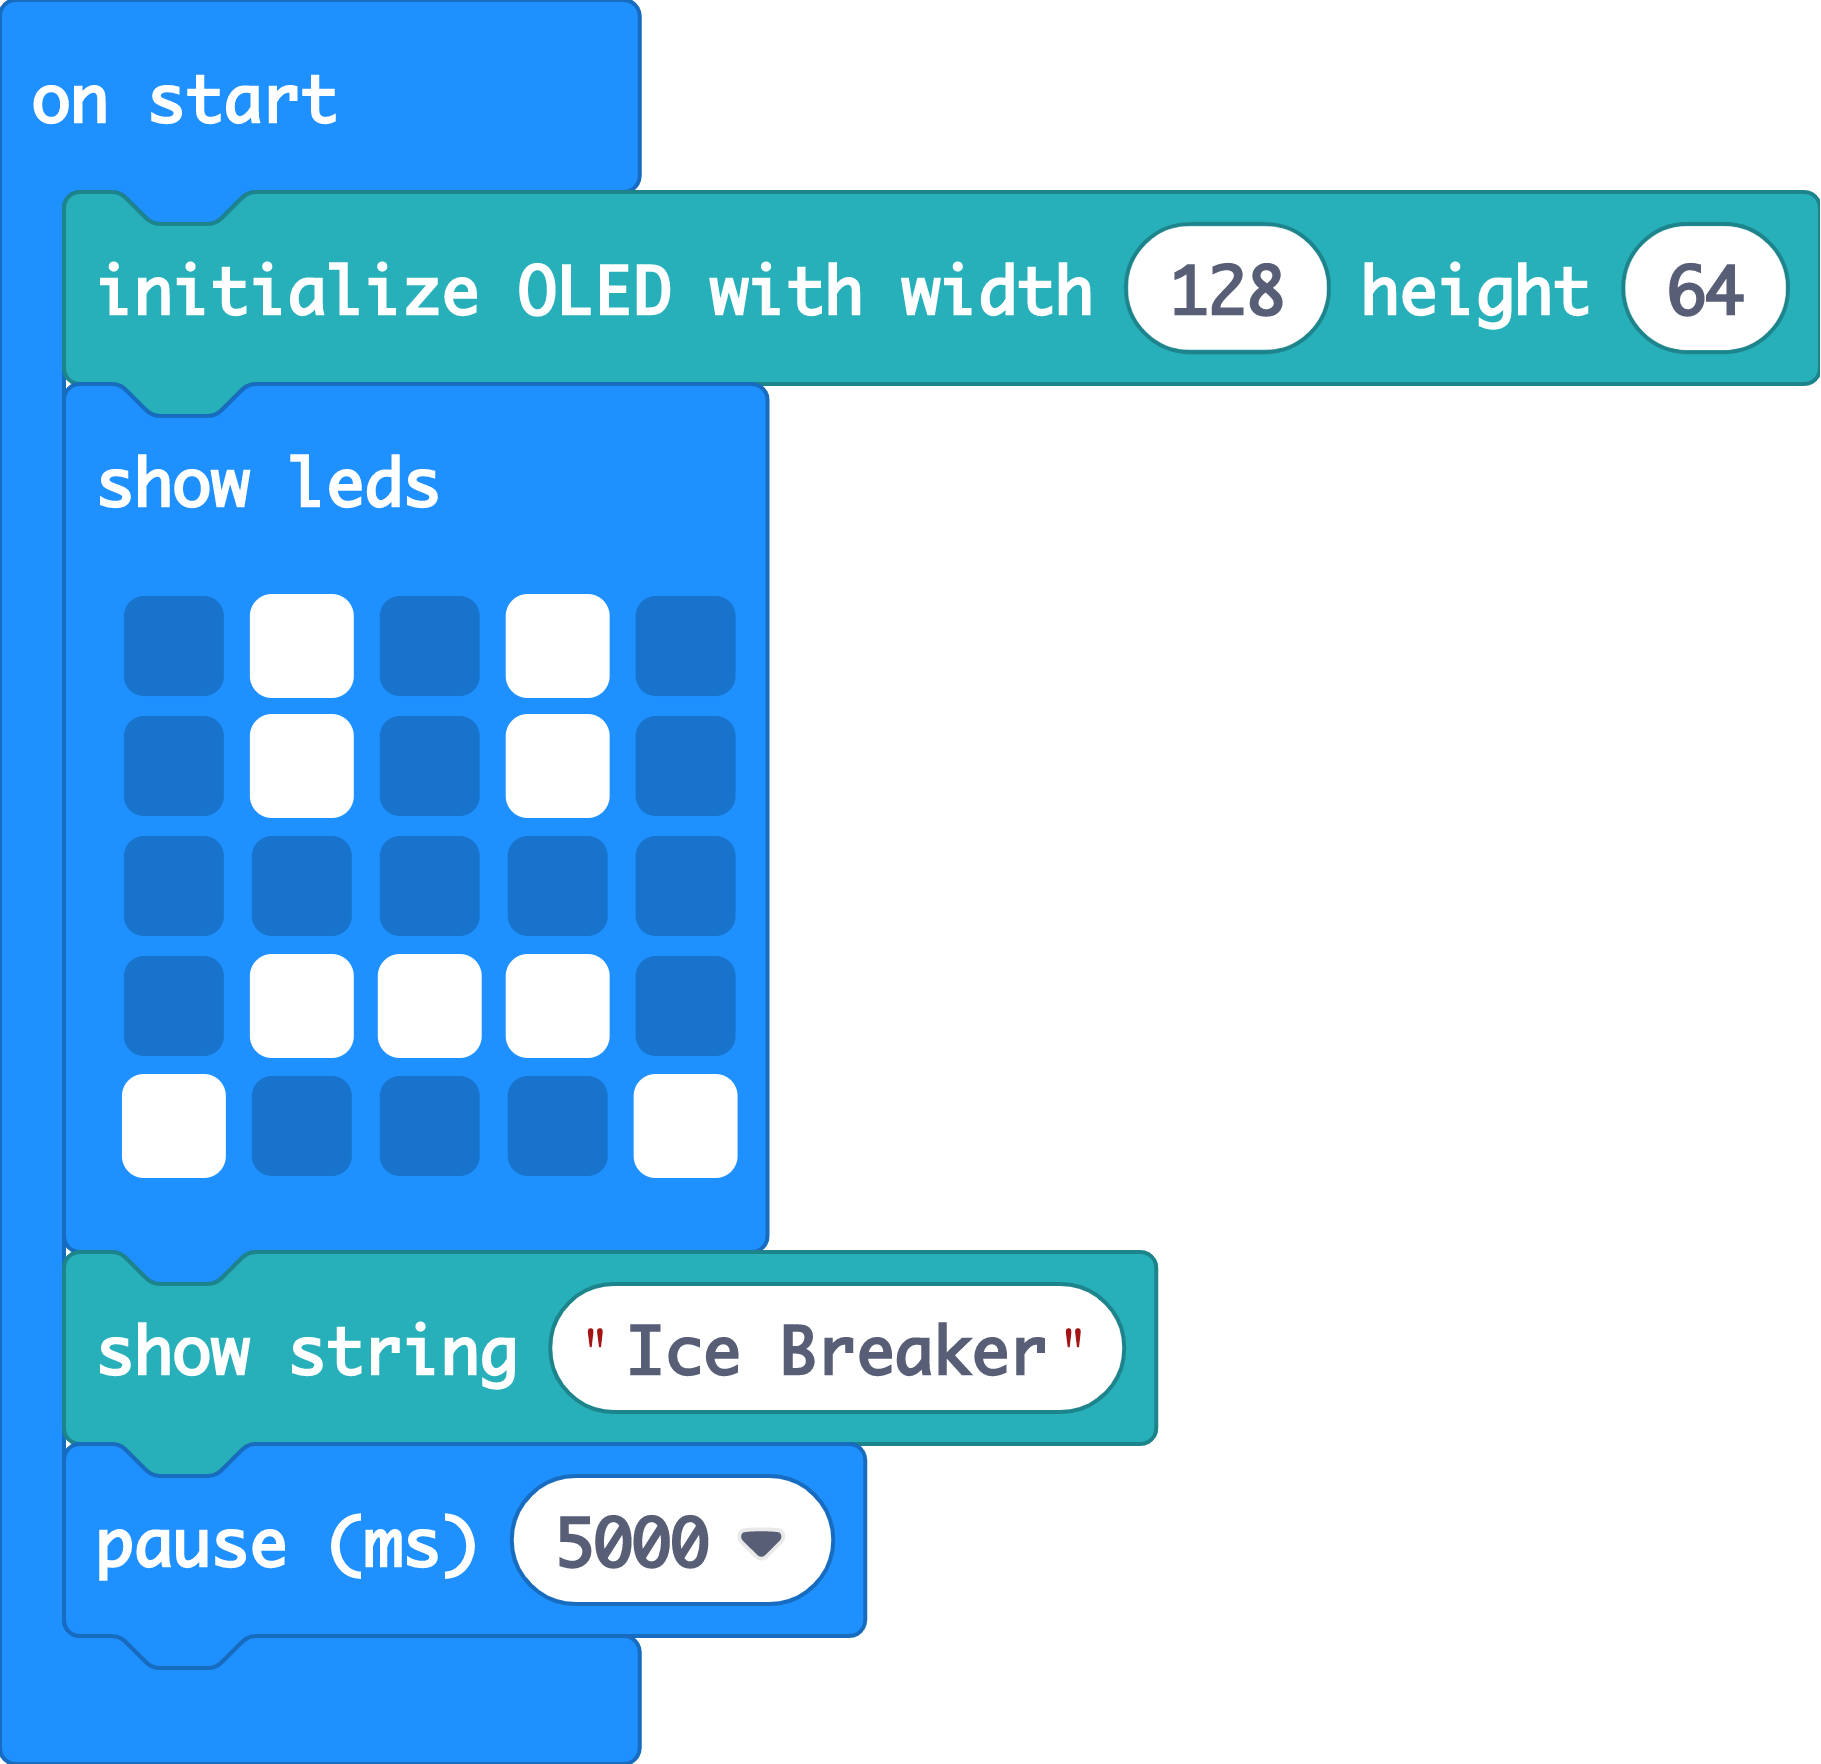
On Start
(a) Initialise the OLED screen to run it in its proper sizing.
(b) On the OLED screen,
• Show the name of the game, 'Ice Breaker'
(c) For (b), make sure to use the 'OLED' drawer blocks (not 'Basic’, which will scroll past on the micro:bit LEDs one word at a time).
(d) You can add an image of a sad face on the micro:bit.
STEP 5

Functions - Easy Game Level
(a) From 'Advanced' > 'Functions' drawer, create a function for the game level “Easy”.
(b) If the player presses the button C, call “Easy”.
(c) Pause for the players to see the game level.
(d) Create 3 variables, “ice_counter”, “x” and “y” and set all 3 variables to 0.
(e) Make sure all the LEDs on the micro:bit are lighted up.
(f) Make a while loop such that the code would only run when ice_counter is smaller than a value i.e.10,000.
(g) In the while loop, if A or B is pressed, ice_counter will increment by 1.
(h)When ice_counter reaches a certain value, a certain led on micro:bit will be turned off. At the same time, the progress of ice that is “broken” will be shown on the OLED using the loading bar.
(i) Once the loading bar shows 100%, display “Ice broken! You made a new friend!” on the OLED.
(j) You can also change the display on the micro:bit to a smiley face.
STEP 6

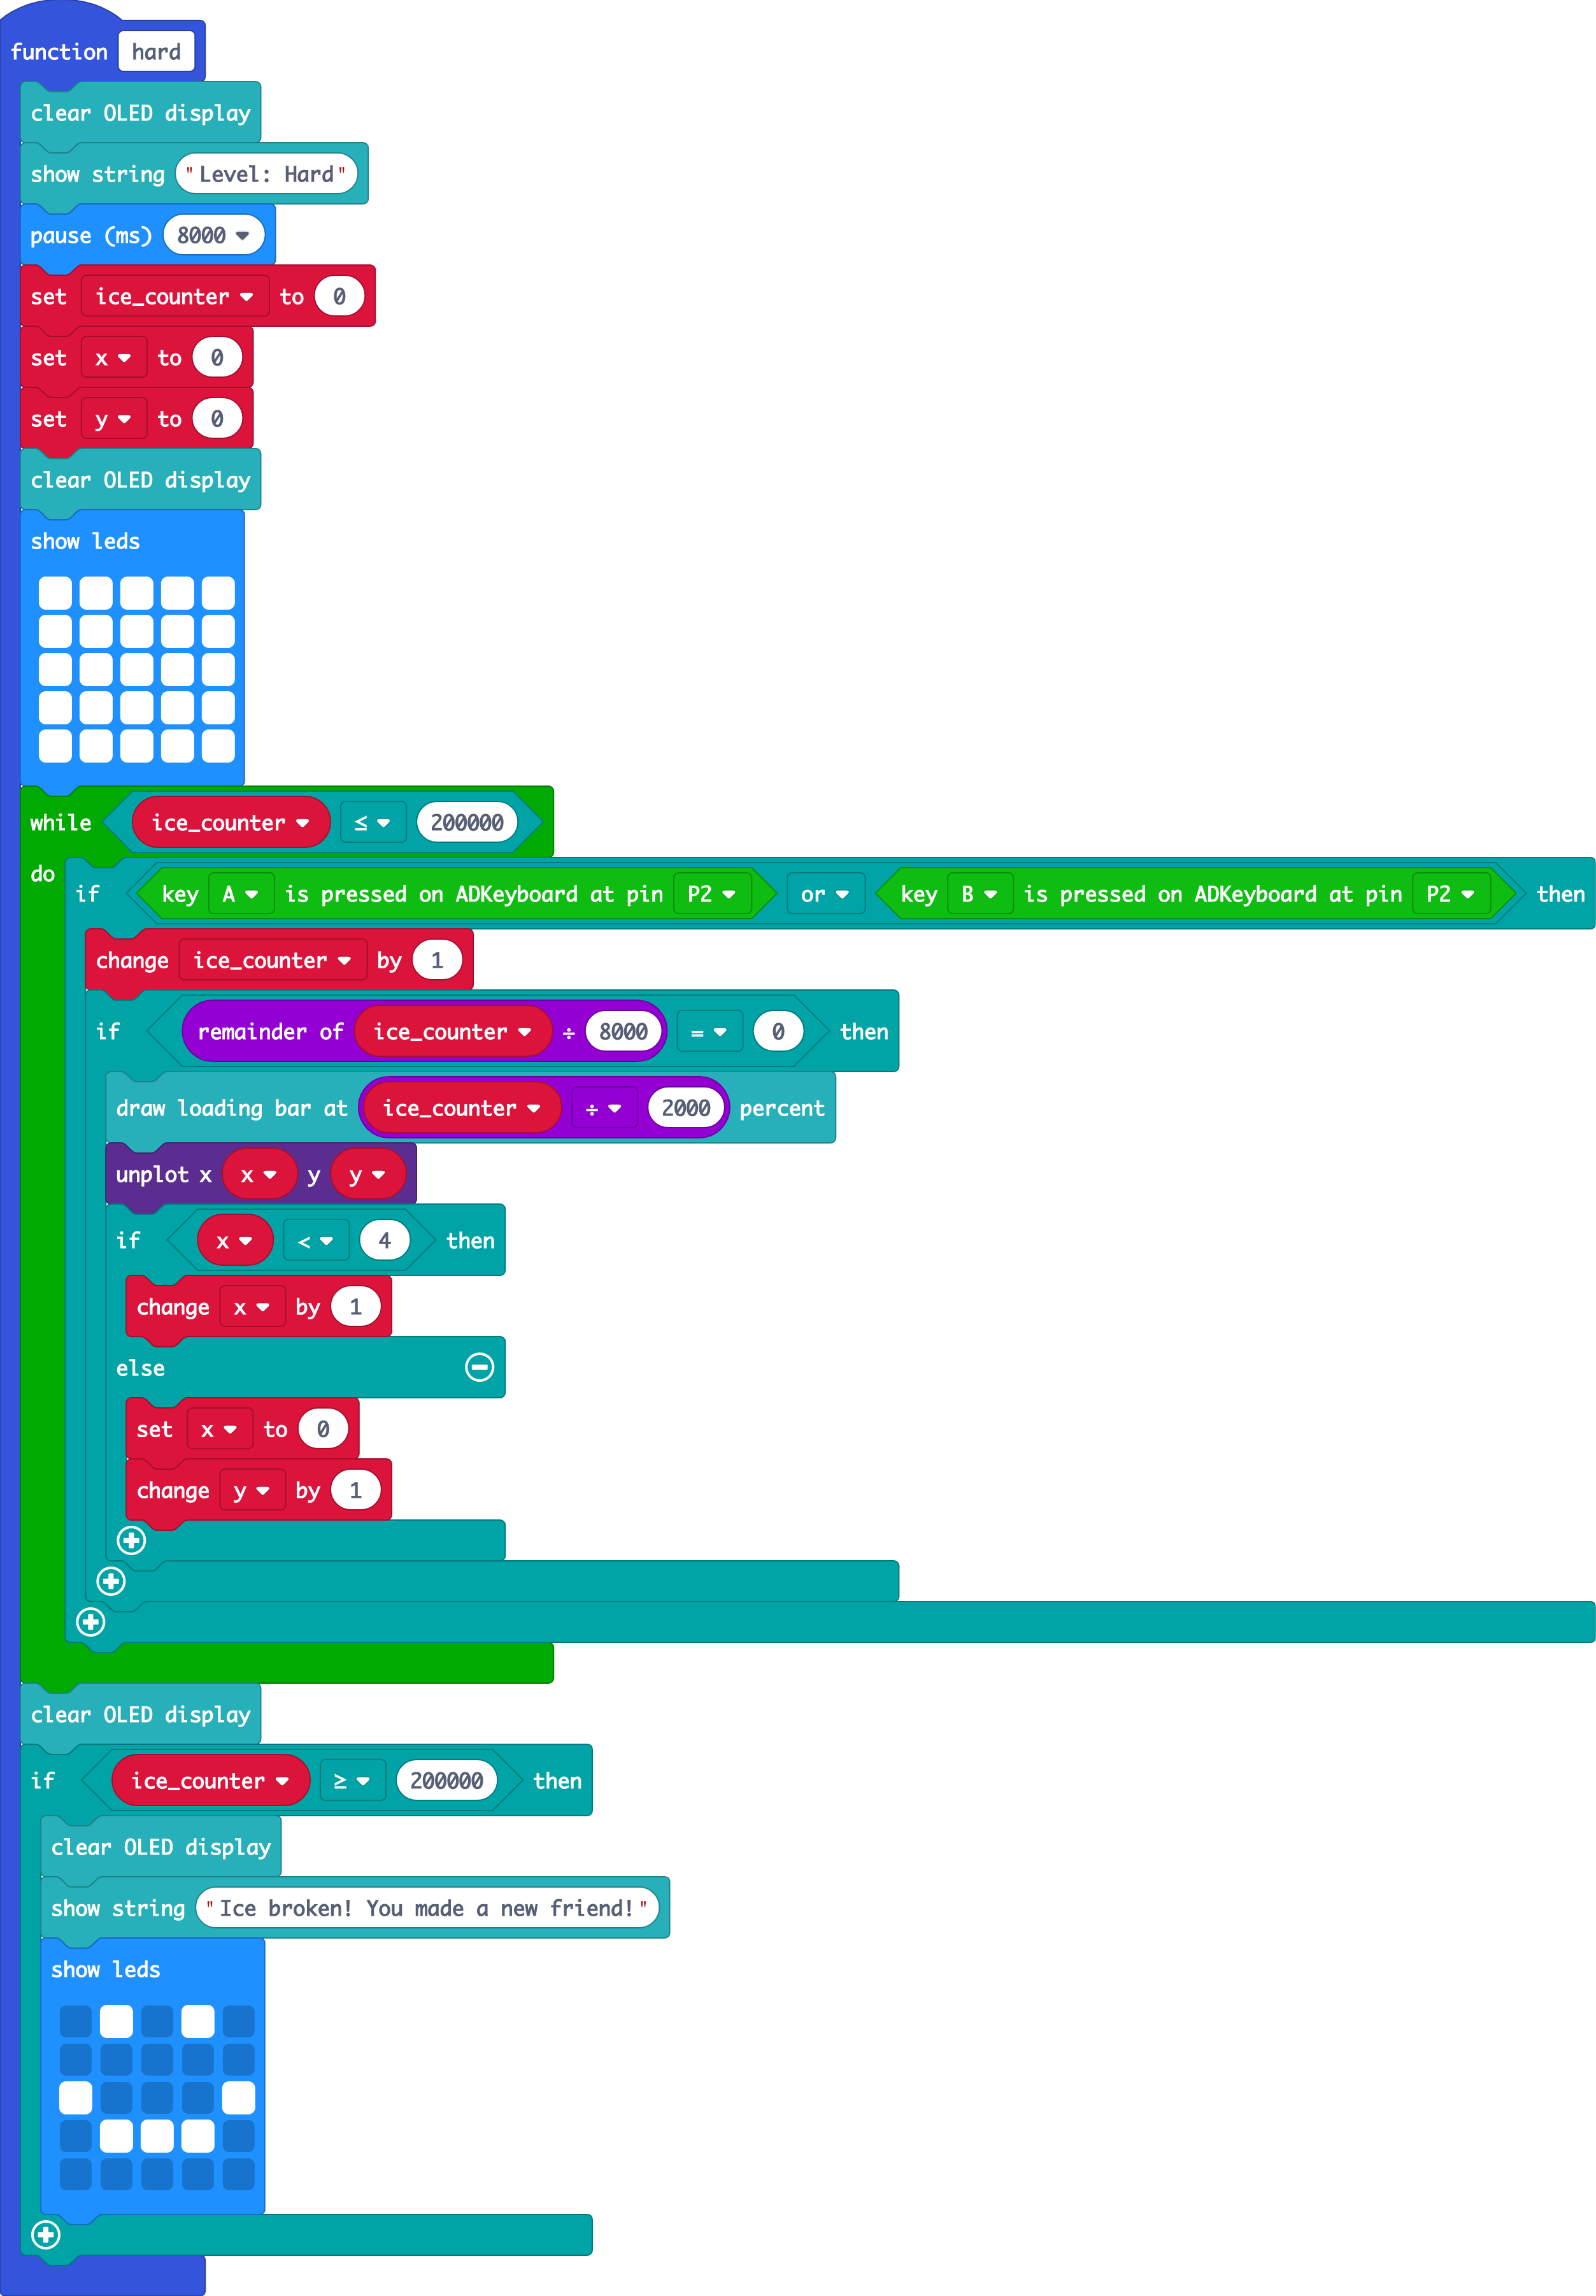
Creating other levels
(a) Create 2 more functions named “Normal” and “Hard” for other levels of difficulties.
(b) You can increase the level of difficulty by increasing the number of times buttons A and B need to be pressed.
(c) These two functions remain largely similar to the “Easy” function we have created. However, make sure you change the values of “ice_counter” and display the correct game level on the oled display.
STEP 7

Choosing the game level using ADKeypad
(a) When 'C' on the ADKeypad is pressed, the game will start by calling the easy level function.
(b) We'll do this in an if-then statement. This is a conditional, everything under this block runs only when the condition is fulfilled, ie. C is pressed.
(c) Add this conditional under a 'forever' loop so the program forever checks if C, D, or E is pressed.
(d) Clear the Oled display before calling the function.
(e) You can choose to change the emotion on the micro:bit LED display when C, D or E is pressed.
STEP 8

Complete!
(a) Don’t forget to plug a micro USB cable from your laptop to the top of your micro:bit, and click ‘Download’ to download the code to your micro:bit.
(b) You’ve completed your Ice Breaker game, have fun playing and making new friends!
(c) We hope you’ve learnt more about using and controlling external components, as well as conditional statements and functions.
(d) You can also add a restart button or countdown timer to make it more challenging!
Code and References
Made this activity? Good Job! Now spread the word. Share a photo of your creation on social media with #letsgethacking #Icebreakergame