Maze Runner
Create a maze game on your Micro:bit! Use the ADKeypad to navigate through the maze.
YOU WILL NEED
- 1 x Micro:bit
- 1 x Micro USB cable
- 1 x Breakout Board
- 1 x Buzzer
- 2 x F-F Jumper Wires
- 1 x ADKeypad
STEP 1
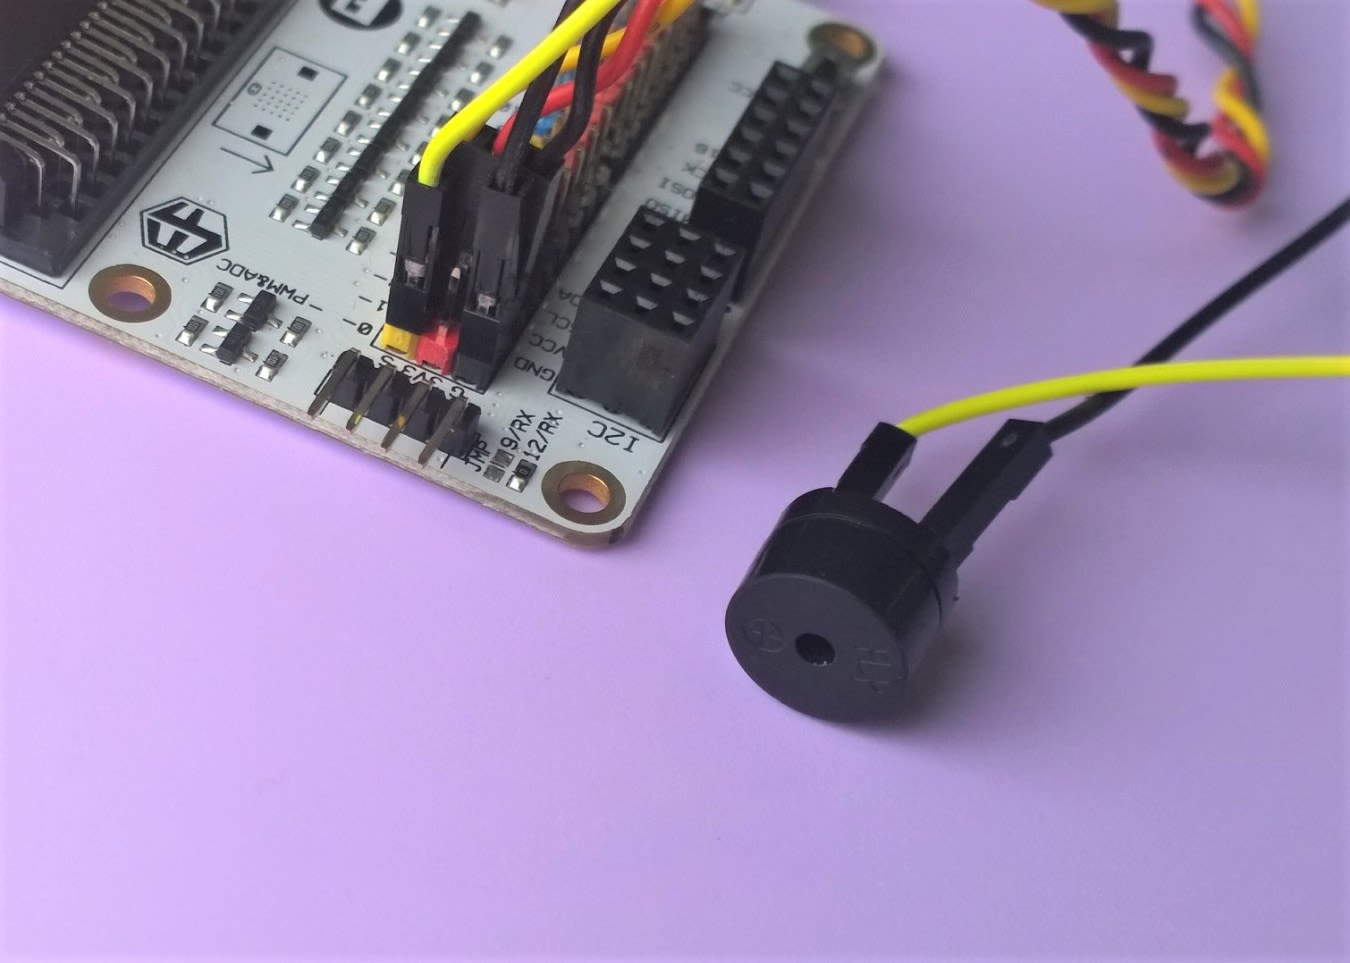
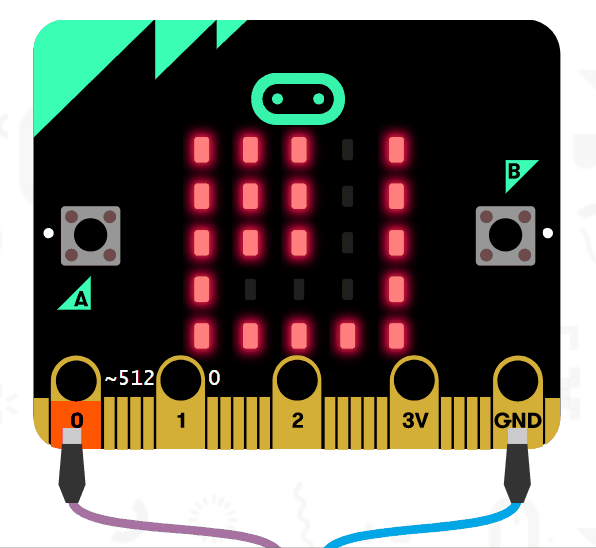
Connect the Buzzer to pin 0 of the Breakout Board, connecting the yellow signal pin to the positive leg of the buzzer and the black ground pin to the negative leg of the Buzzer. Then connect the ADKeypad to pin 1 of the Breakout Board, matching the colours of the wires to the colours of the pins.
Materials
1 x Buzzer 2 x F-F Jumper Wires 1 x ADKeypad 1 x Breakout Board
STEP 2
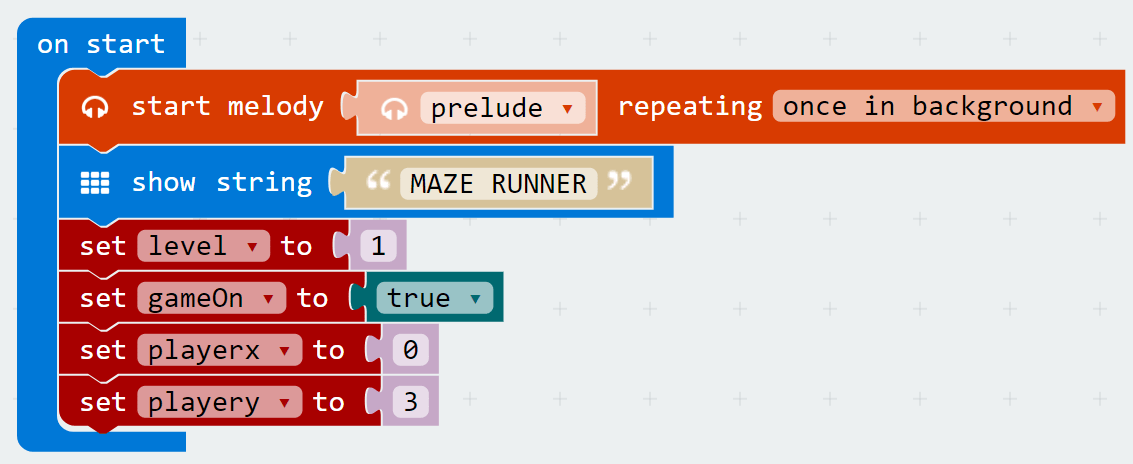
Go into the Block Editor at makecode.microbit.org and follow the code in the picture. This code shows what happens when you first turn on the Micro:bit. It will play the music and display the word "MAZE RUNNER". Then it will set up all the variables. These variables can be created in the variables tab. "level" refers to what level the game is on, "gameOn" determines if the game continues or not and "playerX" and "playerY" represent where the player dot starts on the screen. You can change the "playerX" and "playerY" variables to your liking, just remember to design the level accordingly later so the player doesn't start in a wall.
STEP 3
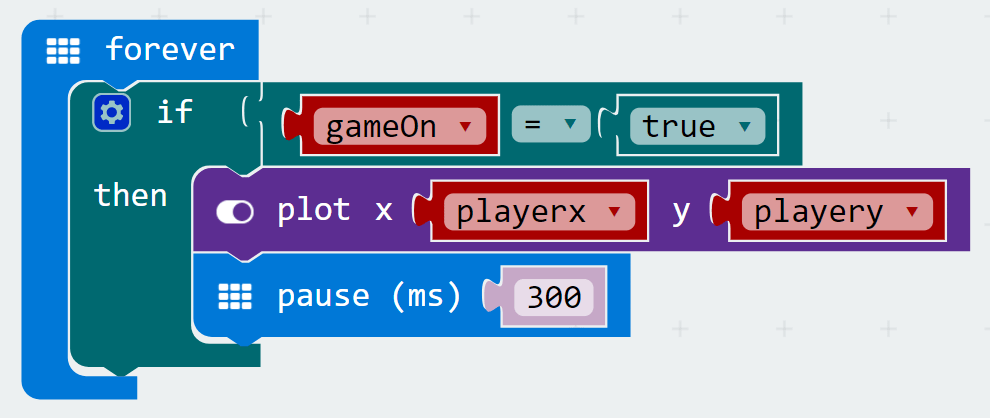
After that, add these blocks under the "forever" block. We want to make the player dot blink so that we can tell where the player is. The 'if' checks if "gameOn" is true, then the "plot x y" block lights up the LED where the player is, based on "playerX" and "playerY". The blinking won't start if you run it now, but in a later step when we draw the level, every time the level is drawn the player dot disappears, so the wait block creates the blinking effect when the "plot" block redraws the player dot. You can change the number on wait to change the speed it blinks as well.
STEP 4
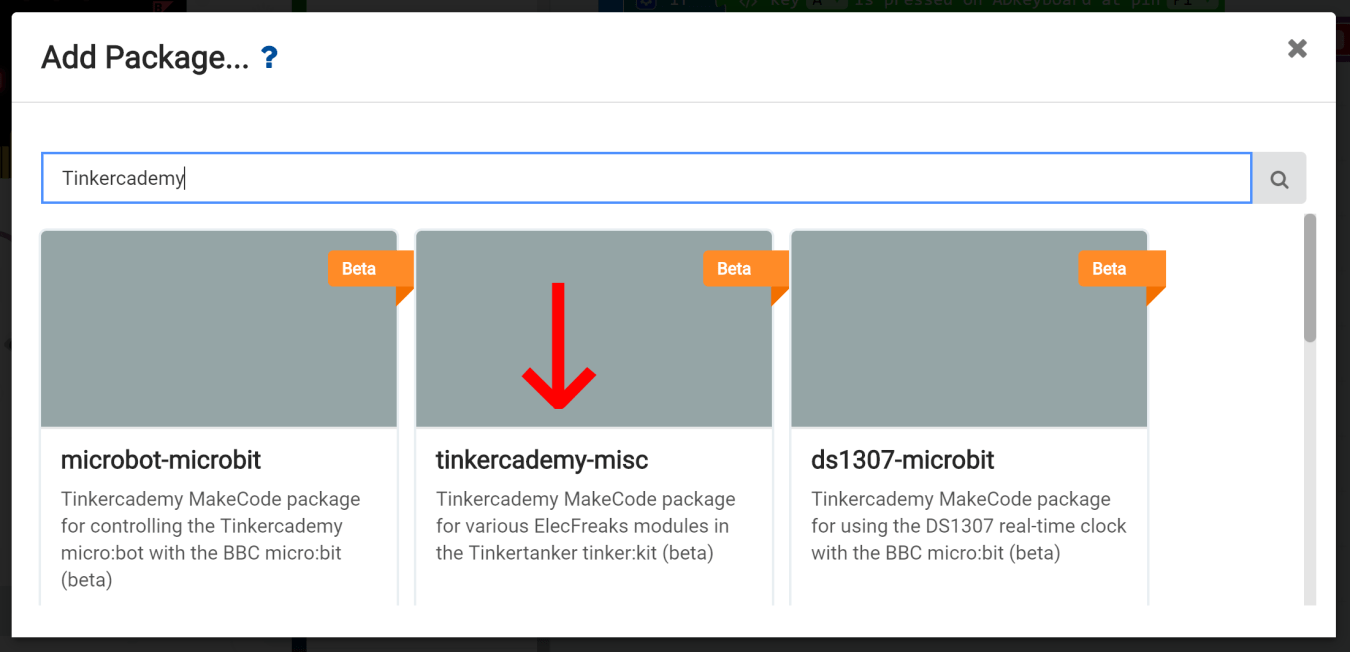
Scroll down the packages tab to "Add Packages" and click on it. Then type "Tinkercademy" in the search box and select the one shown in the picture. It should start installing the packages. The bright green package has blocks that enable the Micro:bit to sense inputs from the ADKeypad.
STEP 5
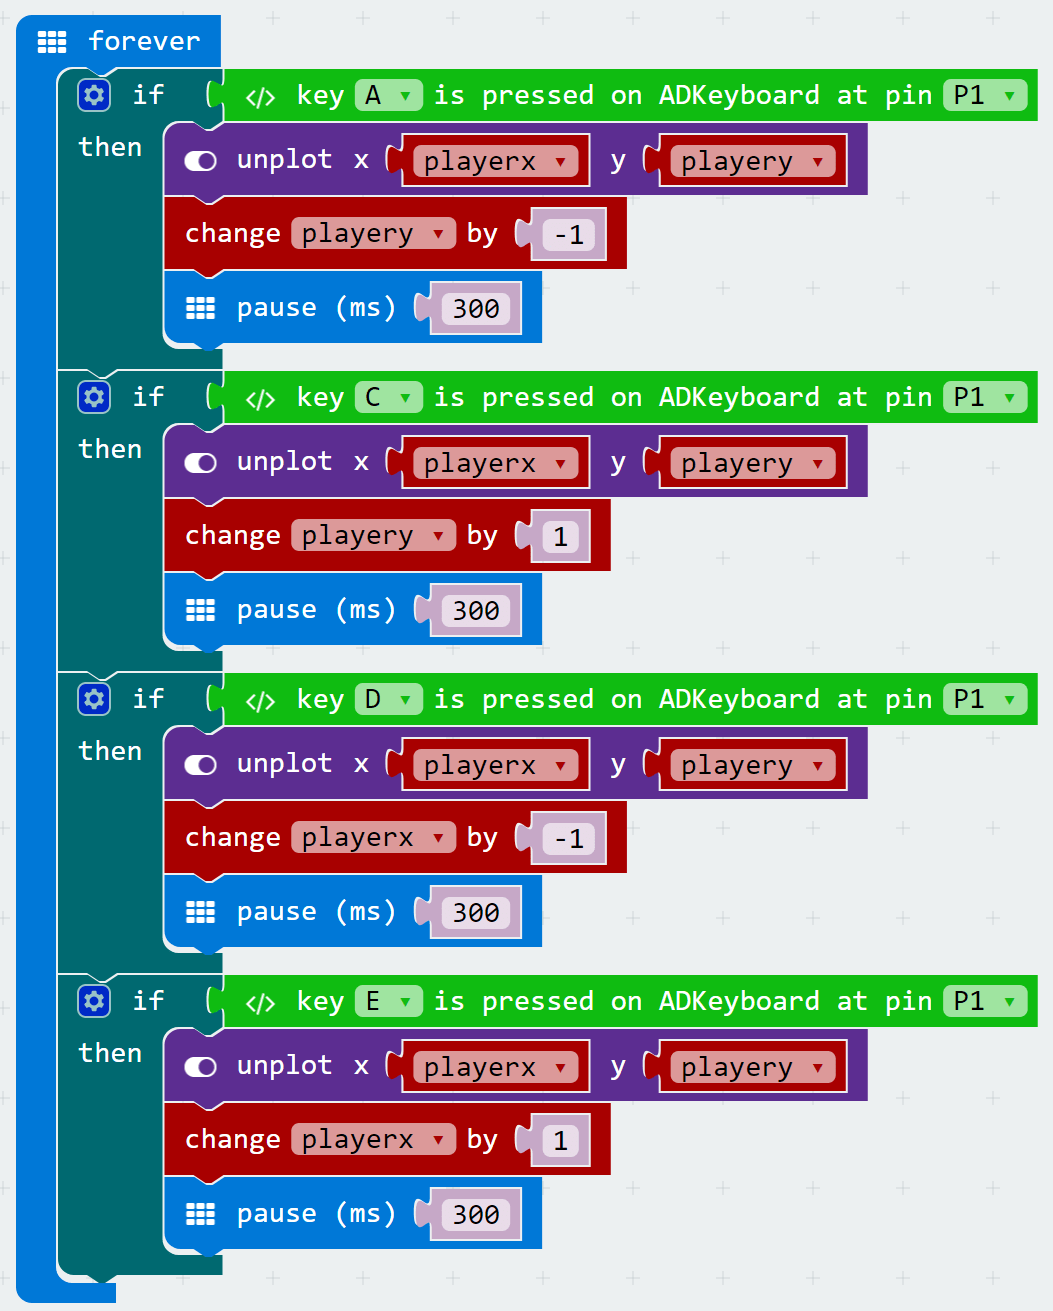
Now that you have the Tinkercademy package, add another "forever" block. Then follow the code in the picture. Increasing "playerY" moves the player dot down and decreasing it moves the player dot up. Increasing "playerX" moves the player dot right and decreasing it moves the player dot left. The pauses added are to make sure the player dot doesn't move more than once in one press.
STEP 6
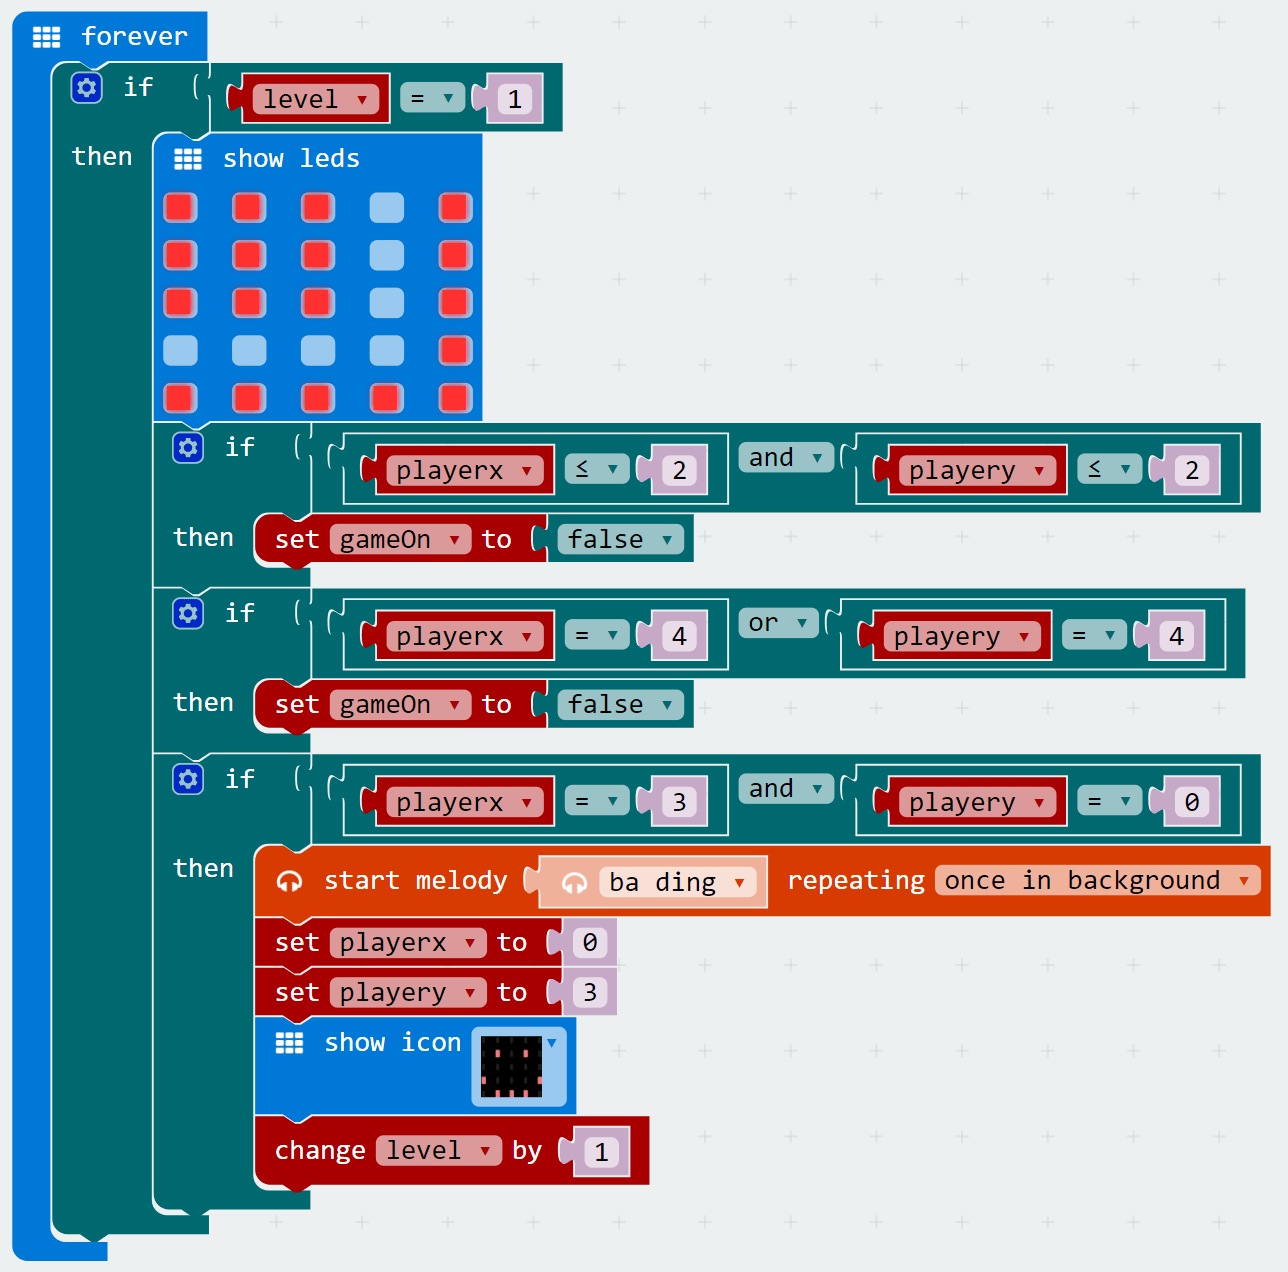
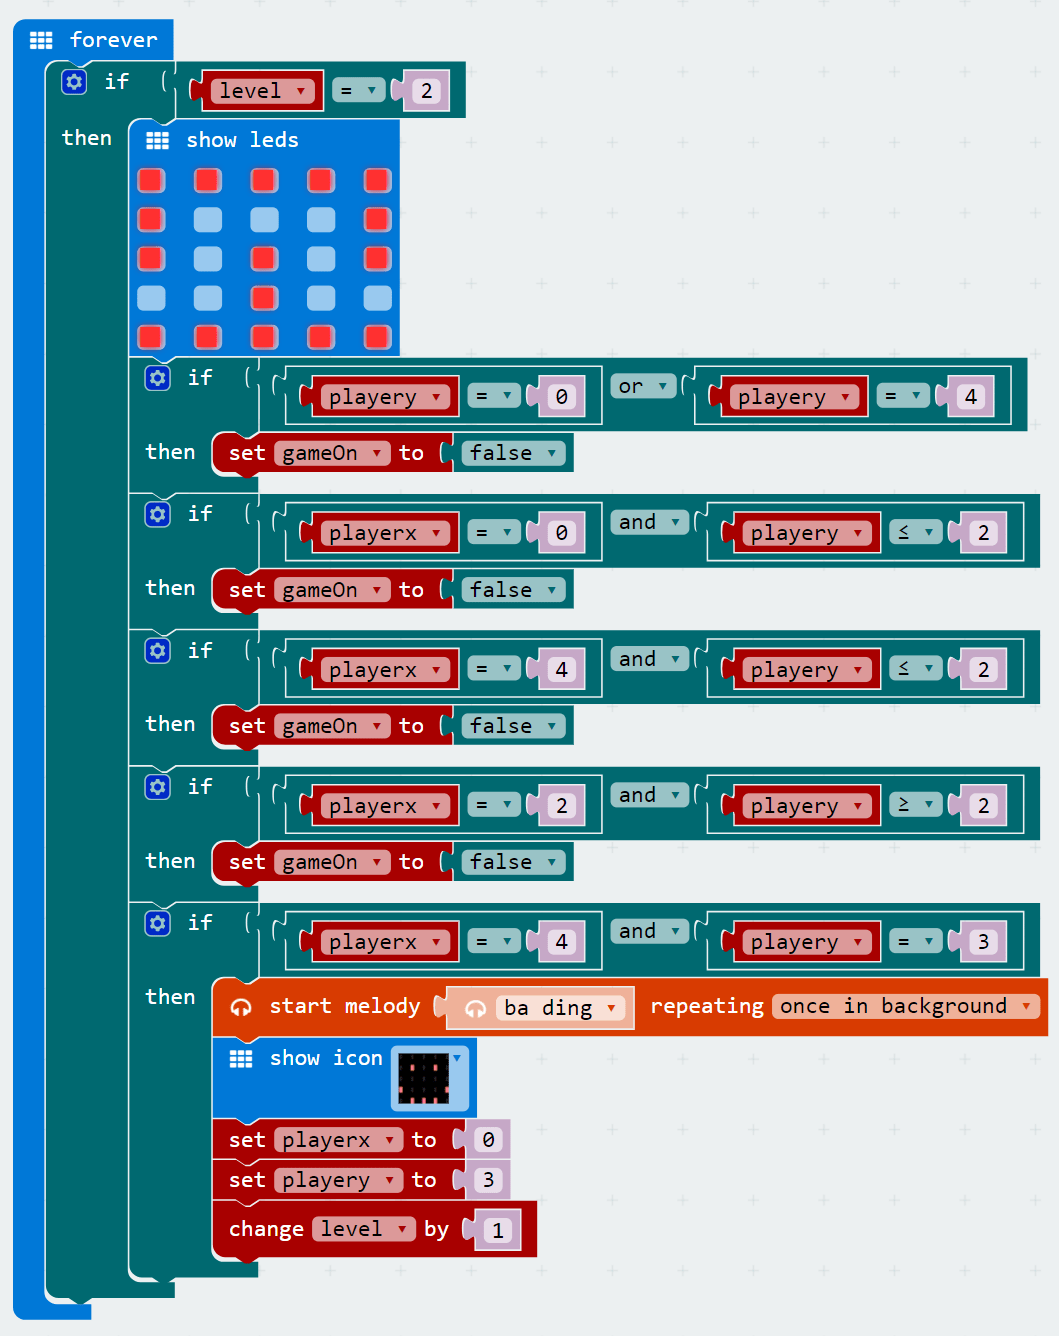
Add another forever block and follow the code in the picture. This portion of the code determines the layout of level 1, as well as creates the win and lose parameters of the level.
STEP 7
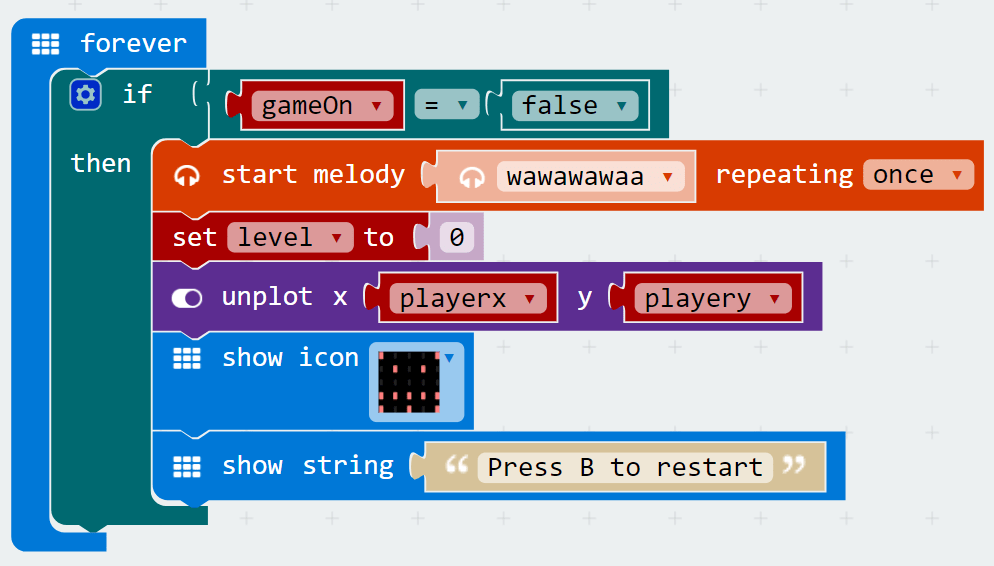
Next we will code what happens when you lose a level. Make yet another forever loop and follow the code in the picture. In this portion, it checks if "gameOn" is false, which happens when you touch a "wall" as seen in the last step, then it plays a melody, resets the "level", removes the player dot, then shows an angry face and "Press B to restart".
STEP 8

In another forever, copy the code in the picture. This constantly checks if the B button had been pressed and once it has, it will reset all variables to what they were when we started.
STEP 9
Now that we have done all those, you are ready to add your own levels! Just remember to start the player dot where your level starts using the "playerX" and "playerY" variables.
STEP 10
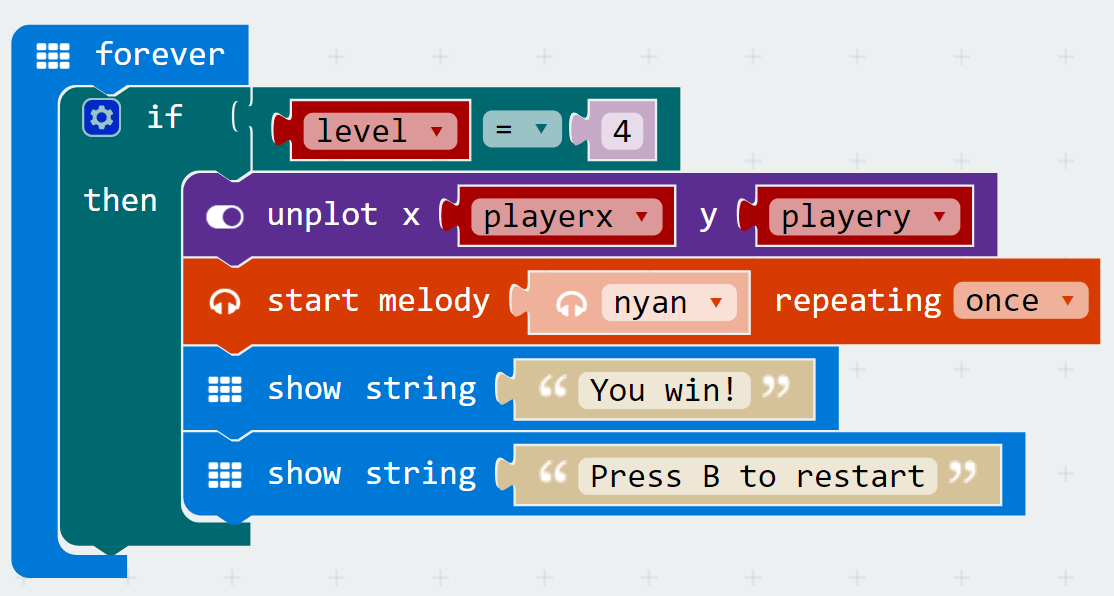
Once you're done adding as many levels as you like, create the code you see in the picture. This is the "win" once the player has completed all the levels. Remember that the "level" in the if block must always be +1 of the last "level". (in the picture there are 3 levels so the "level" = 4 in the if block)
Made this activity? Good Job! Now spread the word. Share a photo of your creation on social media with #letsgethacking #MazeRunner