Medicine Tracker
To help one to manage their Medicine:Bits
YOU WILL NEED
- 1 x Micro:Bit
- 1 x Basic:Bit
- 1 x LED strip (length 10 LED)
- 1 x Medicine holder
- 1 x Battery pack
- Screw driver
- Screws
- Tape or glue
STEP 1

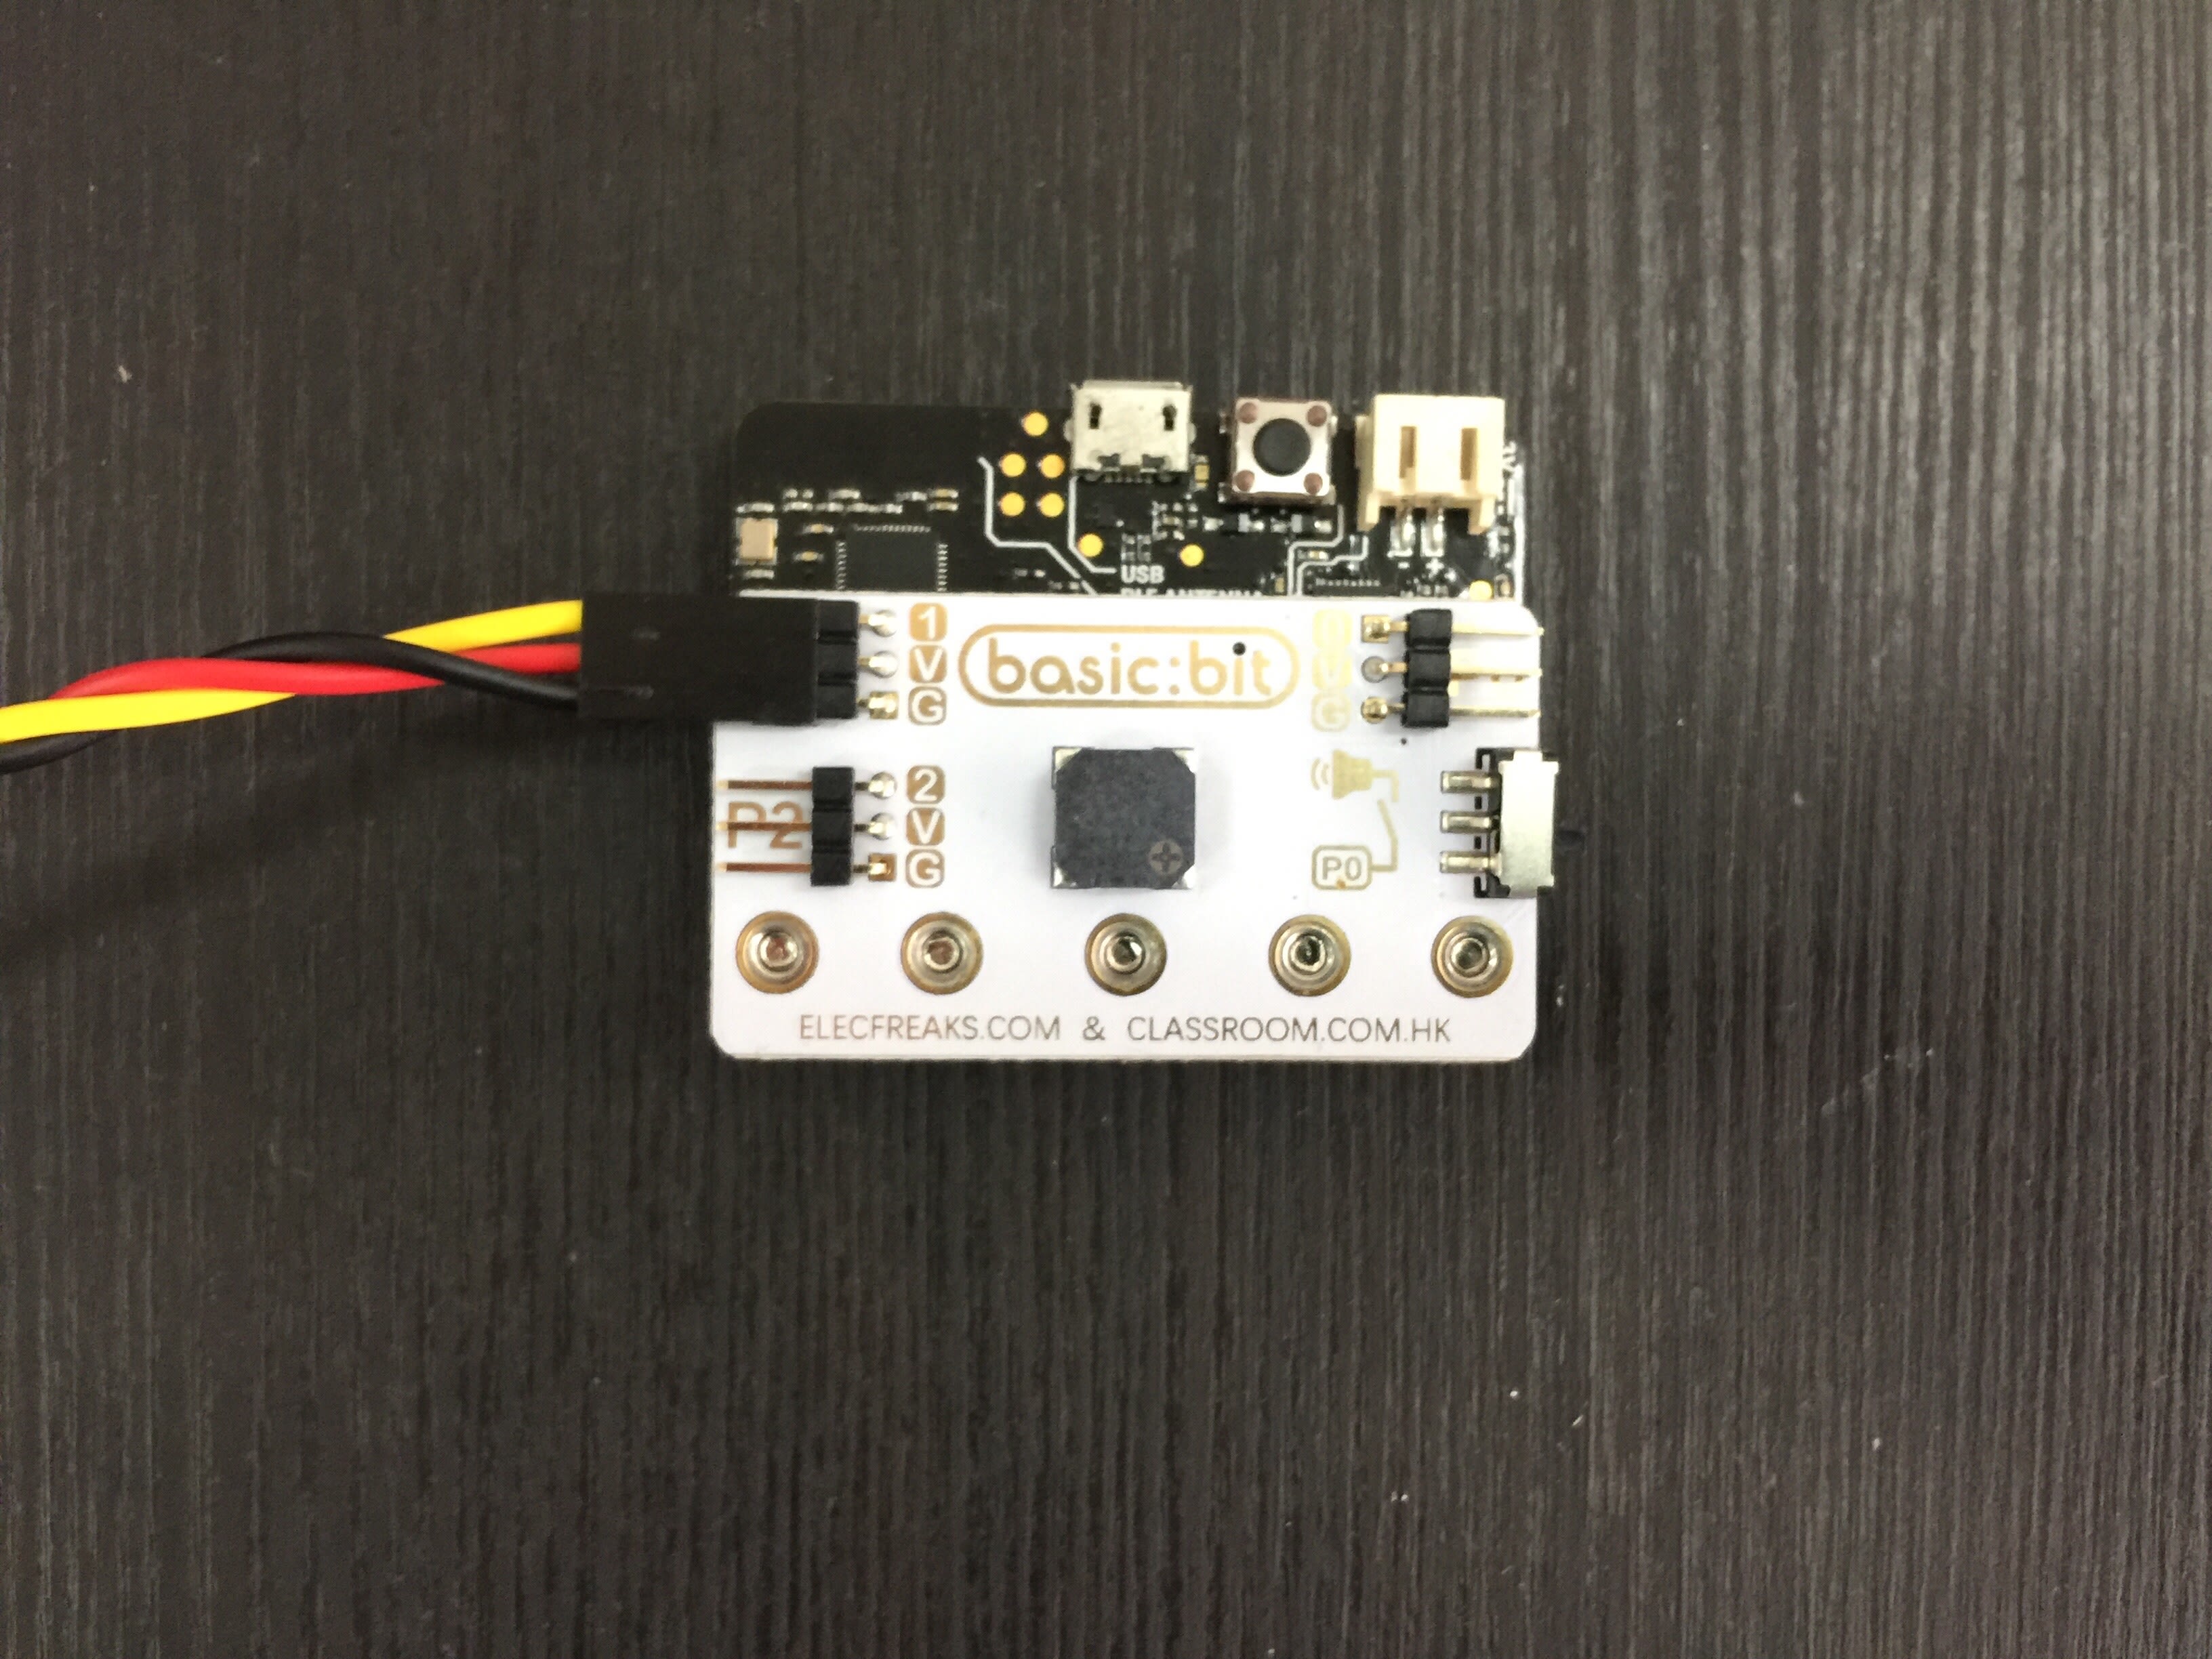
Attach Basic:Bit to the Micro:Bit as shown above using the screws provided.
Materials
- Micro:Bit
- Basic:Bit
- Screwdriver
- Screws
STEP 2
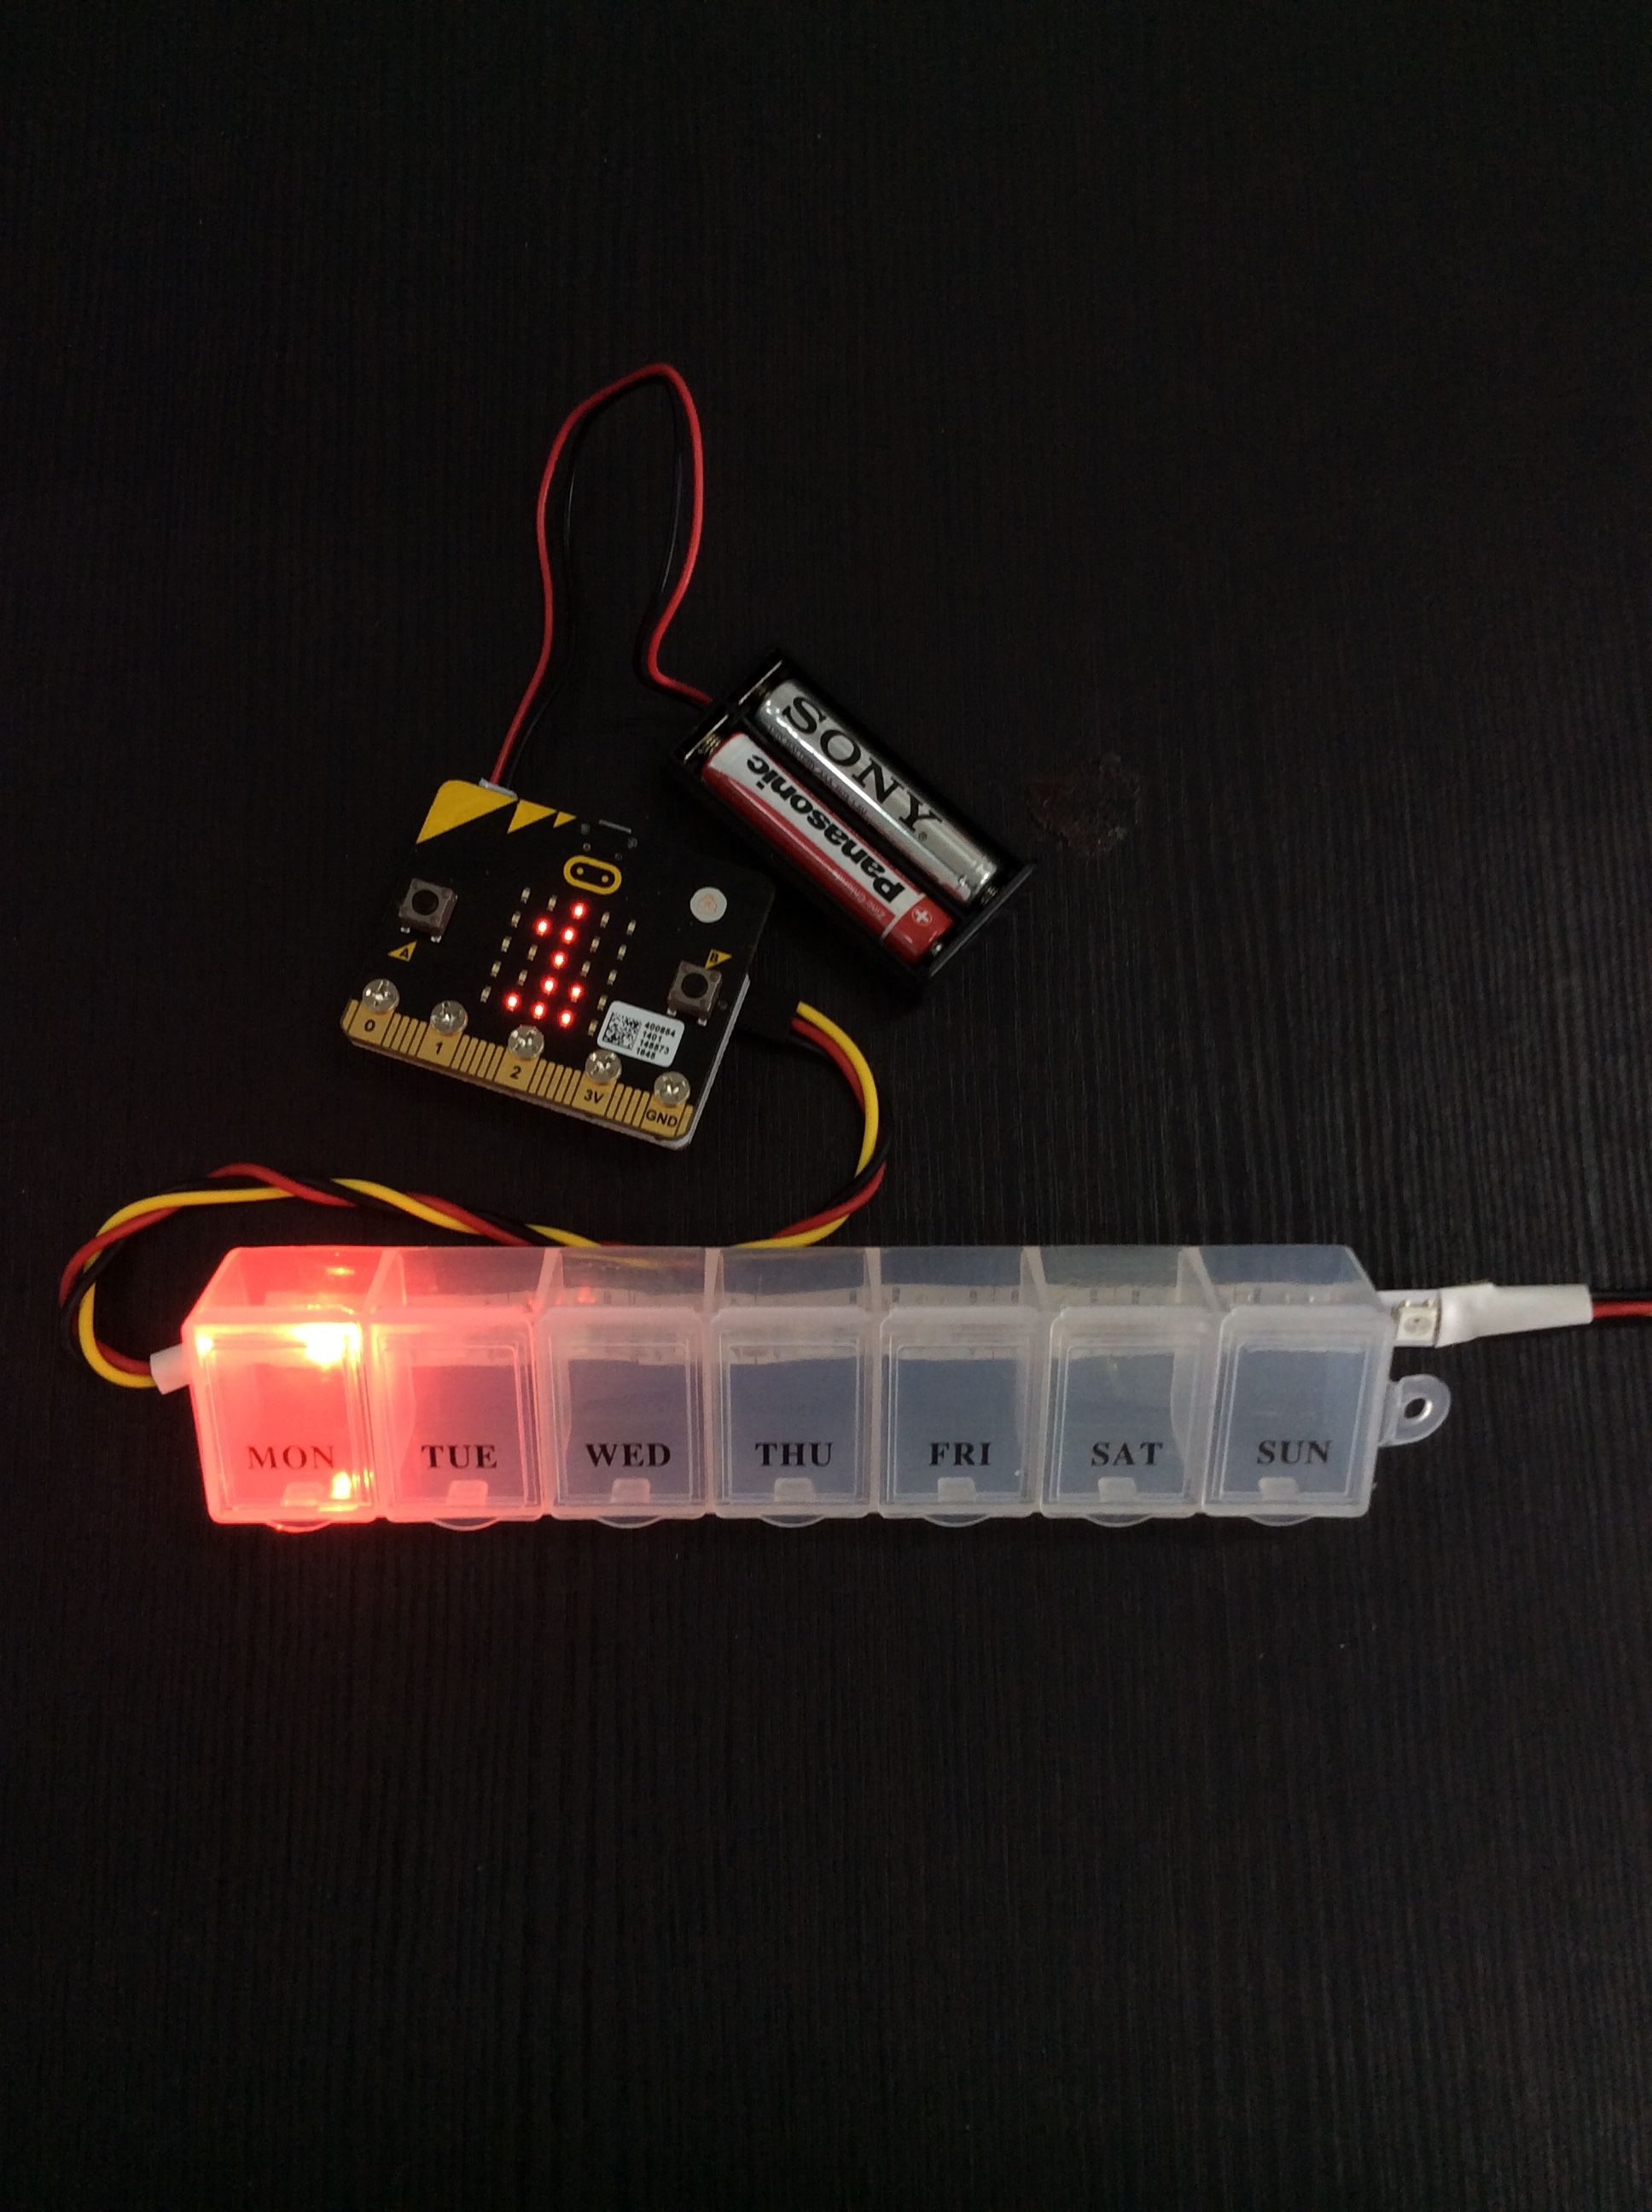
Connect the LED strip to the Basic:Bit pin 1 as shown above.
Materials
- LED strip
- Basic:Bit
- Micro:Bit
STEP 3

Secure the LED strip to the Bottom of the medicine box using tape or glue, ensuring that the longer end of the cable is on the Left and the alignment is as shown above where the fourth LED is is at the right edge of the Wednesday section.
Materials
- LED strip
- Medicine box
STEP 4
Now, lets dive right into MakeCode.
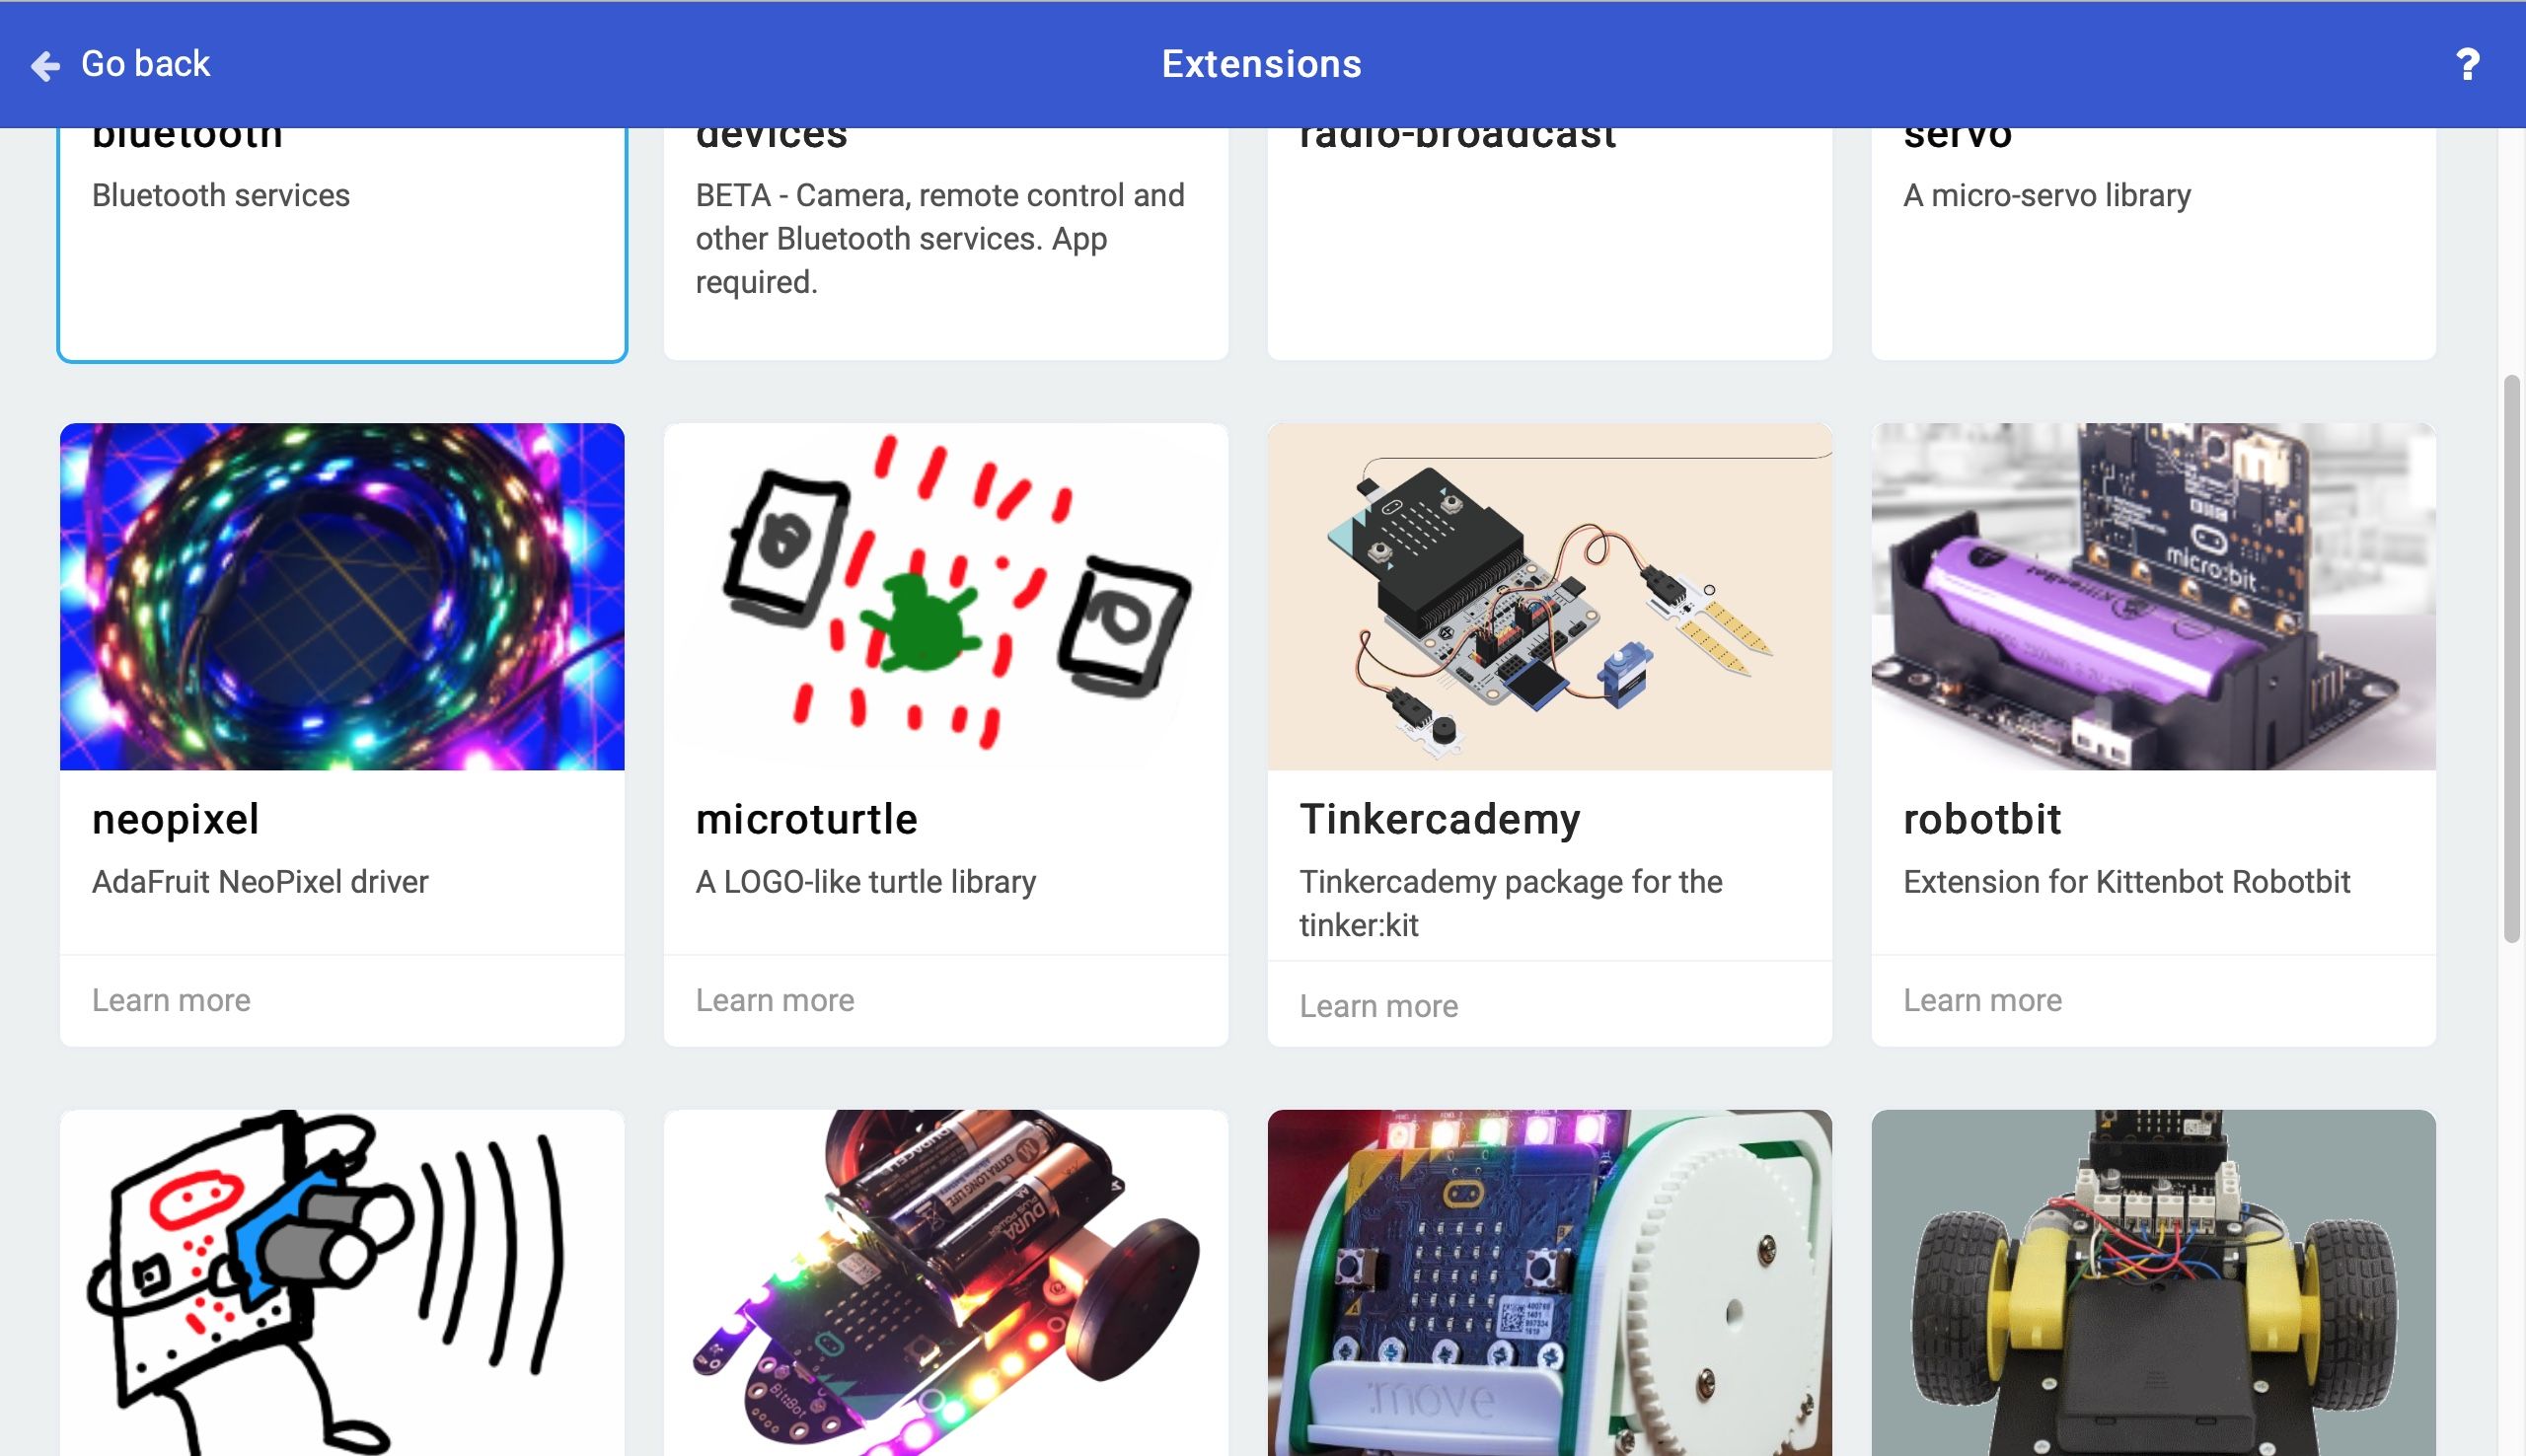
Under the Extensions Drawer in the centre collumn, download the neopixel extension. This will provide the code for the LED to function
STEP 5

In the “on start” code block, create 4 Variables from the Variables drawer,
- strip : to store the values for the LEDs
- dayOfWeek : to track the day of the week
- hours : to keep track of the hours
- minutes : to keep track of the minutes
Be sure to initialise the LED strip with 10 to match the number of LEDs
STEP 6
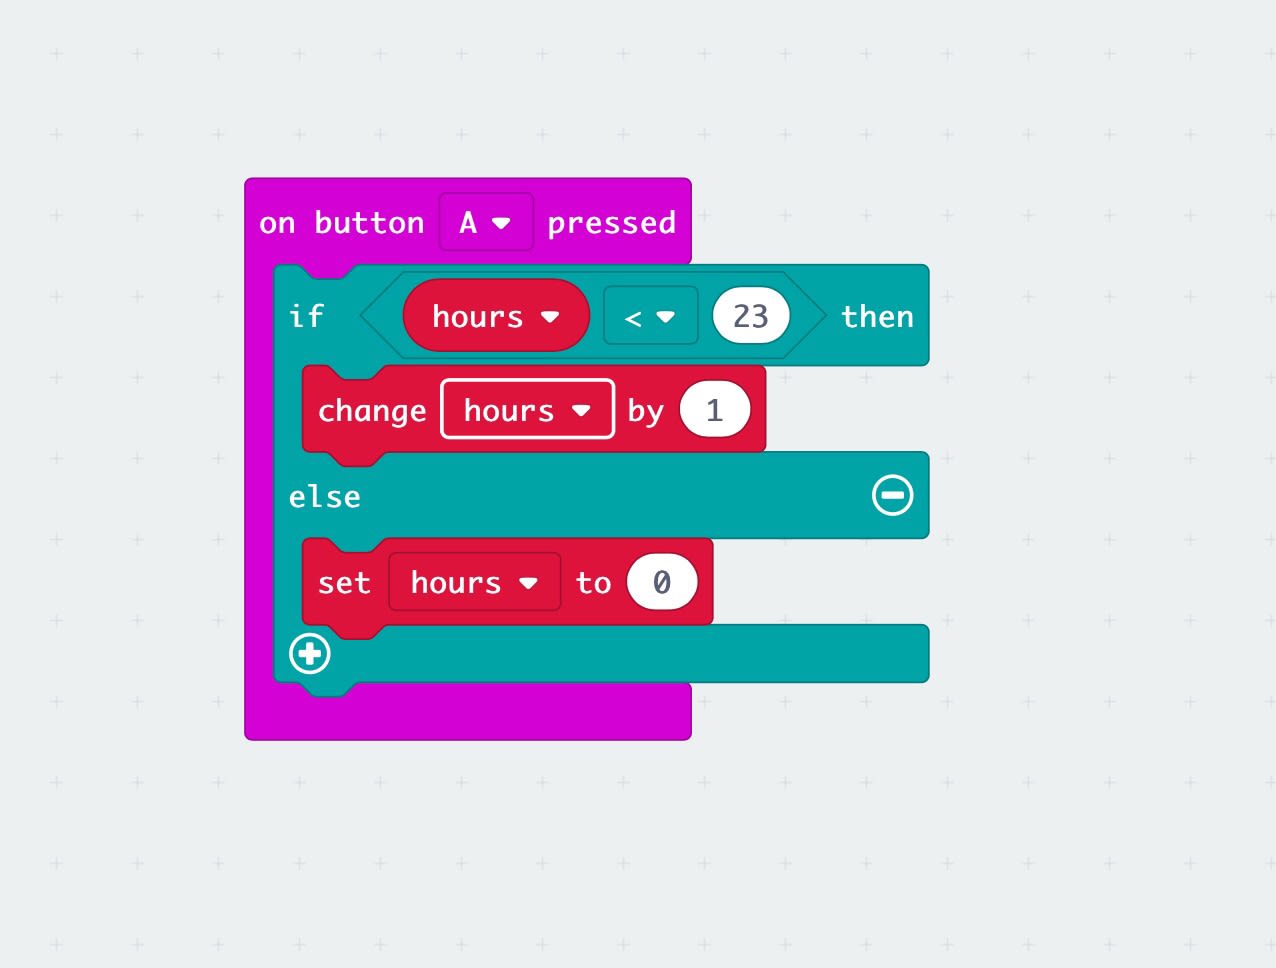
We will set button A to increase the hours by 1 to set the time for hours.
To do so, from the Input drawer, drag a “On button A pressed” code block into the workspace.
Within it, place a if else statement from the Logic drawer.
Using a Comparison tool, set it to hours < 23.
Within the if block, use the change block from the Variables drawer to change hours by 1.
Within the else block, set hours to 0.
STEP 7

We will set button B to increase the minutes by 1 to set the time for minutes.
Duplicate the code block in the previous step.
Replace Button A to Button B.
Change hours to minutes.
Replace 23 with 59.
STEP 8

We will set button A+B to increase the dayOfWeek by 1 to match the day of the week today.
Bring a new button pressed block from Inputs to the workspace and chaange button A to A+B.
Using the Change tool under the Variable drawer, set dayOfWeek to change by 1.
STEP 9

To build a fully functioning clock, in a forever code block,
Add a pause of 60,000 ms from the Basic drawer to count the passing of a minute.
Below the pause, add an if-else statement to increase the value of the minutes variable by 1, if its less than 59, or reset it to 0.
STEP 10
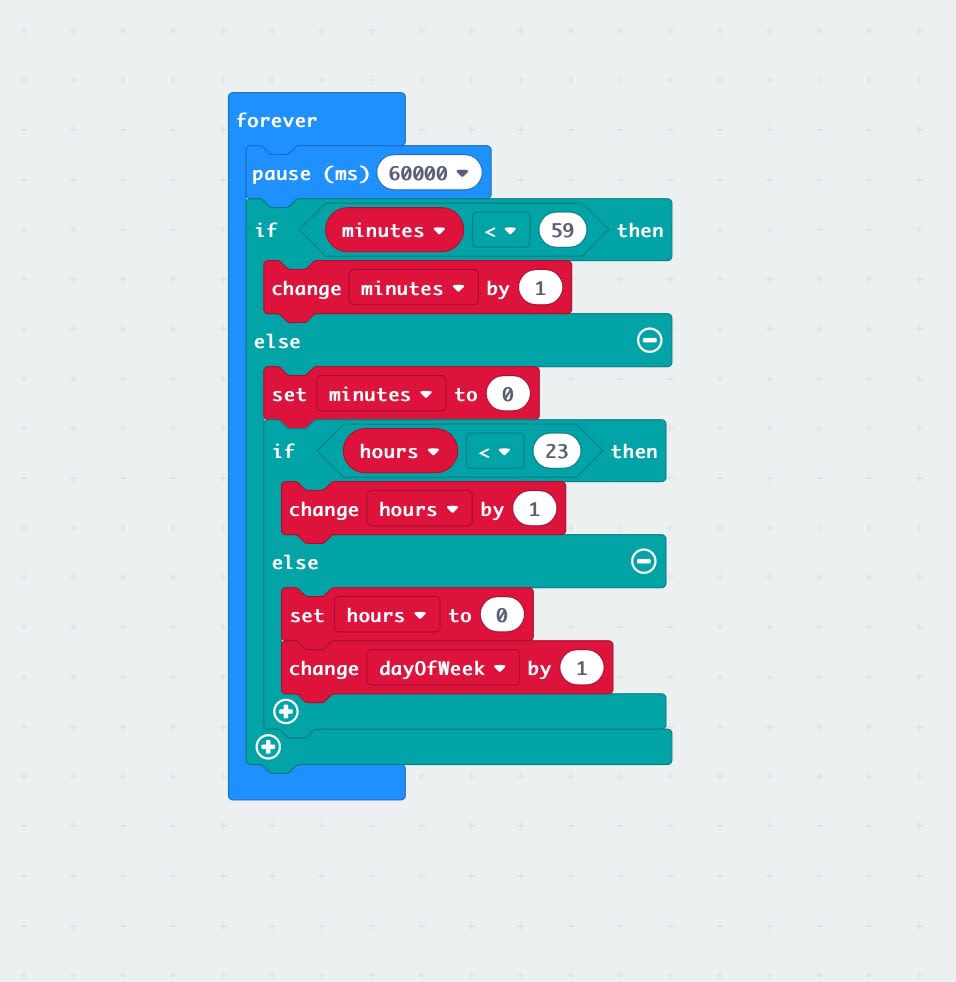
Within the first else code block, we need a second if-else statement to increase the value of hours for every 60 minutes passed.
Likewise in the second else statement where hours reset to 0, we need to increase the day of the week by 1 to show that a whole day has passed.
STEP 11
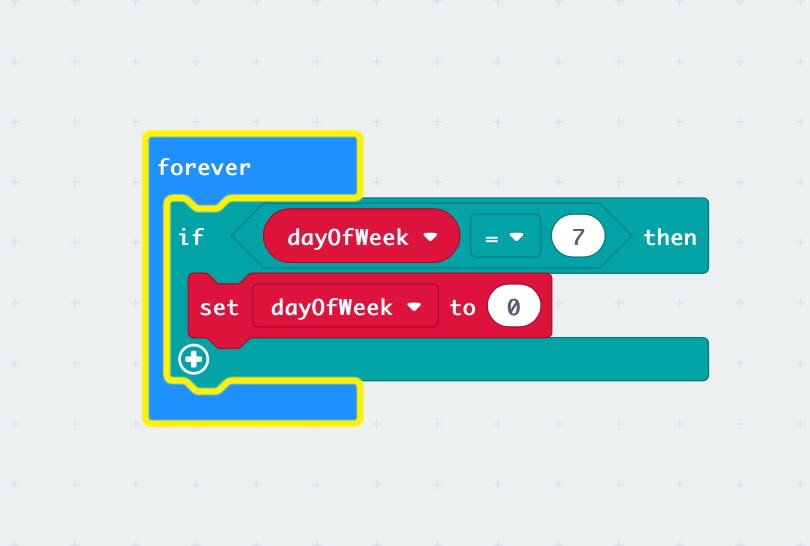
In a new forever code block, we need to ensure that whenever the day of the week reaches 7, it resets to zero as there are only 7 days in a week.
Using an if statement and comparison block from the Logic drawer, when the dayOfWeek variable reaches a value of 7, set the dayOfWeek to 0.
STEP 12
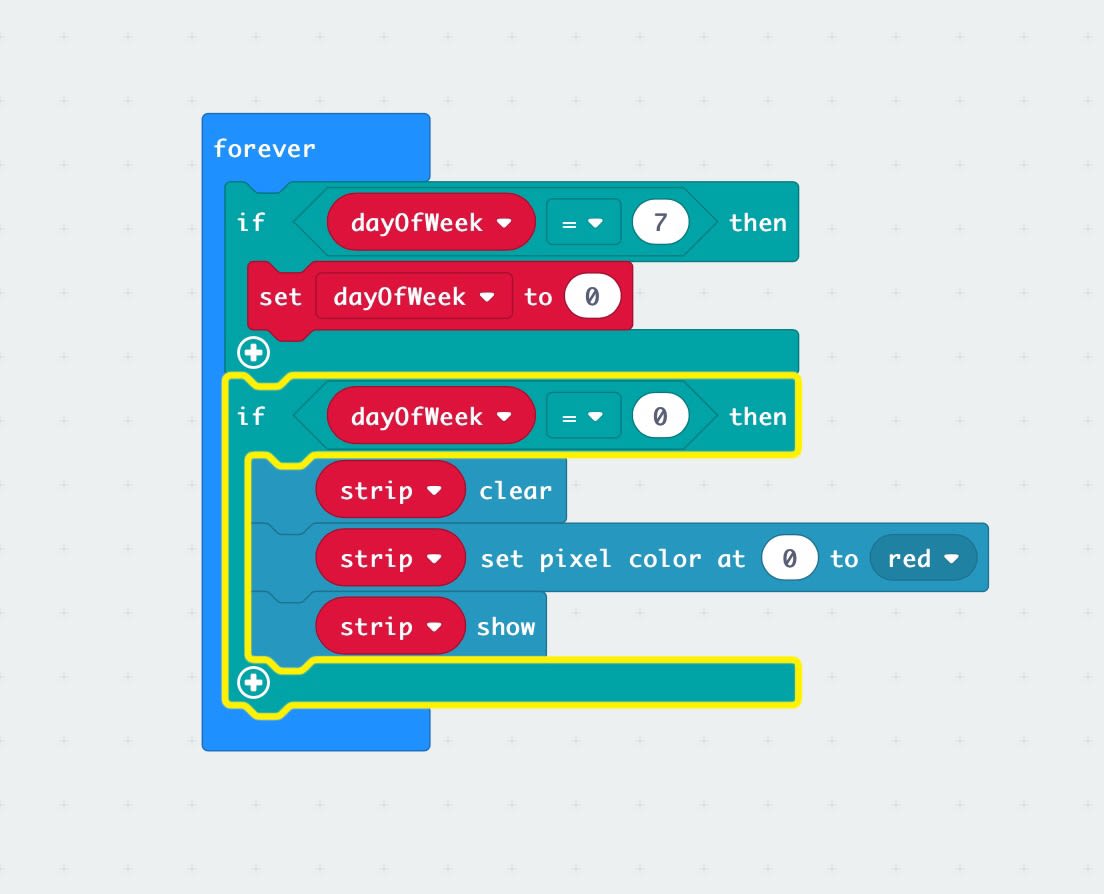
In the same forever code block, we need to set the LEDs to light up on the day matching the day of the week.
Using an If code block from the Variable drawer, test the value of dayOfWeek to check its 0, meaning Monday.
If it is, we need to clear any previous lights that could be turned on and set the first LED to turn on with the colour red. Then set the block to turn on the LED.
Note: remember the LEDs are zero-based so the first LED’s address value is 0, the second’s 1 and so on.
STEP 13

Duplicate the if code block. Remember to change the dayOfWeek as well as the LED number and colour.
In my code, I am using LEDs 0, 1, 3, 4, 5, 6, and 8.
STEP 14

Lastly we need to display the current time on the Micro:Bit screen so that you know what time it is.
Create a new forever code block. Using the join feature in the Text drawer, join hours and minutes together and save the value into a new variable called time.
Using show string from the Basic drawer, show the value of time and add a pause to allow for the screen to stay blank for a while before the time updates.
Finally, save your .hex file and transfer to your Micro:Bit and never miss another Medicine:Bit again!
Extra:Bits : Can you add code that reminds you to take your medicine at specific times each day?
Hint: Basic:Bit comes with a built in buzzer