Micro:bit chatroom
Create a micro:bit chatroom using the blocks in the Radio drawer!
YOU WILL NEED
Electronics
• 2 x BBC Micro:bit
• (Optional) Tinkercademy GVS breakout boards
• (Optional) OLED displays
STEP 1
Attaching the OLED
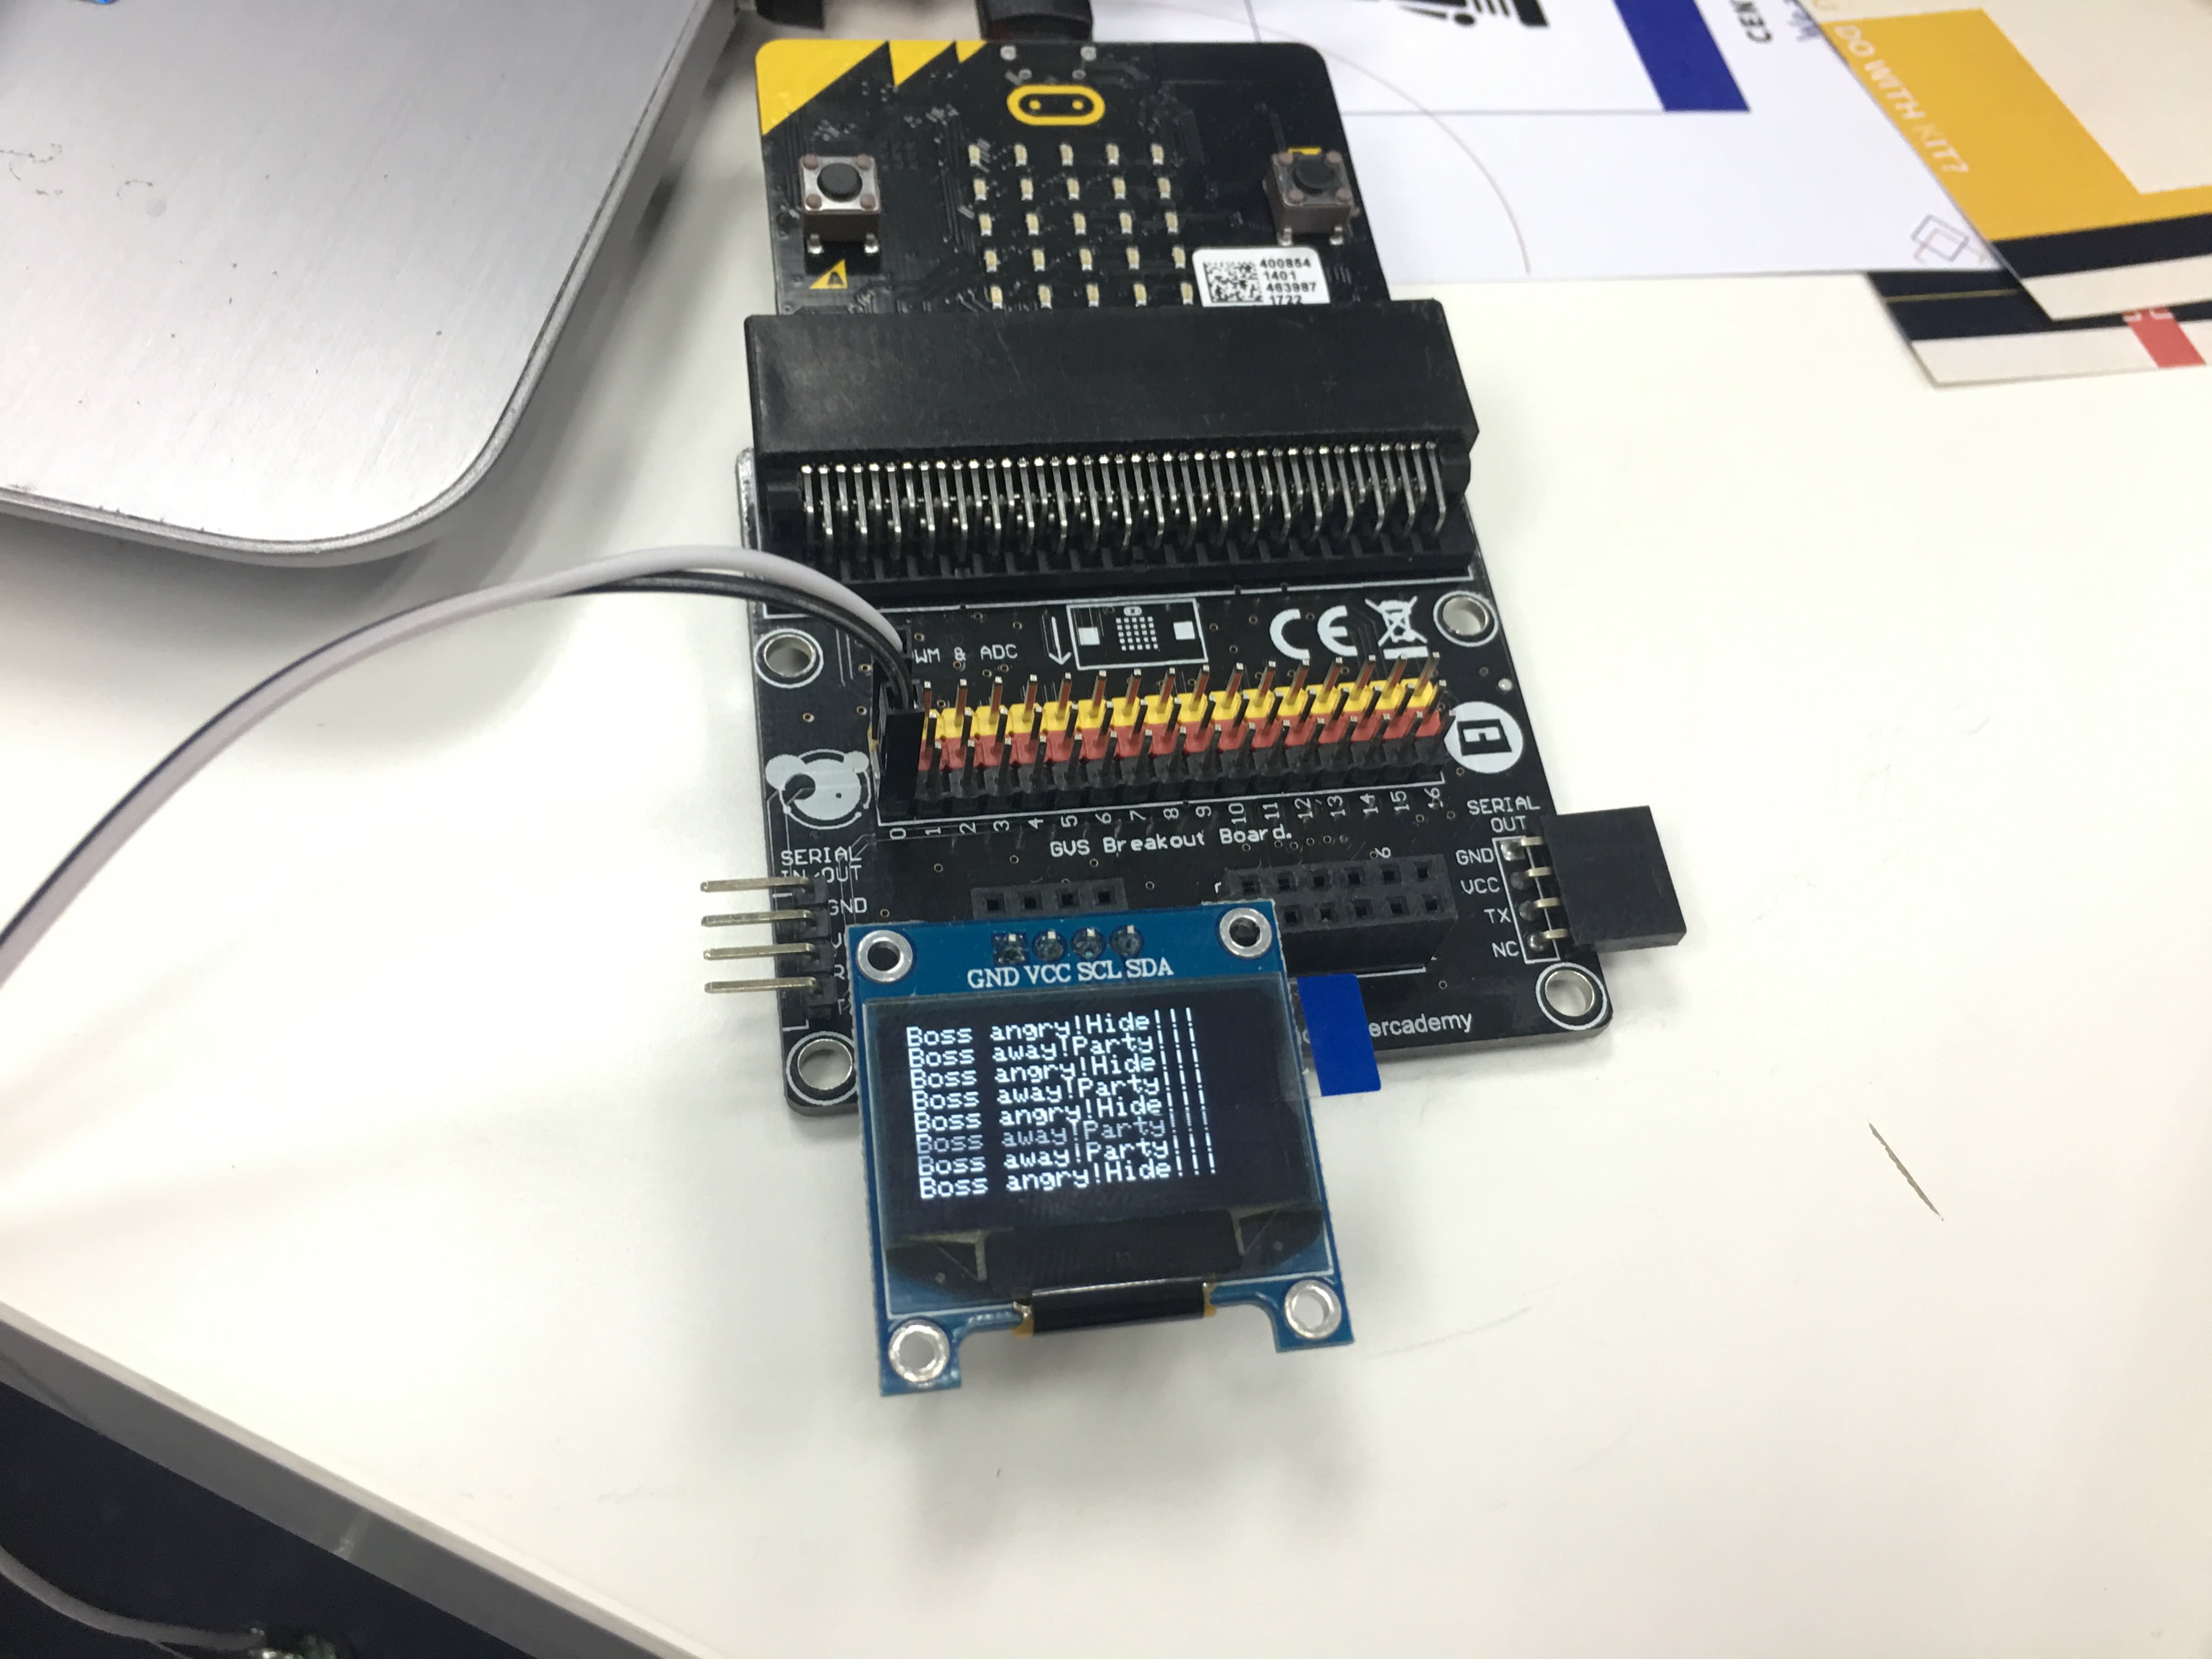
Plug each micro:bit into a Tinkercademy GVS breakout board, and plug an OLED display into the I2C headers. (We previously did this in Chapter 6). If you don’t have an OLED display, you can modify the code to use the built-in 5 x 5 LED screen, but be prepared to wait for messages to s…c…r…o…l…l slowly across the screen.
STEP 2
Choosing a radio group
Like channels on a walkie-talkie, your micro:bits must be on the same radio group in order to “hear” each others’ messages. This also means any other micro:bit can pick up your messages as long as they guess the right radio group - be careful what you send! We choose the group 42, just because.
STEP 3
Choosing a message format
There are three data types that you can send and receive : numbers, name/value pairs, or strings. Your micro:bits must be sending and receiving the same data type, otherwise they won’t understand each other. Here we’ll go with strings.
STEP 4
Try it out
Download the same code to each of the micro:bits in your chatroom and give it a go.
Code and References
Made this activity? Good Job! Now spread the word. Share a photo of your creation on social media with #letsgethacking #Micro:bitchatroom