MissileDodge
Create your very own simple but addictive game with just a micro:bit! Dodge the dropping missiles to survive and achieve new high scores! The pace of the game gets increasingly faster as you advance the ranks.
YOU WILL NEED
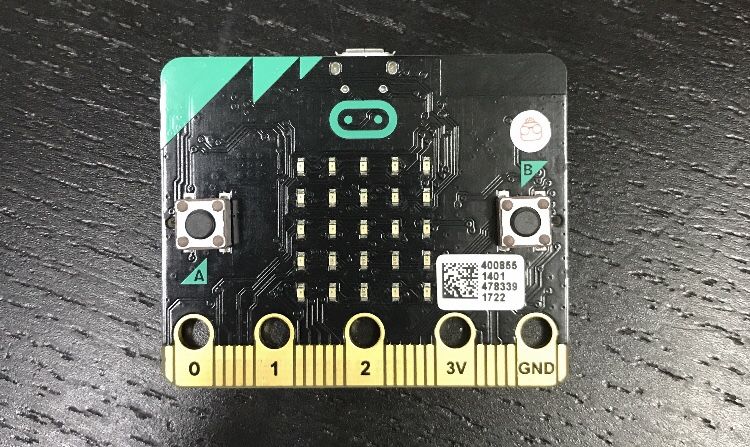
- 1 x BBC micro:bit
- 1 x Micro USB cable
- 1 x Laptop
STEP 1
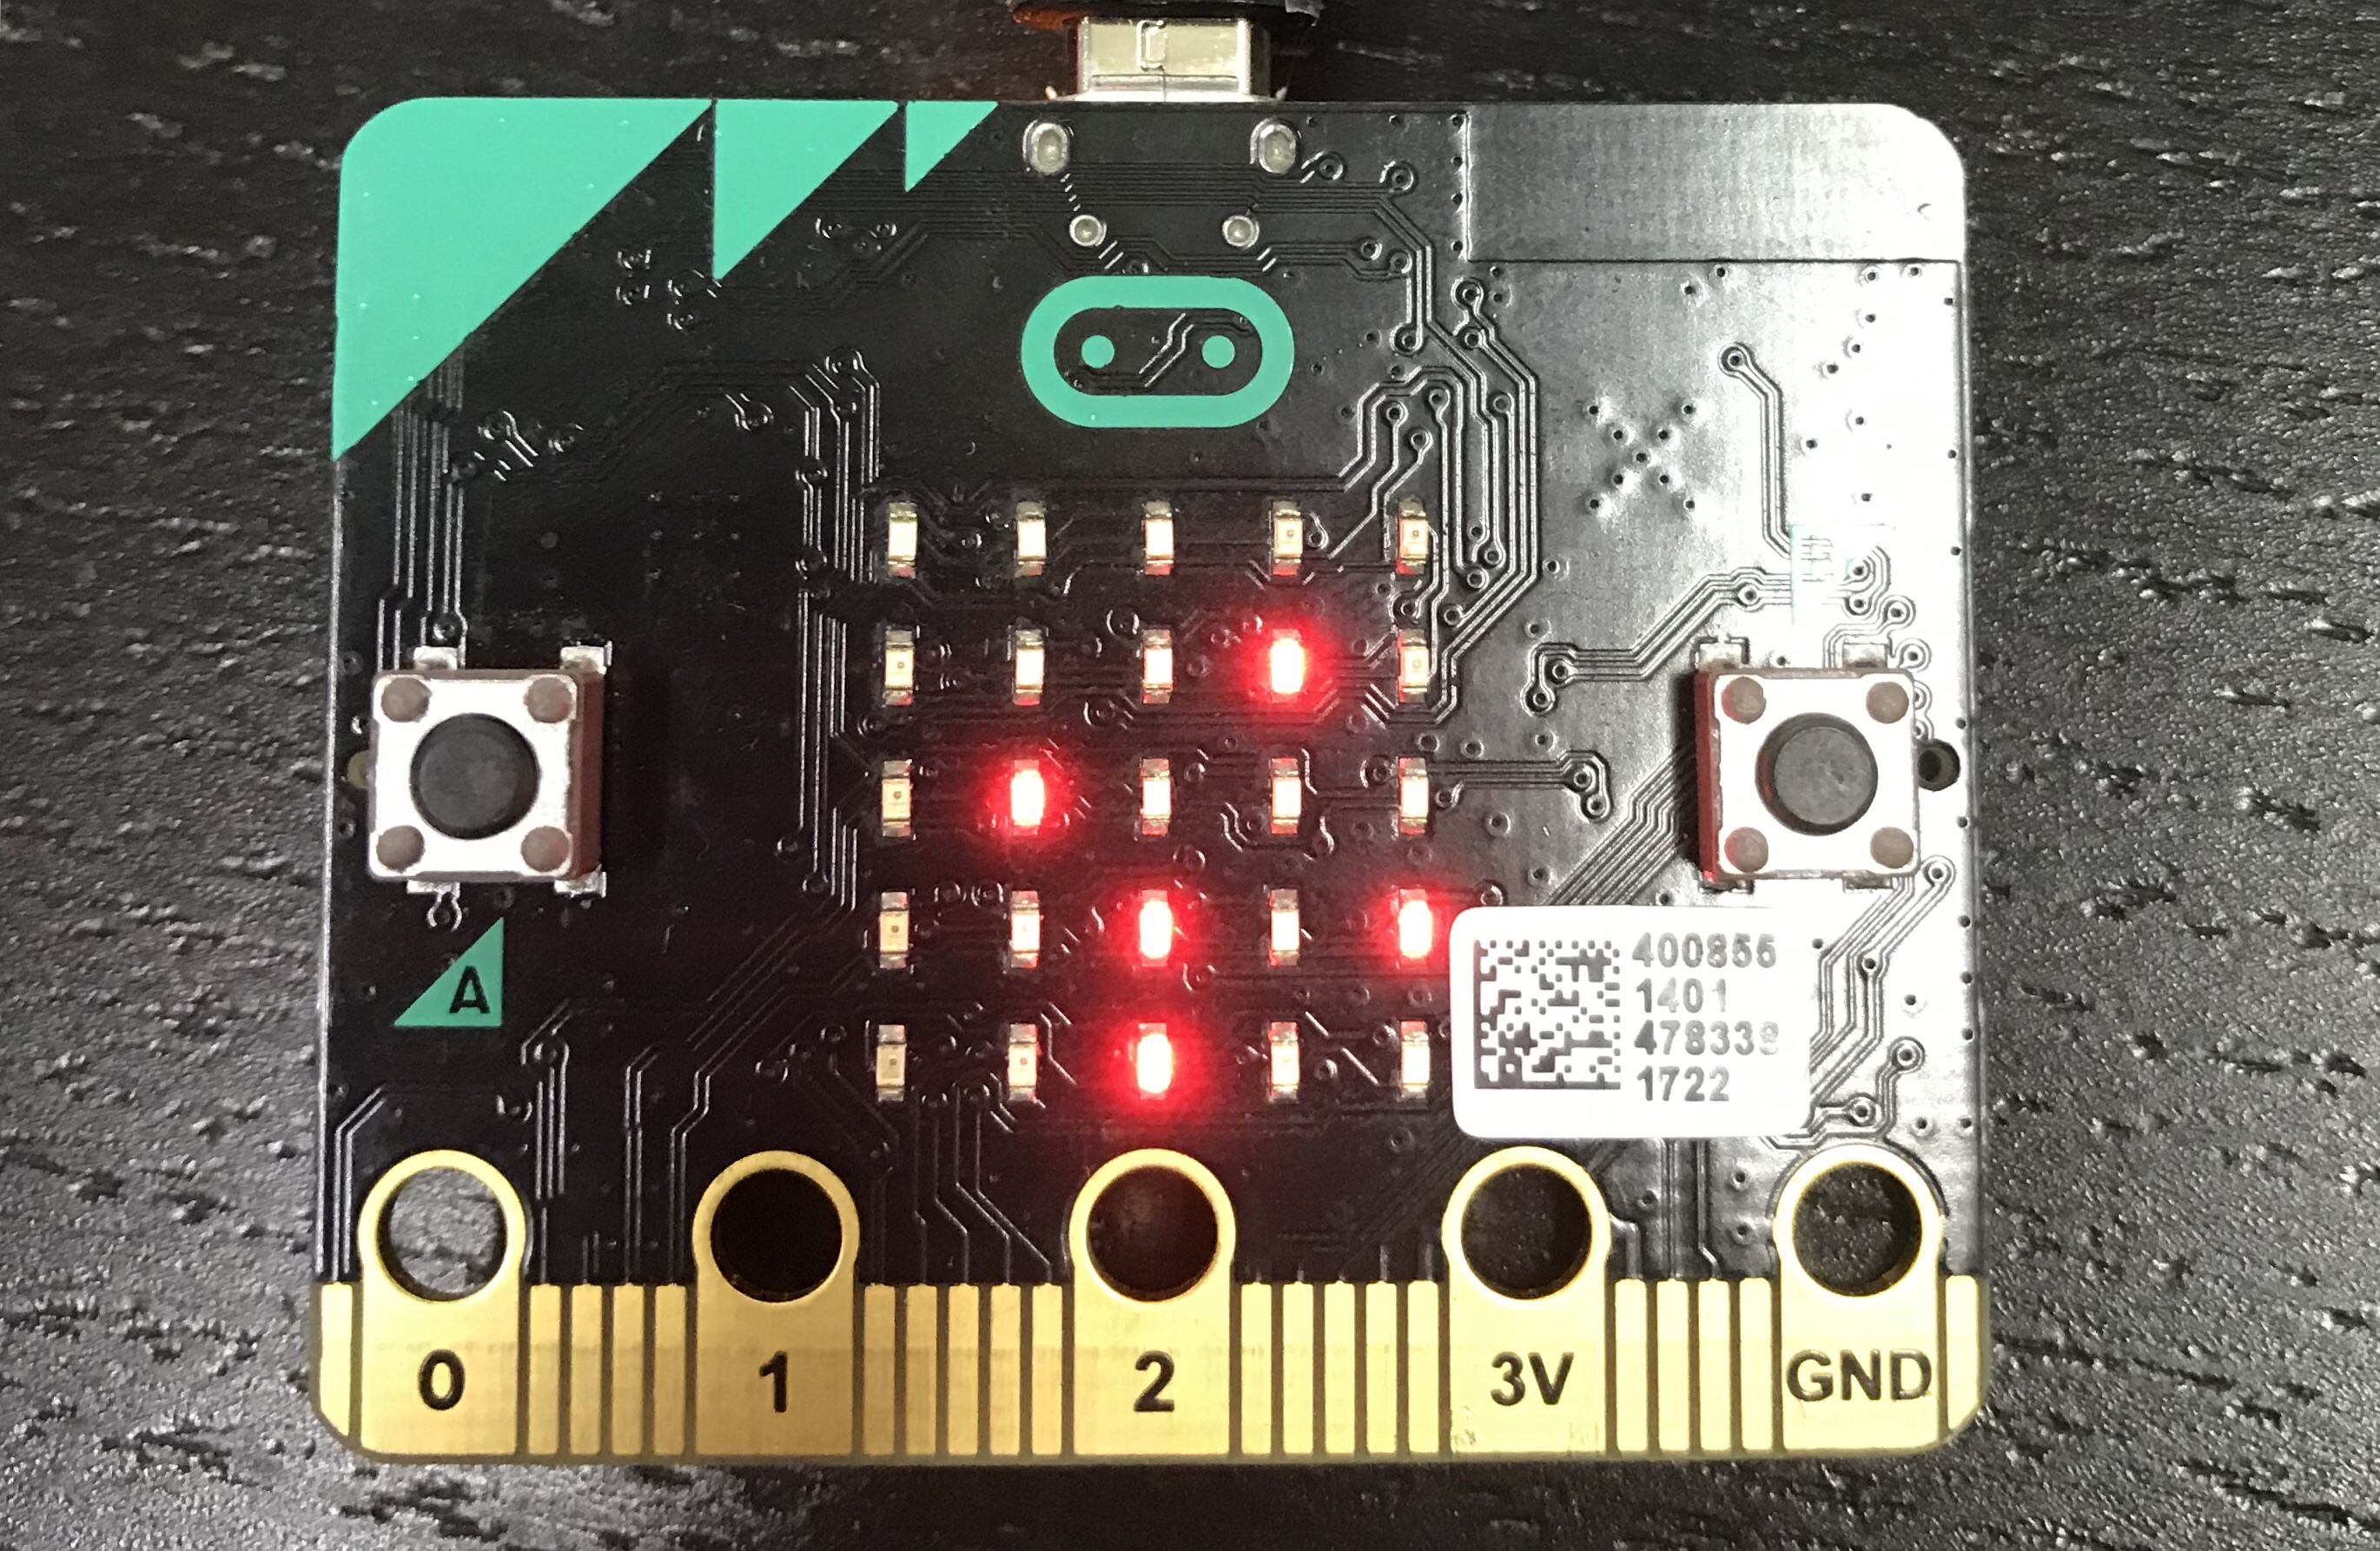
Before we start, let’s learn a little about the layout of the micro:bit. The micro:bit consists of 25 red LED lights arranged in a 5X5 grid. As computer number functions typically start from 0, for the 5x5 microbit, we say that it has 0 to 4 rows, and 0 to 4 columns. We use x , y coordinates to specify a particular LED in the grid; where x is the horizontal position and y is the vertical position e.g. the LED at the top corner is (0,0).
STEP 2

So let’s begin!
First, let’s type the pre-game message and define some variables - playerX is the x-coordinate of the player’s position; MissileY() is the y-coordinate of the missile’s position (which I will elaborate in the next step); fallingPause is the rate of falling of the missile.
Now, you might be wondering what “pick random -4 to 0” in MIssileY() is about. To avoid all 5 missiles dropping down at the same time, we use the random function. The random range is negative (-4 to 0) to ensure that it is unseen on screen at that moment in time. You will understand it better when you learn about the plot function in the next step.
STEP 3
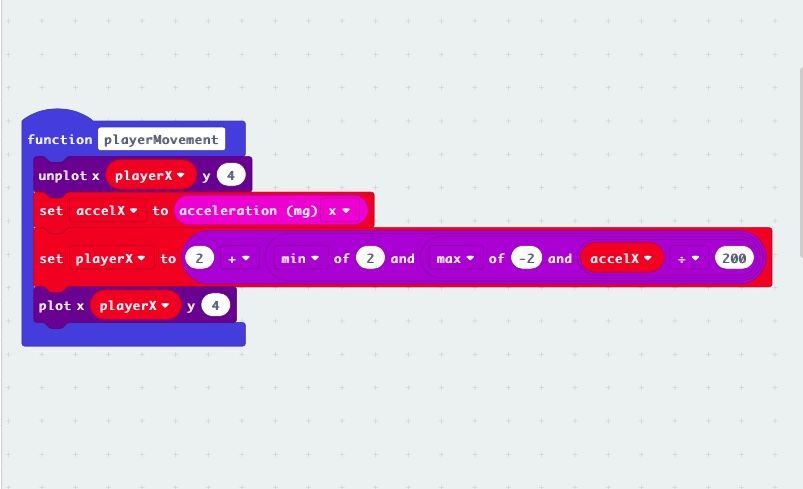
Next, let’s program the movement of the player’s LED! We are going to create our very first function - playerMovement. With functions, we save the hassle of rewriting similar code over and over again, making it much more efficient.
Plot and unplot functions, which we will use in the later stages, basically turn on or turn off a specific LED respectively, e.g. [plot x(2) y (2)] will light up the centre spot which has x-coordinate=2 and y-coordinate=2.
In order for the player’s LED to respond to tilting, we need to activate its accelerometer. We set variable accelX to the acceleration input (x) as we only want the micro-bit to respond to horizontal tilting. The next line defines the limits of the LED to the tilting.
Also, why unplot? Without unplot, when your LED moves, the LED at the previous location stays, and soon the whole row will be cluttered with LED, making it unplayable!
STEP 4
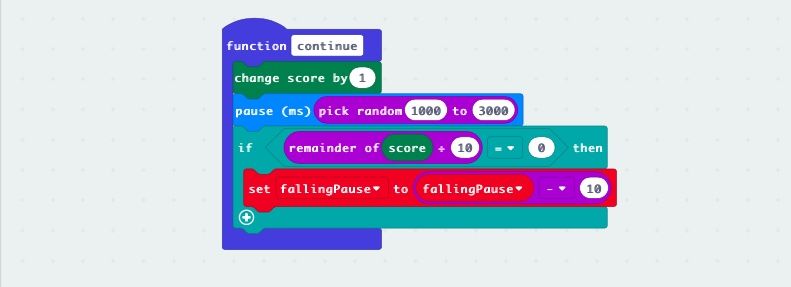
The continue function defines what happens when the player successfully dodges a missile. It includes an if statement indicating that the falling rate will decrease by 10ms every 10 points, making it more challenging.
STEP 5

The gameOver function defines what happens when the player gets hit by a missile. It includes a post-game message, which will differ depending on whether the player makes a new highscore. This is accomplished by the if-else function.
STEP 6
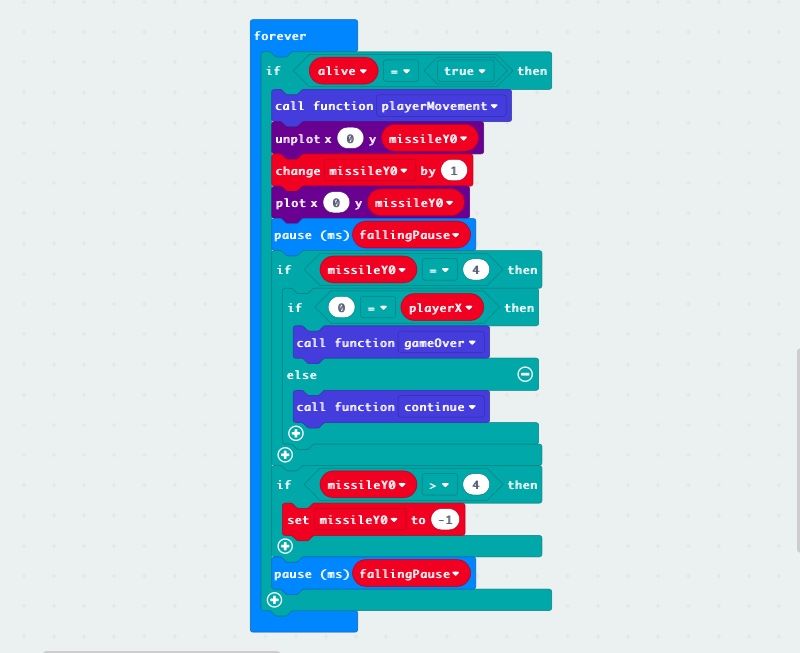
Now, let’s program the movement of the left-most missile, as displayed above. You might be wondering why the need of “if alive=true, then …” statement? This is because without it, even when it is game over, the missiles will still continue dropping since it is in the forever loop!
STEP 7
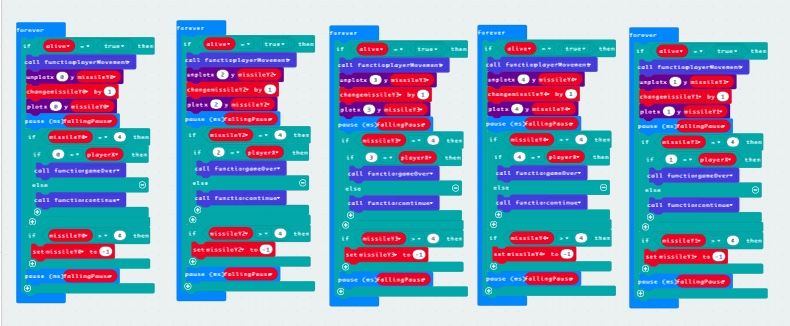
Finally, duplicate the program 5 times for the 5 missiles, adapting the coordinates of the missiles accordingly. You can see now why creating functions at the start makes this process much simpler. You may also want to test-run your program to ensure you did not make careless errors!
STEP 8

And…you’re done! Have fun playing!!
Made this activity? Good Job! Now spread the word. Share a photo of your creation on social media with #letsgethacking #MissileDodge