Morse Code
Send secret messages to one another!

YOU WILL NEED
- 2 x micro:bit
- 4 x Crocodile clips
STEP 1
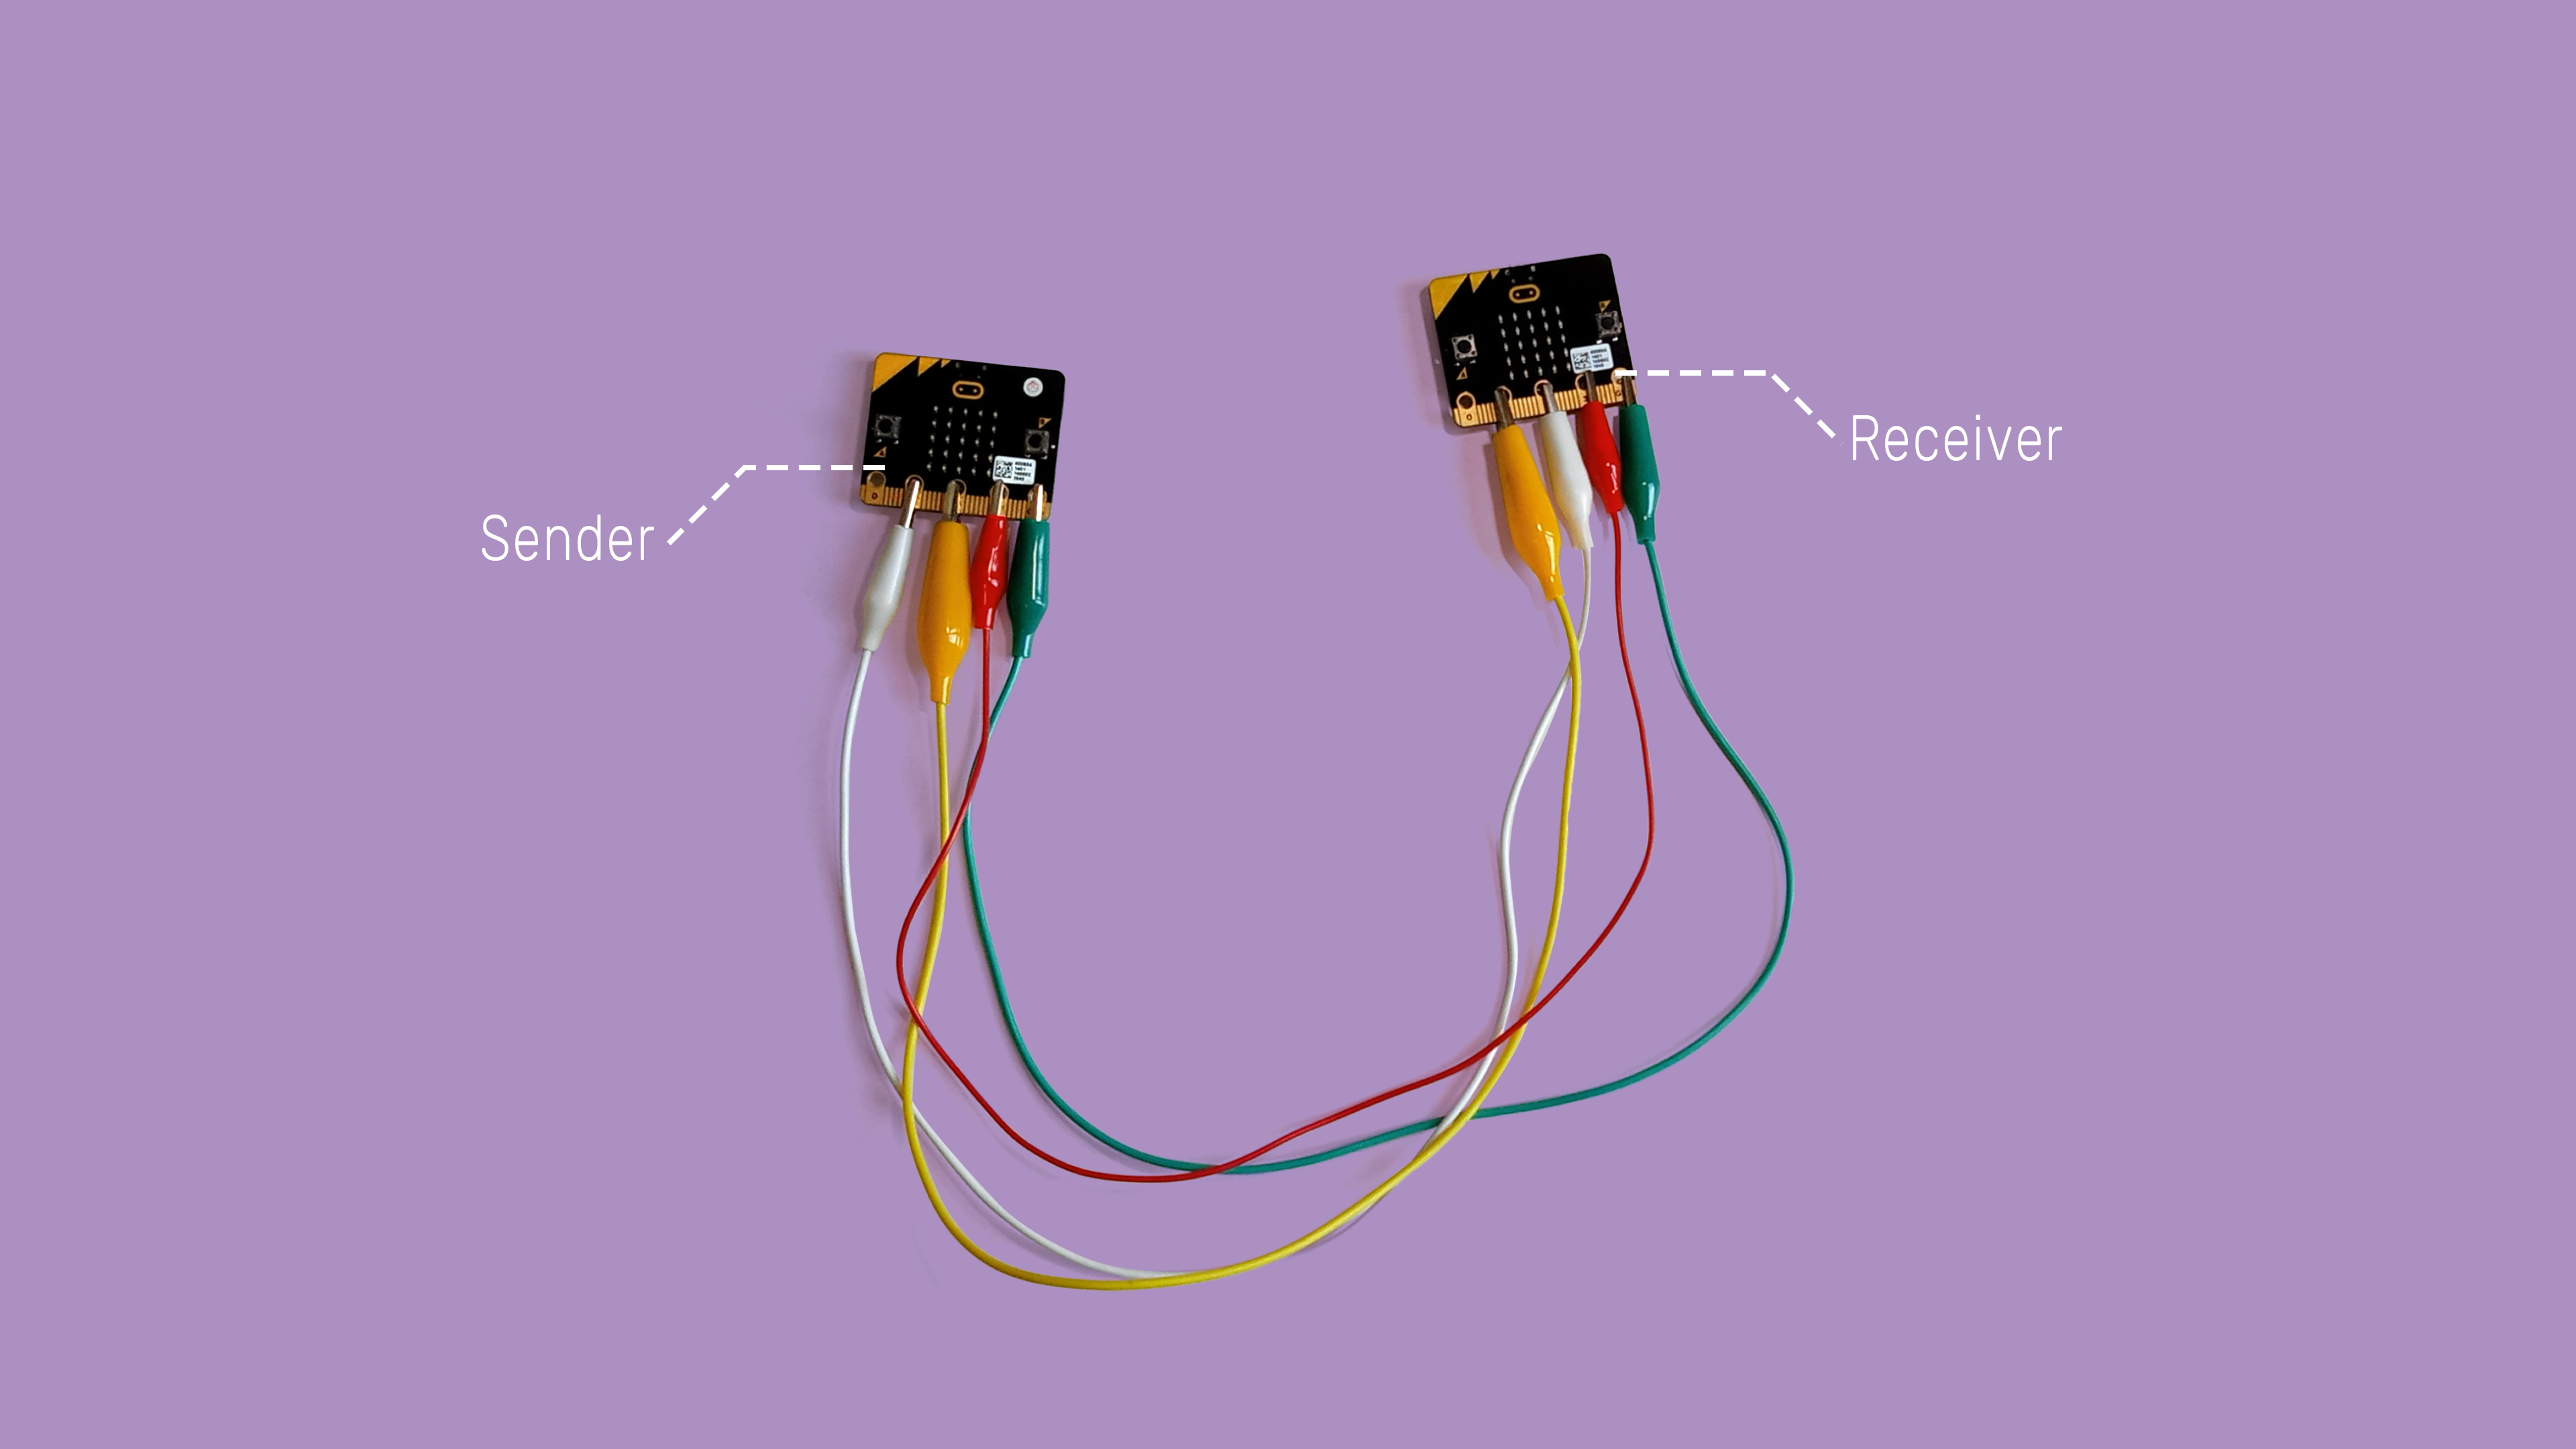
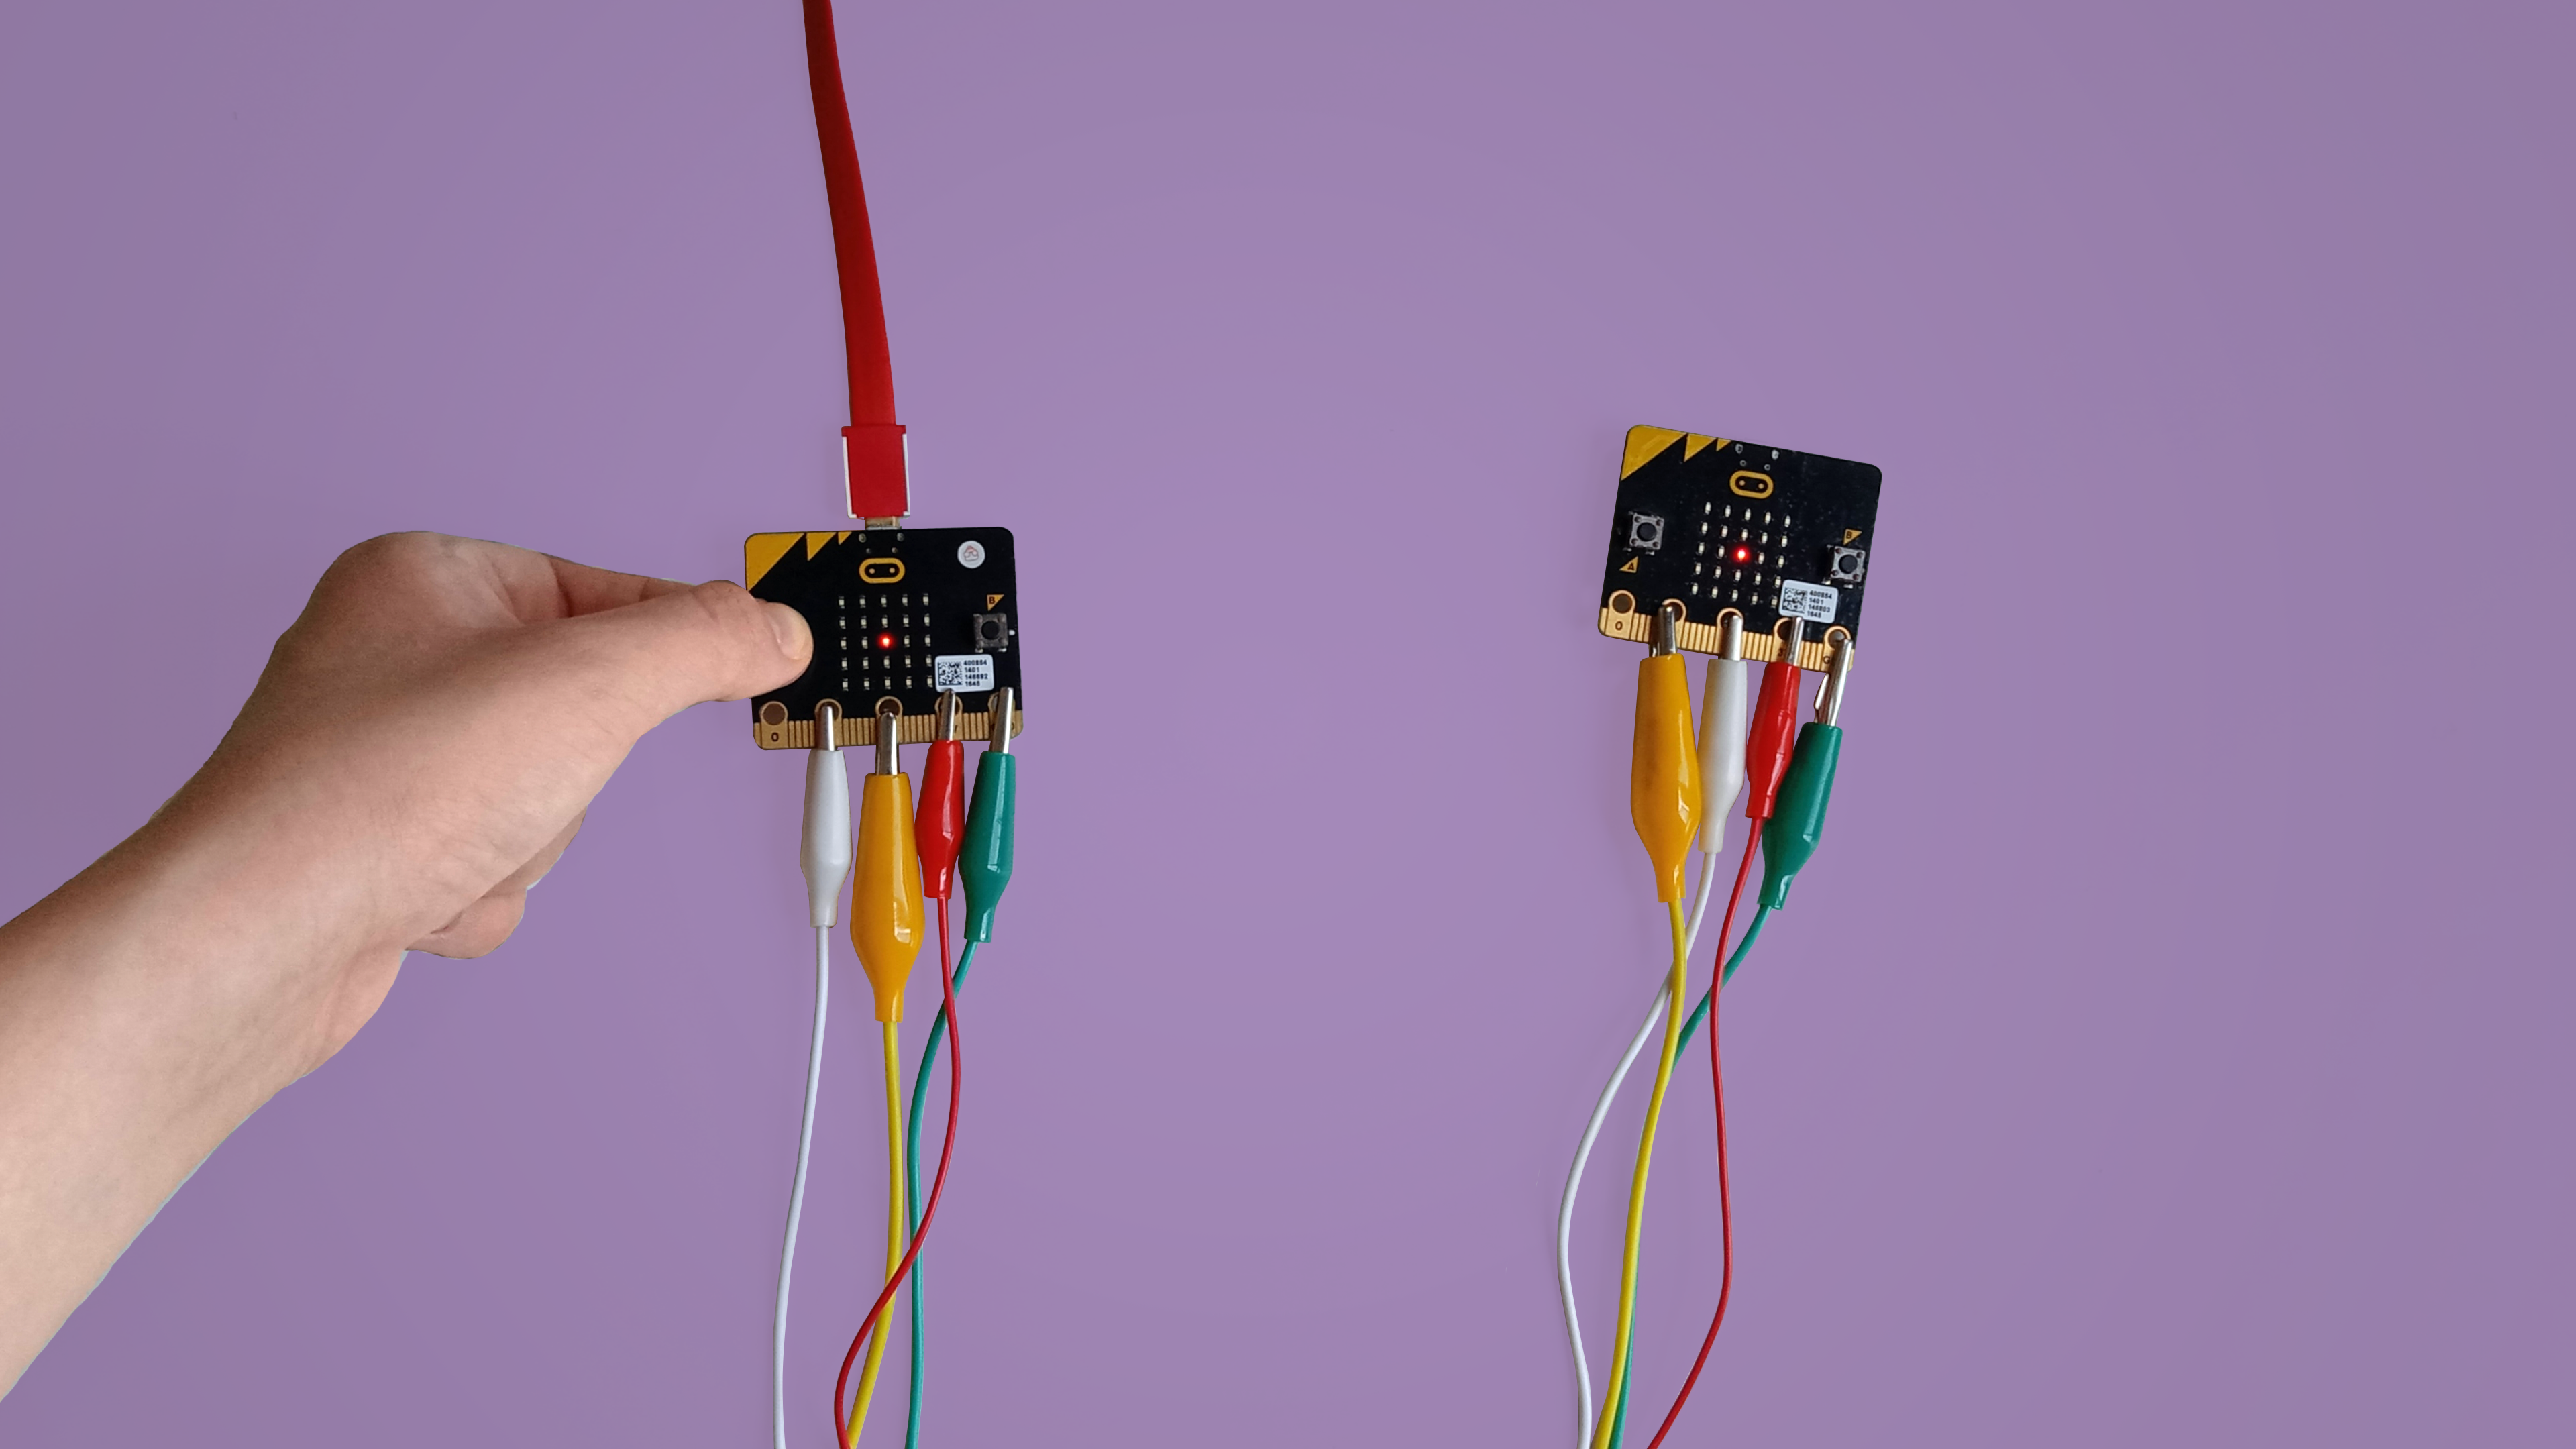
We want to send signals from Pin 1 of the first micro:Bit to Pin 2 of the second micro:Bit (and vice versa). To do so, connect:
(a) GND to GND
(b) 3V to 3V
(c) Pin 1 to Pin 2
(d) Pin 2 to Pin 1
Materials
- 2 x micro:bit
- 4 x Crocodile clips
STEP 2
Code for sender - Button A
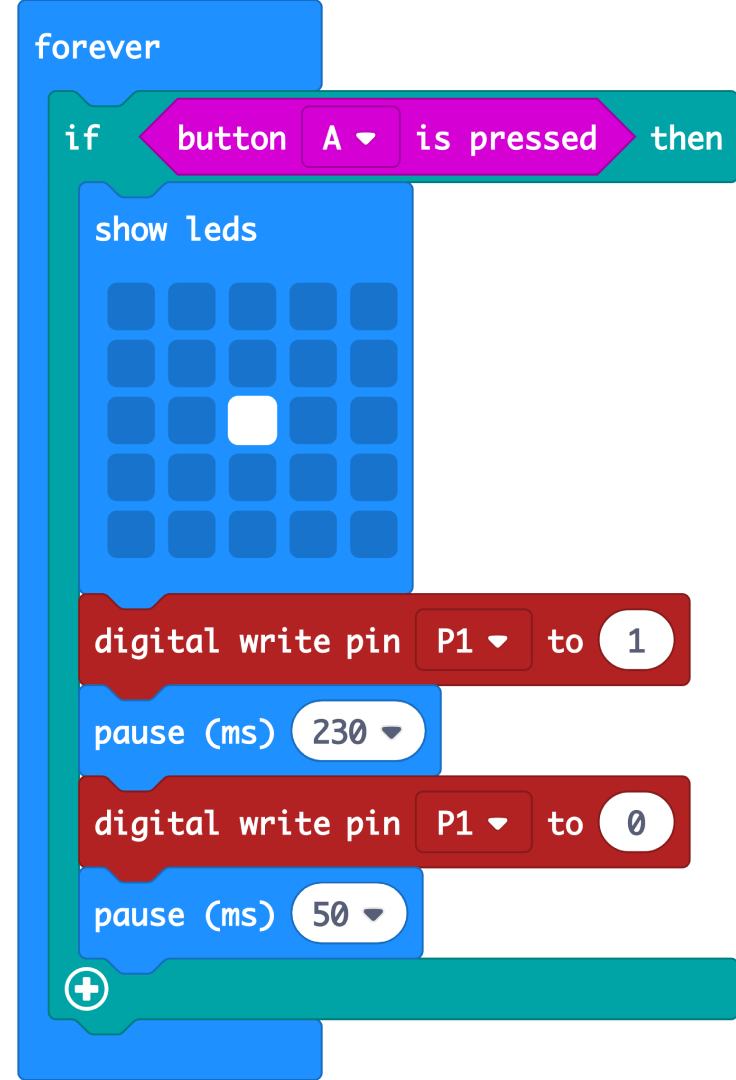
(a) We want a dot signal to be sent when the A button is pressed.
(b) Open up MakeCode and name this file “Sender”.
(c) The show led block in the then section displays the “dot” on the sender screen when button A is pressed.
(d) Setting the digital write pin block to 1 will turn the signal at p1 (where we attached the clip) “on”.
(e) Then, it will pause for 230 ms, turn off with the digital write pin block set to 0, and pause for another 50 ms.
Materials
- 1 x Micro:bit (sender)
STEP 3
Sender: Button B
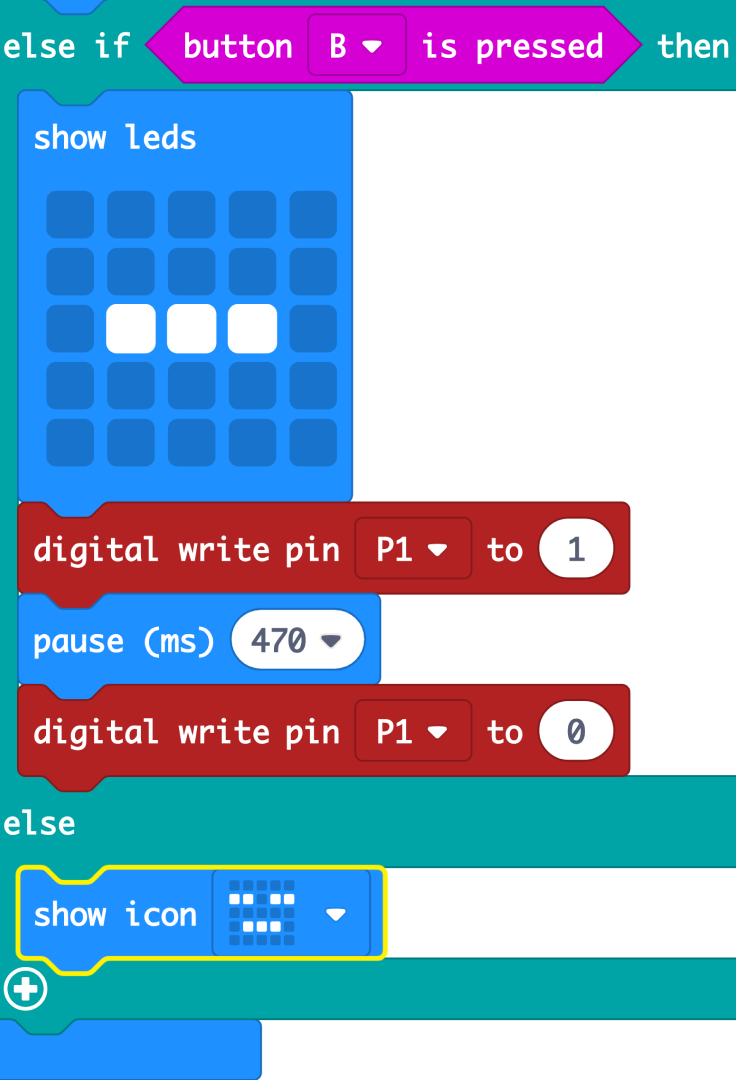
We want a “dash” signal to be sent when the B button is pressed.
(a) Add an else if block to the if-then-else block from earlier.
(b) Repeat the steps as with Step 2, except
- Use button B is pressed
- Display a “dash” in the LED
- Pause for 470 ms
- For the else statement, add a clear screen block from Basic block, or an icon.
Materials
- 1 x micro:bit (sender)
STEP 4
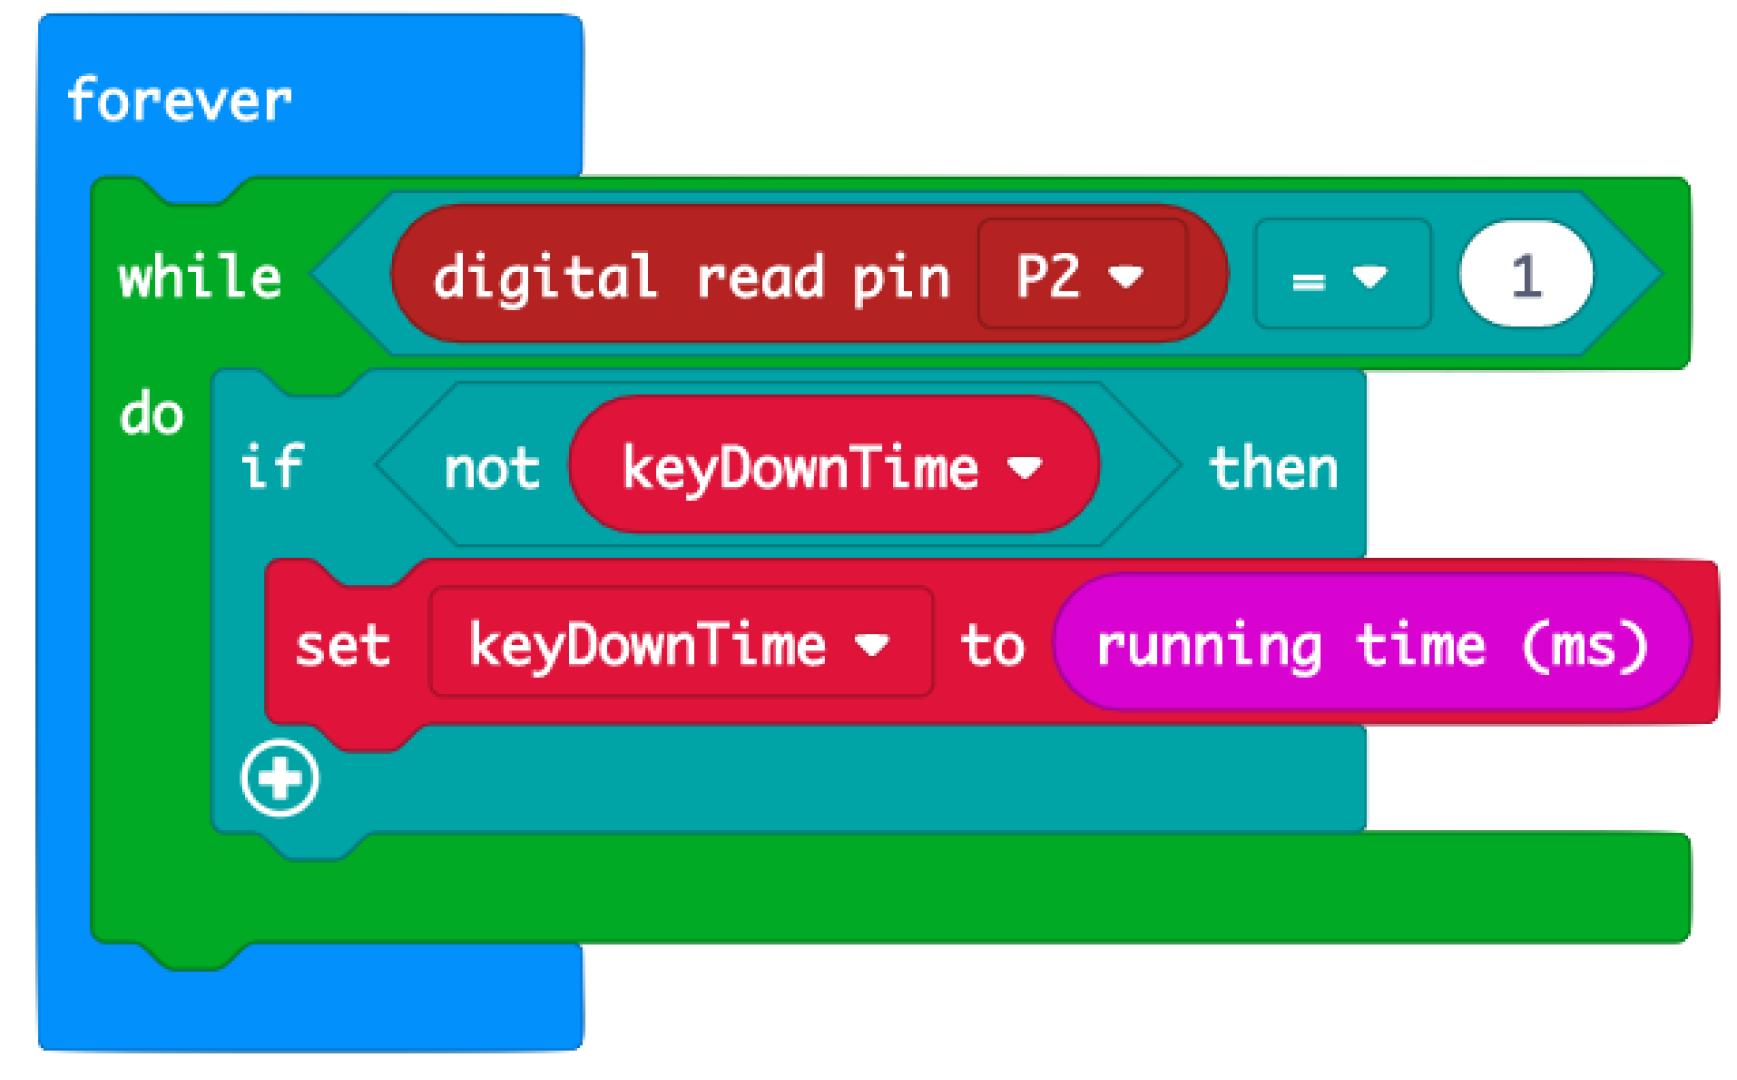
We want to record the duration of time between whenever the signal is received and when it stops. We will be using the running time (ms) block for this.
(a) Create another project on MakeCode called “Receiver”.
(b) The digital read pin = 1 block indicates when a signal is detected. Make sure to change it to P2, where we attached the crocodile clip.
(c) From the Variables drawer, create a new variable ‘keyDownTime’. Get ‘running time (ms)’ from the Input > more drawer and attach it to keyDownTime.
Materials
1 x micro:bit (receiver)
STEP 5
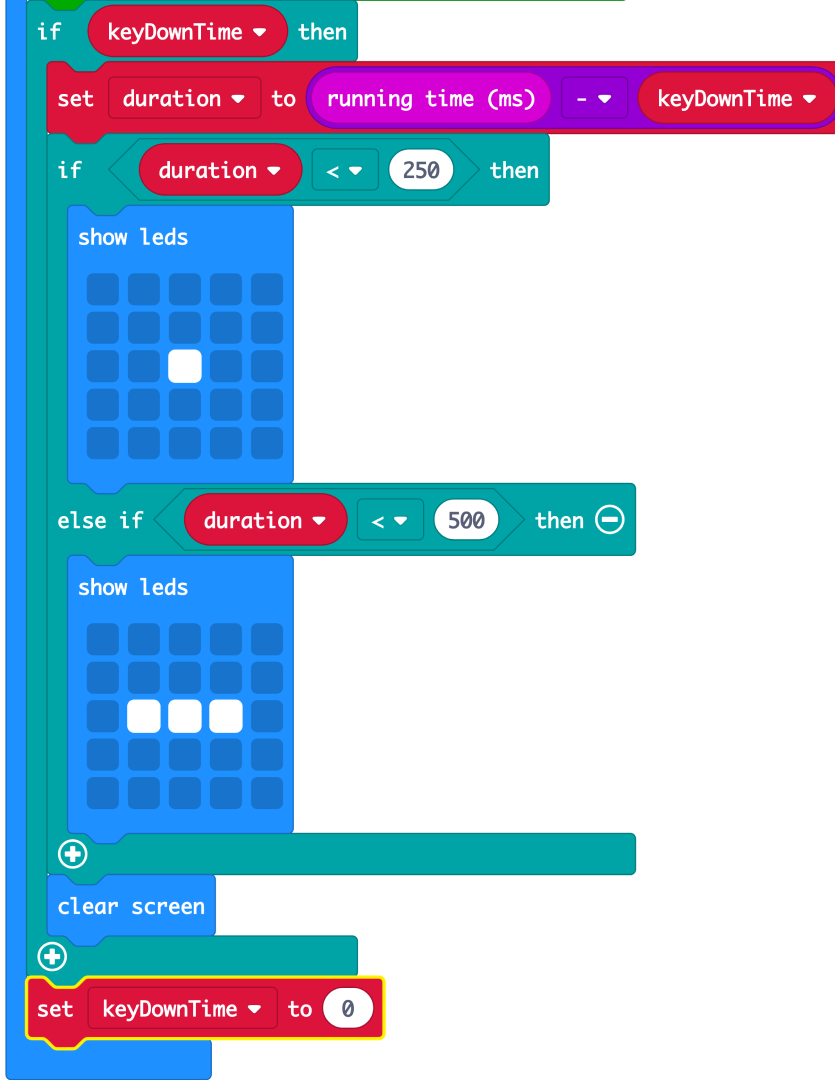
Now, we want to display the correct signal on the screen.
(a) The set duration block only runs if a signal has been detected with the keyDownTime variable.
(b) The duration variable tells us the amount of time between when the program started running and signal detection. We used 250 ms as the “dot” takes 230 ms.
(c) The “dash” threshold will be set to 500, since the “dash” takes 470 ms.
(d) After the first if-then block, set keyDownTime to 0 so that it works every time you send a new signal
Materials
1 x micro:bit (receiver)
STEP 6
Done!
(a) Make sure to flash the code to both micro:bits and test it out! It should display the same signal on both screens when you press a button. Hold the button on the sending micro:bit down for as long as you want the send the message for.
(b) For an added challenge, try to translate the morse code on the second micro:bit.
Made this activity? Good Job! Now spread the word. Share a photo of your creation on social media with #letsgethacking #MorseCode