Pitch Perfect
Create a game that will test the player's pitch

YOU WILL NEED
- 1 x BBC micro:bit
- 1 x Tinkercademy Breakout Board
- 1 x Micro USB cable
- 1 x Buzzer
- 1 x ADKeypad
- 1 x OLED display
- 2 x F-F Jumper Wires
STEP 1

We're going to create a game that will test the player's pitch. The micro:bit will play various notes and the player has to press the correct button on the ADKeypad corresponding to the note played.
STEP 2
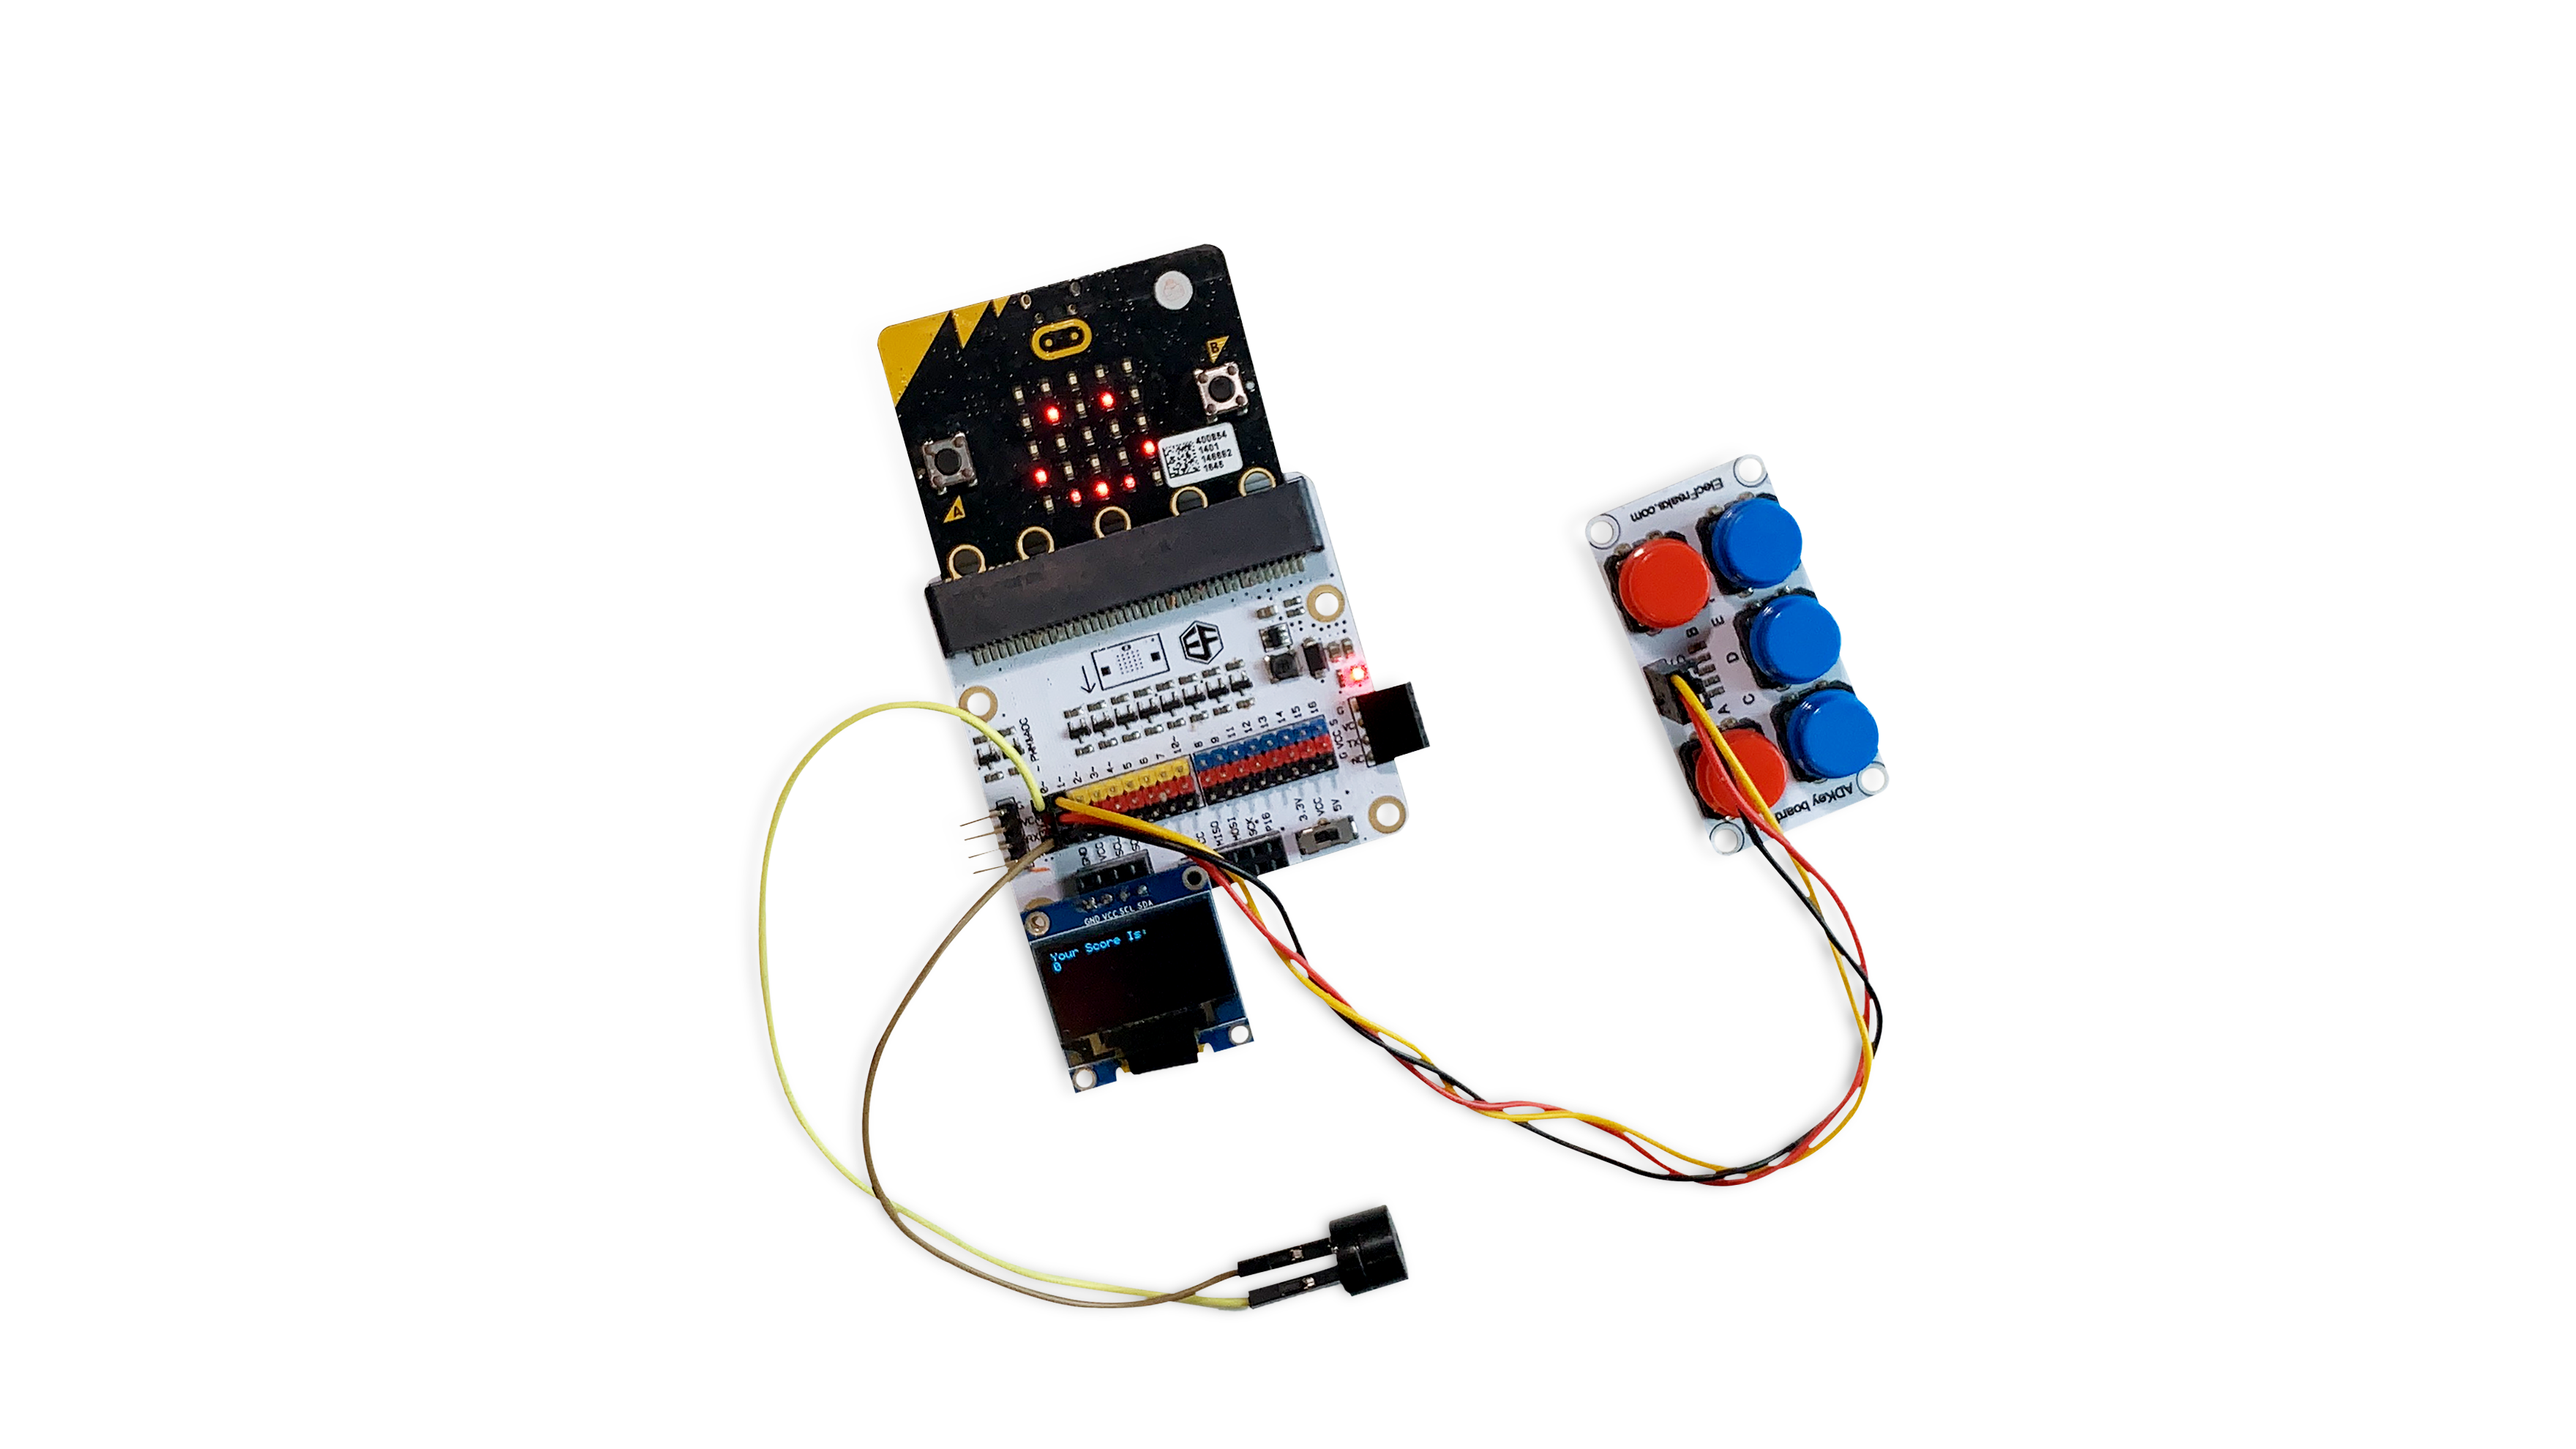
Connecting the Components
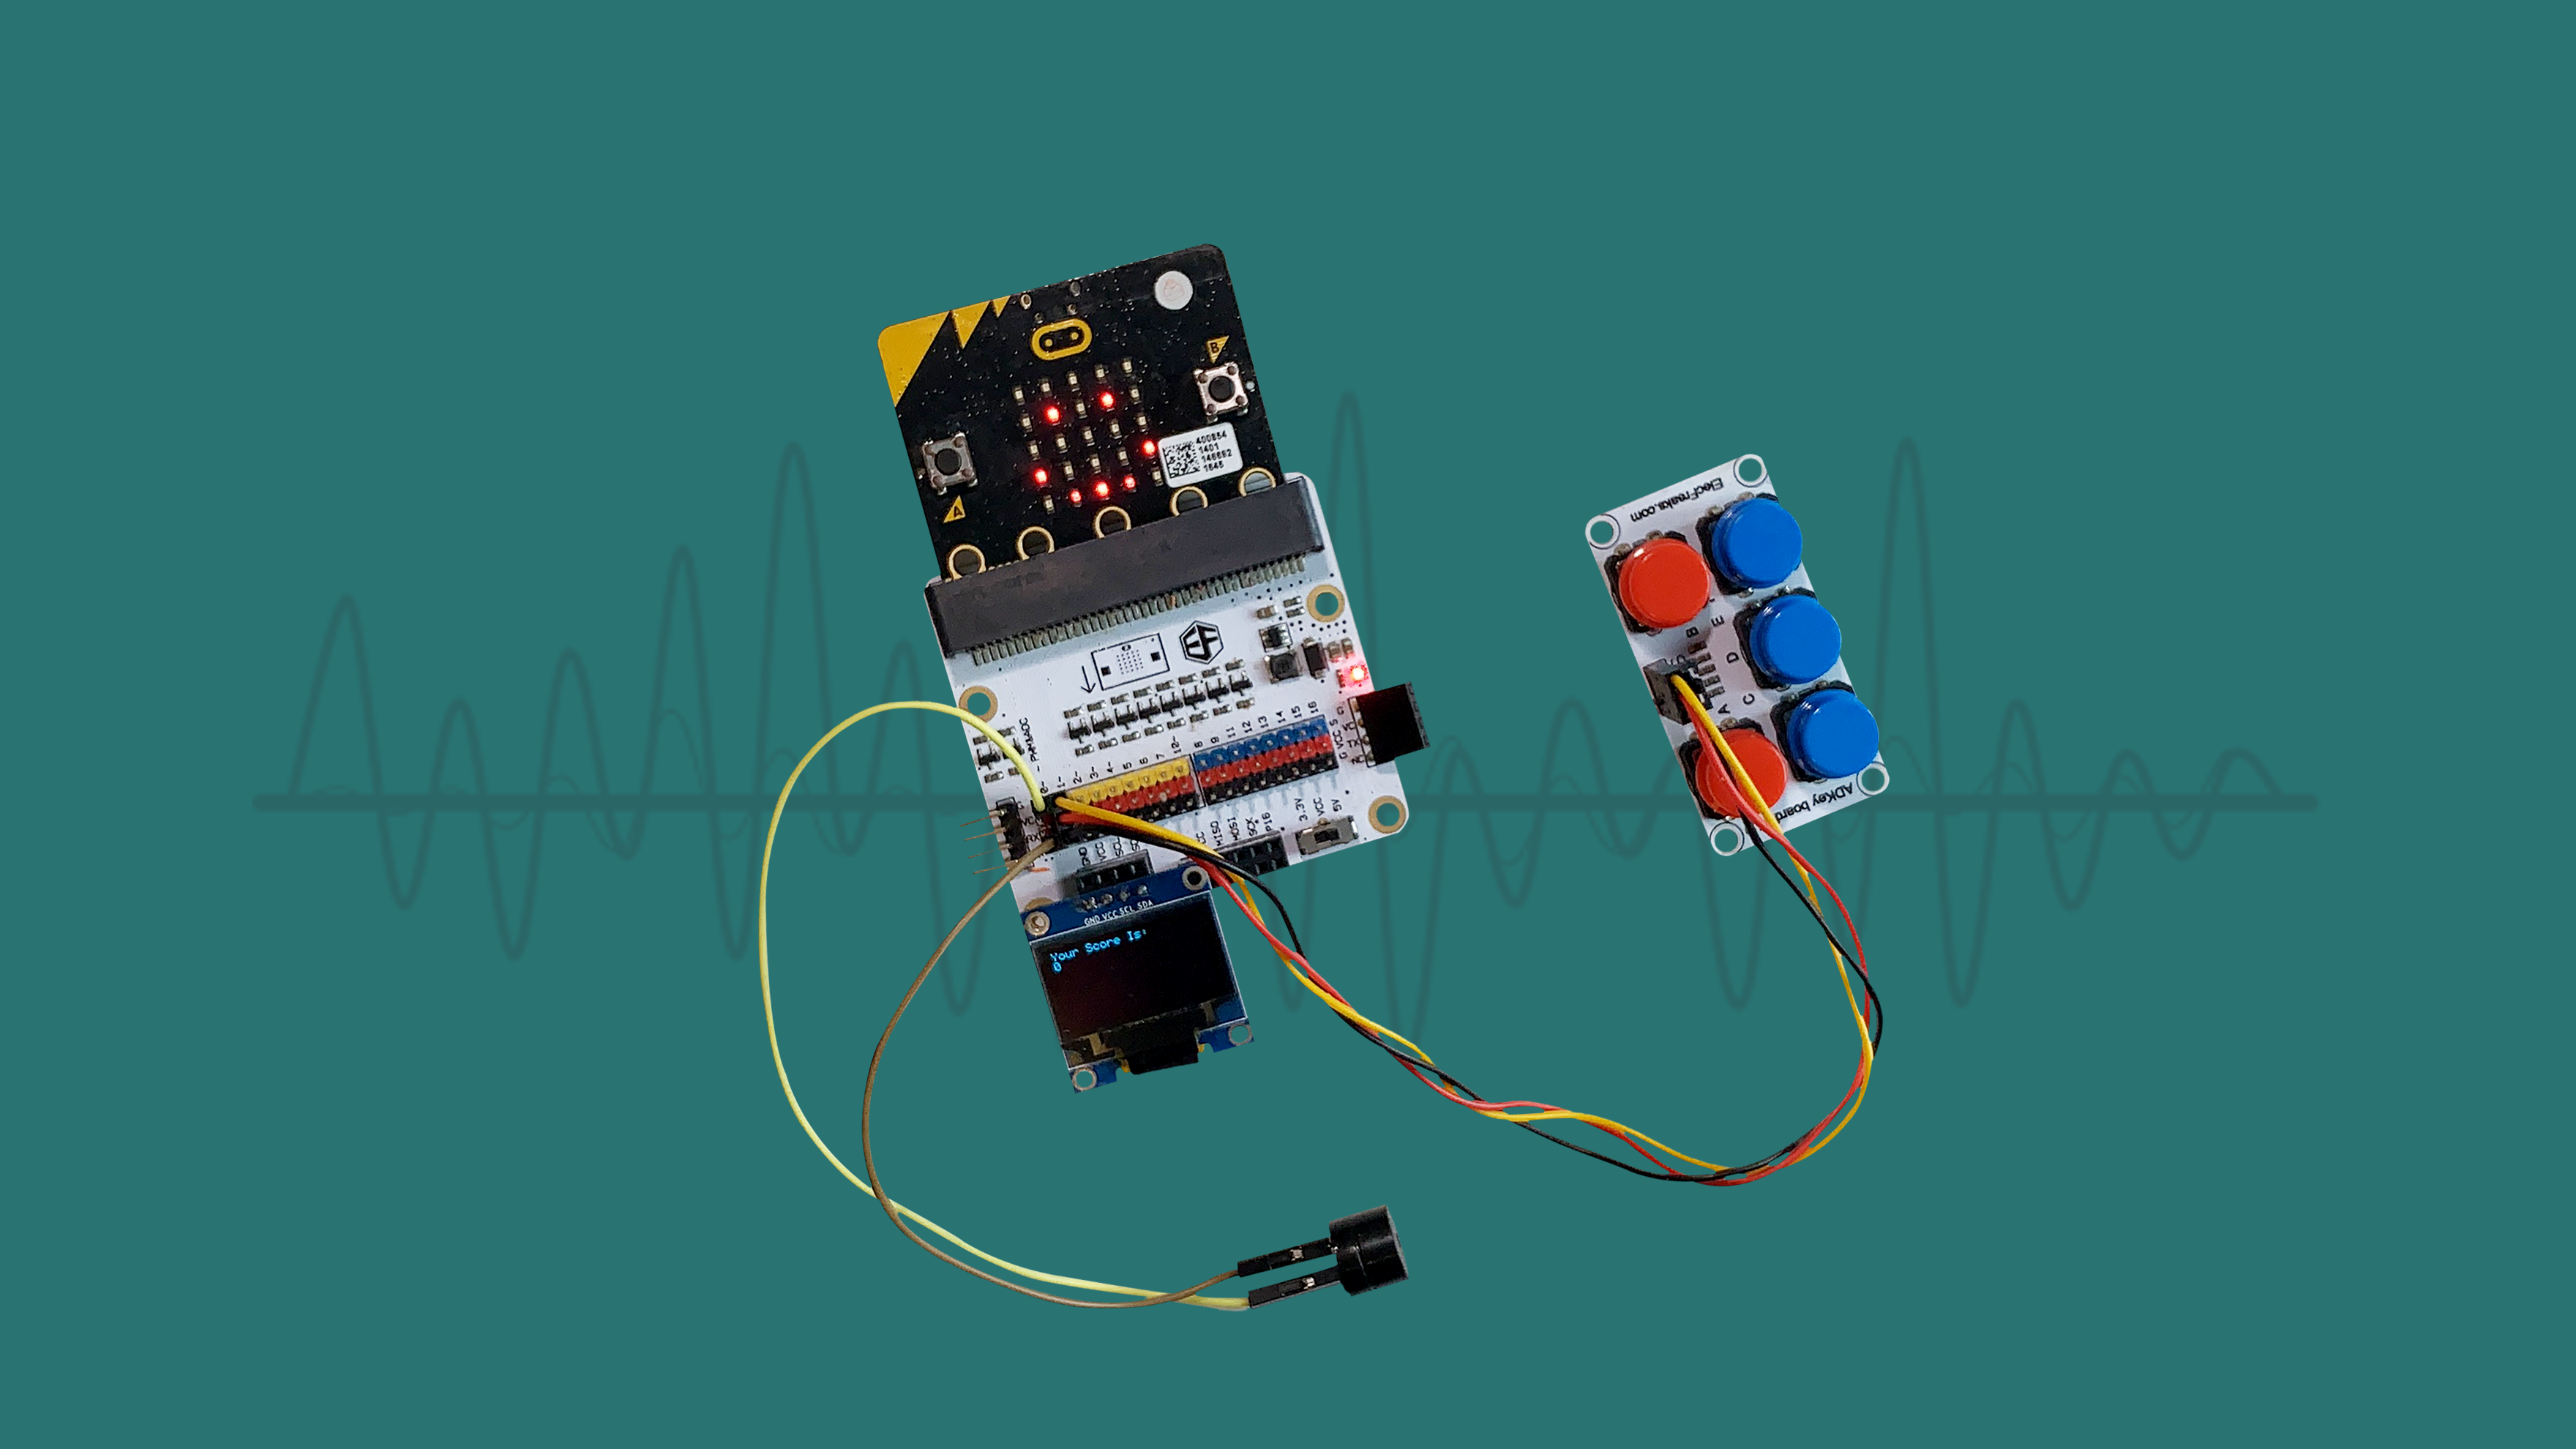
(a) Slot the micro:bit into Tinkercademy breakout board.
(b) Connect the external components to the Tinkercademy breakout board.
• Using 2 F-F jumper wires, connect the ‘+’ end of the buzzer to the yellow signal (S) pin, and ‘-’ end to the black ground (G) pin.
• Connect the ADKeypad to pin1. Match the colours of the wires to that on the breakout board pins.
• Insert the OLED display into the I2C pinouts. Any row will do.
Materials
- 1 x BBC micro:bit
- 1 x Tinkercademy Breakout Board
- 1 x Buzzer
- 1 x ADKeypad
- 1 x OLED display
- 2 x F-F Jumper Wires
STEP 3
Importing Tinkercademy Extension
To detect button presses on the ADKeypad and display messages on the OLED, we need to import a special package in MakeCode.
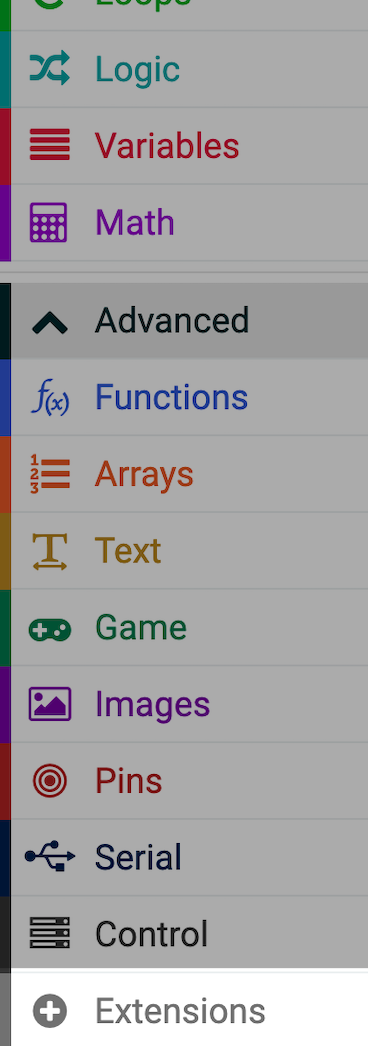
(a) Click on the ‘Advanced’ drawer, select 'Extensions'.
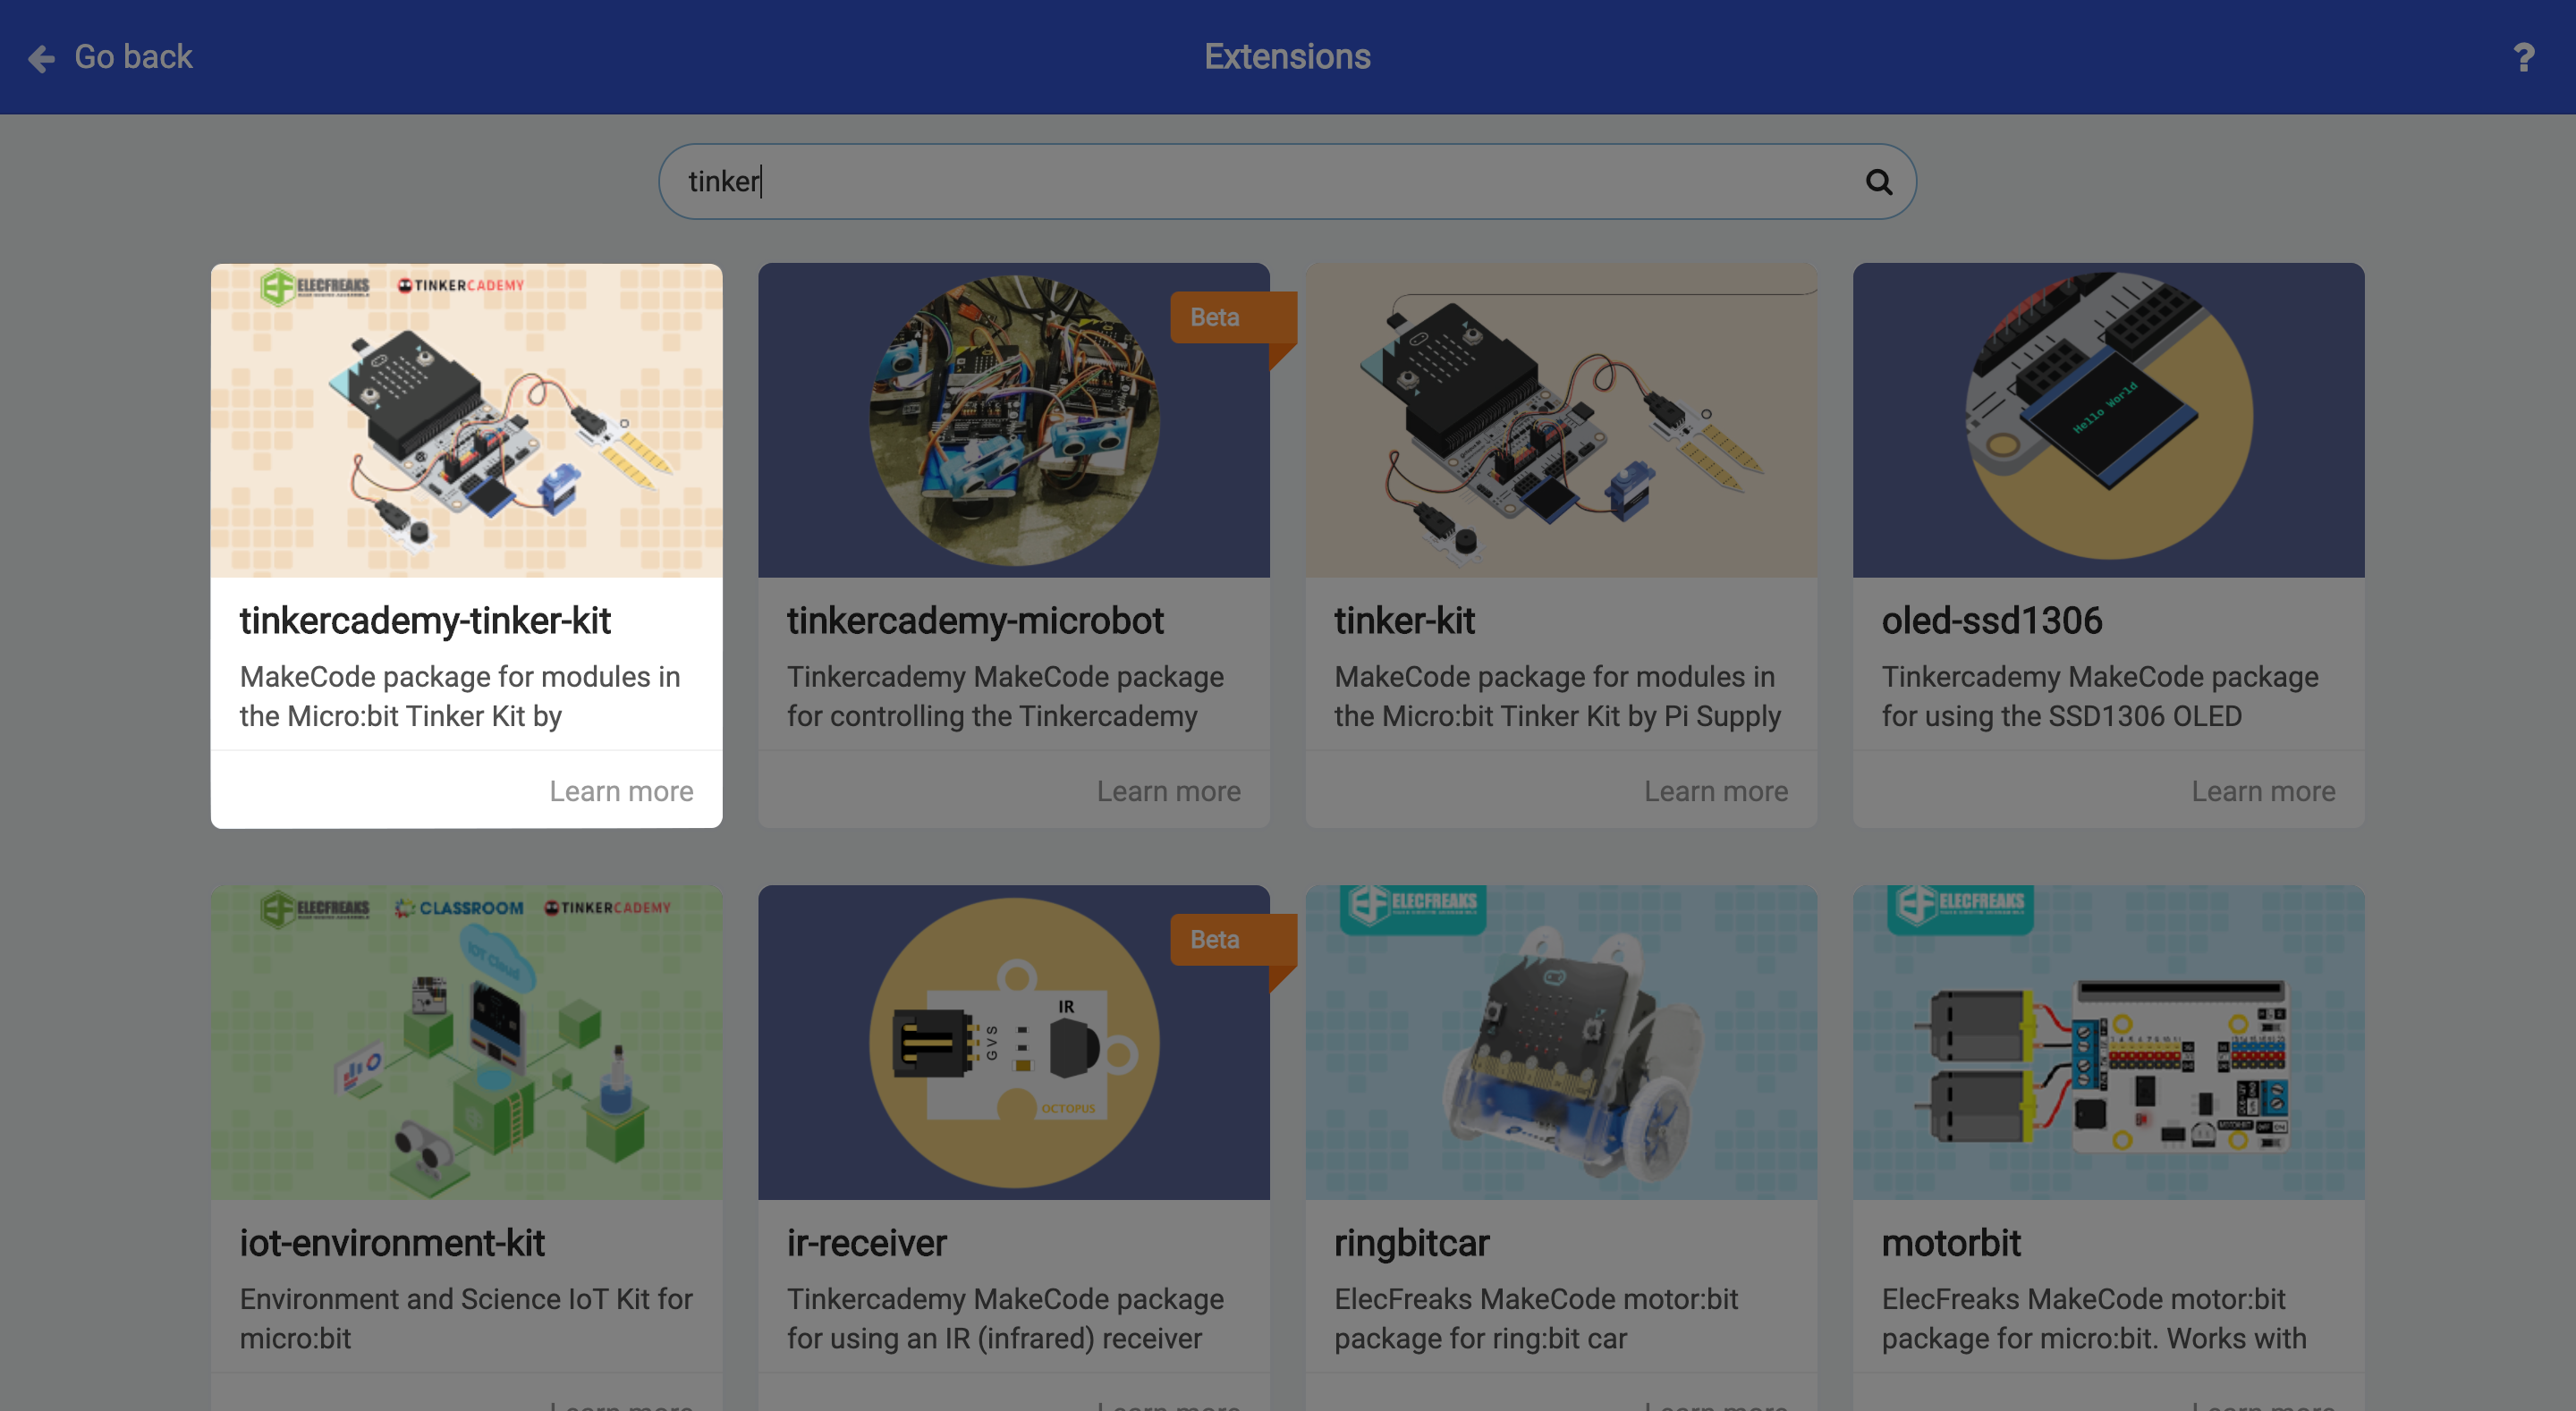
(b) Search ‘tinkercademy’ and click 'tinkercademy-tinker-kit' to import the Tinkercademy extension. You will see 2 new drawers - ‘OLED’ and ‘Tinkercademy’.
(c) You’ll need to re-import the extension again for new projects in the future.
STEP 4
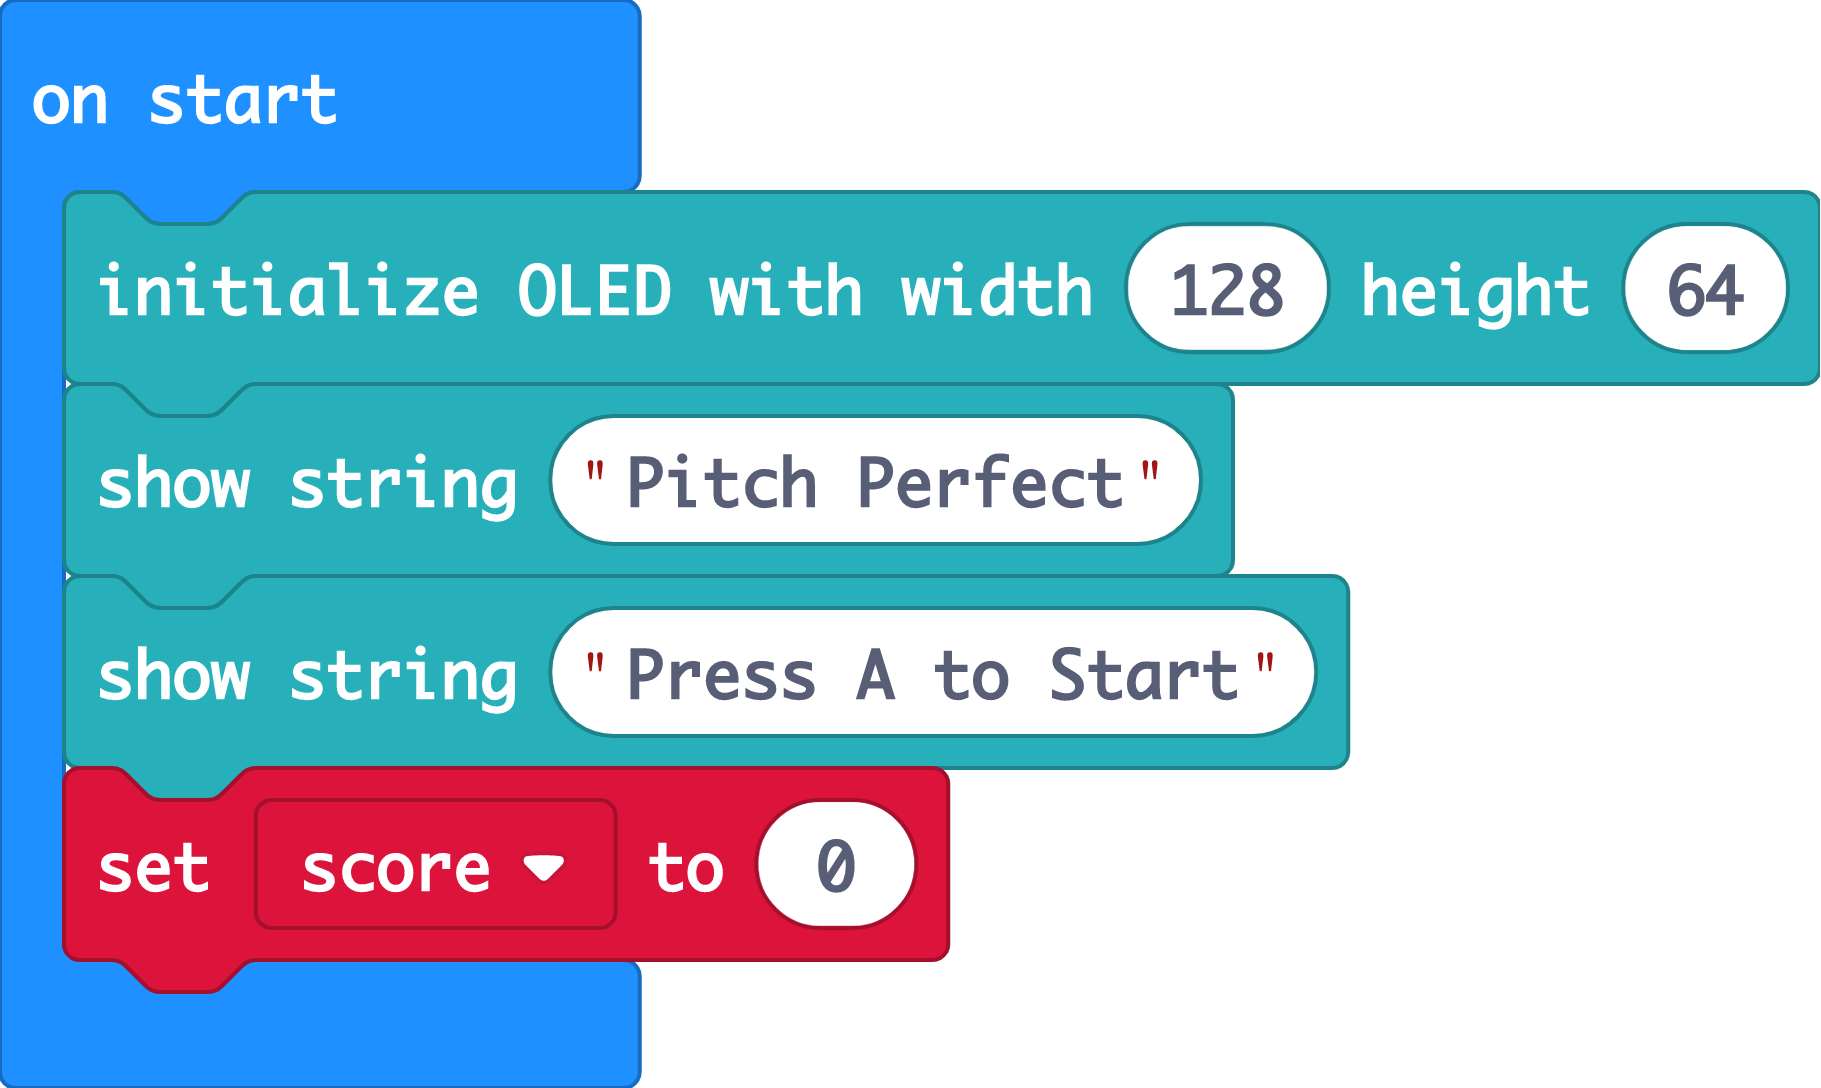
On Start
(a) Initialise the OLED screen to run it in its proper sizing.
(b) Store the player's score in a variable 'score', and set it to 0 at the start.
(c) On the OLED screen,
• Show the name of the game, 'Pitch Perfect'
• Show a starting instruction
(d) For (c), make sure to use the 'OLED' drawer blocks (not 'Basic’, which will scroll past on the micro:bit LEDs one word at a time).
STEP 5
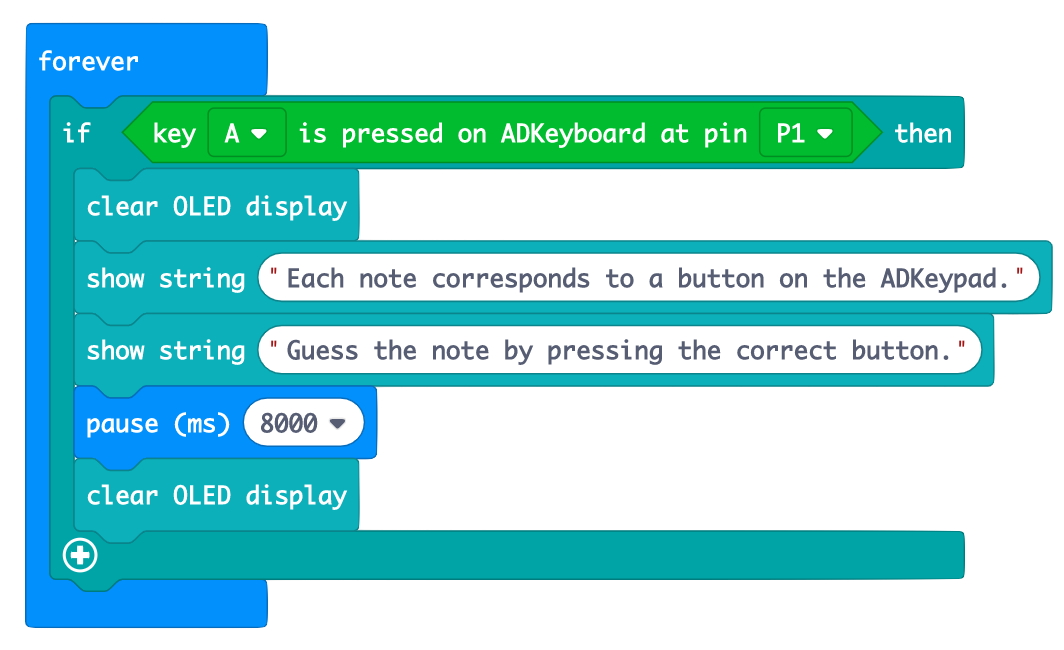
If Key A is Pressed
(a) When 'A' on the ADKeypad is pressed, brief the player about the game first.
(b) We'll do this in an if-then statement. This is a conditional, everything under this block runs only when the condition is fulfilled, ie. A is pressed.
(c) Add this conditional under a 'forever' loop so the program forever checks if A is pressed.
(d) Clear the OLED display before displaying this set of instructions.
(e) Pause for 8000ms (8s) to let the user read.
STEP 6
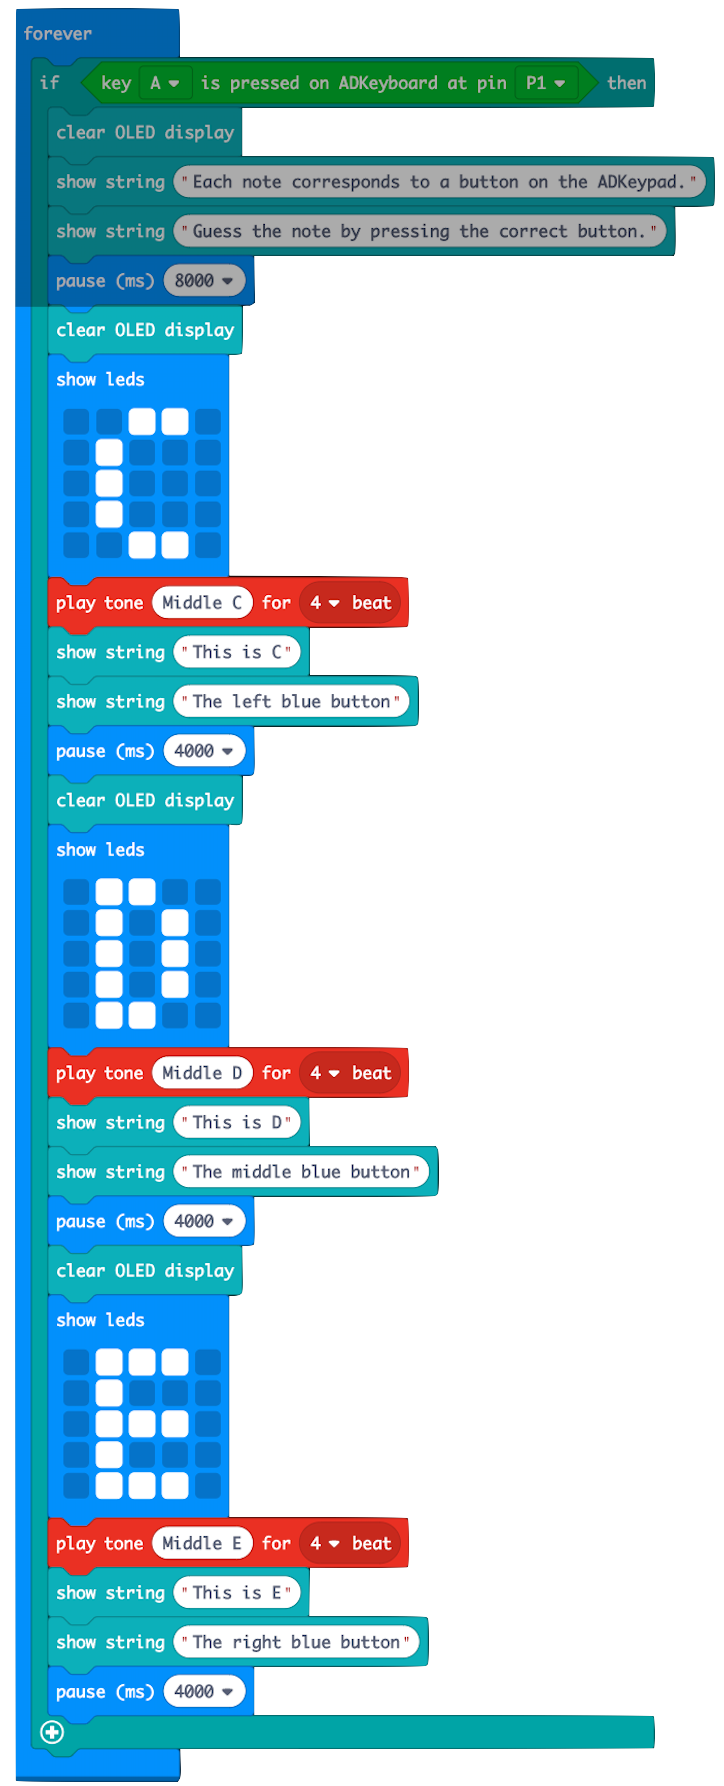
Introducing the Pitches
Now, let's introduce the player the different notes and corresponding buttons to press on the ADKeypad.
(a) Show the note (eg. C) on the micro:bit LEDs.
(b) Play the note for 4 beats.
(c) On the OLED, let the user know which note this is, and the ADKeypad button they should press.
(d) Pause 4000ms (4s) for the player to remember this.
(e) Do this 3 times, for all 3 notes (C, D, E).
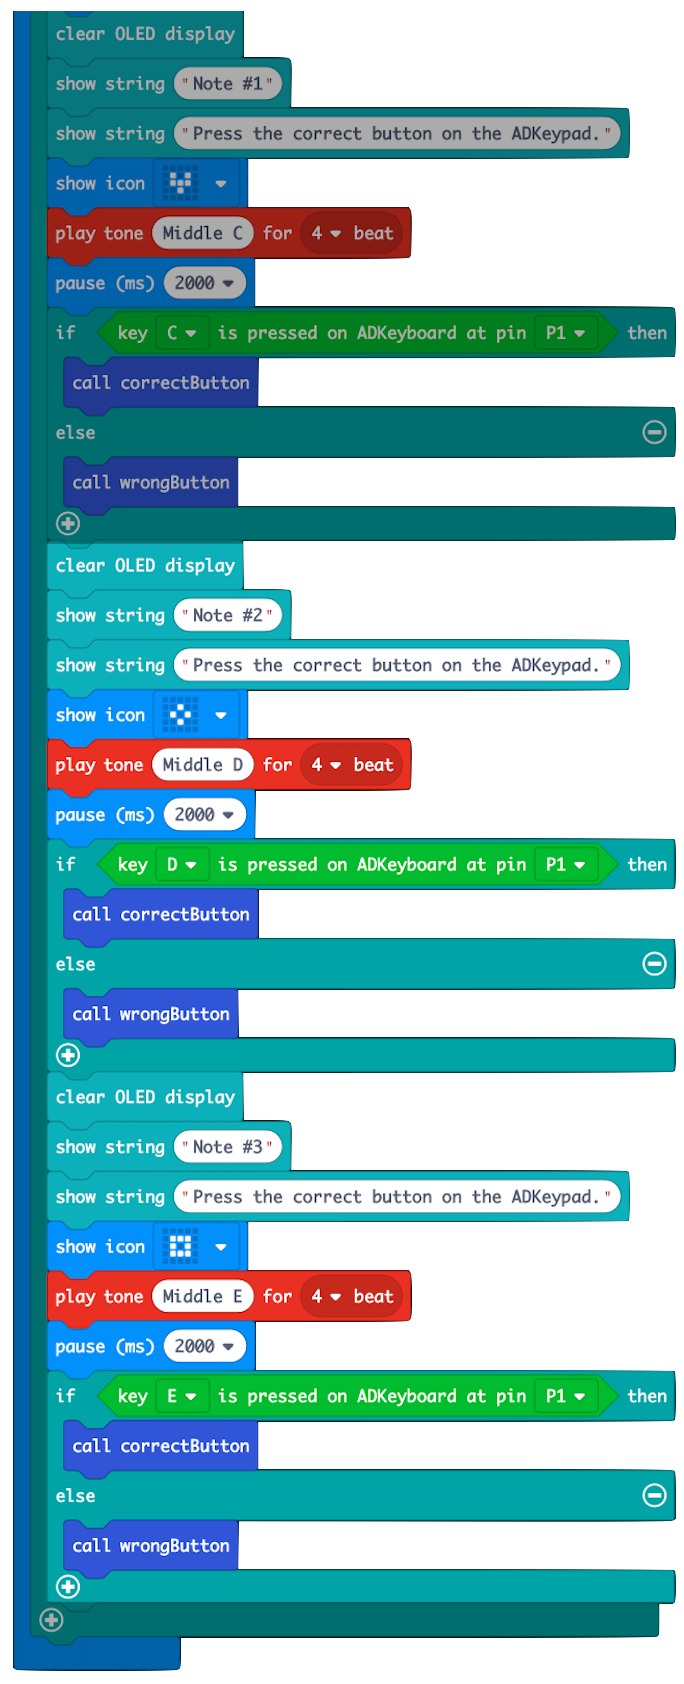
STEP 7
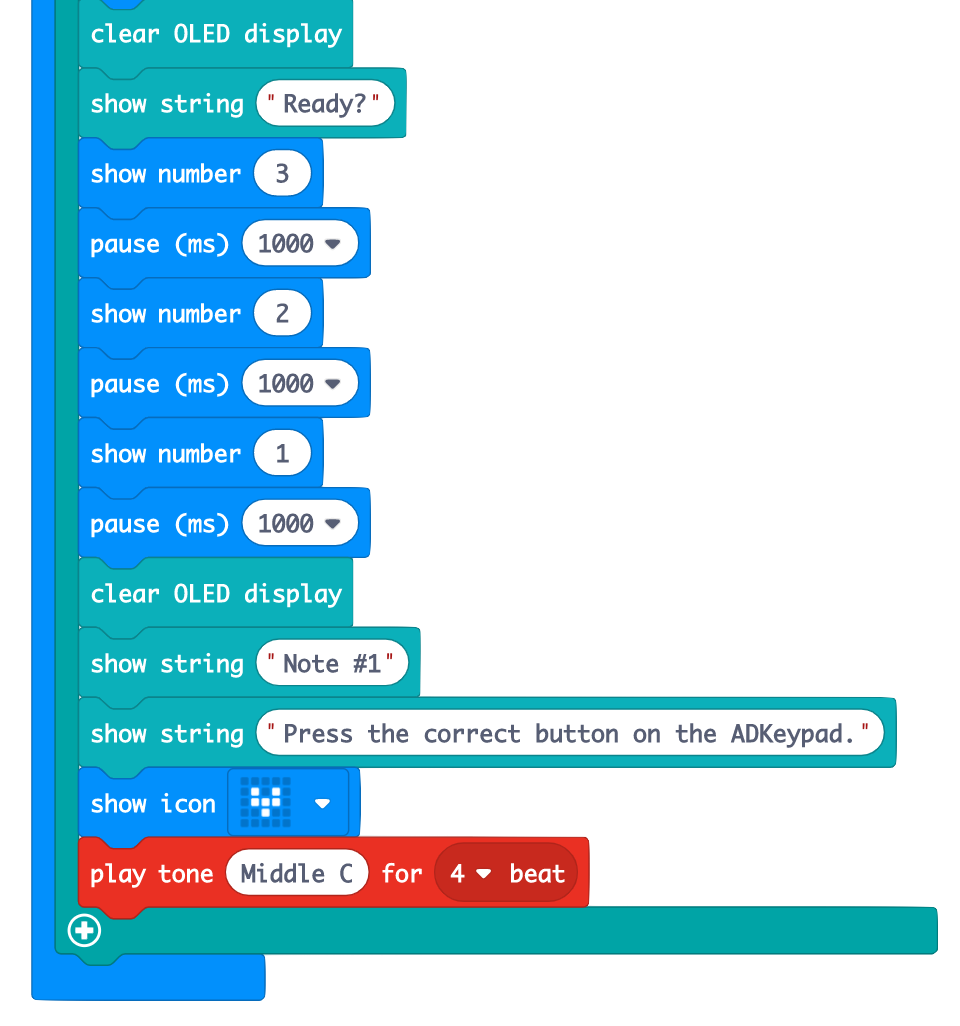
Game Start
Adding on below the last pause block in step 5:
(a) Clear the OLED screen display.
(b) Create a countdown before the game starts!
(c) And the game starts! Let’s play each note and let the player guess. For each note,
• Clear the OLED display
• Show a message (eg. Note #1) and provide instructions
• Show an icon on the micro:bit - feel free to customize this with anything!
• Play the note for 4 beats
STEP 8

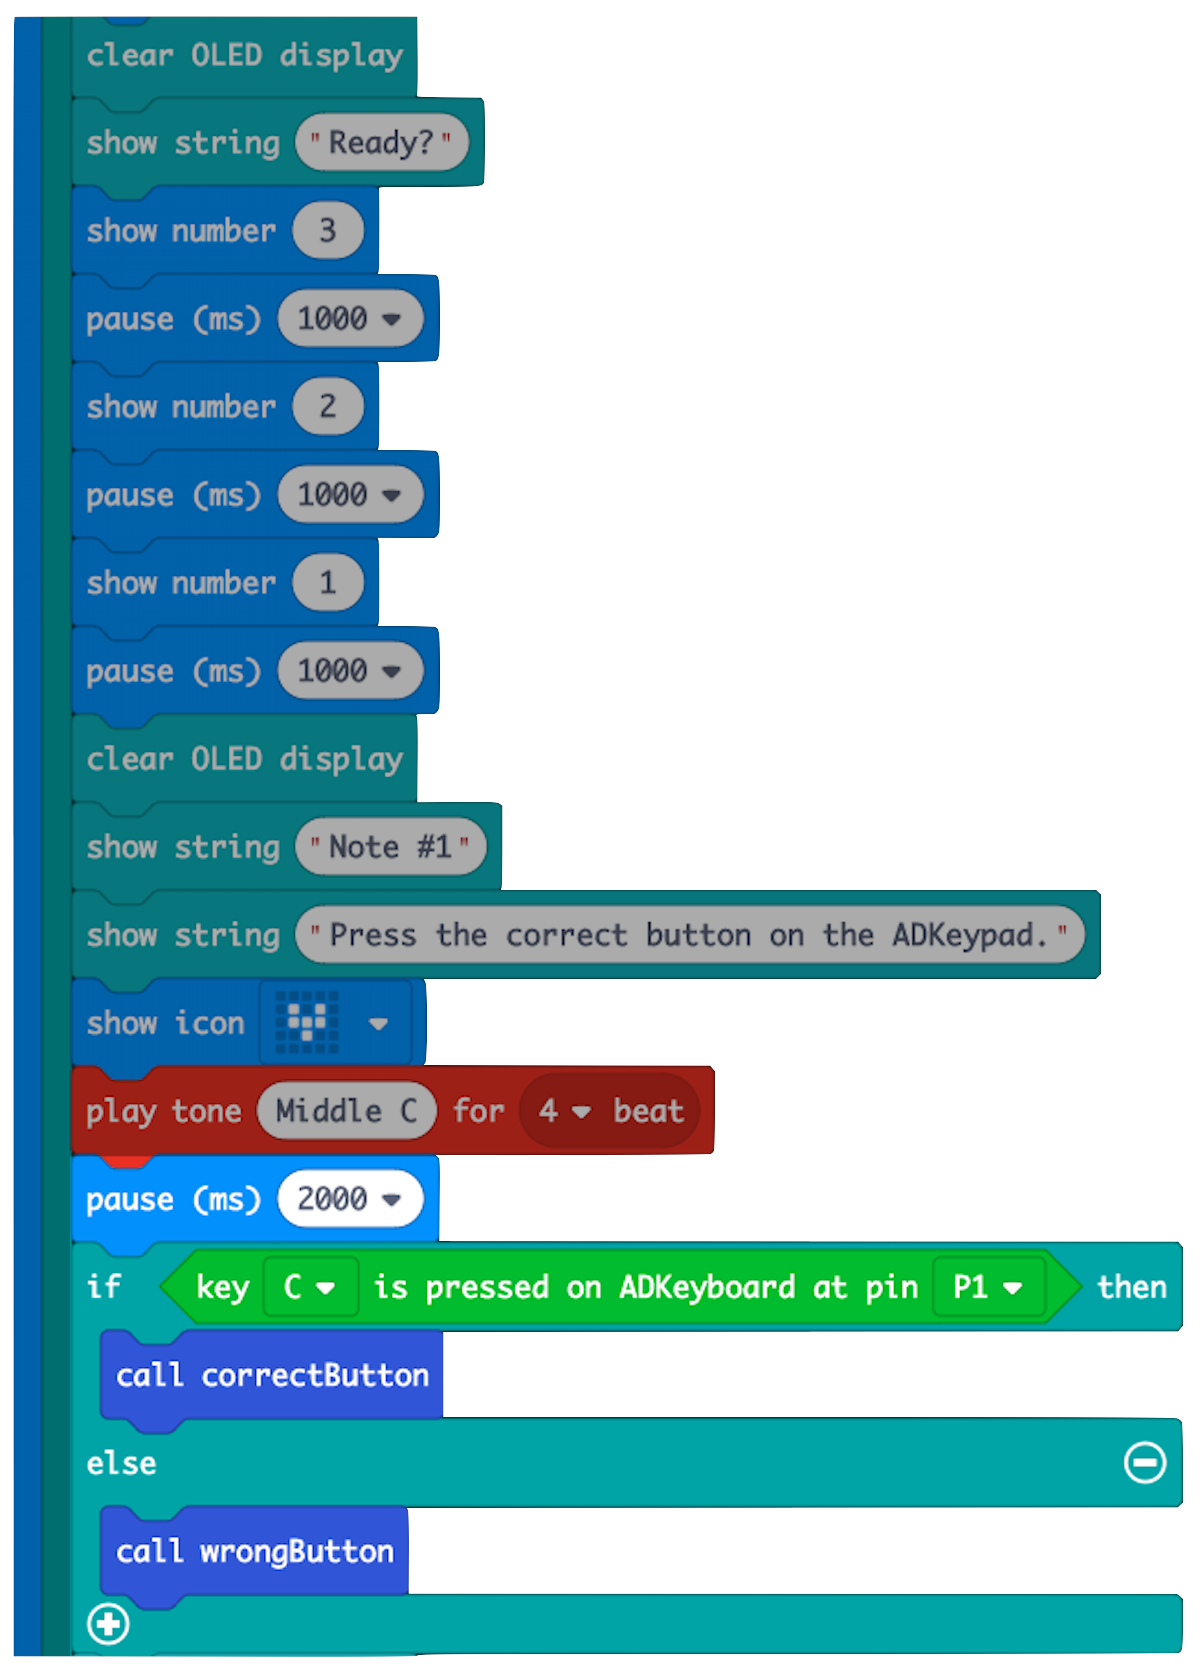
Functions
(a) From 'Advanced' > 'Functions' drawer, create 2 functions (correctButton, wrongButton), to store what should be done if the player presses the correct and wrong button on the ADKeypad respectively.
(b) If the player presses the correct button (C in this case), call correctButton, ie:
• increase ‘score’ by 1
• pause
• show tick icon
(c) Else, call wrongButton, ie:
• don’t add to ‘score’
• pause
• show cross icon
(d) Pause before (b), to give the player time to register the note played.
STEP 9
More Notes
Now, let’s add more notes for the player to guess!
(a) Simply repeat steps 6(c) and 7(b) to 7(d) , but with ‘D’ and ‘E’ notes this time.
(b) As there are a few conditional statements here, be careful which conditional statement you add the blocks too.
STEP 10
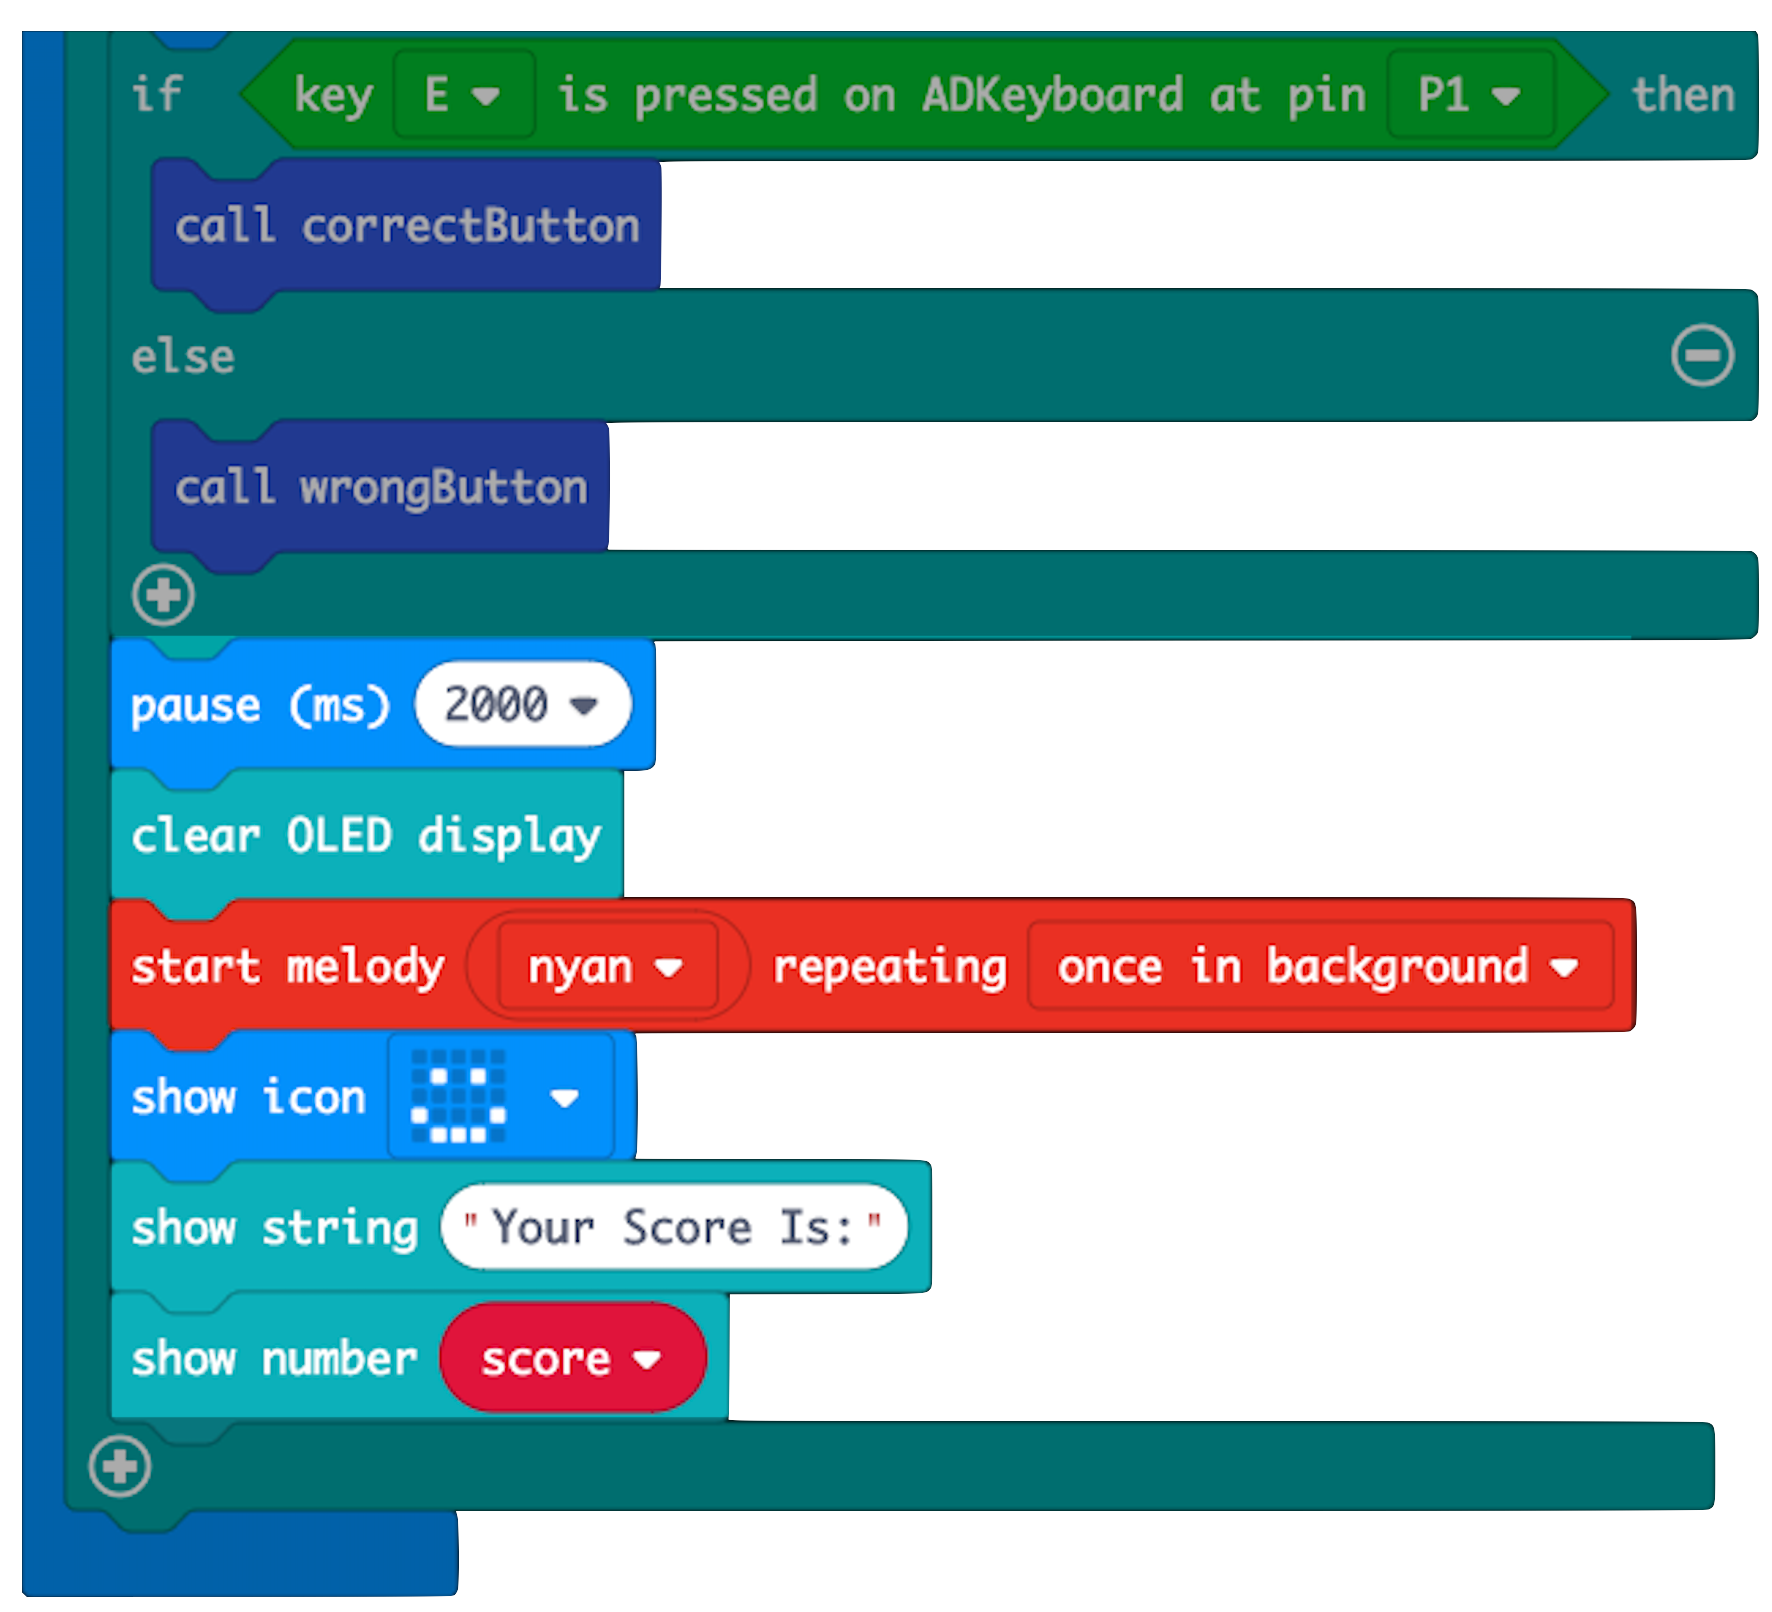
Final Screen
(a) When the player has finished, pause and clear the OLED screen.
(b) Play happy music and show a smiley icon to congratulate the player. Playing the music 'once in background' allows the rest of the code to run without waiting for the music to end.
(c) Display the player's final ‘score’ on the OLED screen.
STEP 11
Complete!
(a) Don’t forget to plug a micro USB cable from your laptop to the top of your micro:bit, and click ‘Download’ to download the code to your micro:bit.
(b) You’ve completed your Pitch Perfect game, have fun playing!
(c) We hope you’ve learnt more about using and controlling external components, as well as conditional statements and functions.
(d) You can also add more notes or add a restart button function to allow the player unlimited tries!
Code and References
Made this activity? Good Job! Now spread the word. Share a photo of your creation on social media with #letsgethacking #PitchPerfect