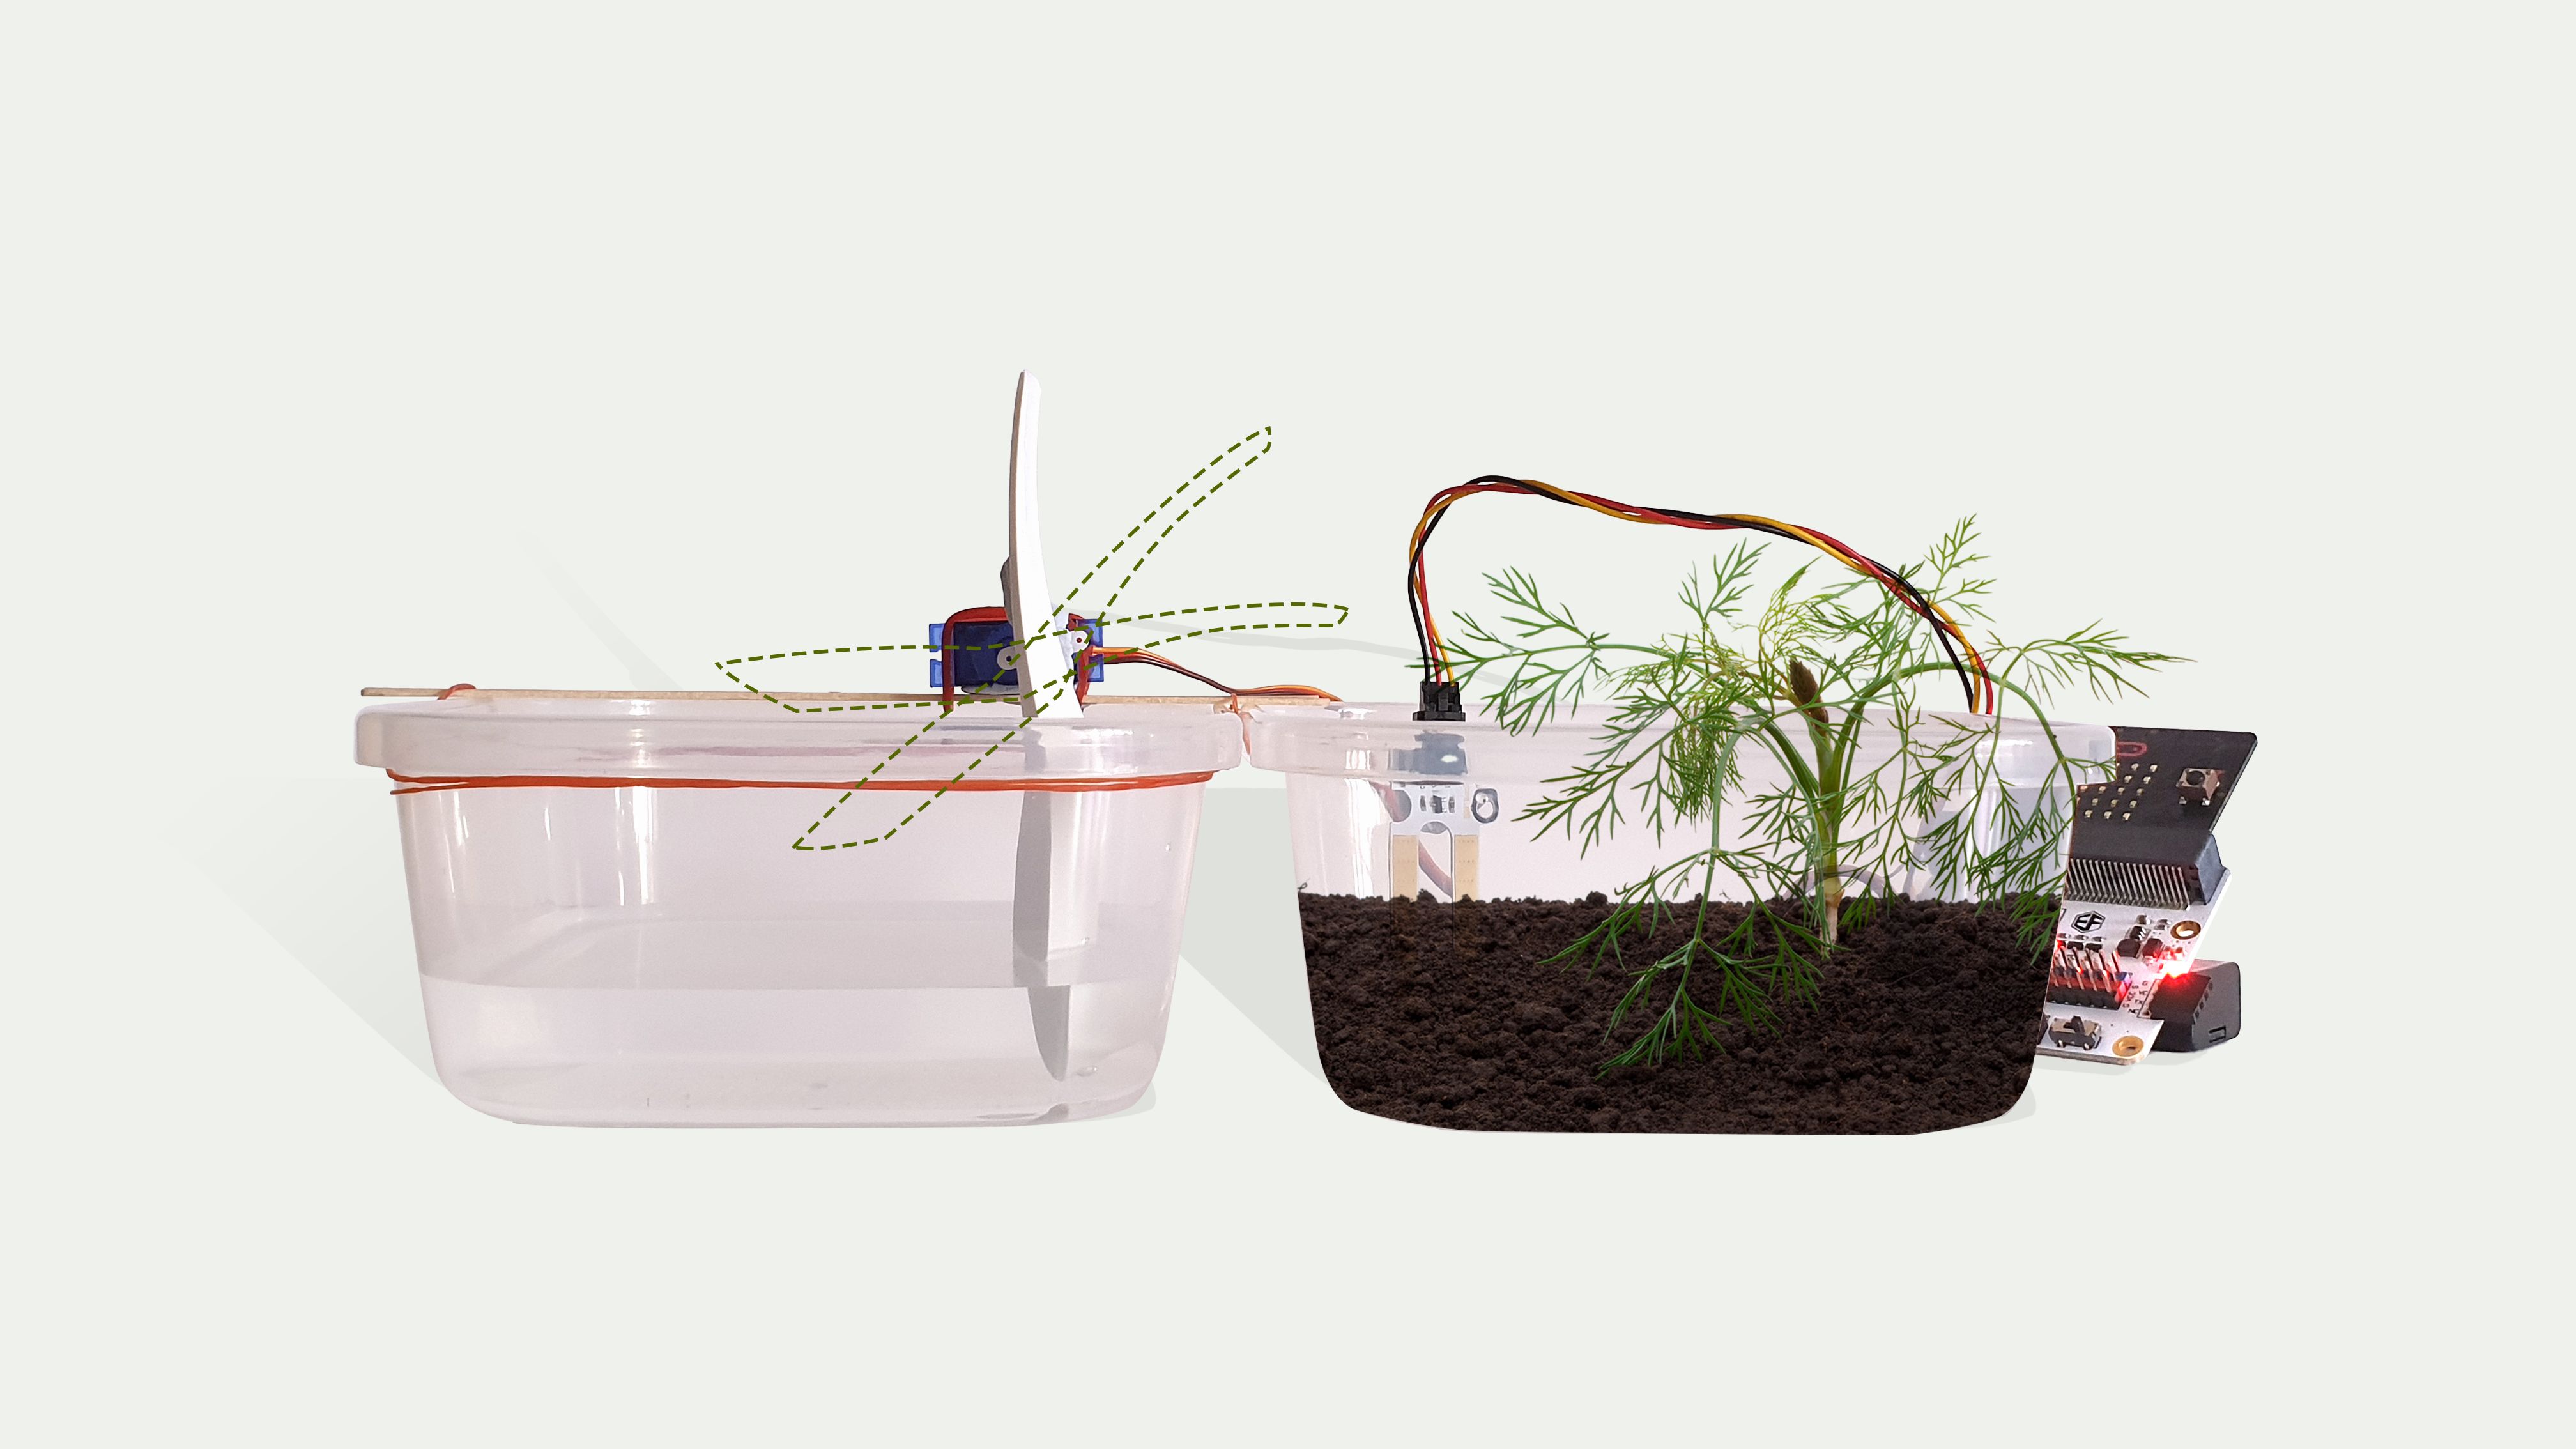
Plant watering system
No more dry and dying plants! Keep your plant hydrated with this plant watering system!
YOU WILL NEED
- 1 x micro:bit
- 1 x SG90 Servo
- 1 x Soil Moisture Sensor
- 1 x Tinkercademy Breakout Board
- 1 x AAA battery pack (double)
- 2 x AAA batteries
- 1 x Chinese soup spoon
- 2 x Container
- 3 x Rubber band
- Blue tack
STEP 1
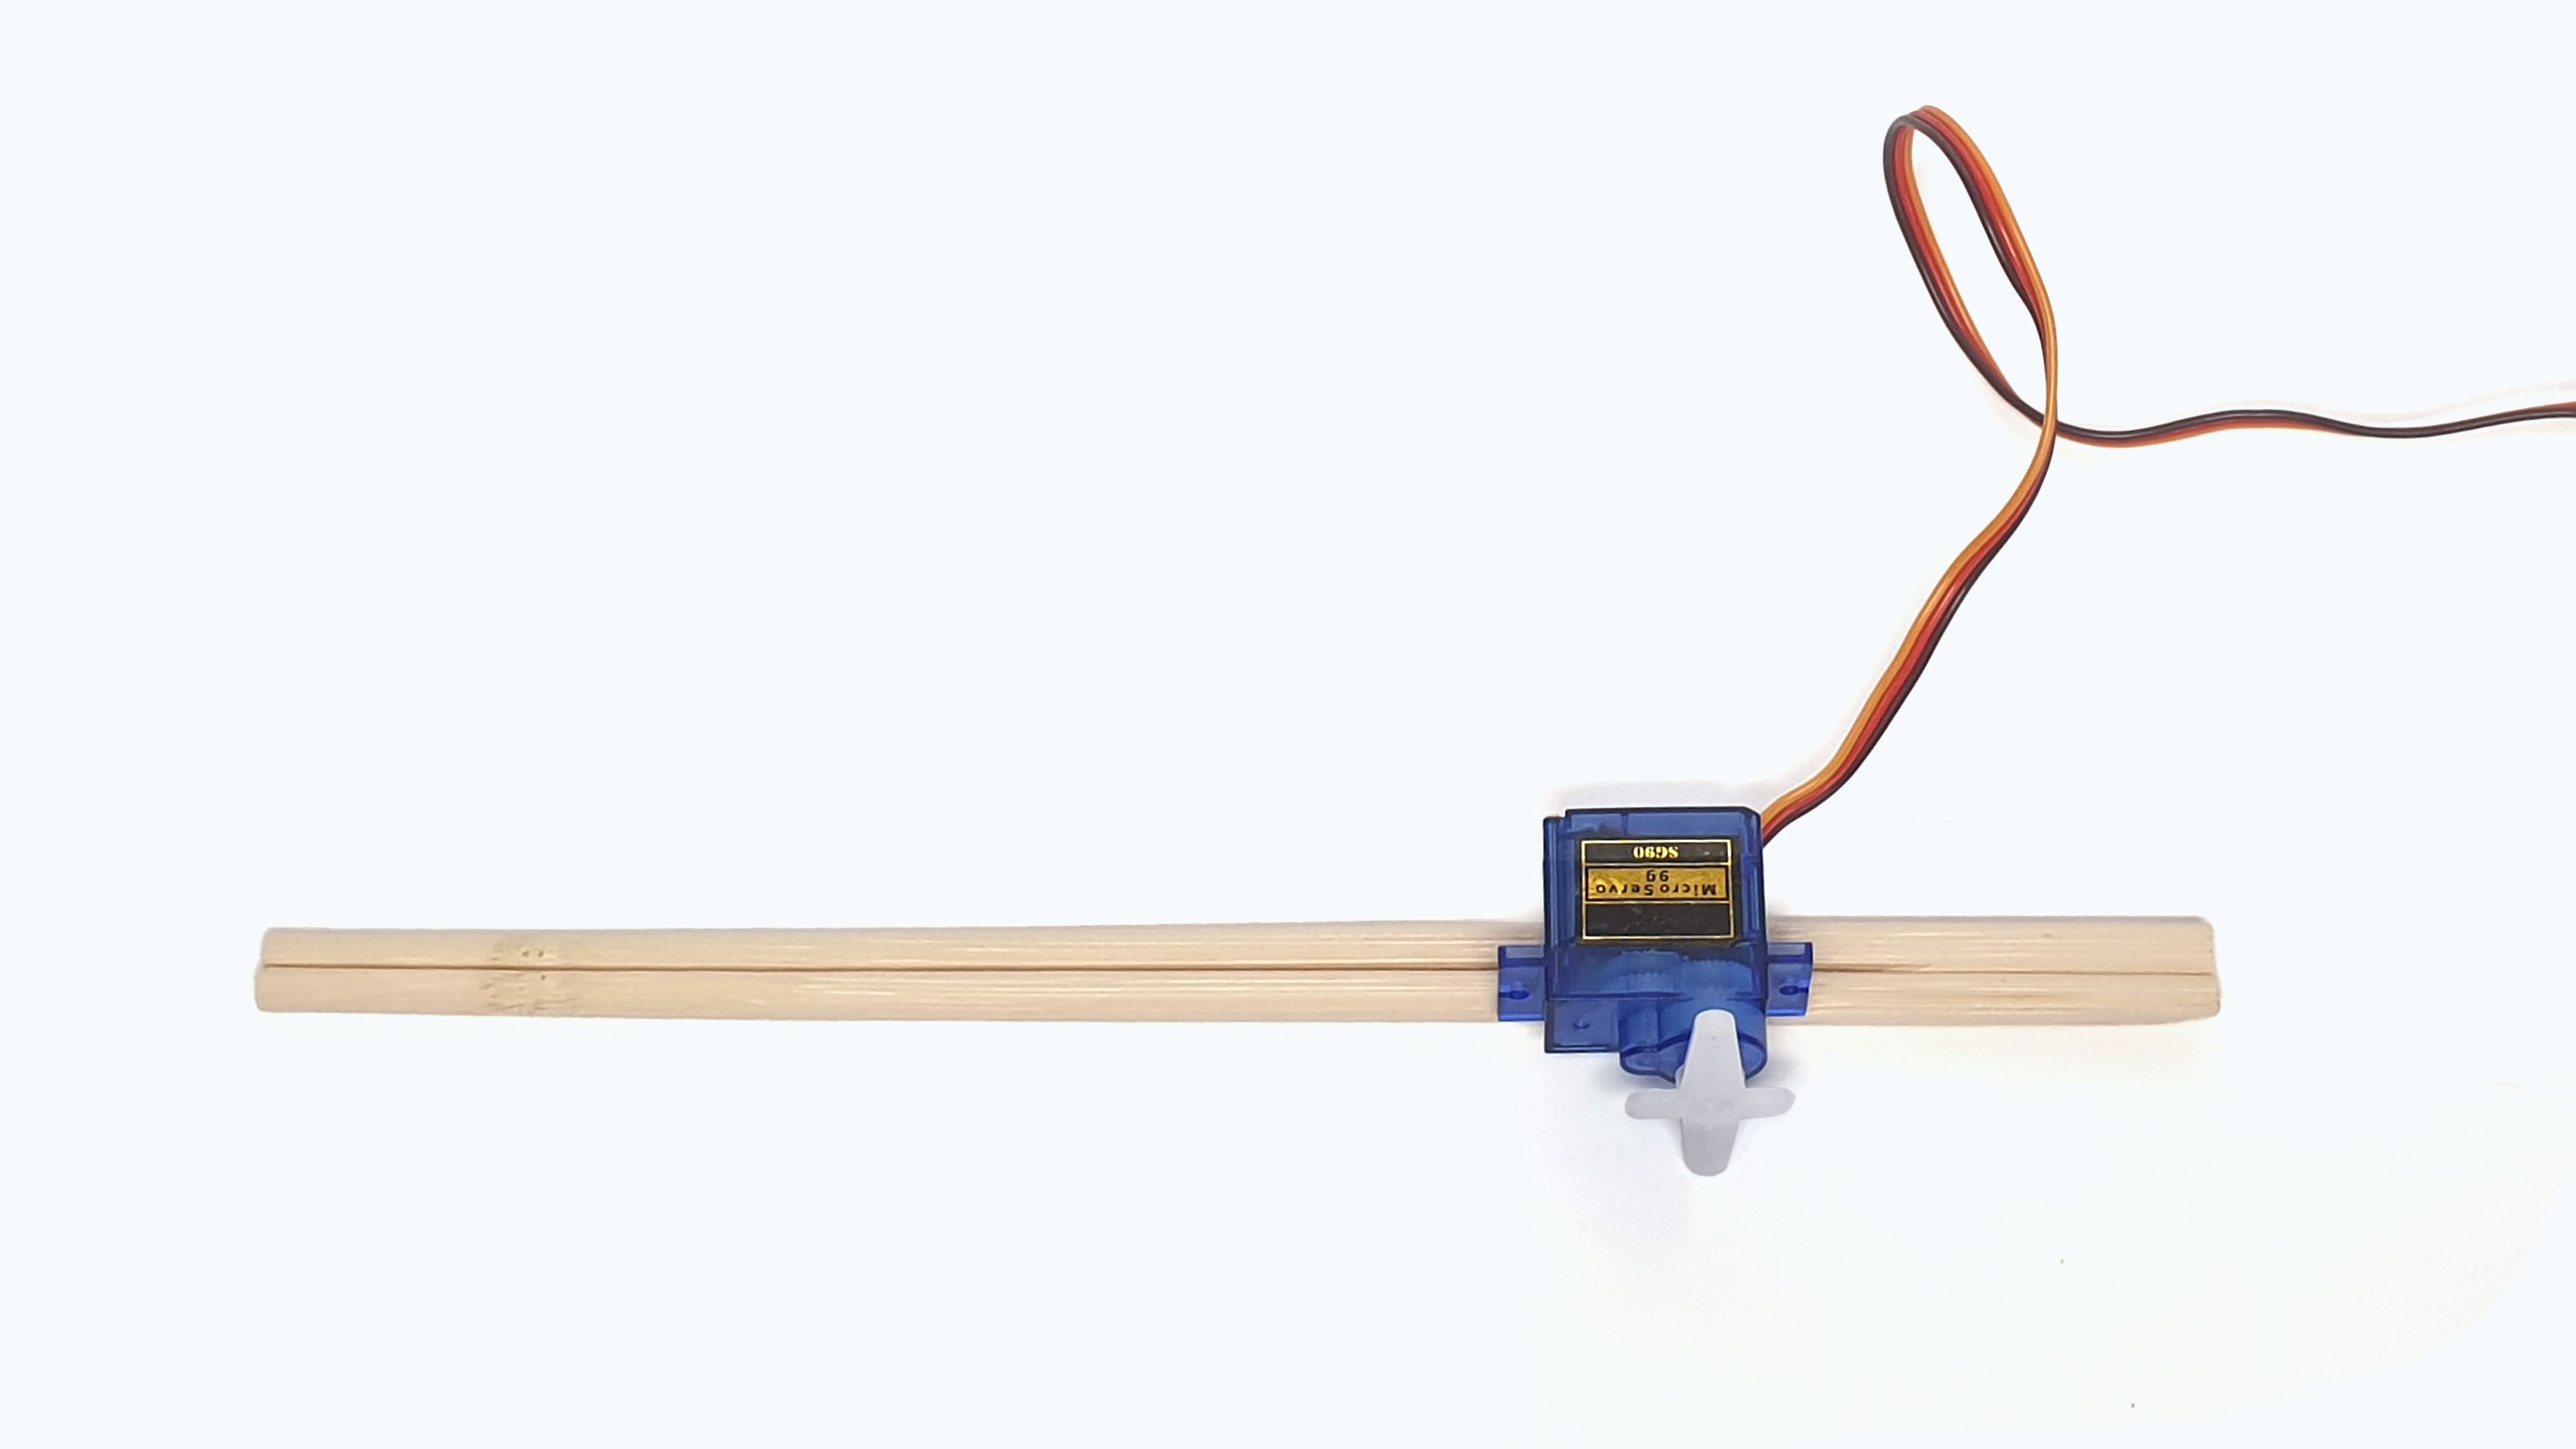
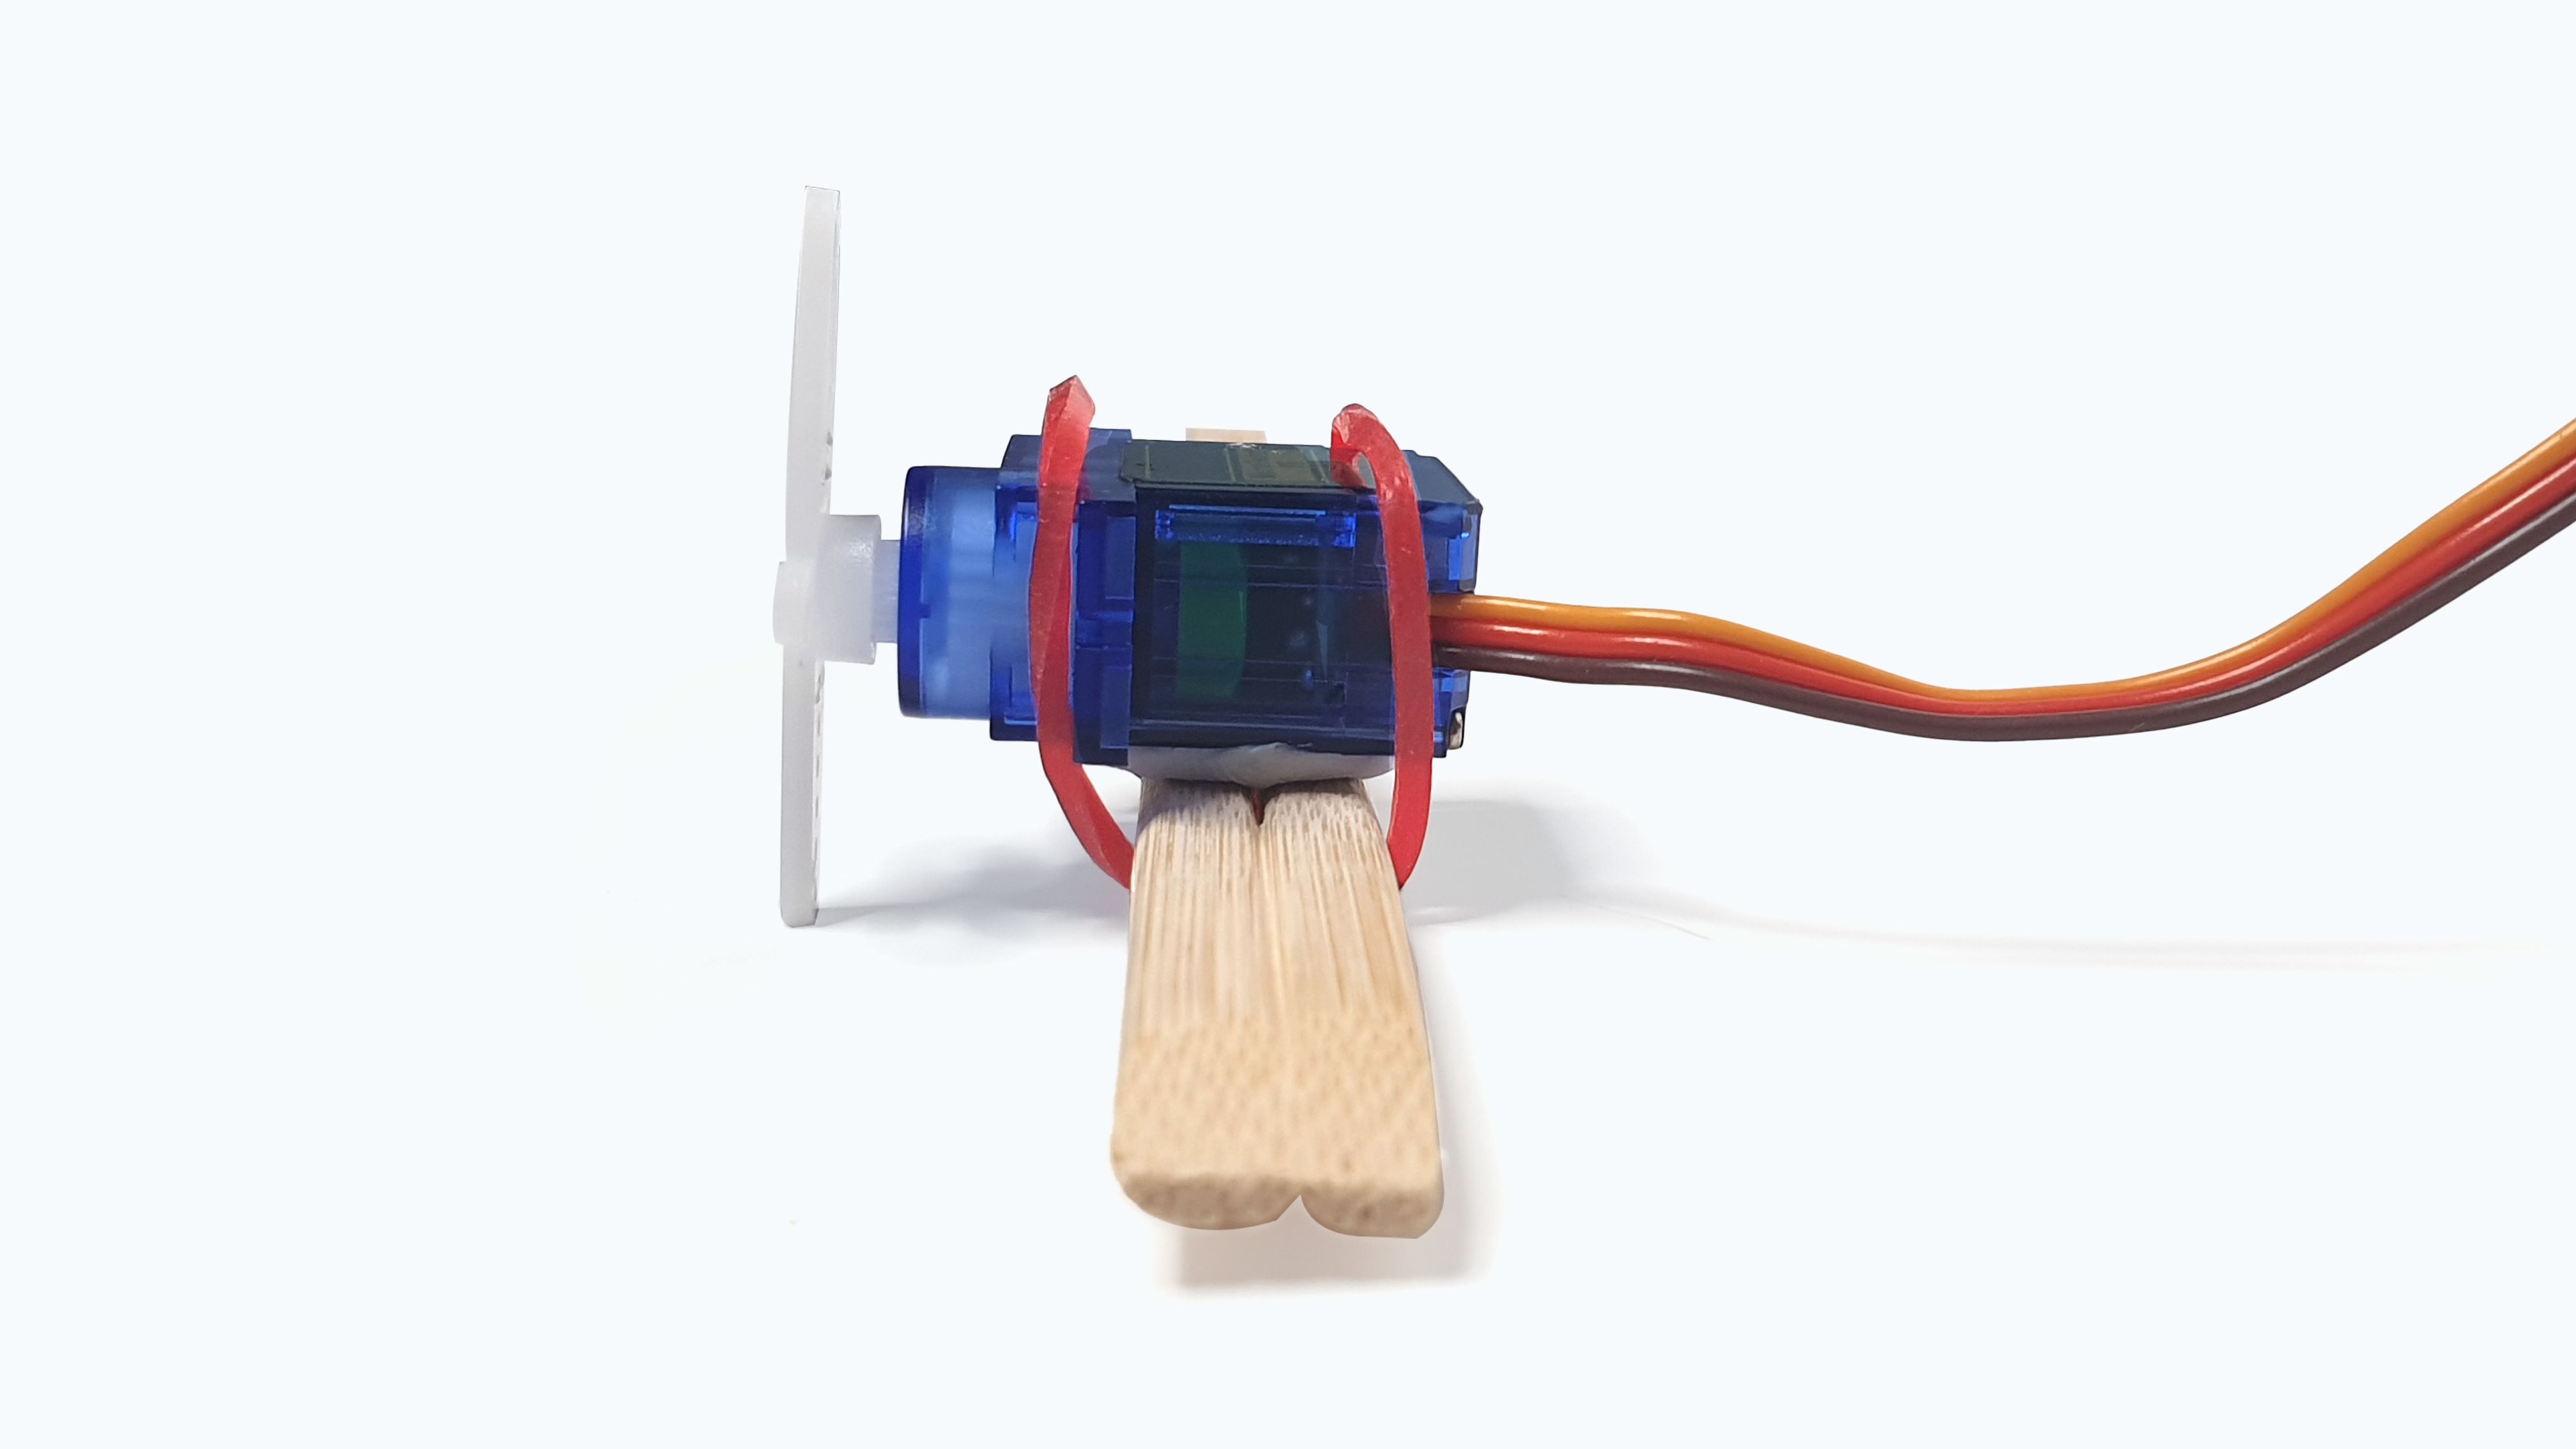
Mount servo on chopsticks
(a) Flip the servo such that the wires are on the right side.
(b) Place blue-tack on the underside of the servo
(c) Mount servo about 1/3 across the chopstick, from the right.
(d) Wrap a rubber band around the servo (as shown in the image)
Materials
- 1 x Servo (w servo mount)
- 1 x Rubberband
- A pair of chopstick
- Blue-tack
STEP 2
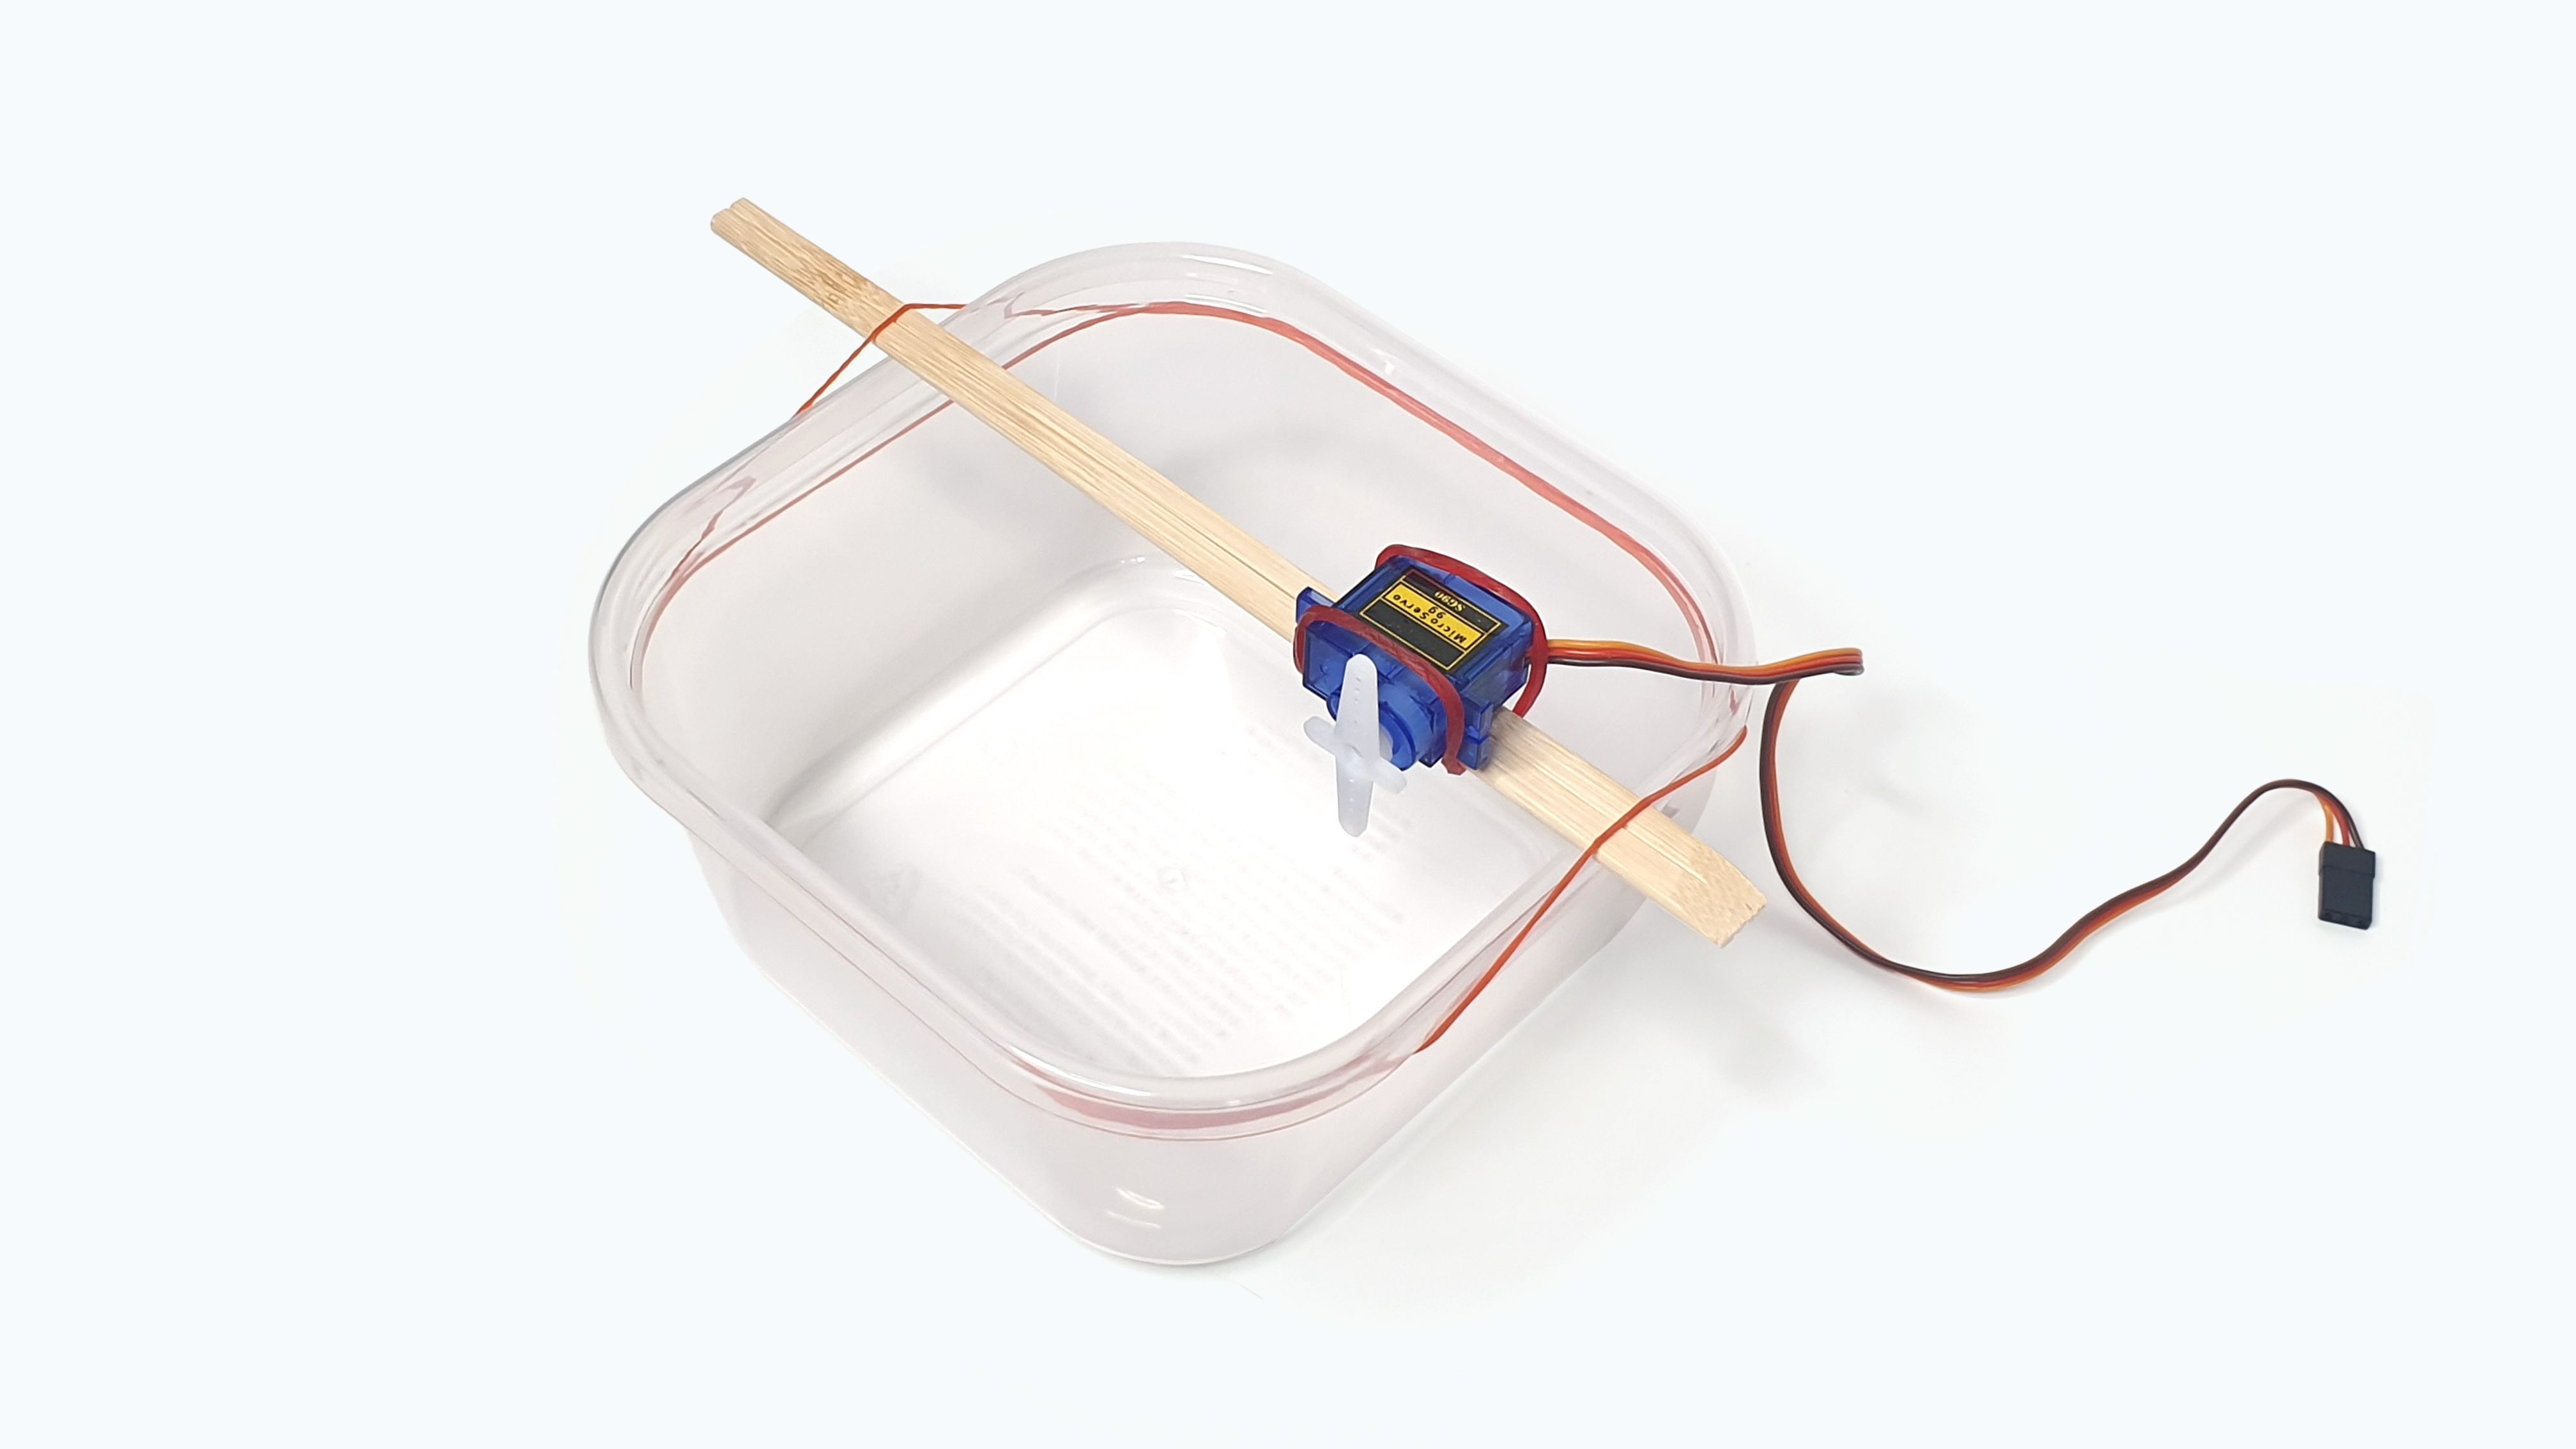
Mount chopstick onto container A
(a) Place the servo-chopstick contraption on top of container A
(b) Take a rubber band and wrap around the container. Pull on side of the rubber band and clamp the right side of the chopstick
(c) Take another rubber band and clamp down the left side of the chopstick
Materials
- 1 x Container
- 2 x Rubber band
STEP 3
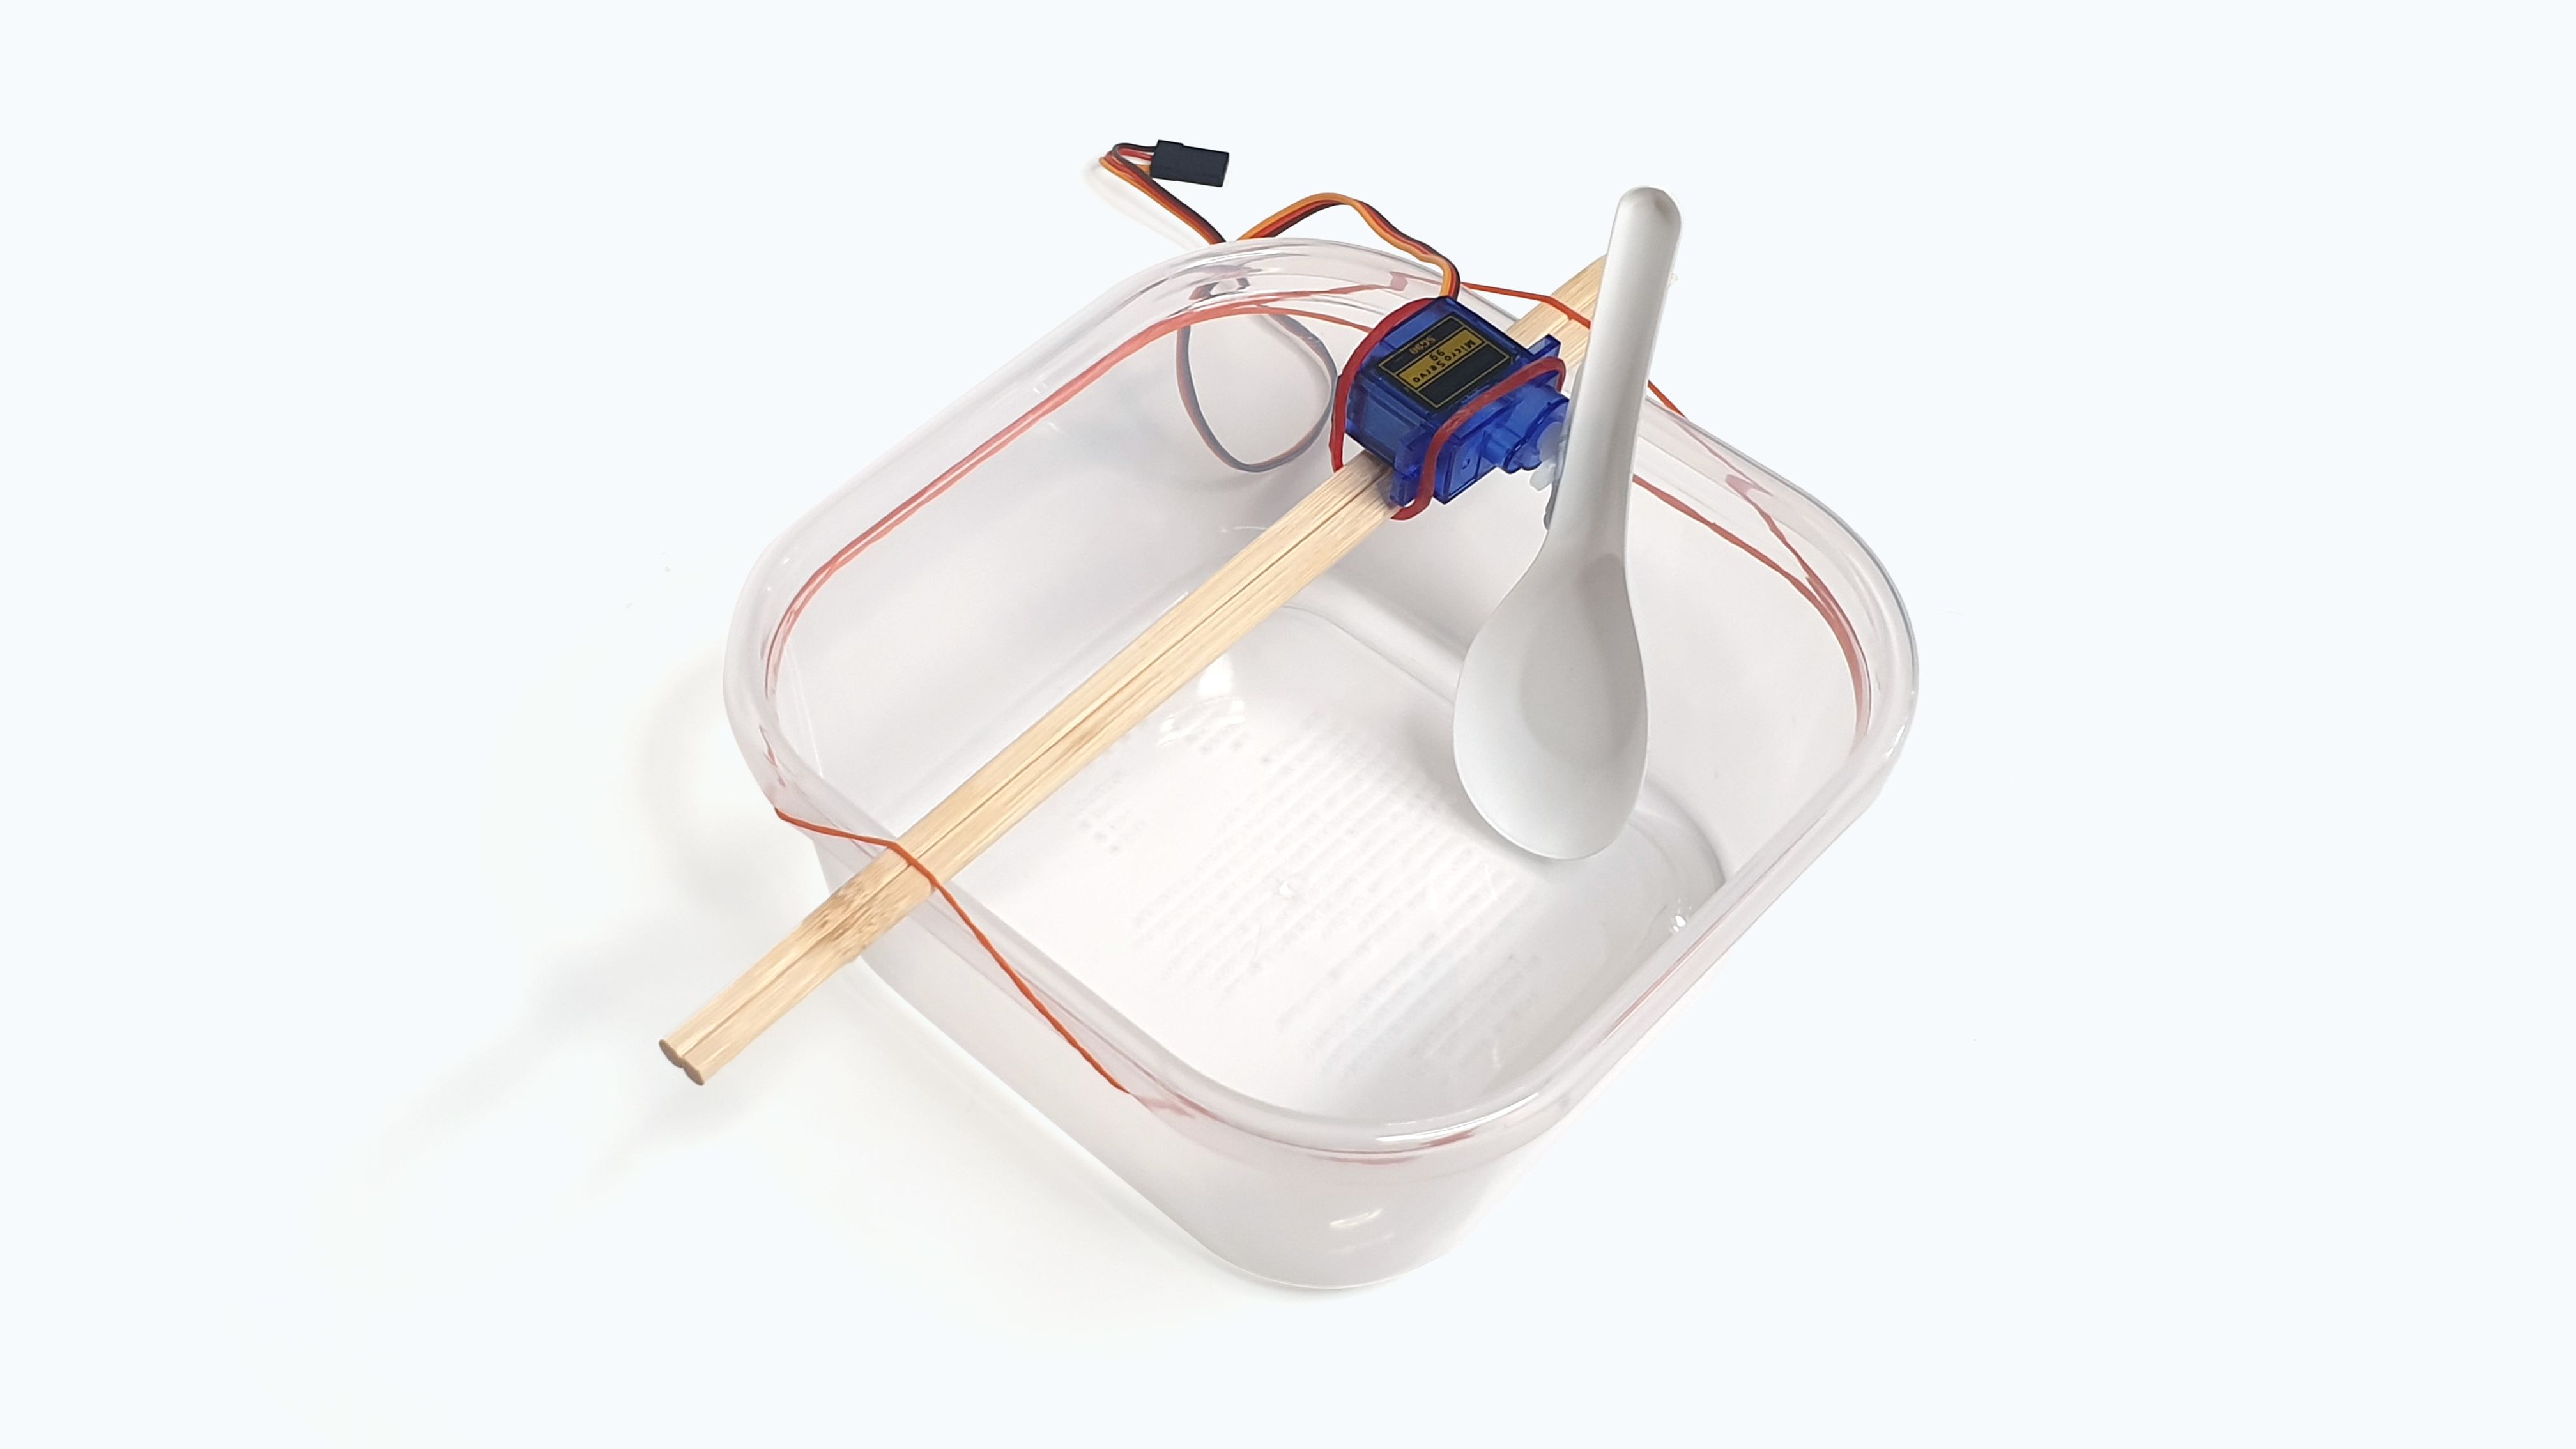
Mount spoon onto servo
(a) Place some blue tack on servo top
(b) Mount spoon on top of the servo top
Materials
- 1 x Chinese soup spoon
- Blue tack
STEP 4
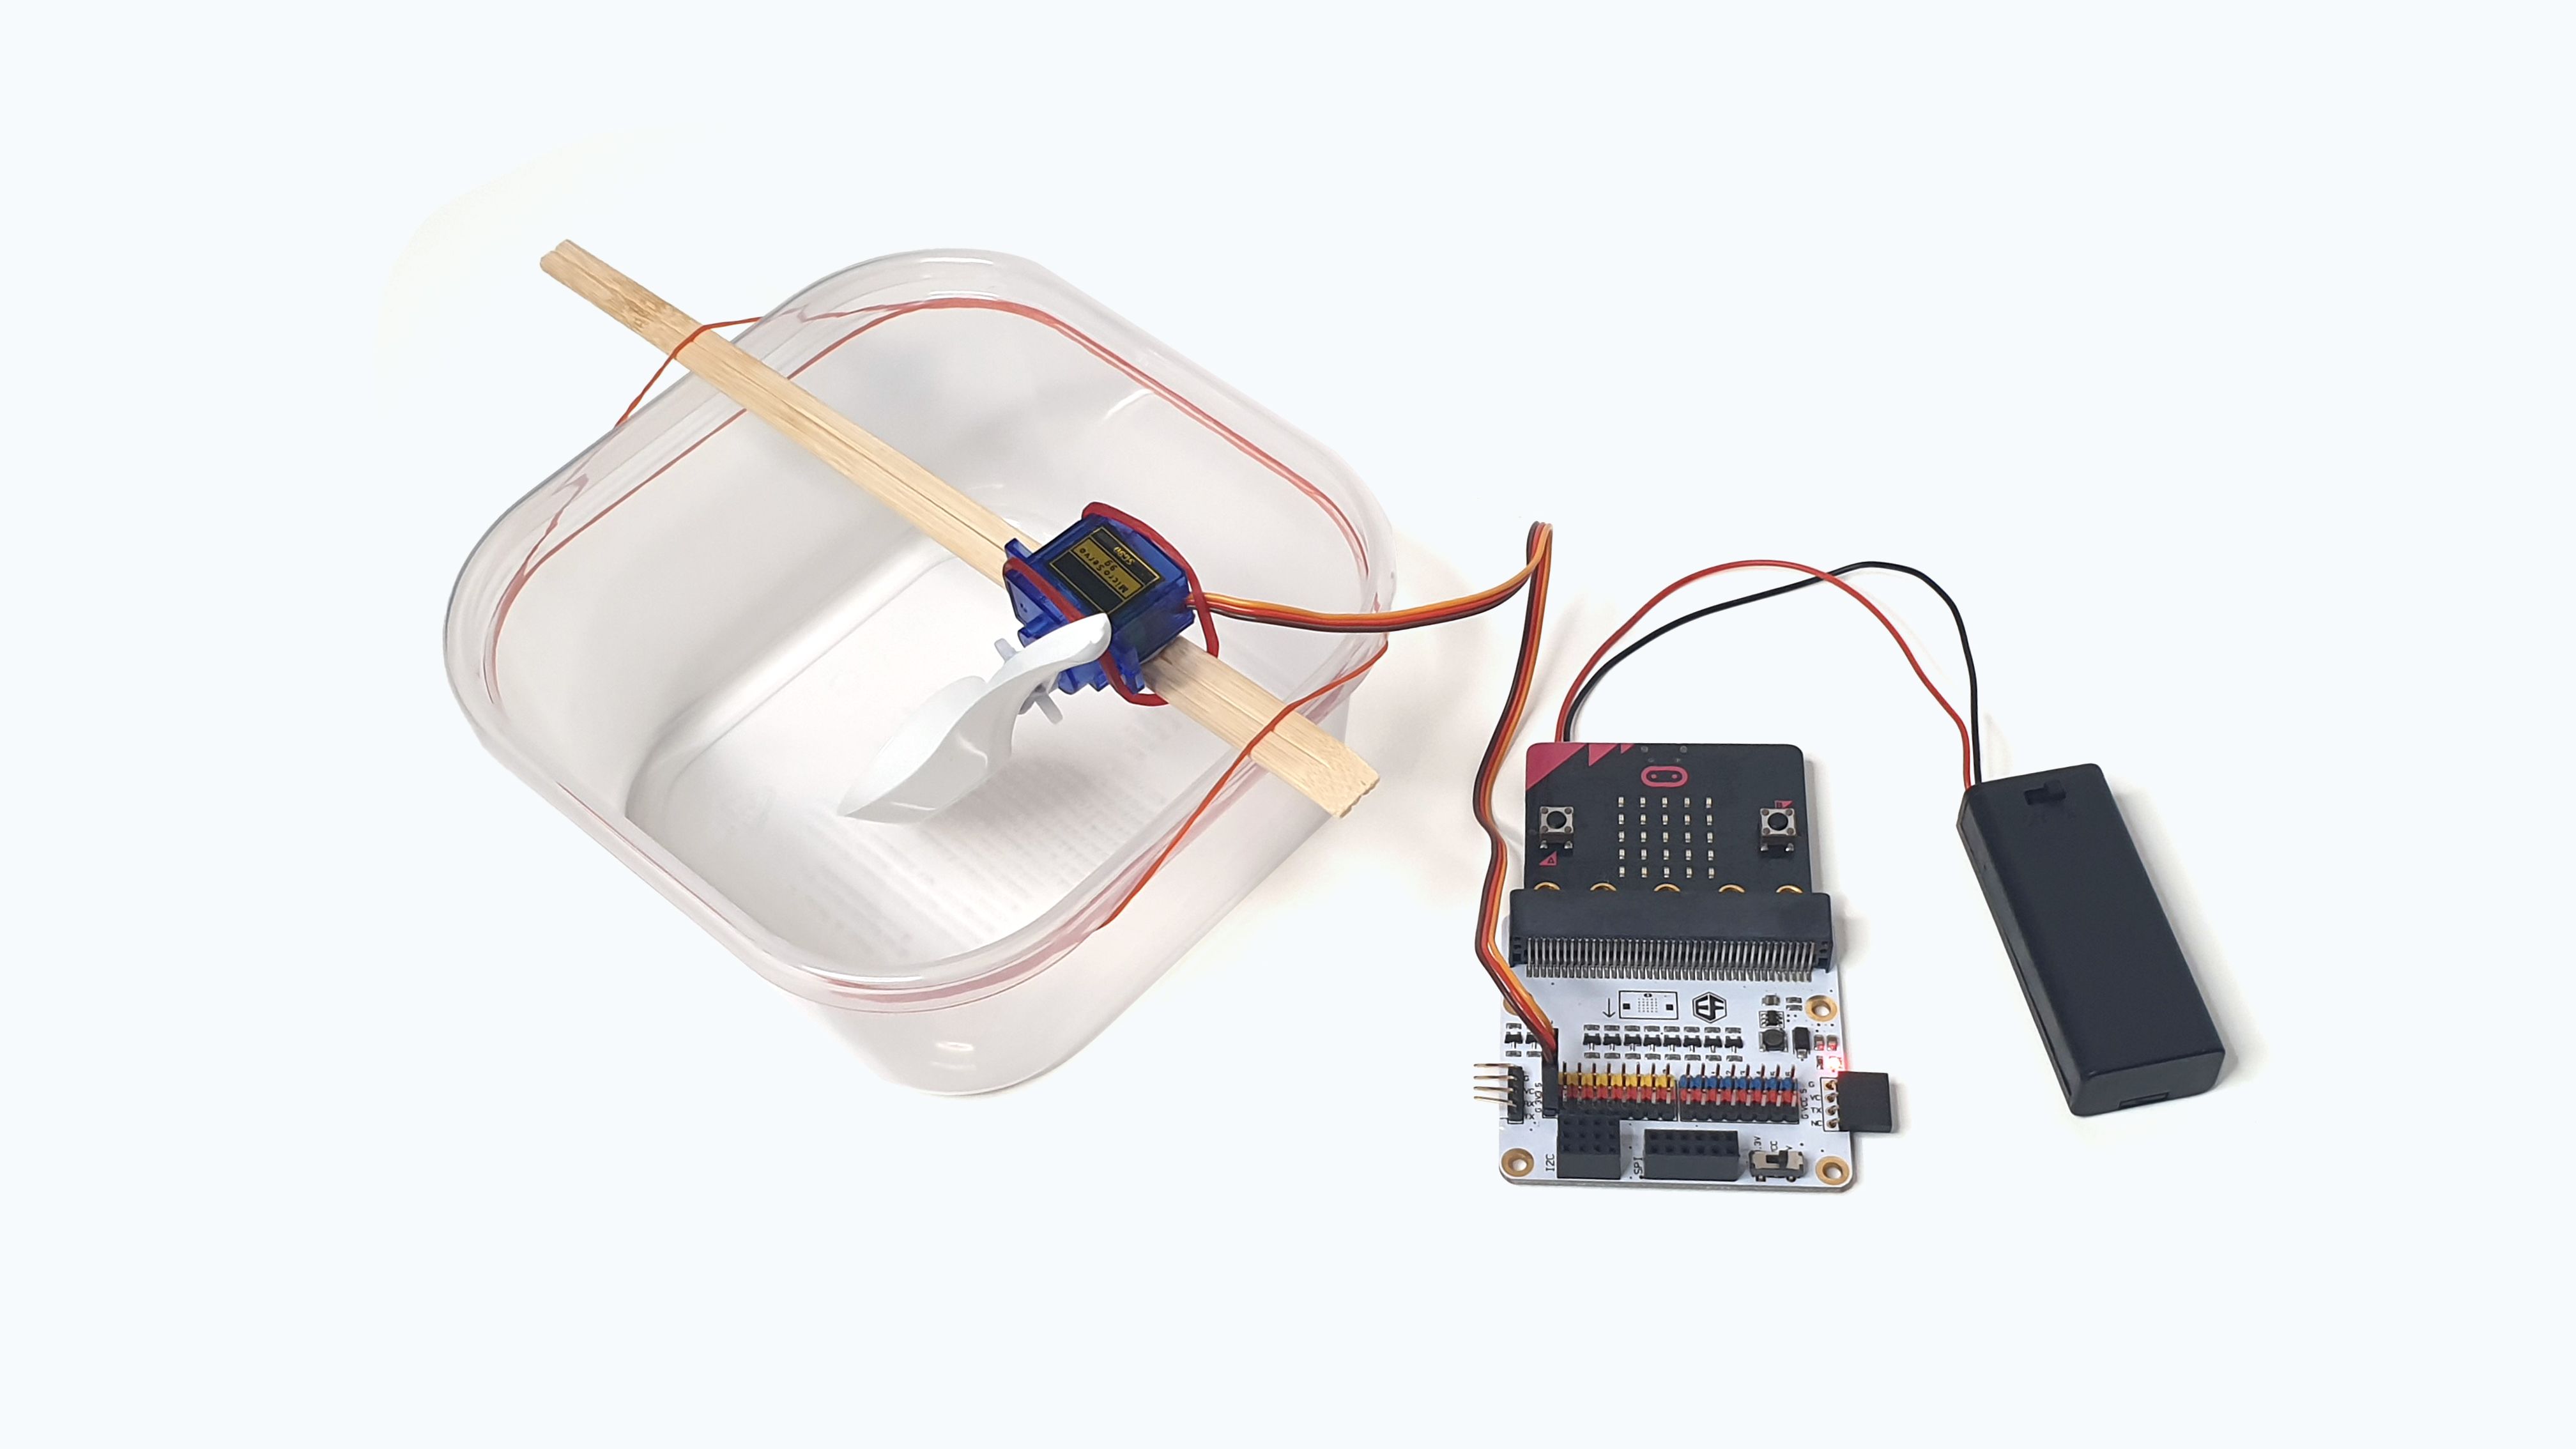
Plugging in
(a) Slot a micro:bit into a breakout board
(b) Plug in the servo into pin0 of the breakout board
Materials
- 1 x Micro:bit
- 1 x Breakout Board
STEP 5
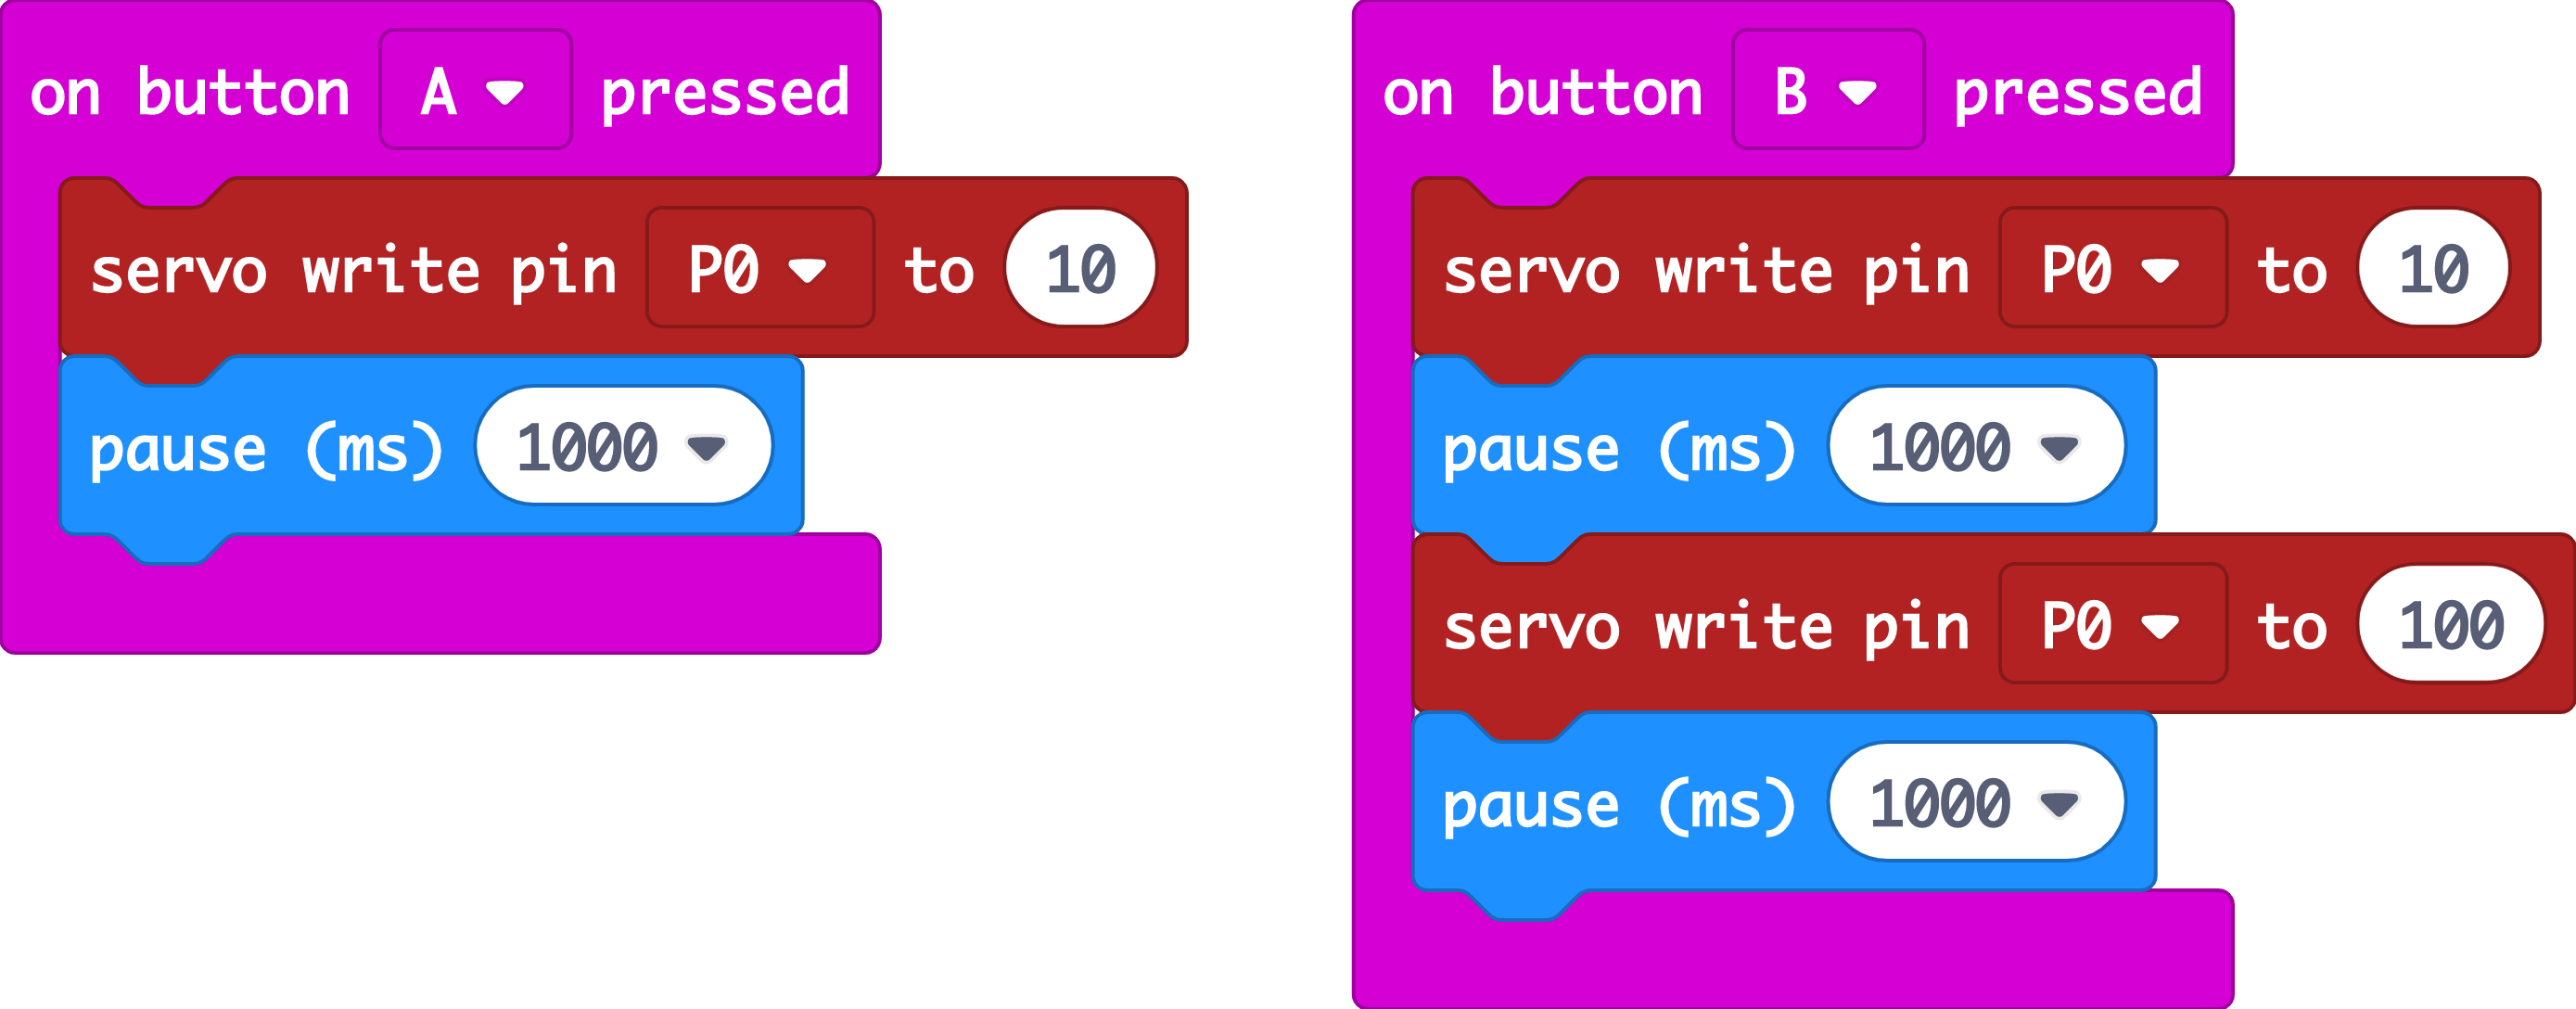
Test and fine-tune servo rotation
(a) Open makecode editor
(b) Copy the code as shown in the picture
(c) Download into your micro:bit
(d) Take note of the spin direction - it should be spinning in the clockwise direction and back
(e) Change the servo rotation angle accordingly. In this case, we're using 10 and 100 degrees
STEP 6
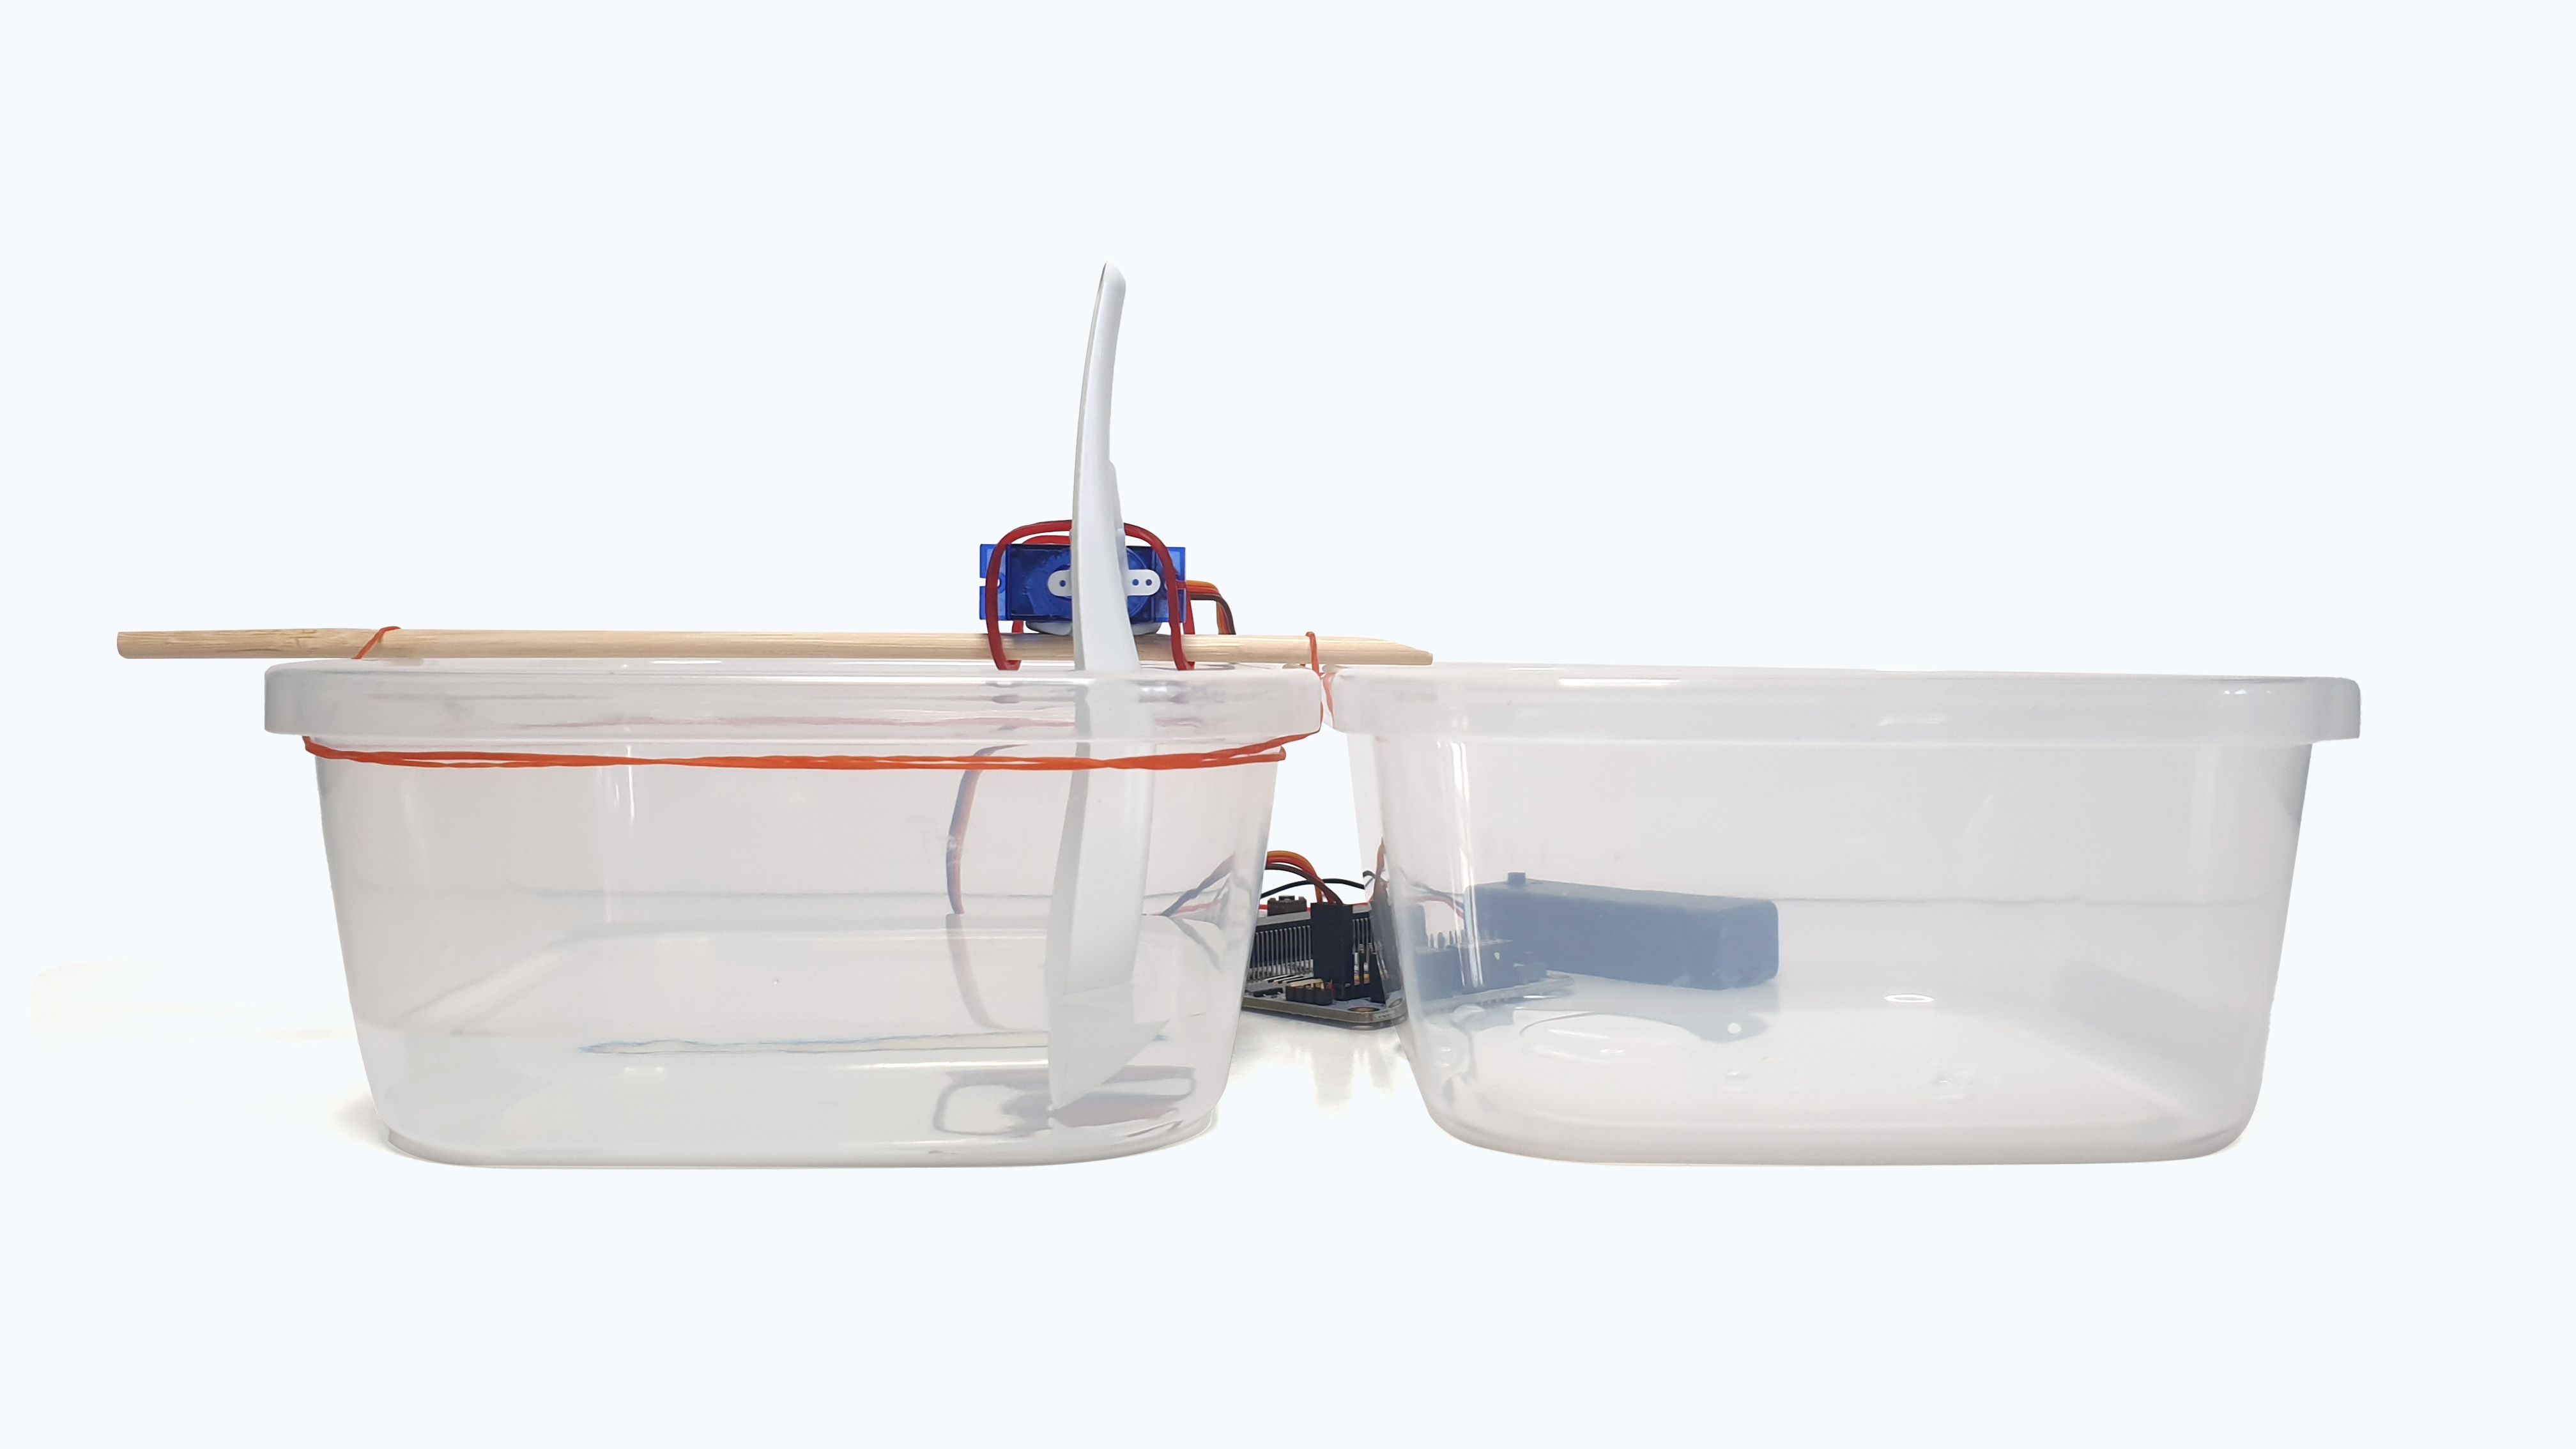
Test with actual water
(a) Once you've fine tuned the angles, try out with actual water!
(b) Prepare a second container to receive the scooped water
(c) Press button B to scoop water from container A to B
(d) Adjust the spoon position or servo's angles accordingly!
STEP 7
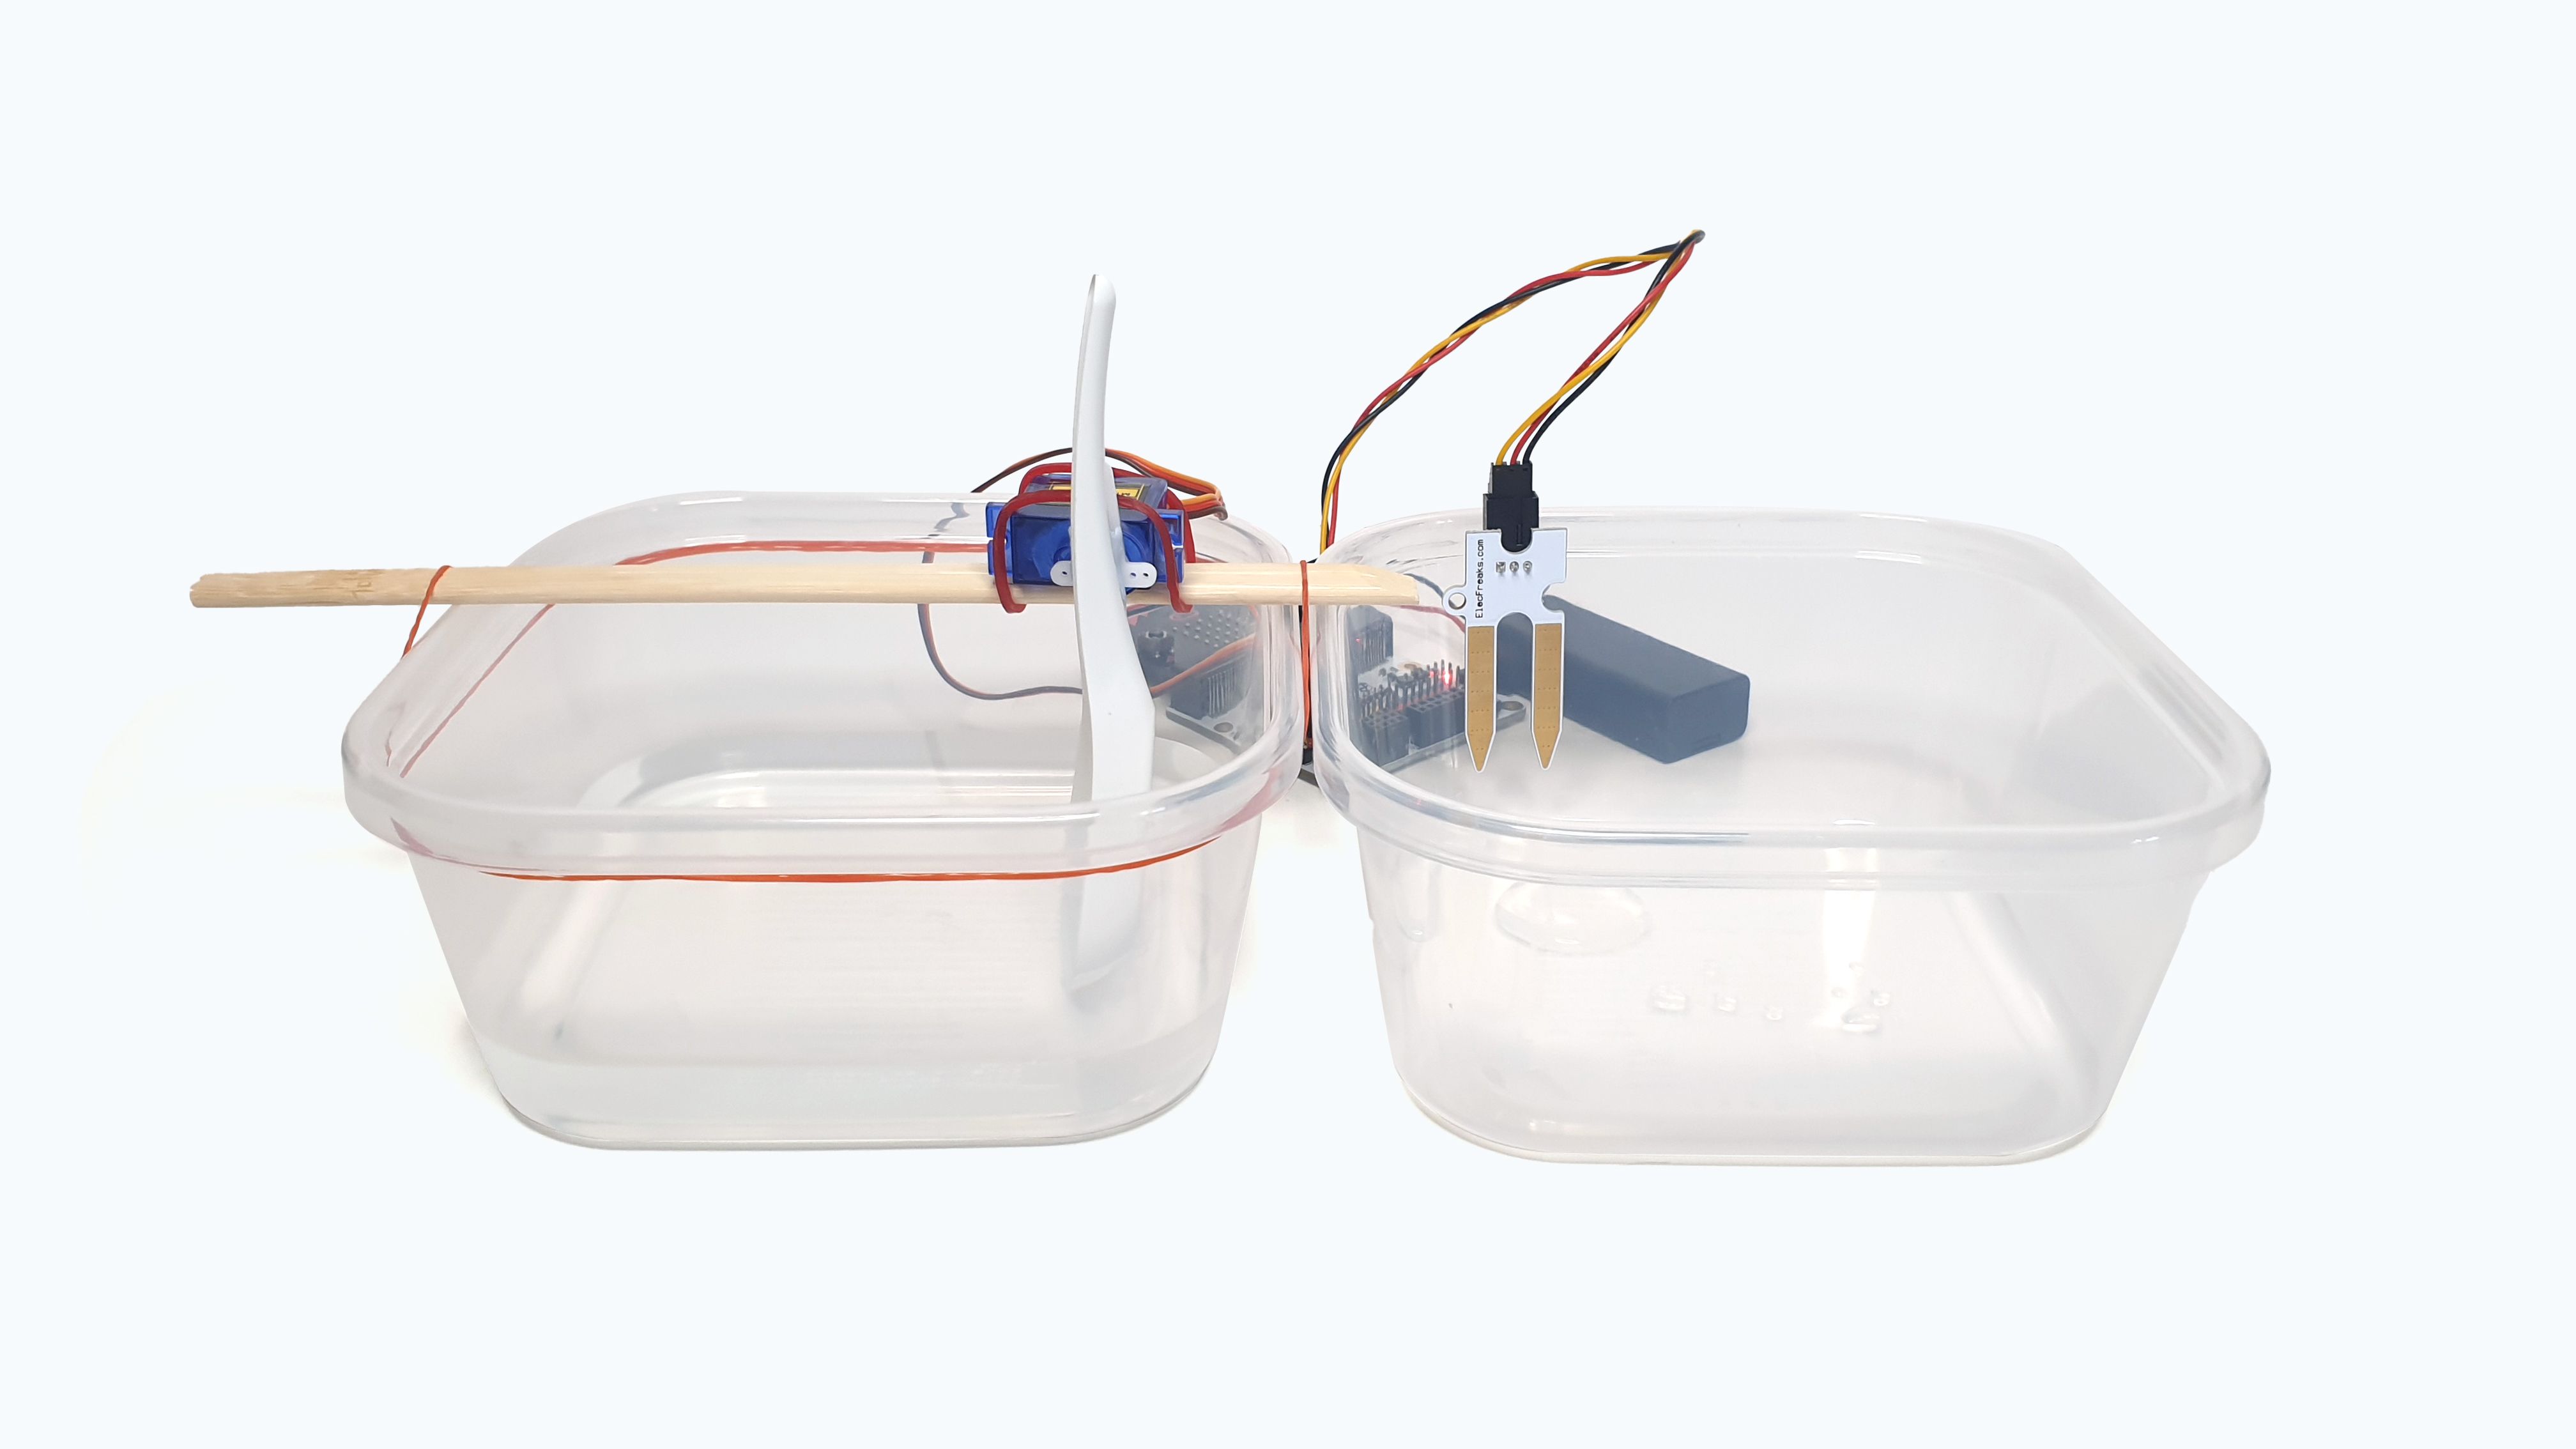
Add a soil moisture sensor
(a) Plug a soil moisture sensor at PIN1
(b) Place some blue tack at the back of the sensor. Attach the sensor on the inner wall of container B
Materials
- 1 x Soil moisture sensor
- Blue tack
STEP 8
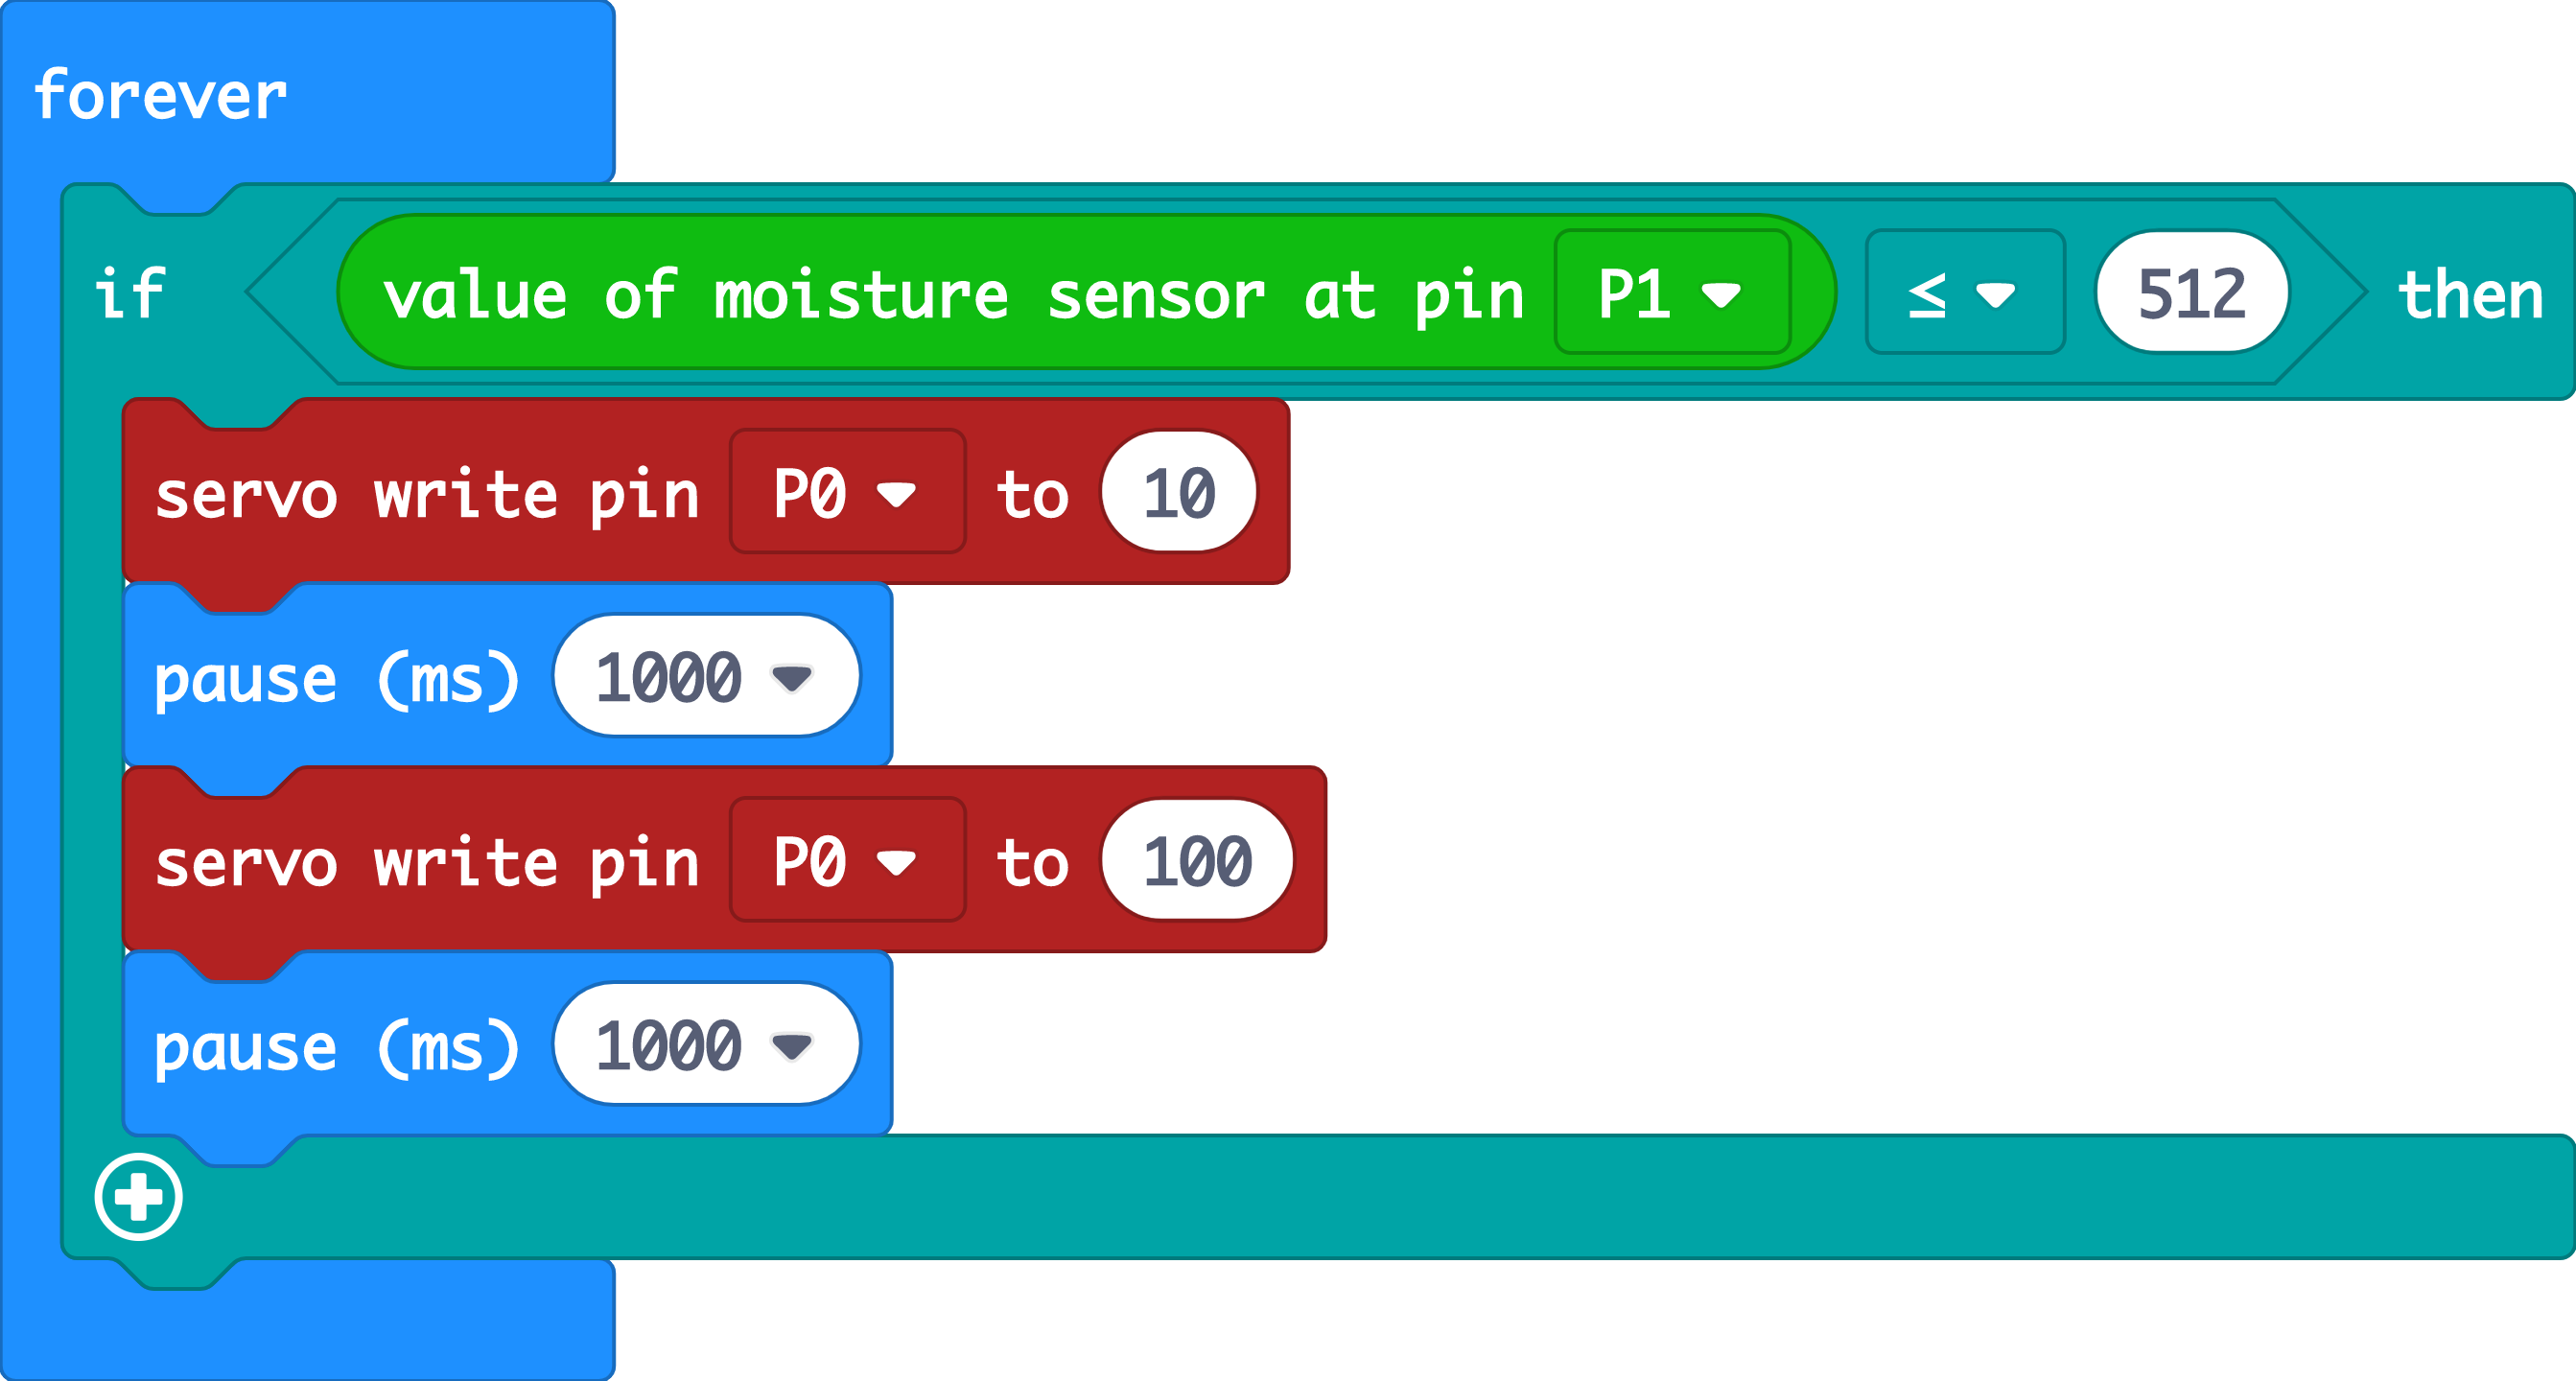
Coding Time
(a) Follow the code as shown in the image. The idea is, the spoon should continue scooping water as long as the moisture level falls below the halfway point
Code and References
Made this activity? Good Job! Now spread the word. Share a photo of your creation on social media with #letsgethacking #Plantwateringsystem