QuickMath
Learn how to create a Micro:bit game to test your quick math skills!

YOU WILL NEED
1 x Micro:bit
1 x USB cable
1 x laptop/computer
STEP 1
Open up the MakeCode editor for Micro:bit, at this link: https://makecode.microbit.org/#editor
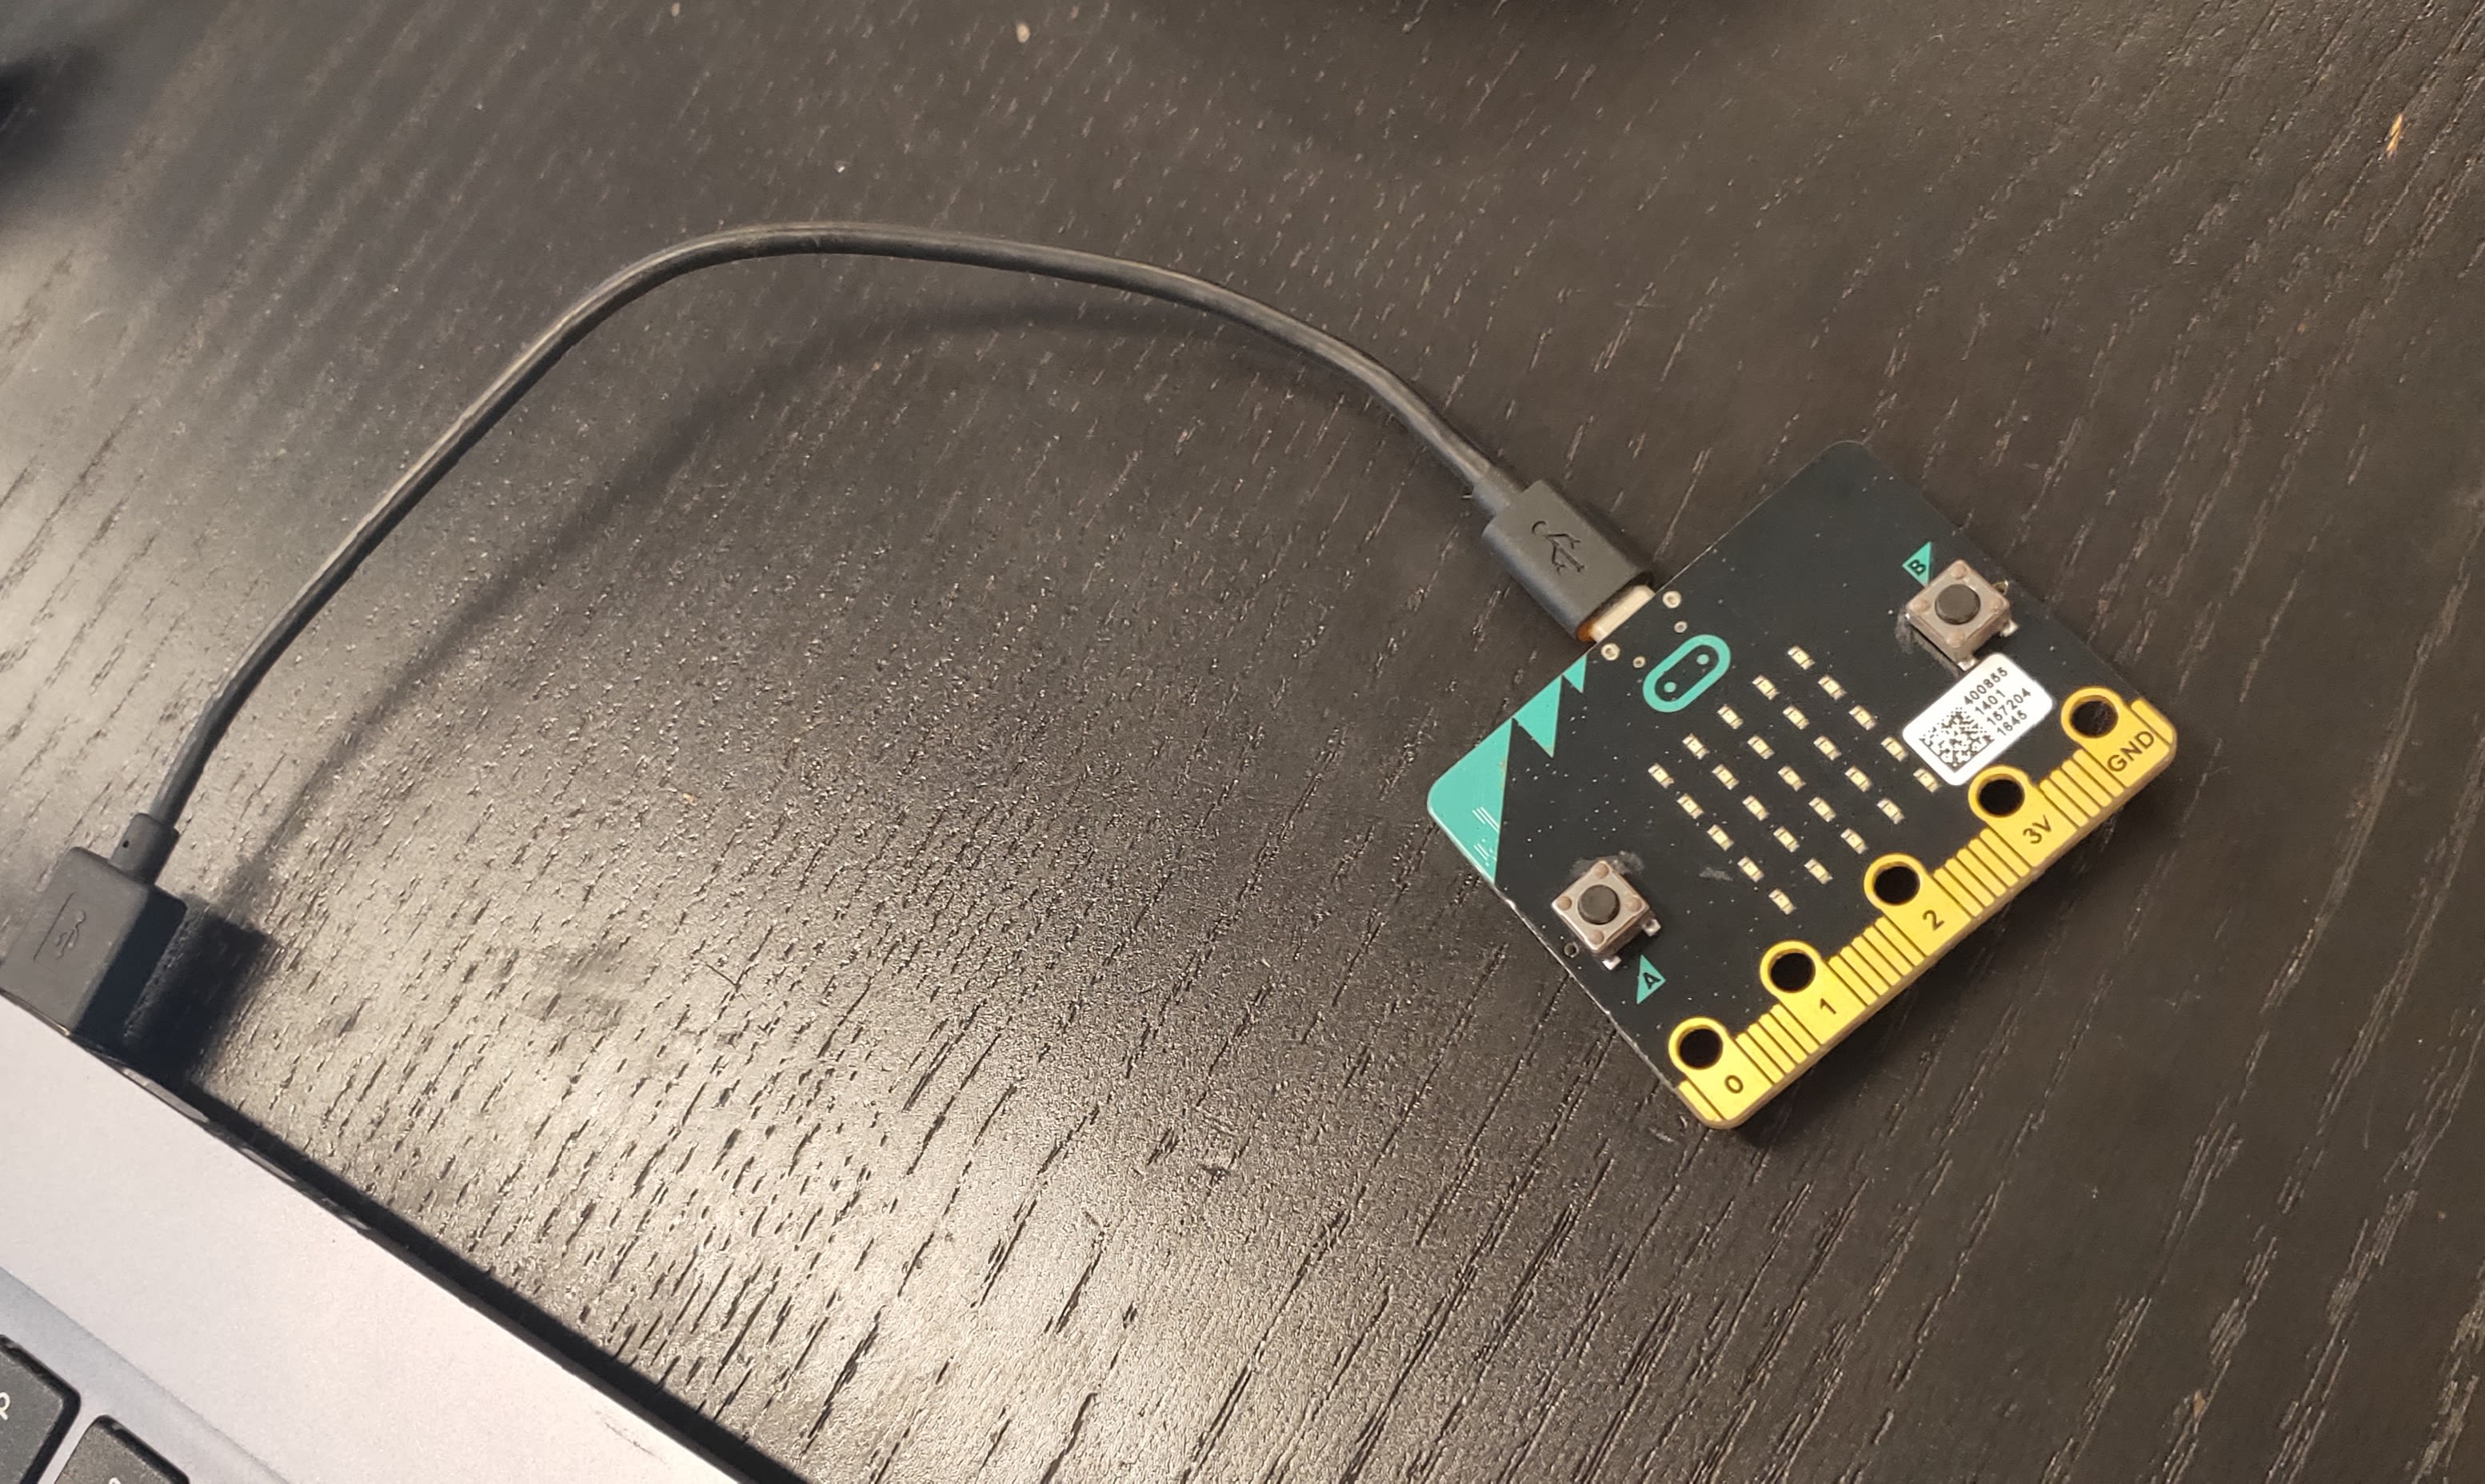
And connect the Micro:bit to your computer/laptop usng a microUSB wire
STEP 2
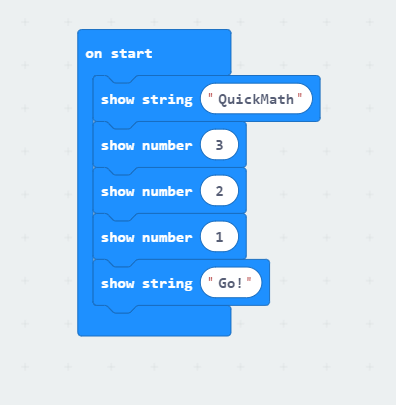
In the "on start" block, add the blocks shown in the image. This is to let the user know that we're gonna start the game!
STEP 3
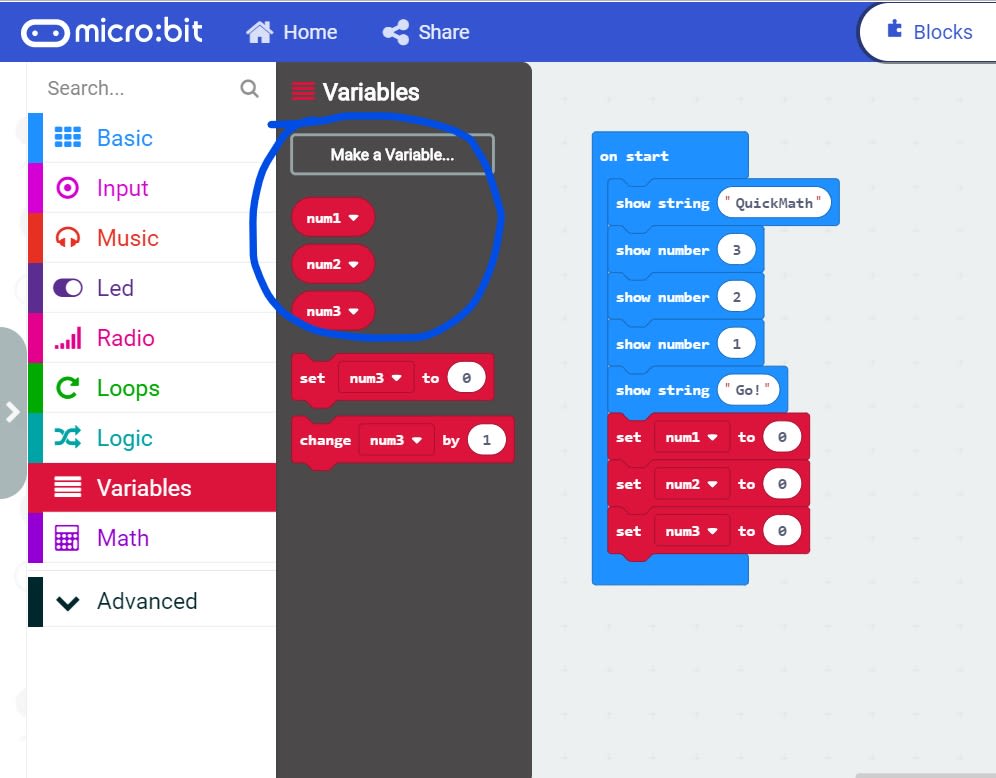
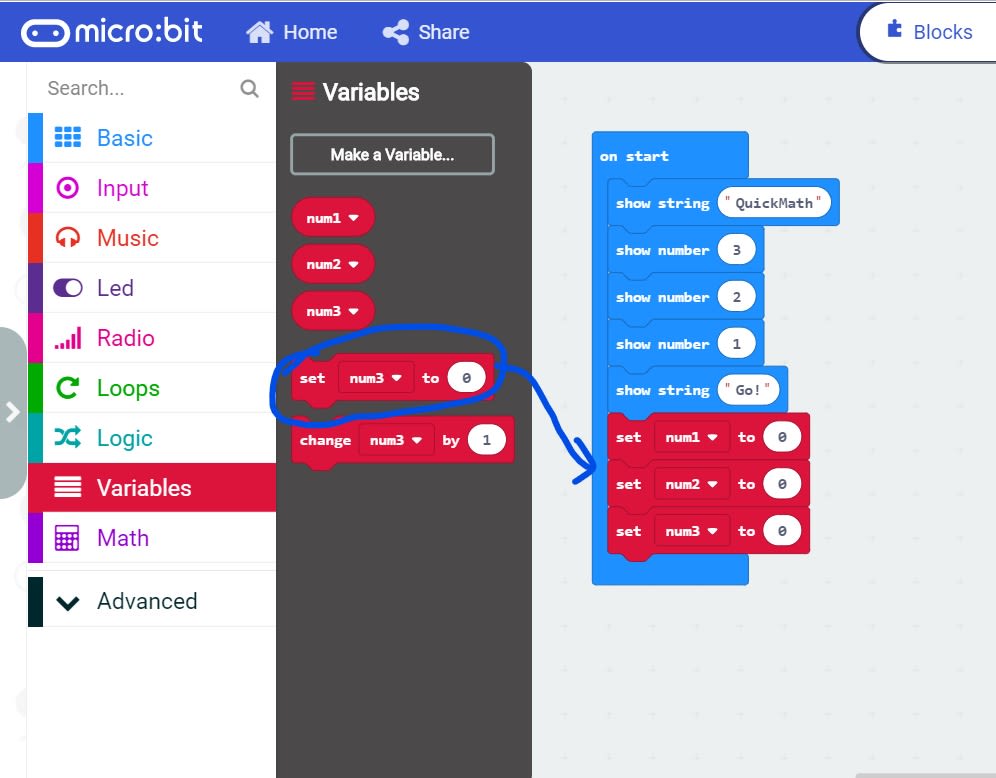
- 1st image: Make 3 new variables named num1, num2, num3.
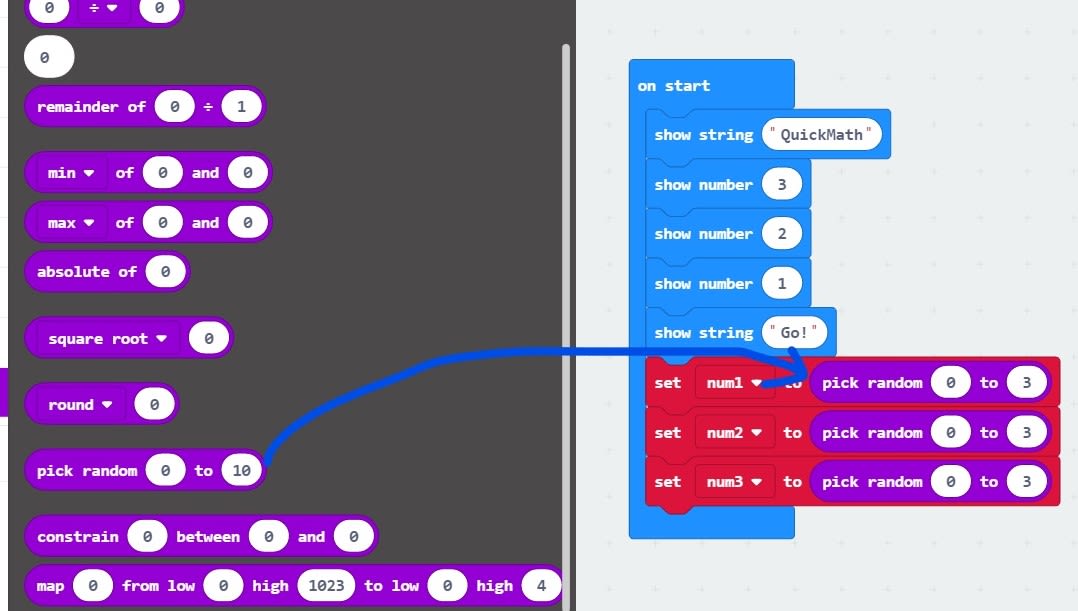
- 2nd image: Then, drag 3 of the "set _ to _" blocks into the main block, and rename each variable to num1, num2 and num3 respectively.
- 3rd image: Lastly, set these 3 variables to pick a random number from 1 to 3.
STEP 4
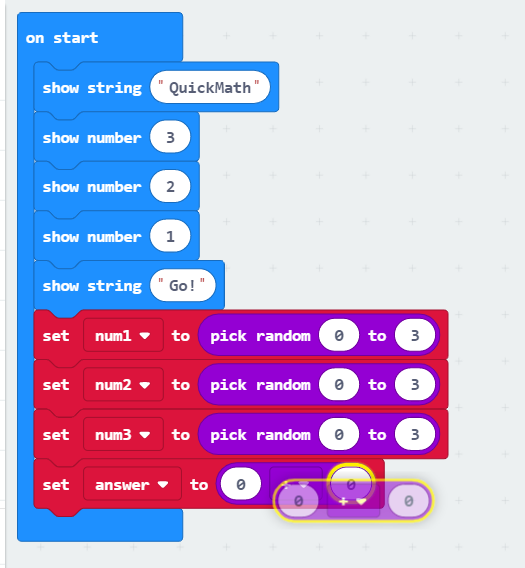
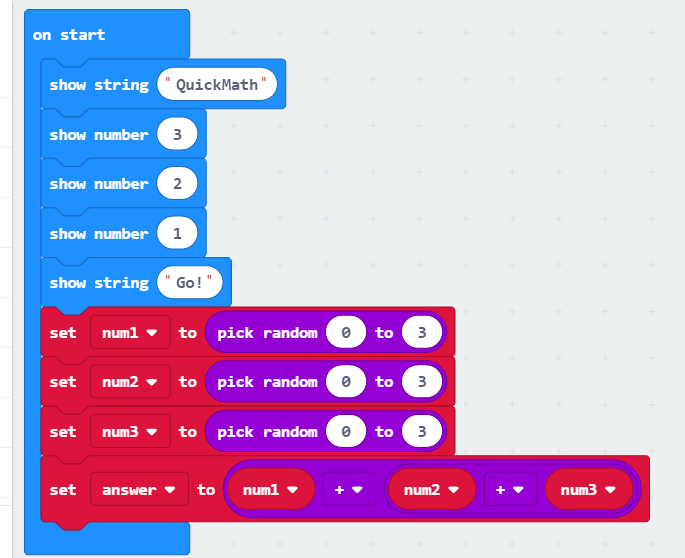
- Create a new variable called "answer" and this will be num1, num2 and num3 added up together.
- 1st image: drag an "add" block into another "add" block, so that you can add 3 numbers together.
- 2nd image: And then drag the num1, num2 and num3 variables into the 3 empty slots.
STEP 5
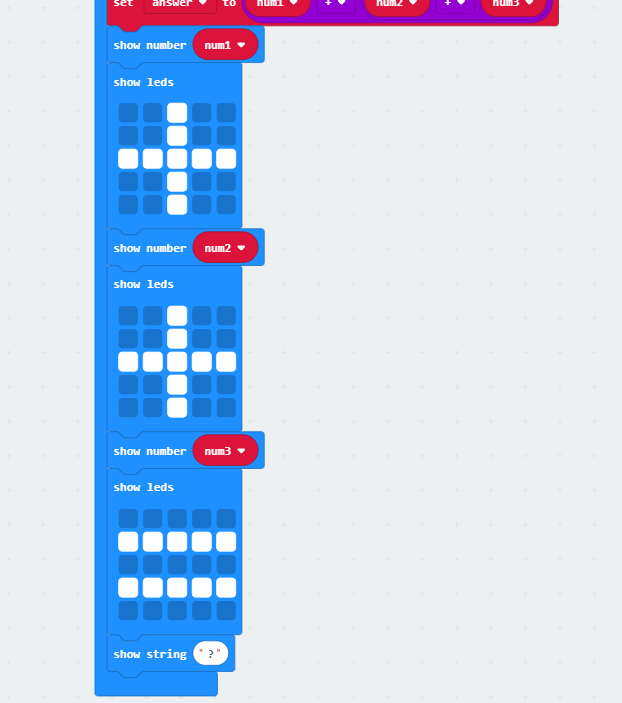
Now, we will show the 3 numbers very quickly. We show num1, a "+" sign, num2, "+", num3, "=", "?". Follow the blocks in the image shown.
STEP 6
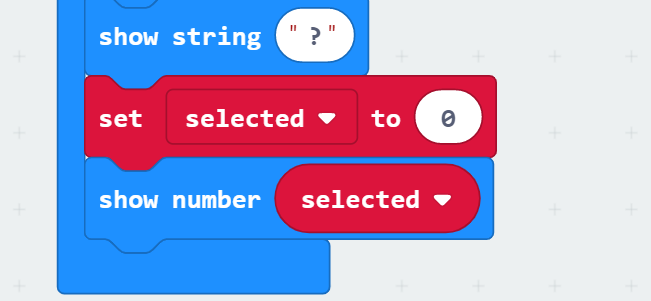
Next, create a variable named "selected" and set it to 0. Show it using the "show number" block. This will be the number that the player selects! We will check if it's correct or not later on.
STEP 7
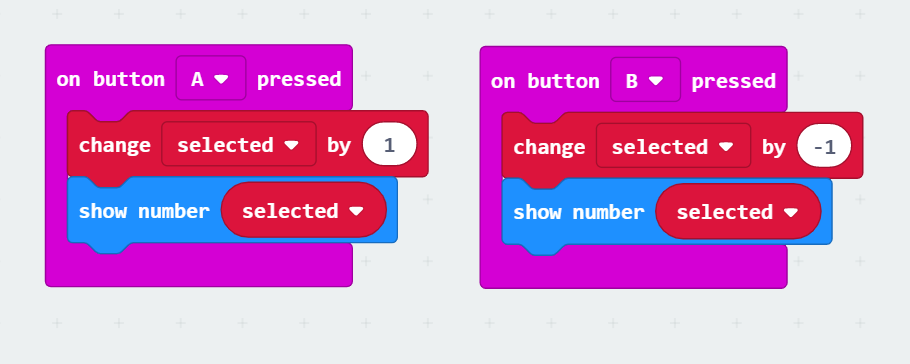
Add the following blocks of code to change the selected number. What we are doing is allowing the player to choose their number.
If they press "A", it increases by 1, and if they press "B", it decreases by 1. Simple stuff.
STEP 8
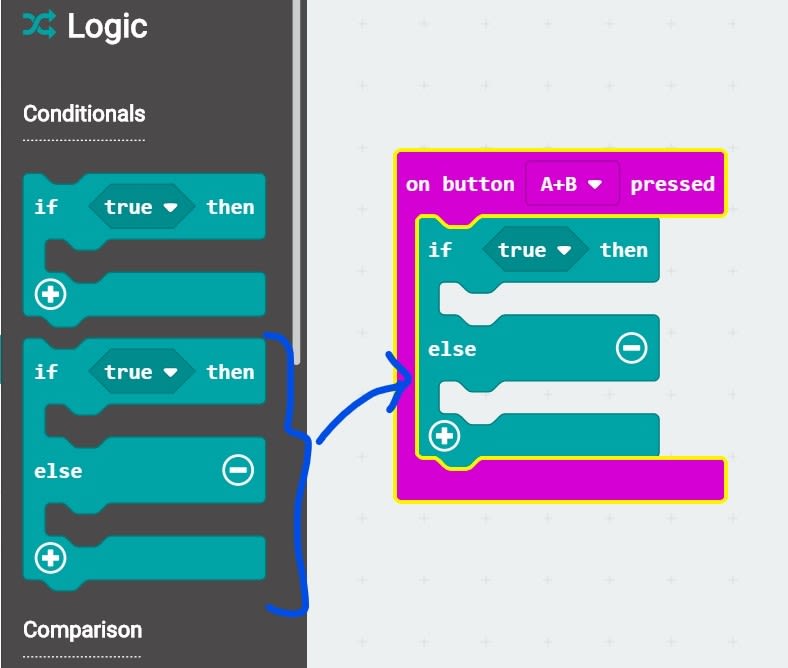
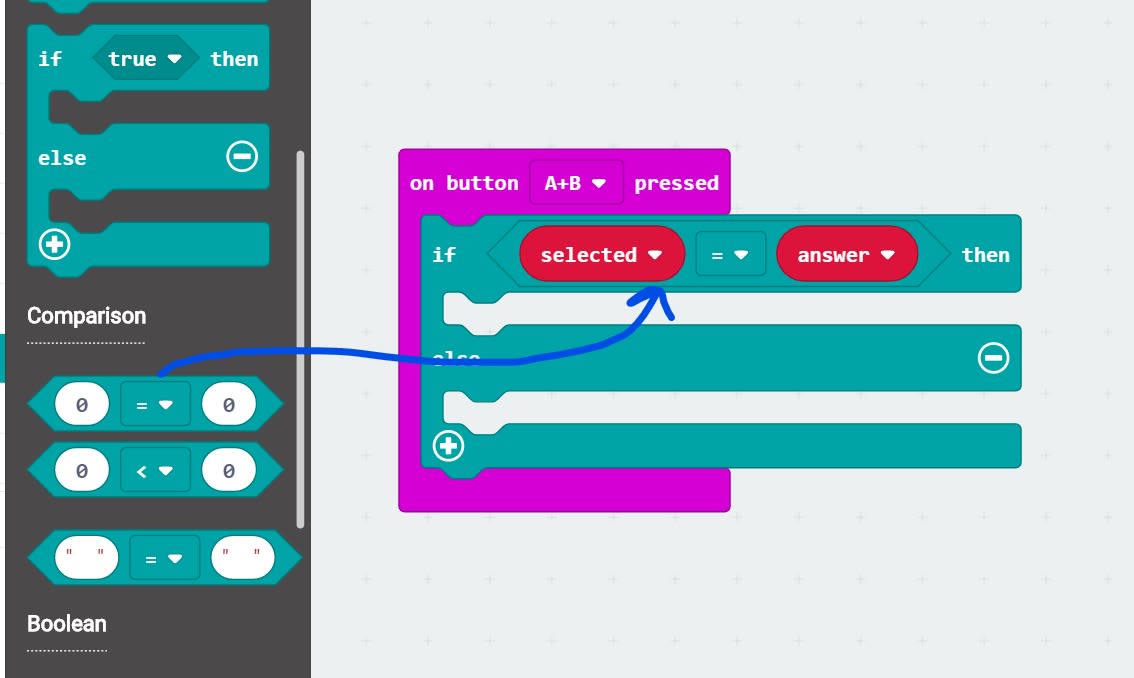
When the player wants to confirm their selection, they will press both A and B at the same time. So we need to check if their selection was correct or not, by checking if it equals the "answer" variable.
- 1st image: drag an "if-else" block into "on button A+B" pressed.
- 2nd image: drag the "something equals something" block and add the variables "selected" and "answer".
STEP 9
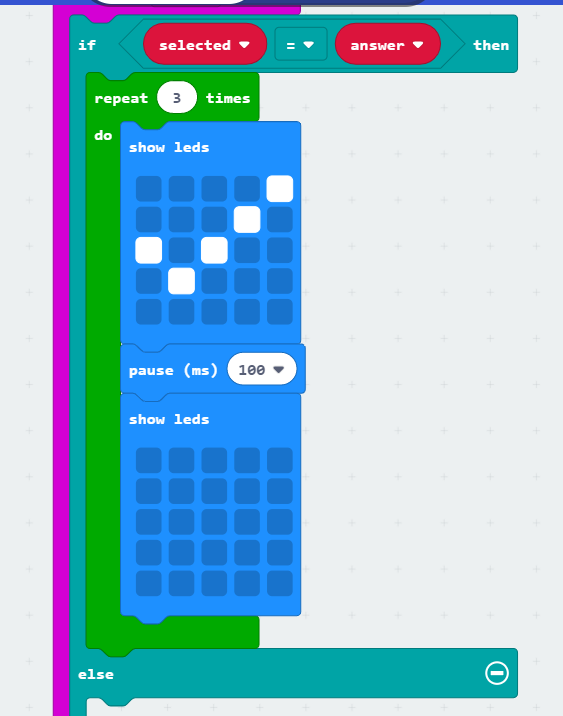
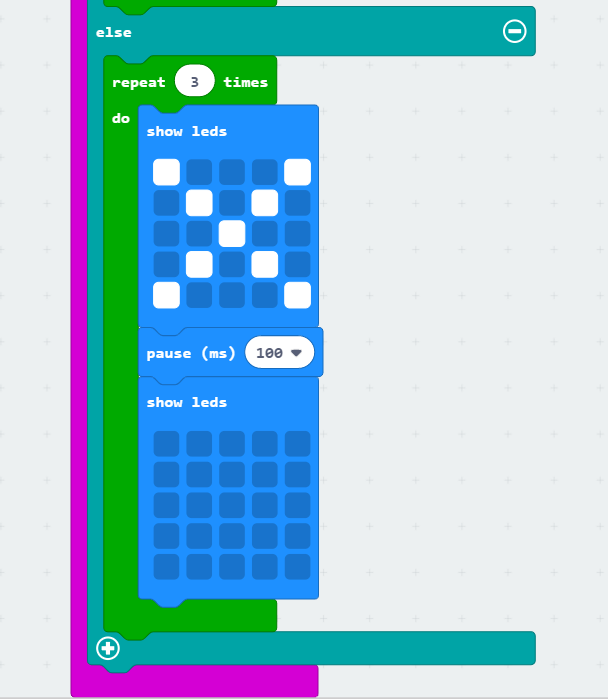
If it's correct, we will show them a "✓" sign 3 times (the "if"). And if it's wrong we will show a "x" sign 3 times (the "else"). For this we need a repeat block.
Drag a repeat block for both "if" and "else", change the number of repetitions to 3. Then, follow the rest of the code shown in the 2 images.
STEP 10
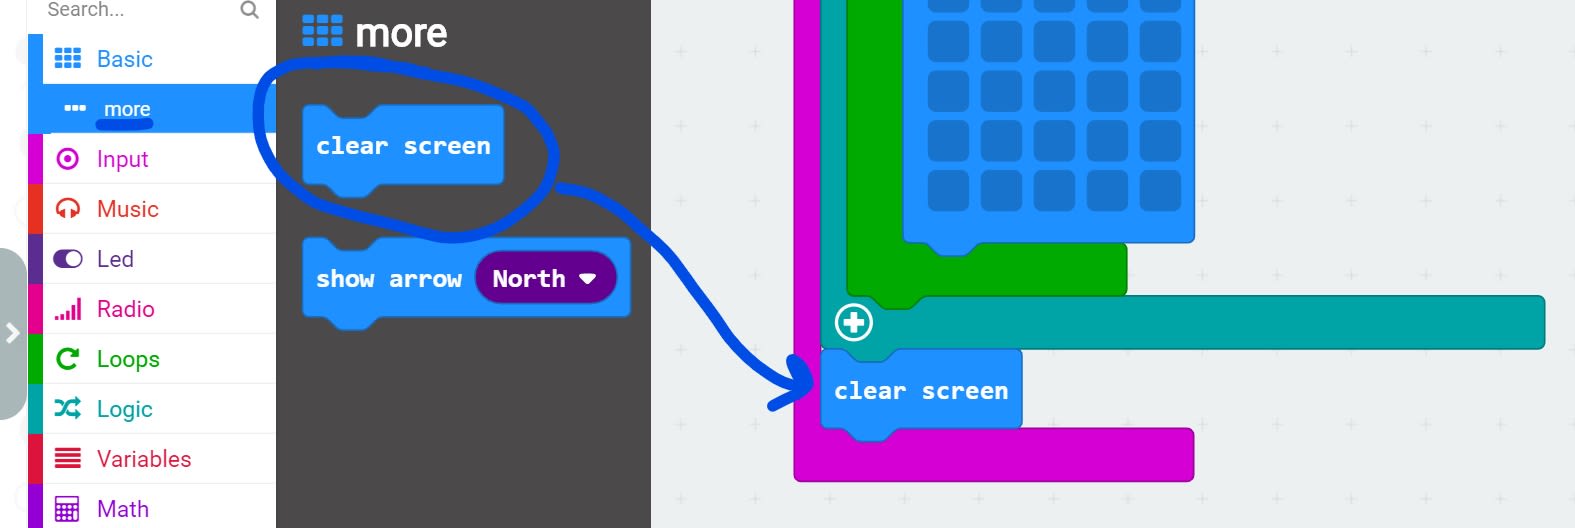
Lastly, add a "clear screen" block at the end. And we're done!
Upload your new code into the micro:bit folder by clicking the big "Download" button at the bottom left of your screen.
Then drag the downloaded .hex file into the Micro:bit drive (usually an E:). And play away!
Code and References
Made this activity? Good Job! Now spread the word. Share a photo of your creation on social media with #letsgethacking #QuickMath