Recluse Bot
Make a reclusive robot that squeals when toggled, touched, or when it detects motion!
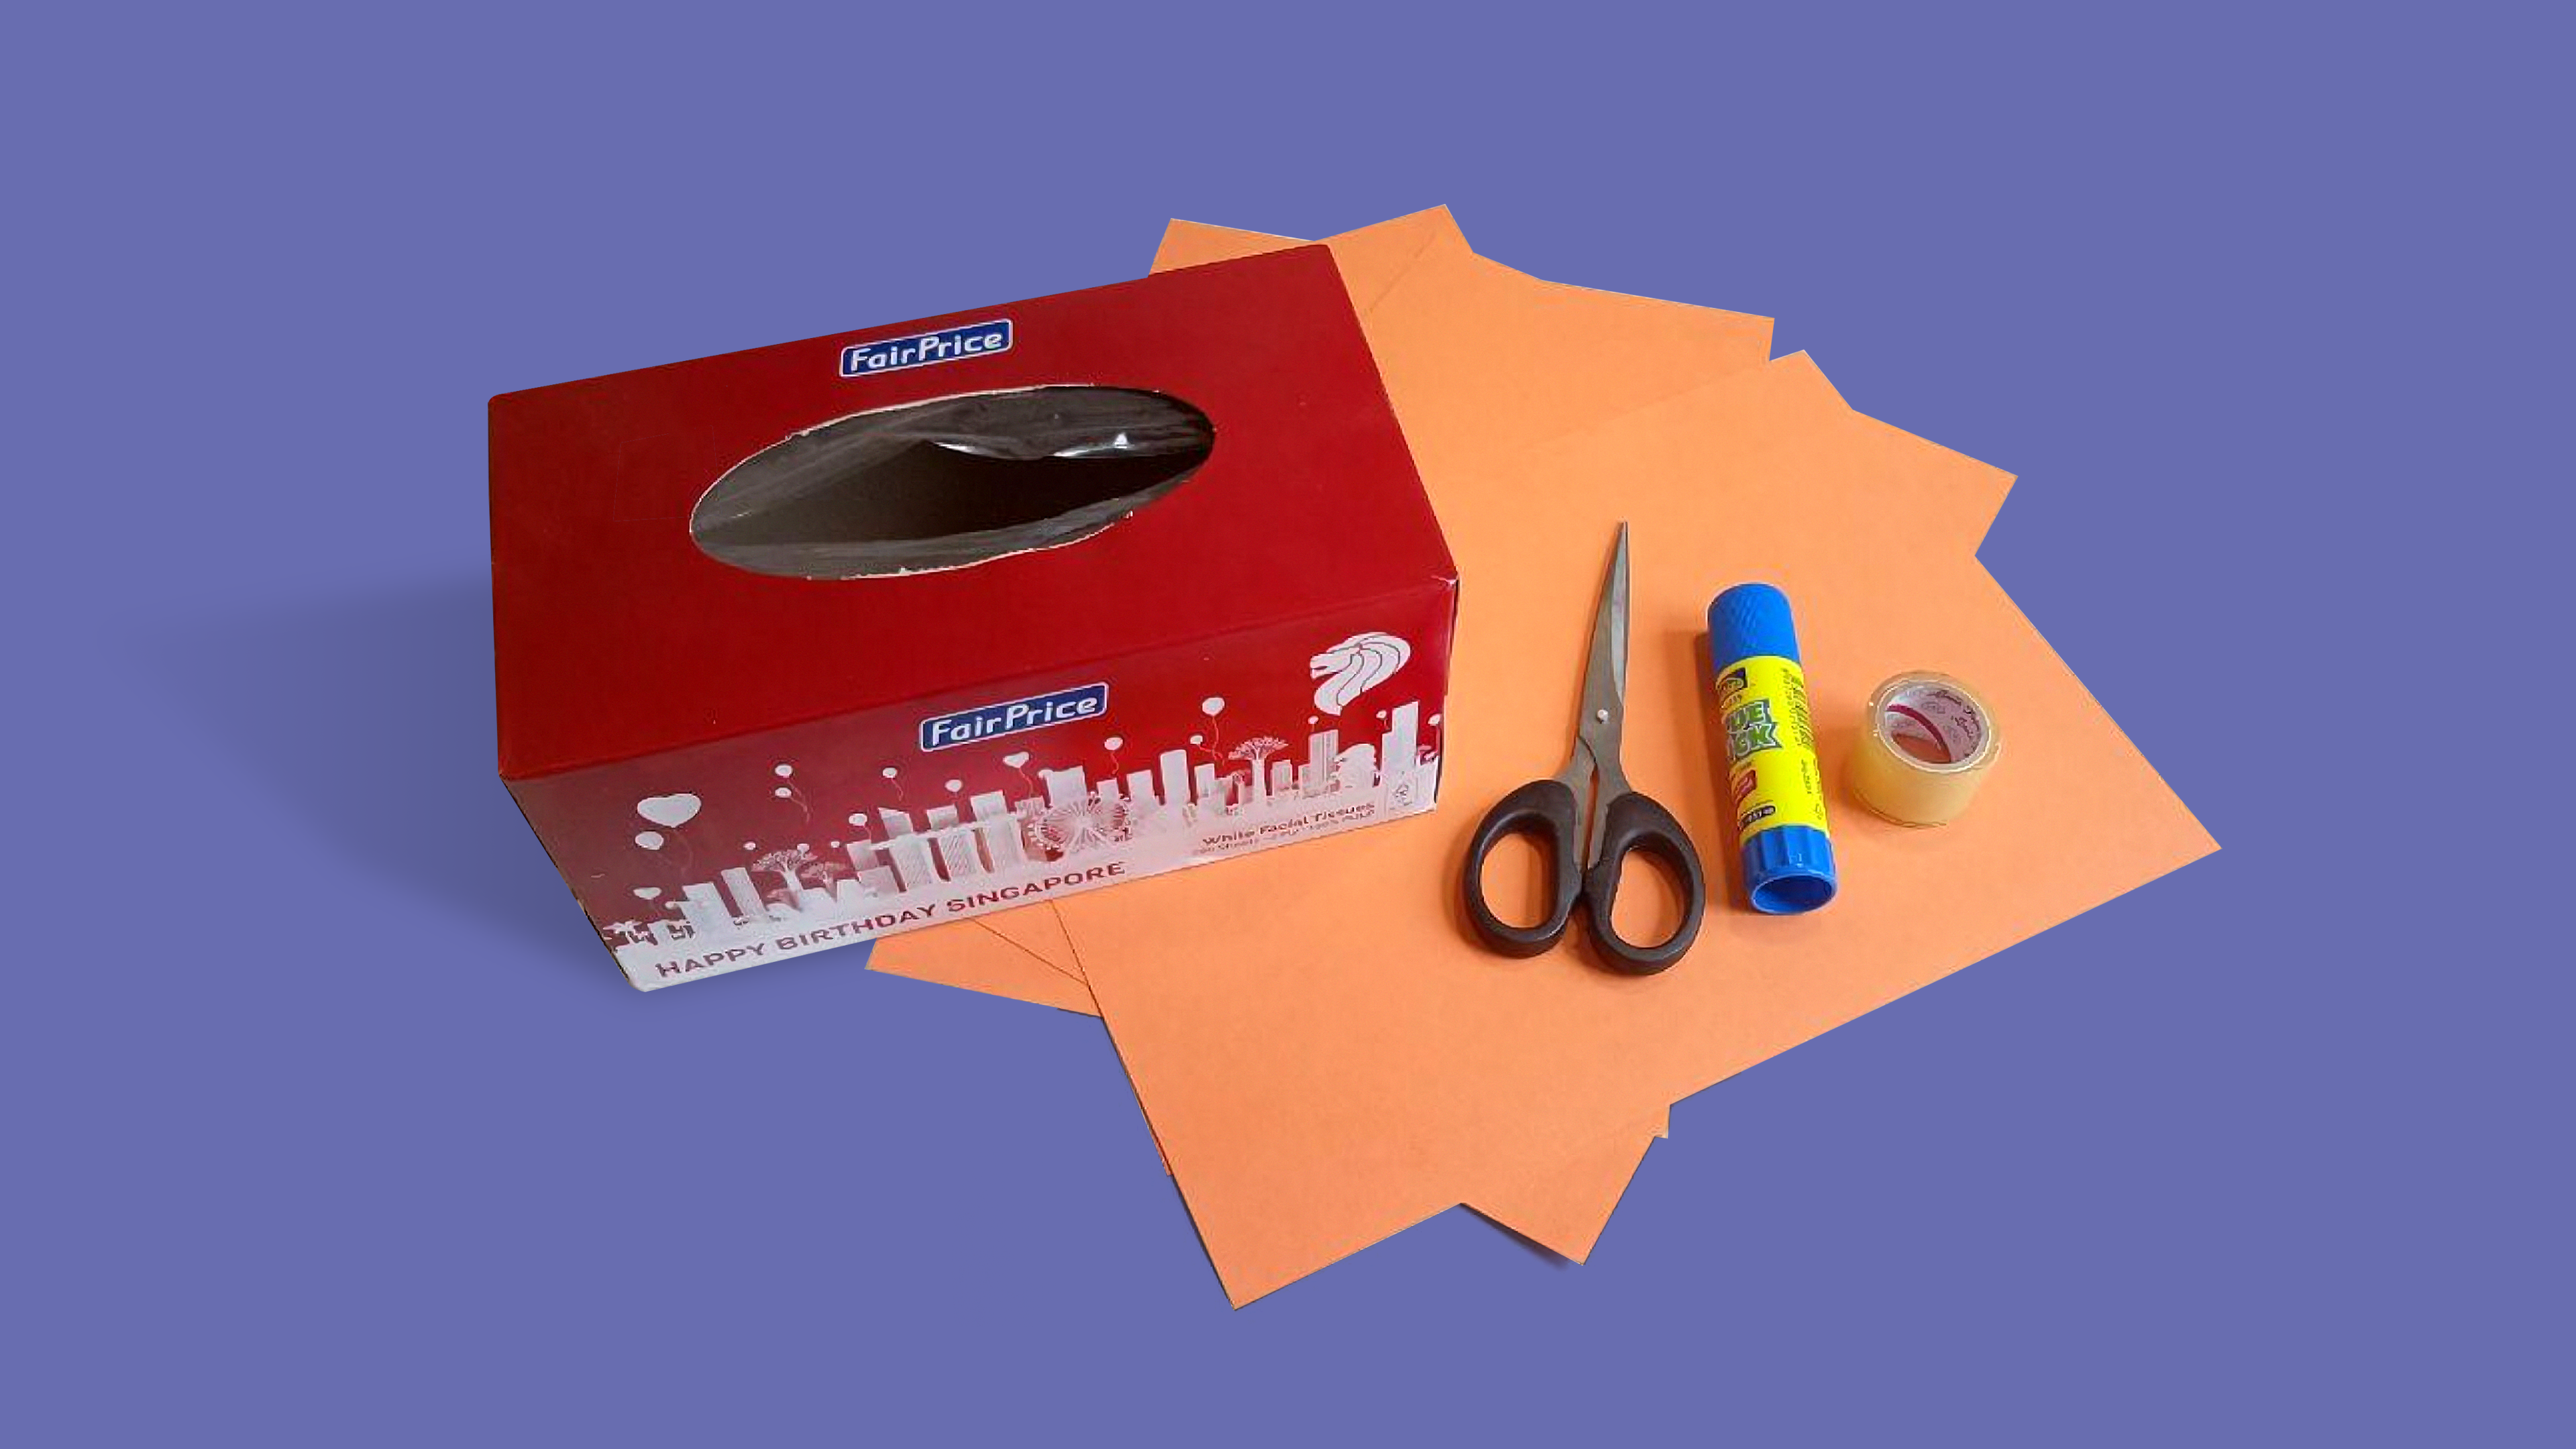
YOU WILL NEED
- 1 x Micro:bit
- 1 x Tinkercademy Breakout Board
- 1 x Battery Holder
- 1 x PIR Sensor Brick
- 1 x Potentiometer
- 1 x Passive Buzzer
- 1 x Soil Moisture Sensor
- 2 x AAA Batteries
- 2 x Female-Female Jumper Wires
- 1 x Glue stick
- 1 x Tissue box (Or any box that is large enough to fit Micro:bit)
- Blu-tack / scotch tape (optional)
- Scissors
- Penknife
- Colored paper
- Markers
STEP 1
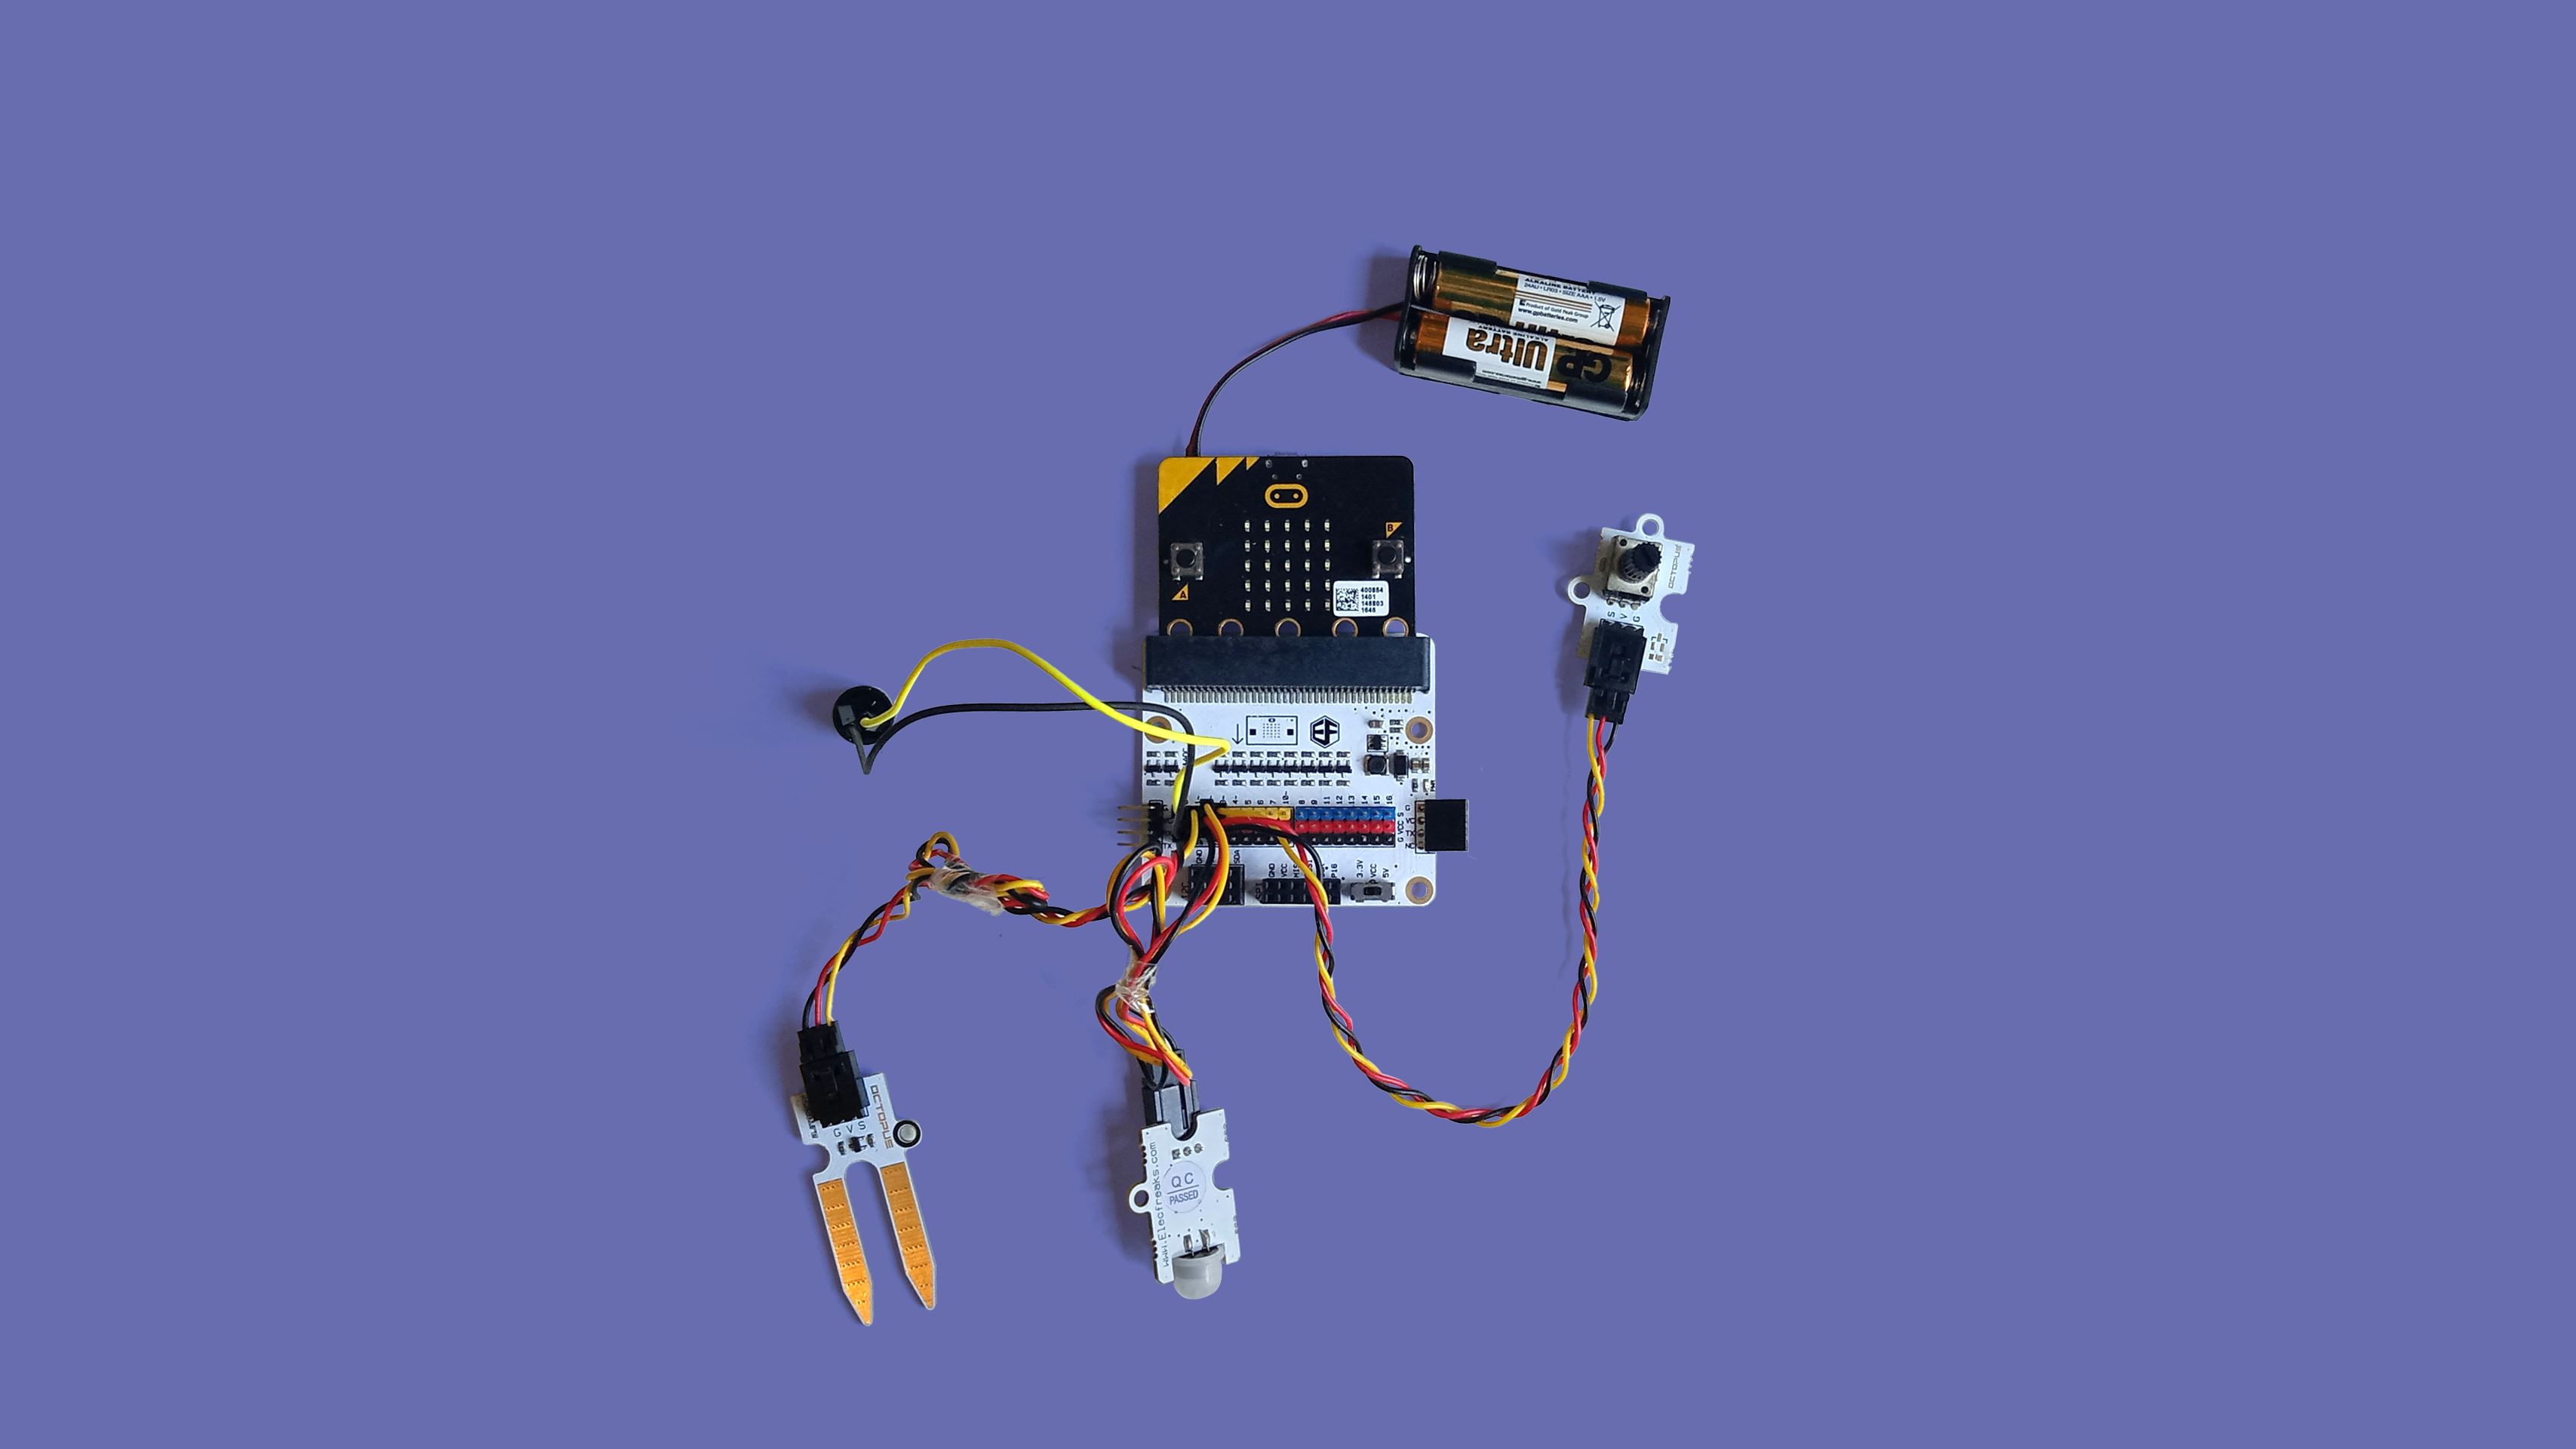
Connect the electronics
(a) Attach the buzzer to pin 0 of the Tinkercademy breakout board. Make sure the ‘+’ sign of the buzzer connects to the yellow pin on the Tinkercademy breakout board, and the ‘-’ sign connects to the black pin on the board.
(b) Connect the soil moisture sensor to pin 1.
(c) Connect the PIR sensor brick to pin 2.
(d) Connect the potentiometer to pin 3.
(e) Connect the battery holder with 2xAAA batteries to the micro:bit.
Materials
- 1 x micro:bit
- 1 x Tinkercademy breakout board
- 1 x Buzzer
- 1 x Soil moisture sensor
- 1 x PIR sensor brick
- 1 x Potentiometer
- 1 x Battery holder (AAA)
- 2 x AAA batteries
STEP 2
Add the Tinkercademy Tinker Kit Extension
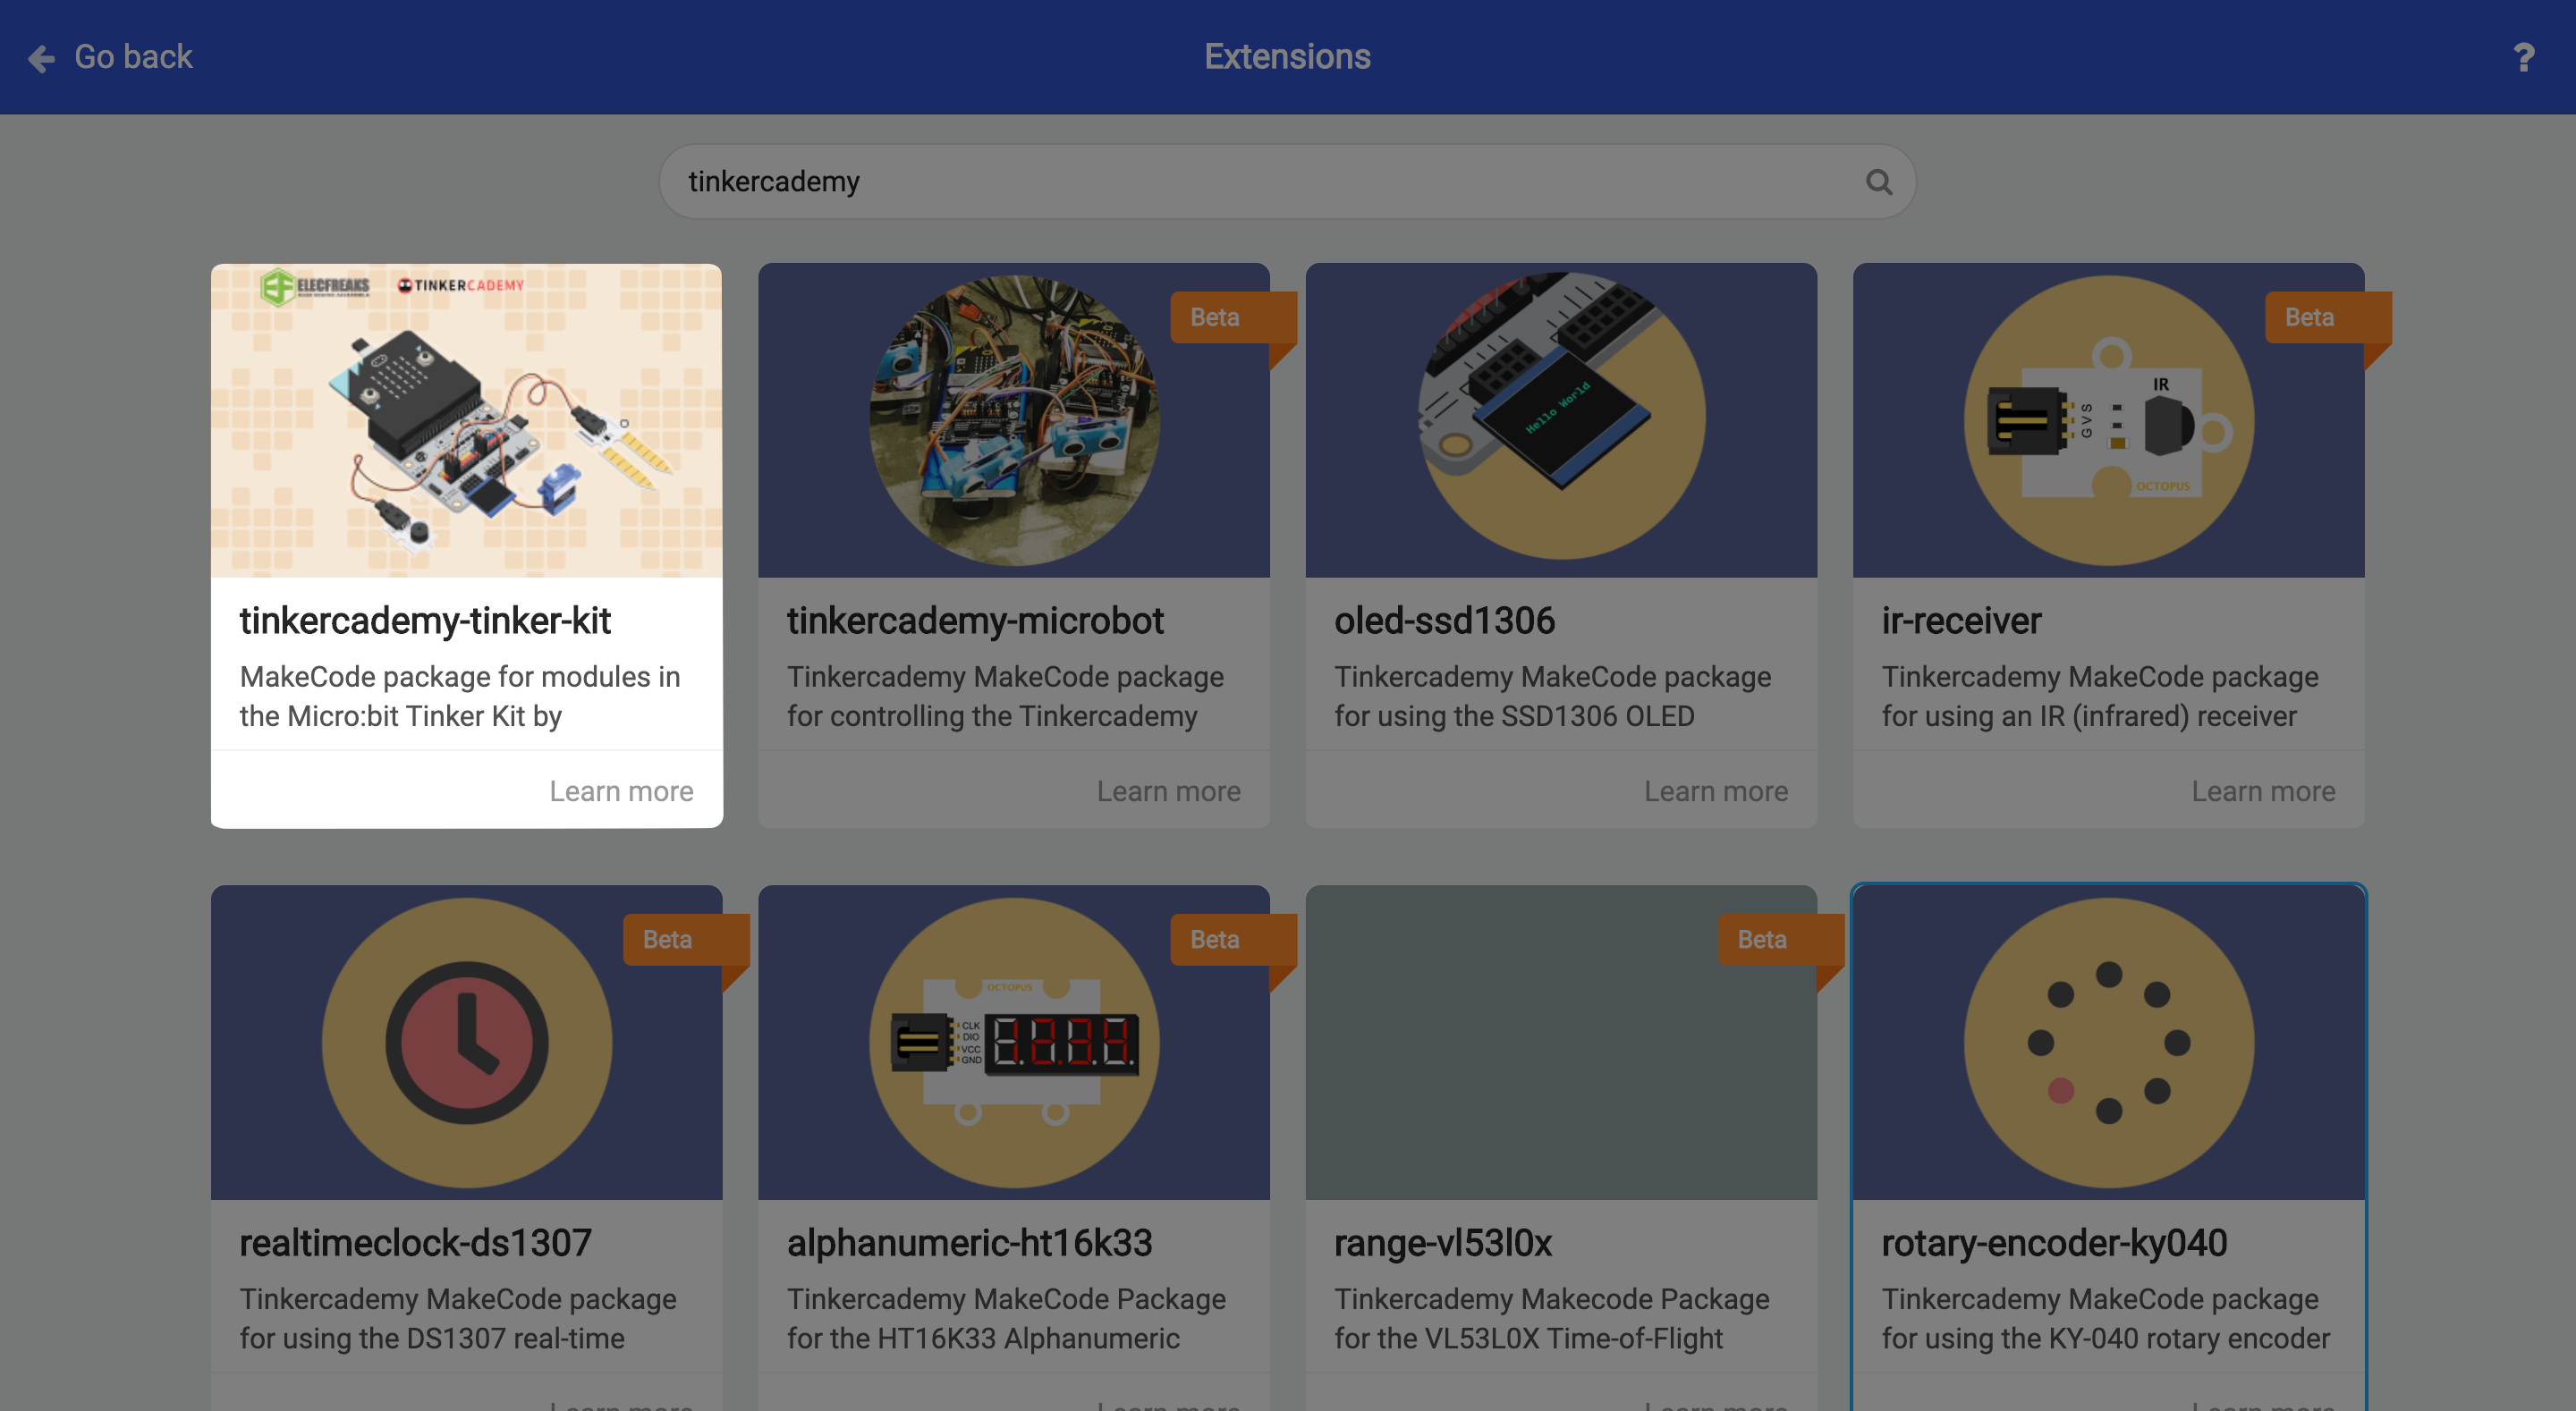
(a) To control the kit components, we need to import the Tinkercademy package. On MakeCode, click on the Advanced drawer, and click on Extensions.
(b) In the search box, key in "Tinker Kit". Select "tinkercademy-tinker-kit".
(c) This will import two libraries: Tinkercademy (for general-purpose sensors), and OLED (for the OLED module). We will not be using the OLED module in this tutorial, but you can!
STEP 3
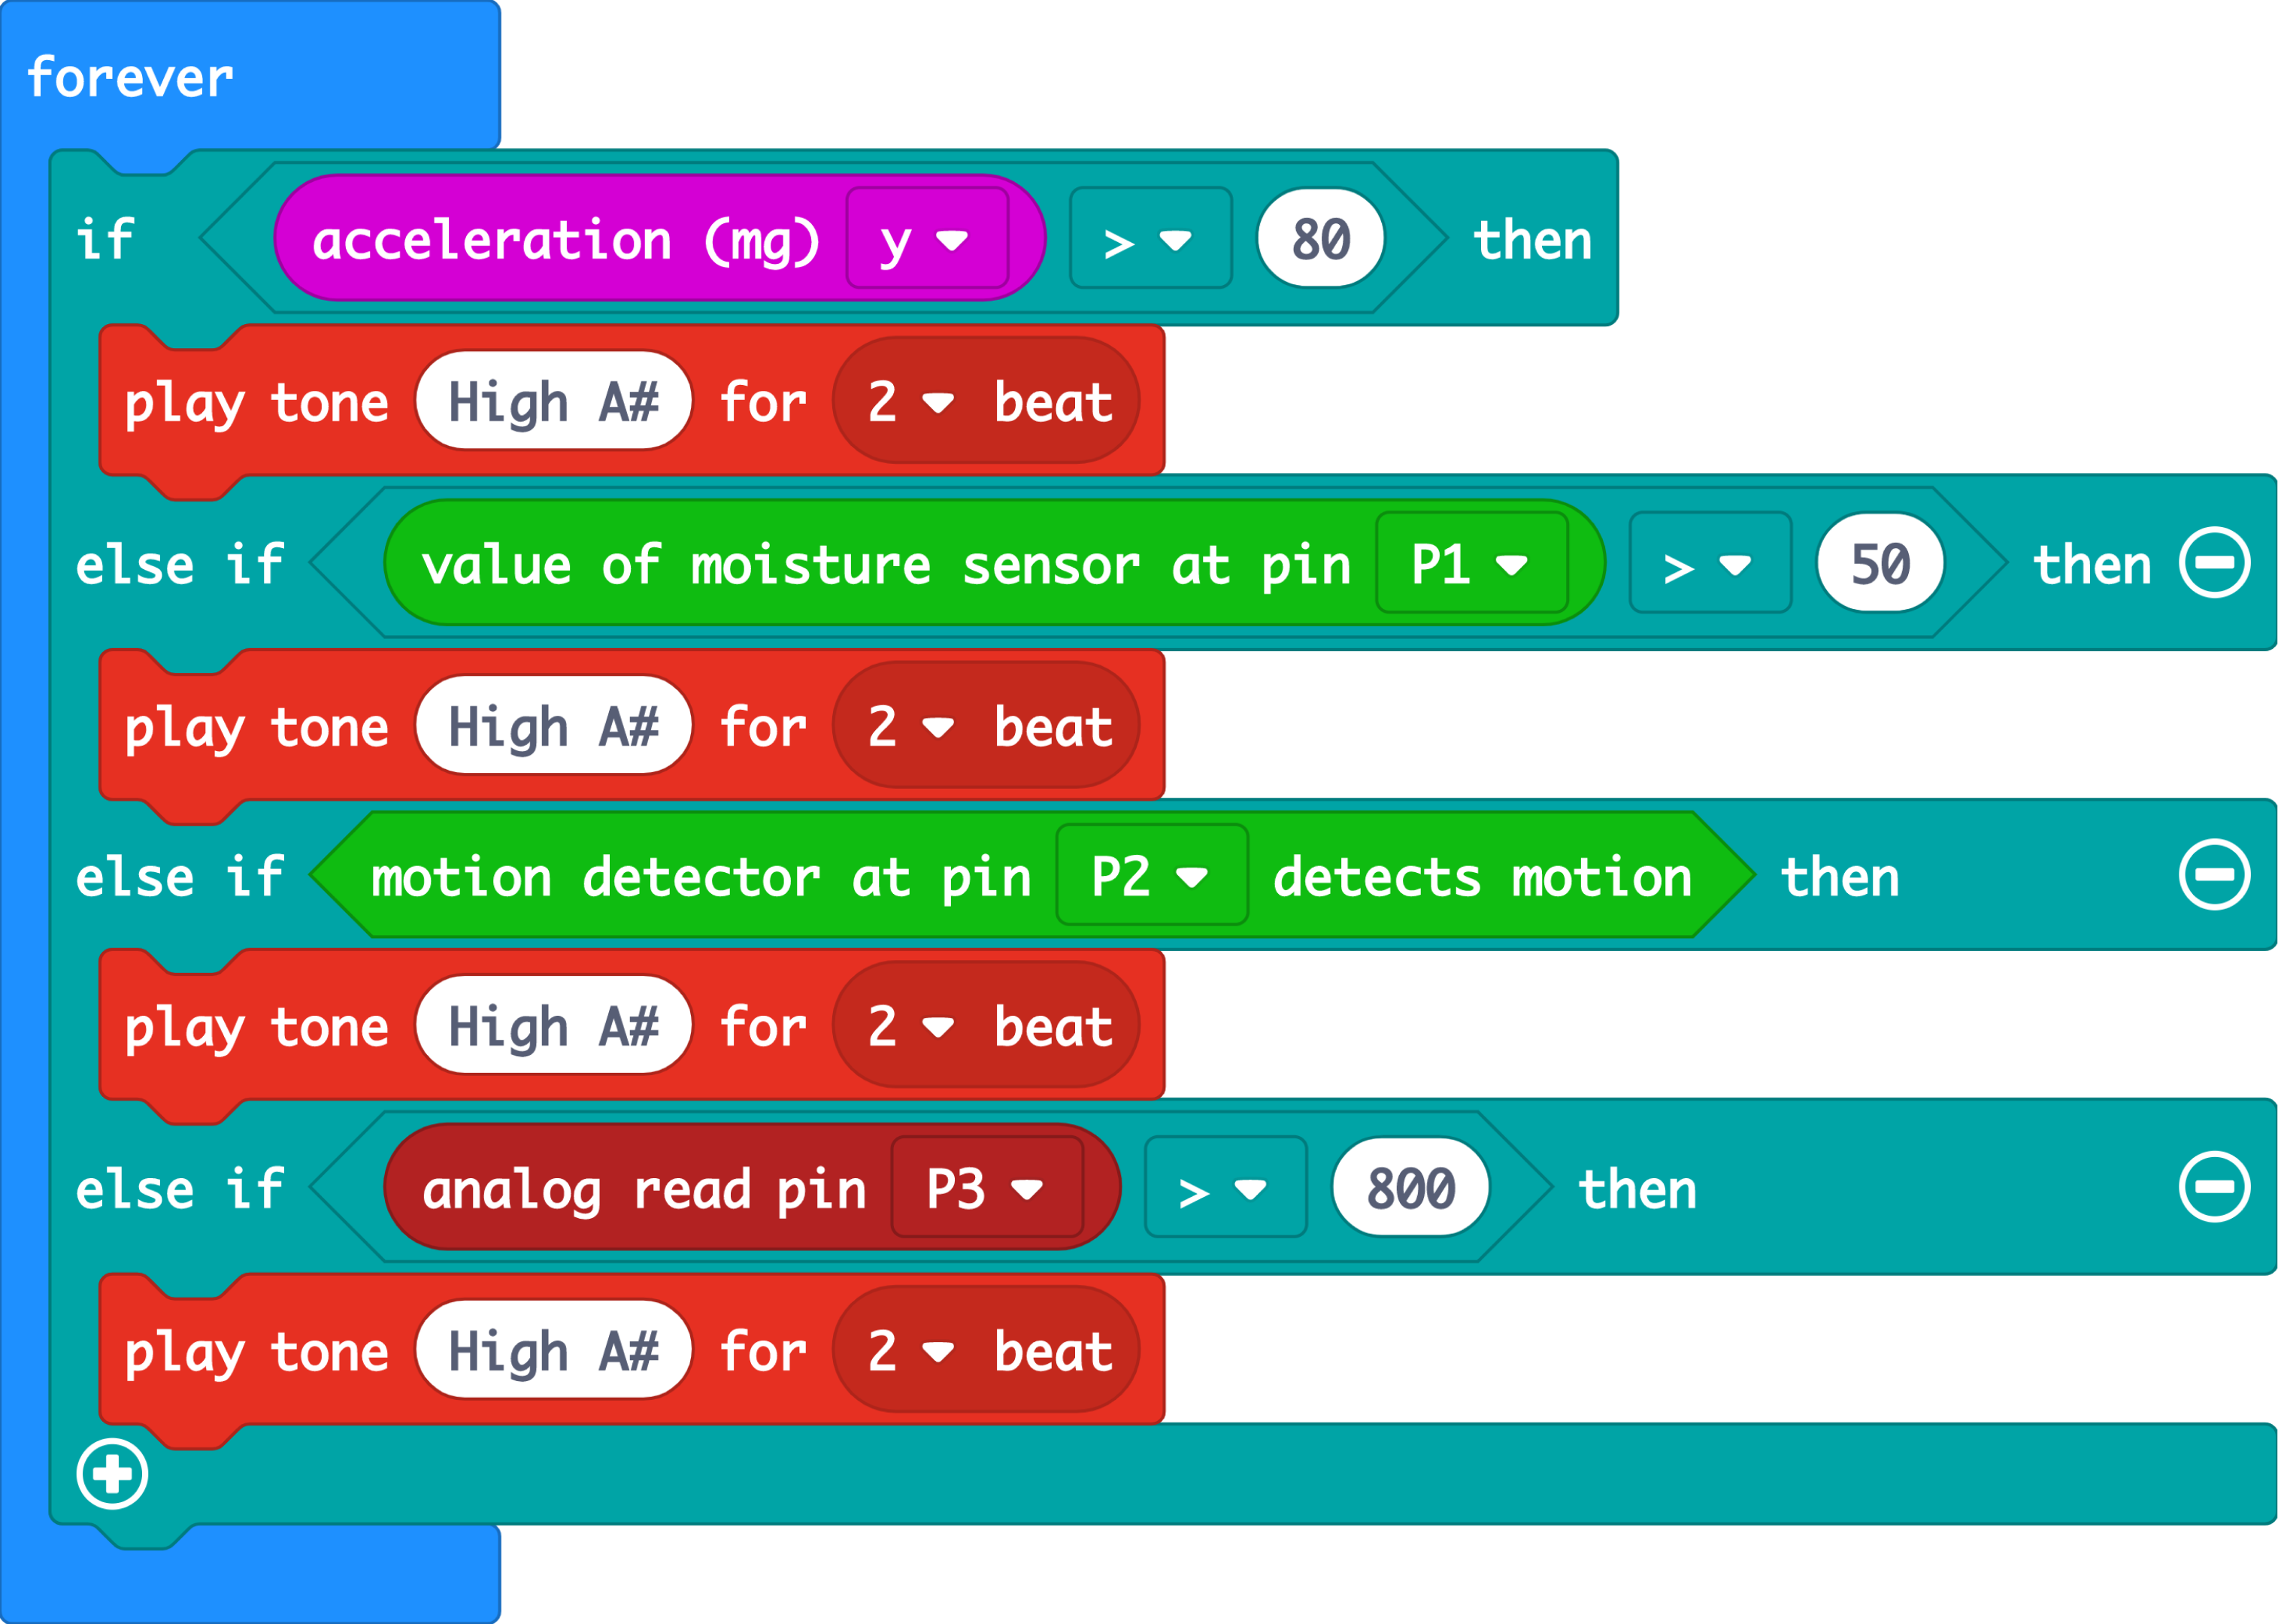
Let's code your reclusive robot on MakeCode!
Here, we want the robot to only react to four events. Hence, we have four conditional statements (‘if’, ‘else if’)
(a) The first event is when the robot is picked up.
(b) The second event is when someone touches the soil moisture sensors.
(c) The third event is when the robot detects movement in front of it, and
(d) The last event is when someone toggles the potentiometer.
STEP 4
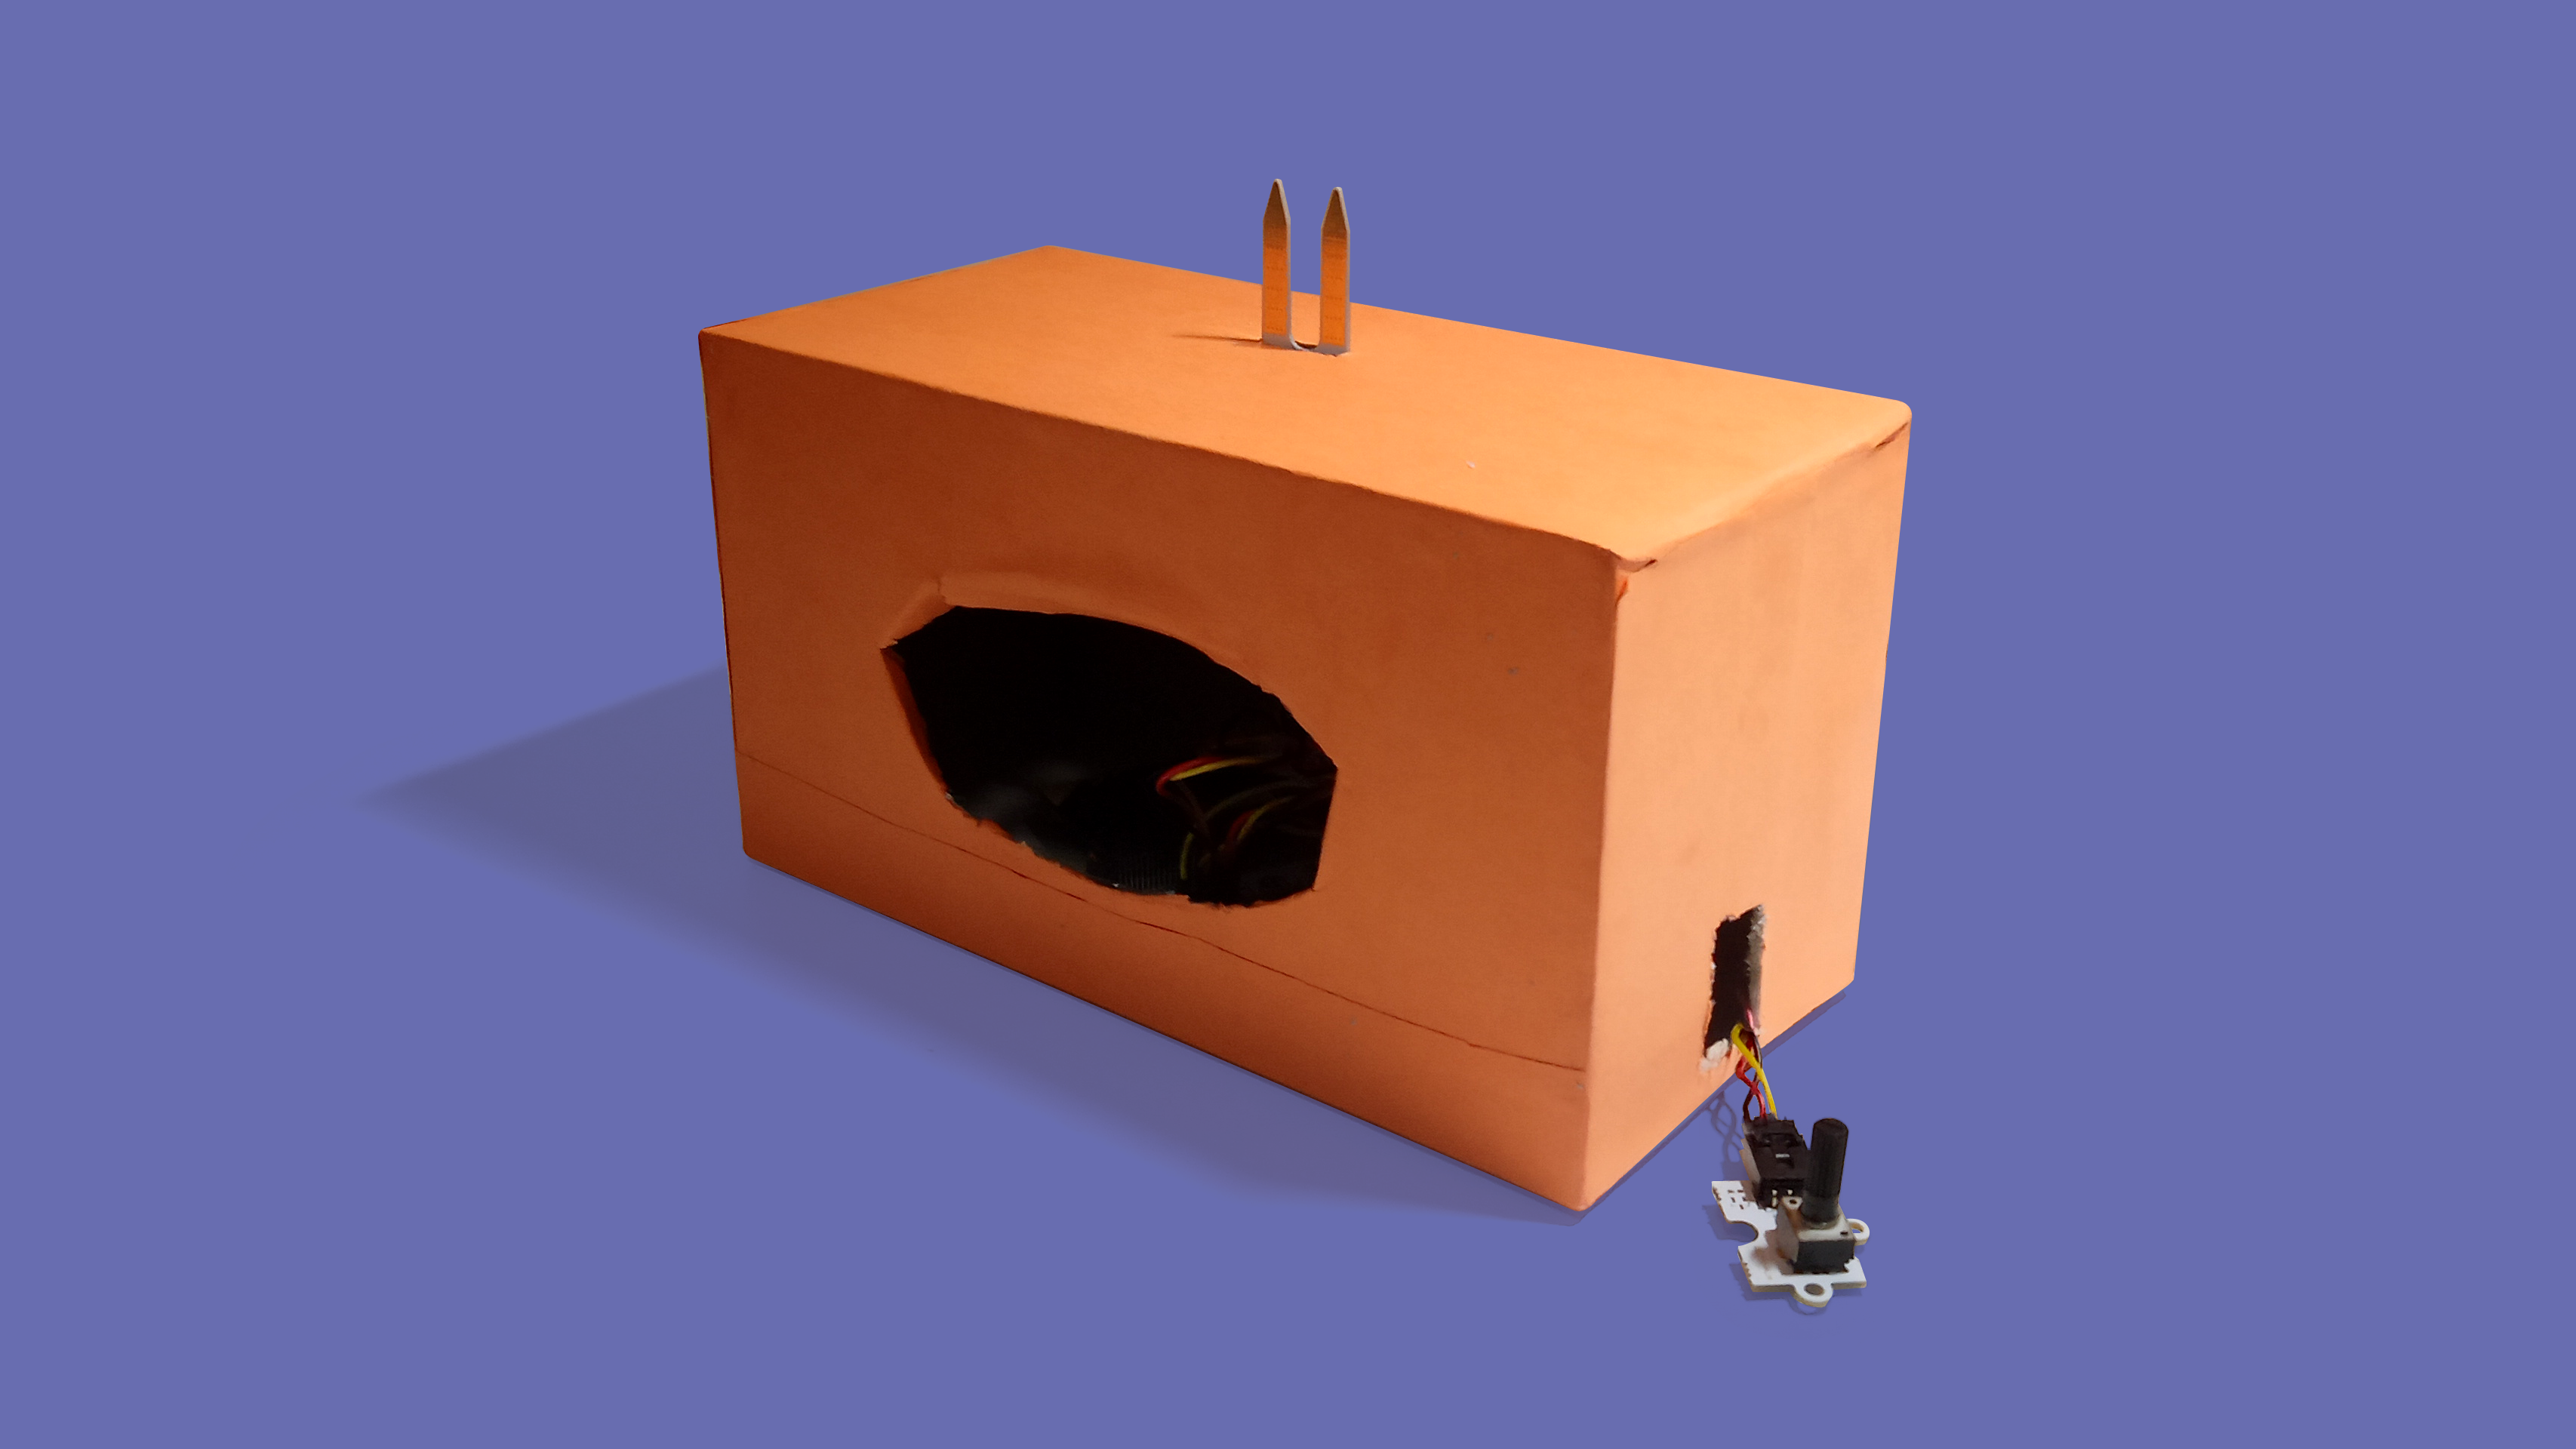
Contruct recluse bot's body
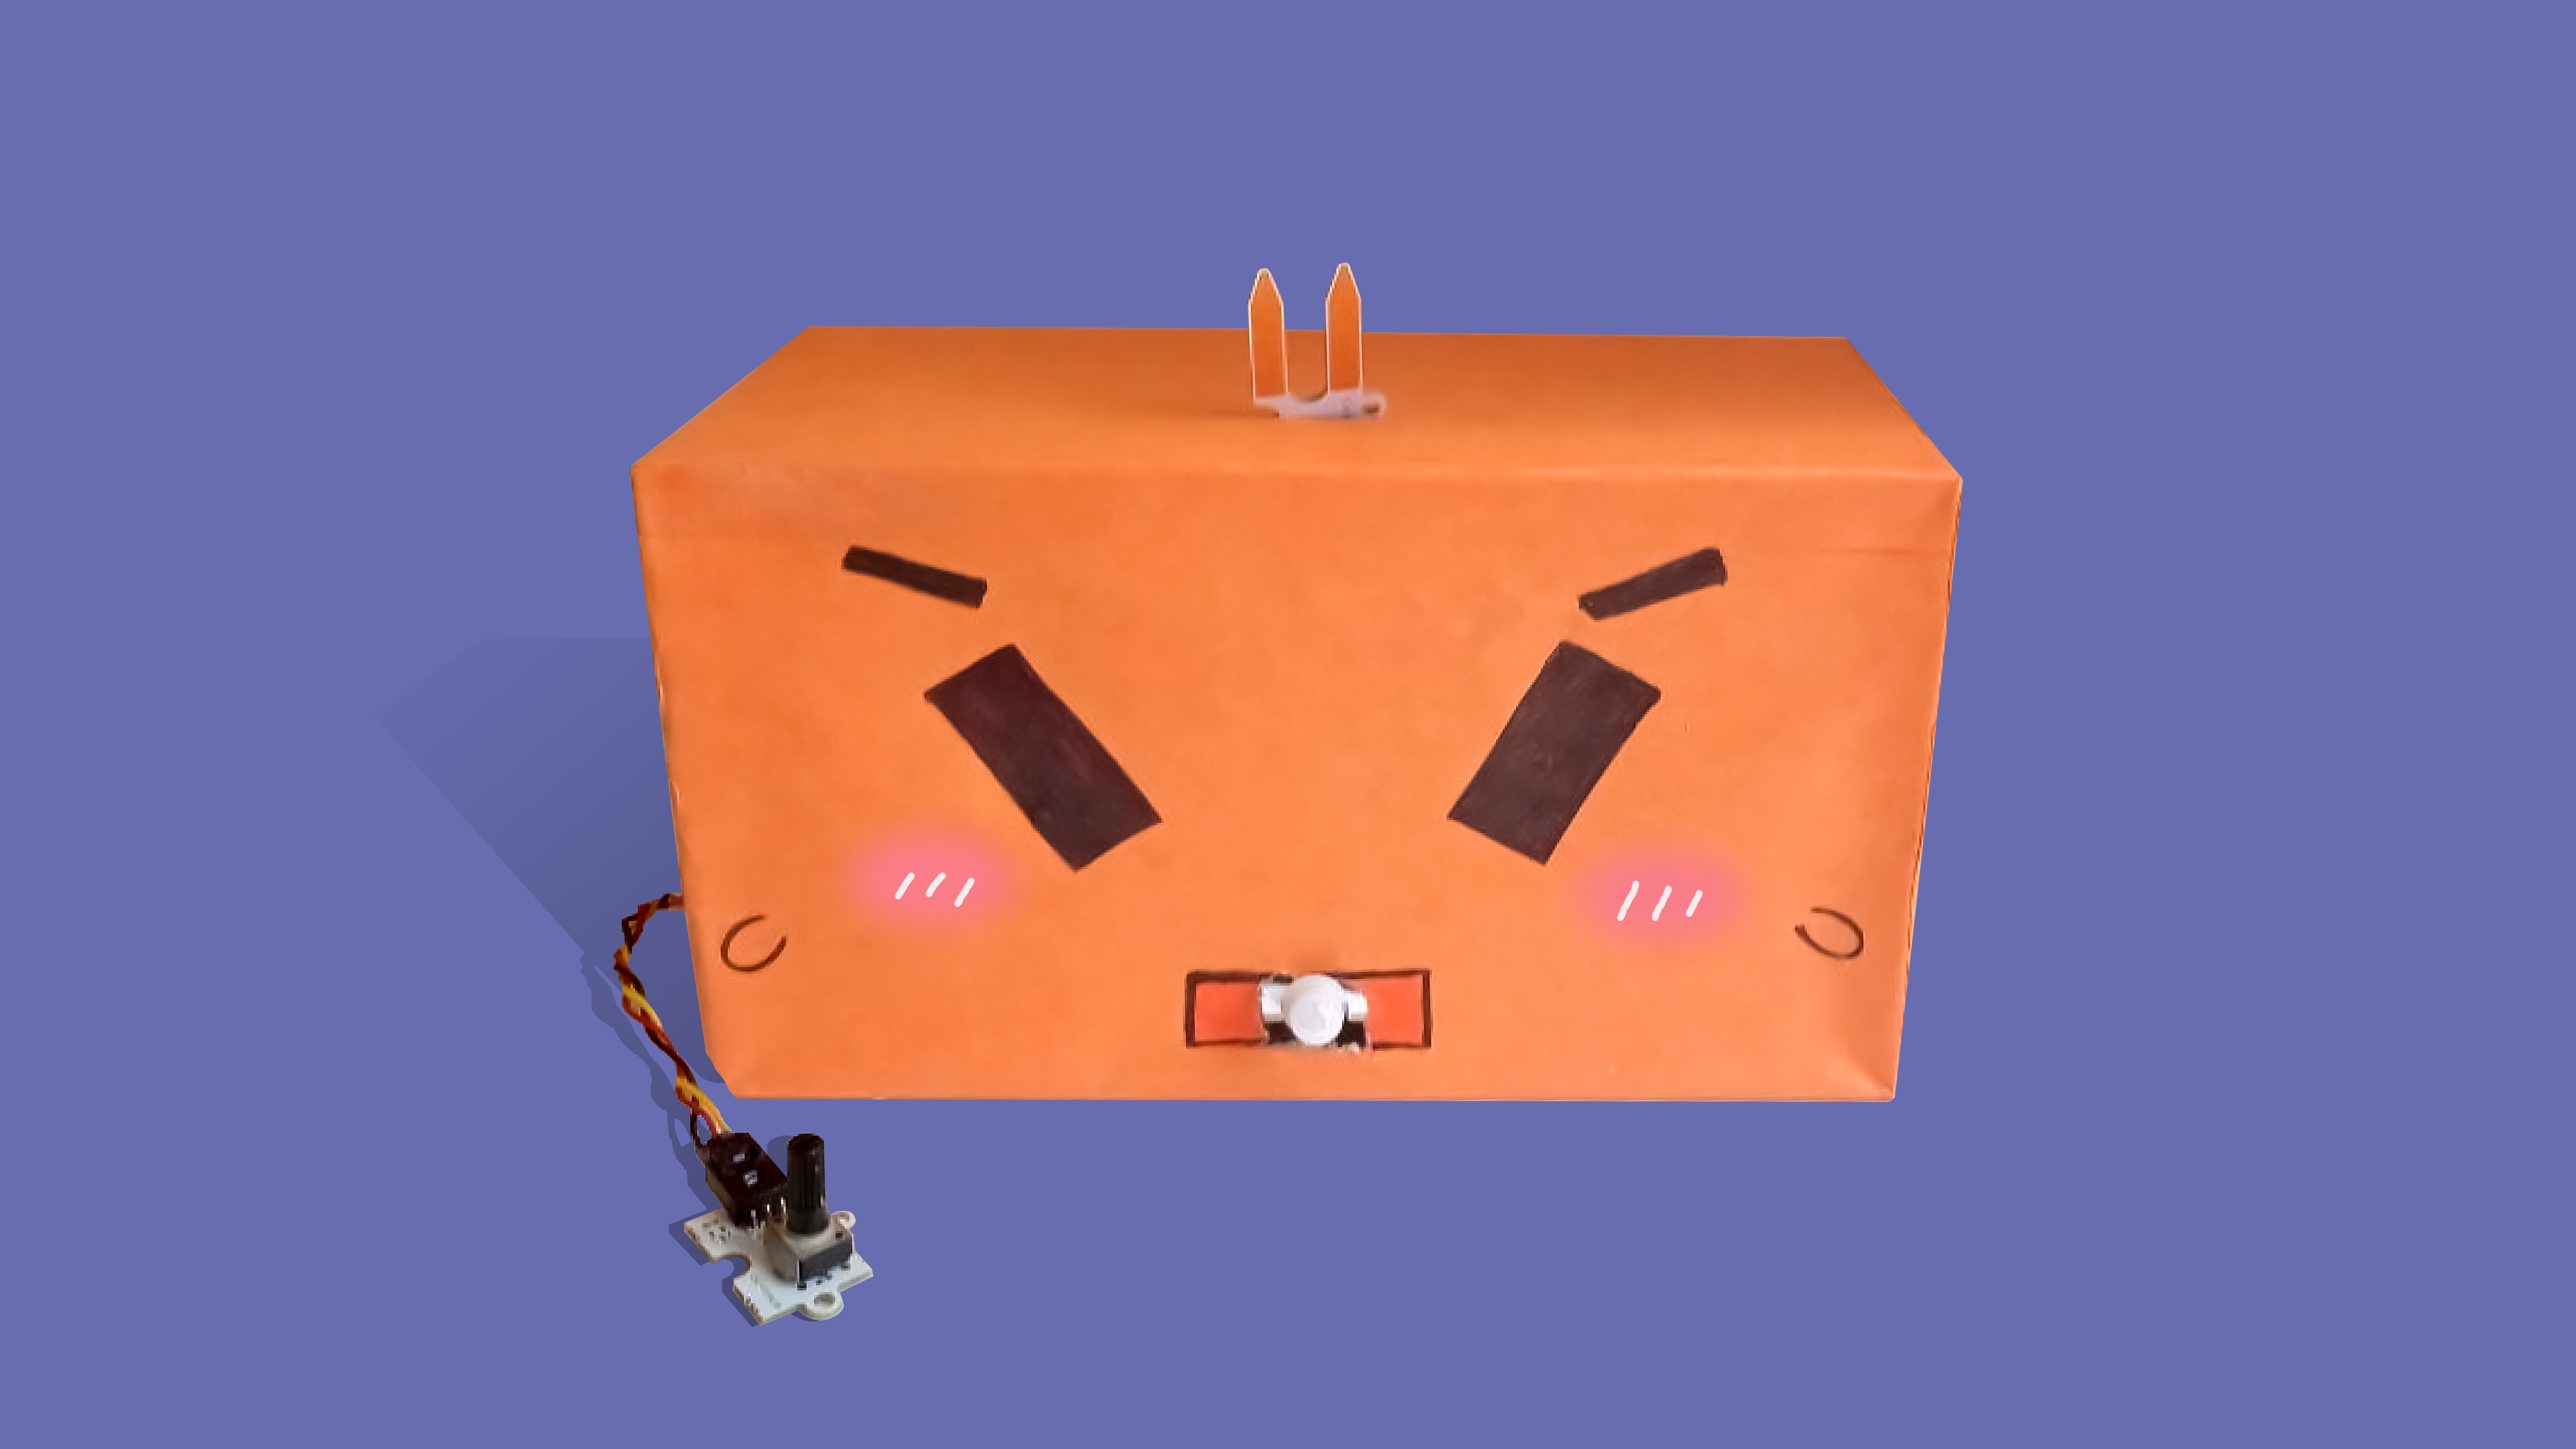
(a) We used a tissue box for the robot, but any box large enough to contain the micro:bit with the Tinkercademy breakout board and all the connected components will do.
(b) Using the glue stick, tape coloured paper around all sides of the box. You can also use scotch tape to secure them down.
(c) Cut an opening on the back of the box, large enough to insert the micro:bit and all the components. We cut a hole in the colour paper on the side of the tissue box that already had an opening for dispensing tissues originally.
Materials
- 1 x Tissue box
- Colored paper
- Glue / Scotch tape
- Scissors
STEP 5
(a) Connect the micro:bit to the battery holder with 2xAAA batteries, and slide the slider switch on the battery holder to ‘ON’.
(b) Place the micro:bit with all the components into the box, through the opening. Make sure to place the micro:bit and potentiometer flat.
(c) Use a penknife to cut slots on the sides of the box to stick the 3 connected components out. You can also use blu-tack / scotch tape to secure the components in place. These are the dimensions we used:
- Soil / moisture sensor slot (top): 1.8cm (width) x 0.4cm (height)
- Potentiometer slot (left): 1.7cm (width) x 2.9cm (height)
- Motion sensor slot (front): 1.4cm (width) x 1cm (height)
STEP 6

Congratulations, you’ve finished building all components needed to make a reclusive robot. Now it will scream whenever someone surprises it!
Feel free to dress it up. But take care, or it’ll start squealing in surprise!
Code and References
Made this activity? Good Job! Now spread the word. Share a photo of your creation on social media with #letsgethacking #RecluseBot