Scratch Pinball
Create a 2D pinball board on Scratch with semi-realistic physics and a micro:bit controller
YOU WILL NEED
STEP 1

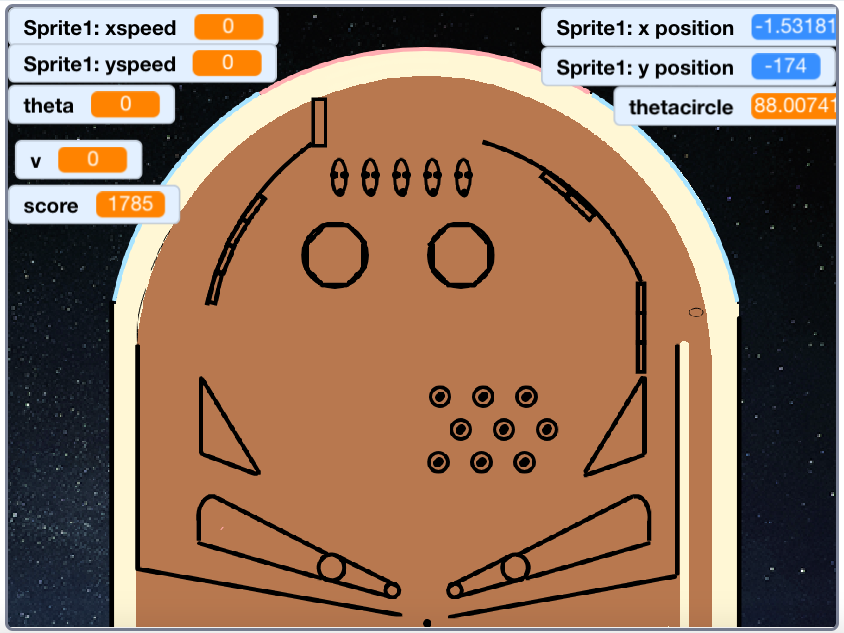
Hover over the picture/scenery icon in the bottom right hand corner and click the paintbrush that appears for Paint. Draw the outline of your pinball board and colour it in.
Materials
- Scratch Online/Desktop
STEP 2
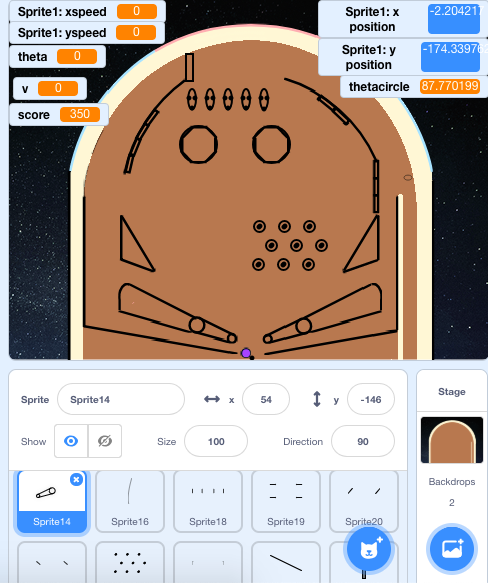
Hover over the cat icon in the bottom right hand corner and click the paintbrush that appears for Paint. Draw each of the different components of your pinball board as different sprites, and position them accordingly on the display screen. Some examples of components include flippers, bumpers, barriers, etc. These will all be coded differently, so do make sure they’re separate sprites. Don’t forget the ball!
You may choose to name your sprites for cleaner organisation, or plan the layout of your pinball board beforehand on a piece of paper before you start.
Materials
- Scratch Online/Desktop
STEP 3
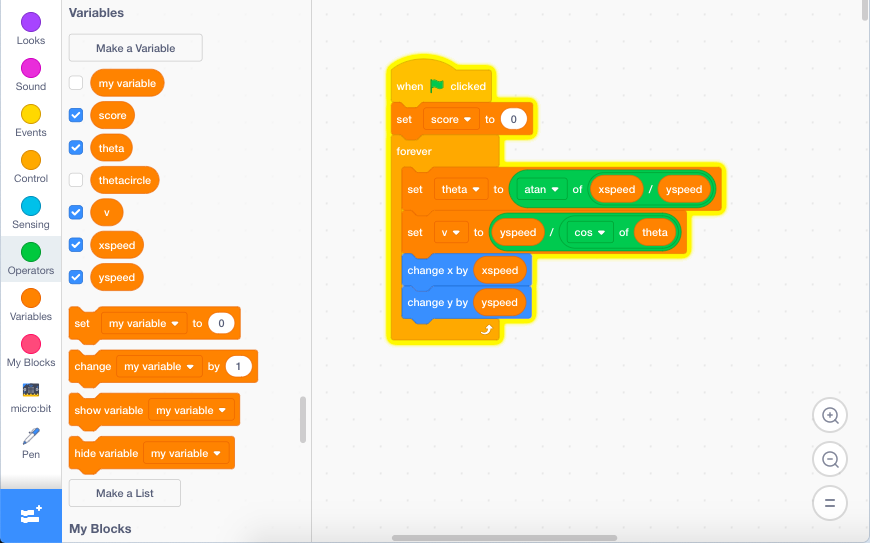
Select the ball sprite and click on the Codes tab in the top left hand corner. Select Variables in the left hand side and create the following variables:
- xspeed
- yspeed
- v (for linear speed)
- theta (for angle of the ball’s movement)
- score
Define each variable using code blocks, using your understanding of kinematics.
Materials
- Scratch Online/Desktop
STEP 4
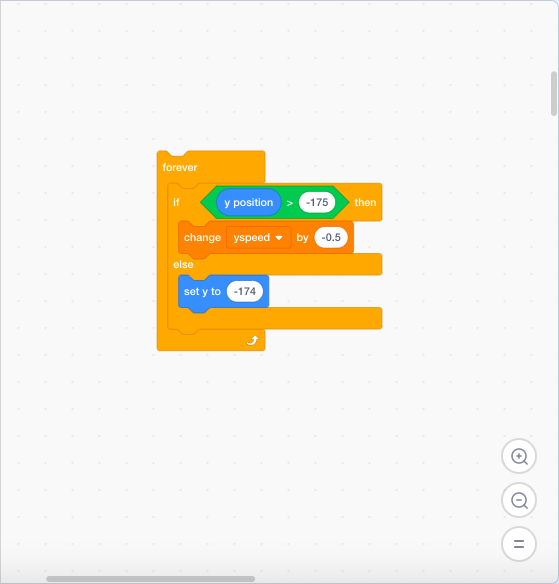
Let’s start off by simulating gravity and defining the lower boundaries of the pinball board.
Here, we are simulating free fall by setting the rate of change of yspeed to be -0.5. You may alter this value as you see fit to customise the speed of your ball, but do make sure it’s negative so that gravity acts downwards instead of upwards.
Materials
- Scratch Online/Desktop
STEP 5
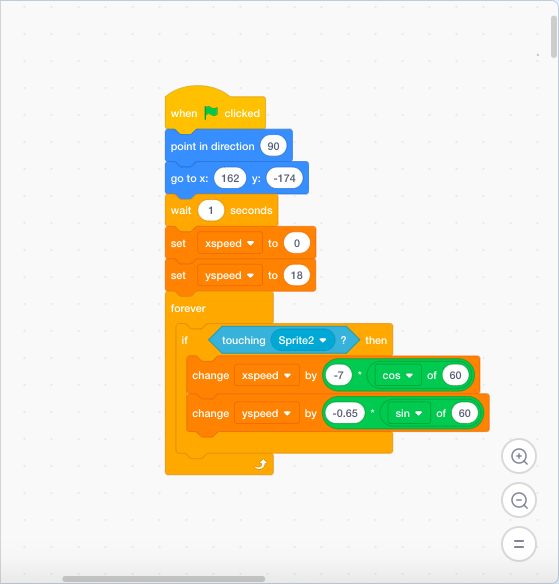
Now it’s time to start coding the launch of the ball. Do customise these values to fit the position and speed of launch of the ball.
To get the curvature of the ball to follow the curve of the pinball board, create a sprite (Sprite2) where you want the path of the ball to start following the curve. Again, do customise the value of change of xspeed and yspeed to fit your own pinball boards.
Materials
- Scratch Online/Desktop
STEP 6
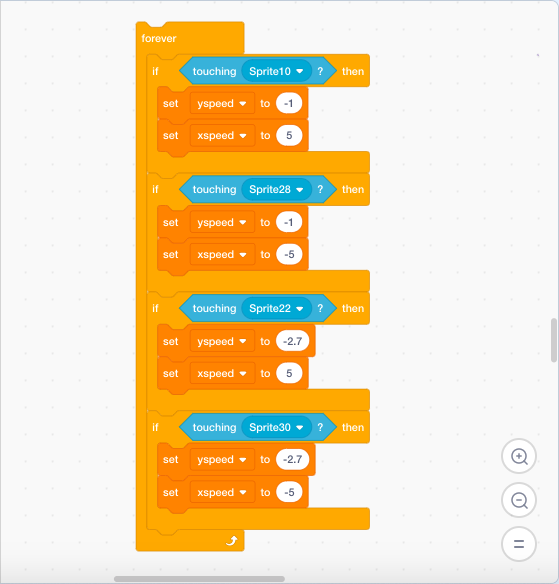
We will be coding for the ball sprite’s movement when the ball touches every component on the pinball board.
Horizontal and vertical surfaces
Change the sign of xspeed when the ball bounces off a vertical surface, and change the sign of yspeed when the ball bounces off a horizontal surface.
Materials
- Scratch Online/Desktop
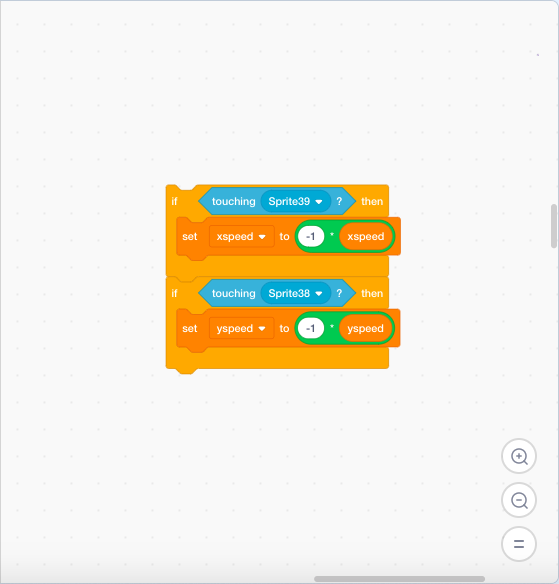
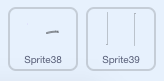
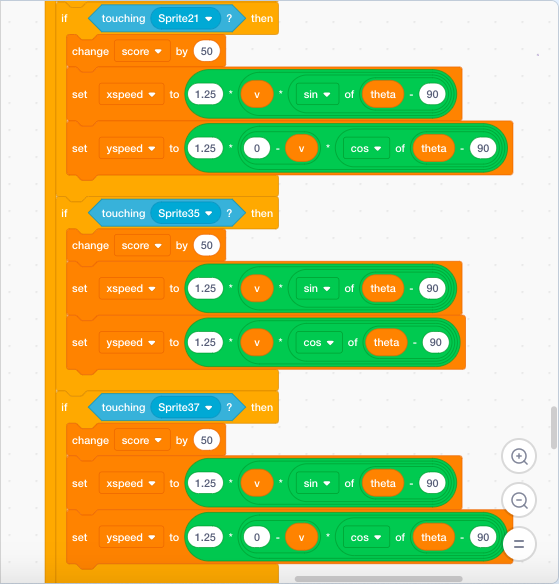
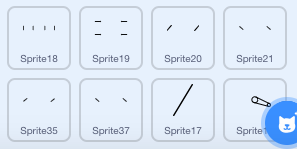
STEP 7
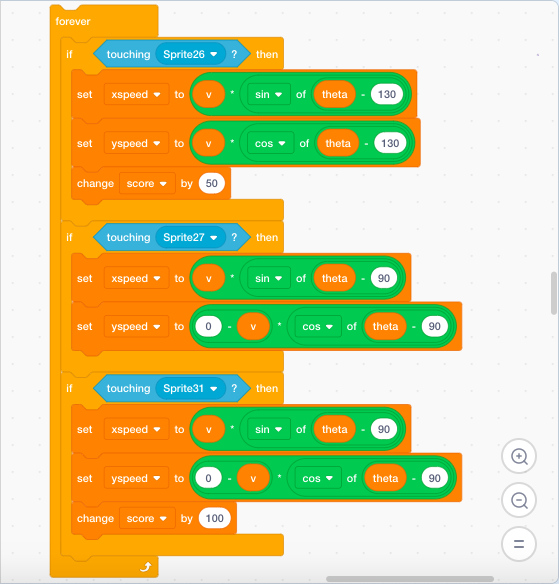
Diagonal surfaces
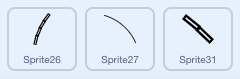
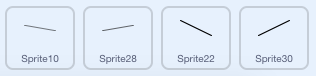
Similarly, use trigonometry to determine the approximate angle of the slopes and the angle at which the ball should bounce off and travel in. For diagonally-placed point targets (e.g. Sprite26 and Sprite31), increase score as desired when the ball sprite touches the point target.
Use similar code for horizontal, vertical and diagonal surfaces at the boundaries of the pinball board.
Materials
- Scratch Online/Desktop
STEP 8
Slopes
Sometimes you want the ball to roll down the surface upon contact instead of bouncing off. I know, what’s physics again?
Make sure the xspeed and yspeed values are set and customised according to the gradient of your own slope.
Materials
- Scratch Online/Desktop
STEP 9
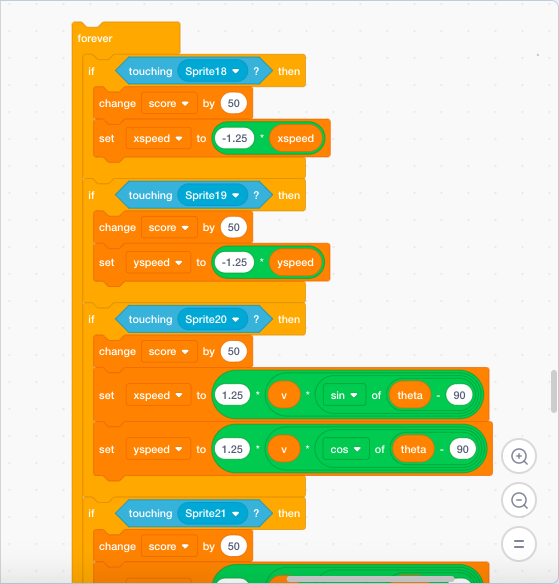
Circular bumpers
It would be more than a hassle to determine the gradient of tangent at the point of contact between the ball and bumper sprite, so instead, we will be using an octagon to simplify this.
Basically, put horizontal, vertical and diagonal surfaces together to form an octagon, and add point increments and a slight speed boost (1.25x in my case) to simulate the bounce.
Materials
- Scratch Online/Desktop
STEP 10
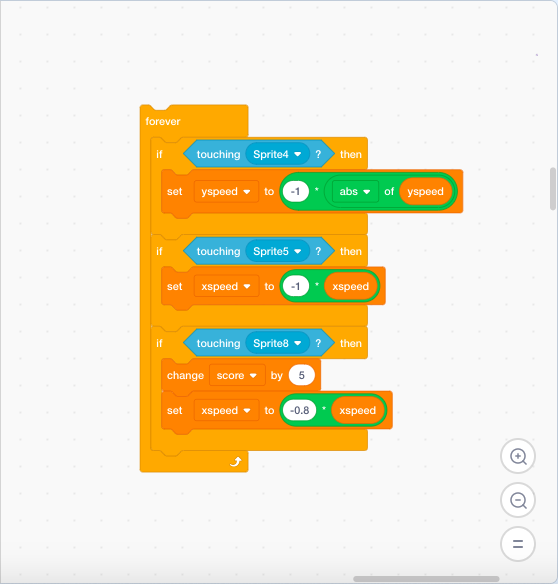
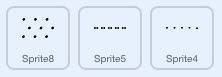
Smaller bumpers
For smaller bumpers, using dots as contact points is a more viable option.
Materials
- Scratch Online/Desktop
STEP 11
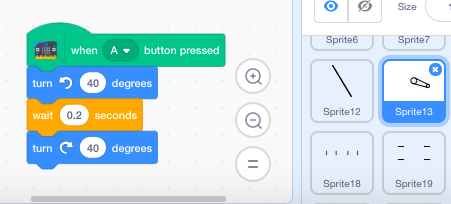
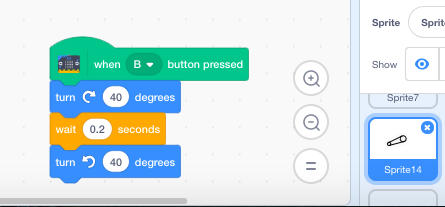
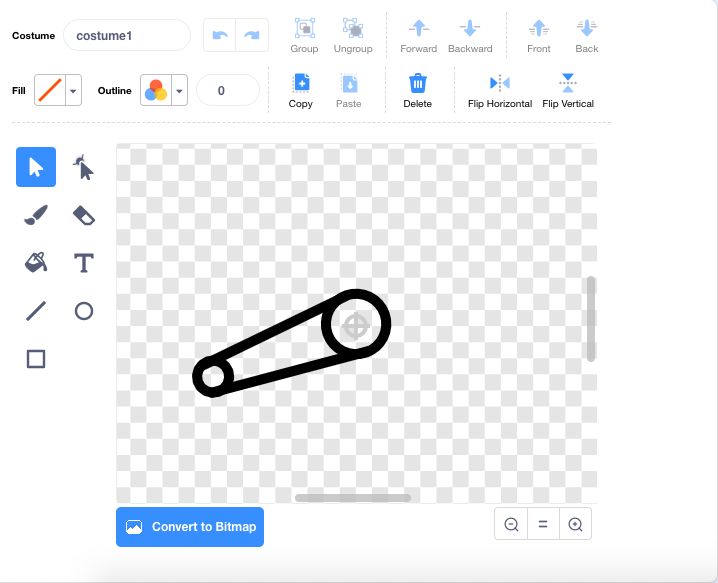
It’s time to whip out your micro:bit for the flippers. Follow the instructions here on how to connect your micro:bit and add the micro:bit extension to Scratch.
Make sure your flipper sprite is drawn such that the point of rotation is aligned with the small grey target icon in Paint. Select each of the sprites and code the movement of the two flippers when the micro:bit buttons A and B are pressed.
Materials
- Scratch Online/Desktop
- micro:bit and corresponding cable
STEP 12
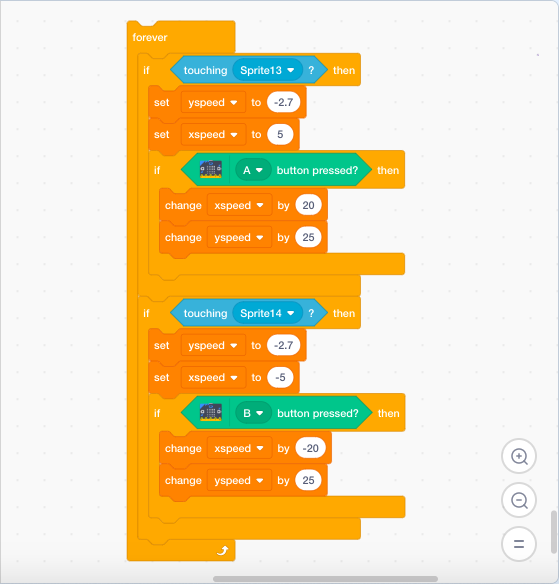
Return to the ball sprite and code the movement of the ball when touching the flipper.
If the corresponding micro:bit button is pressed in time when the ball is touching the flipper, the ball will be flipped back into the middle of the board. If not, the ball will simply roll down the flipper.
Materials
- Scratch Online/Desktop
- micro:bit and corresponding cable
STEP 13
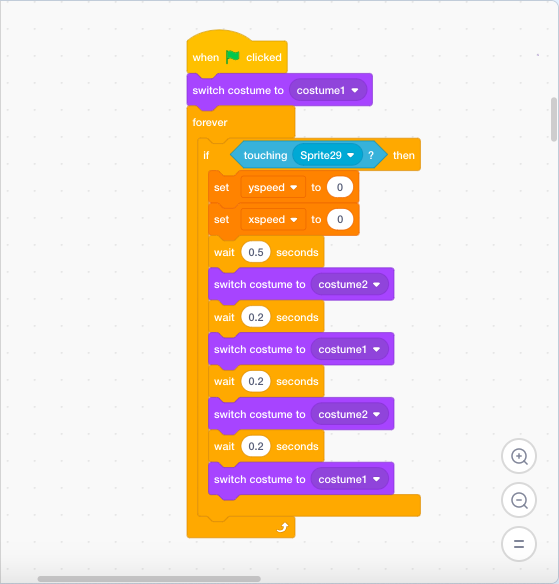
Create a sprite between the flippers at the bottom of the board. When the ball touches this sprite, this means that the ball has fallen through the flippers and the player has lost the game.
Click on Costumes under the ball sprite and create a blank costume (costume2). This code causes the ball to flash when the ball touches the sprite, indicating that the game is over.
Materials
- Scratch Online/Desktop
STEP 14
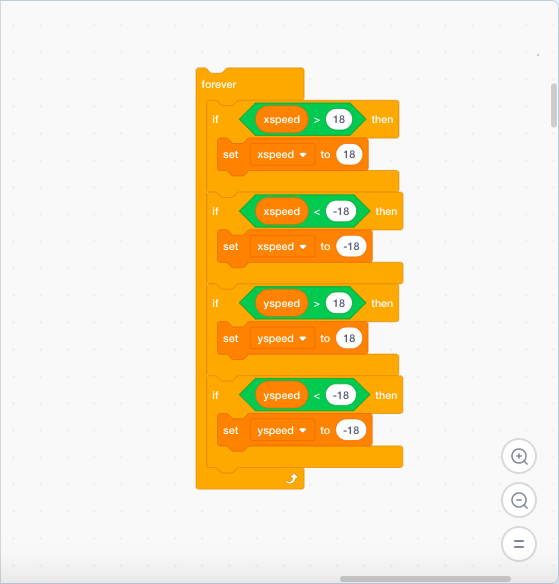
If you’ve been testing your game throughout, you may have noticed that the ball tends to fly out of the boundaries you’ve created even though the code looks perfectly fine. This is because Scratch may not register that the ball sprite is touching another sprite as the ball is moving too fast.
Thus, it would be useful to set certain speed limits on the ball. Though this won’t solve this problem entirely, it should alleviate this problem to a certain extent. However, you probably will still encounter this problem throughout your gameplay due to Scratch’s innate limitations.
Materials
- Scratch Online/Desktop
STEP 15
Hooray, your code is complete! Clean up your code by dragging the different sections into one single block.
Have fun with your very own arcade game!
Materials
- Scratch Online/Desktop
- micro:bit and corresponding cable
Code and References
Made this activity? Good Job! Now spread the word. Share a photo of your creation on social media with #letsgethacking #ScratchPinball