soil moisture sensor
Use a soil moisture sensor, that will produce a warning sound when soil moisture gets to low, as well as a flashing LED, to inform the user to water the plant, also to use an OLED screen to display the value of soil moisture at appropriate intervals
YOU WILL NEED
- 1 x Micro:bit
- 1 x Breakout Board
- 1 x Buzzer
- 1 x Soil moisture sensor
- 1 x Led bulb
- 1 x OLED screen
- 2 x Jumper wires (female-female)
- 1 x Potentiometer
STEP 1
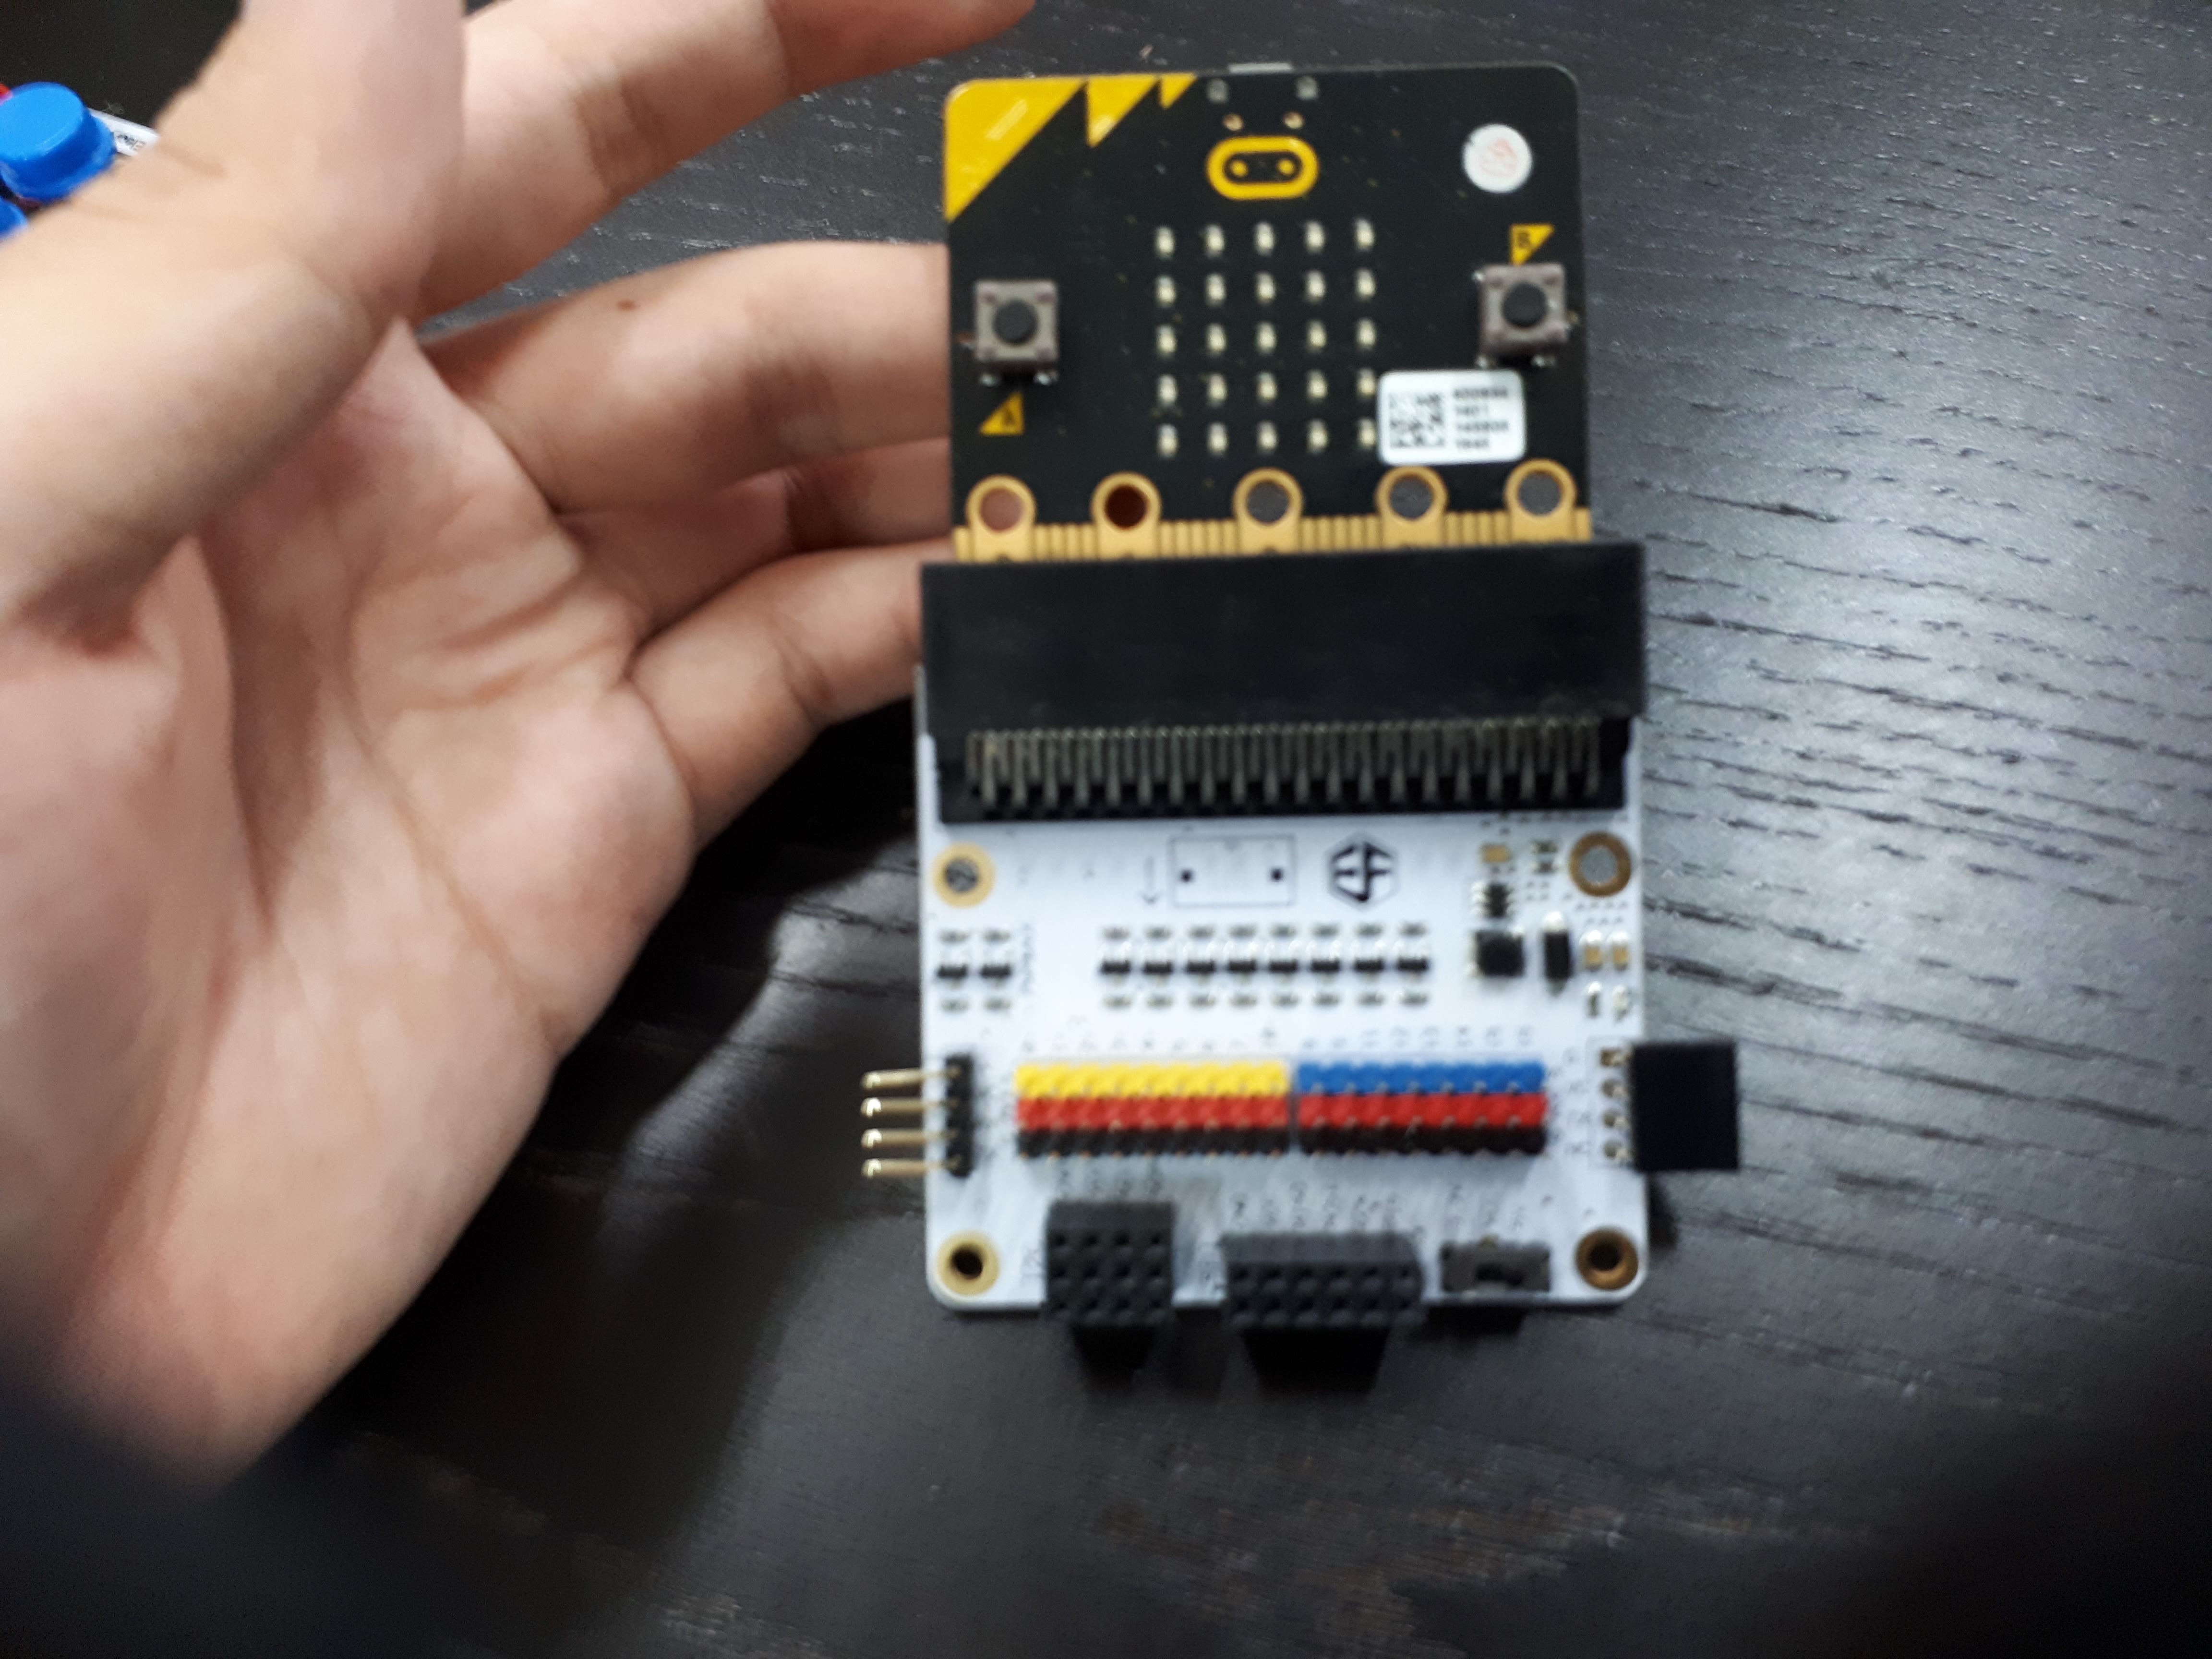
Insert the micro:bit into the breakout board. There is no difference between using the black or white colour breakout board
Materials
1 x Breakout board
1 x Micro:bit
STEP 2
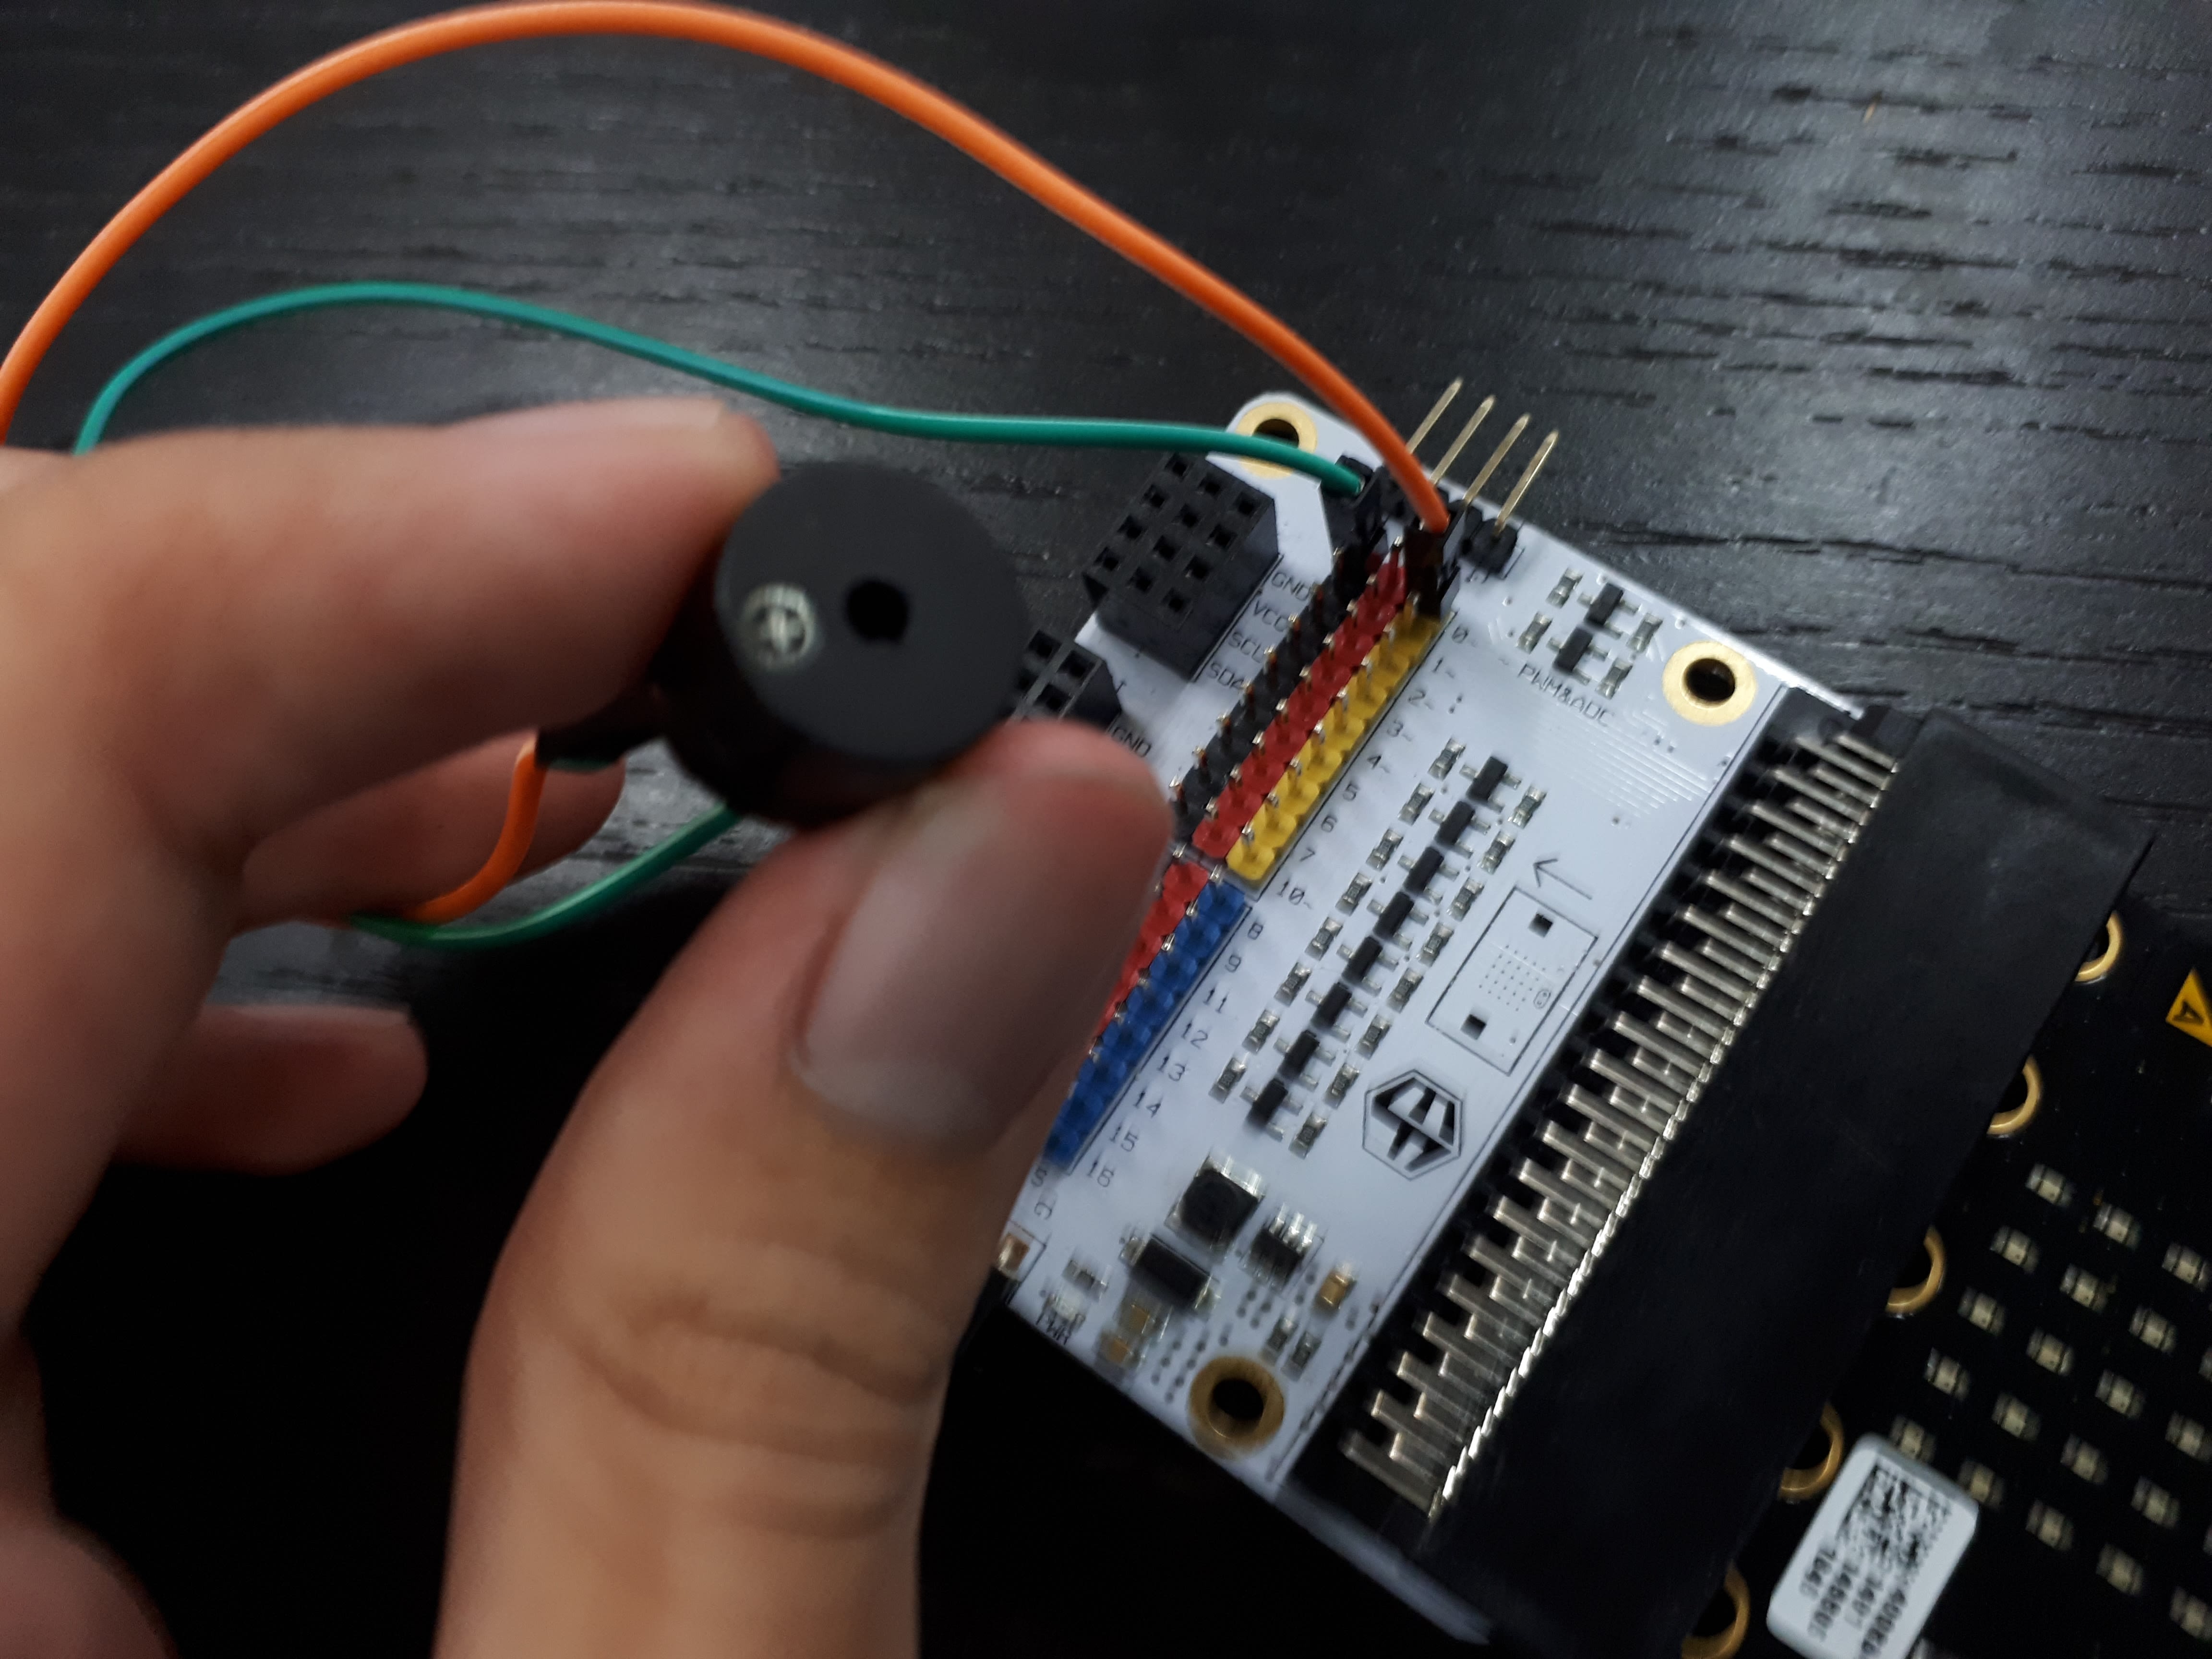
Plug in the buzzer to Pin 0 on the breakout board. (must be pin 0)
The colour of the jumper wires never matters. A jumper wire is just a connector
But the colour of the pin on the breakout board does.
The positive leg of the buzzer (in this example, the orange jumper wire) goes to the yellow pin.
The negative leg (in this example, the green wire) goes to the black pin
Materials
2 x female to female jumper wires
1 x Buzzer
STEP 3
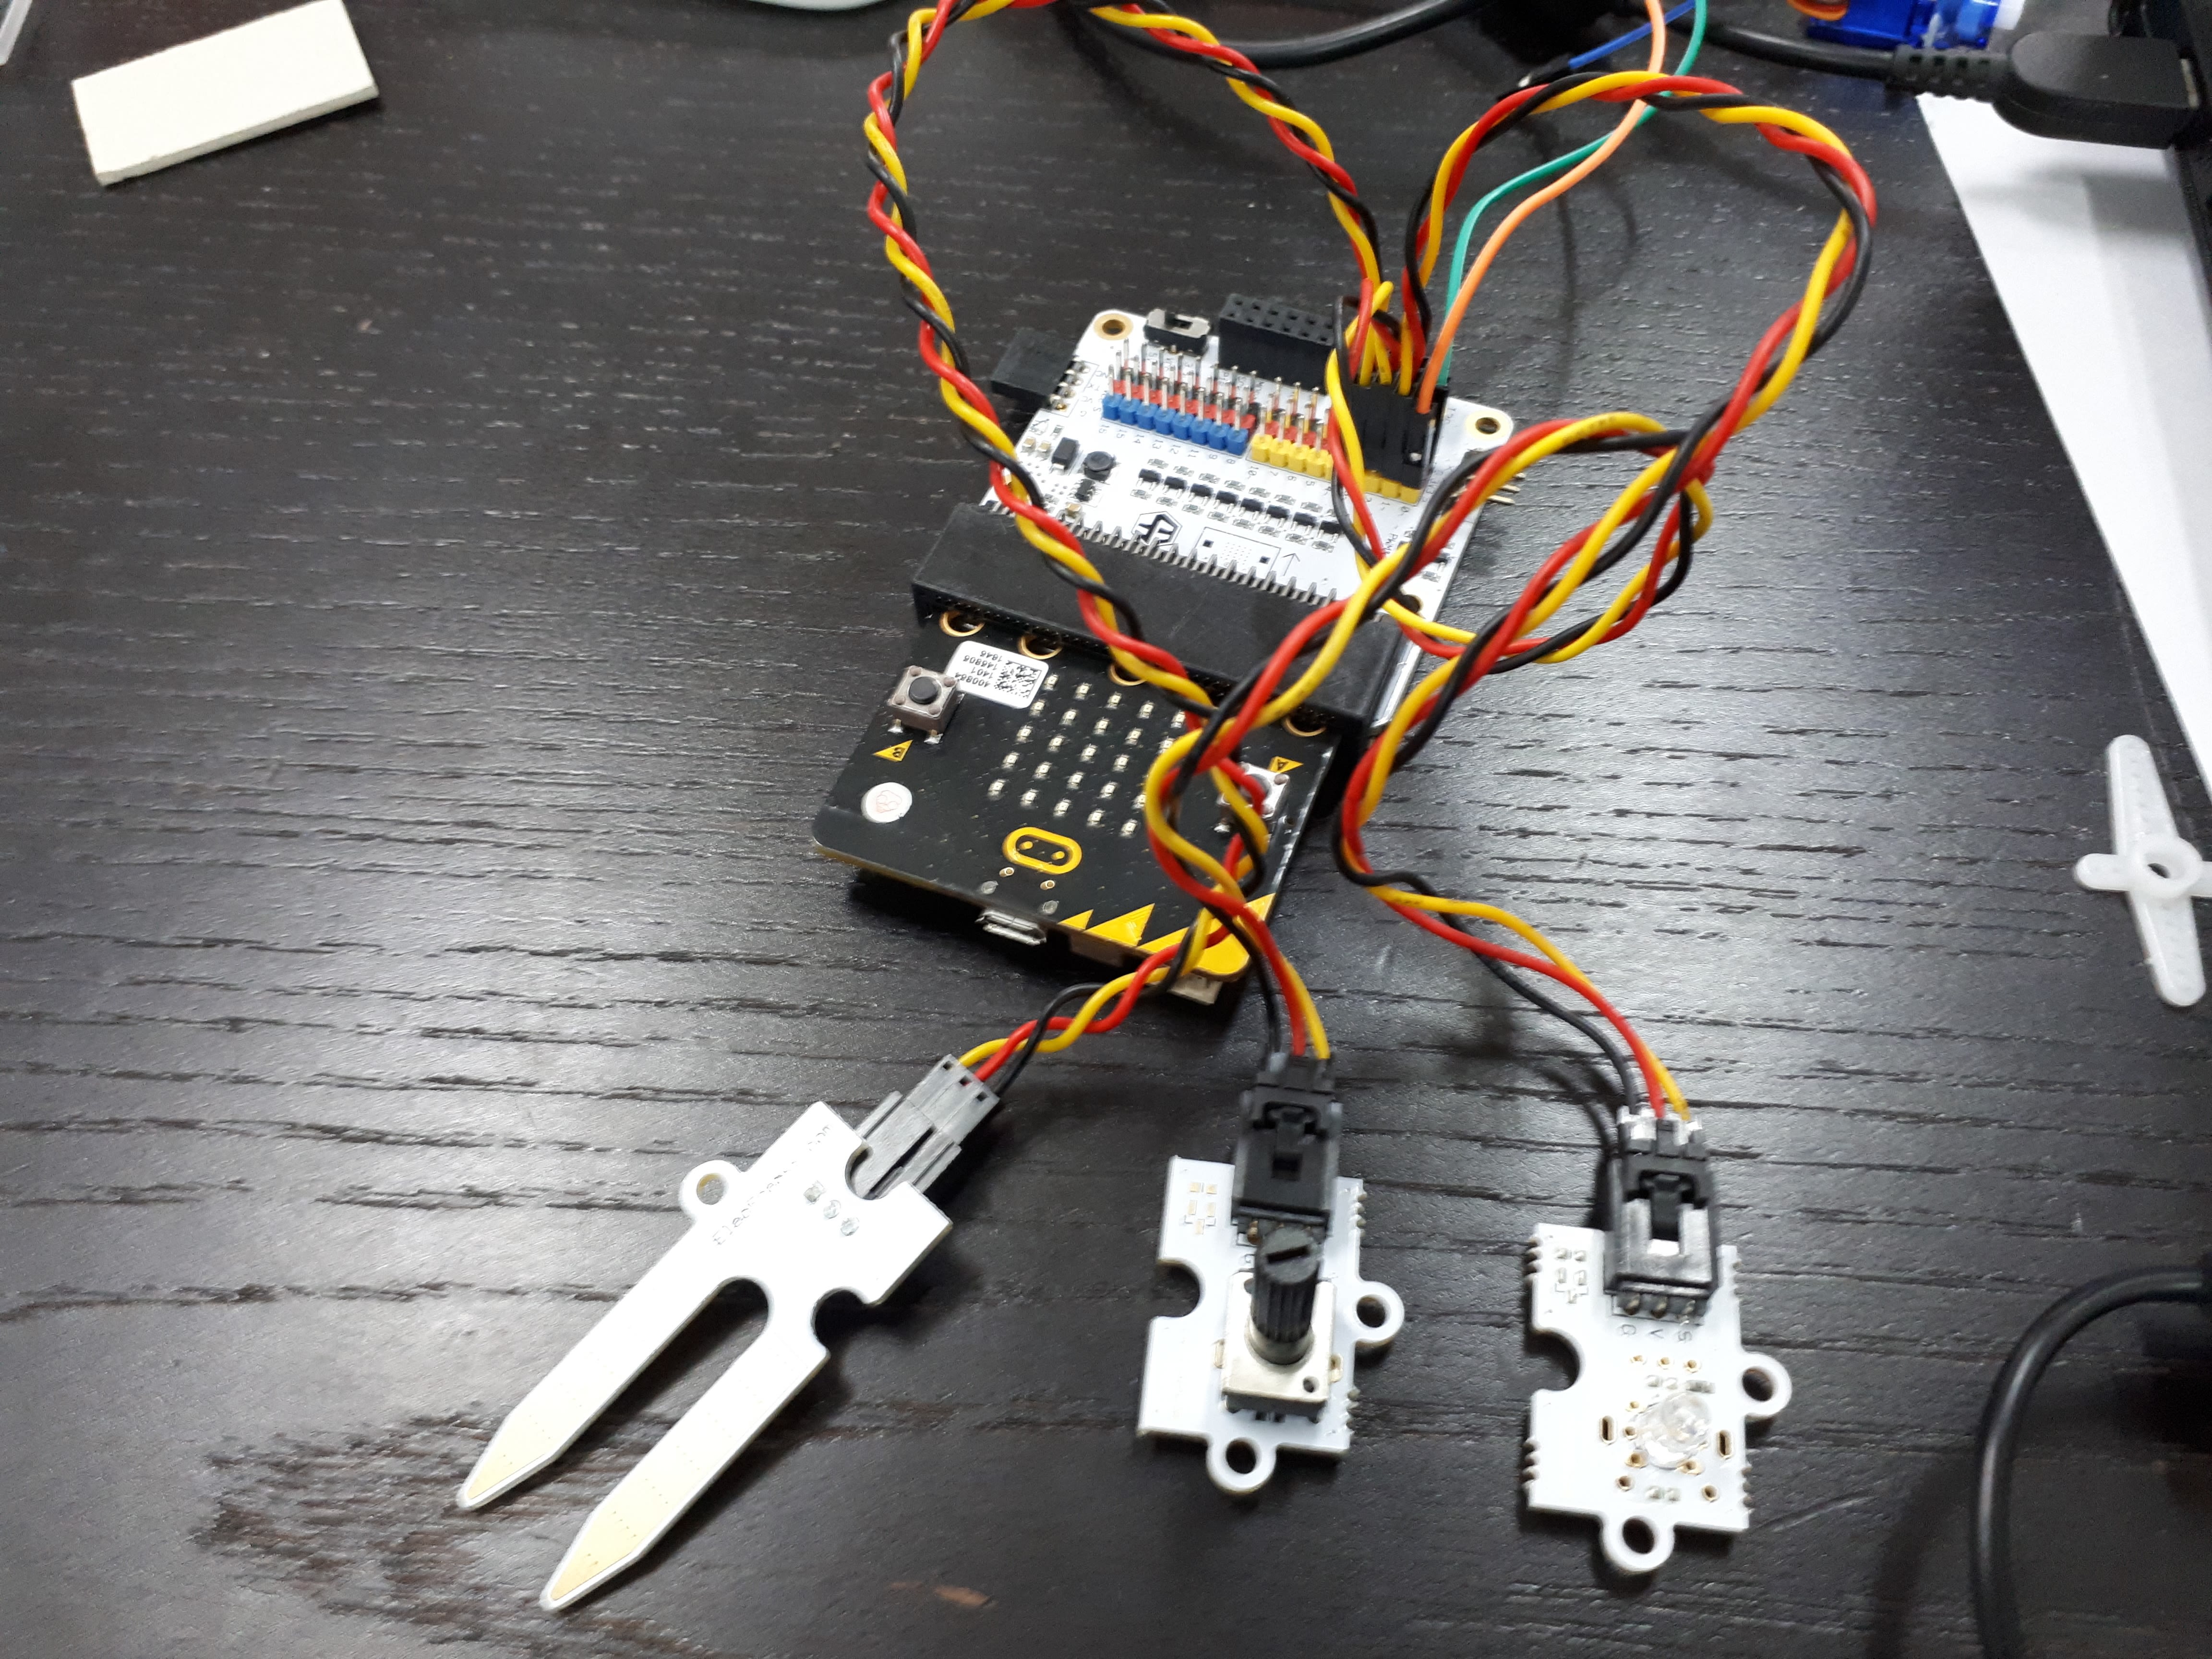
Connect the light bulb to P1, the potentiometer to P2 and the soil moisture sensor to P3
Ensure the following points:
Bumpy end of the connector goes to the sensor
Flat end goes to the breakout board
Make sure the wire colours match up to the row of pins
Materials
1 x potentiometer
1 x light bulb
1 x soil moisture sensor
STEP 4
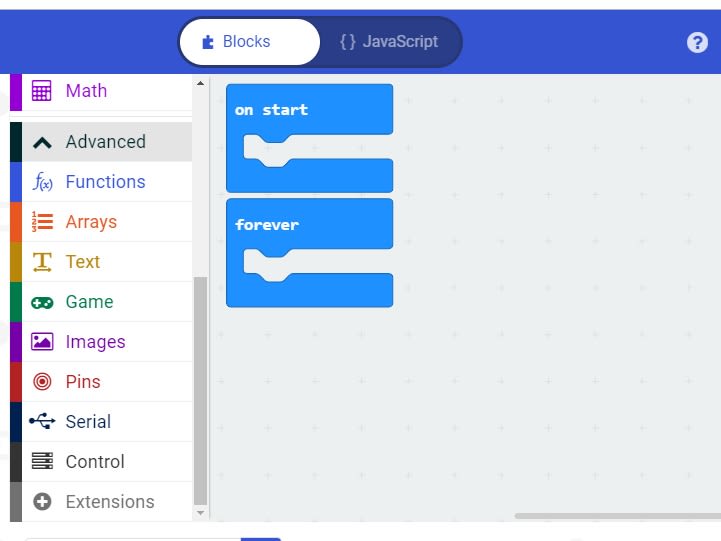
Go to makecode.microbit.org, create a new project.
You will need to download an extension to allow you to use the components in the Tinker kit.
Open the “Advanced” code drawer and select “extensions”, then search for Tinkeracademy (or just “Tinker”)
Materials
-
STEP 5
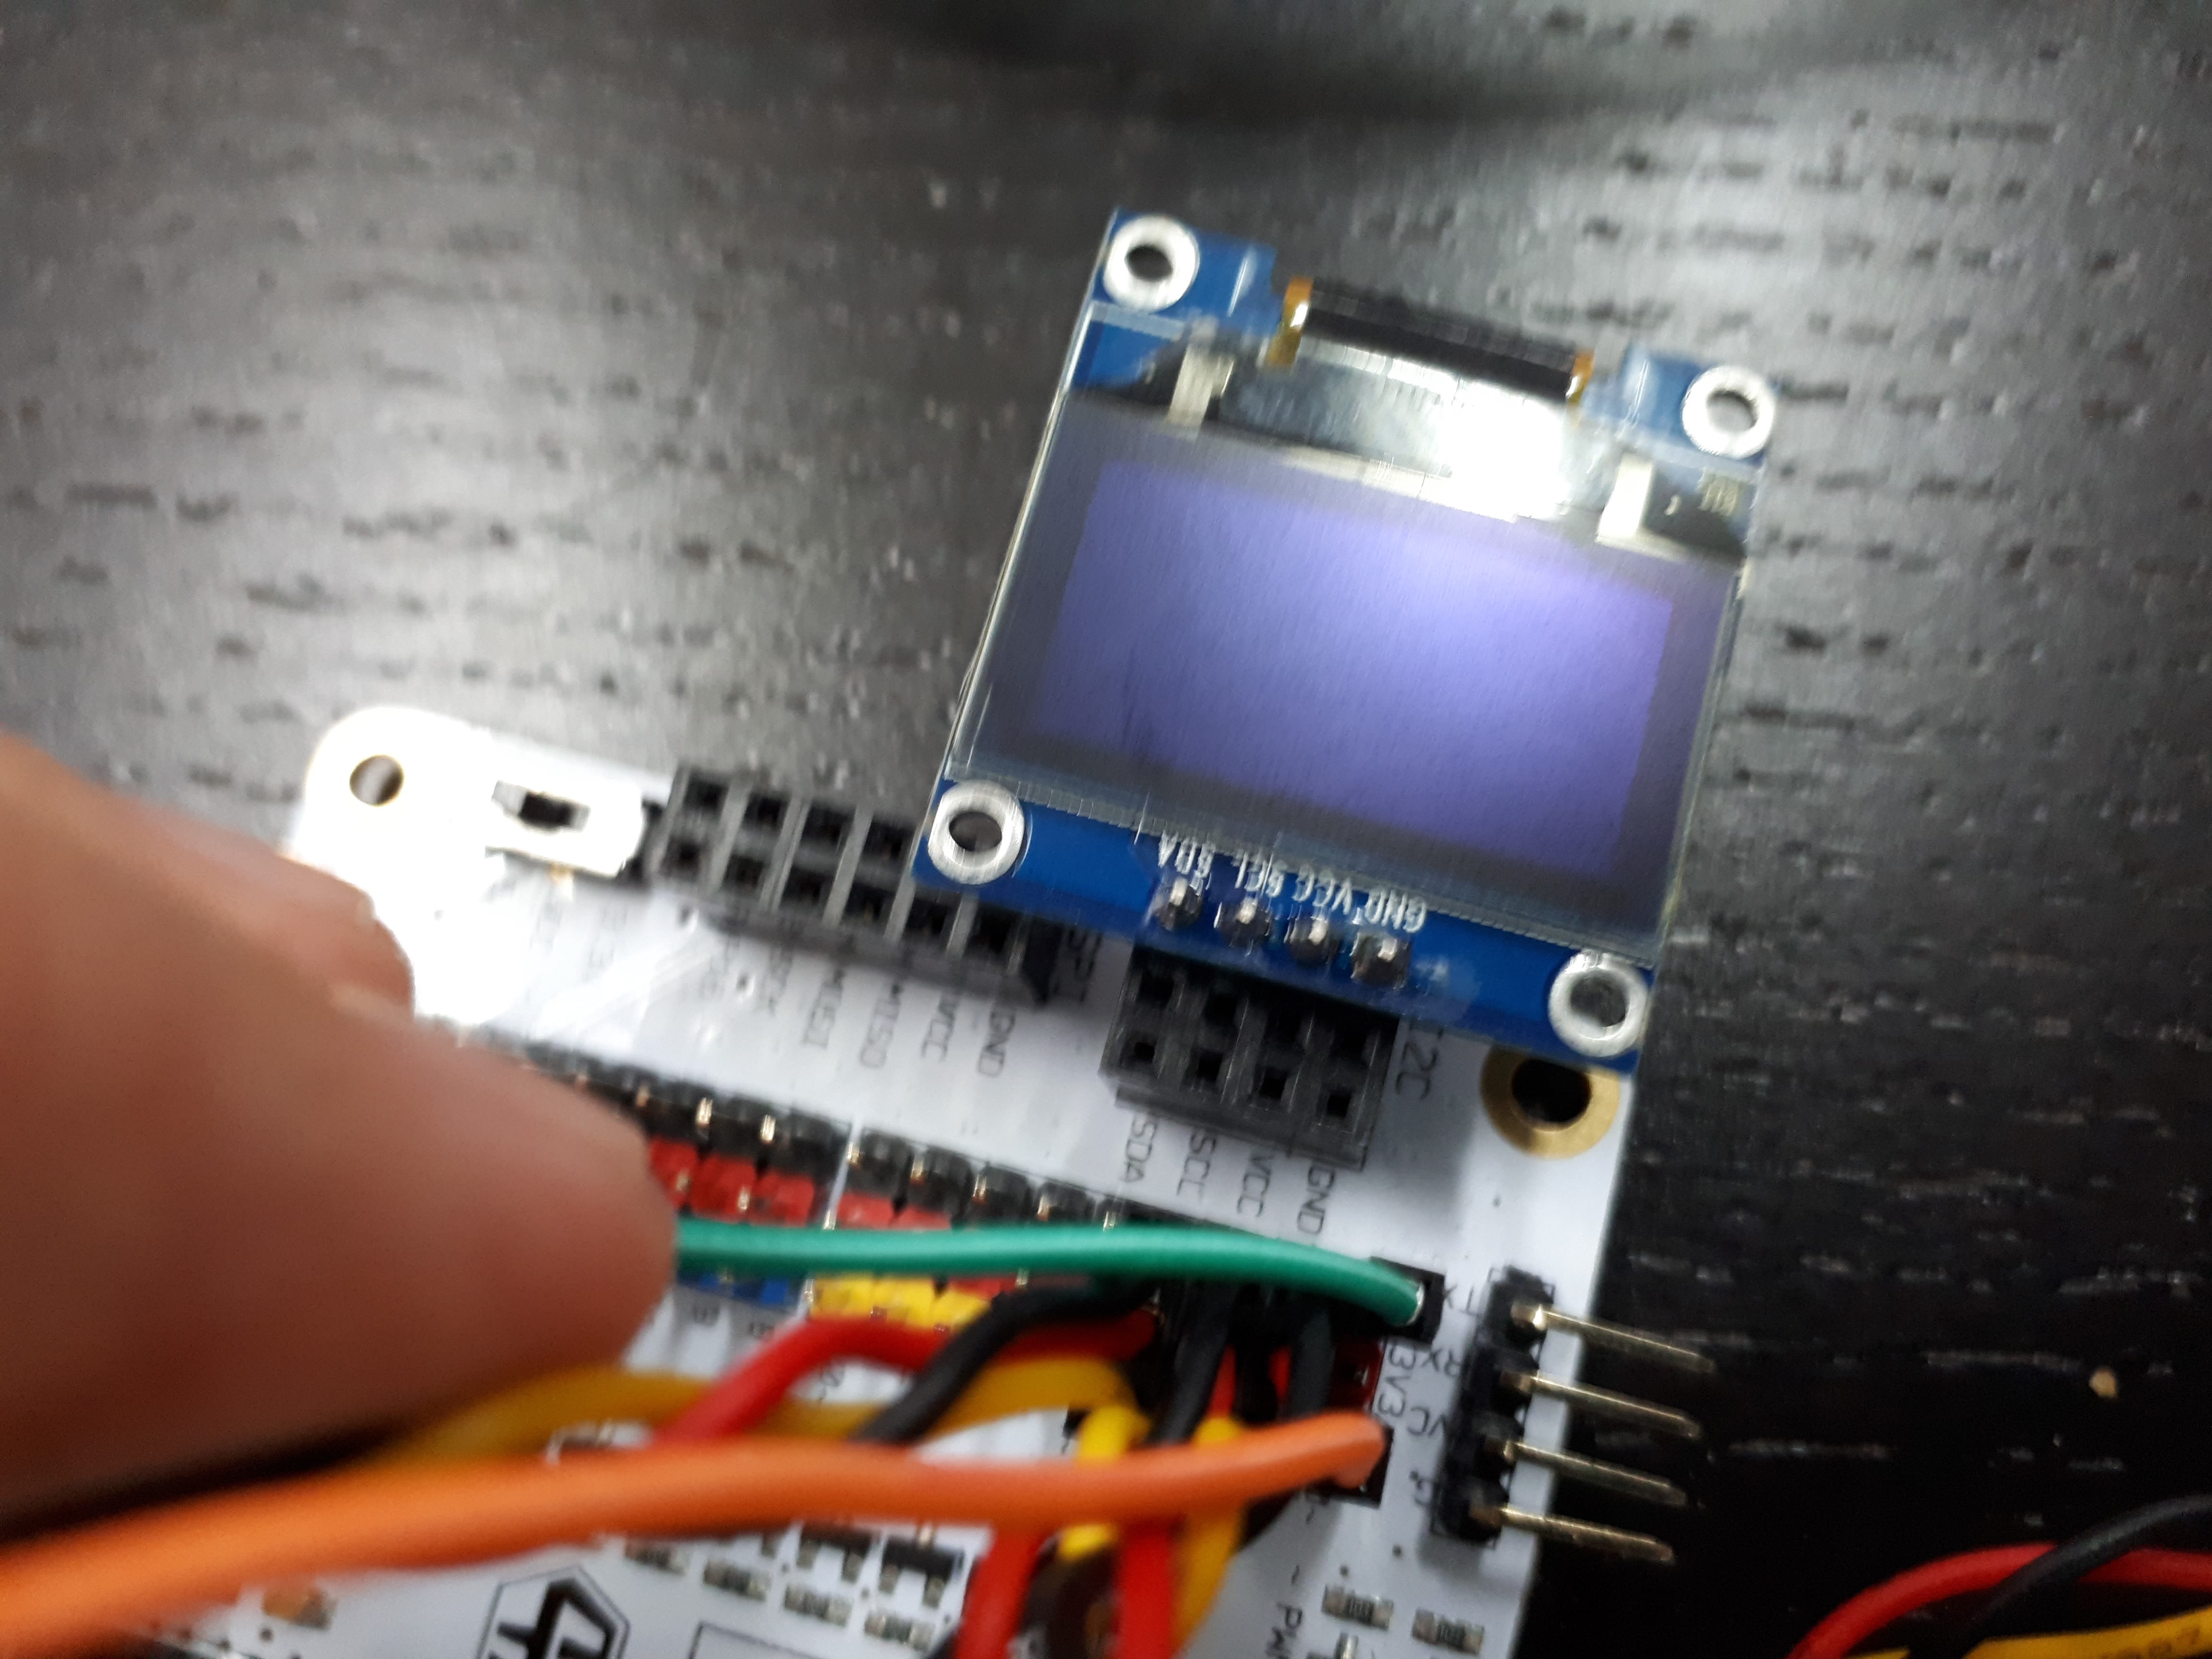
insert the OLED screen into the I2C ports, any four will do, ensure that the pins are connected correctly(GND to GND, SDA to SDA)
Materials
1 x OLED screen
STEP 6
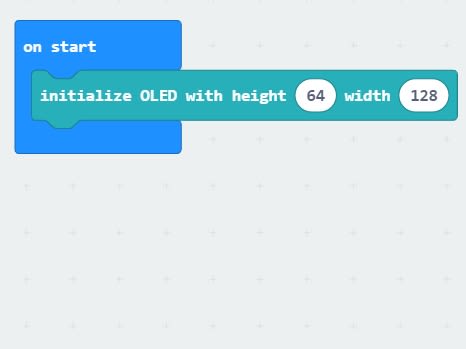
Initialise the OLED by using the code from the OLED drawer.
STEP 7
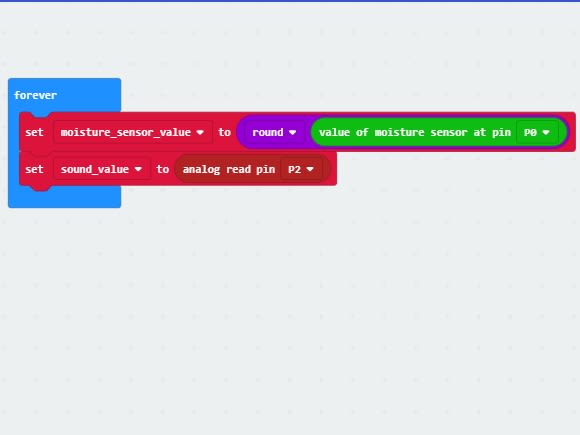
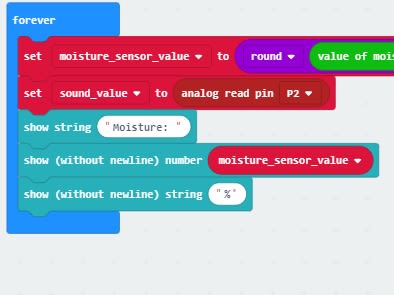
Set the two variables "moisture_ sensor_value" and "sound_value" to the values as seen above.
Materials
-
STEP 8
Add the following code from the OLED drawer as seen above
Materials
-
STEP 9
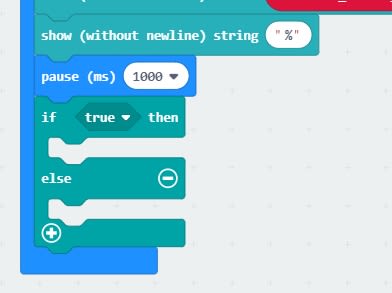
Add a "pause", setting it to 1000ms or 1 second
Add a "if-else" statement from the "logic" drawer
Materials
-
STEP 10
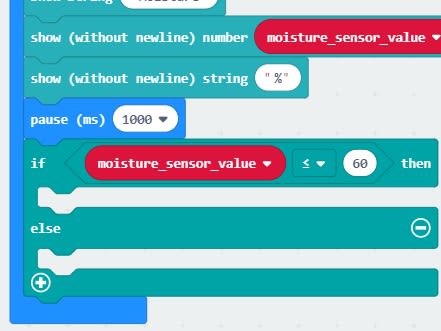
Add the comparision statement under the logic drawer after "if", change it to the "less than or equal to sign", then input your desired value in the right box, which is 60 in this example
This means that when the moisture goes below 60%, the code under the "if" statement will run.
Materials
-
STEP 11
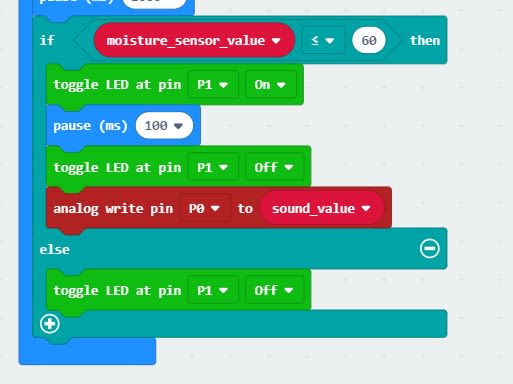
Add the following code to the "if-else" statement as seen in the picture.
You may upload the code to your micro:bit, if the steps are done correctly, when the moisture sensor value goes below 60% are your desired value, the LED blinks and the buzzer makes a sound. Turning the potentiometer will control the volume of the sound created
Made this activity? Good Job! Now spread the word. Share a photo of your creation on social media with #letsgethacking #soilmoisturesensor