Sunbrella
Automated protection from the sun!
YOU WILL NEED
Electronics
• BBC Micro:bit
• Tinkercademy GVS Breakout Board
• 28BYJ-48 stepper motor
• ULN2003 stepper motor driver board
• 9V battery pack
• 3 x analog light sensors
• F-F jumper wires
• M-F jumper wires
Craft materials
• 2 ice cream sticks
• 5 straws
• Wood or sturdy cardboard
• Paper
Stationery
• Tape
• Blu Tack
STEP 1
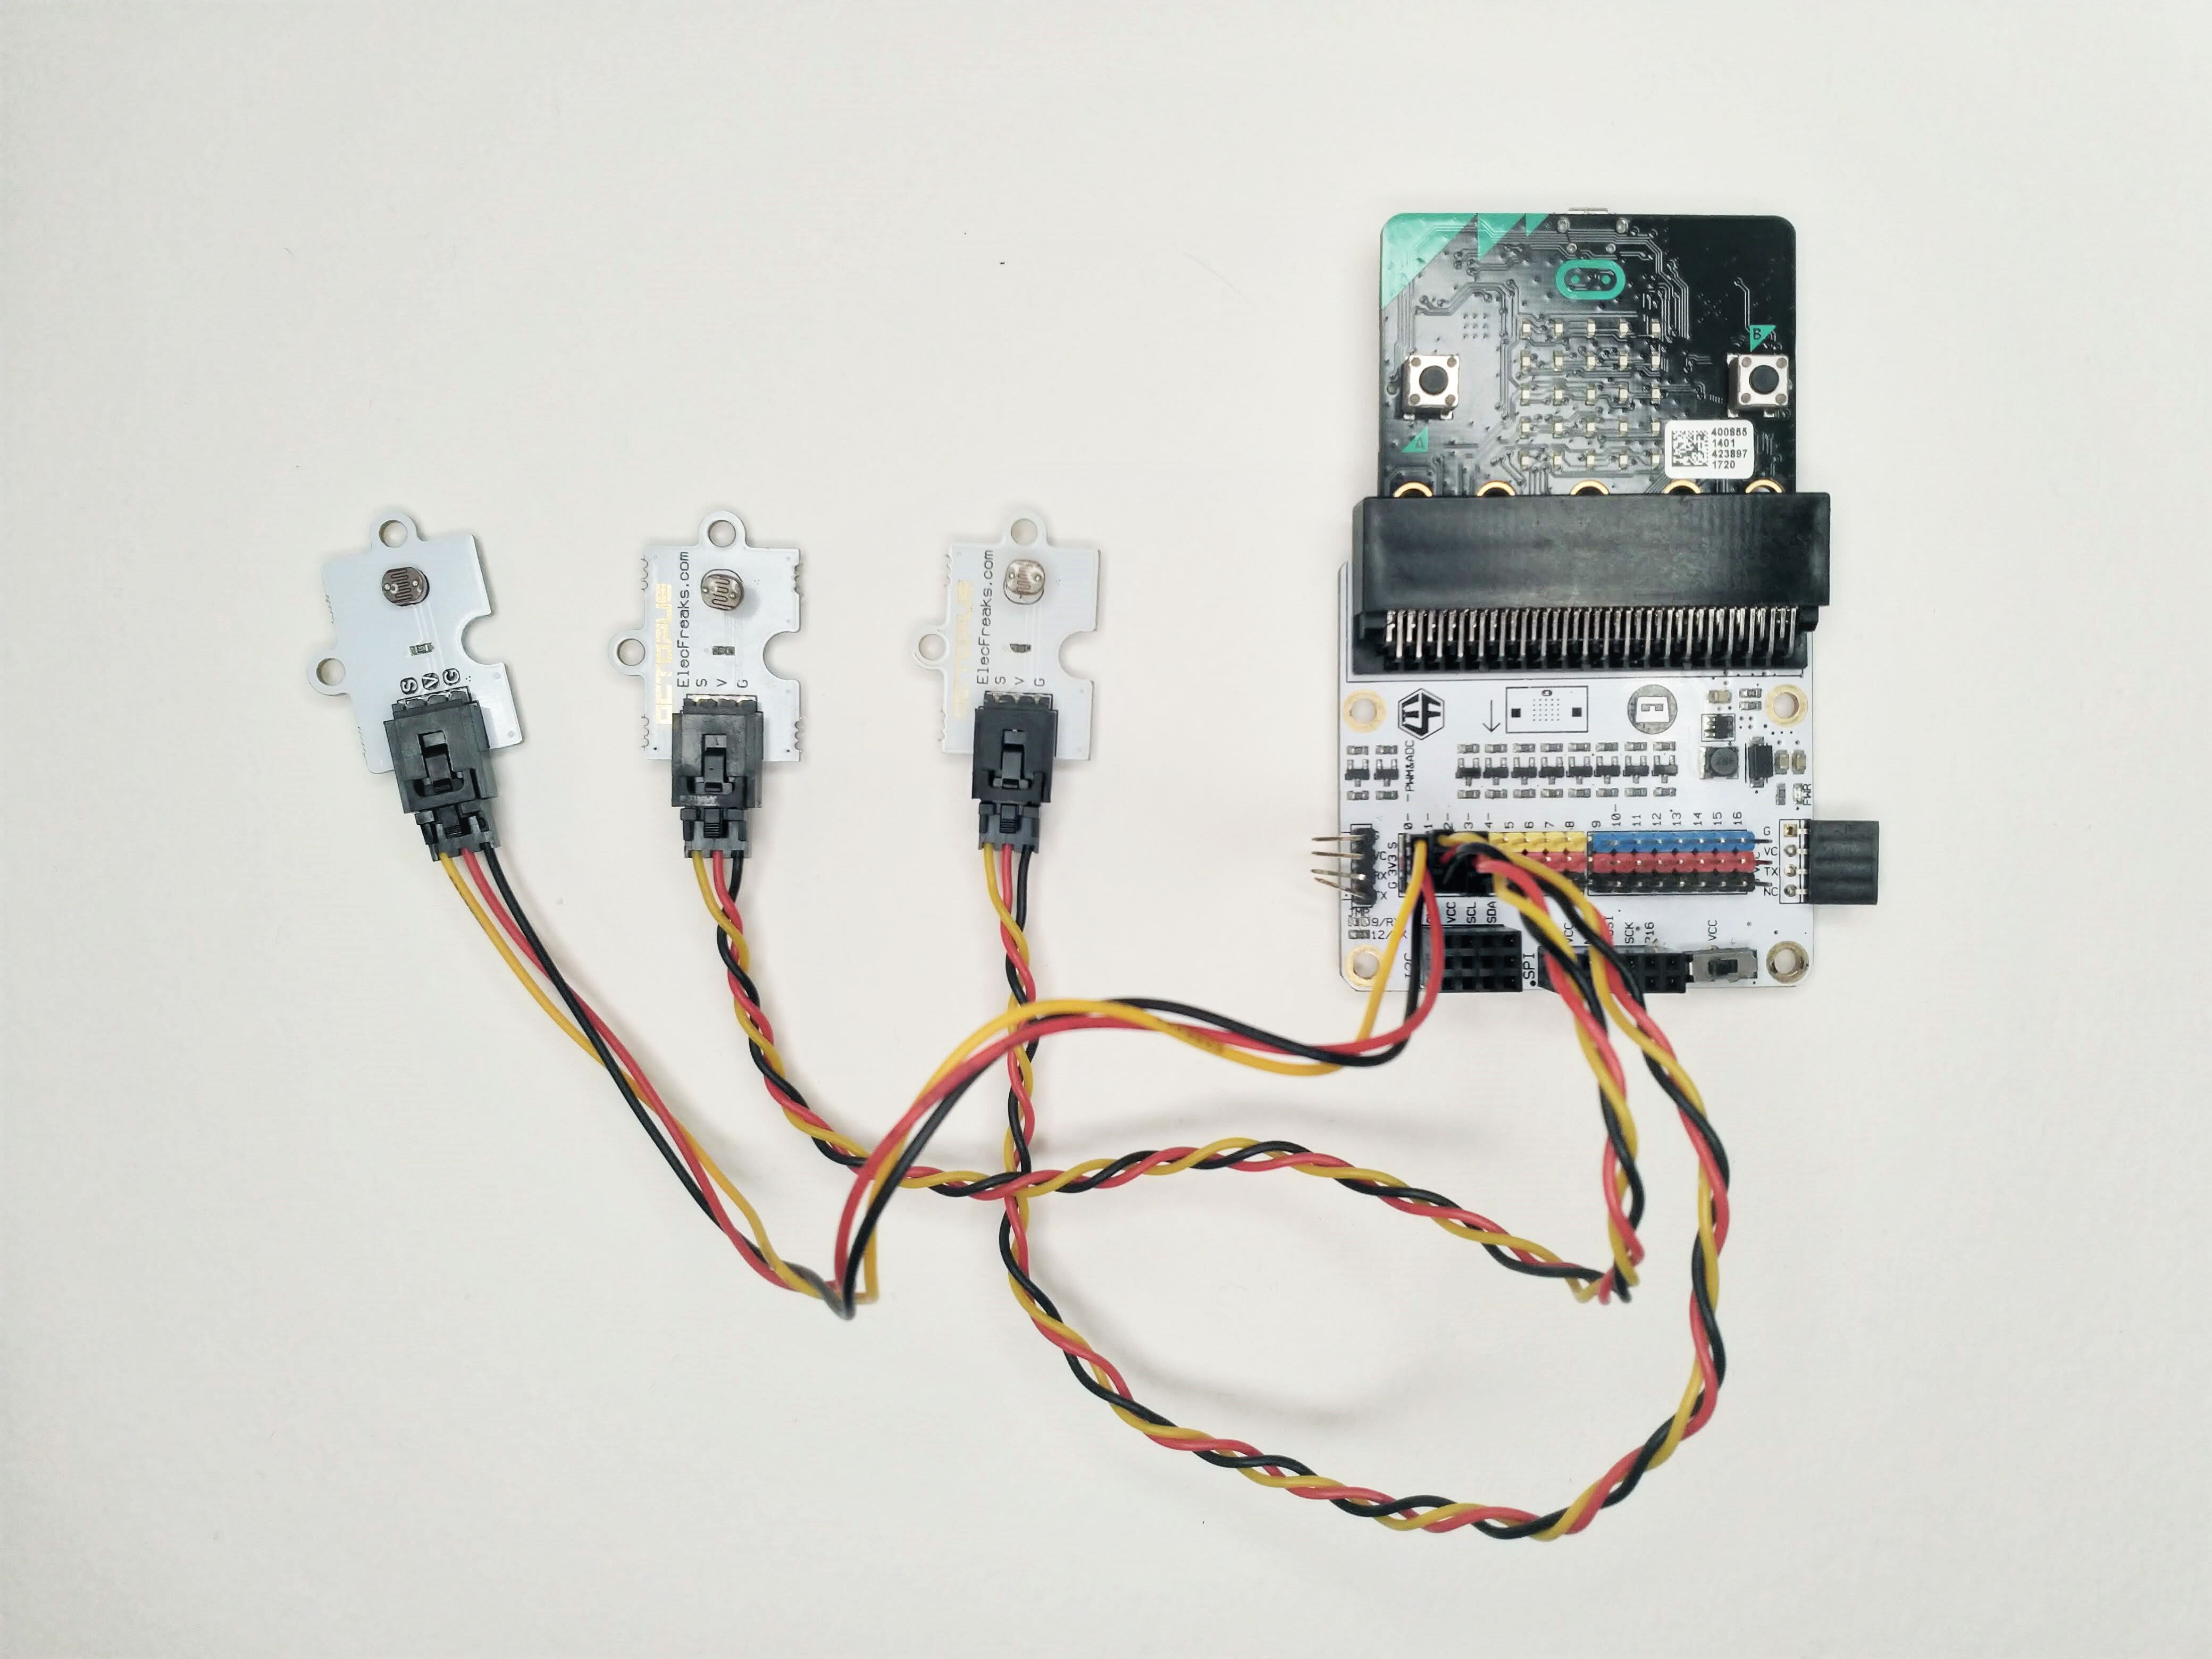
Connect components
We begin by slotting our micro:bit into the breakout board, and connecting the light sensors to P0, P1, and P2.
STEP 2
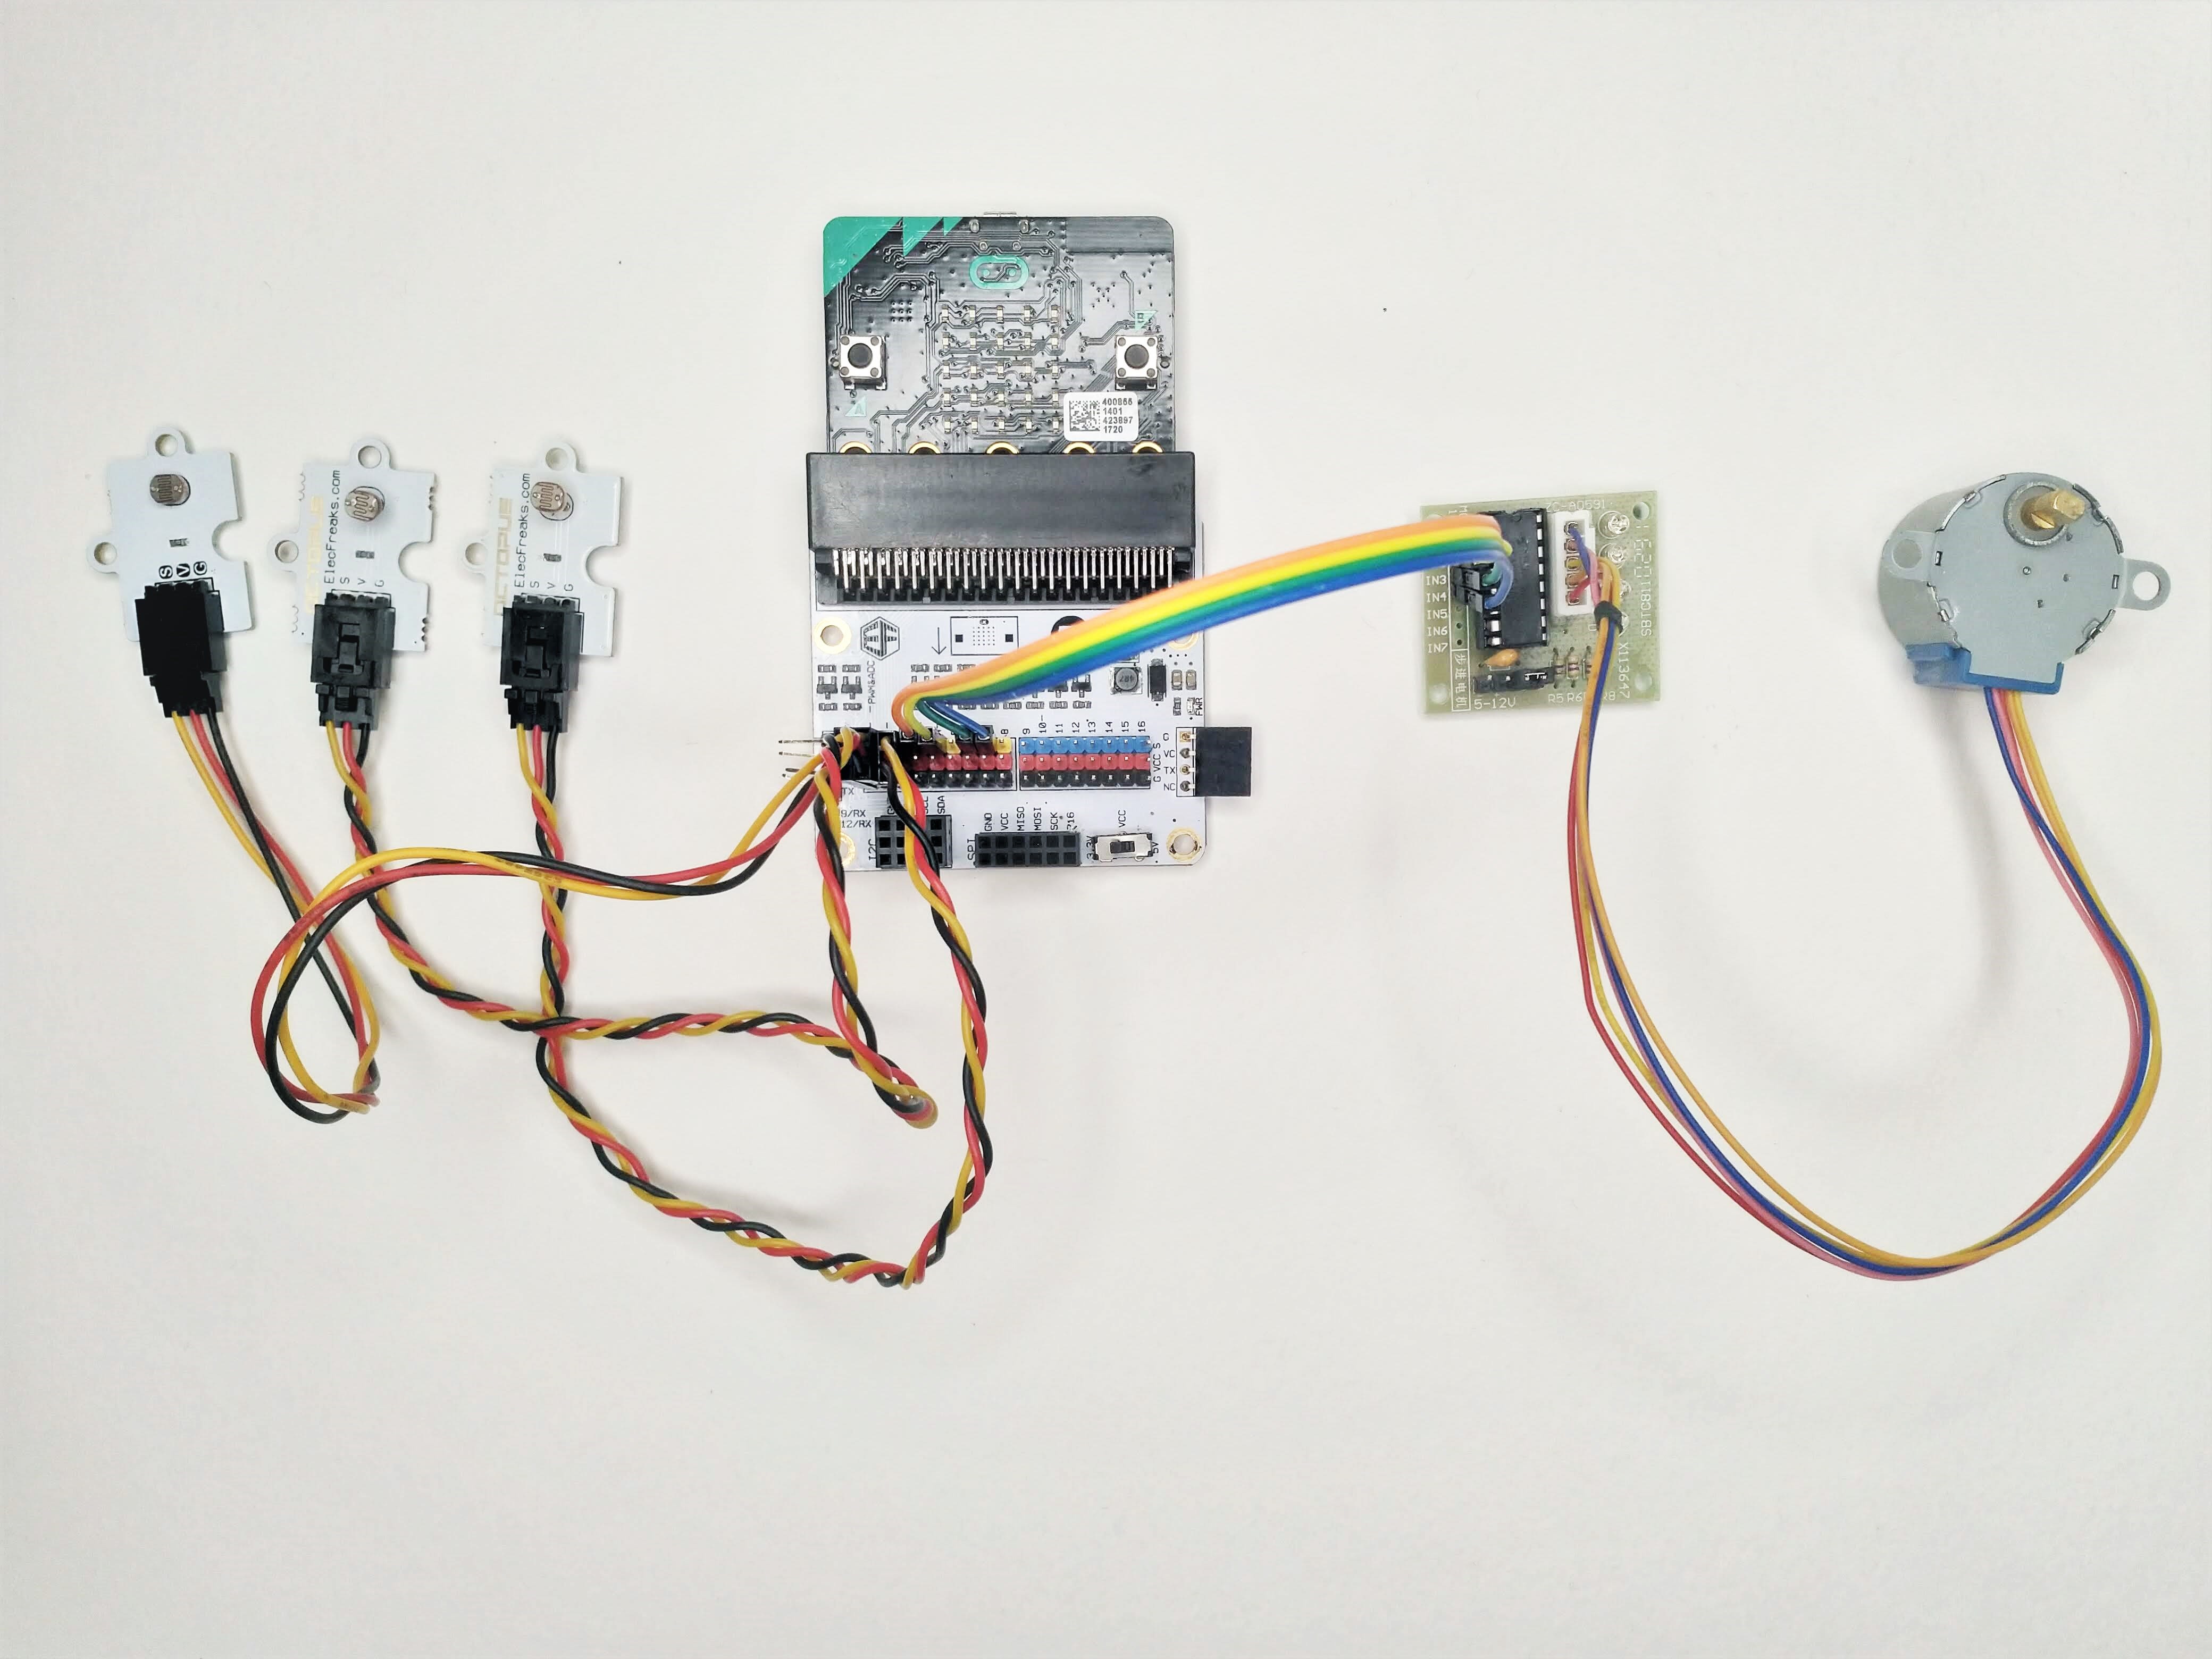
Connect stepper motorl
Next, connect the stepper motor driver’s IN1, IN2, IN3, and IN4 to the micro:bit on P3, P4, P6, and P7 respectively. We avoid P5 on the micro:bit because it connects to button A, and we might want to use that button. See https://book.tk.sg/mb-pins for more information.
STEP 3
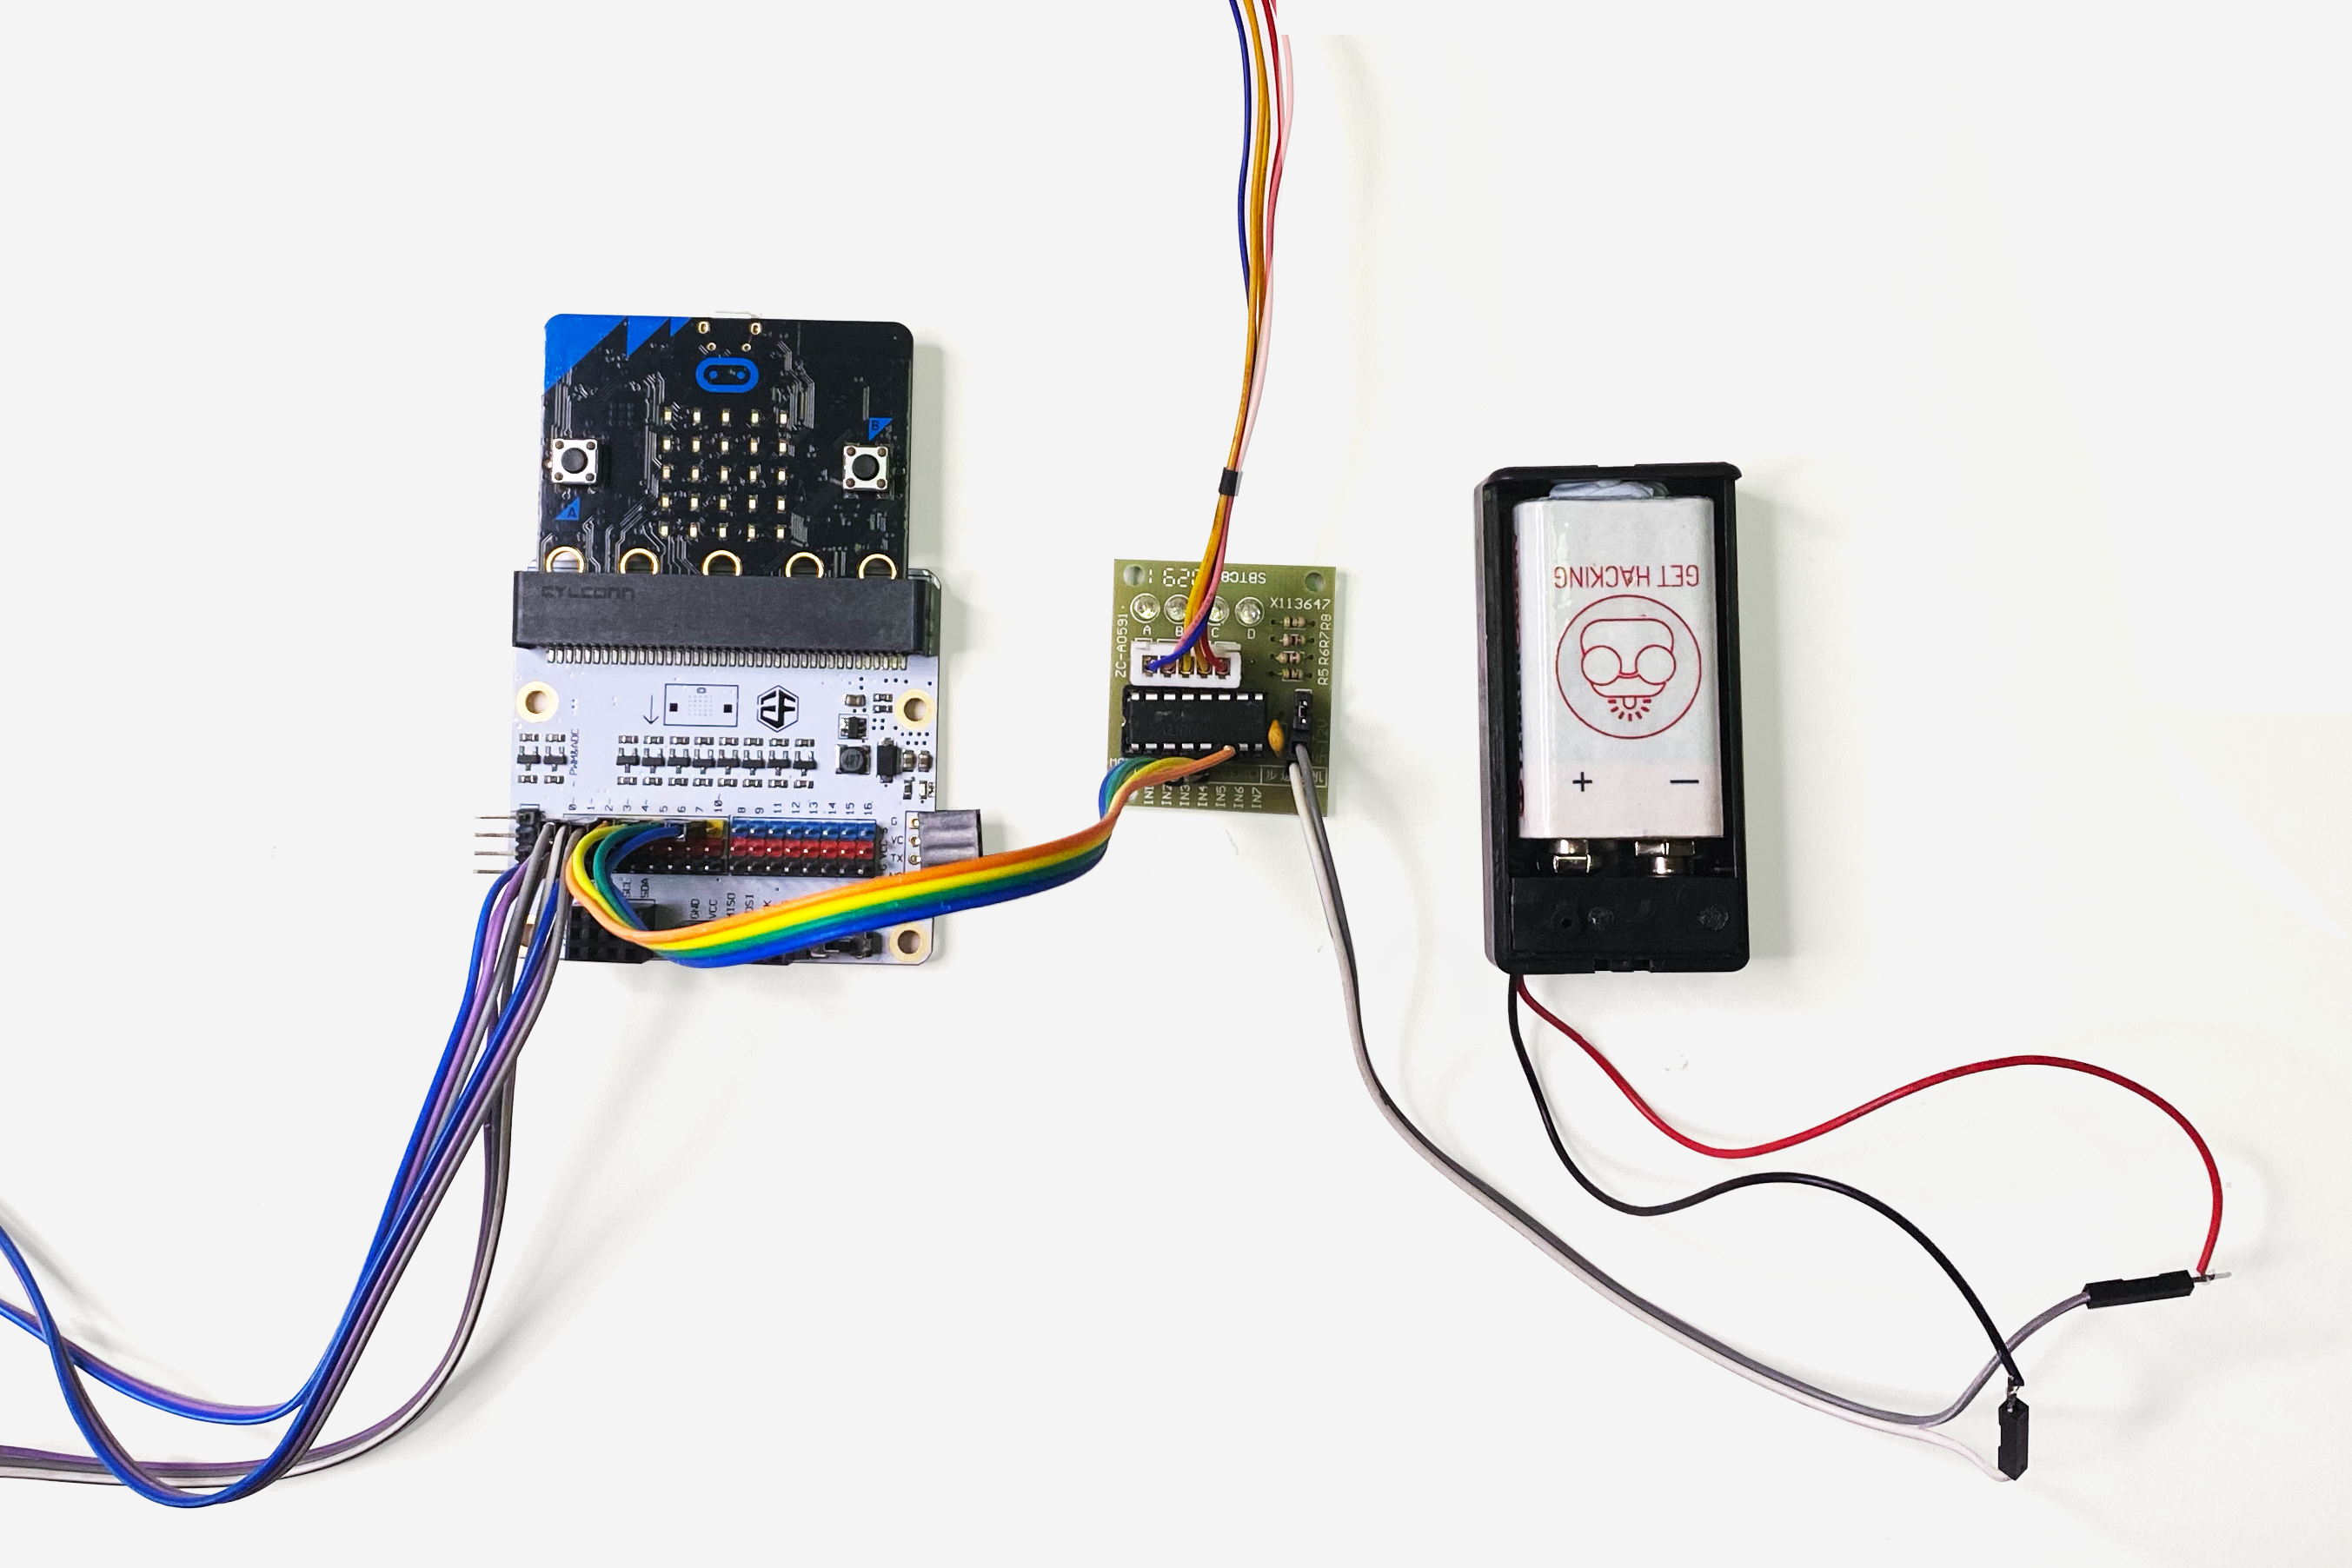
Power the driver
Use two M-F jumper wires to extend the positive and negative pins on the driver board, then connect a battery pack to the pins on the driver board.
STEP 4
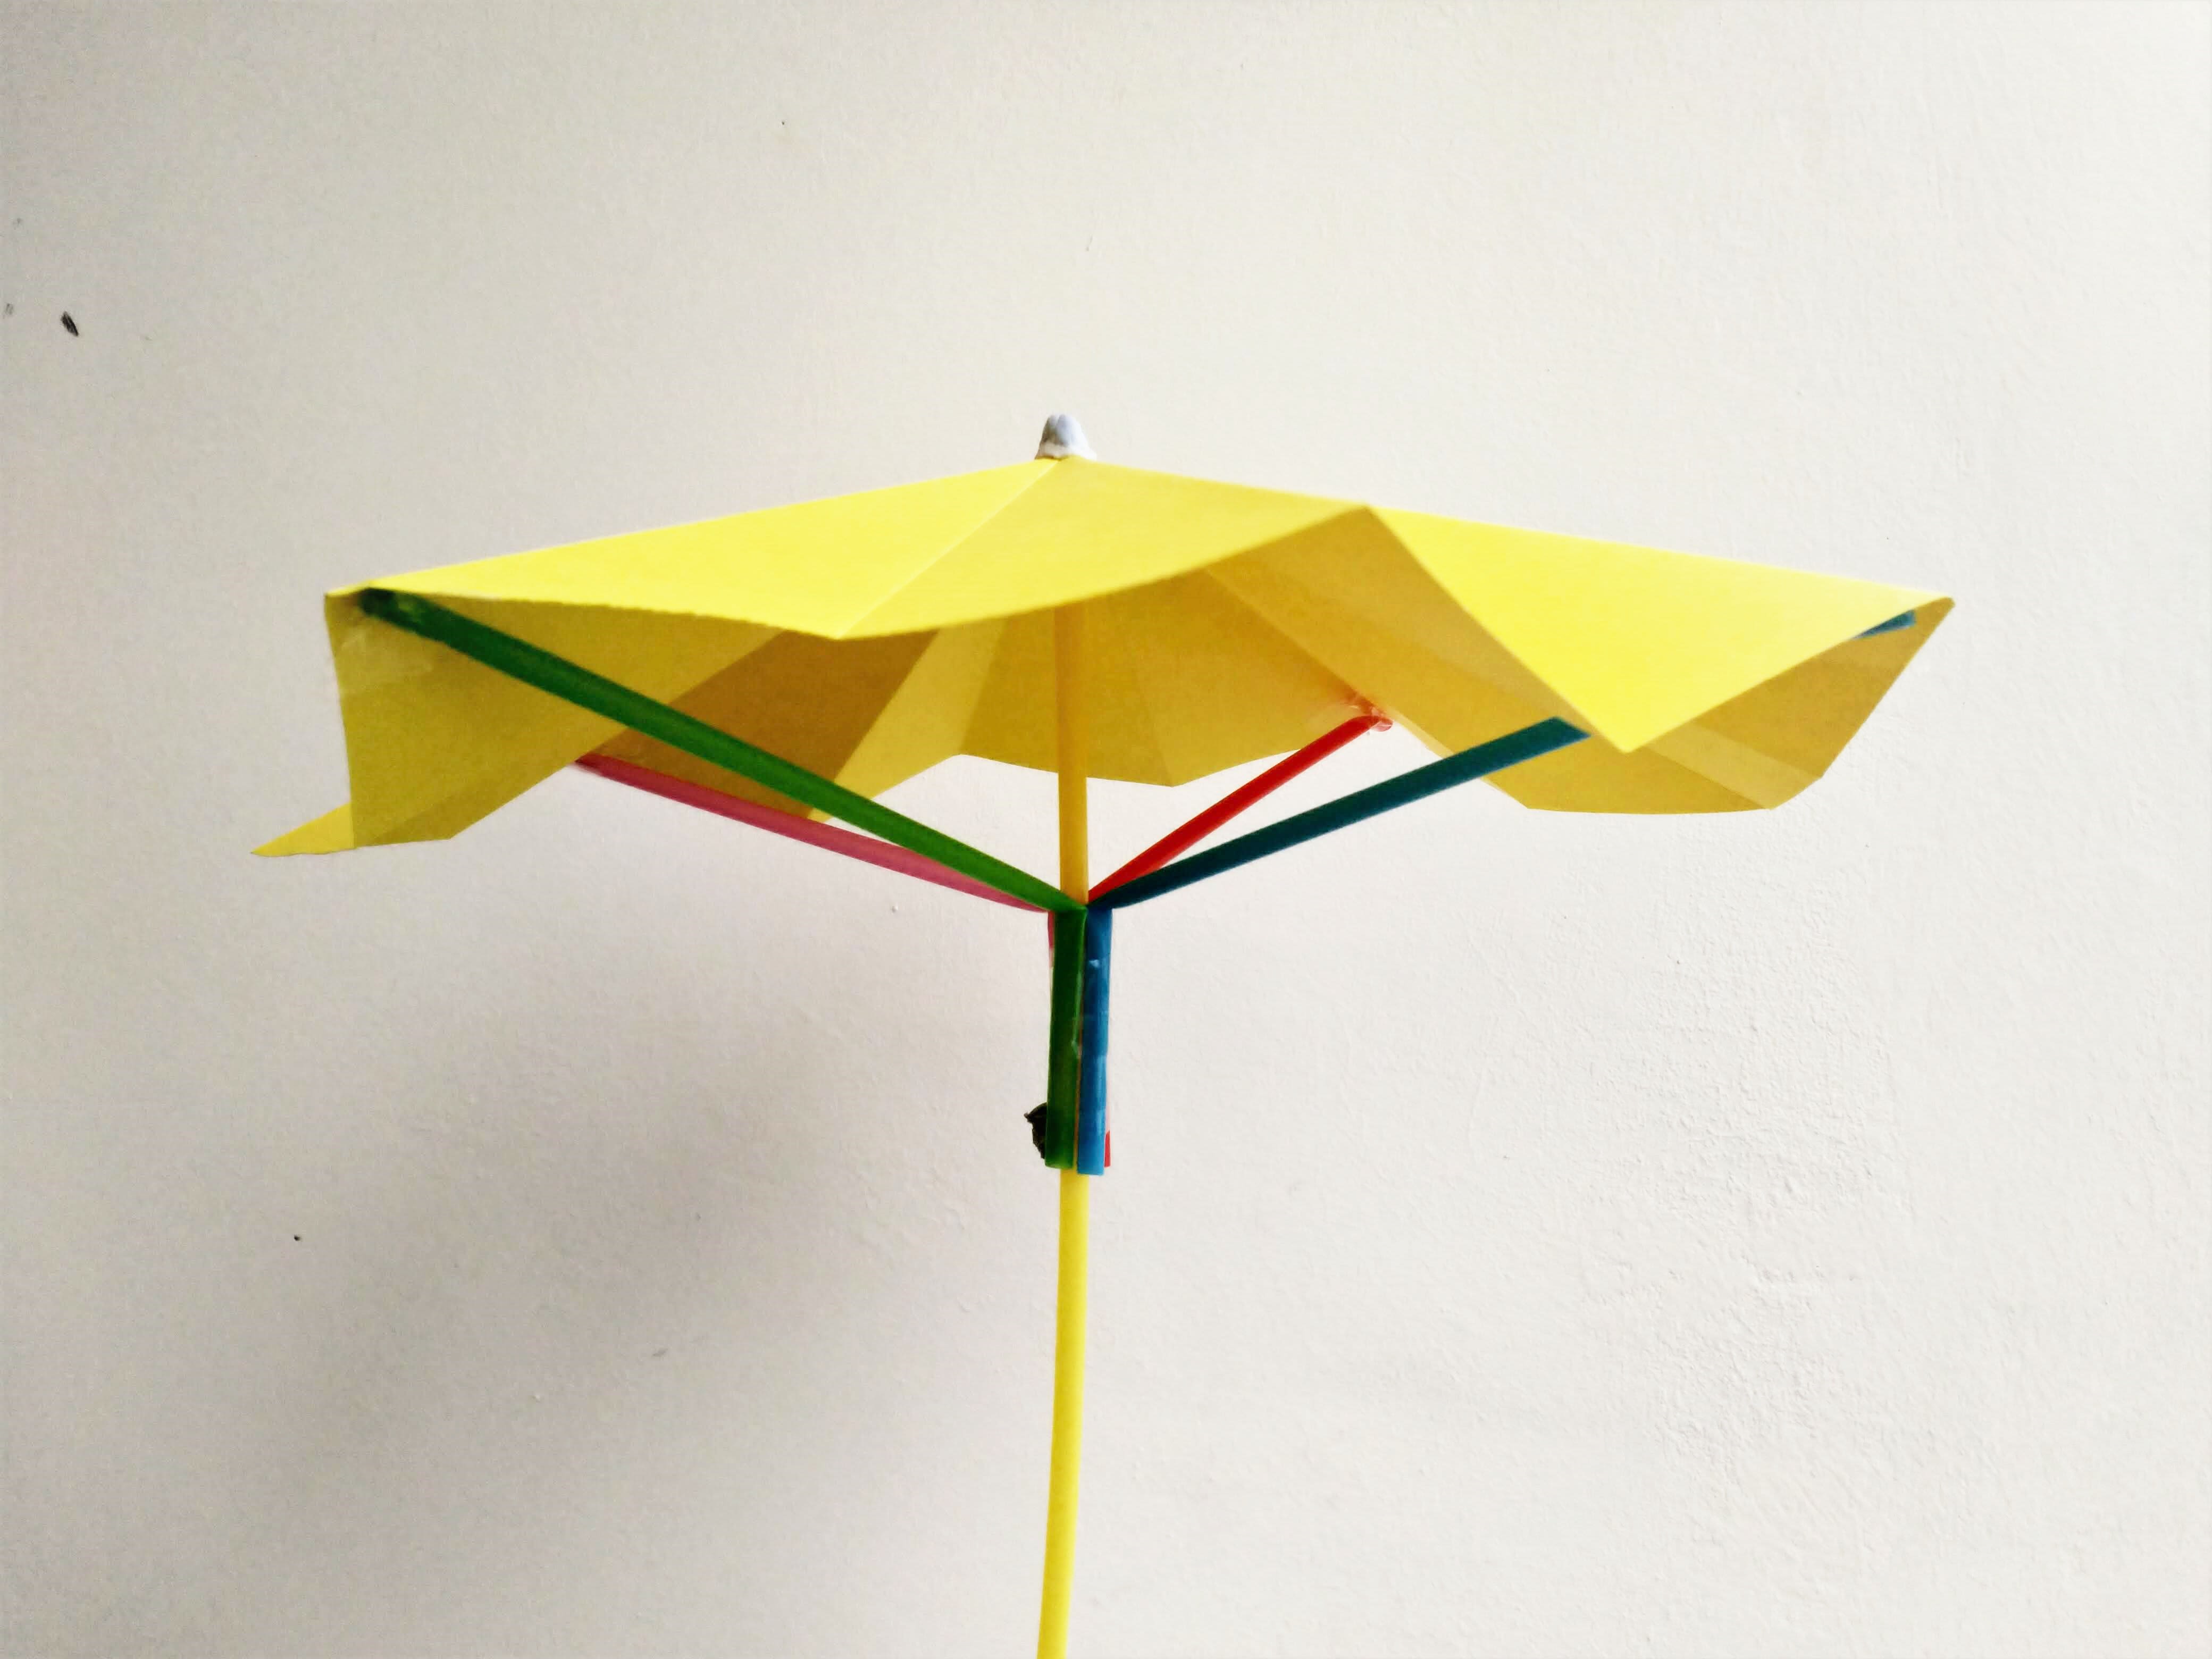
Making the sunbrella
Make a paper umbrella! You can follow our sample video at https://book.tk.sg/paper-umbrella for instructions. You can make it purely out of paper, but here, we use straws to add a little structural support and mobility. (It closes! Well…kind of.)
STEP 5
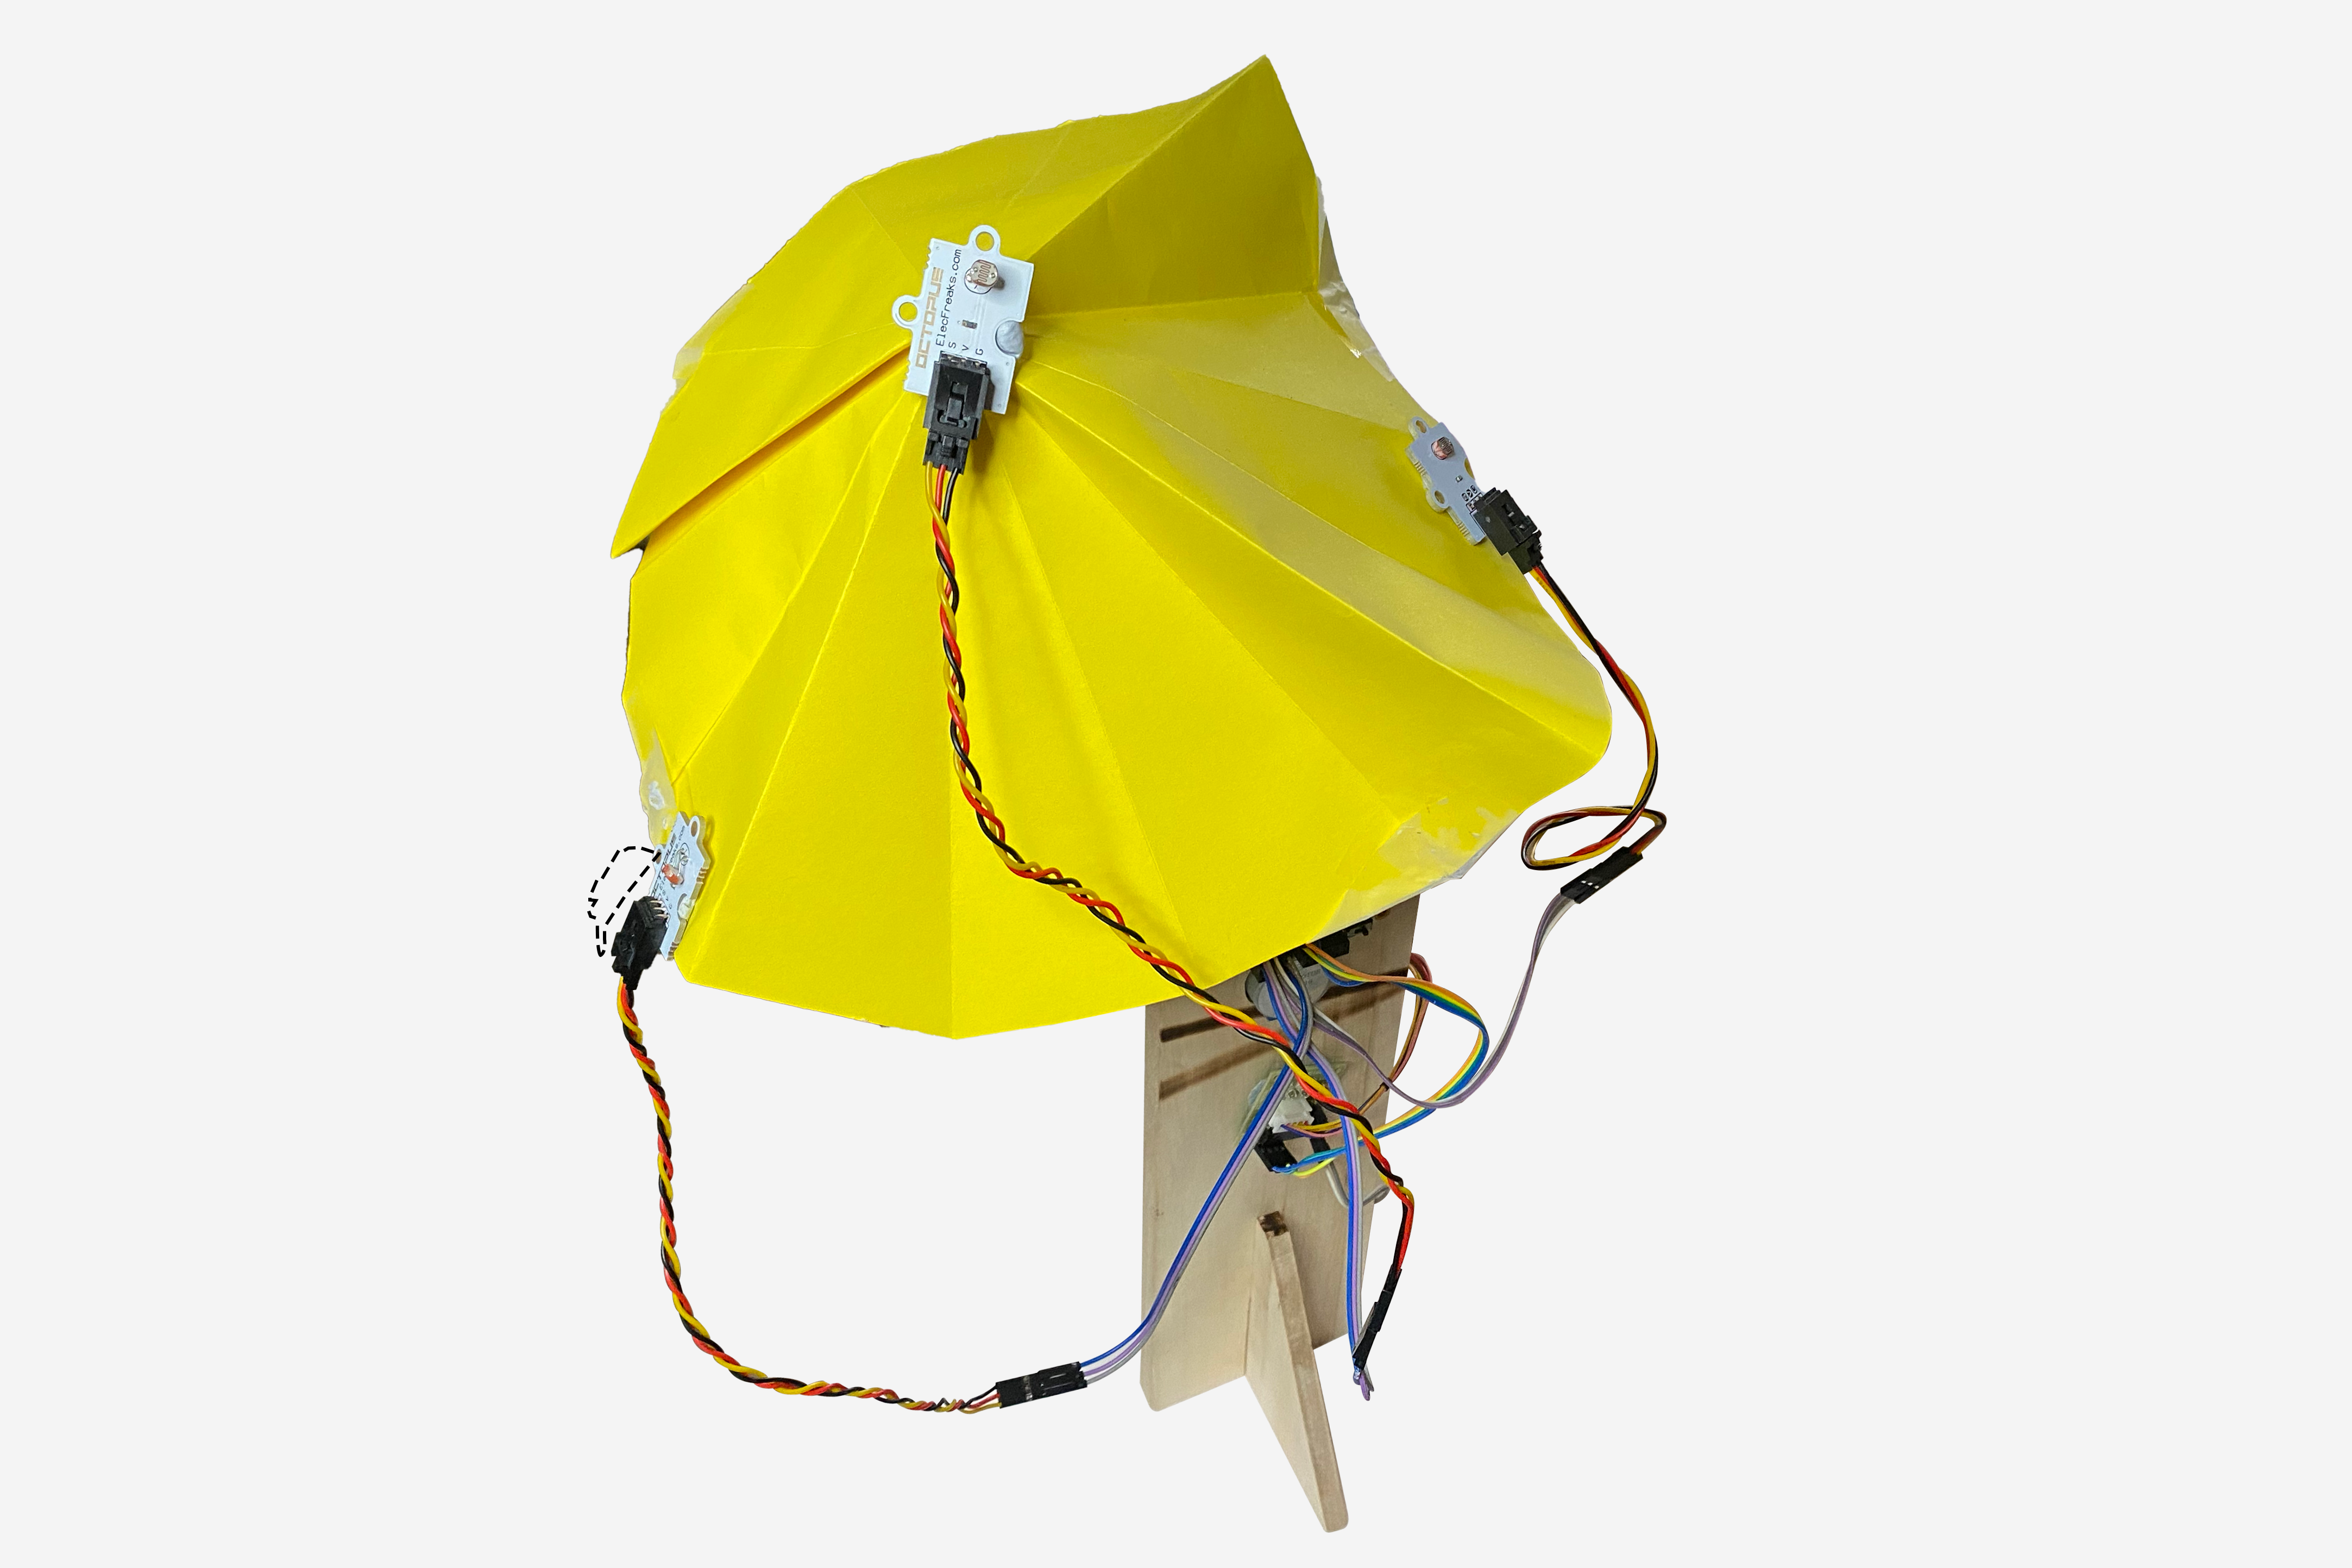
Let there be light sensors
Attach the light sensors to the umbrella. With 3 light sensors, we can put them along a row to track the sun’s movement from east to west. Attach them such that two are along the edges of the umbrella, and one is right at the top.
STEP 6
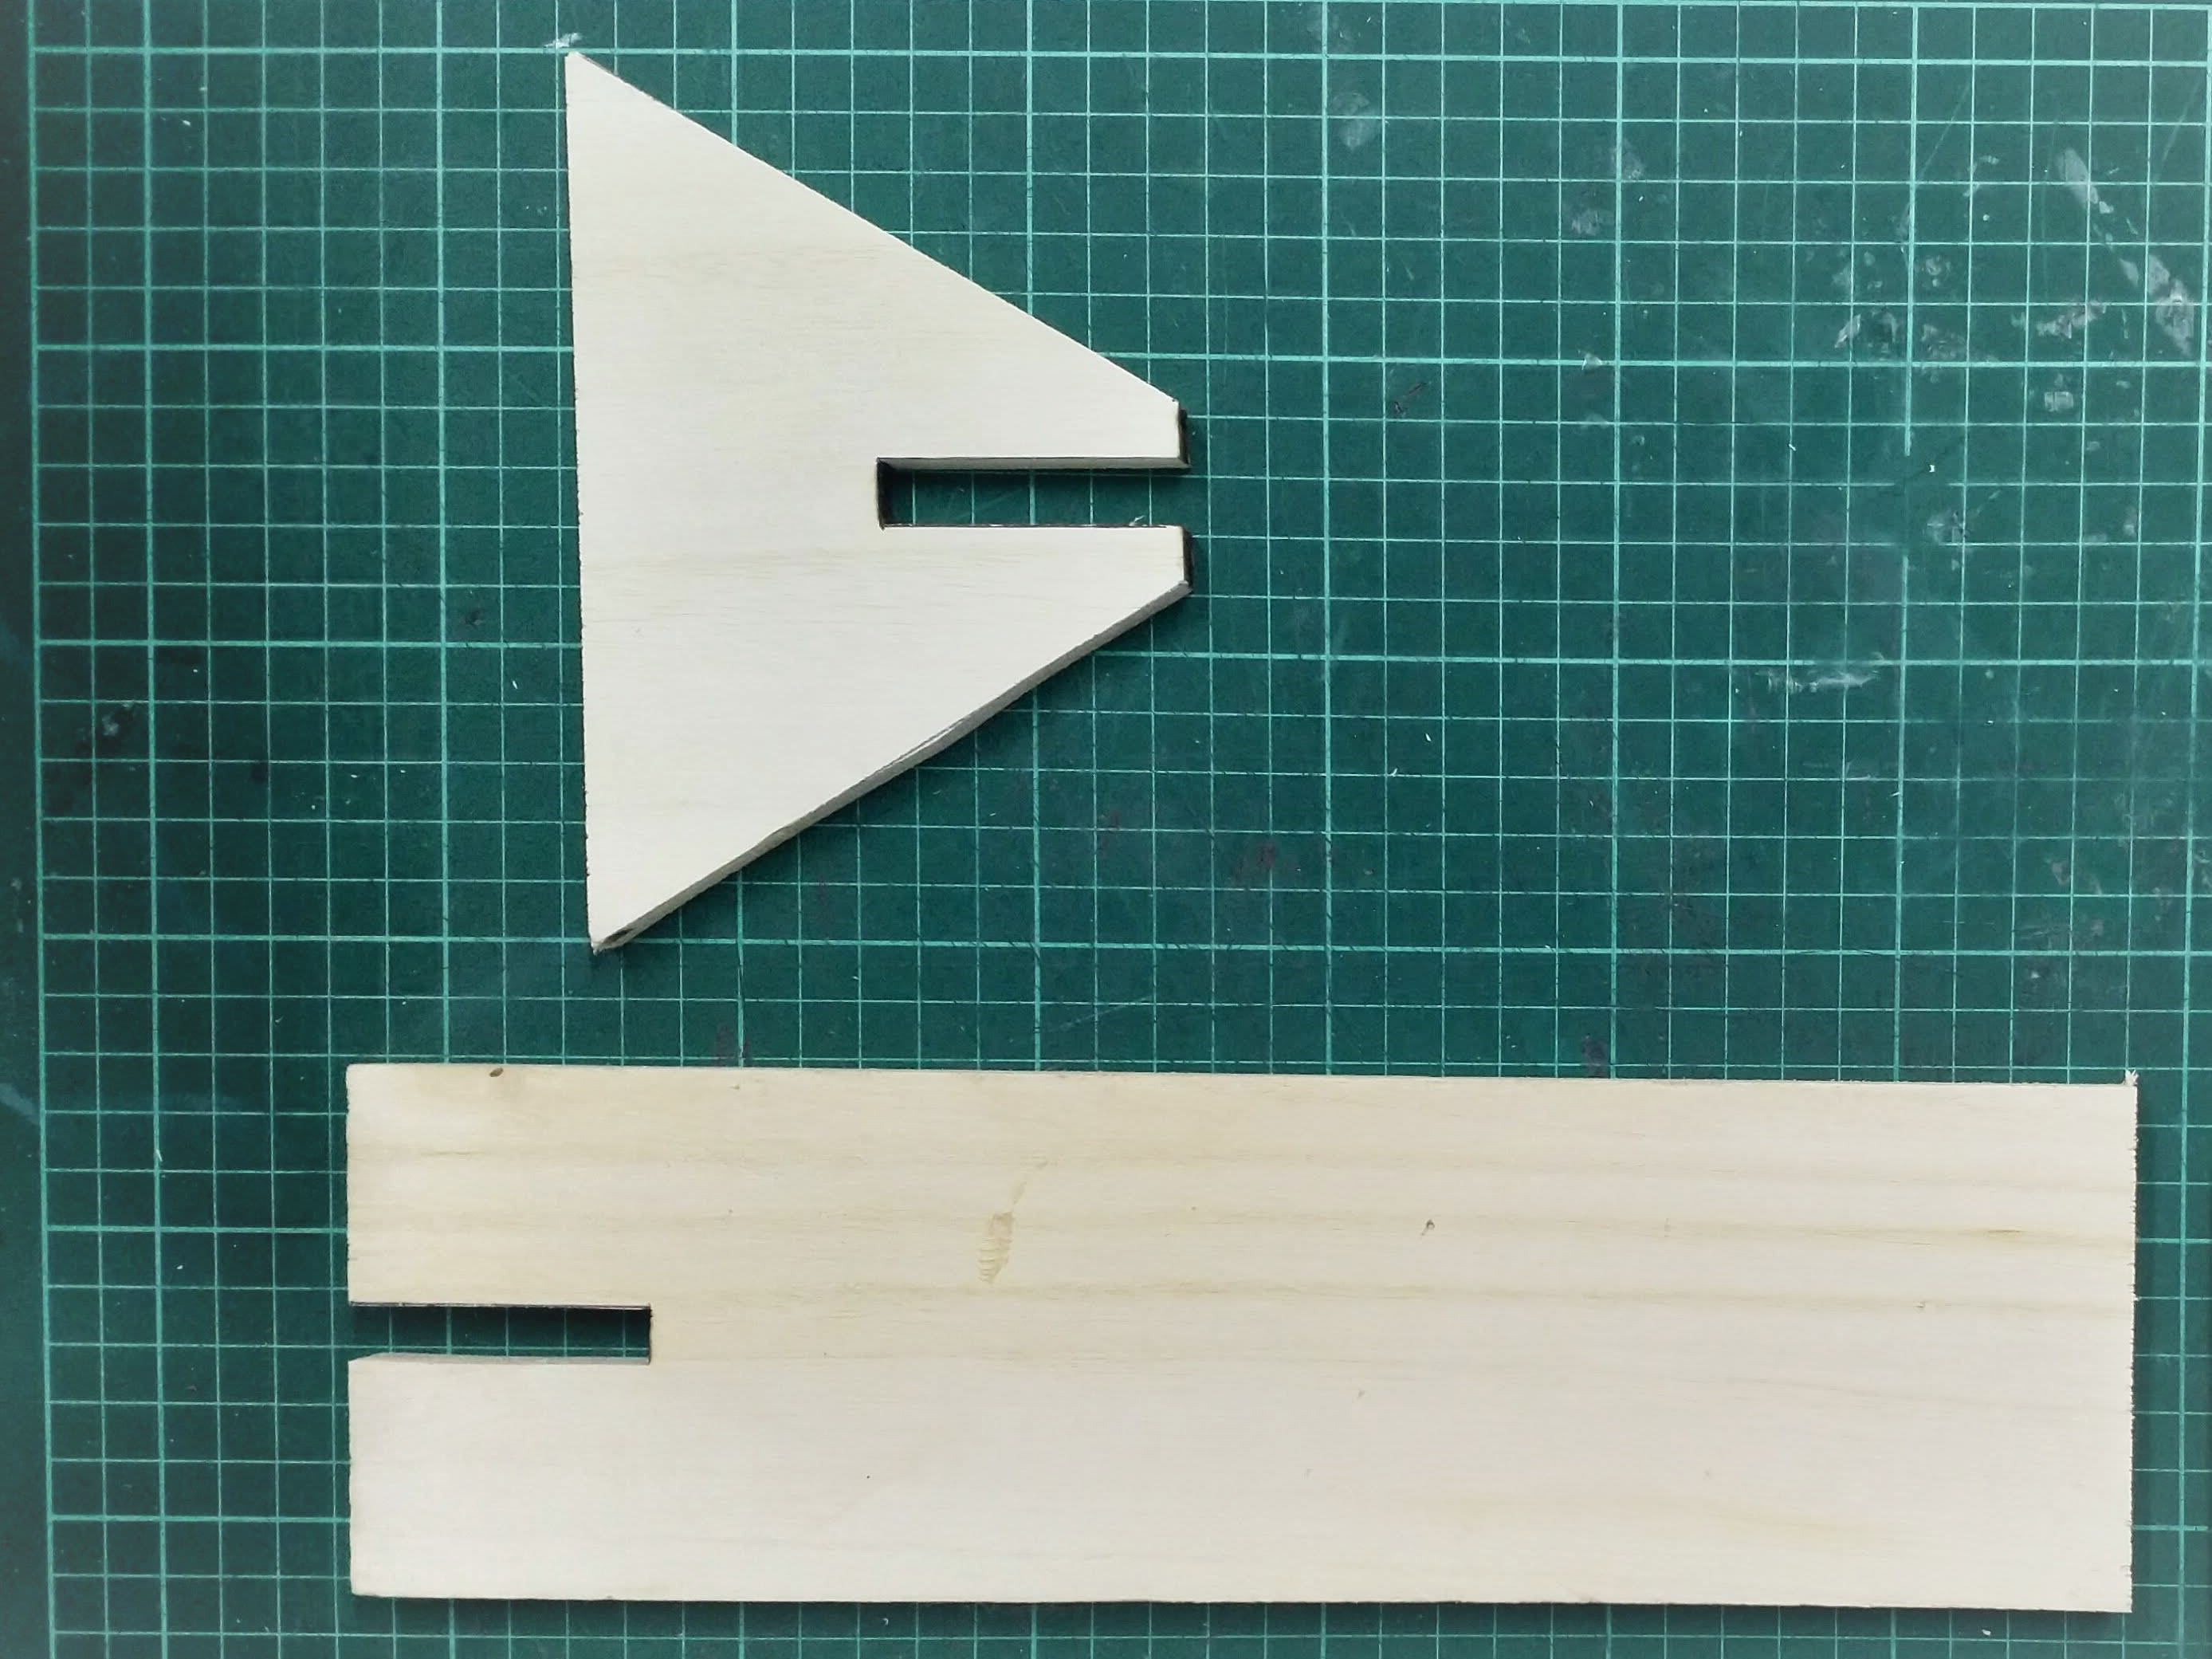
Make a stand
Cut out a stand from cardboard, wood, or any material that eventually can stand on its own and will not be blown over by the wind
STEP 7
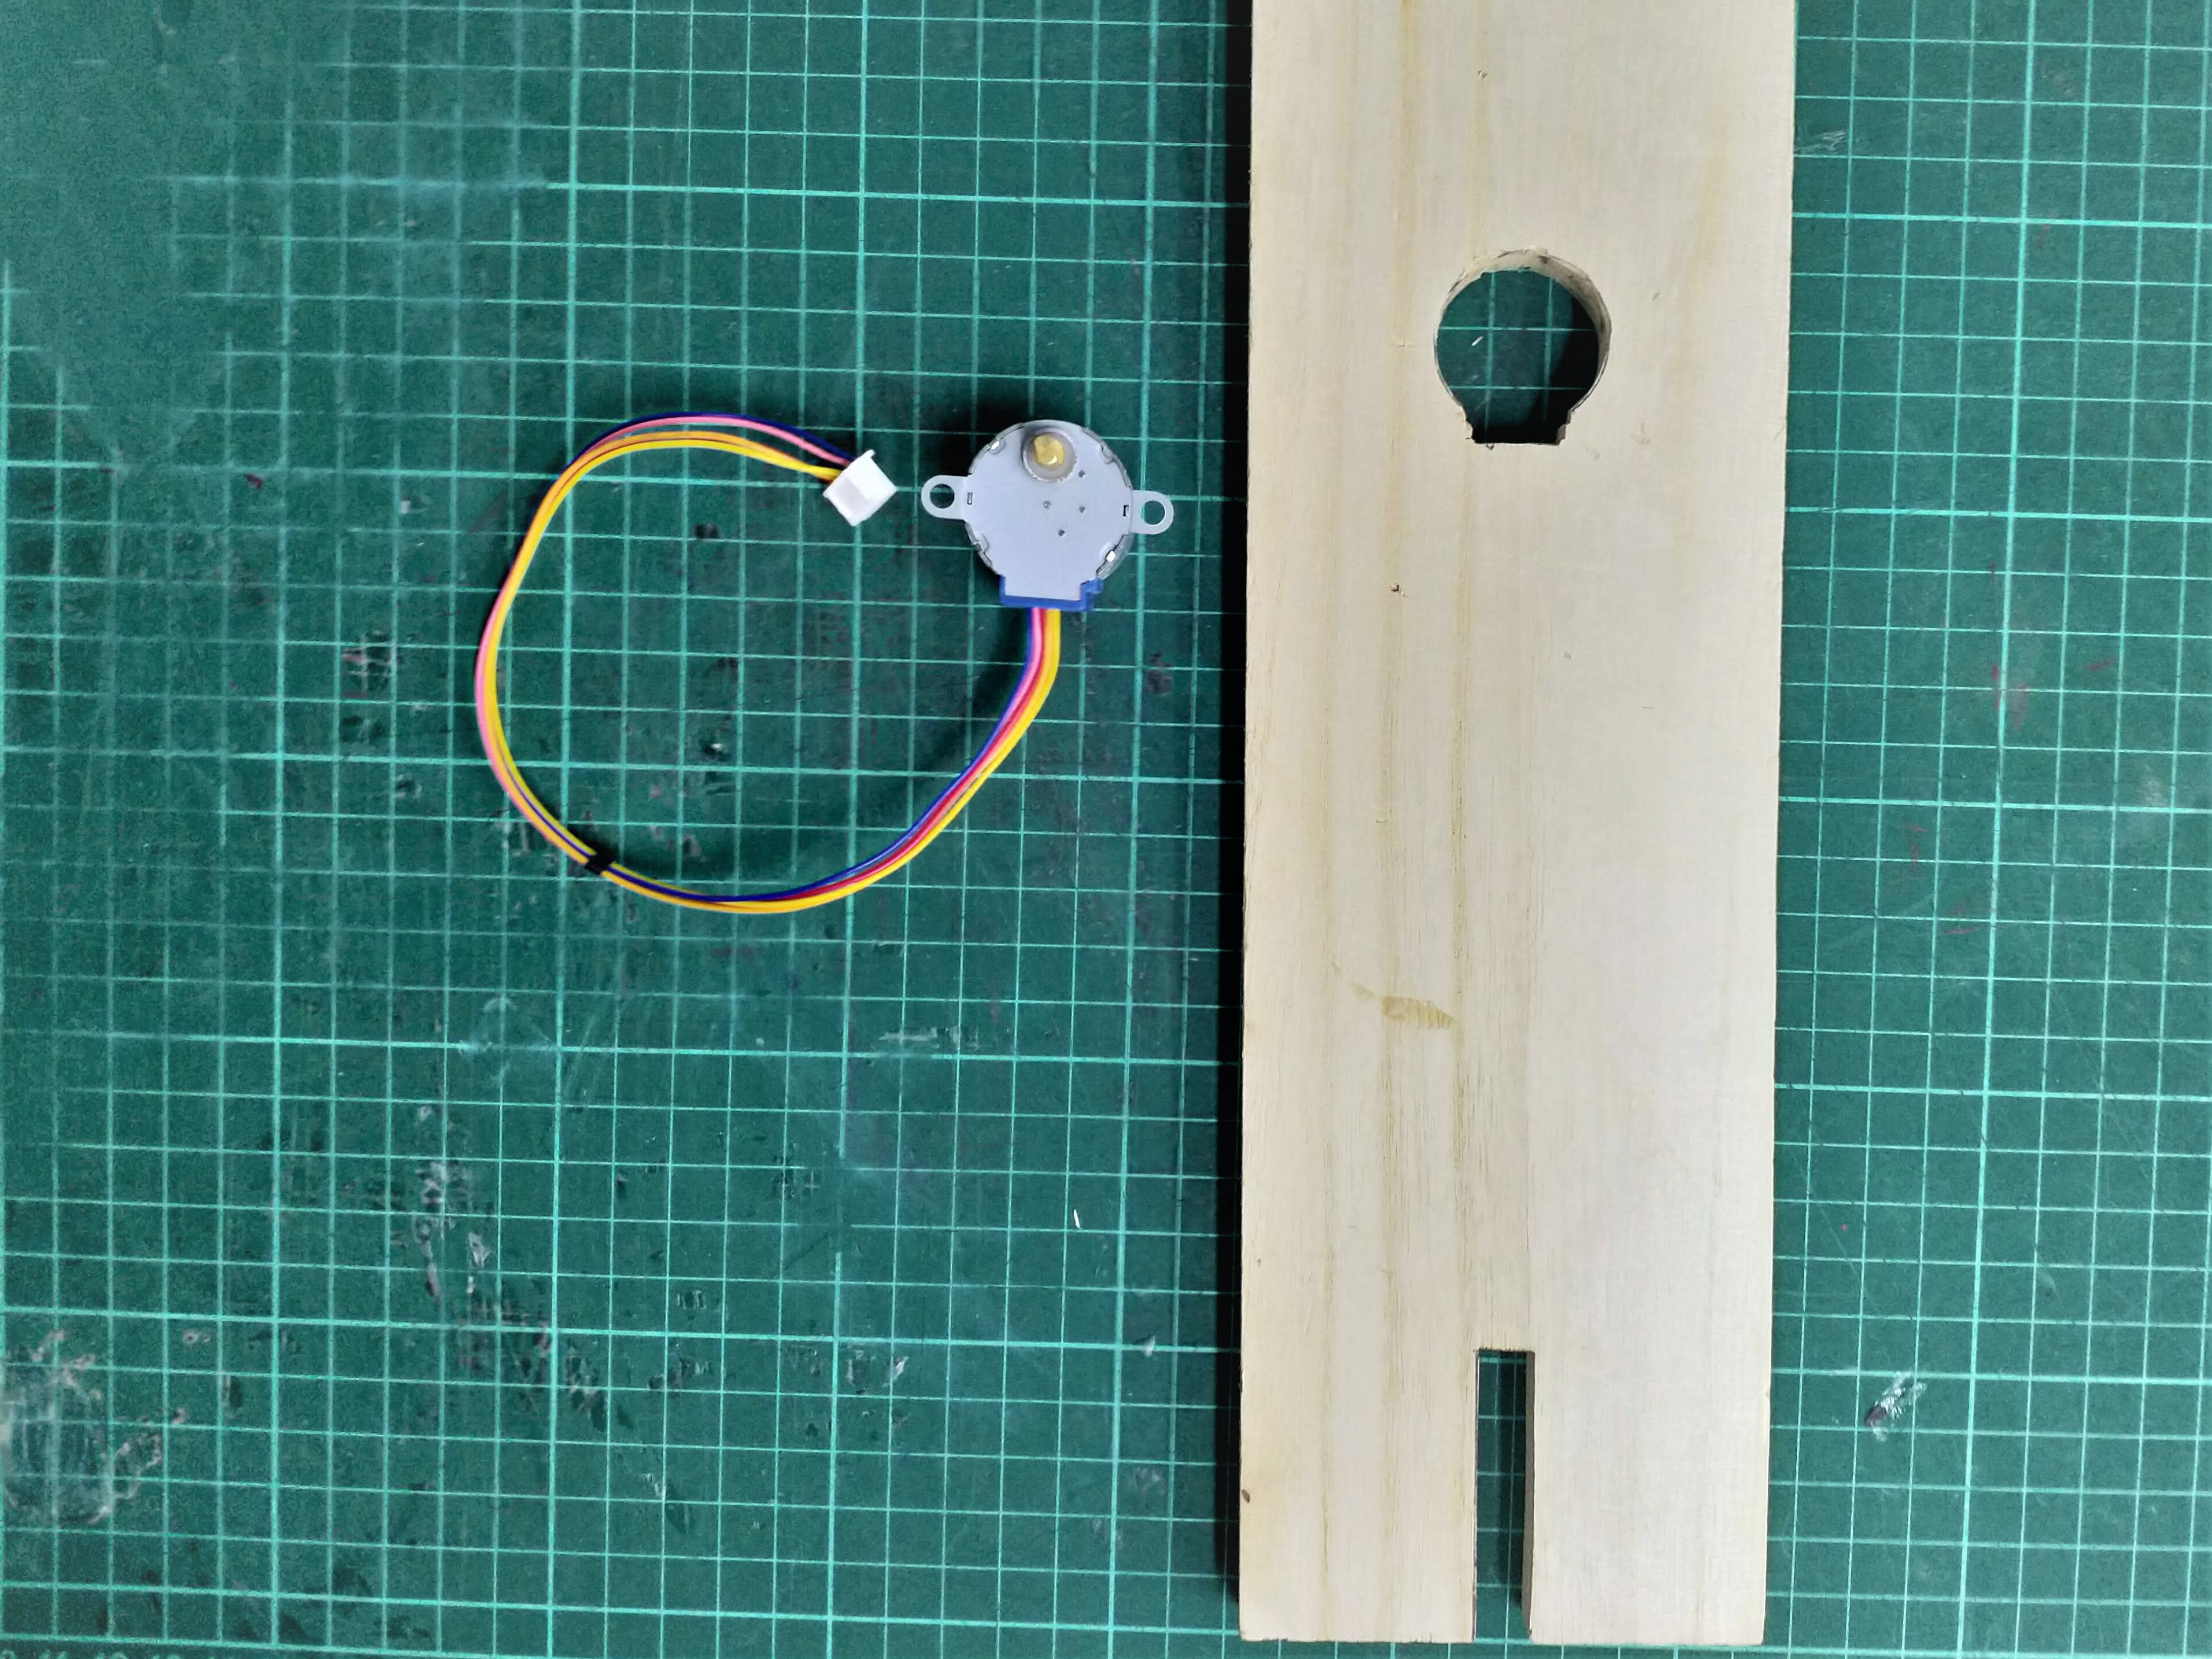
Motor-shaped hole
Trace and bore out a stepper motor shaped hole in your stand. The stepper motor should fit snugly and not move when it is pushed into this hole. Make it a little more snug than a glove.
STEP 8
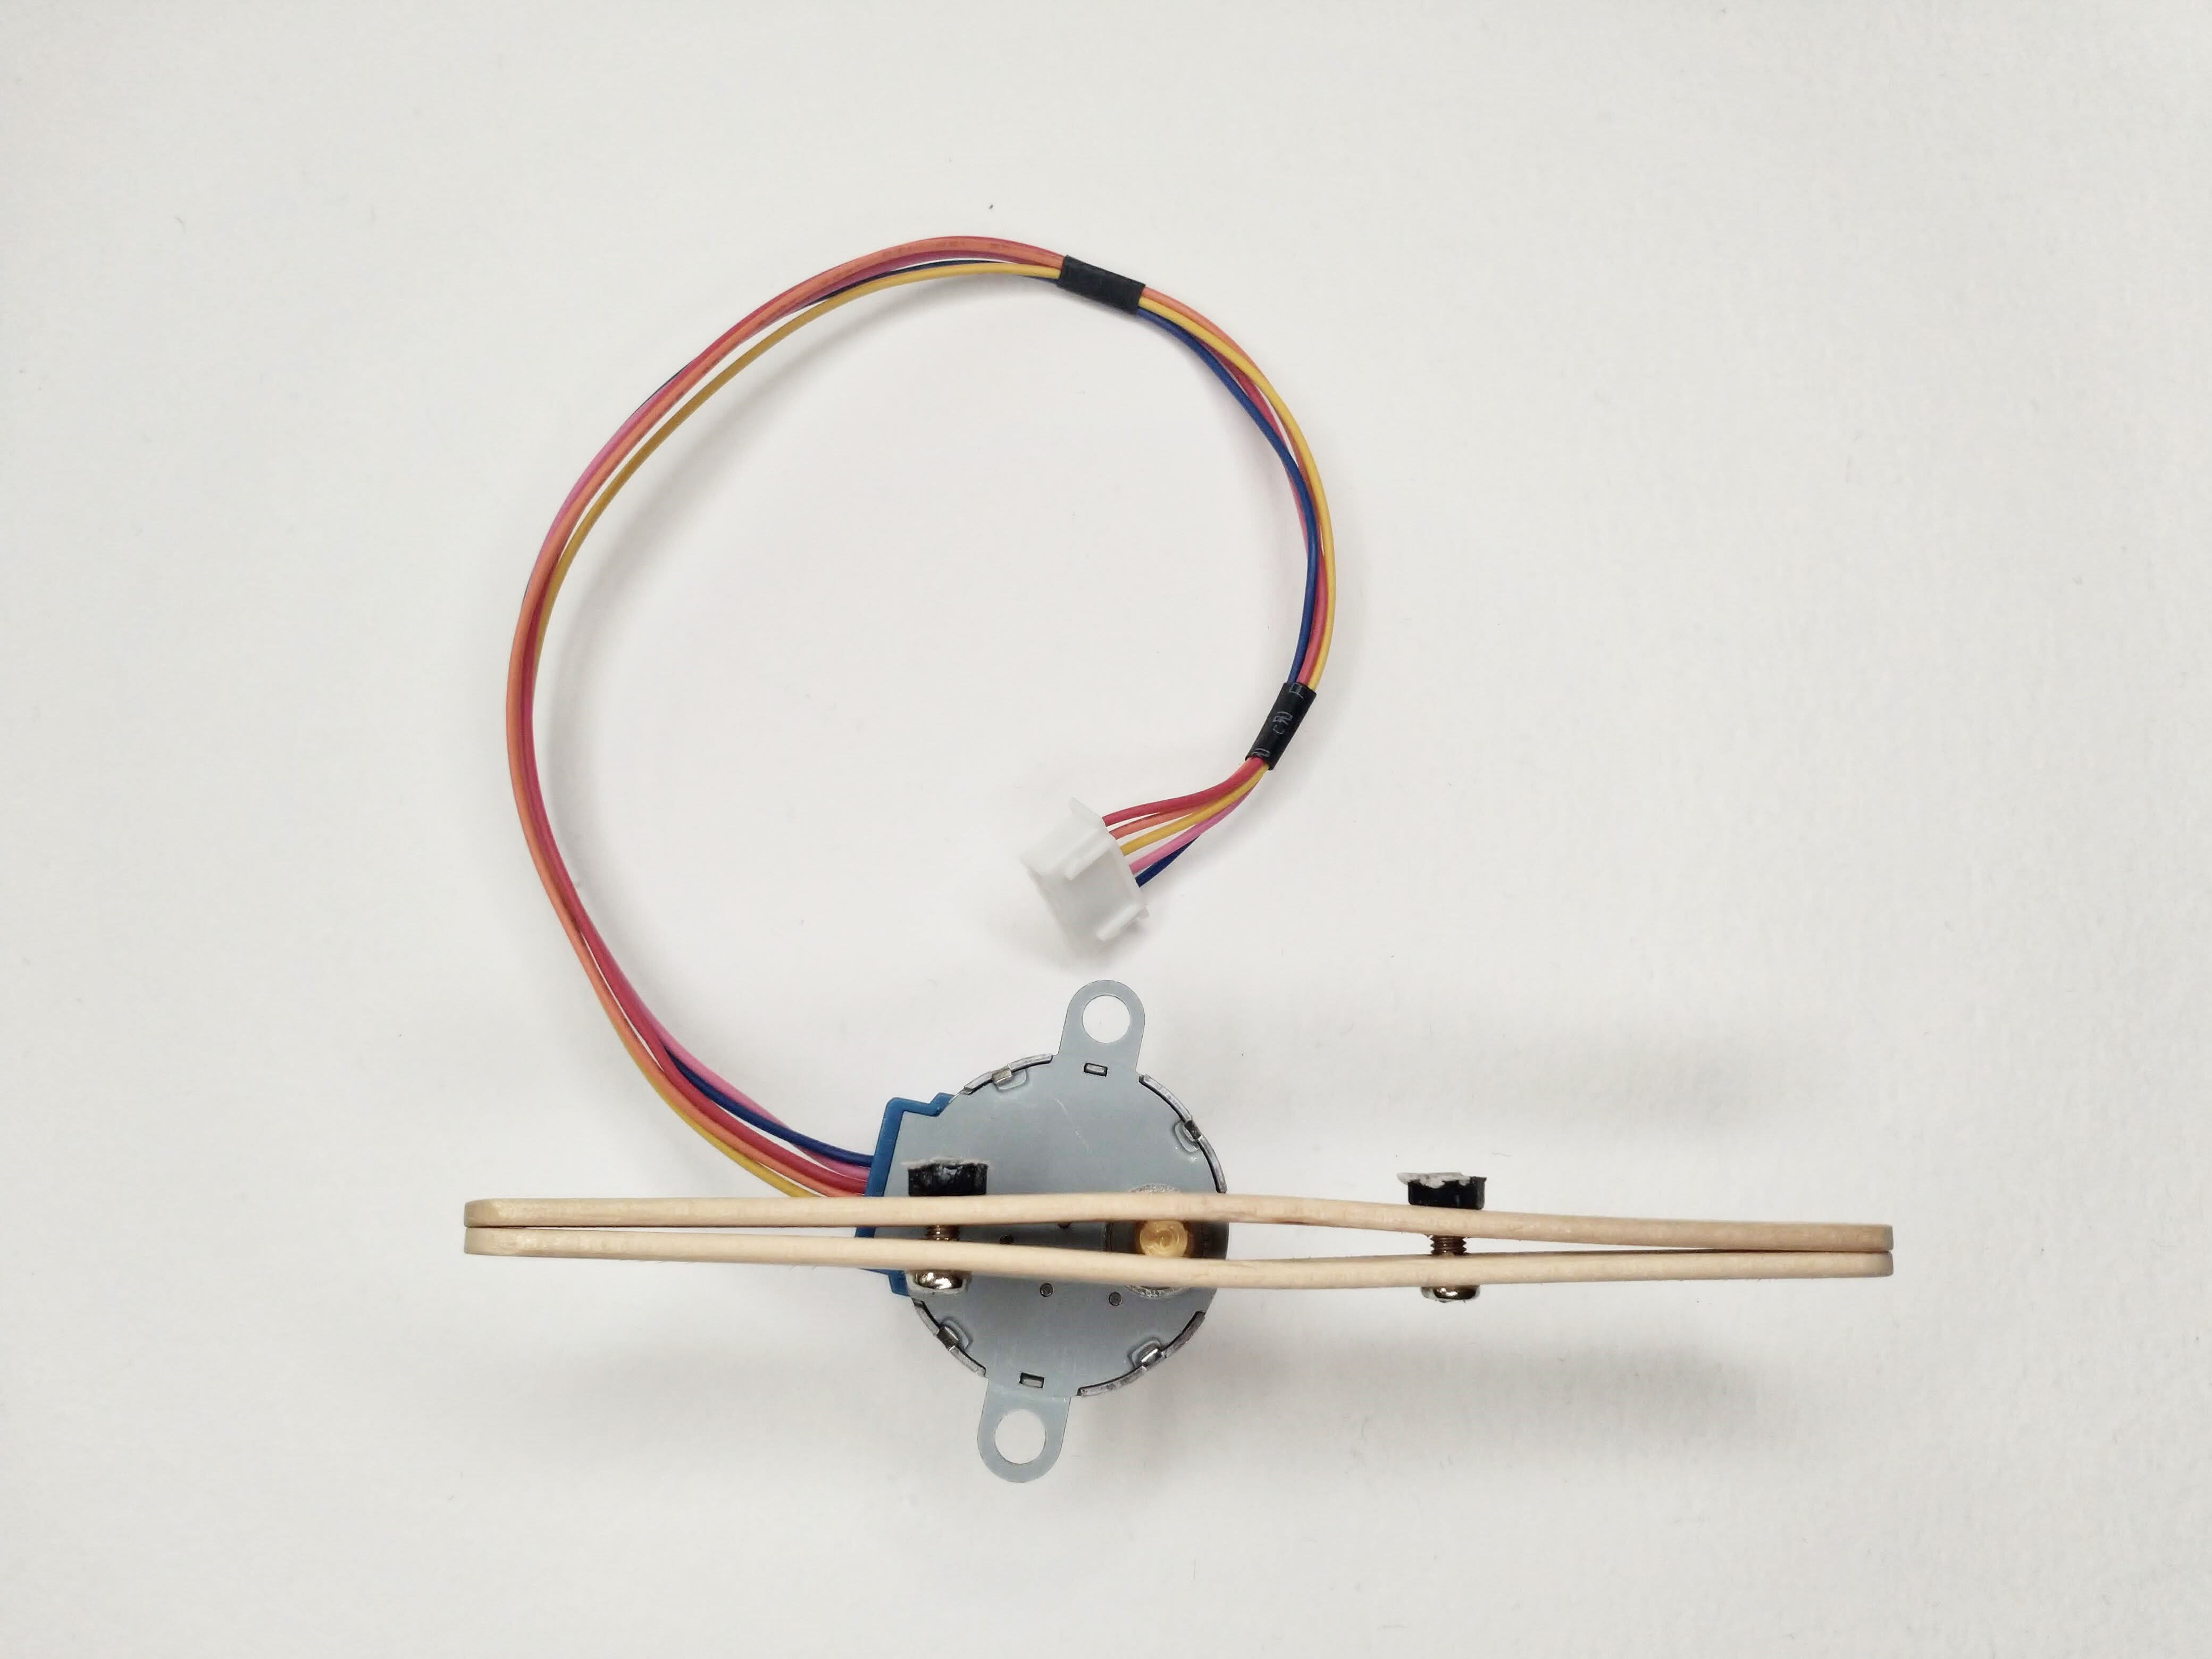
More boring steps
Bore appropriately-sized holes into the ice cream sticks, then extend the stepper motor’s shaft with two ice cream sticks screwed tightly together to sandwich the shaft.
(If you don’t have a drill, don’t worry - ordinary stationery can work equally well! The ice cream sticks pictured were drilled with a pen knife and a generous helping of patience. There are also other methods to extend a motor’s shaft, such as using shaft couplers or gear trains, but we figure readers are even less likely to have those.)
Get creative with your solutions! This is just one method, You might want to explore laser cutting or 3D printing your own shaft extension instead.
STEP 9
Motoring the umbrella
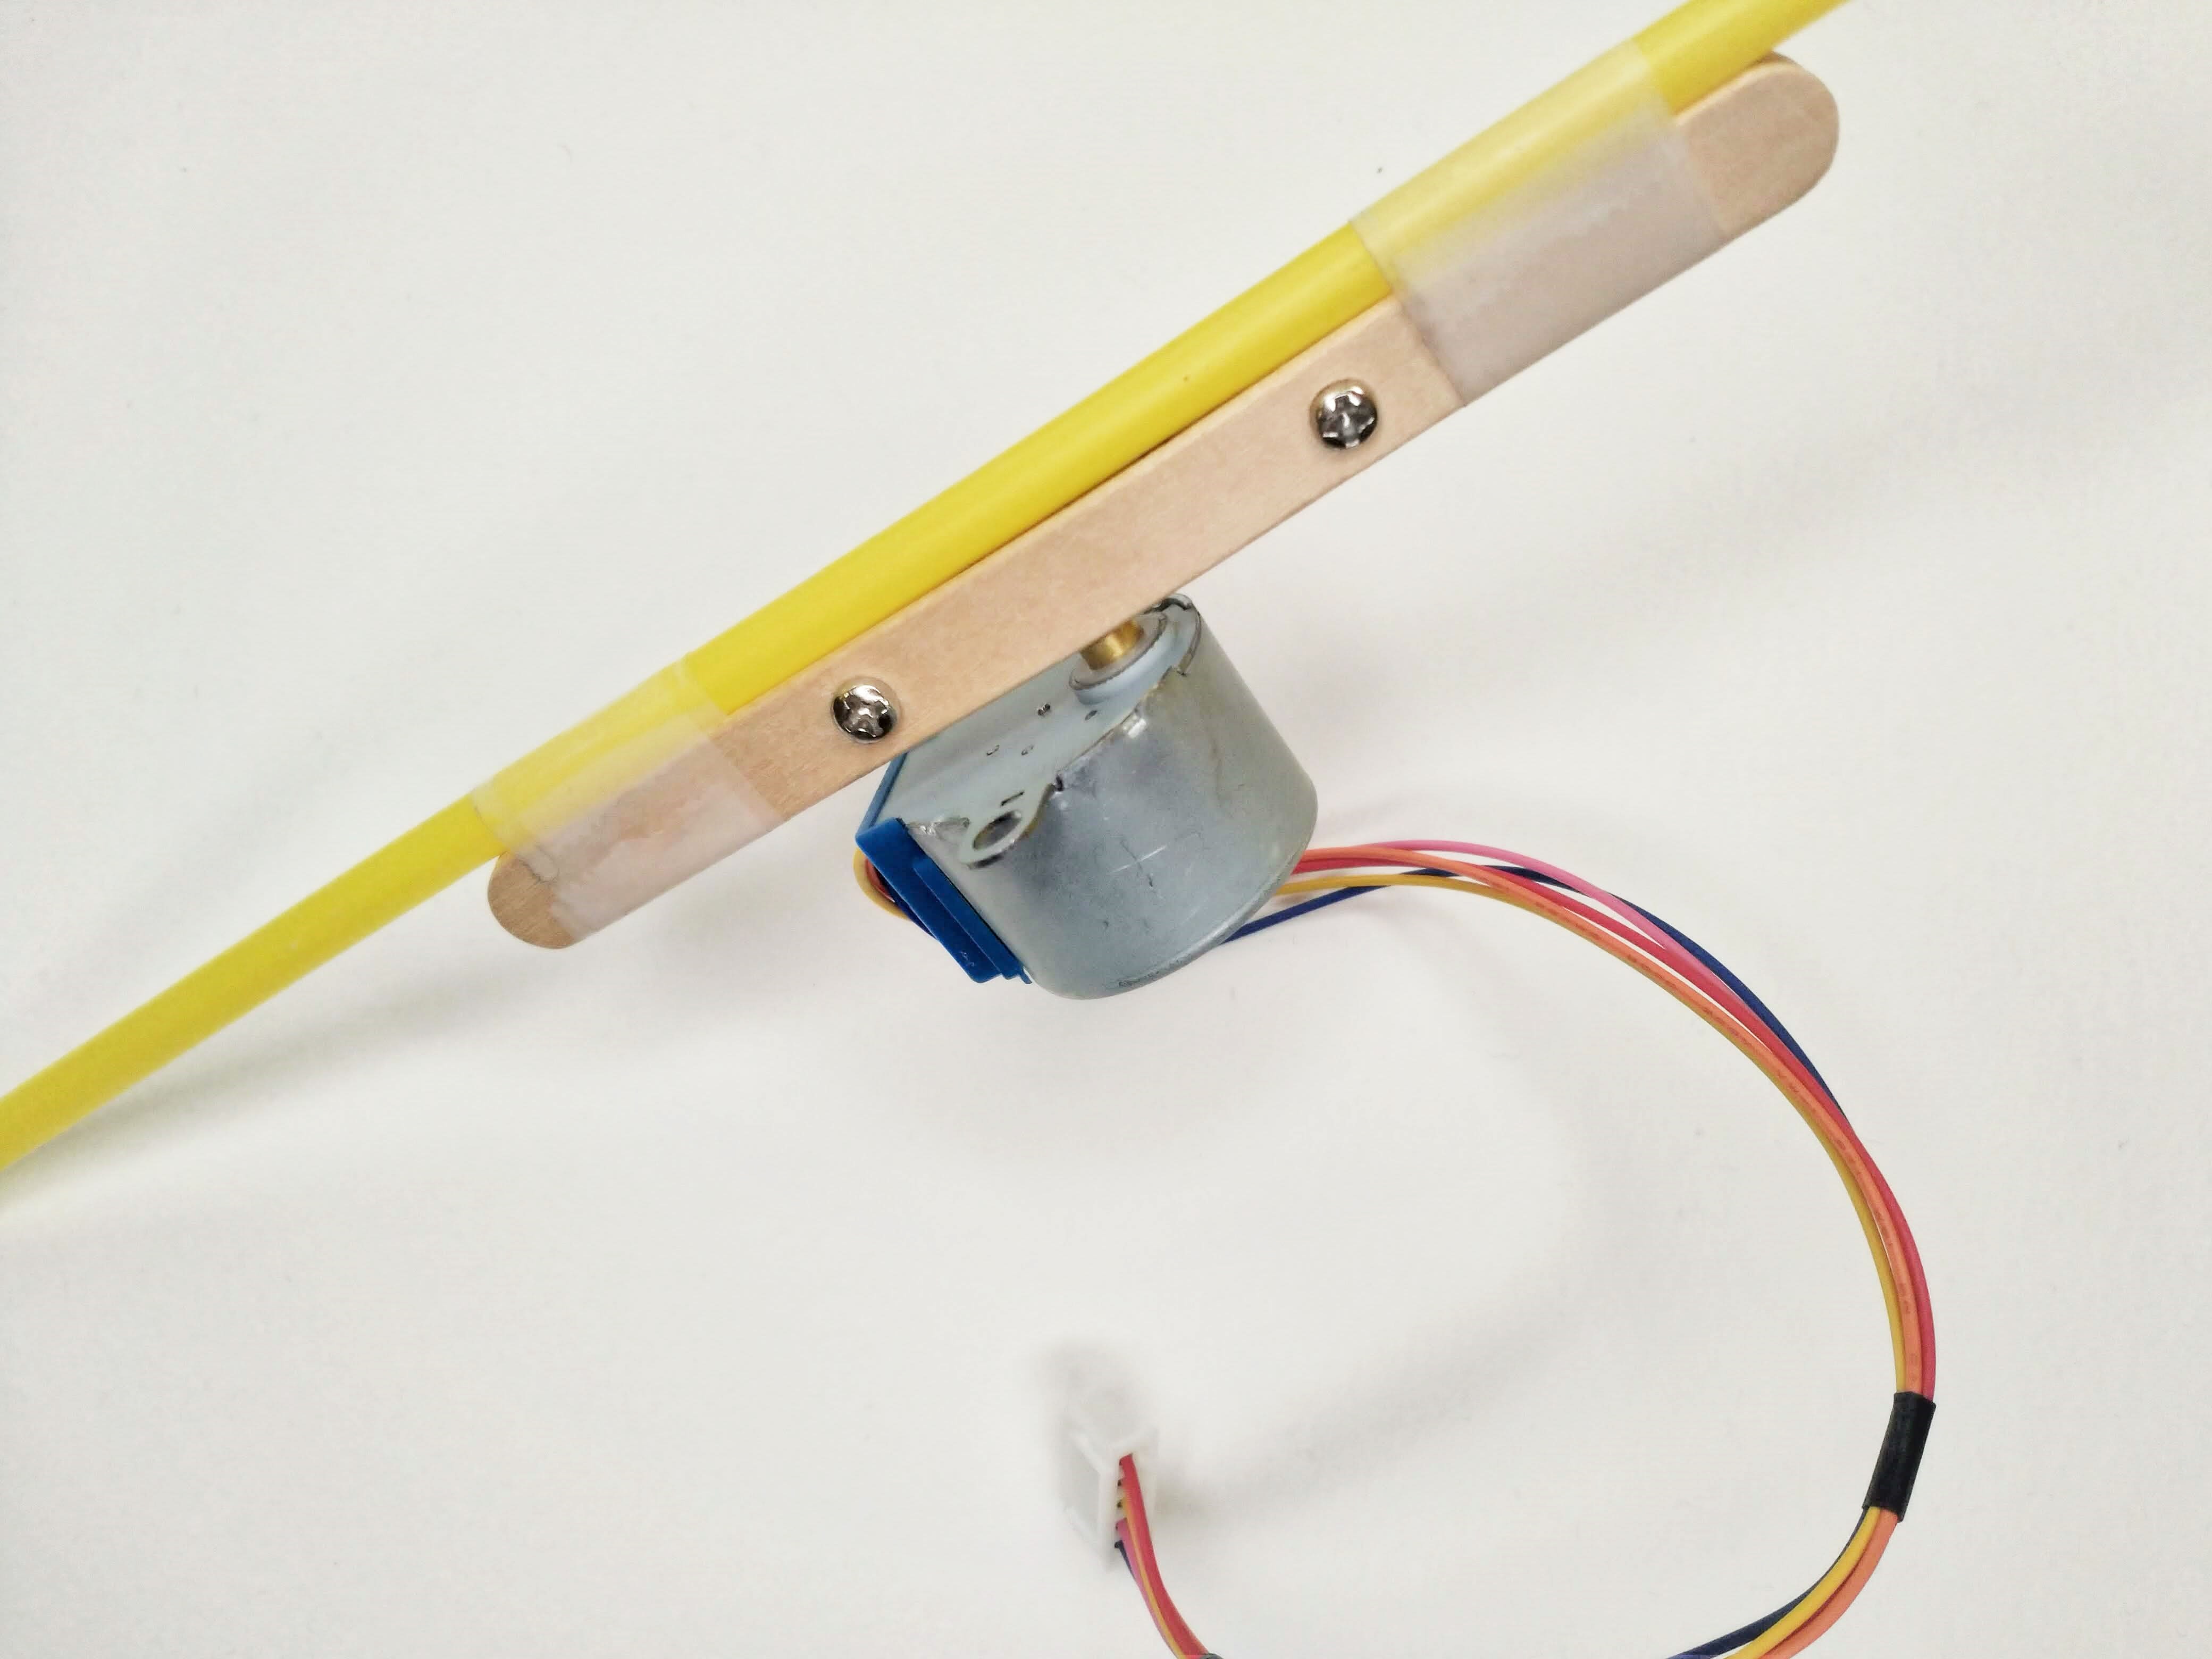
Now, tape the shaft extension to the spine of the umbrella, making sure it is secure.
STEP 10
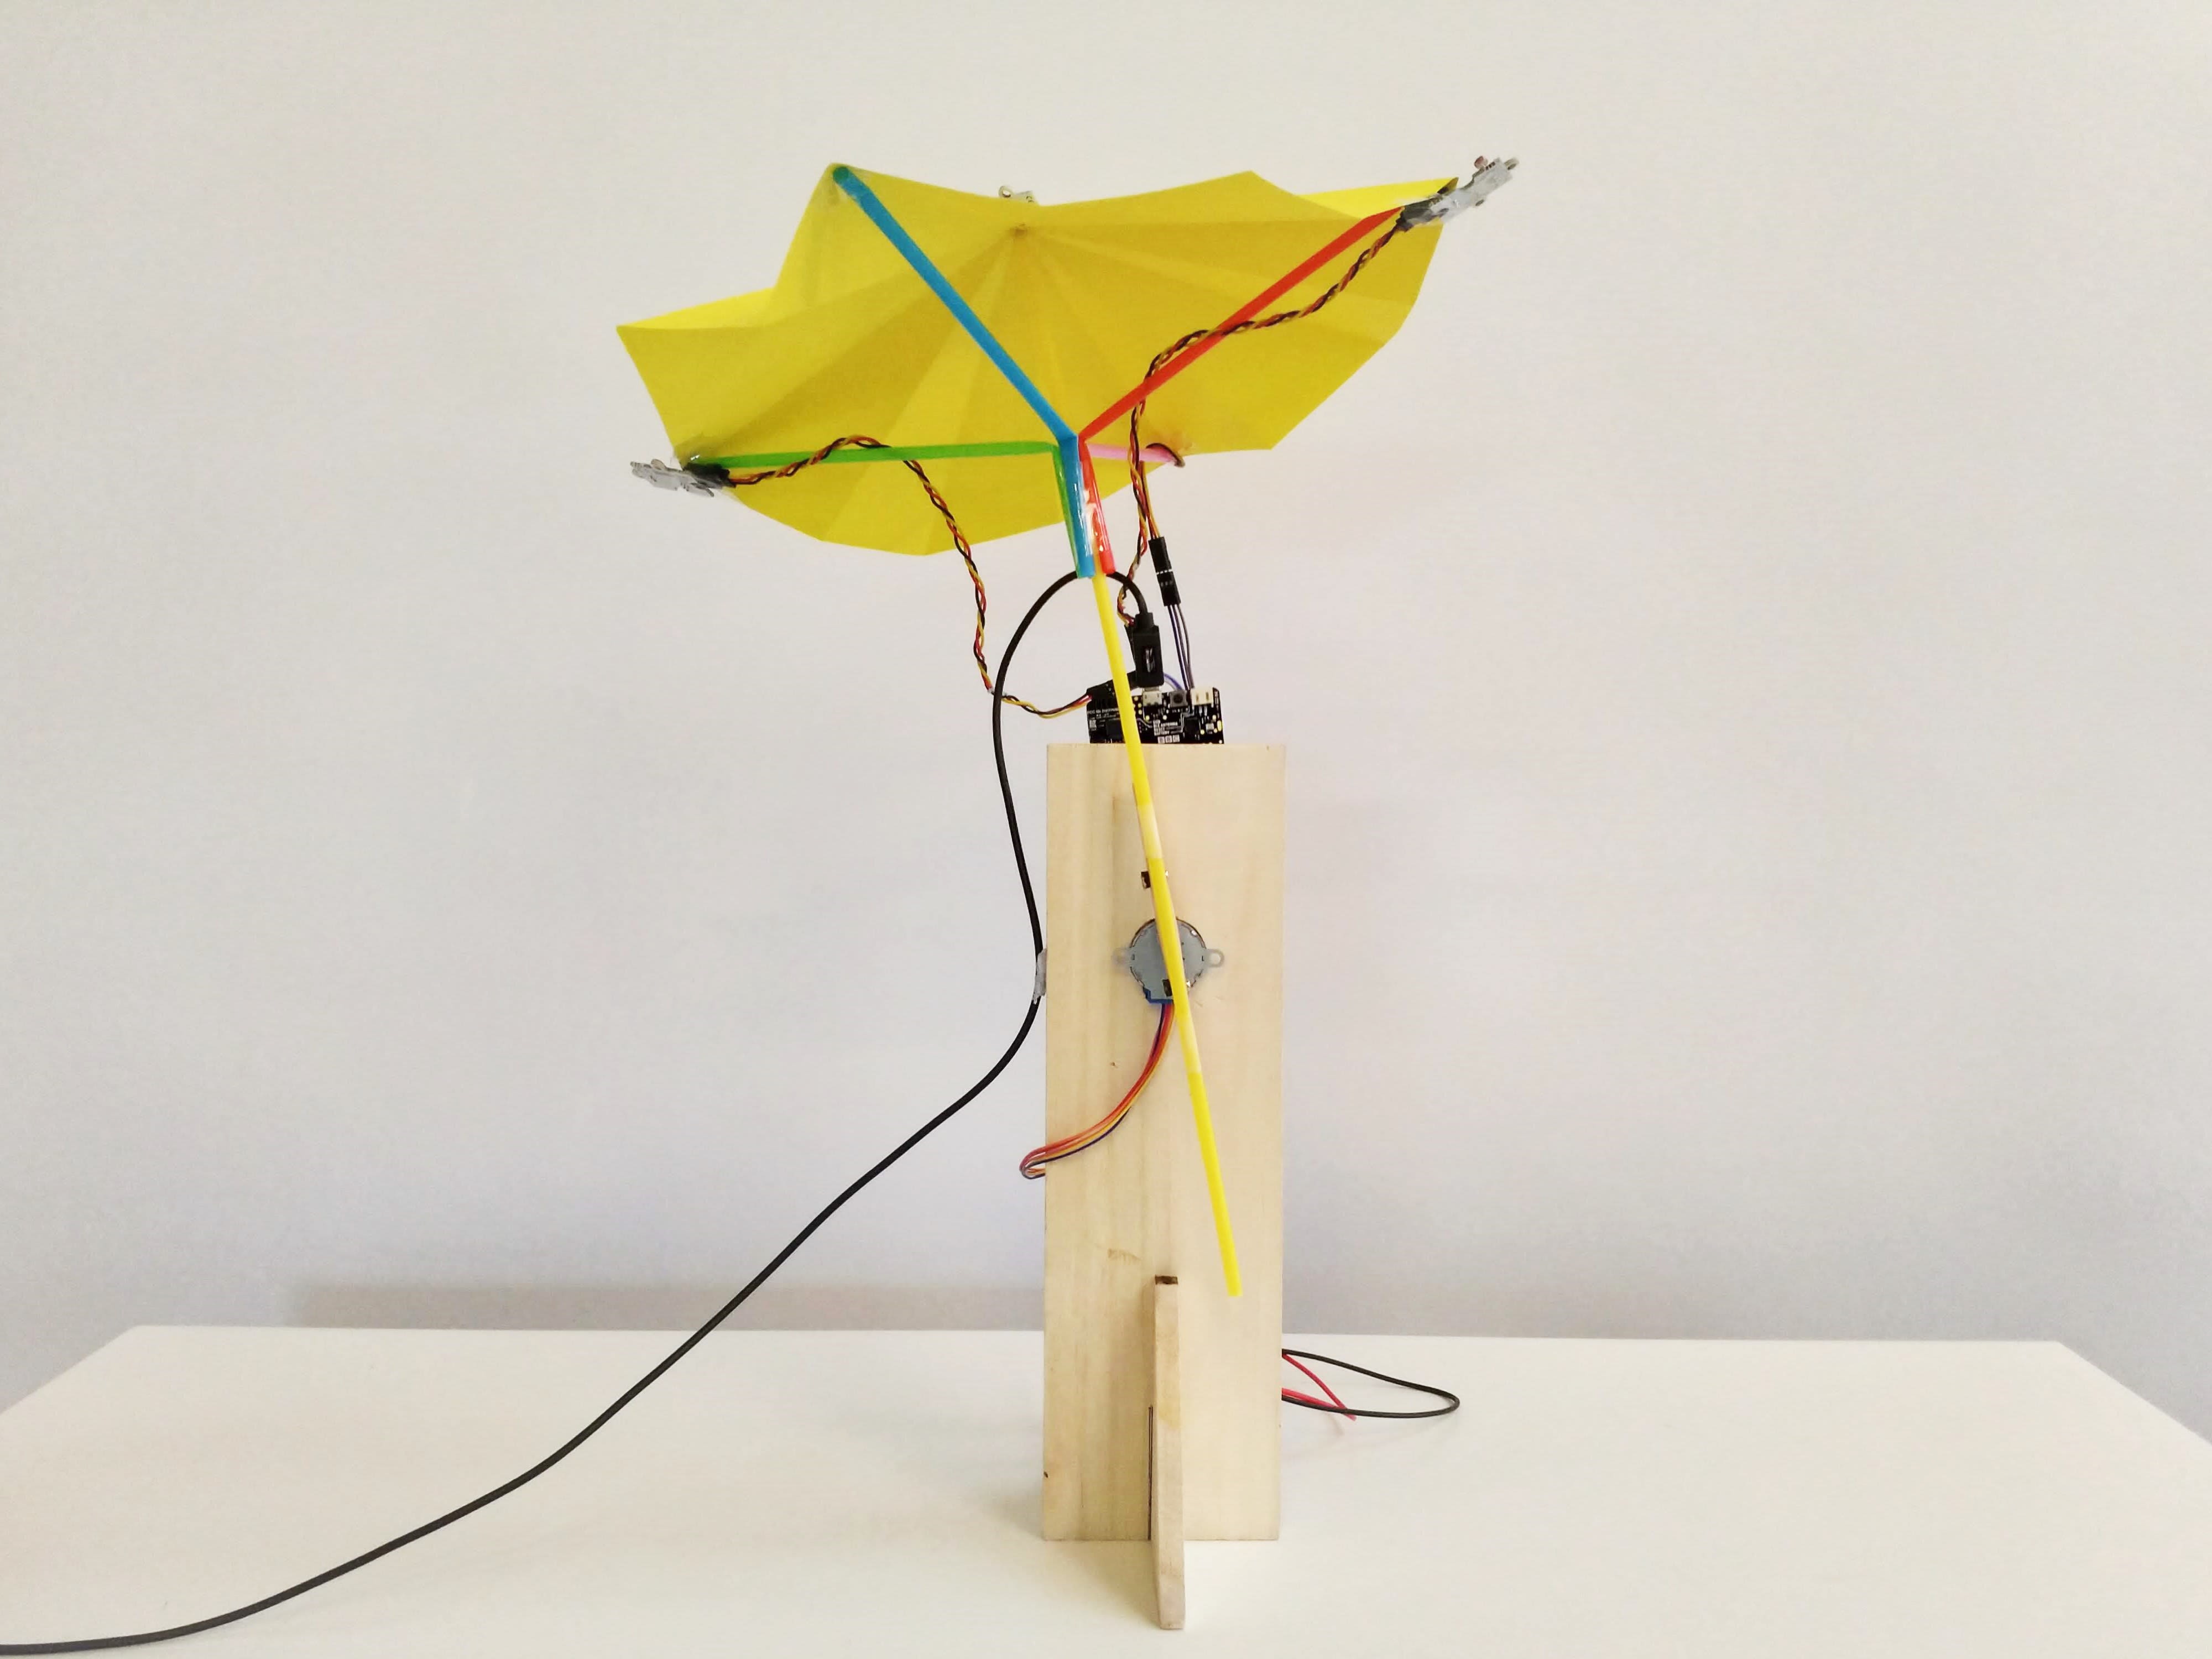
Stand up
Push and secure the stepper motor into the snug hole in the stand. The light sensors should face the sides of the stand, so the rotation of the umbrella follows the line created by the 3 light sensors.
STEP 11
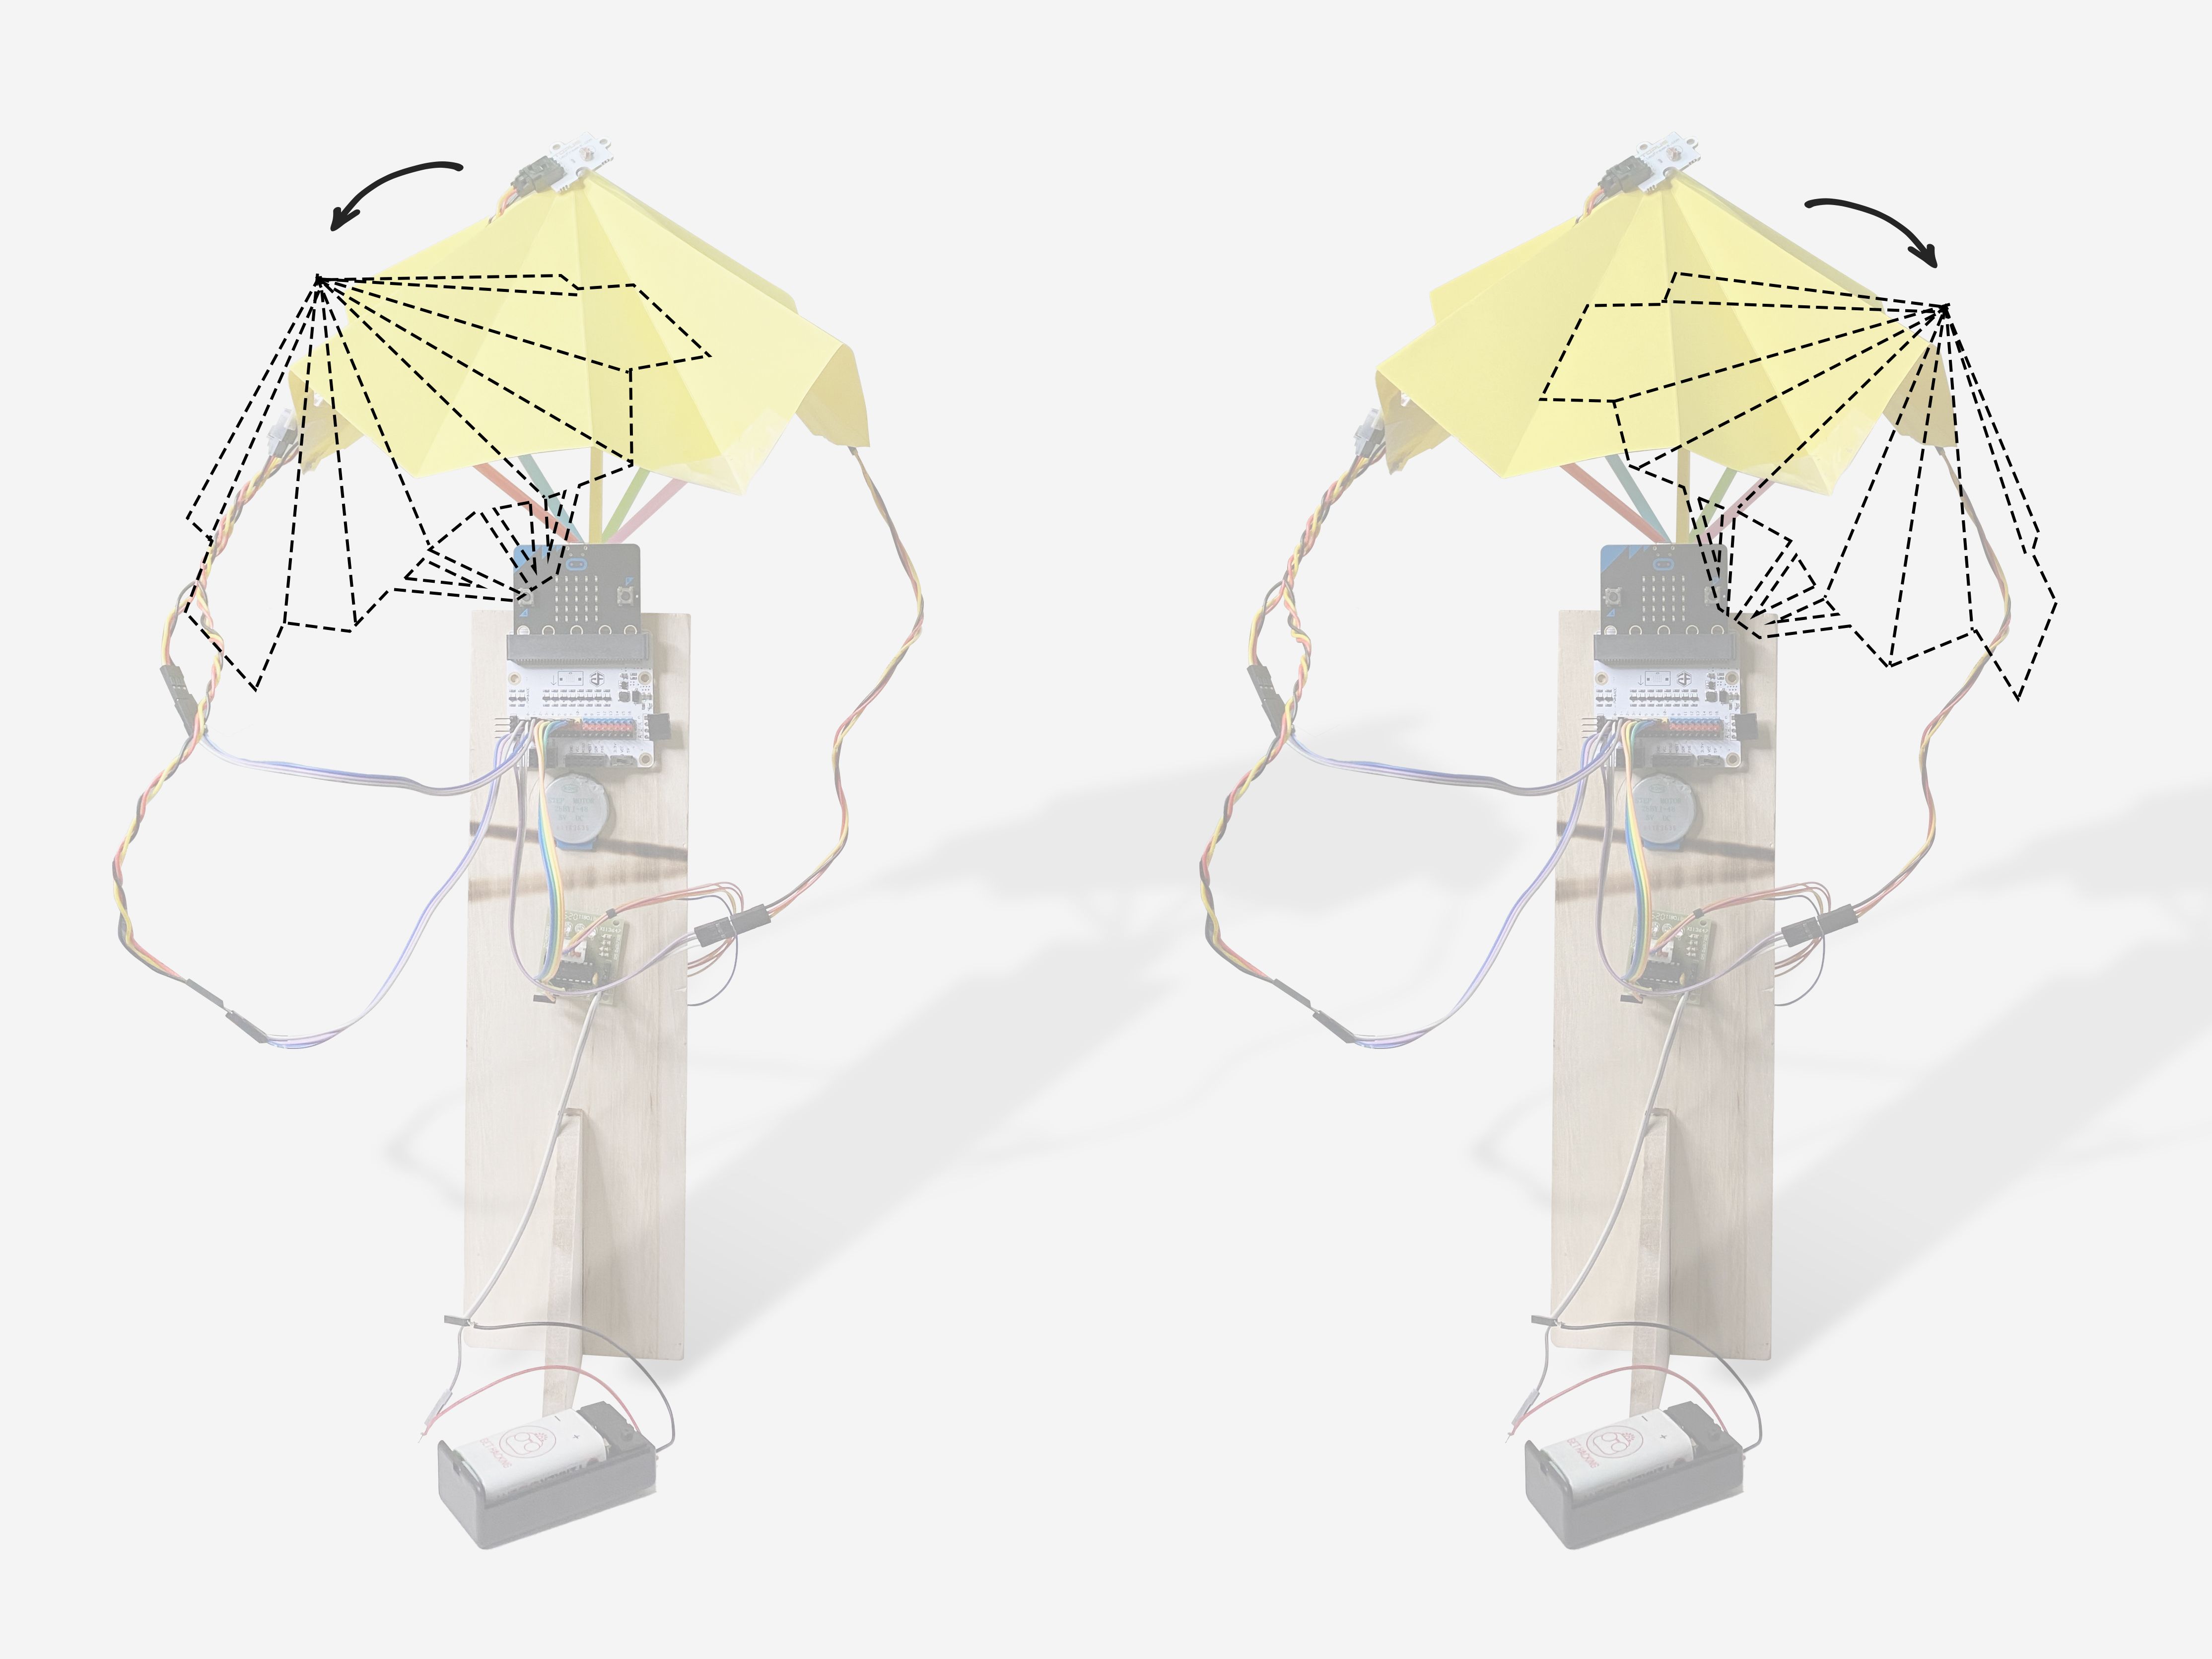
Under my umbrella
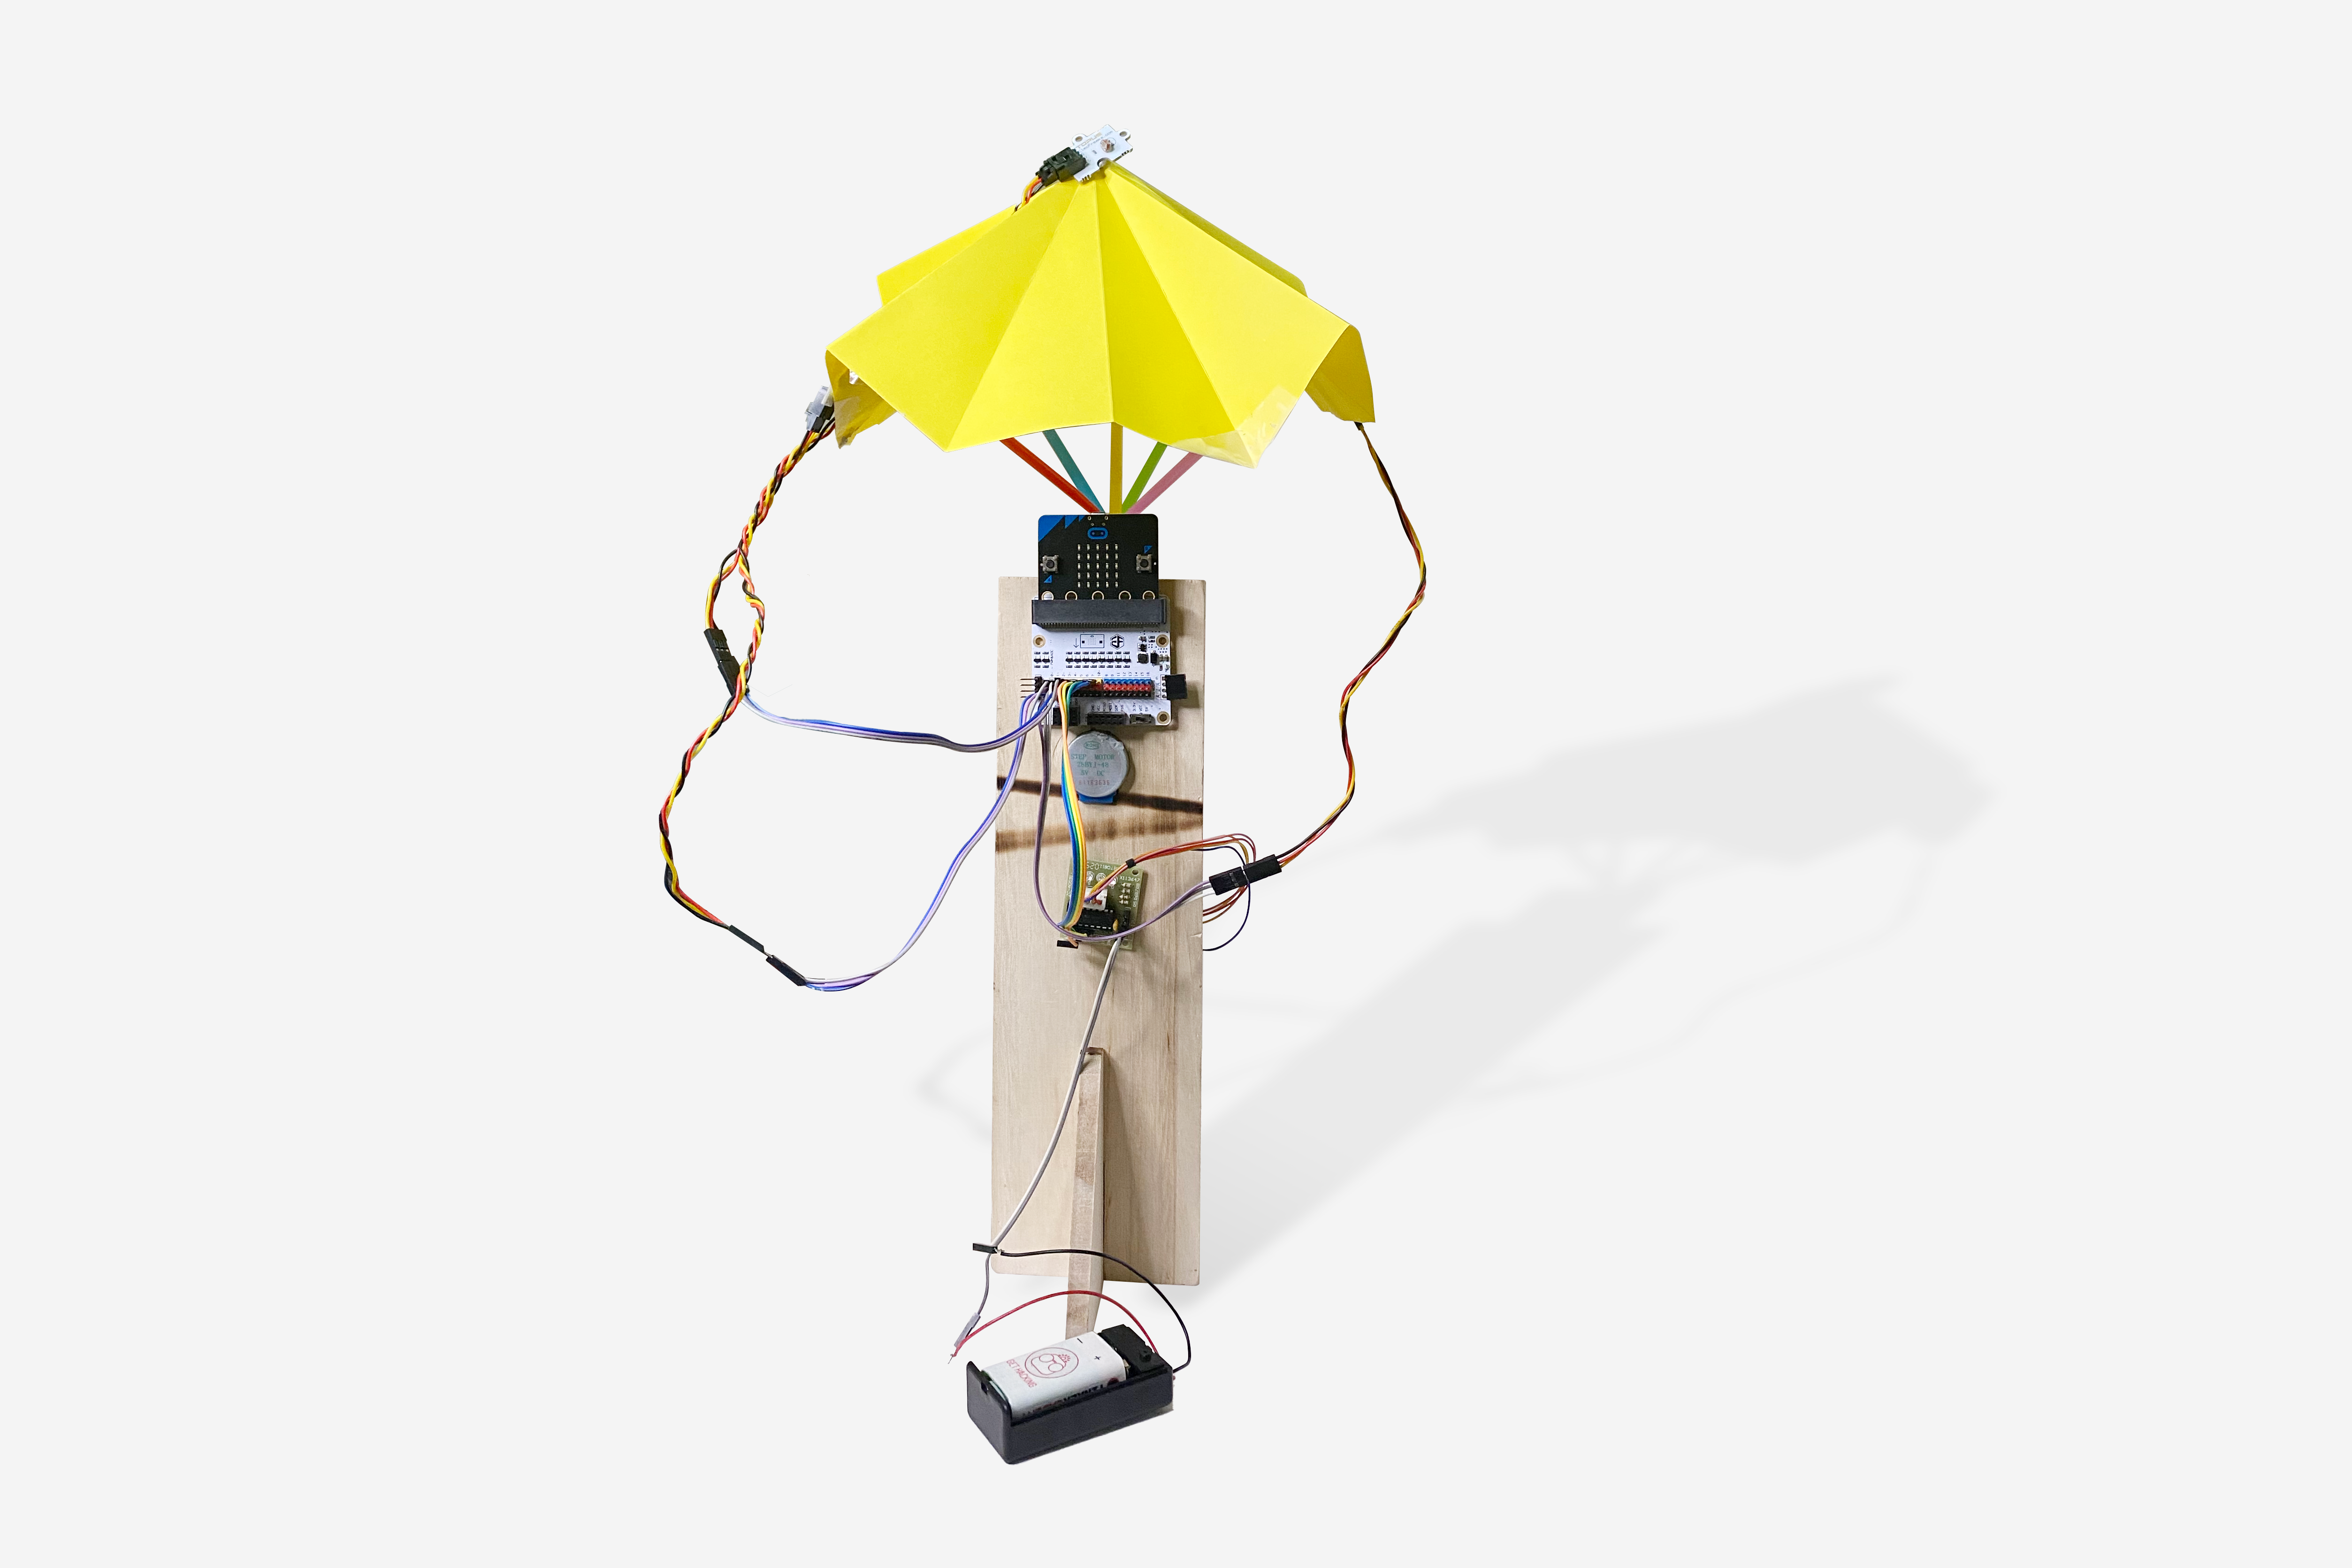
Attach the micro:bit and motor driver to the stand, connect all the components, and extend the components with jumper wires if needed.
The light sensor right at the top of the sunbrella should be connected to P1, and the sensors at the sides should correspond to the appropriate pins that influence which direction the sunbrella rotates towards.
(Remember to connect a battery as well!)
STEP 12

Finally, code up the micro:bit! What we want to see is that the umbrella should move towards where the sun is brightest. Hence, if the light sensors on either side are reading a higher value than the light sensor in the middle, move the umbrella towards the sensor with a higher value.
Code and References
Made this activity? Good Job! Now spread the word. Share a photo of your creation on social media with #letsgethacking #Sunbrella