Surveyor's Wheel
Use the micro:bit to measure distances with no additional electronics! Just the onboard accelerometer, craft materials, and of course, variables.
YOU WILL NEED
Electronics
• BBC micro:bit
Craft Material
• Cardboard
• drinking straw
• Wooden skewer
• PVC pipe or broomstick
• toilet paper roll
Stationery
• compass for drawing circles
• ruler
• tape
• penknife
• Blu Tack
• hot glue
STEP 1
Mark the Cardboard
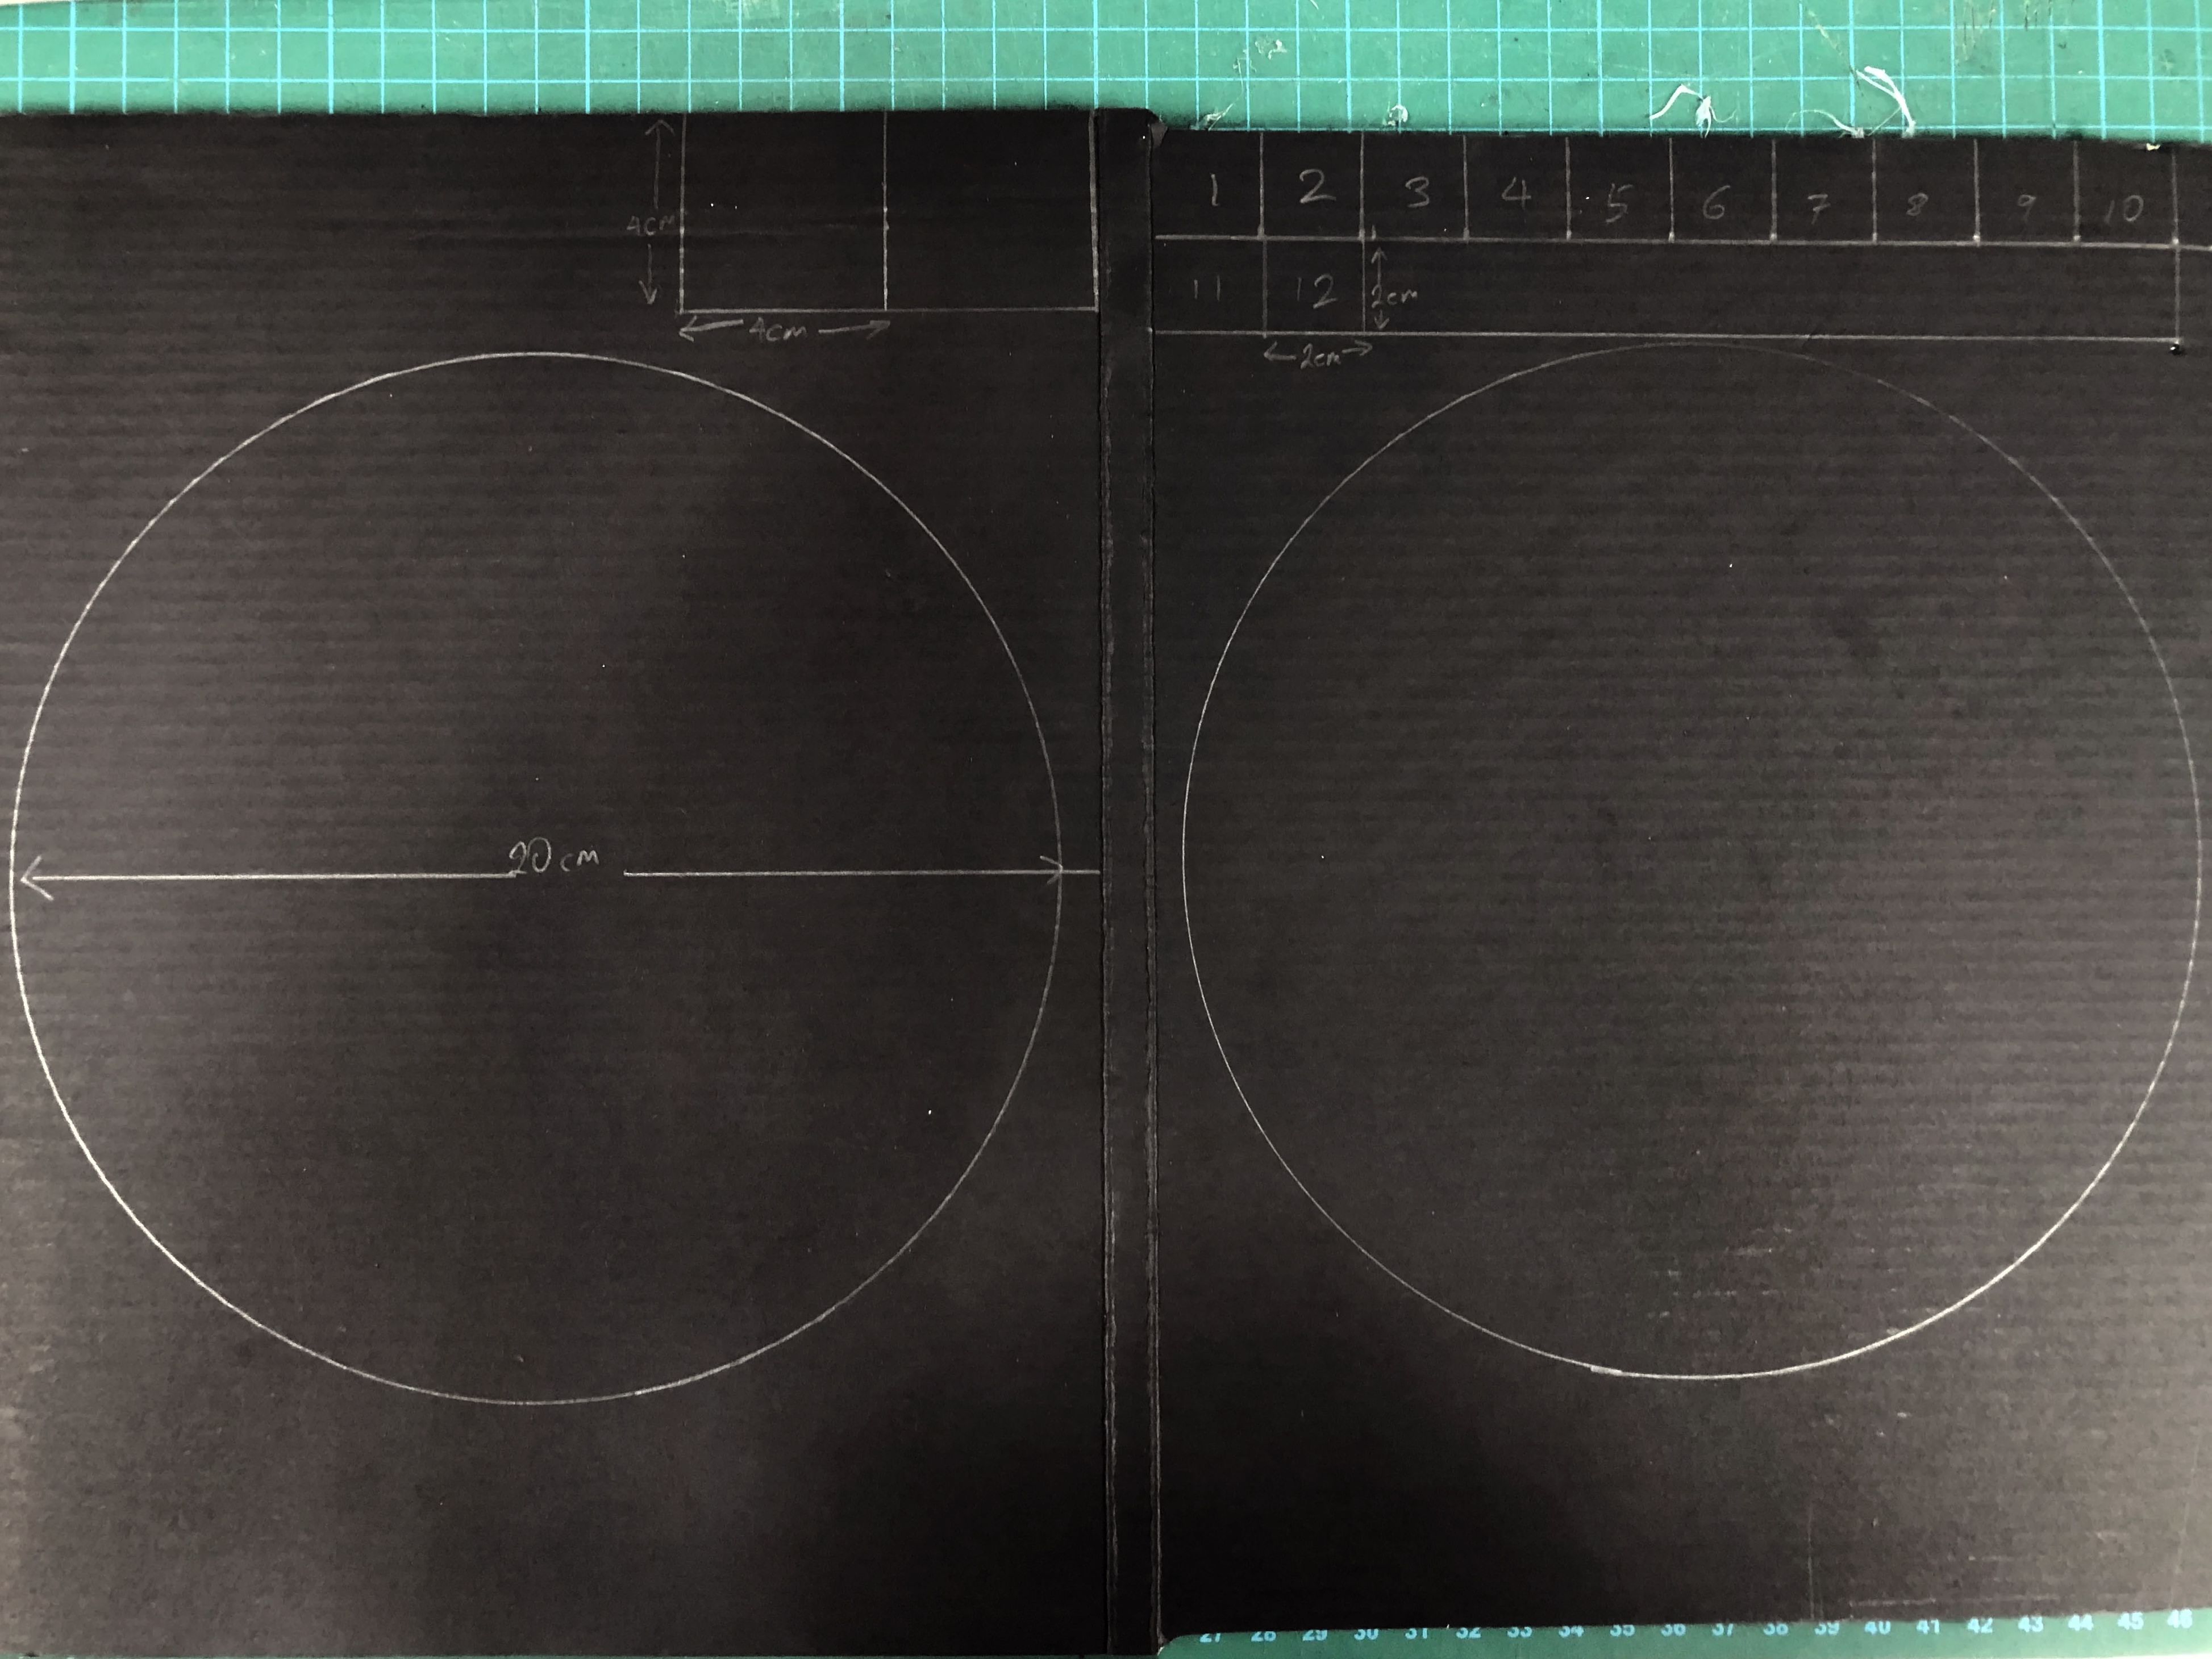
First, we’ll mark the cardboard for cutting.
Use a compass to draw two circles, 20cm in diameter, and use the compass to puncture a deep hole in the centre. We use two discs for our wheel to give it a bit more width and hence better traction.
Also use a ruler to mark twelve 2cm squares that we’ll use to space the large discs apart, and two 4cm squares to hold the wheel together.
STEP 2
Cut Shapes
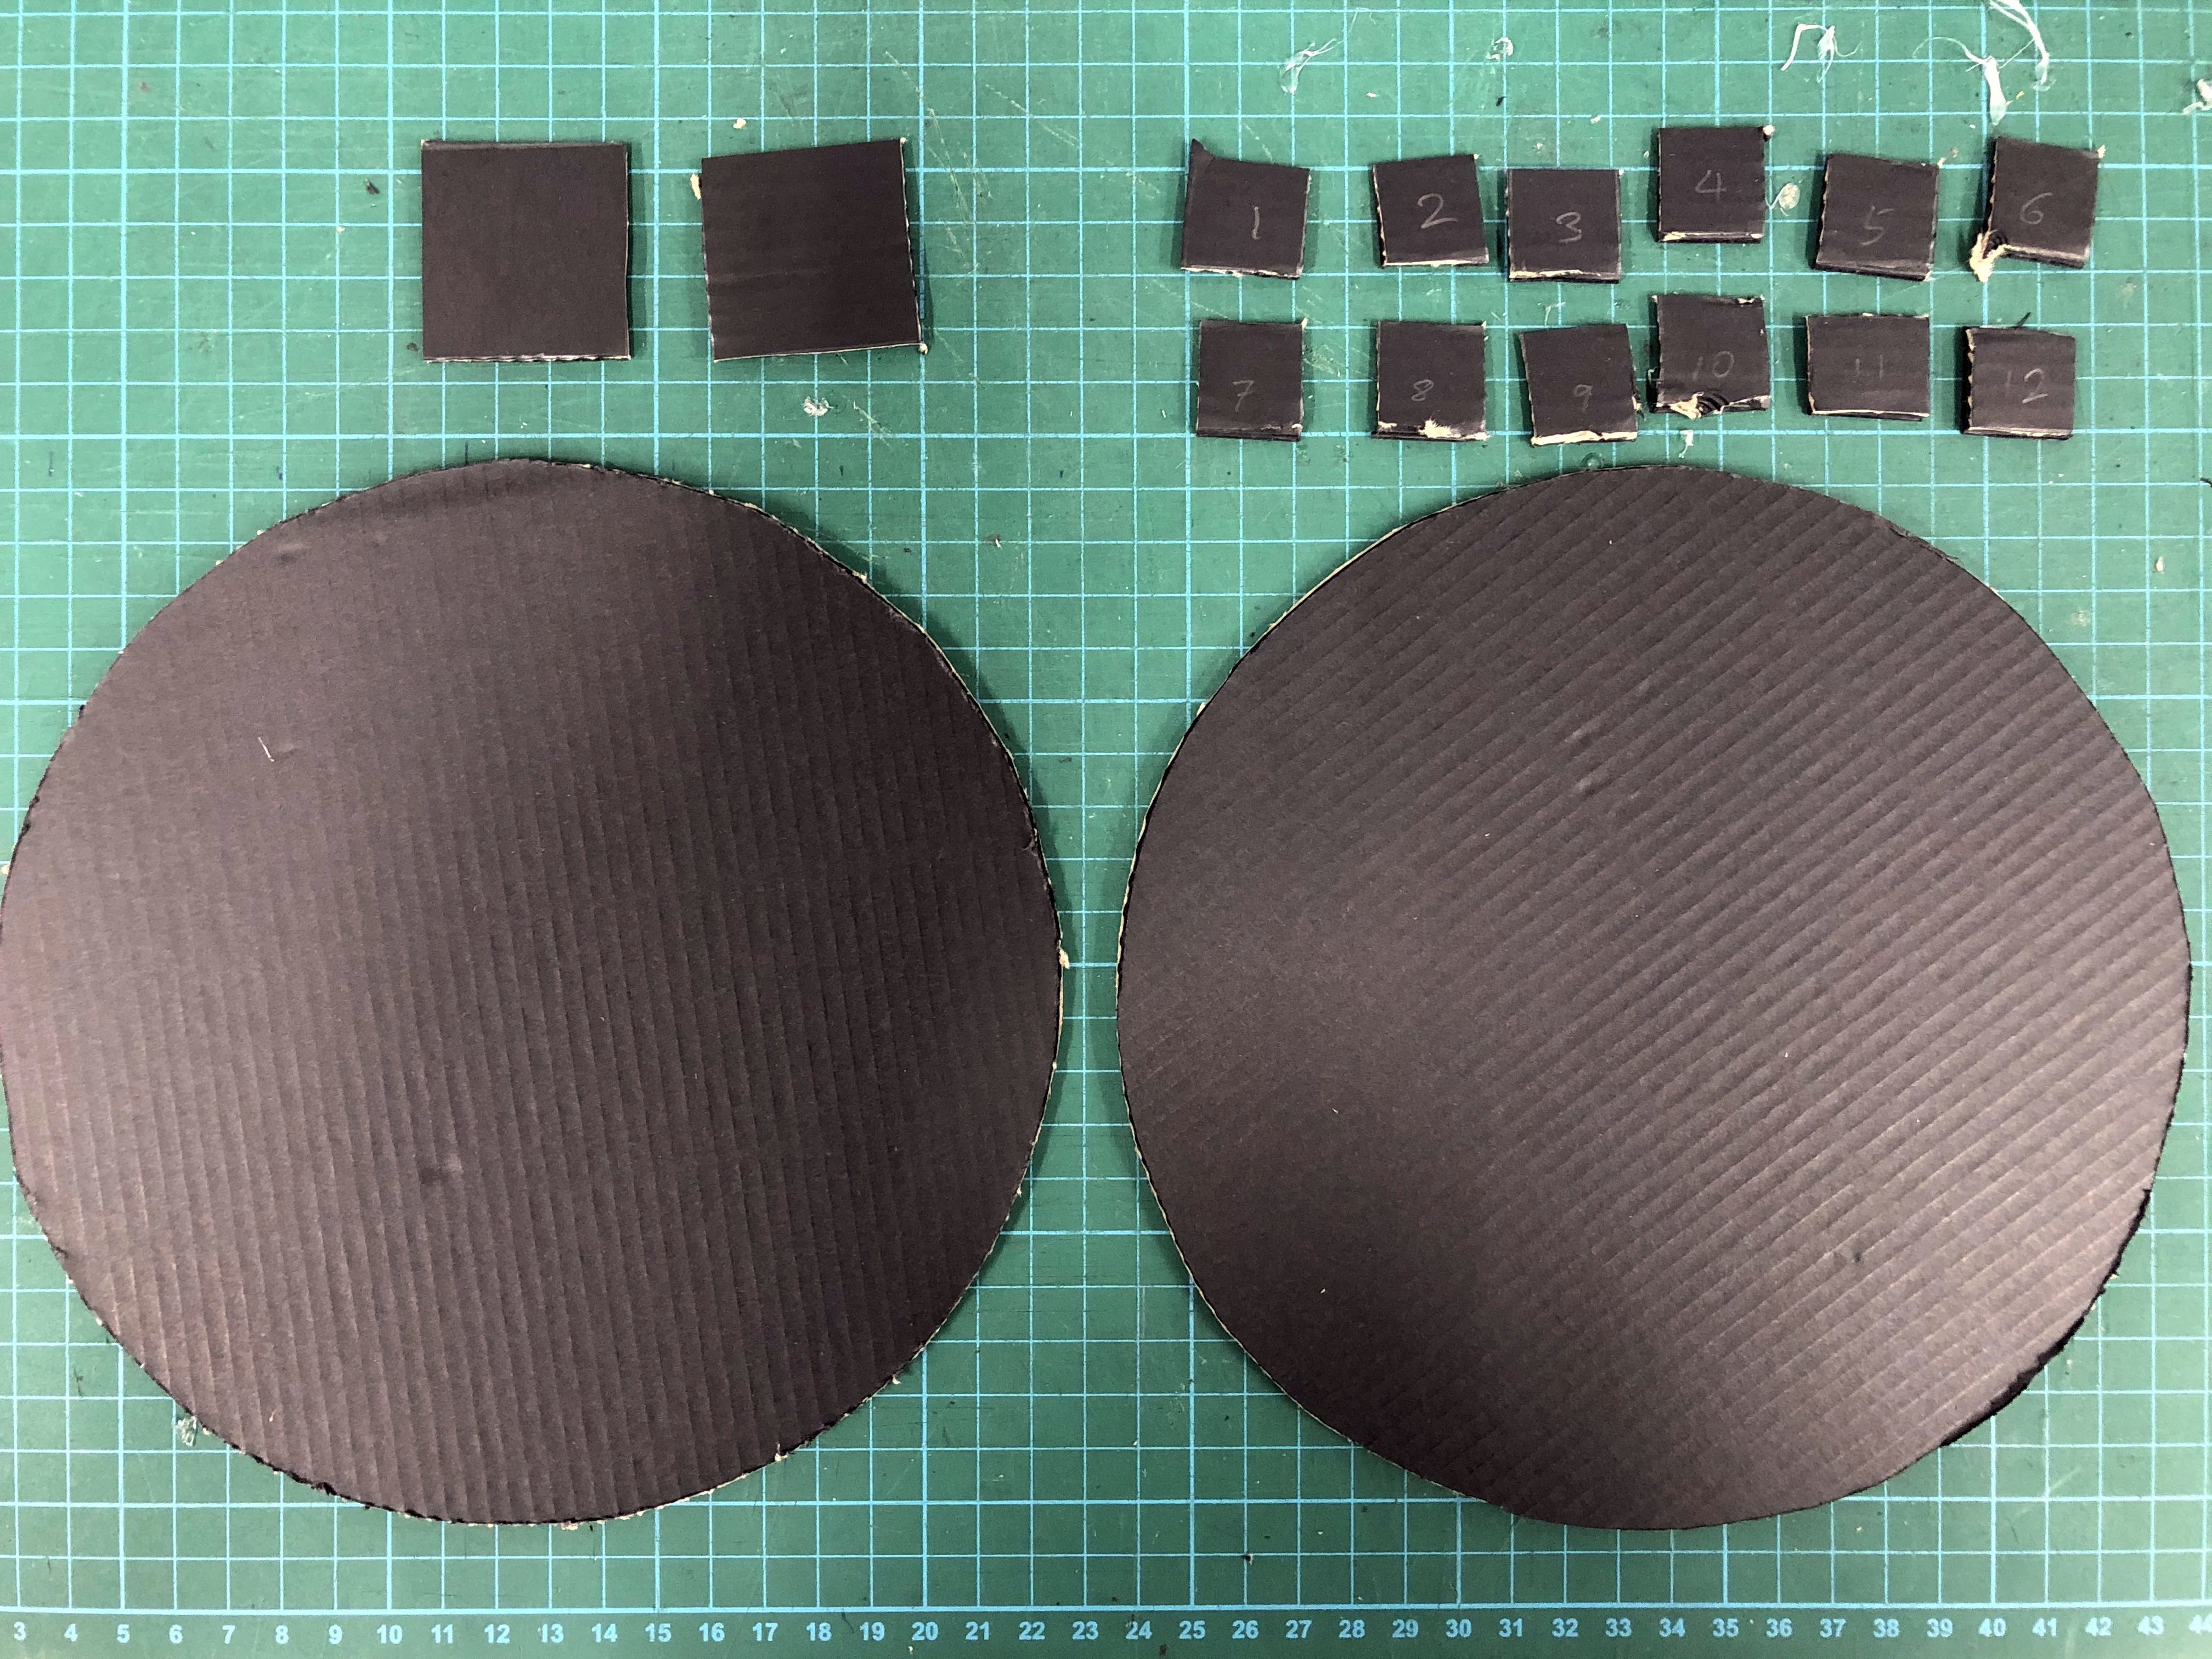
Cut out the circles and squares with a sharp knife.
STEP 3
Poke Holes
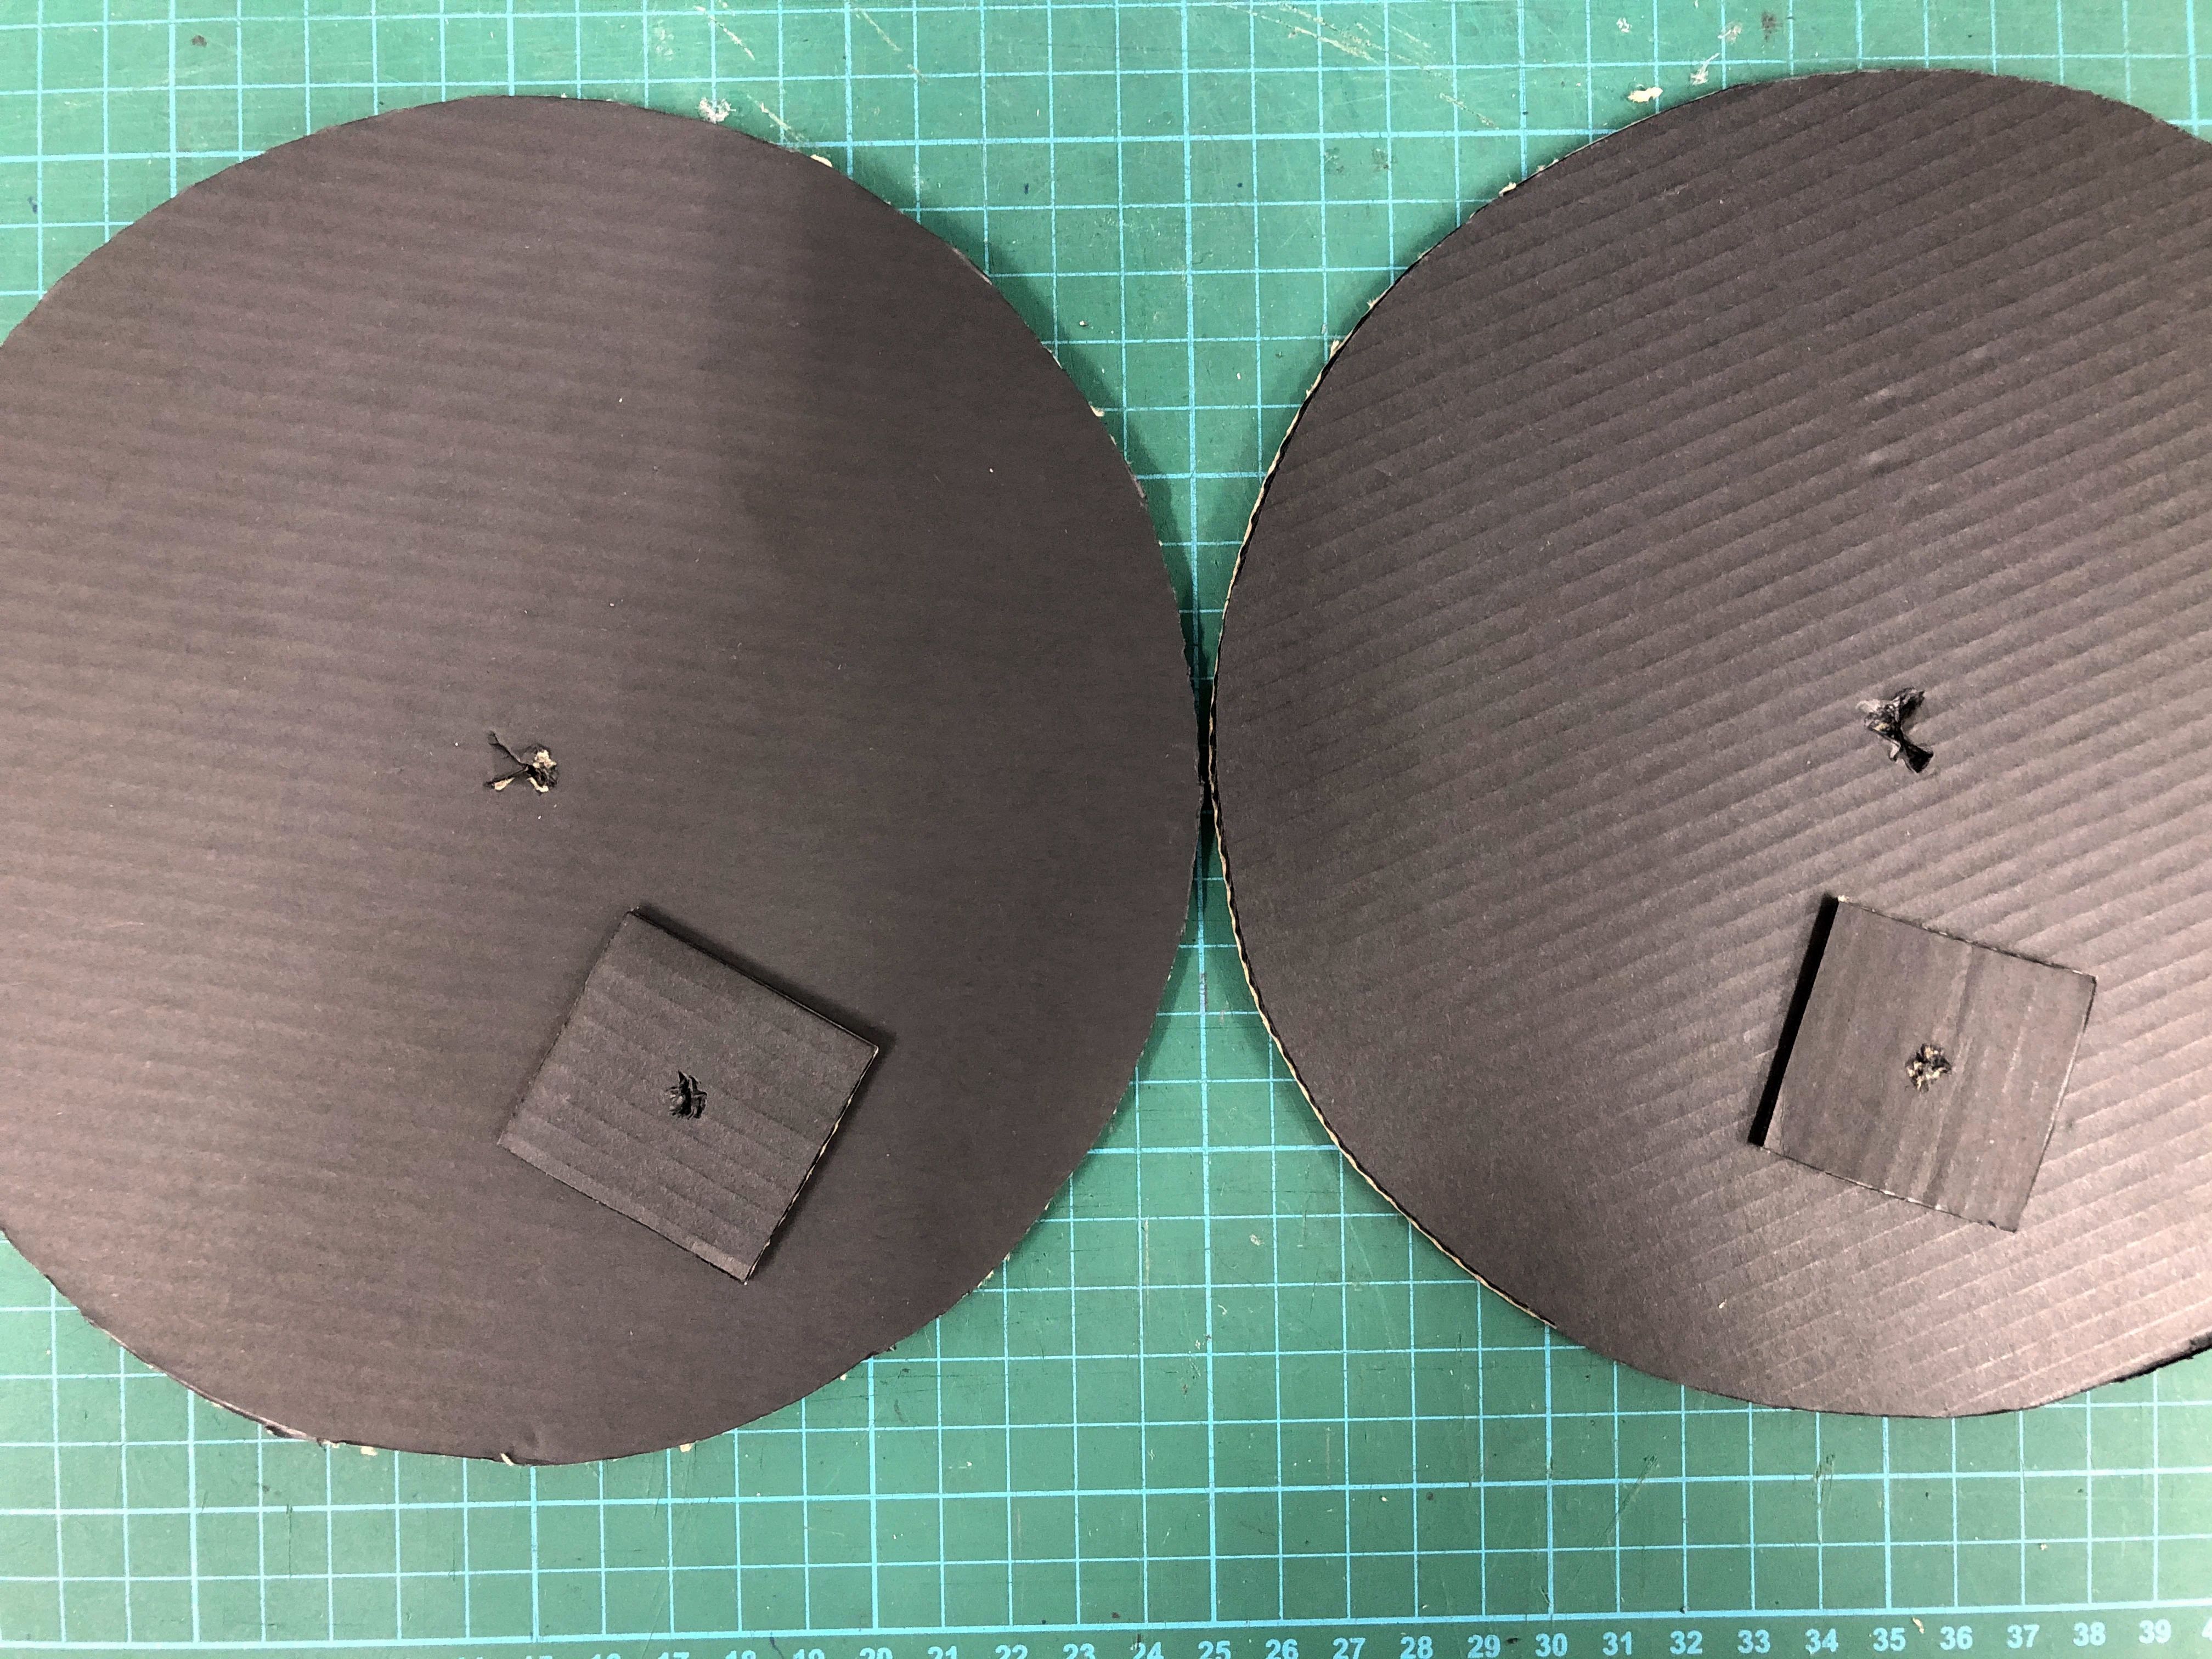
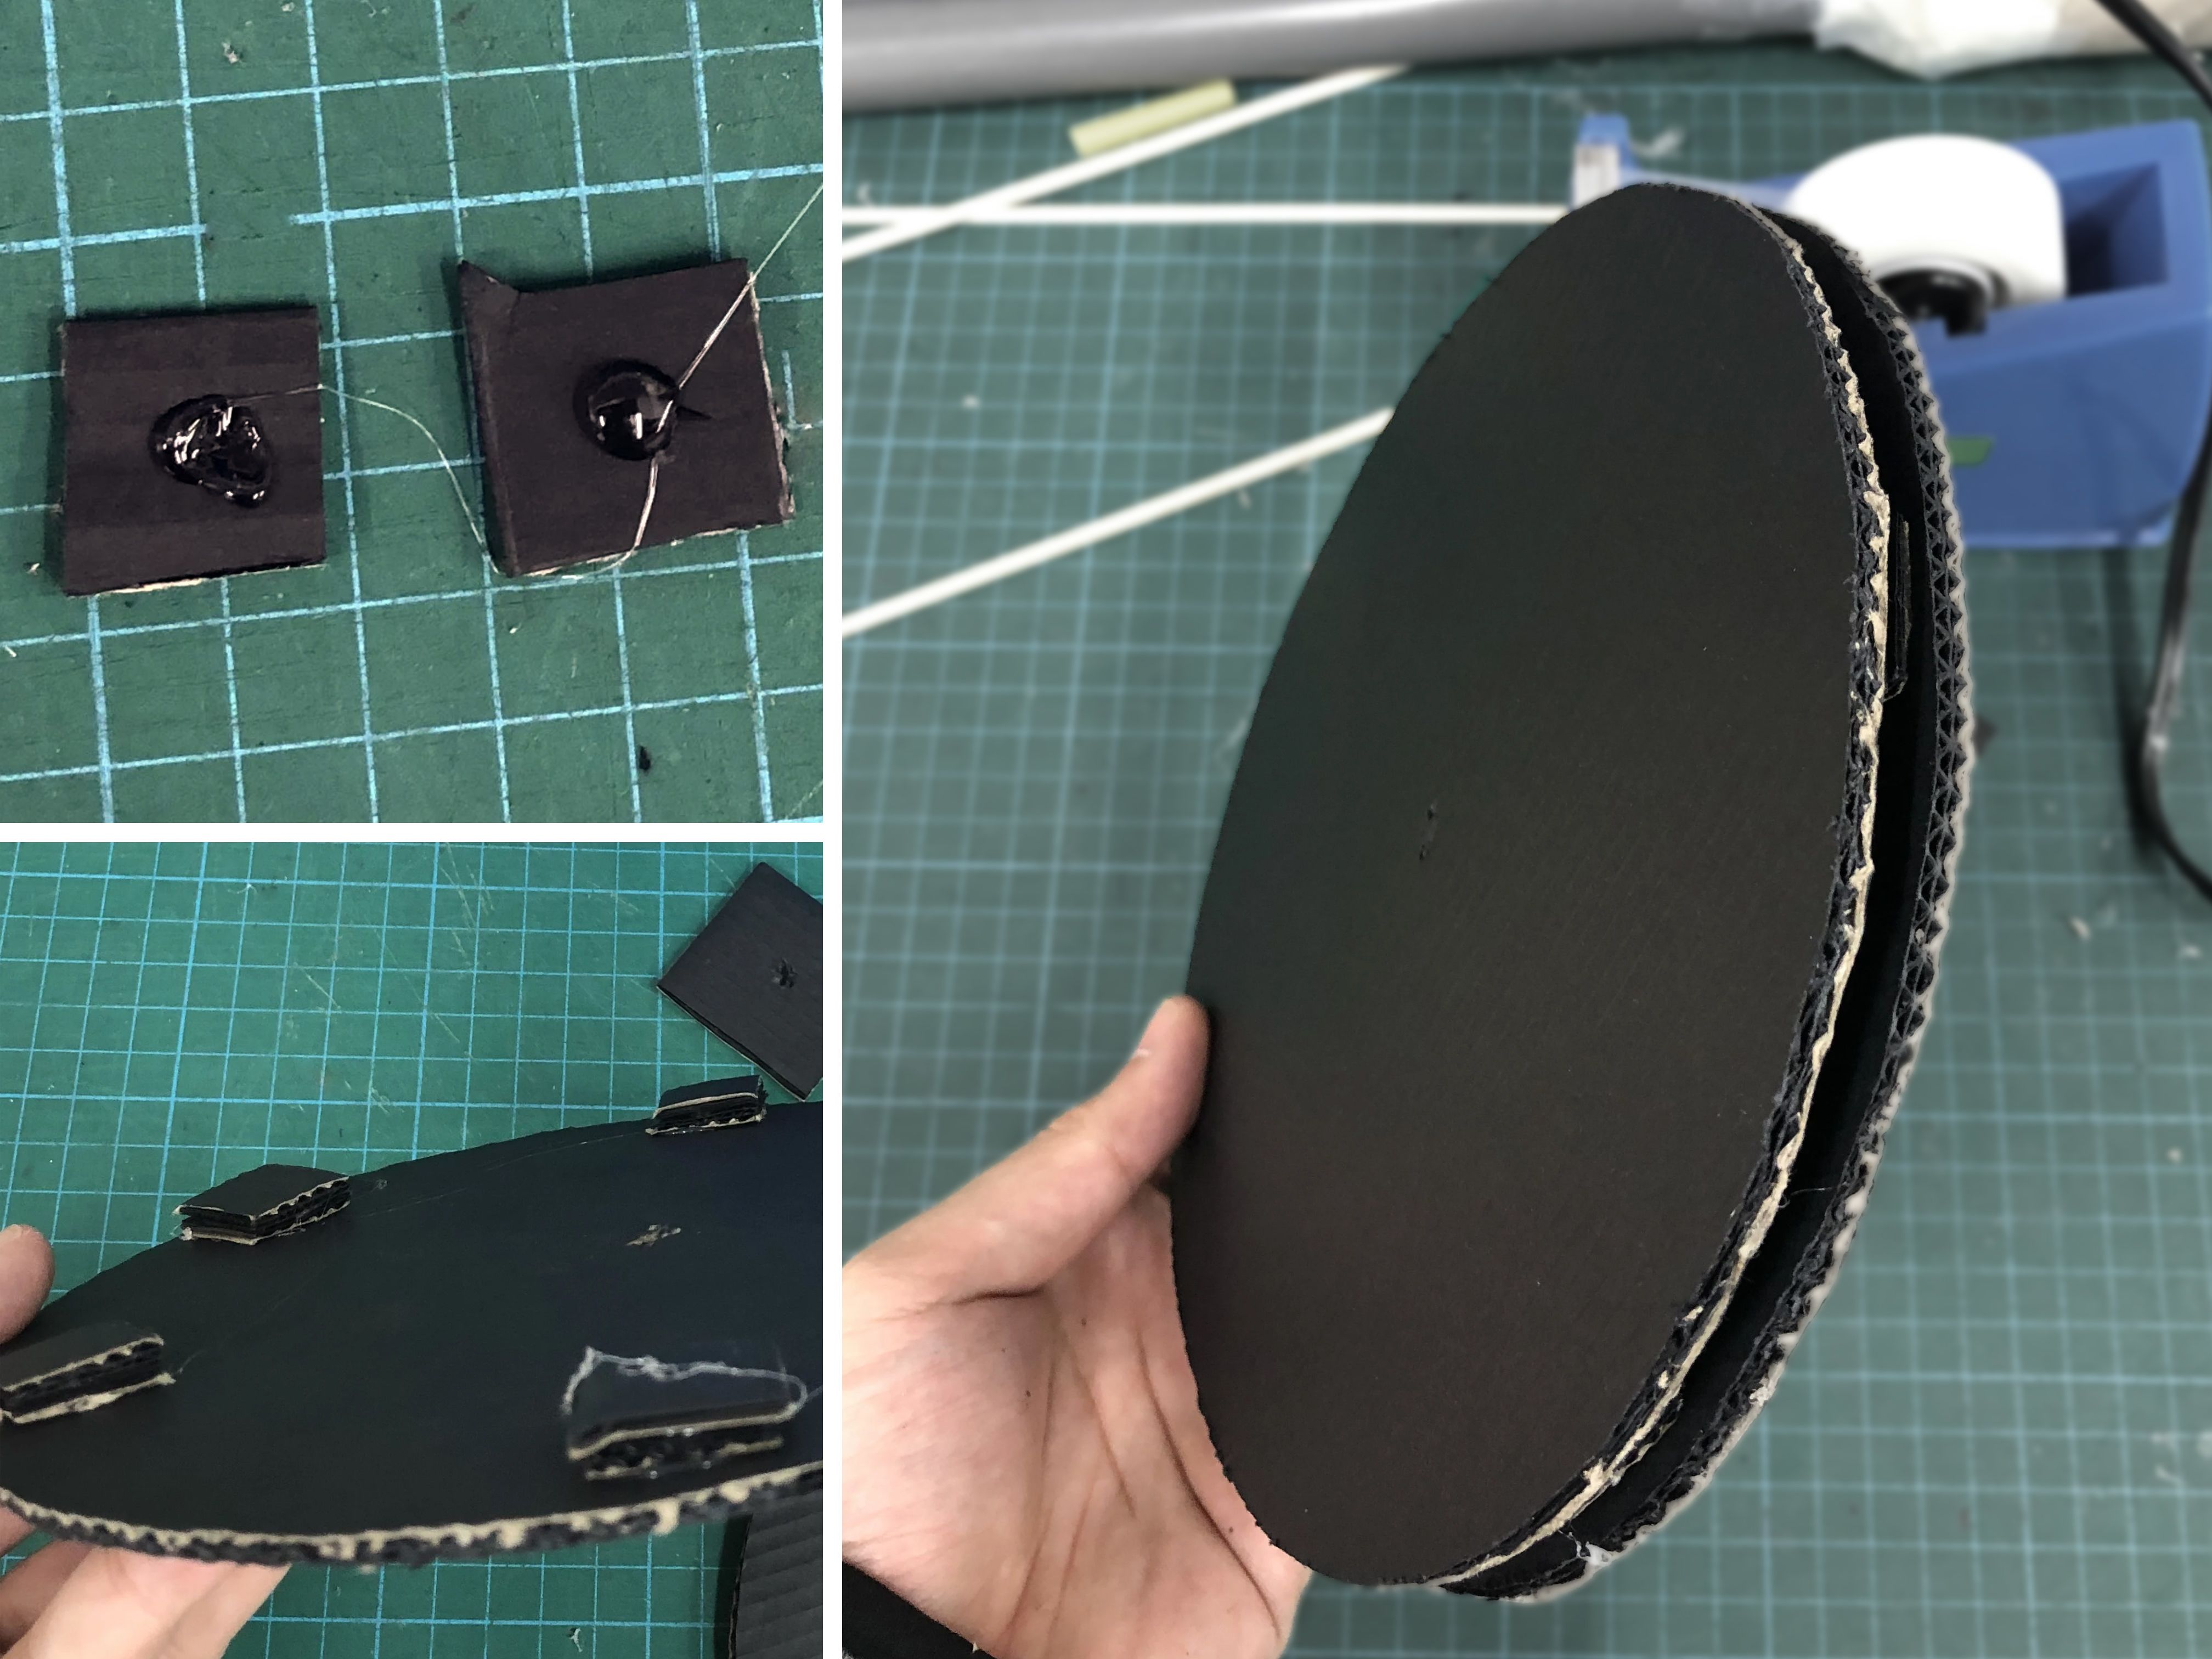
• Make a hole in the centre of the two discs and the two 4cm squares. This will be for the wooden skewer axle to go through, so be as close to the centre as possible.
• You can use the compass or even a pen or screwdriver to make the holes. Be careful not to prick
your finger! You can’t use your finger as a wheel.
STEP 4
Assemble the Wheel
Use hot glue to stick pairs of 2cm squares together, and sandwich them between the two discs, evenly spaced out close to the circumference. This is our wheel!
STEP 5
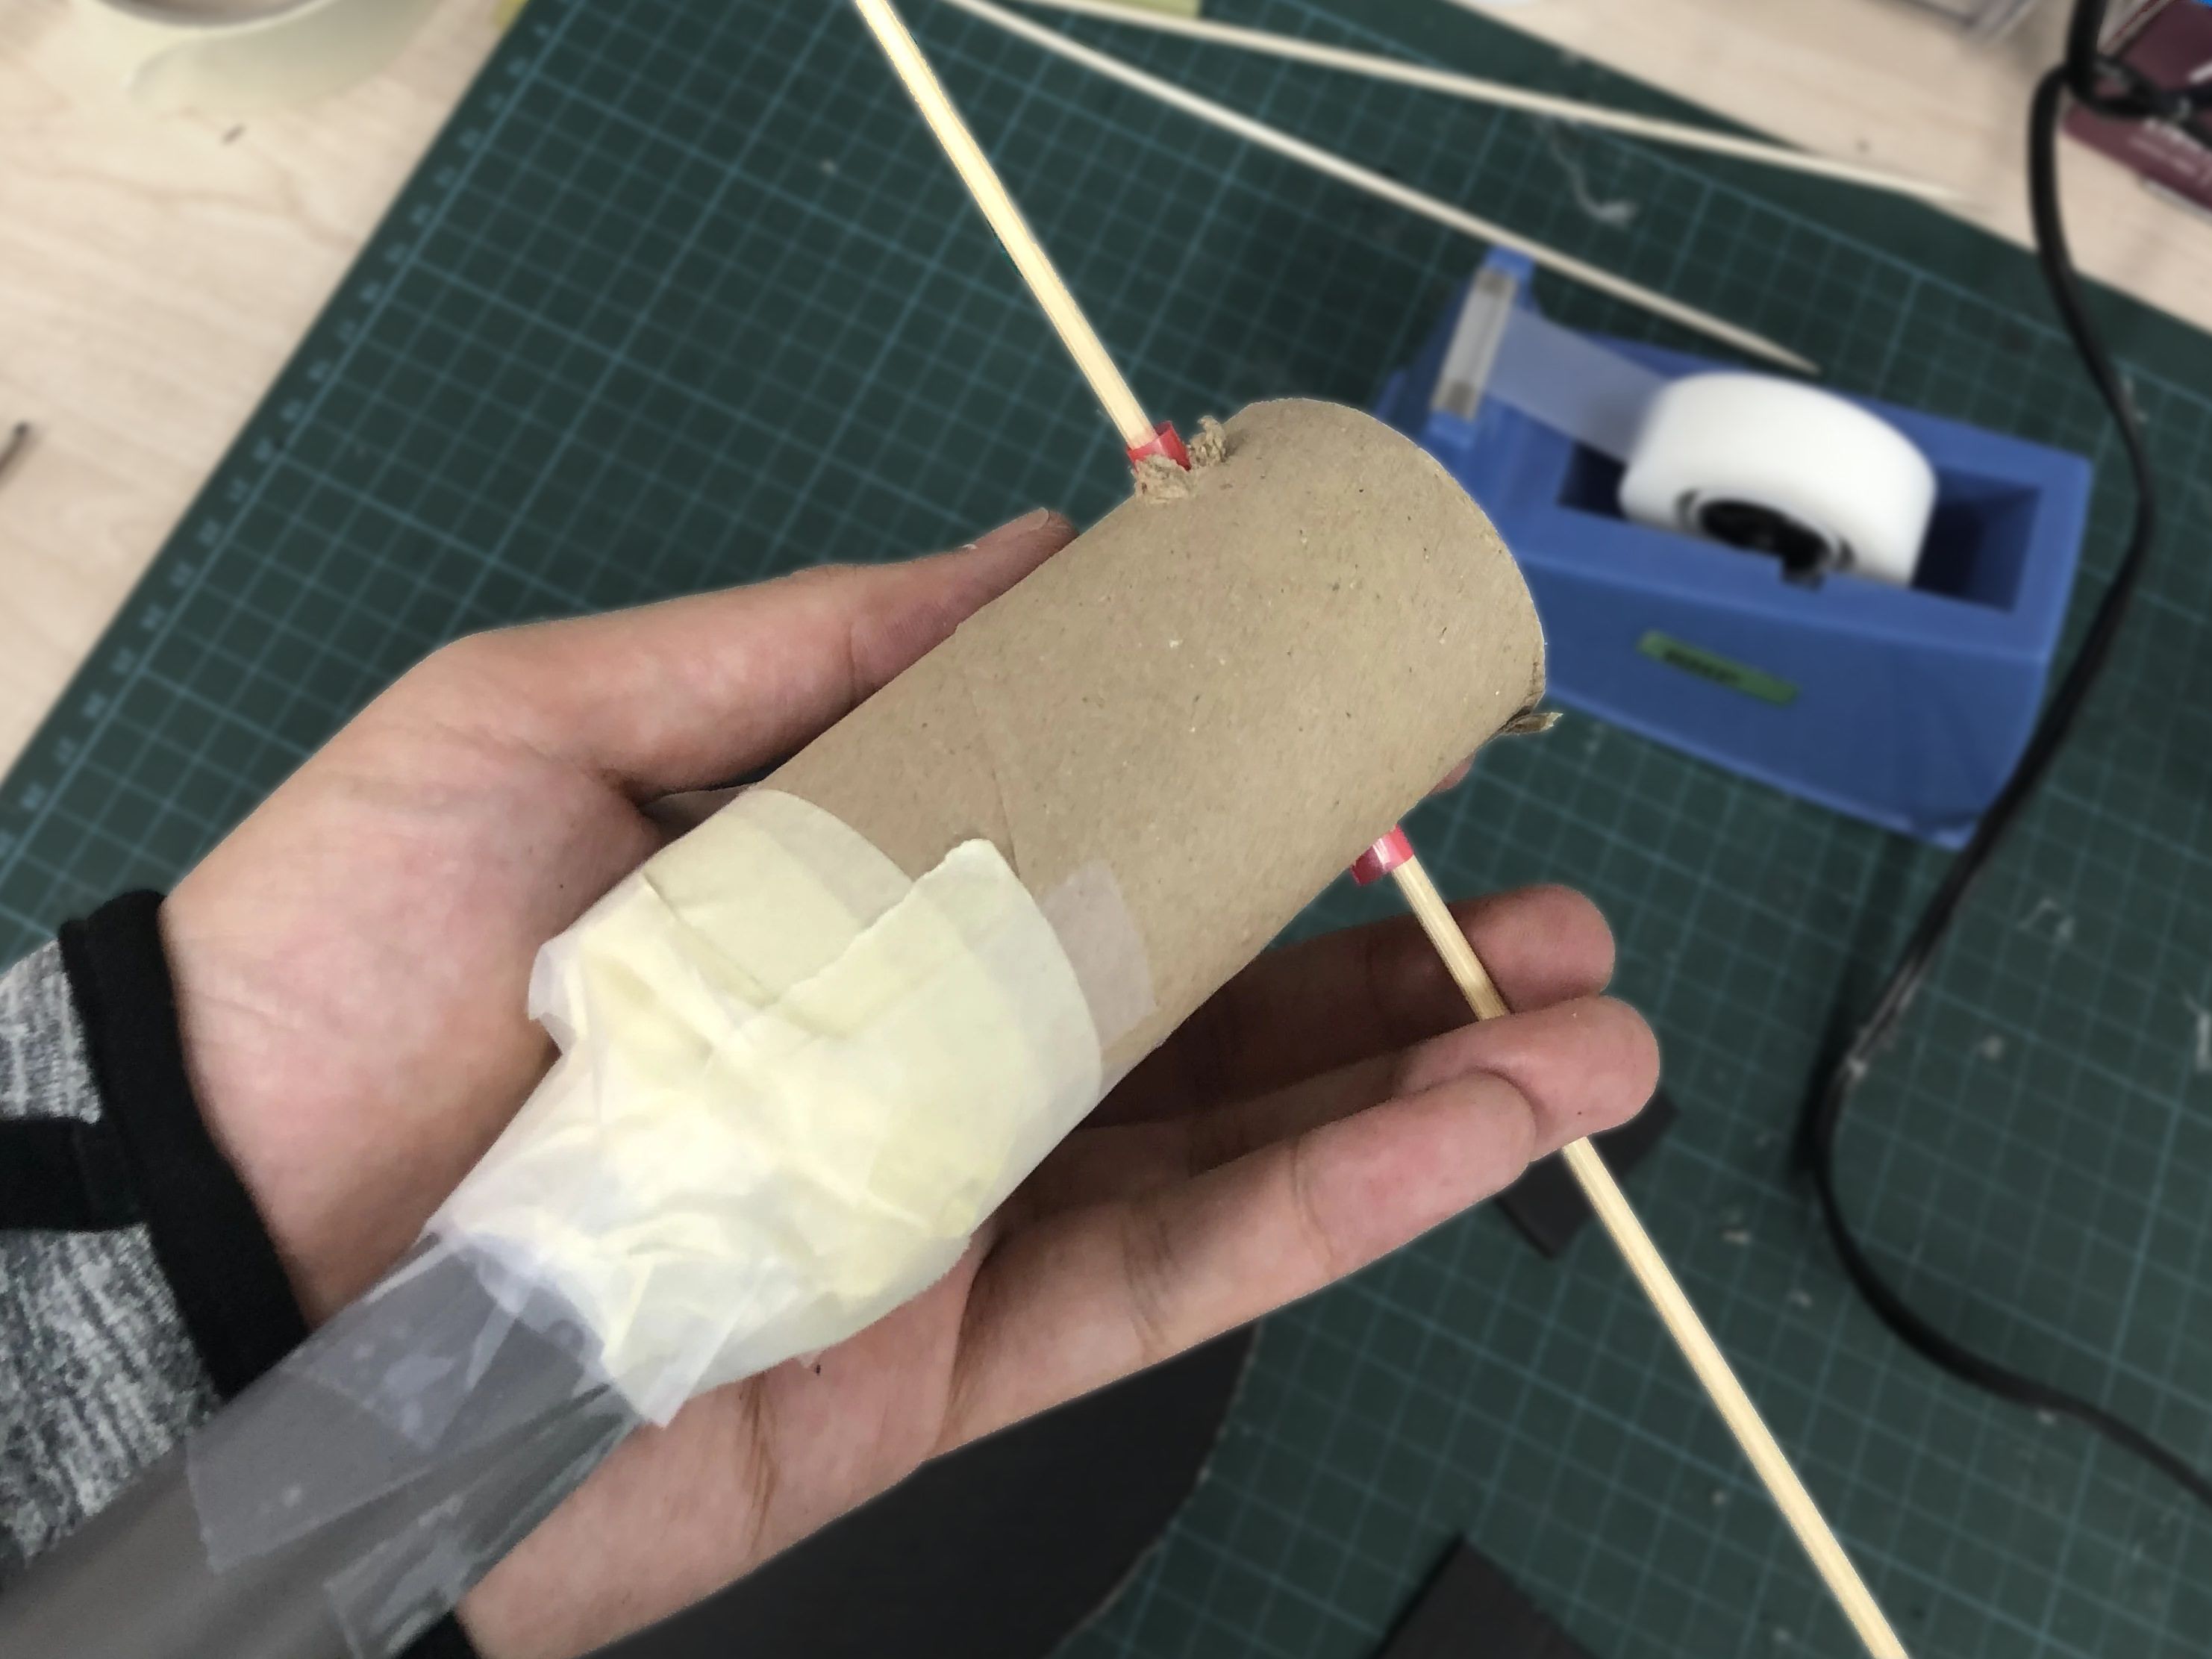
Axle
We’ll use the toilet paper roll to hold the axle for the wheel. Make two 6mm holes in the toilet paper roll to thread the drinking straw through, and attach the roll to your PVC pipe or broomstick using tape.
The drinking straw is to reduce friction between the skewer and the toilet paper roll, and only needs to protrude 5mm from each side of the toilet paper roll. Trim the excess.
STEP 6
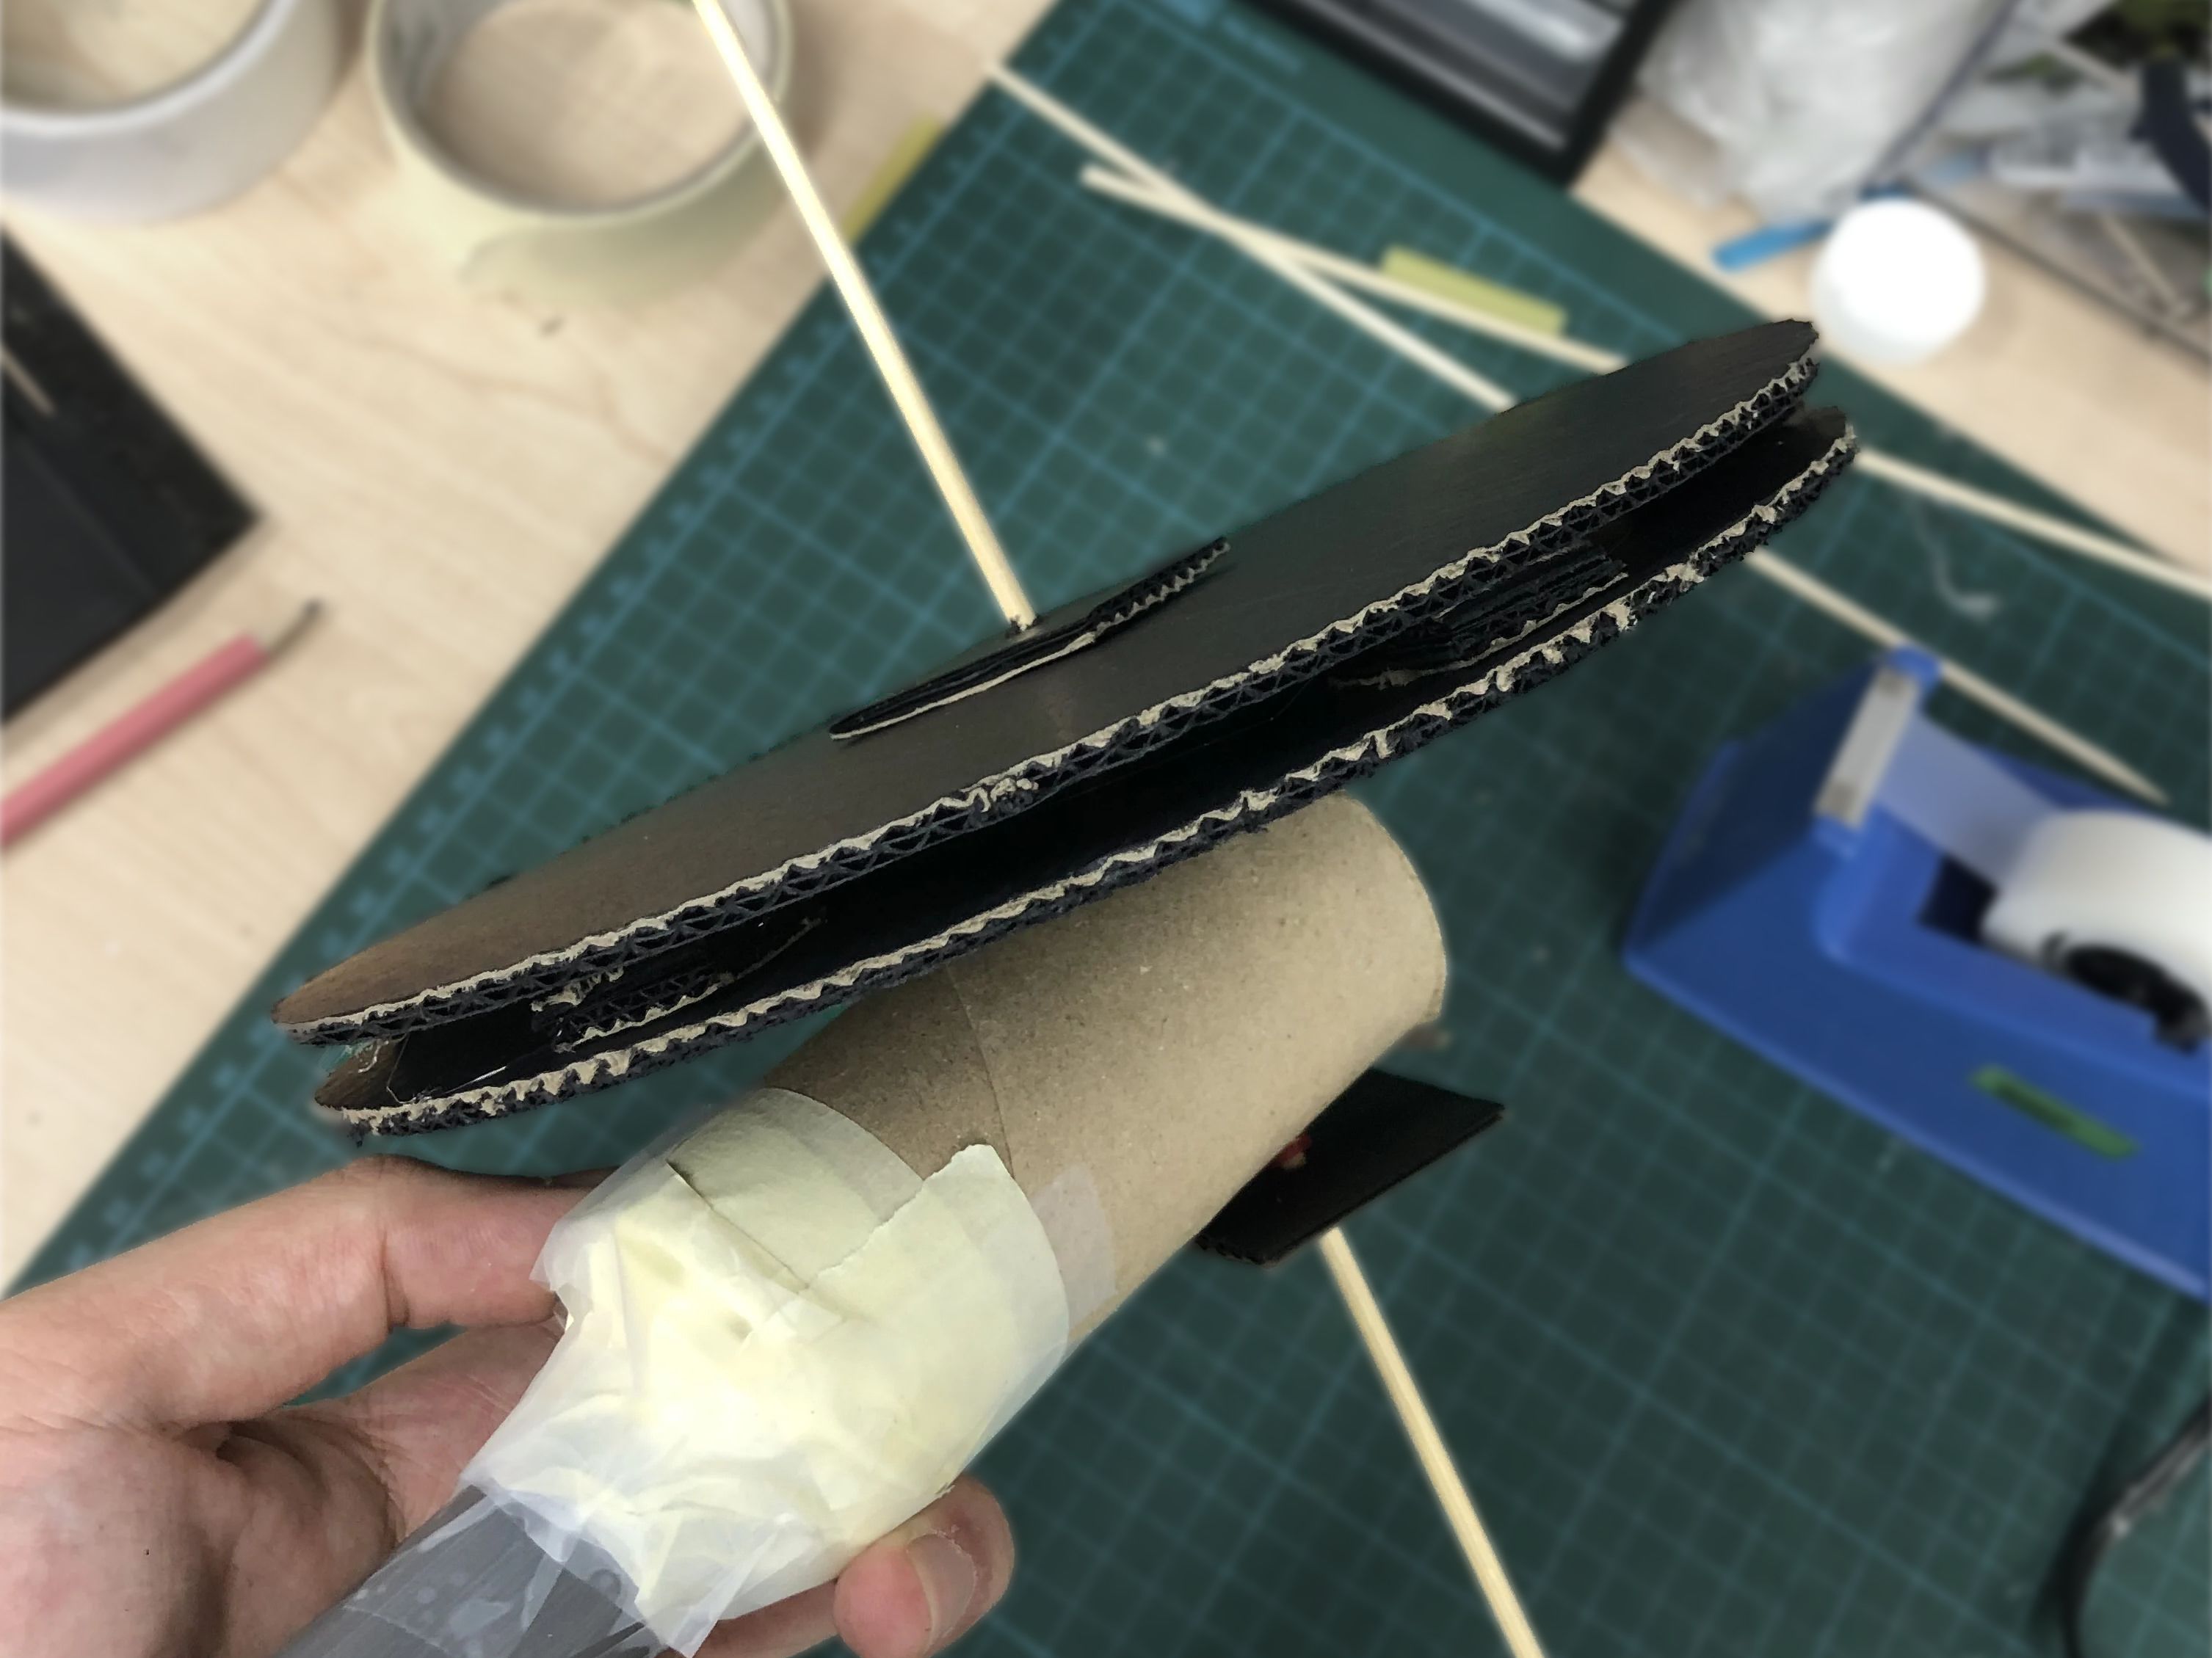
Attach Wheel
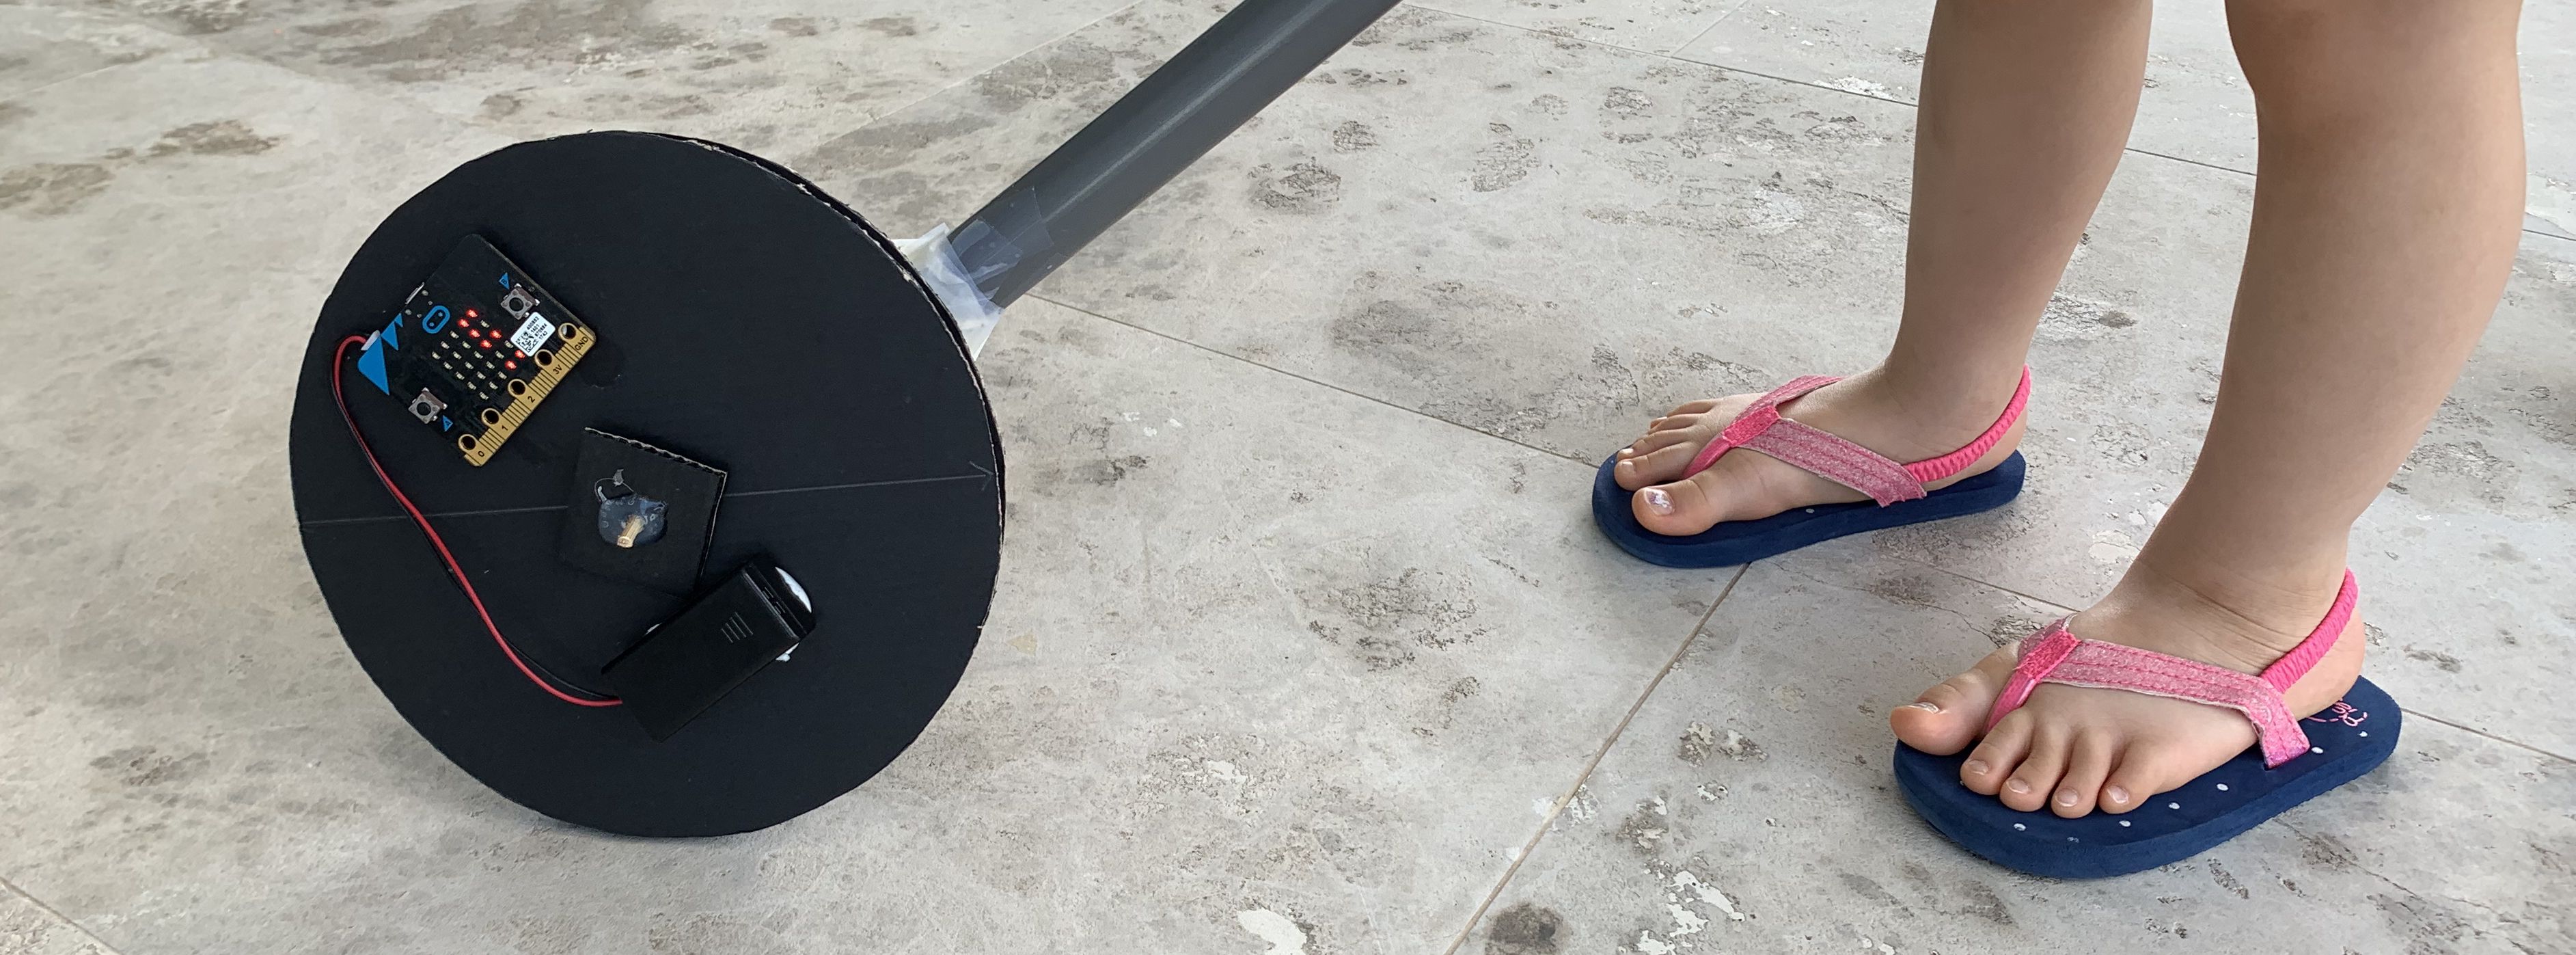
Attach the wheel to the skewer.
Cap off both ends of the axle with the 4cm squares, and hot glue the ends before trimming the excess axle. Make sure there’s no gap between the square-roll-wheel-square sandwich we created, so the wheel doesn’t wobble too much.
STEP 7
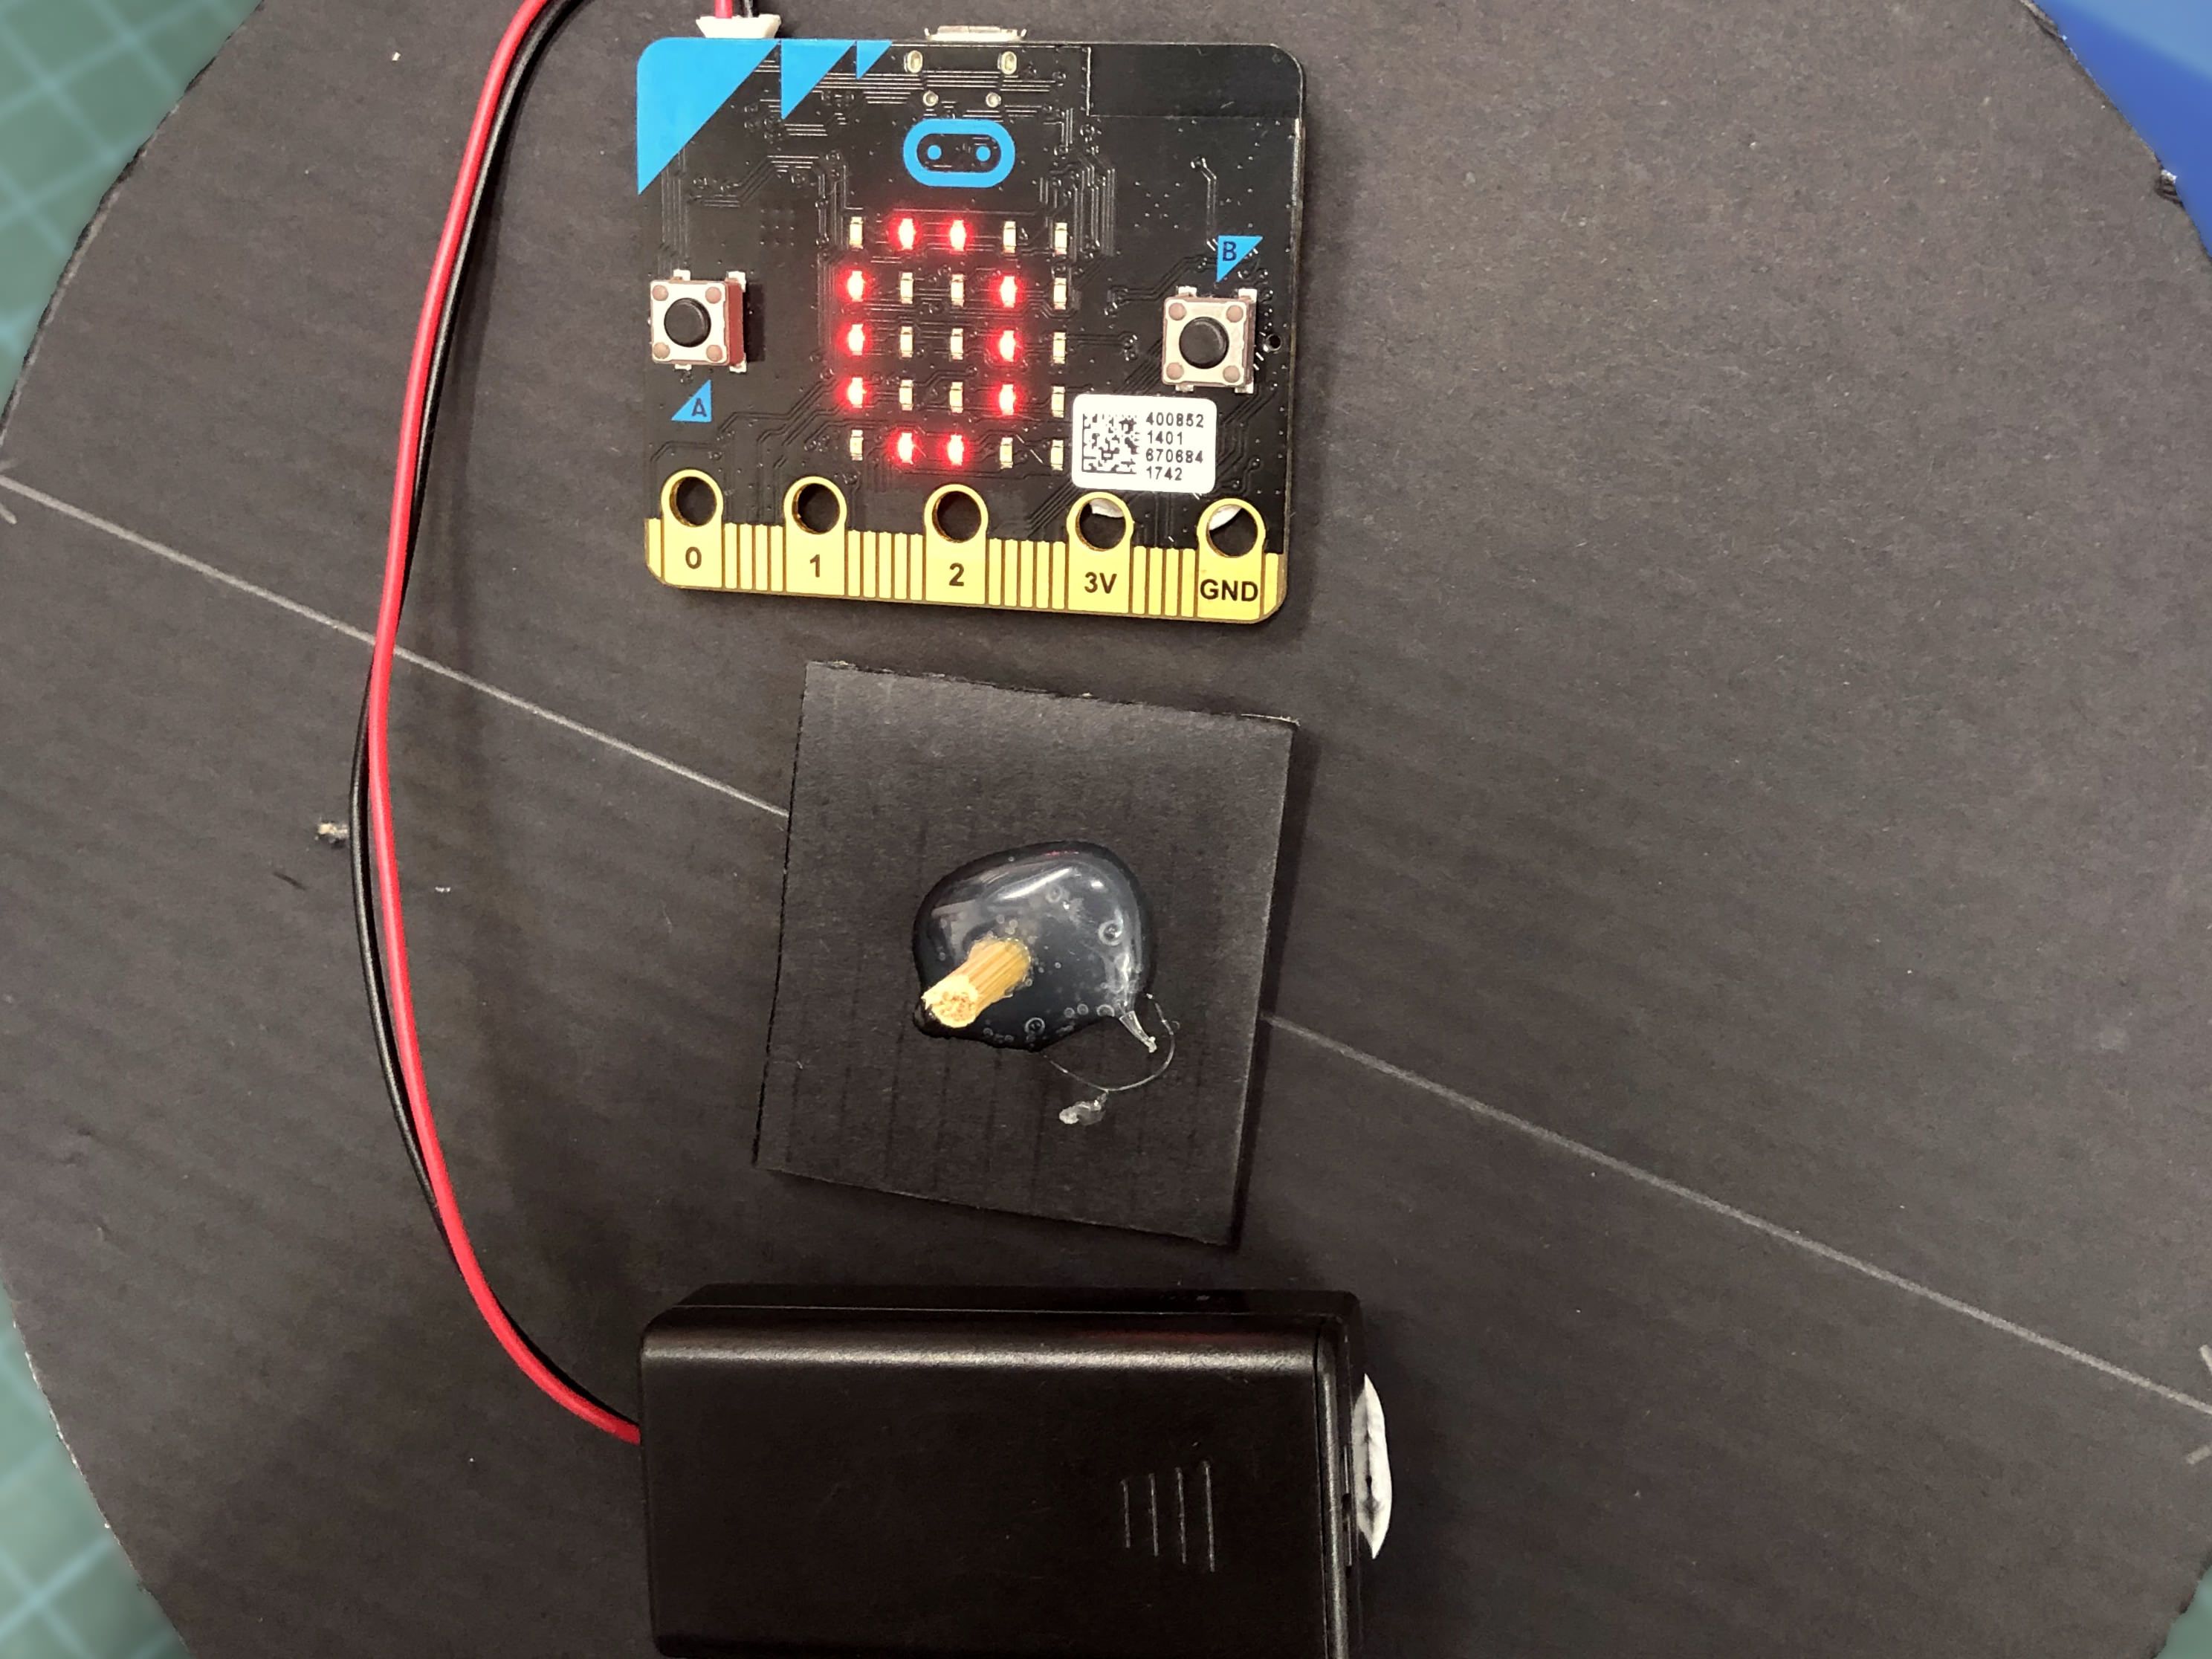
Attach Electronics
Finally, use Blu Tack to attach the battery pack and micro:bit to the wheel; on the opposite side of the toilet paper roll, and with the display facing out.
If Blu Tack isn’t permanent enough for you, you can also use hot glue, which peels off cleanly from circuit boards - great for reusing your micro:bit - but will stick to wires and make a mess.
Code and References
Made this activity? Good Job! Now spread the word. Share a photo of your creation on social media with #letsgethacking #Surveyor'sWheel