Temperature and Light Sensor
To display the intensity of light and temperature and determining if it is a good day to sleep in.
YOU WILL NEED
- 1 x Micro:bit
- 1 x Breakout Board
- 1 x Crash Sensor
- 1 x Buzzer
- 1 x LED
STEP 1

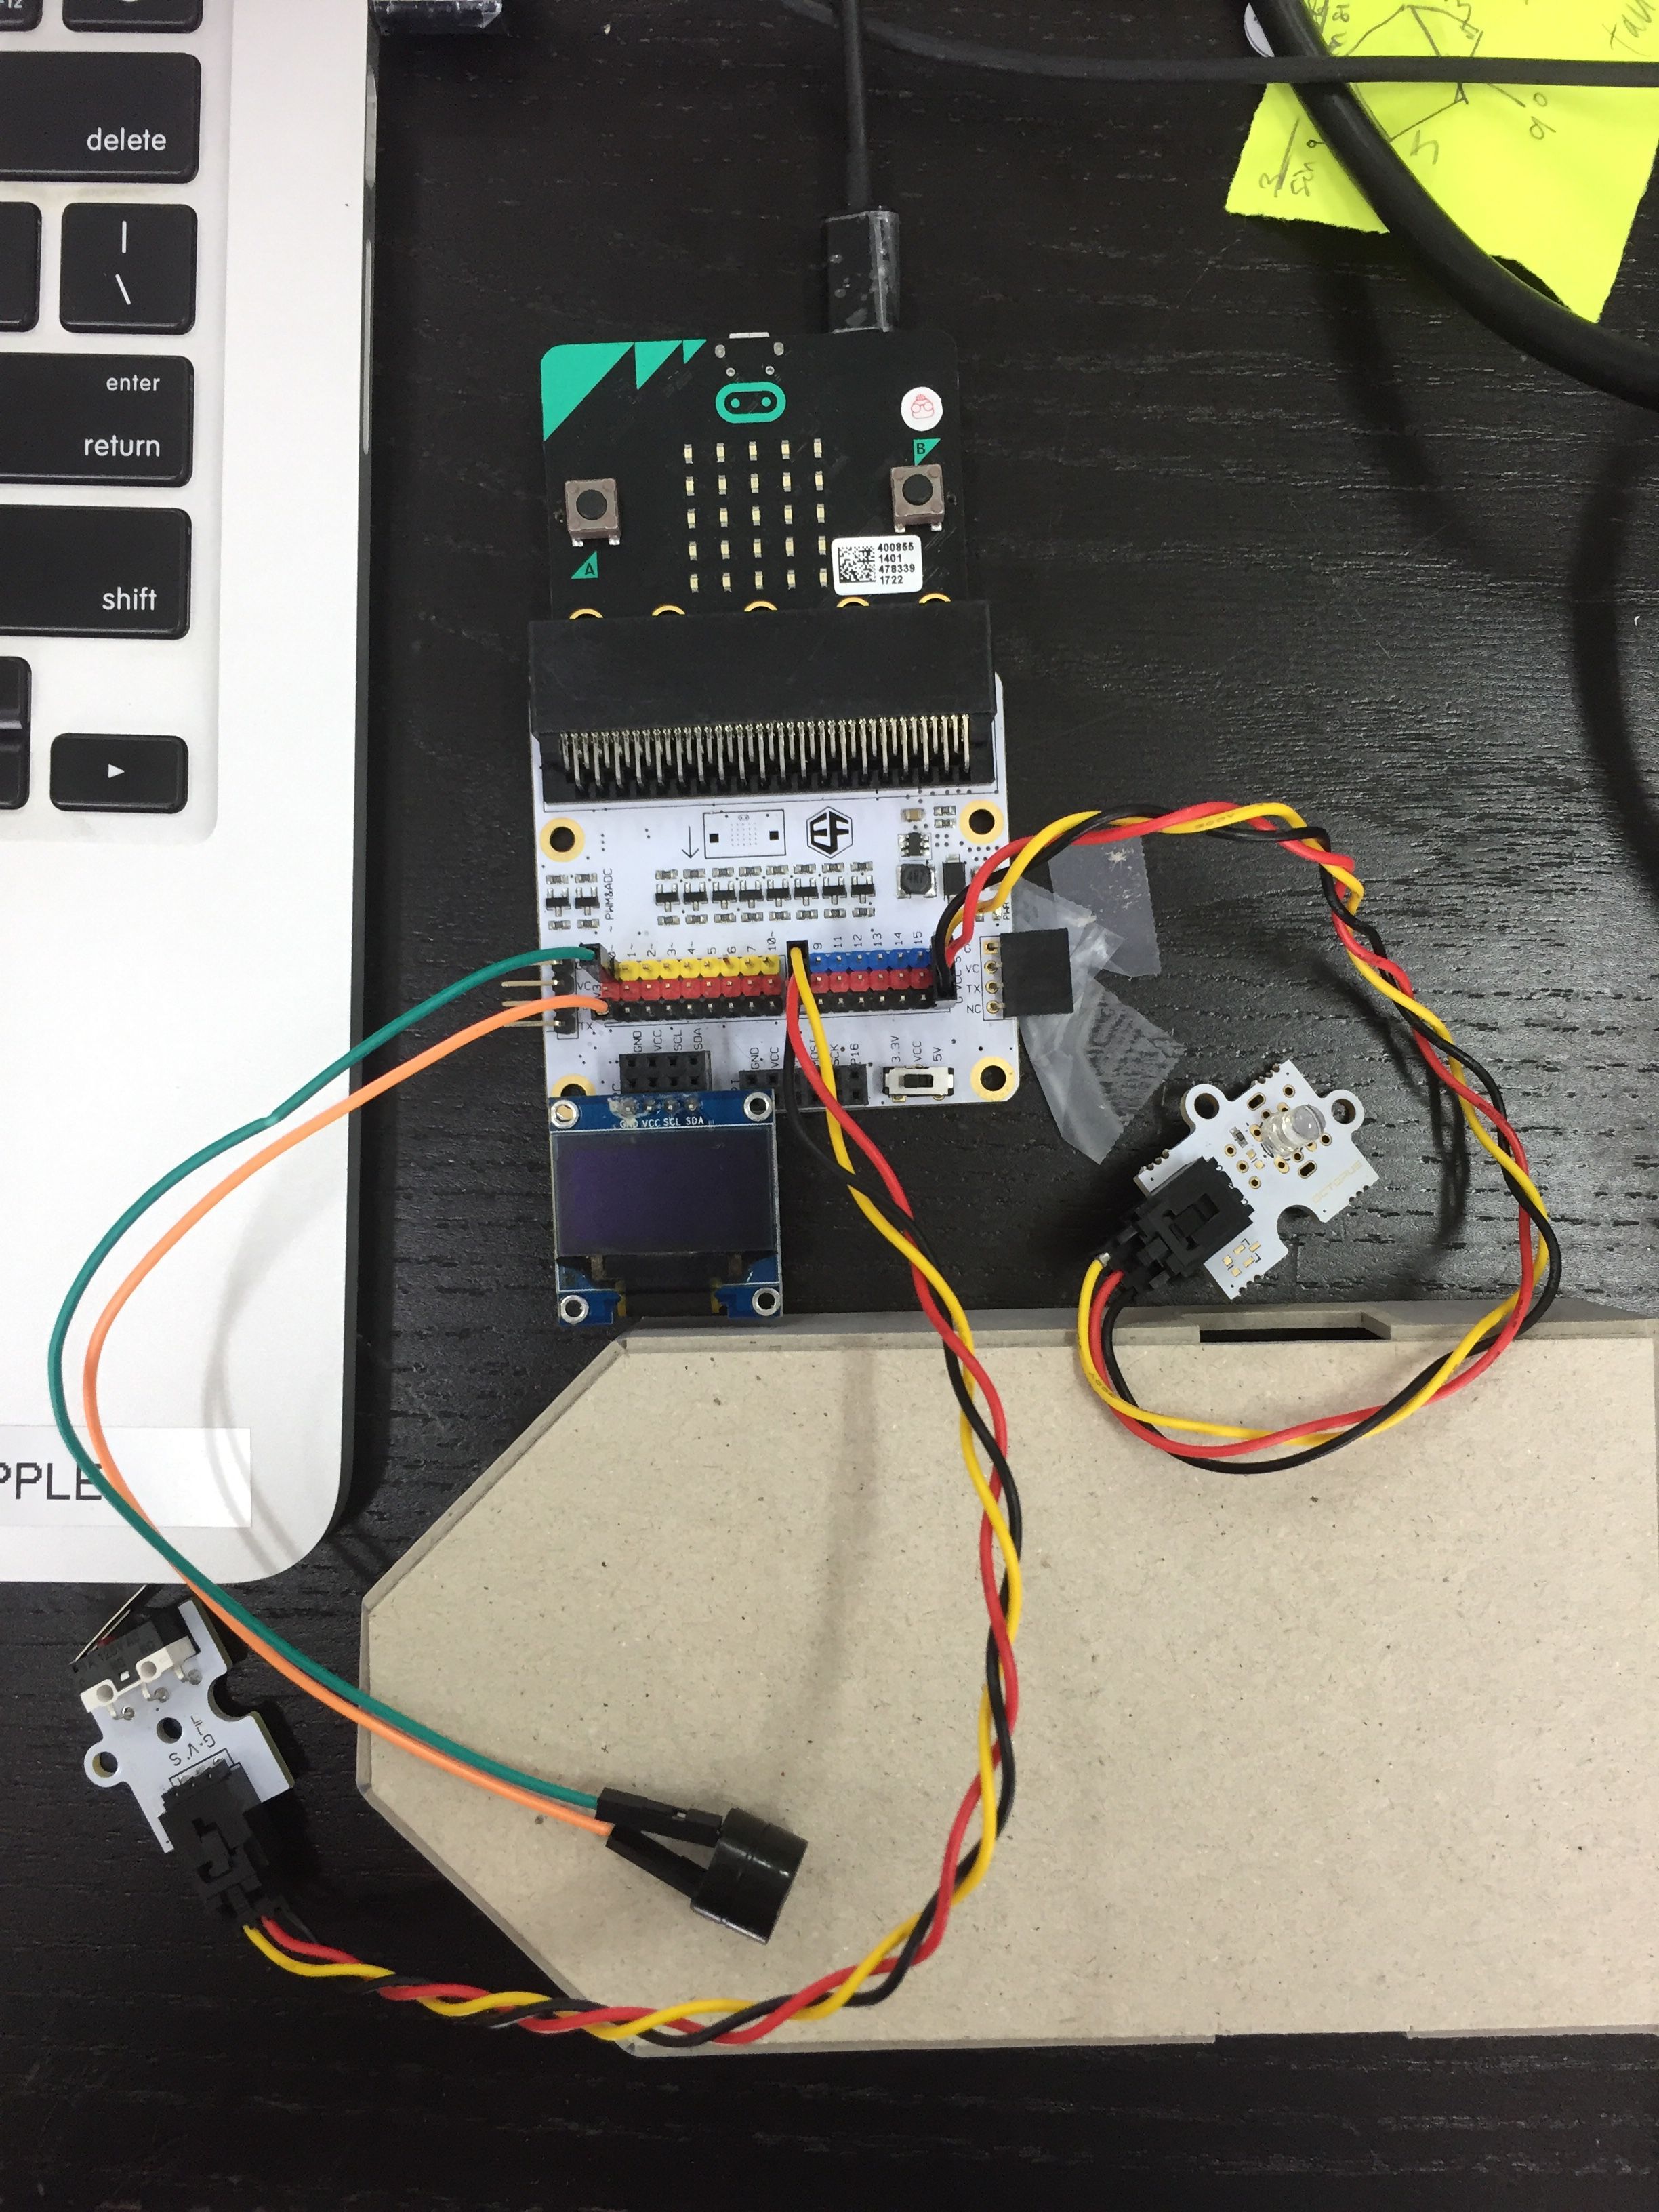
Place the micro:bit on top of the breakout board. Then, attach the OLED screen onto the breakout board
Materials
1xMicro:bit
1xBreakout Board
1xOLED
STEP 2

Take the LED and place the wire in Pin 16(the last one!) of the Breakout Board. Then take the crash sensor and place the wire in Pin 8 of the Breakout Board
Materials
1x Breakout Board
1x LED
1x Crash Sensor
STEP 3
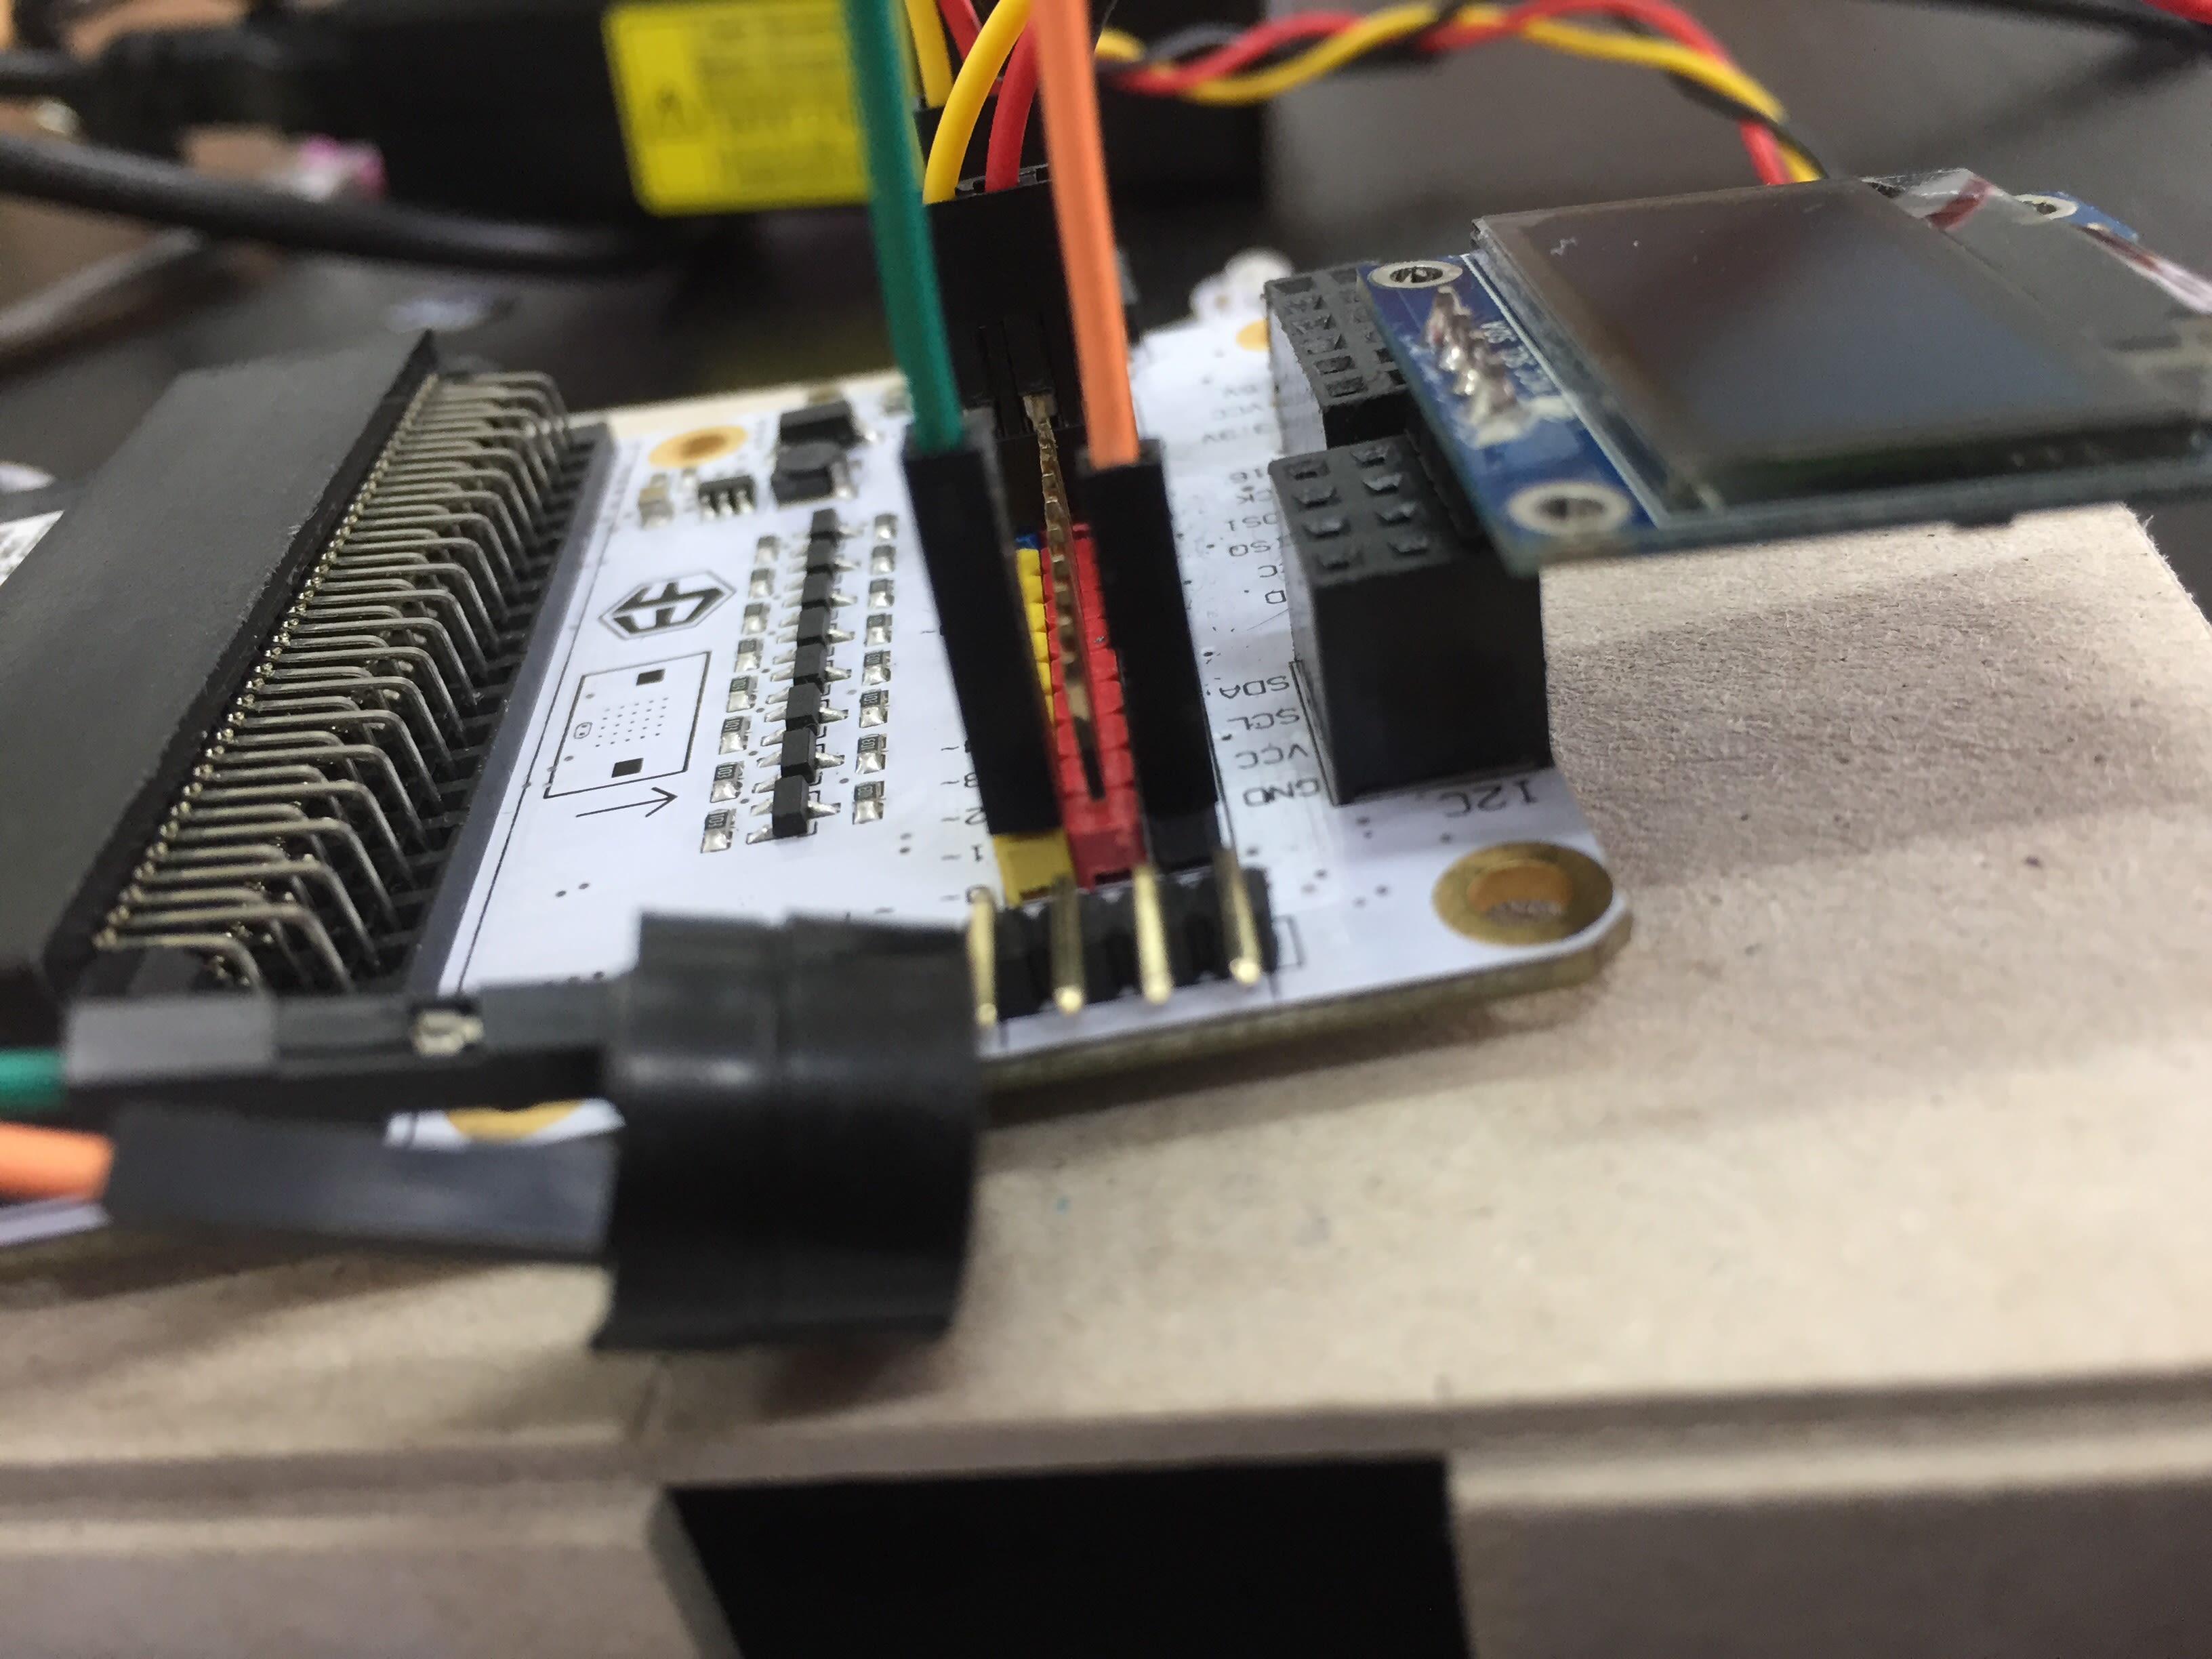
Take 2 F-F wires and attach it one end to the buzzer and the other end to the G and S pins of the breakout board.
Materials
1x Buzzer
2x F-F Wires
1x Breakout Board
STEP 4

You have finished setting it up! Now, to the coding part. To start, you have to go to the micro:bit website and create a new project. After that, click on ‘Advanced’ and click on ‘Extensions’. Search for the Tinkercademy and download the extension shown in the picture above.
STEP 5
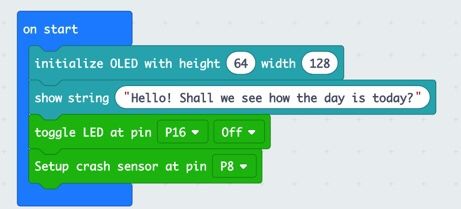
Now to the coding! Using the blocks, write the code shown above. This block of code tells the micro:bit what are the things it has right now.
STEP 6
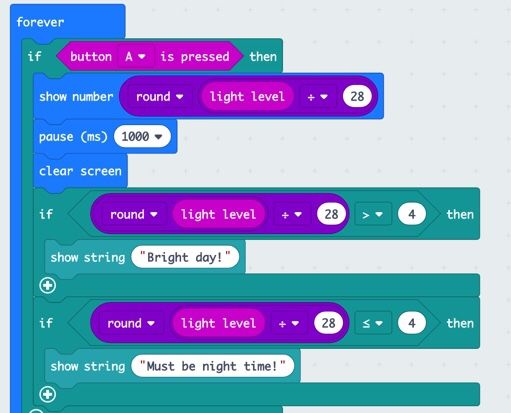
This part of the code is for the light sensor. The purple blocks are the formula to display light intensity from digits 1-9. If it is less than 4, it says ‘Must be night time’ and if it more than 4, it says ‘Bright day’.
STEP 7

This part is for the temperature. If it is less than or equal to 28, it will say ‘It’s cold’ and shows a happy face. If it is more than 28 it will say ‘It’s hot’ and shows a sad face.
STEP 8

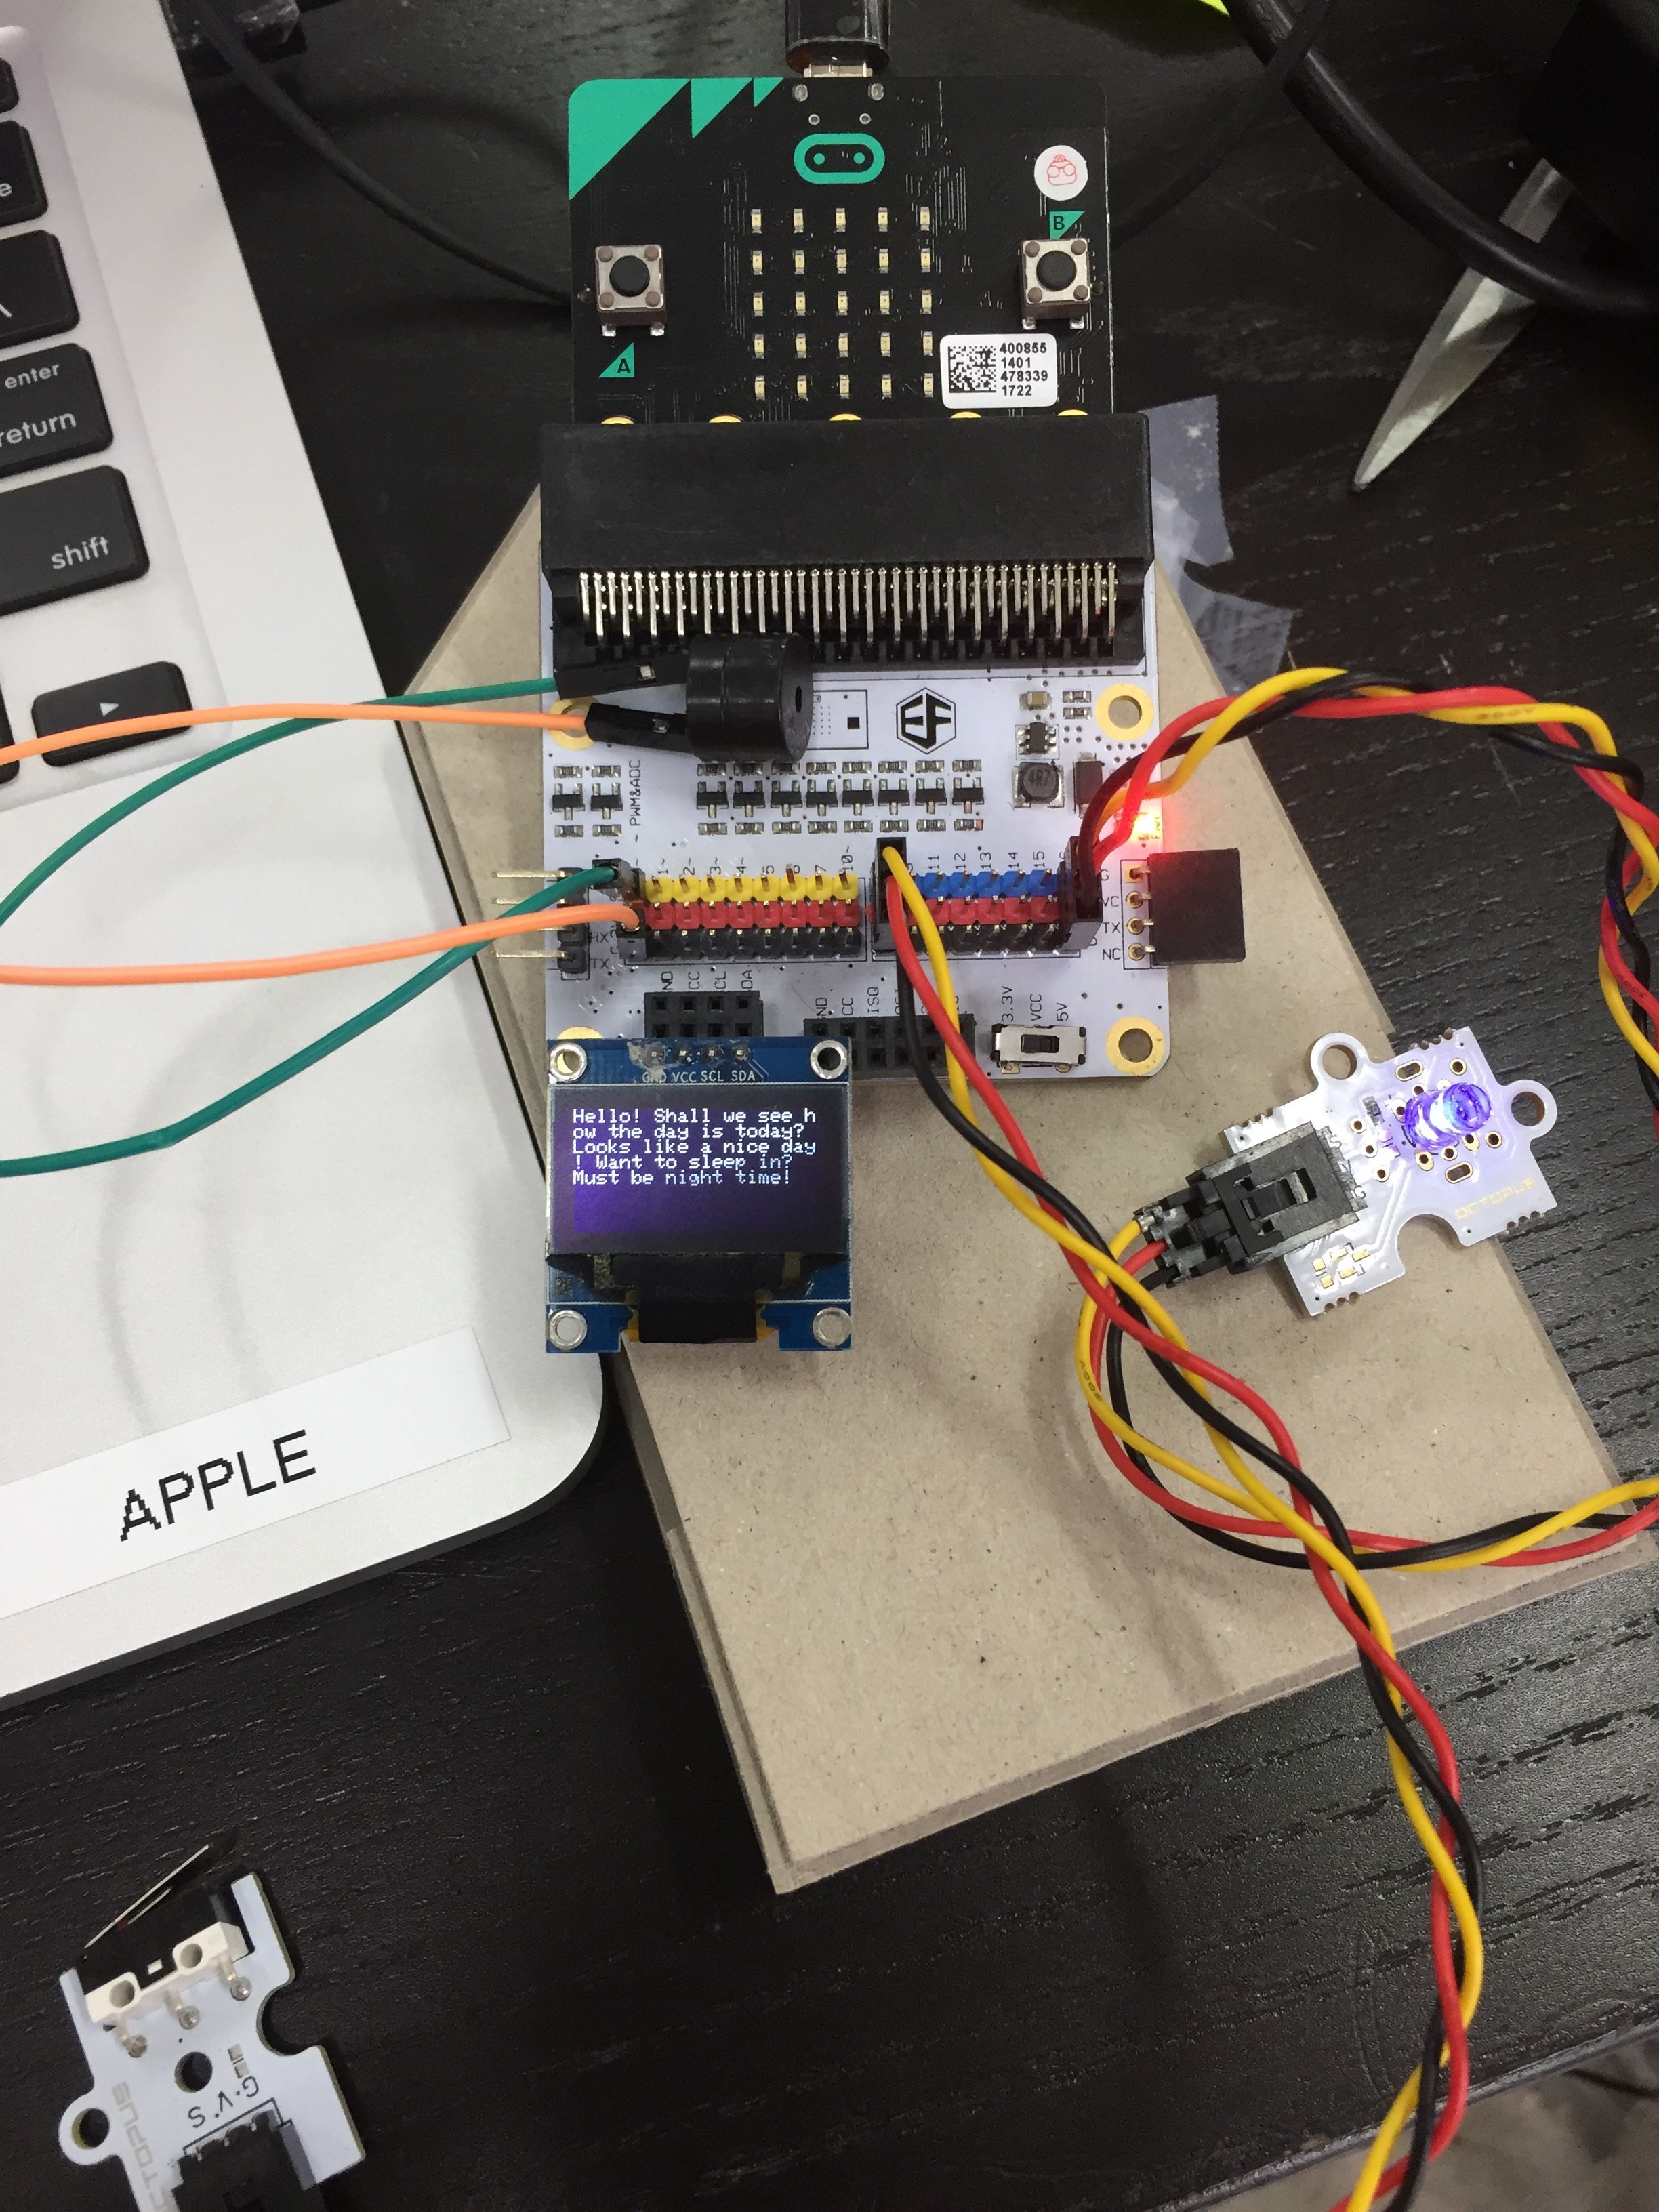
This is the last section. When buttons A and B are pressed, it will display “Looks like a nice day! Want to sleep in?” if temperature is less than 35(you can configure the temperature if you want!). It will proceed on to play a tune(via the buzzer) and switch the LED up. To switch the LED off, the crash sensor must be pressed and this is the function of the if block above the ‘on button A+B pressed’.
STEP 9
Download the file and move it into the micro:bit. And you are done! You can play around with your code to make it more lively. Great job!
Made this activity? Good Job! Now spread the word. Share a photo of your creation on social media with #letsgethacking #TemperatureandLightSensor