The Higher Lower Game
Build a simple math game where you can guess if the next number is higher or lower than the one shown on the micro:bit now.
YOU WILL NEED
- 1 x BBC micro:bit
- 1 x Micro USB cable
- 1 x OLED
- 1 x Breakout board
- 1 x Laptop
STEP 1

Prepare one breakout board, one micro:bit, and one OLED.
STEP 2

Attach these three components together.
STEP 3

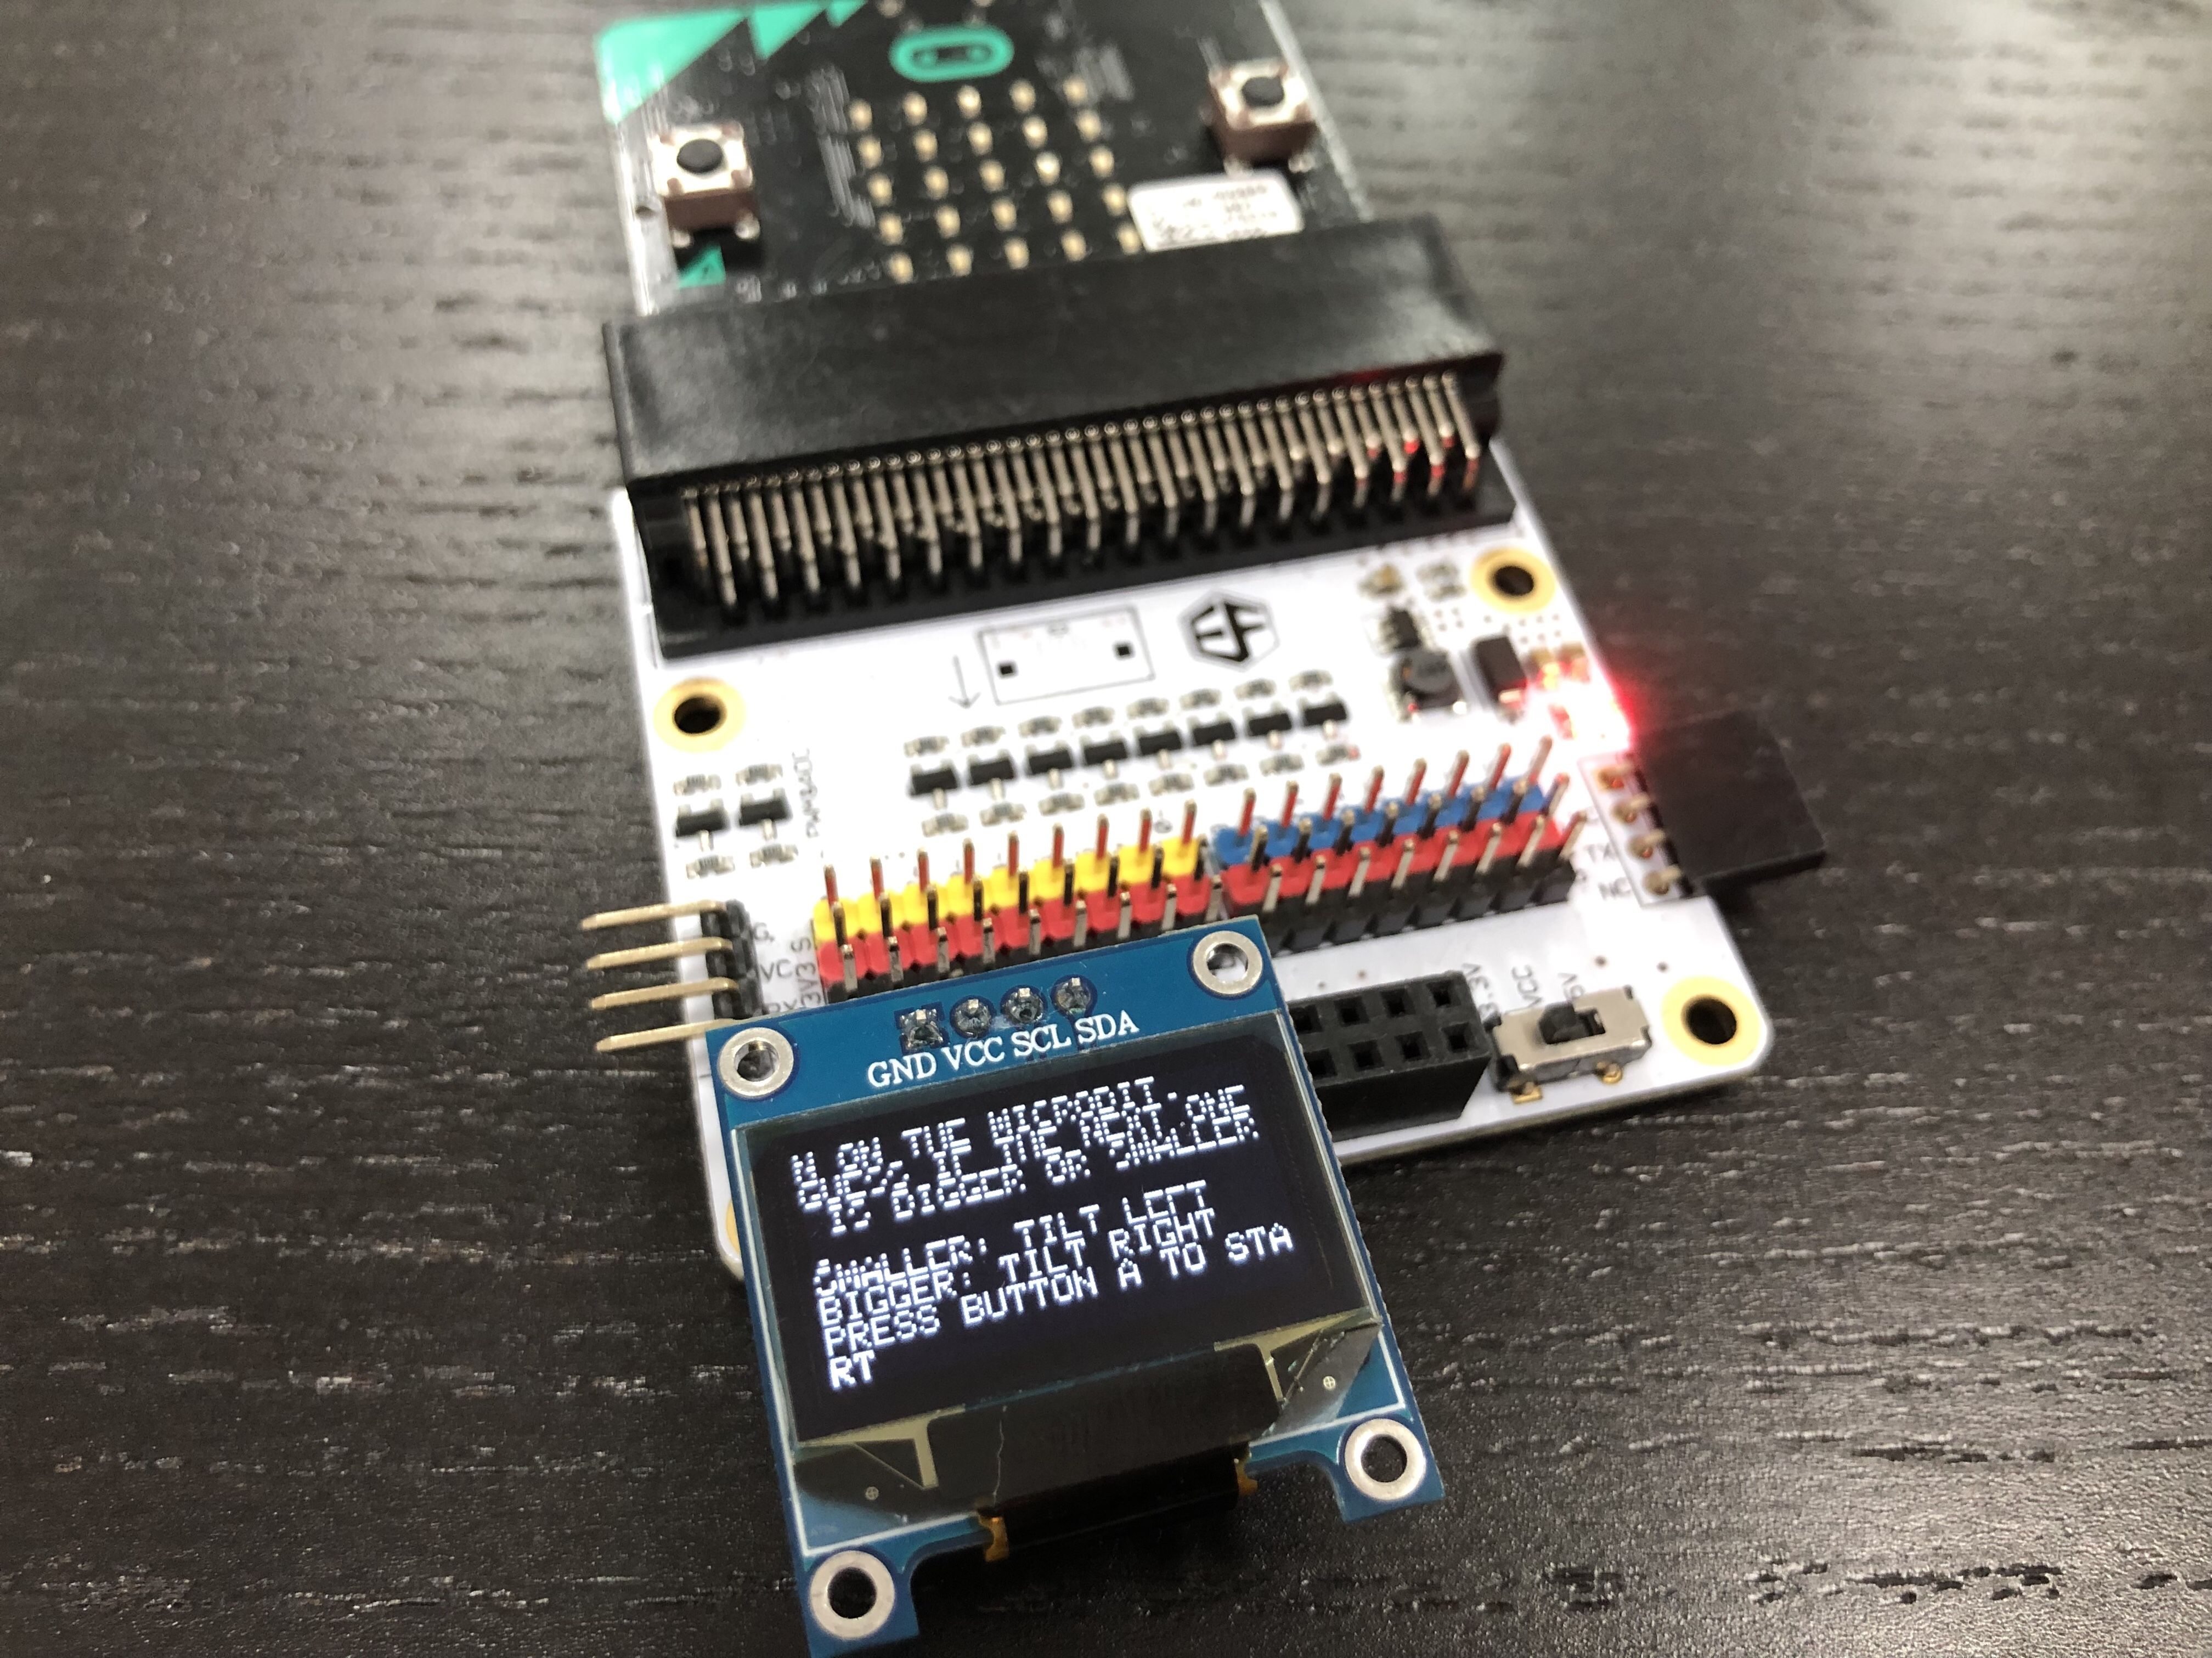
Ensure that the OLED is inserted to any of the three rows as shown in the picture.
STEP 4

Pre-coding
Open the makecode micro:bit webpage on your laptop. Plus an OLED extension by clicking Advanced and then Extensions. Search for OLED in the search bar and click the oled-ssd1306 block (as shown in the picture).
STEP 5

Now, let’s start on coding the initial screen, which is displayed on the OLED.
Use the blocks under OLED section to initialise the OLED and display the commands of the game.
(The high score part will be explained in the last part :> )
STEP 6
How to start your game?
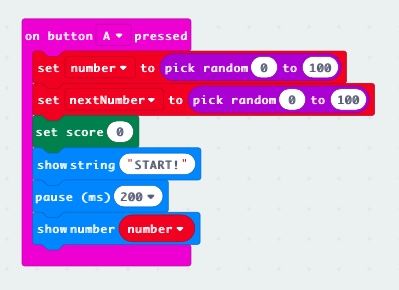
We want the game to start once the player presses button A. Thus, we use the input [on button A pressed]. As long as this button is pressed, the game will start itself.
Now you need to create two variables. One is for the number currently showing on the micro:bit and the other is for the next number, both being between 0 and 100. Employ the pick-random-number block to pick values for the two variables.
A score system is also created to record down the number of correct guesses. So, create a score variable and set it to 0 first.
(You can now flash this starting part on your micro:bit to check if it works.)
STEP 7
Code the if-else part.
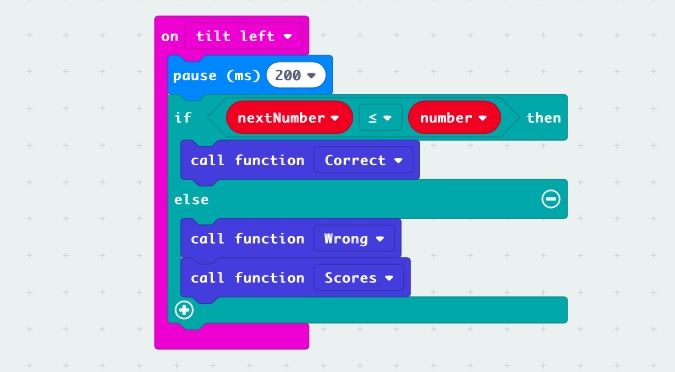
Tilt left if you think the next number is going to be smaller than the one shown on the screen. Hence, we use the [on tilt left] condition. If this condition is met, then this entire block will run.
Use if-else logic to compare values stored in nextNumber and number. If the condition is met, call the function for correct guess. If not, call the function for wrong guess and and function which tallies the score after game ends.
(The functions will be defined in latter steps.)
STEP 8

How about if you think the next number is going to be bigger?
Try this yourself. It’s almost the same as the previous one.
STEP 9

Code the function for a correct answer.
In the project, we will use function to simplify our programme, which has quite a lot of repetitive parts. The main idea behind function is that it groups a few blocks together to perform a certain task. Whenever you want to perform this task, you just need to call it out. This can largely simplify a complicated-looking code.
So, in this function for a correct guess, we need to show a tick when the answer is correct first.
Next, you need to change the player’s score. [Change score by 1] will add 1 to the previous value stored inside the variable score.
Since the game is still running, you need to prepare the next number which is going to be shown on your micro:bit. [Set number to nextNumber] will help to store the value of nextNumber into variable number. You also need to prepare nextNumber by giving it another random value.
STEP 10
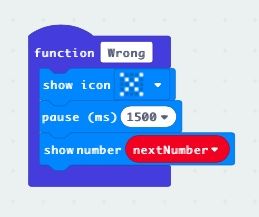
Code the function for wrong guess.
STEP 11

Now, we are on our final part! Let’s code for a function which helps you tally the final score and the highest score. This will be done on the OLED screen.
An if-else block is used to test whether the value stored in highScore is lower than the current score. If yes, it’s value will be replaced with the value of score; if no, it will just remain the same. Both your current score and the highest score will be shown on the screen.
STEP 12

Yeah! Now, try play with your own game! Have fun~
Made this activity? Good Job! Now spread the word. Share a photo of your creation on social media with #letsgethacking #TheHigherLowerGame