Timing Gates
We’re going to build a simple version of timing gates which are sensors used on
some roads to determine how fast cars are travelling.
YOU WILL NEED
Electronics
• BBC Micro:bit
• 4 x Crocodile clips
Craft Materials
• Aluminium foil
• Metal ball (made out of aluminium foil)
• Cardboard
Stationery
• Glue/tape
• Scissors
STEP 1
Making the timing gates
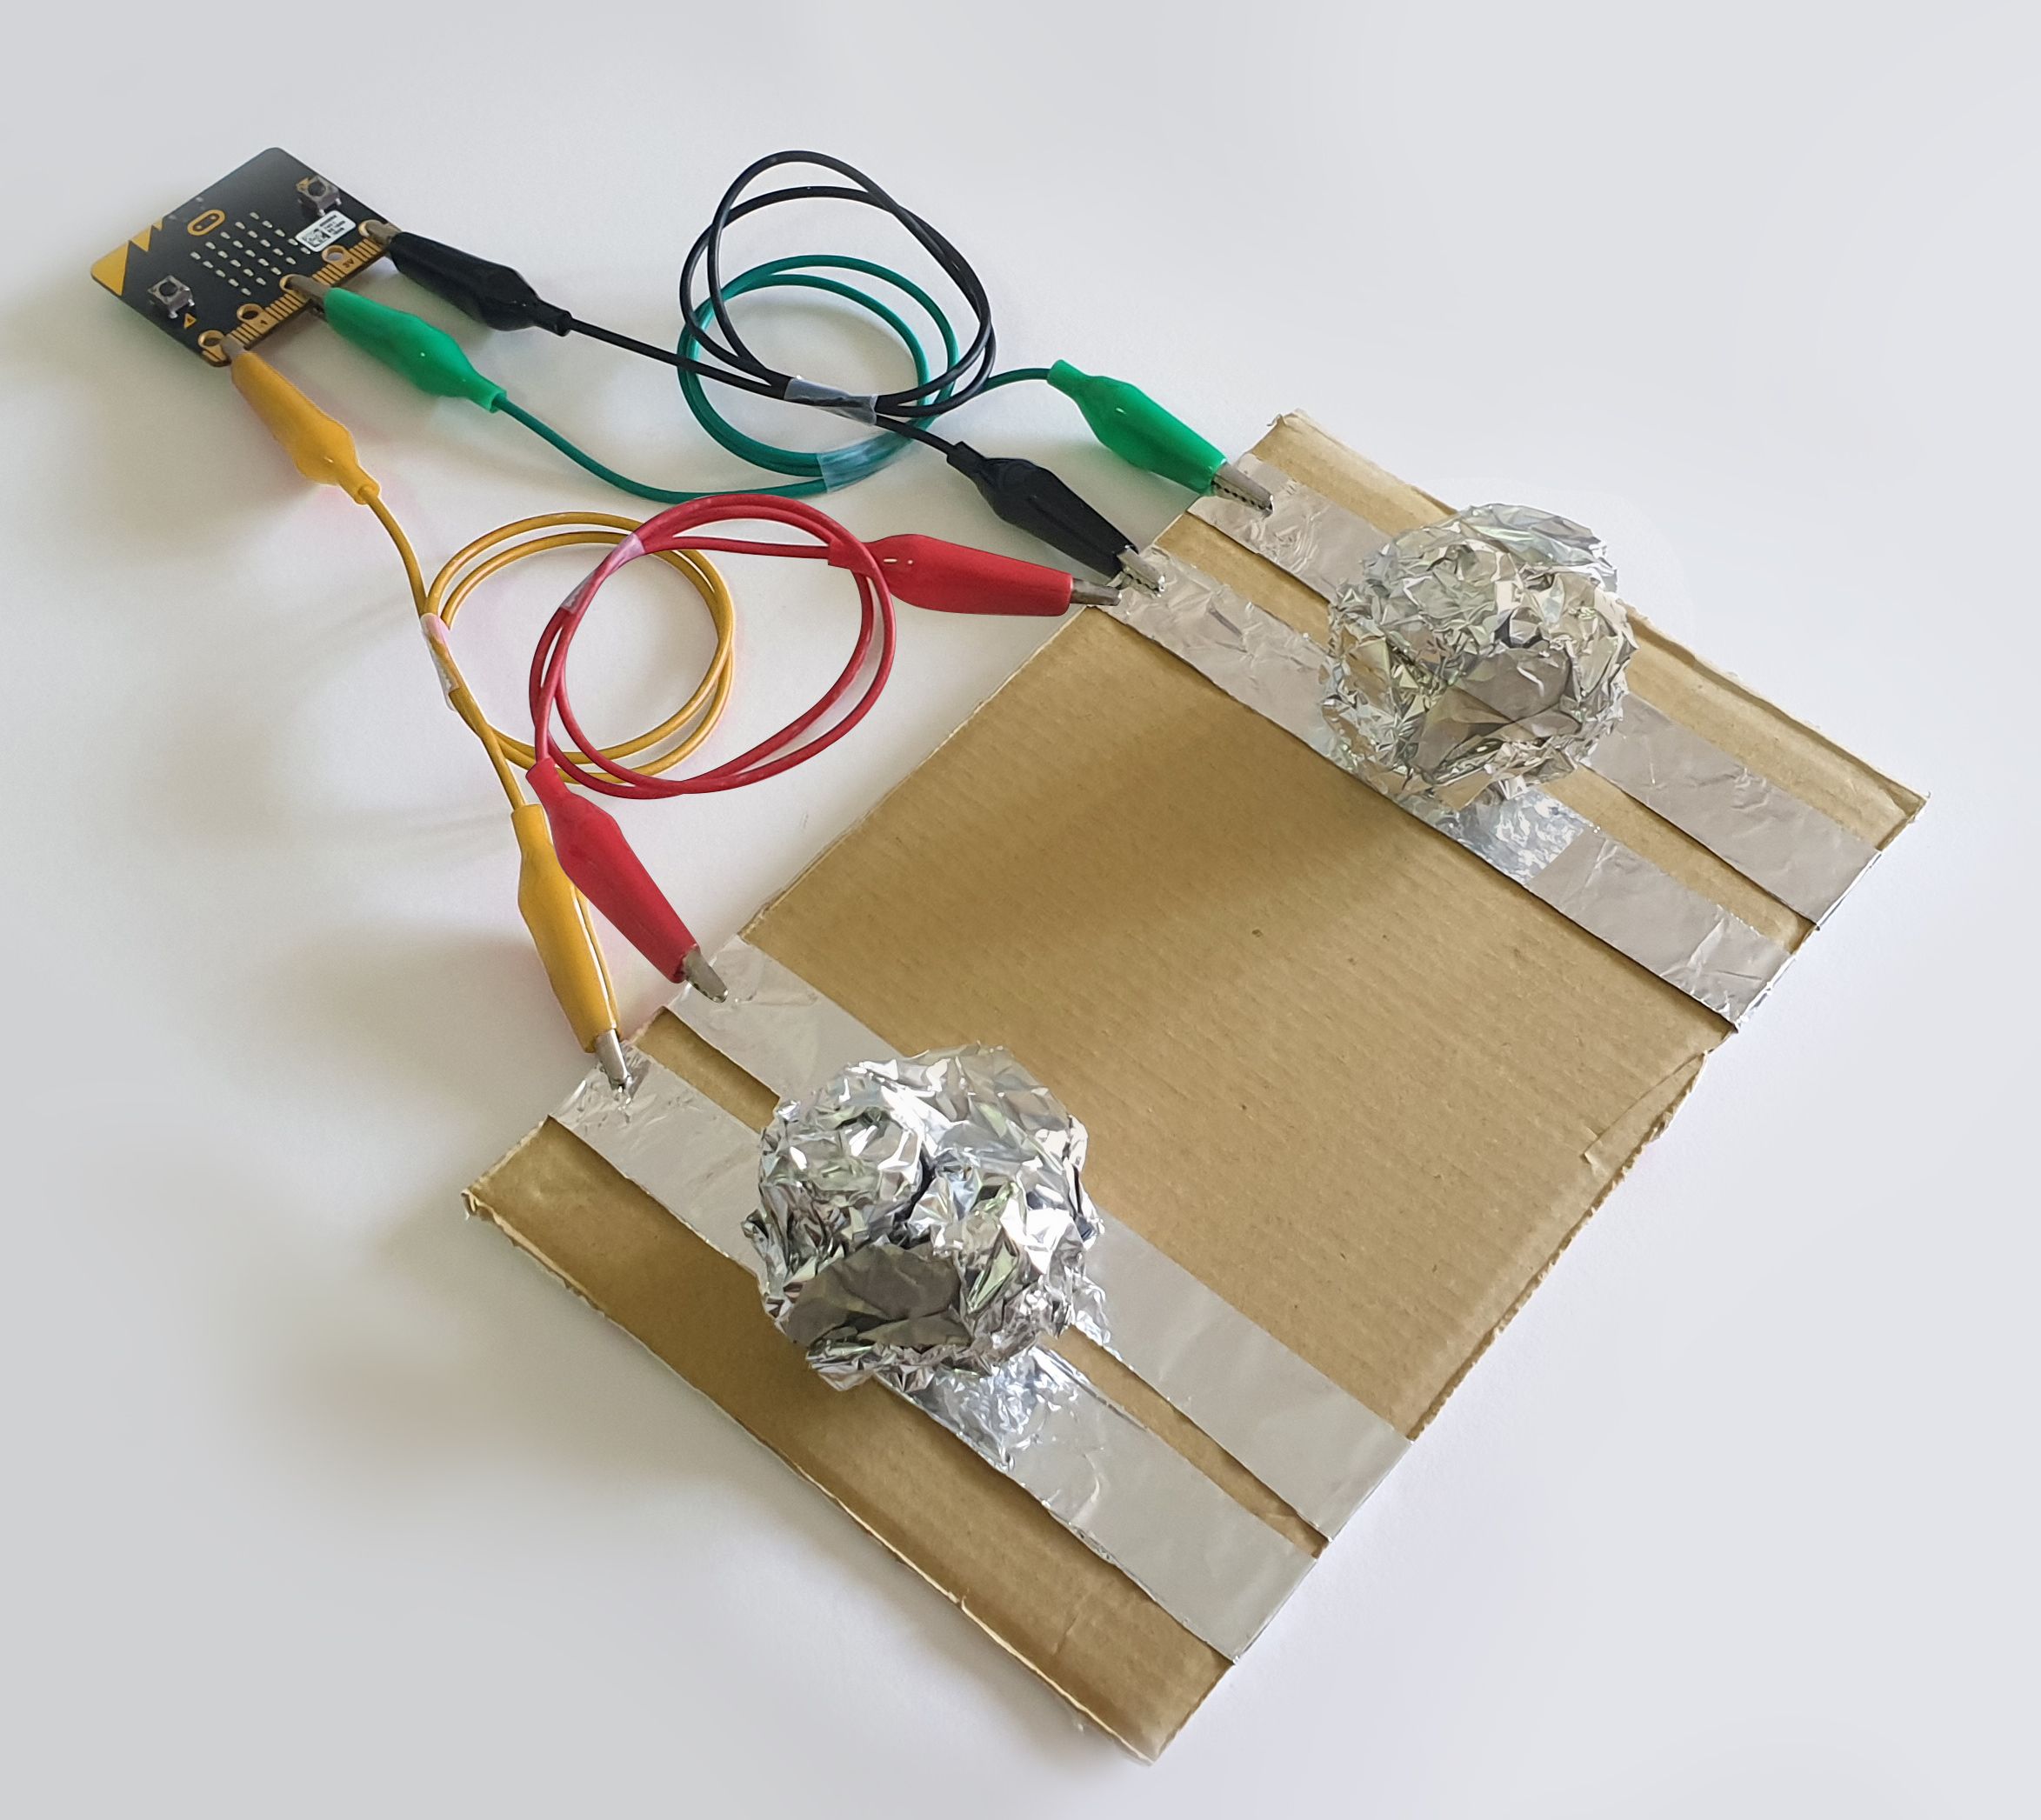
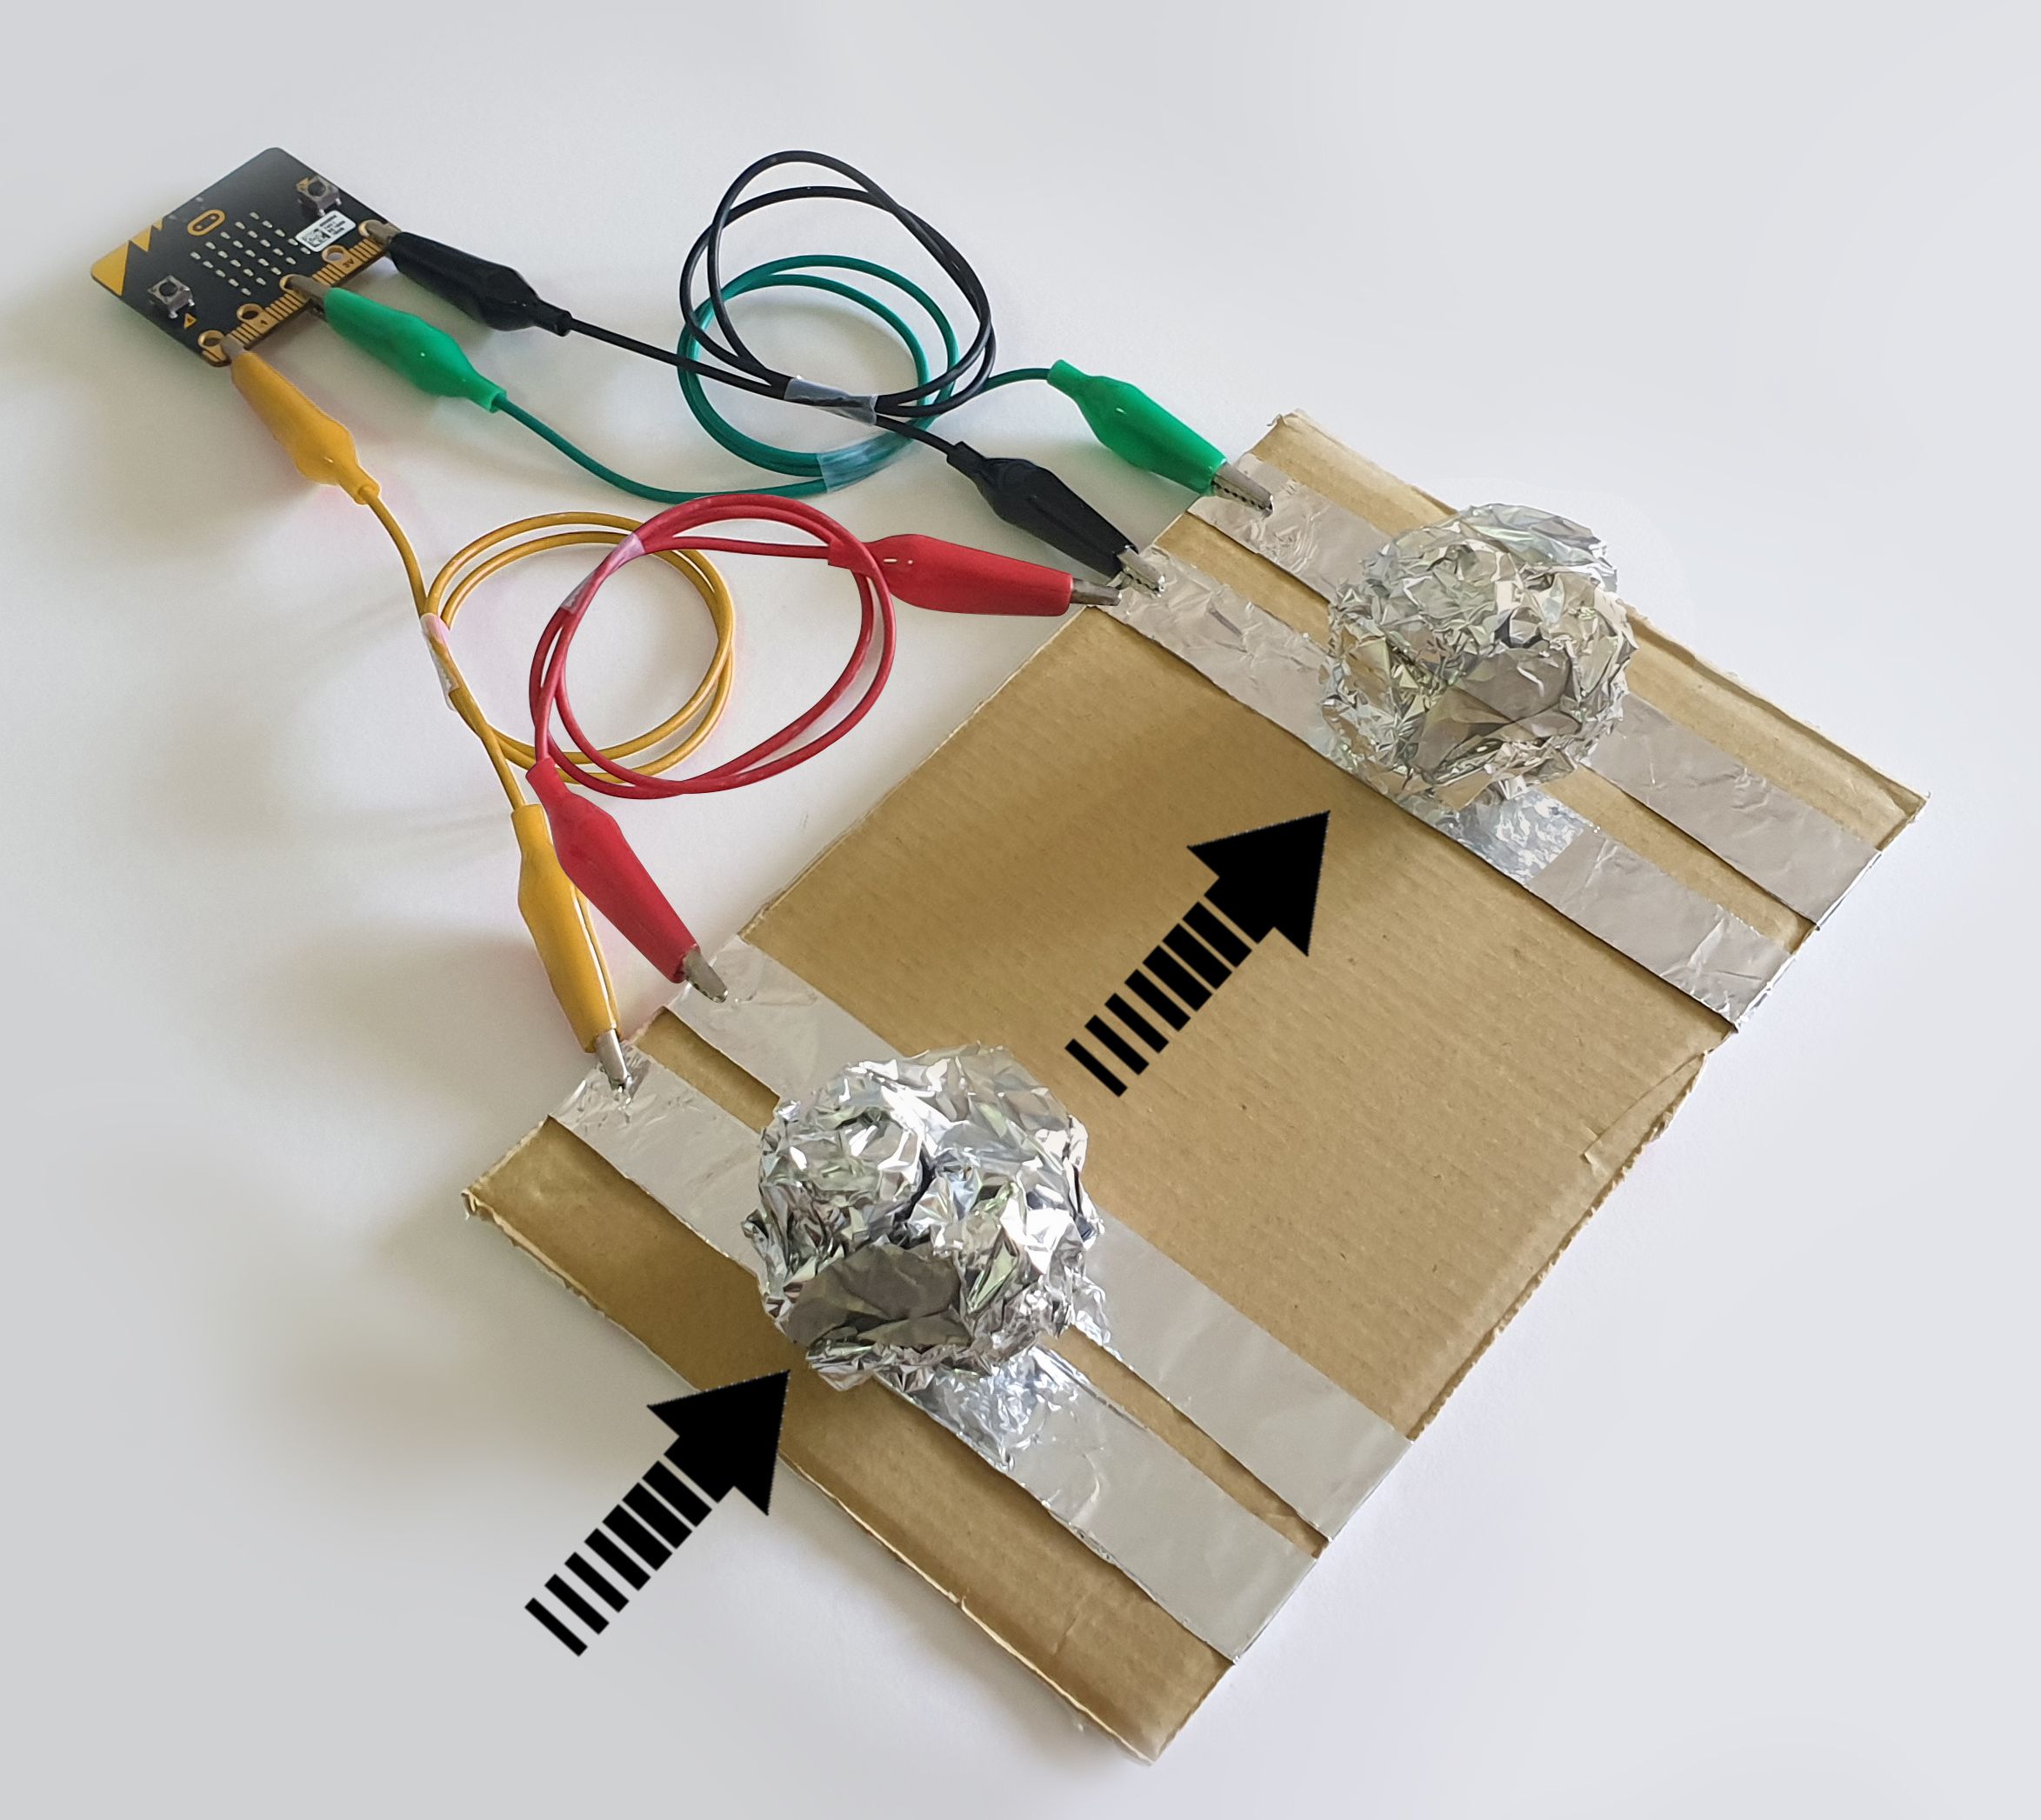
In this project, our “car” will be a ball of aluminium foil, and we’ll drive (roll) it over two sets of timing gates. The micro:bit will then display how long it took the car (ball) to travel from one gate to the other.
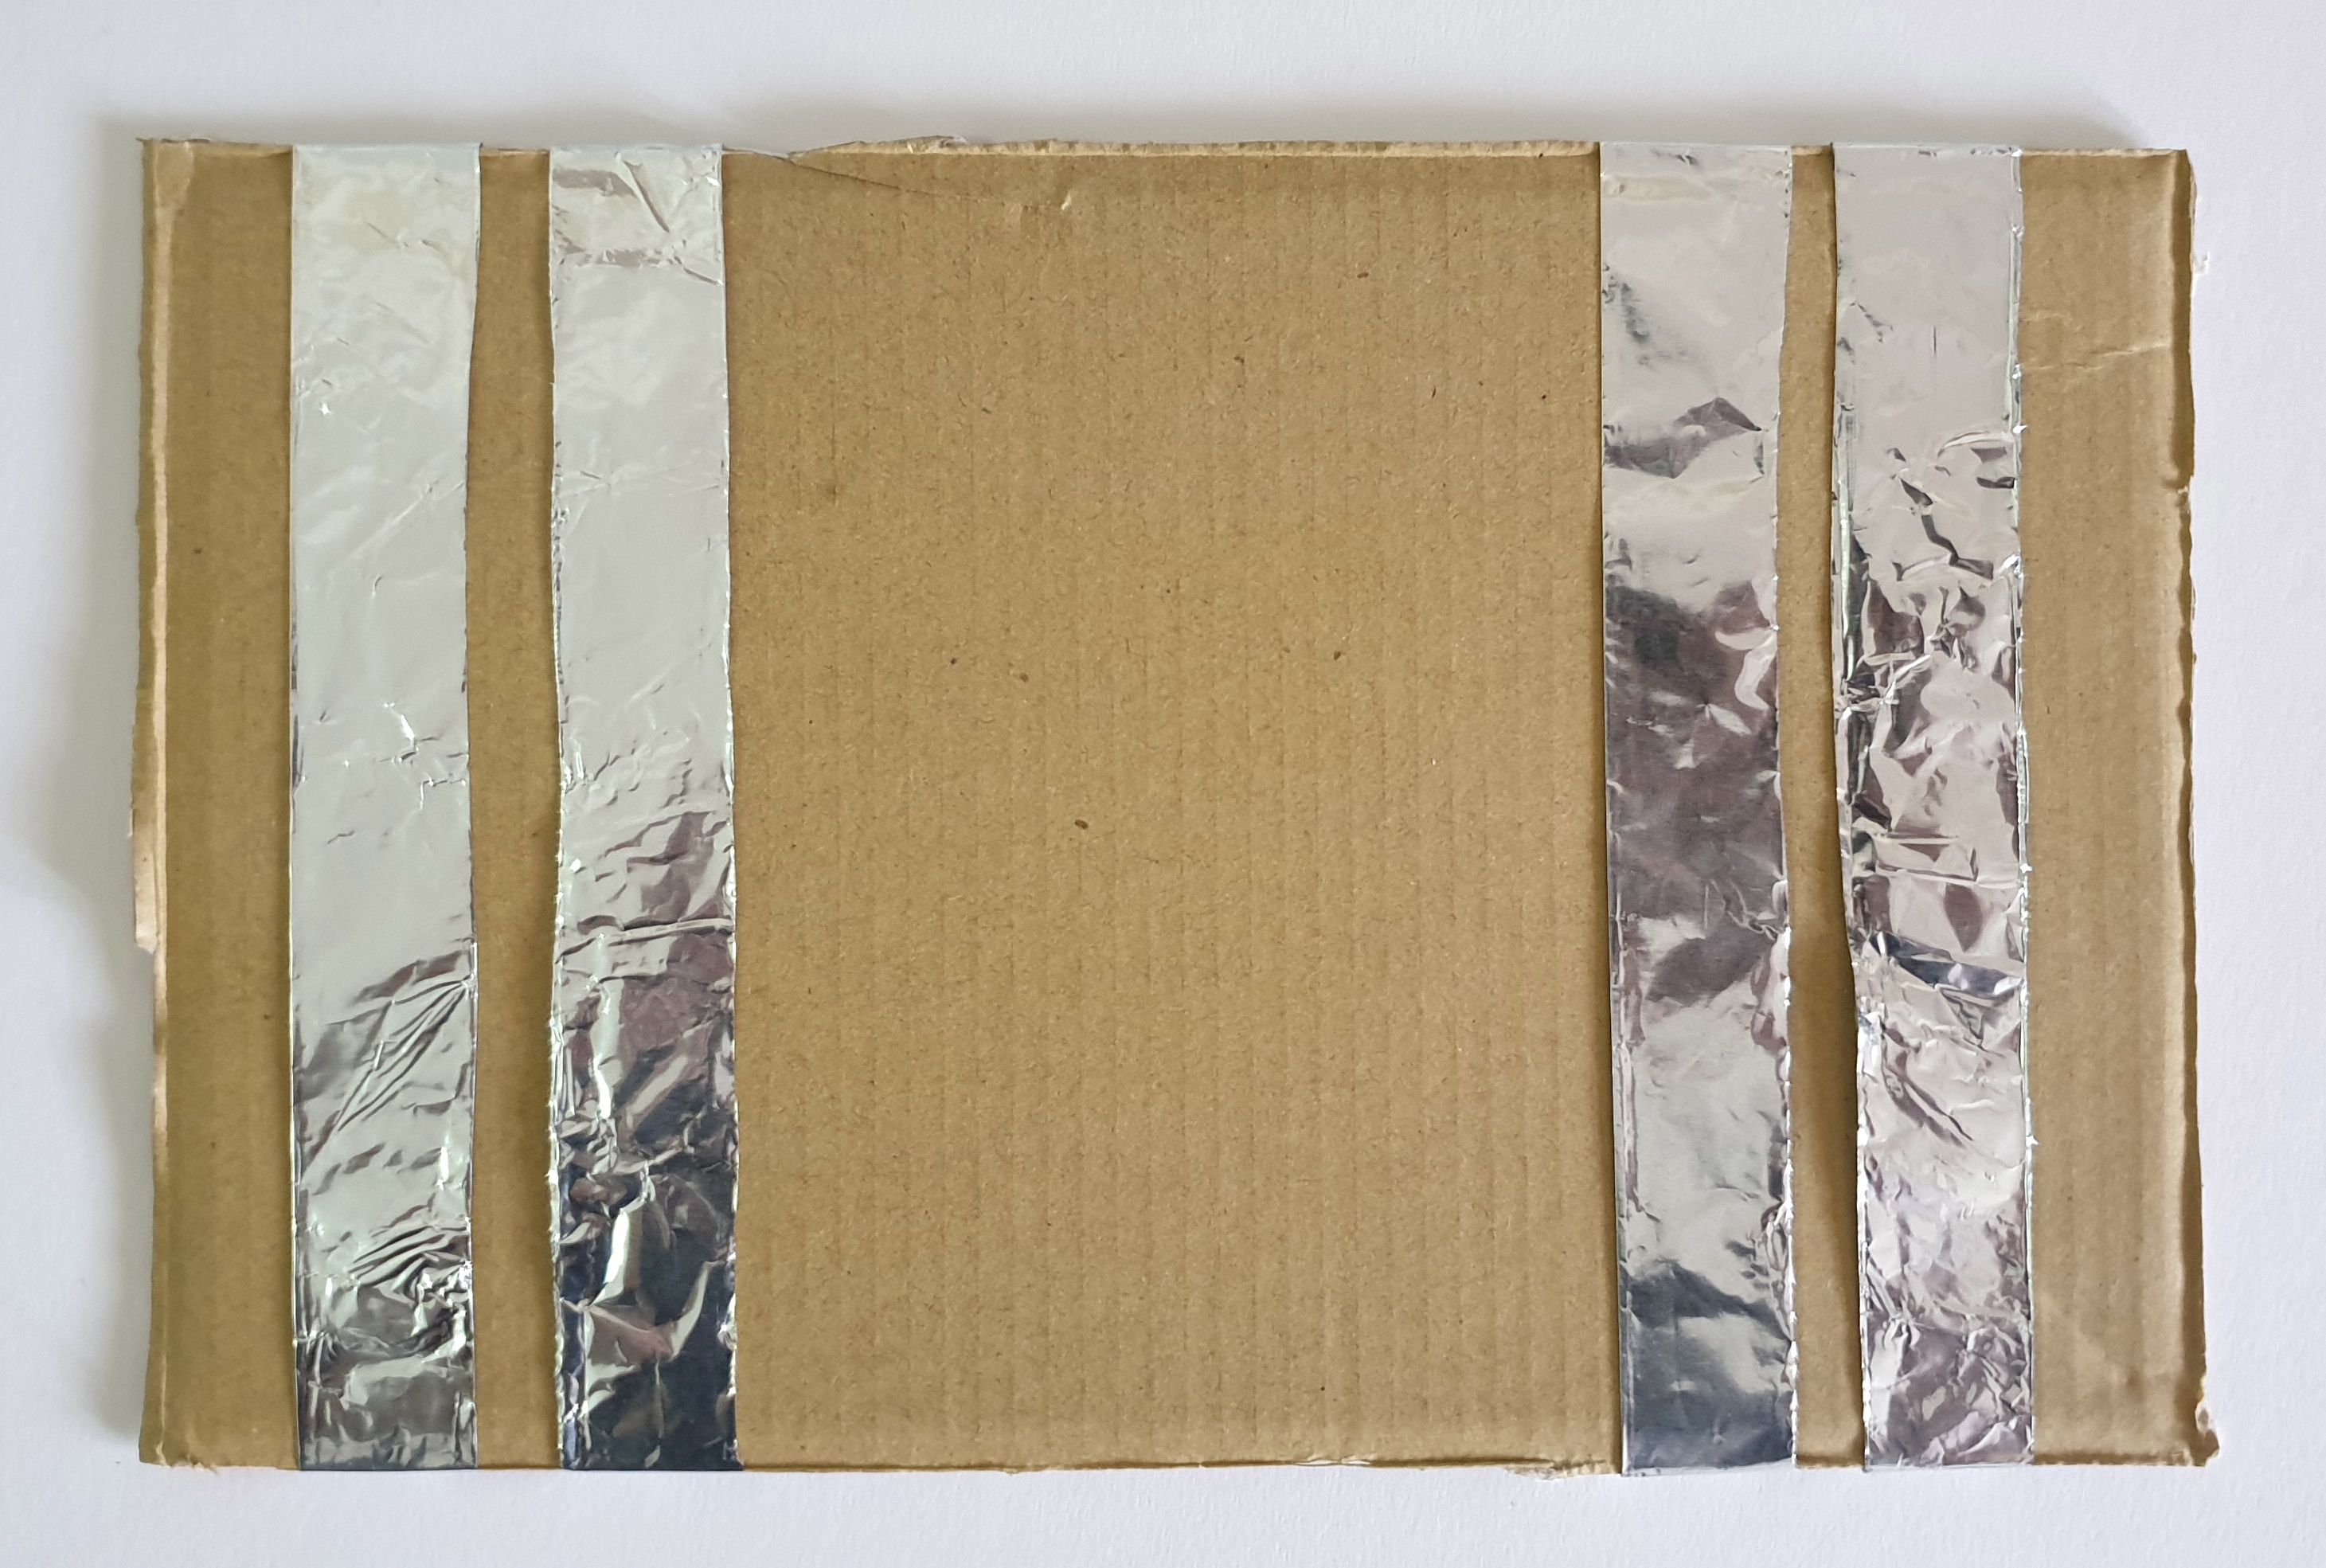
First, we need to construct the gates. Place four strips of aluminium foil on the surface of your cardboard (you can use another material instead of cardboard, as long as it’s not conductive, andyou don’t mind taping aluminium to it).
These strips will be arranged in two pairs (see image for an example). You should leave a wide space between the two pairs. These two pairs will be our timing gates.
STEP 2
Connect crocodile clips
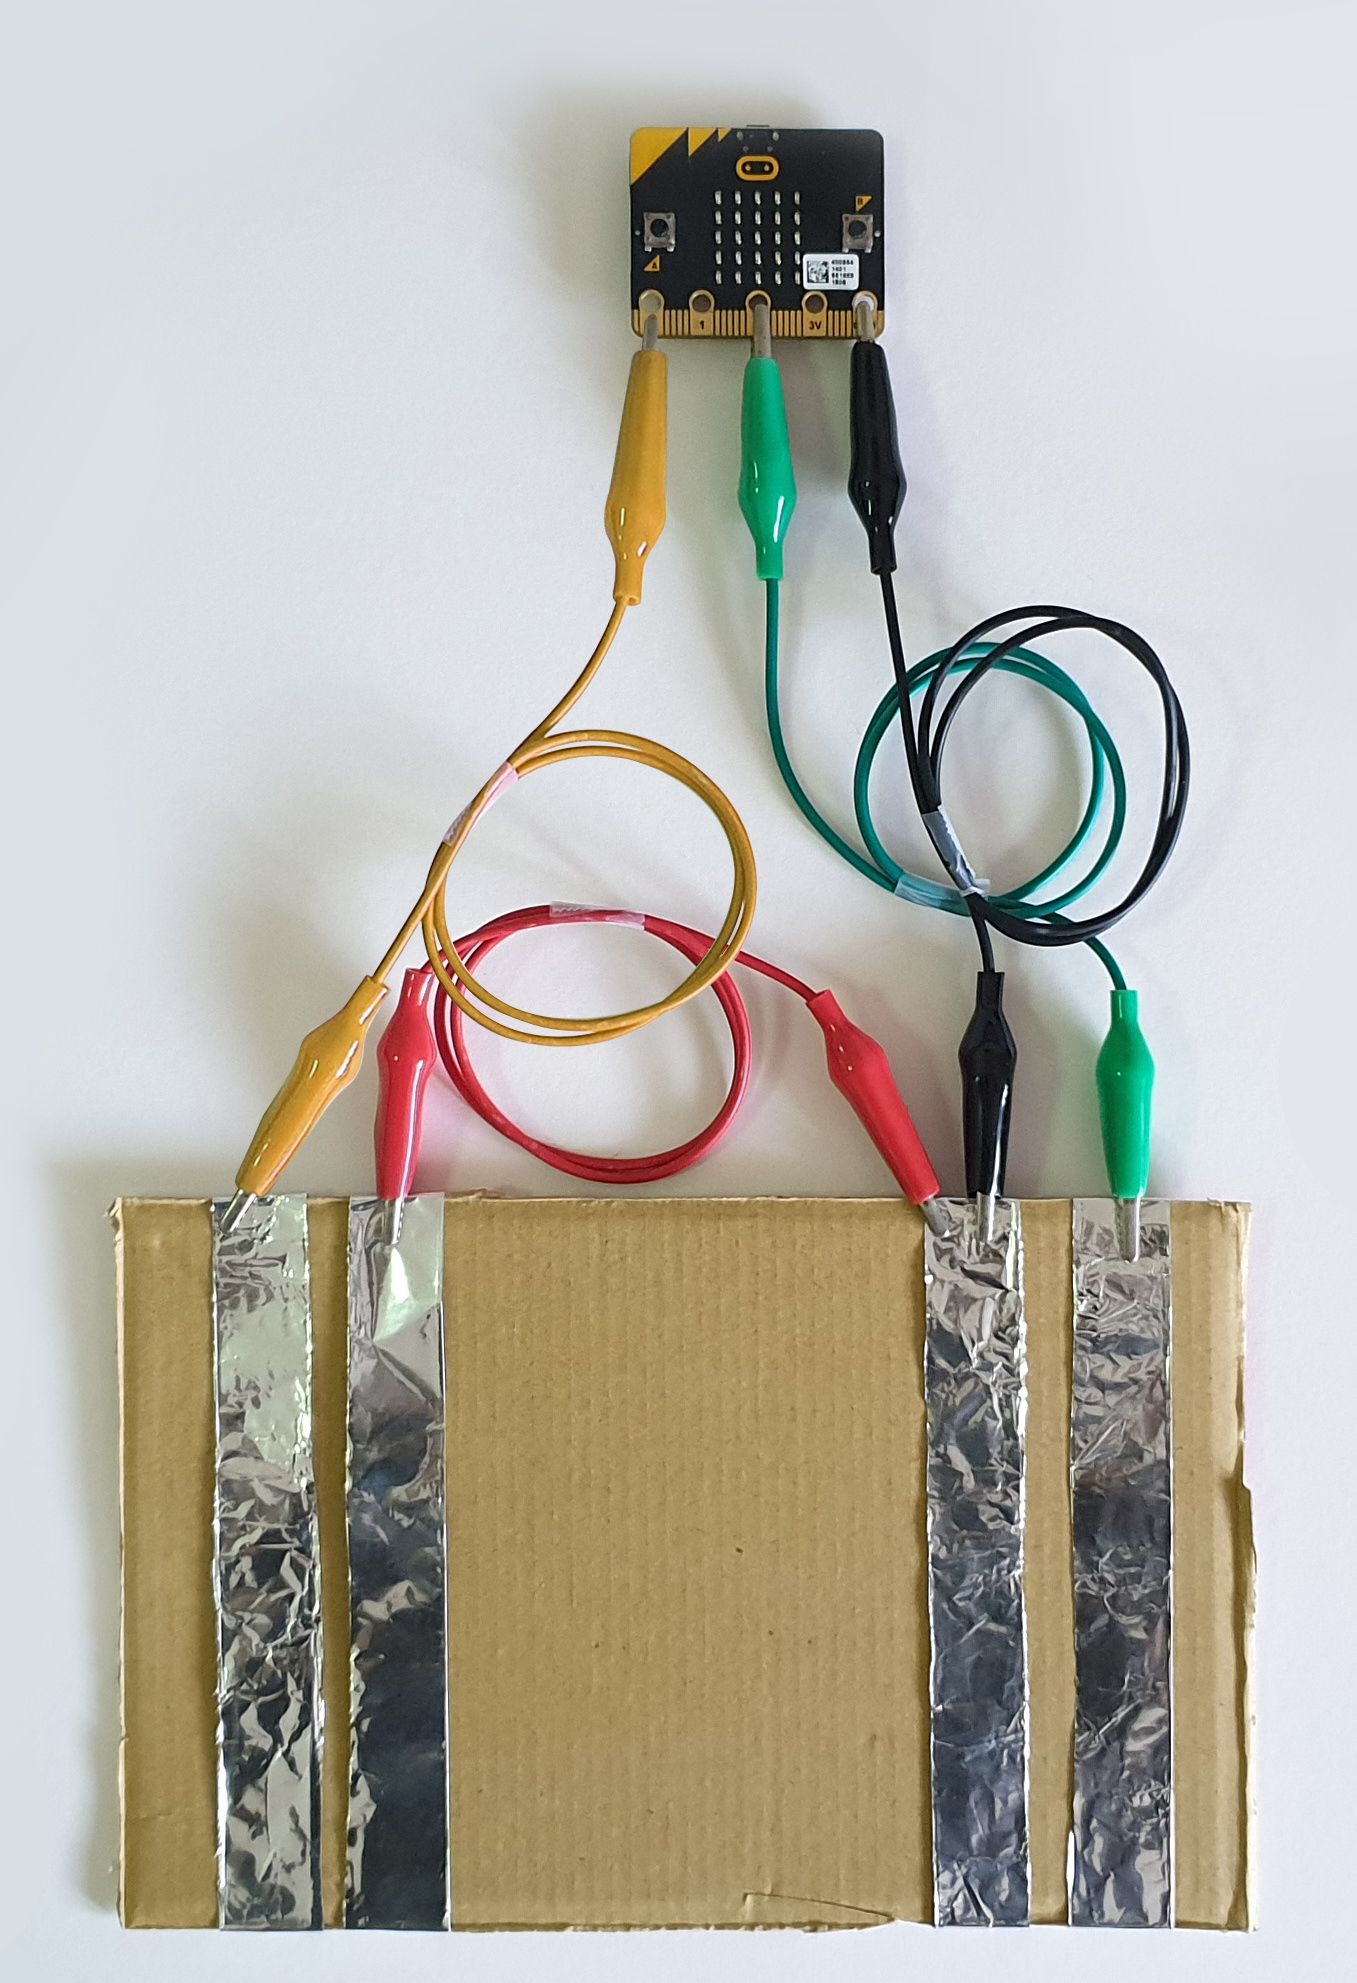
Use crocodile clips to connect the aluminium foil strips to the micro:bit pins as shown in the diagram. From left to right:
• Strip 1 to P0
• Strip 2 to strip 3
• Strip 3 to strip 2, as well as GND (use two crocodile clips)
• Strip 4 to P2
What exactly is happening here? In each pair, one strip is connected to GND, while the other is connected to a pin. When we touch (and release) each pair, it should trigger the respective pin. Let’s test it out!
STEP 3
Testing
When making a project, we should aim to test every small section that we build as we go along, because it’s then easier to identify and isolate problems.
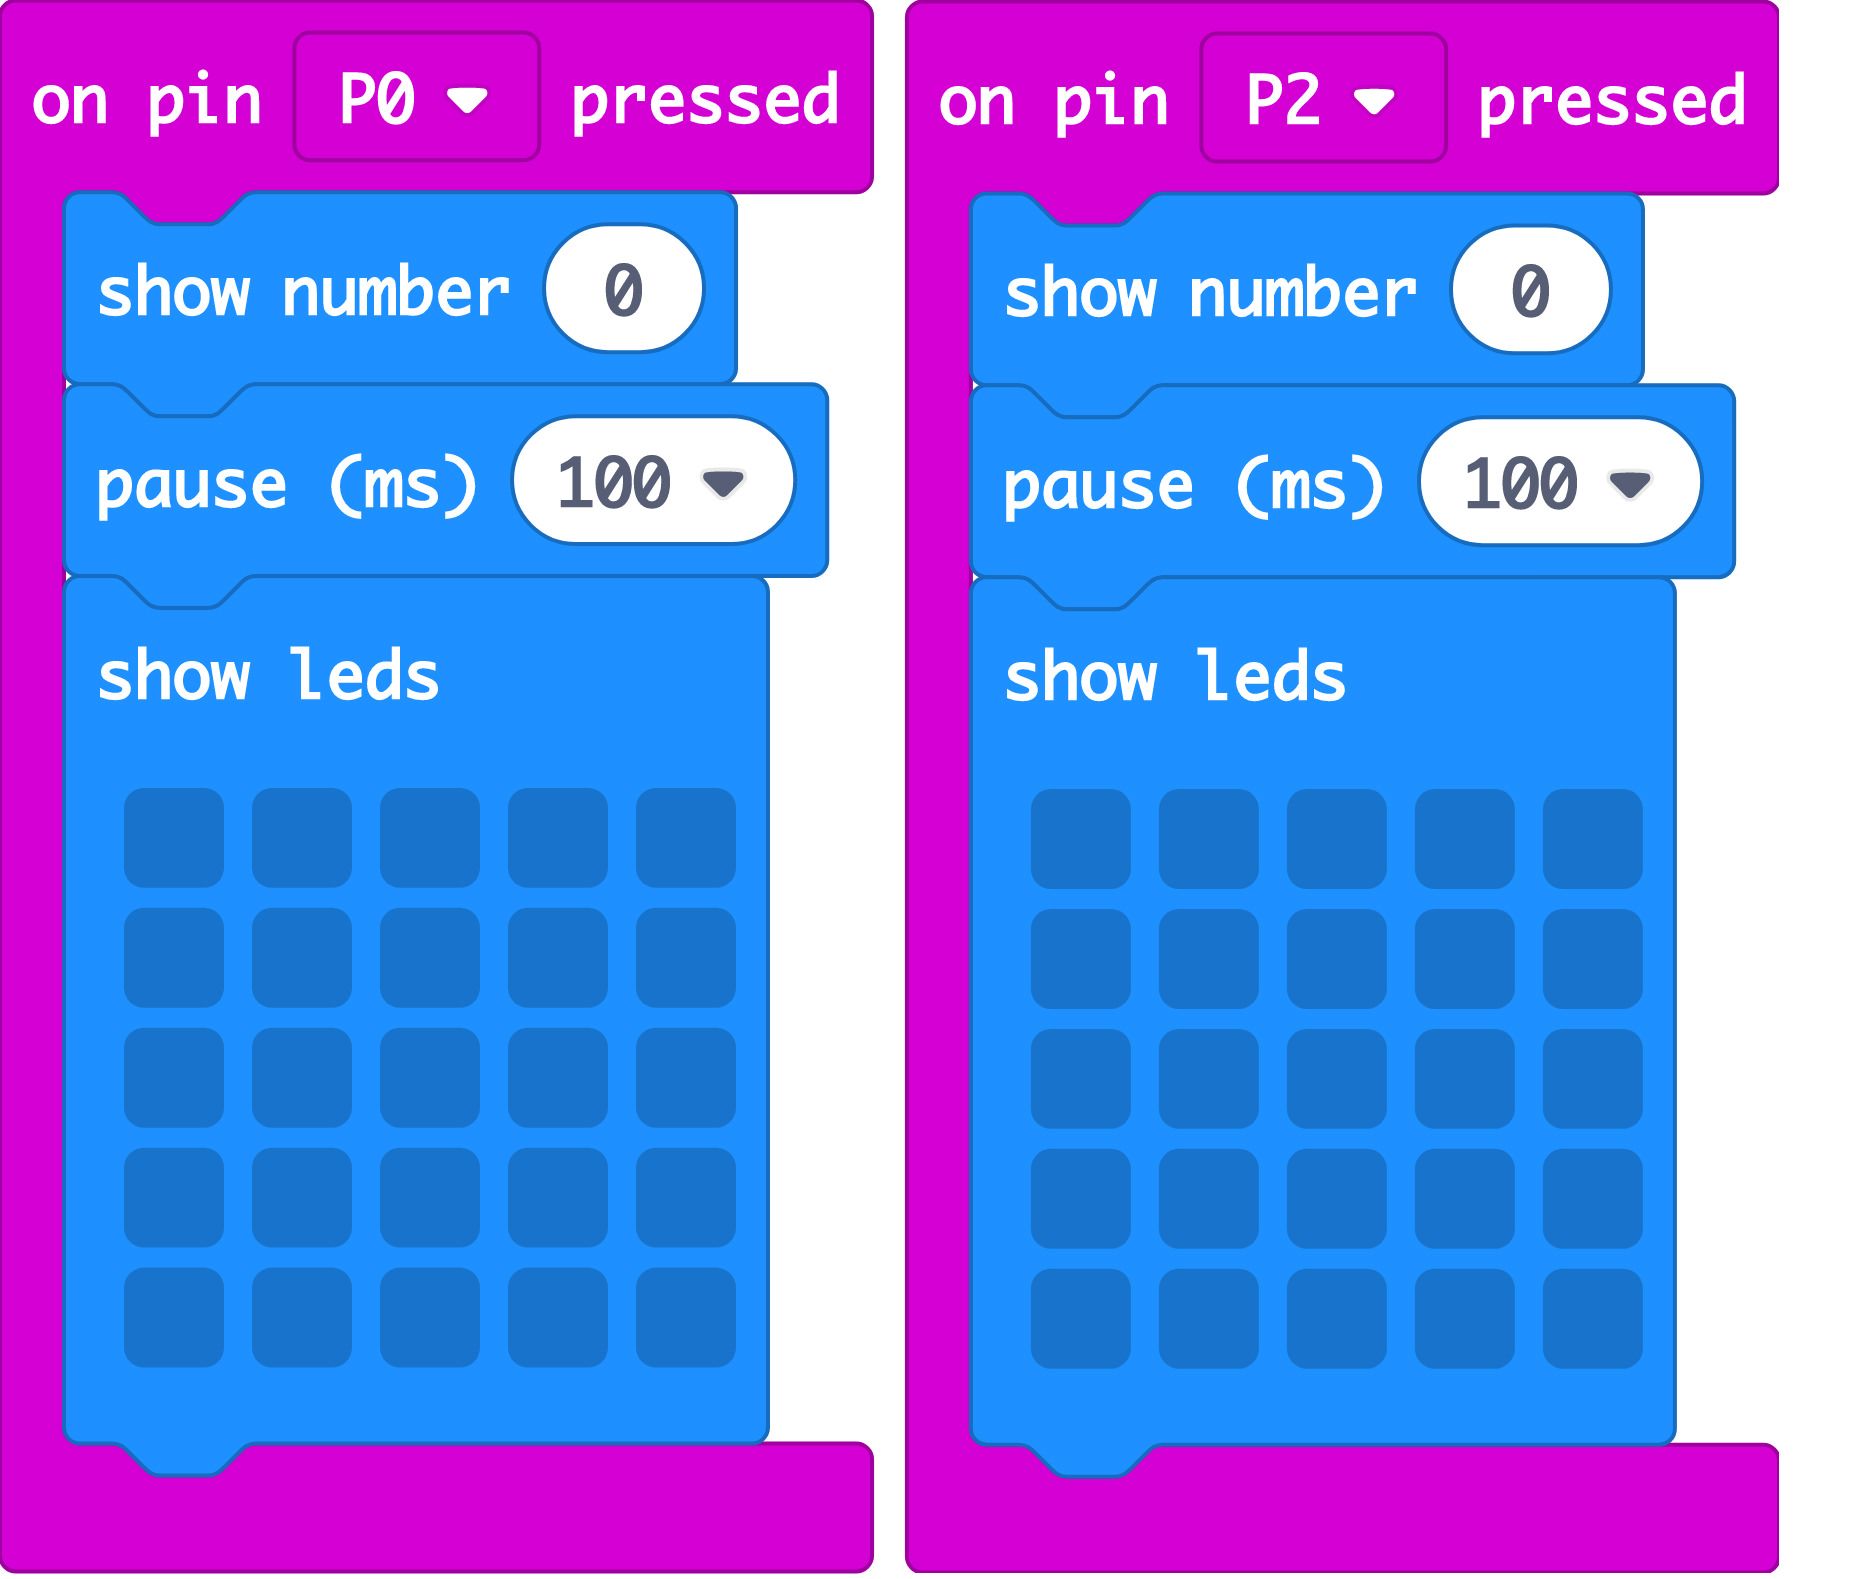
Here is some code to test whether our timing gates will trigger P0 and P2 respectively. If everything is set up properly, simultaneously touching and releasing the 1st and 2nd strips of foil should show “0" on the micro:bit for about 100ms. Likewise, the same should happen with the 3rd and 4th strips. If you don’t see the “0”, check that your timing gates are connected to the right pins!
STEP 4
Whee!
Once you’ve downloaded your code to the micro:bit, test out your timing gate by rolling a ball of aluminium foil across the gates! Whee!
Code and References
Made this activity? Good Job! Now spread the word. Share a photo of your creation on social media with #letsgethacking #TimingGates