Tinkering T-Rex
Build a cardboard T-Rex that will move its mouth and roar whenever you disturb its peace.

YOU WILL NEED
- 1 x micro:bit
- 1 x Tinkering T-Rex Kit
or
- 1 x cardboard T-Rex
- 1 x micro servo motor
- 1 x micro SD card
- 1 x MP3 module
- 1 x speaker
- 1 x PIR motion sensor
- 1 x DFRobot micro:Mate board
- jumper wires
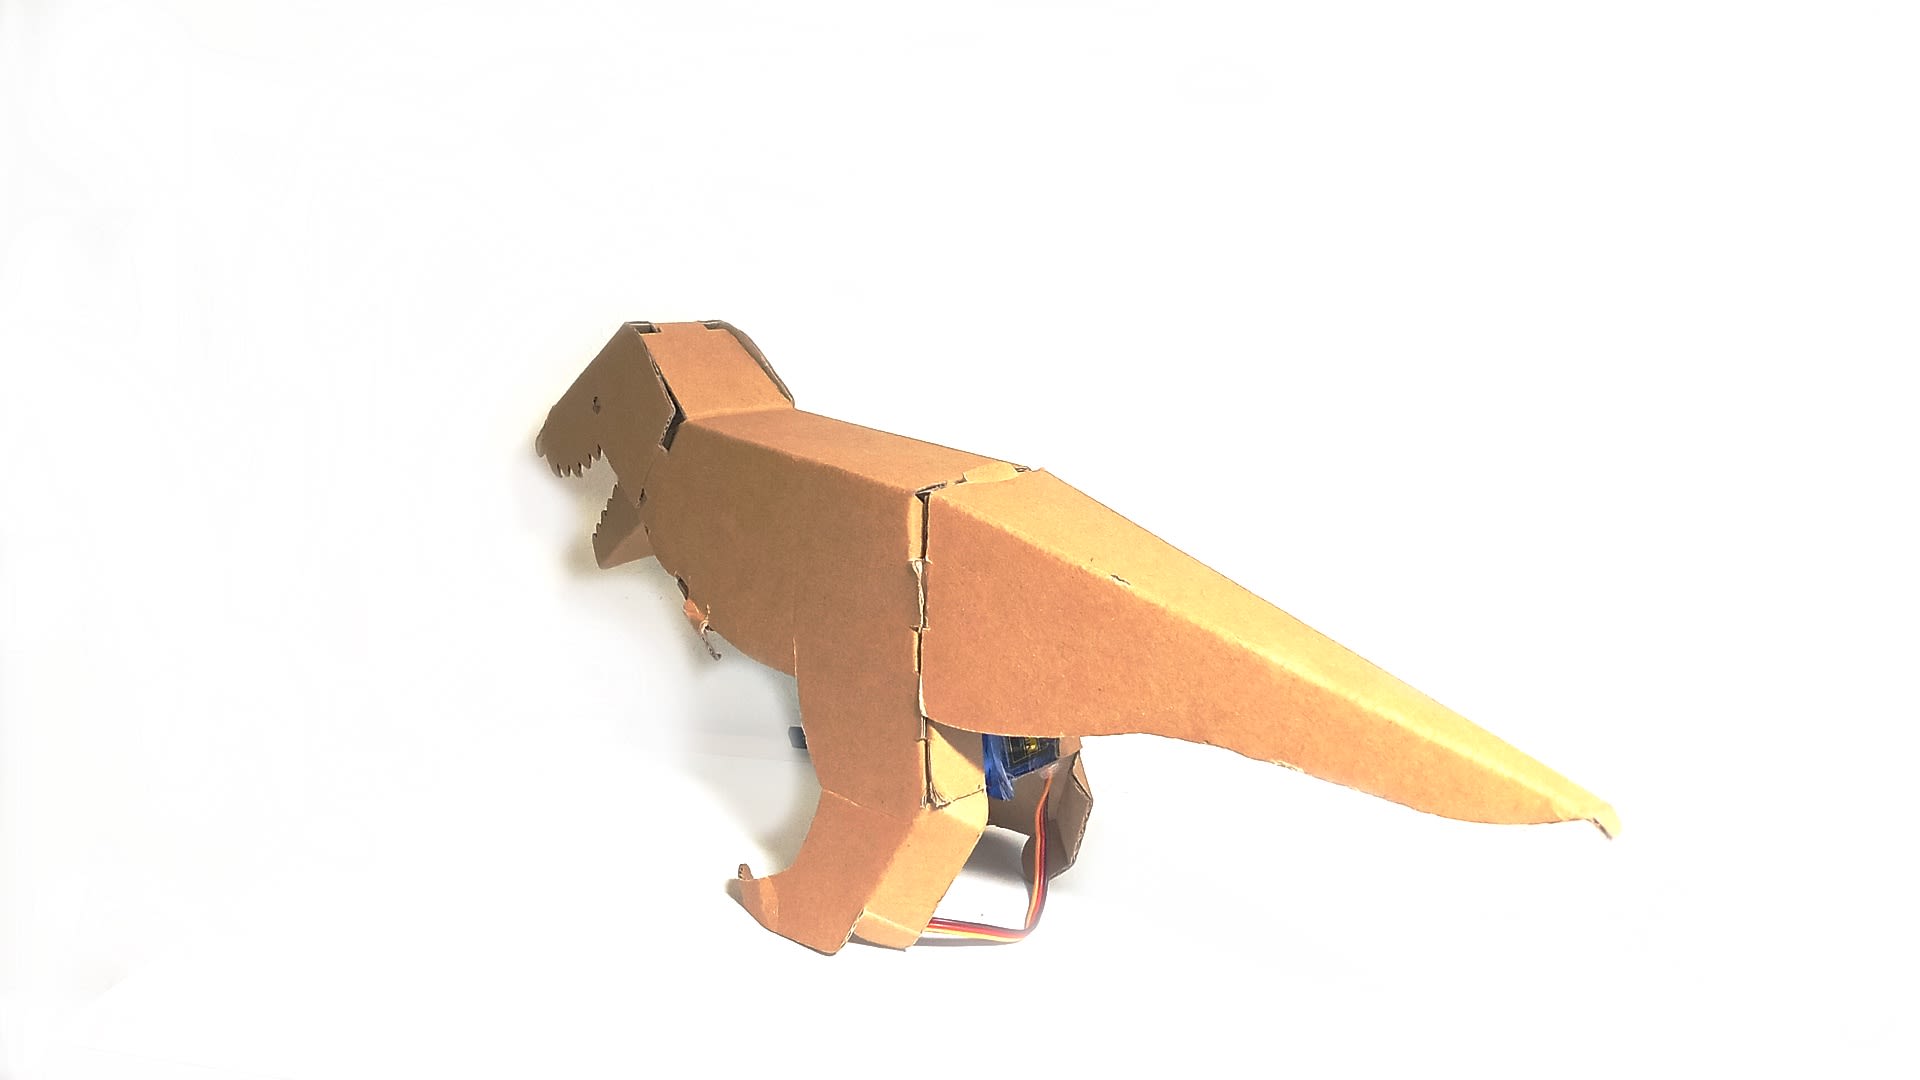
STEP 1
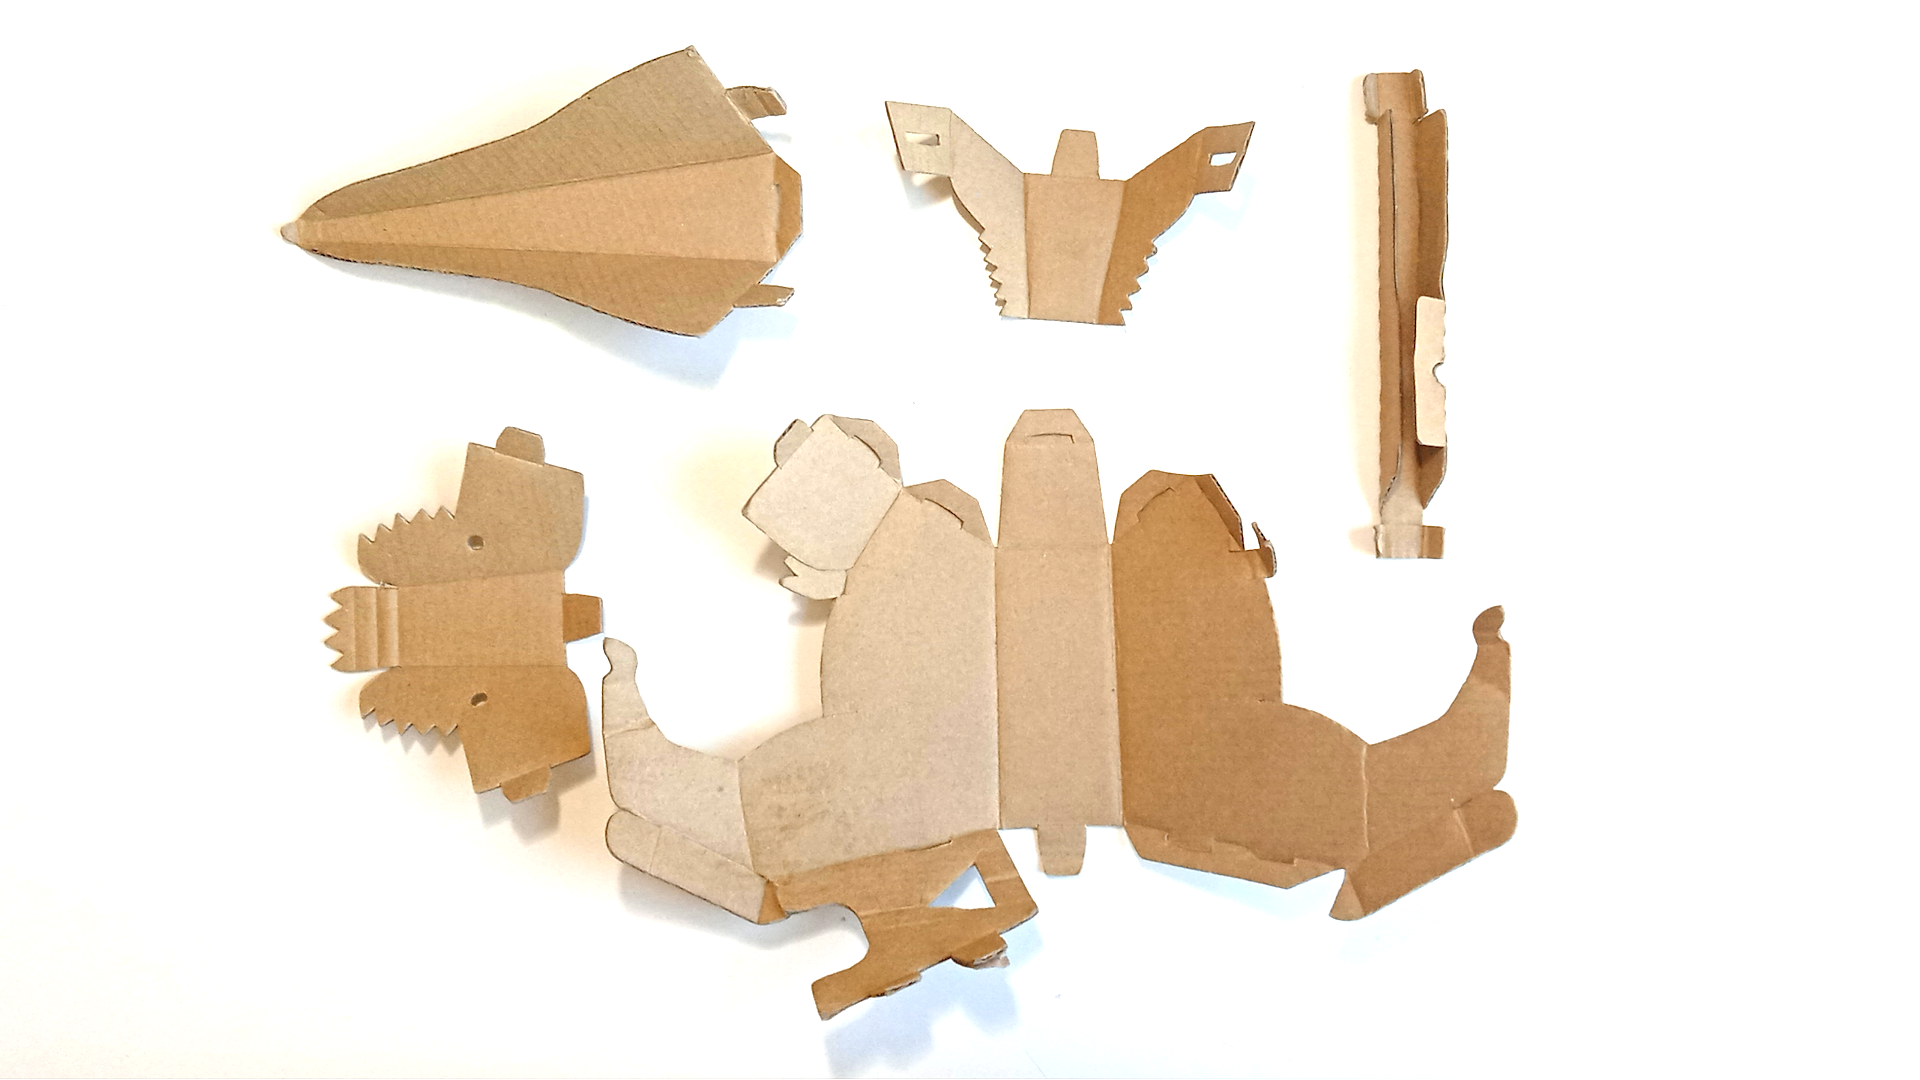
Let’s start with assembly, to build our t-rex.
(a) Open up your kit and remove the cardboard cut-outs from the cardboard piece.
(b) Following the lines on these cut-outs, crease them carefully.
STEP 2
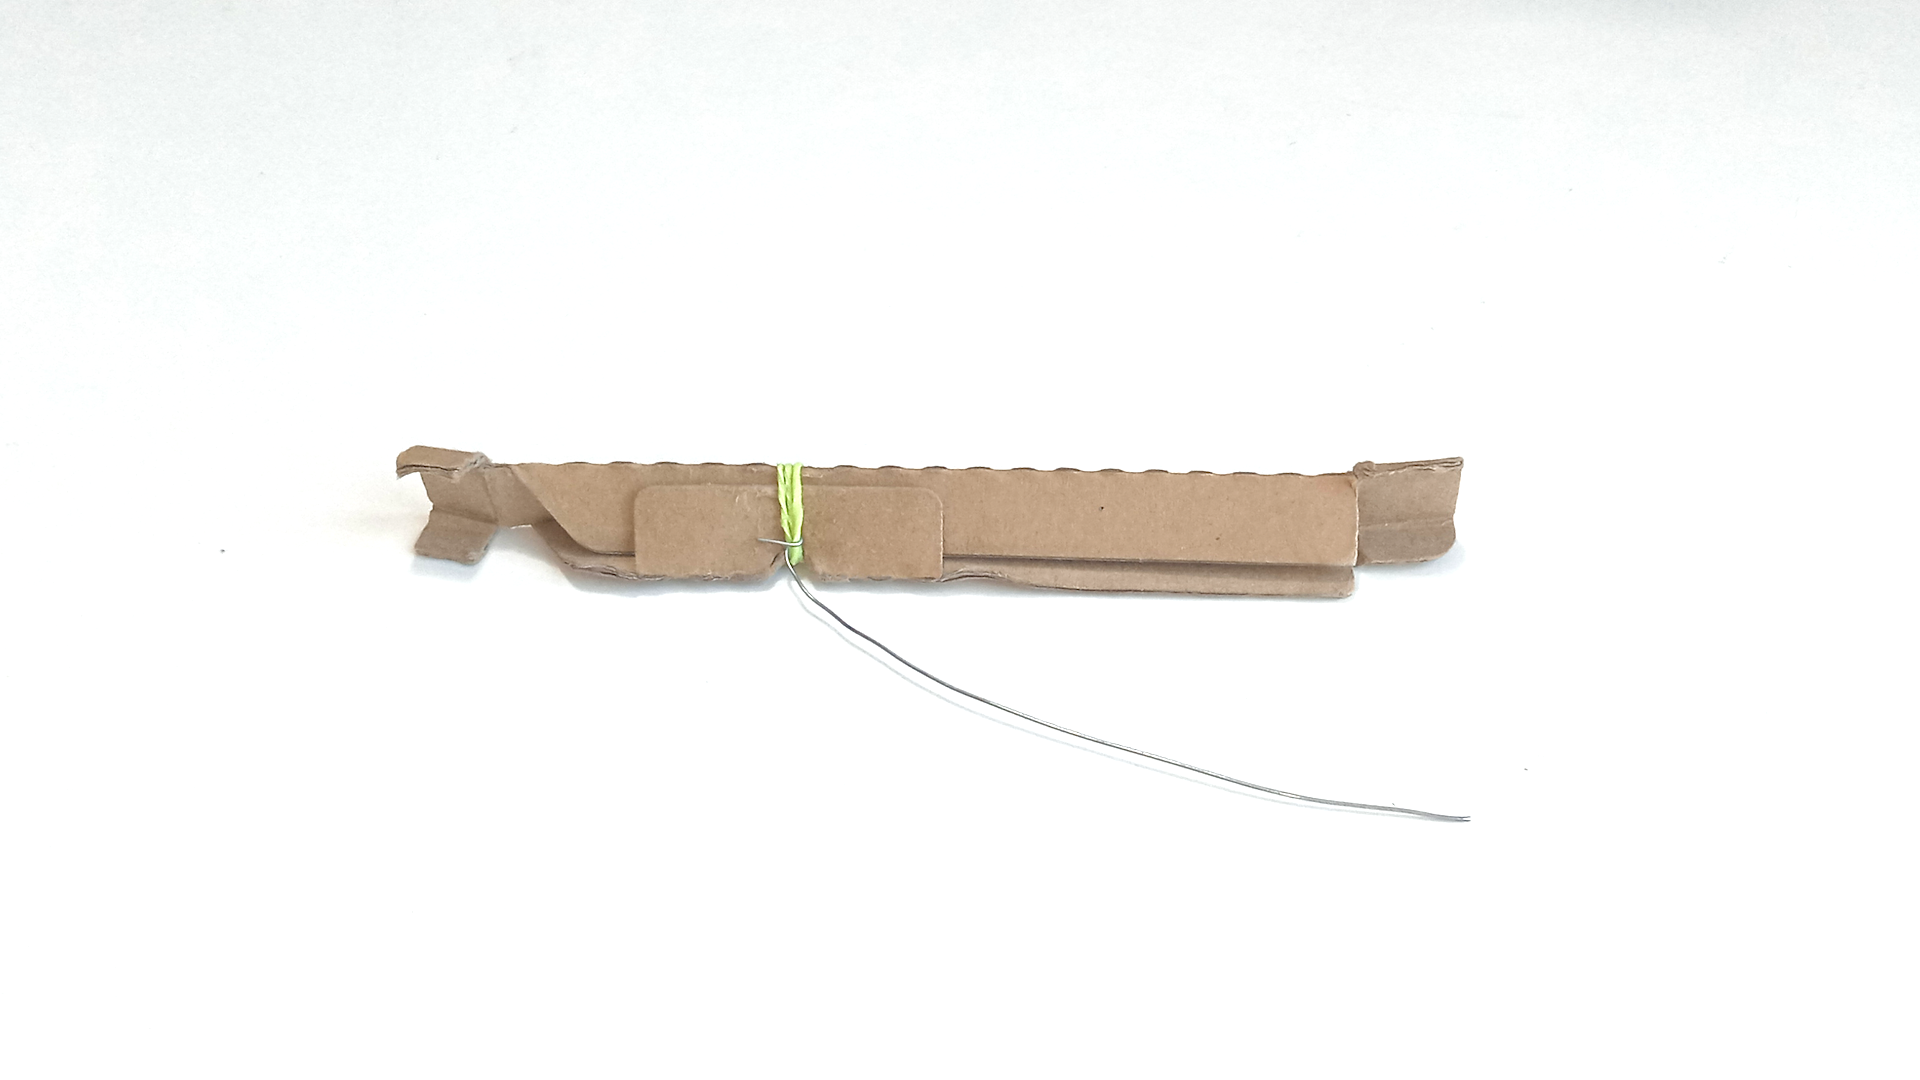
Assembling the lever
(a) Fold up the left and right ends of the lever, to fold the lever into a triangular prism. There are 2 ends to this lever - end 1 (which is closer to the circular indent) and end 2 (further away from the circular indent).
(b) Tie a rubber band (or a piece of metal wire) around the lever at the circular indent, to secure its folded form.
(c) Using the metal wire, tie a knot around the rubber band, near the circular indent. We will attach this wire to the servo horn later, allowing the servo to move the lever back and forth.
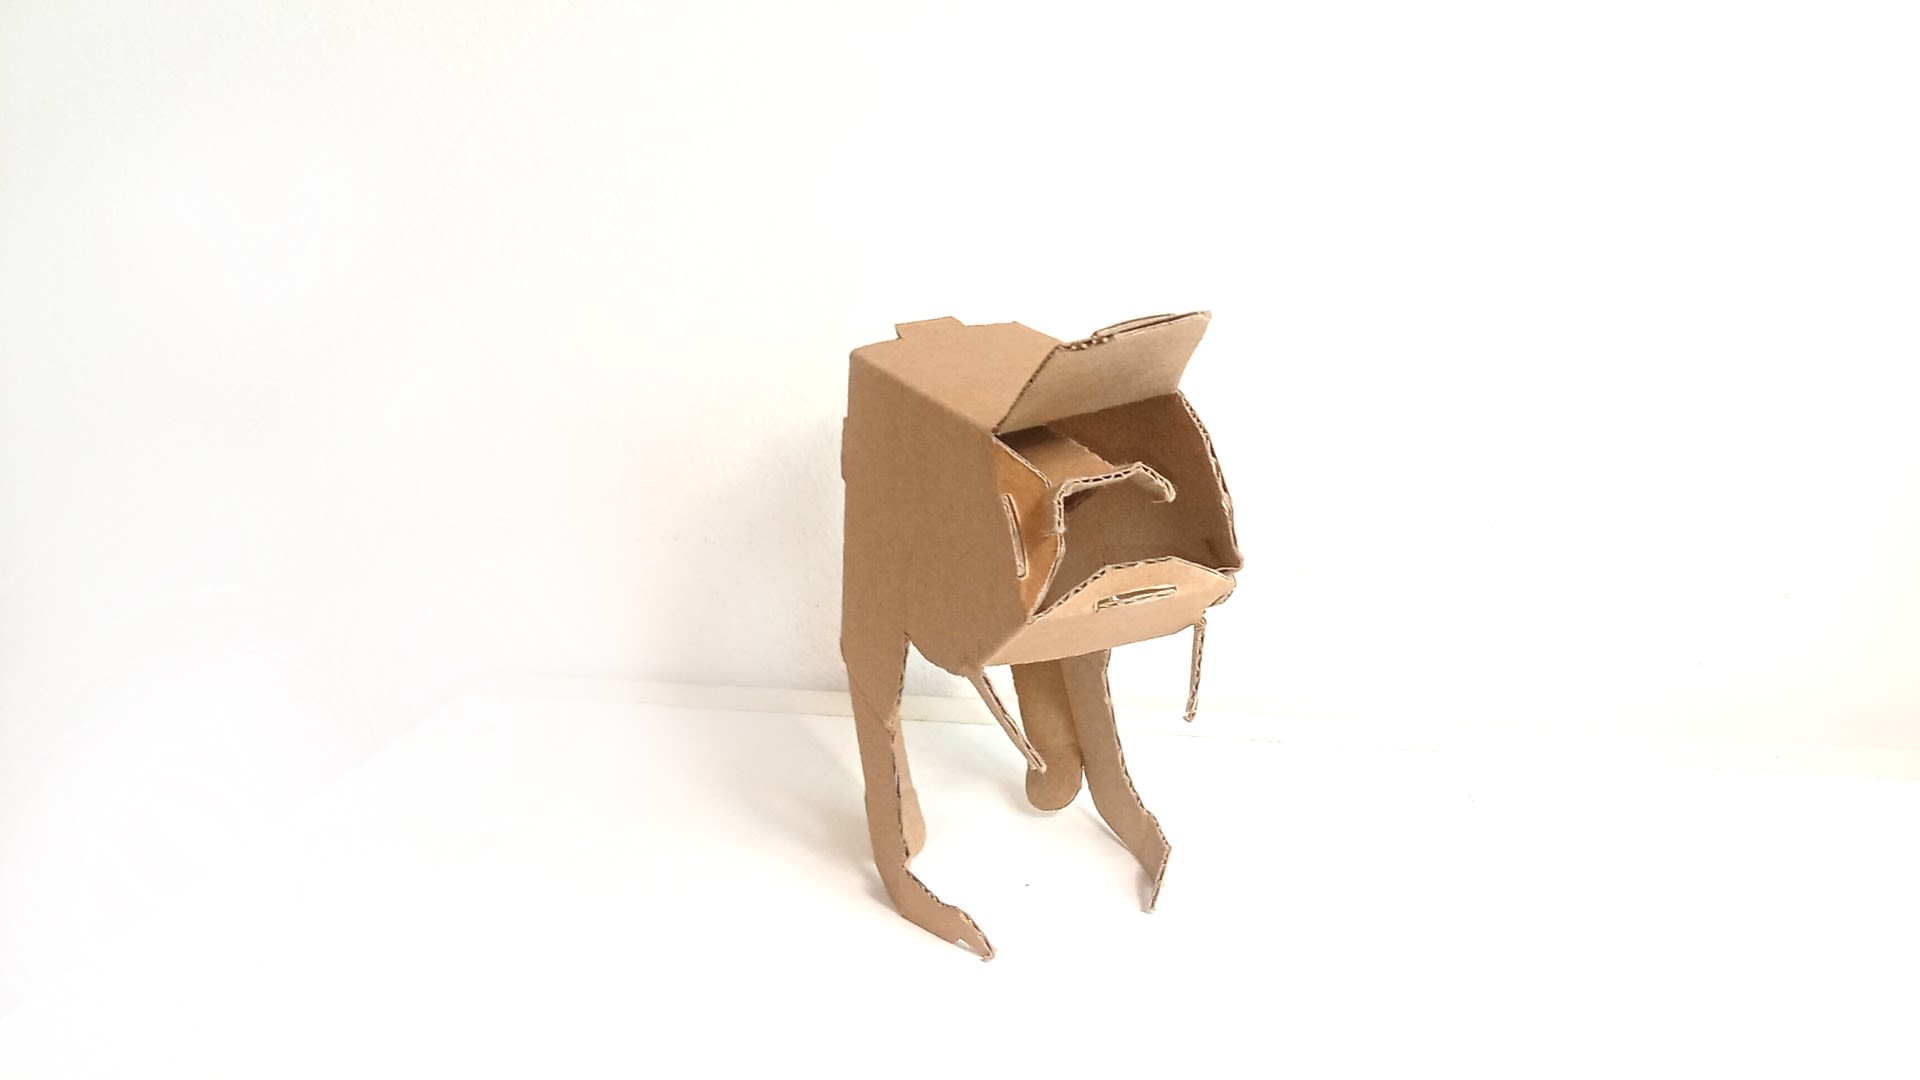
STEP 3

Assembling the torso
Now, let’s assemble the t-rex torso.
(a) Fold down the two legs of the t-rex, according to the creases on the cardboard piece.
(b) Slot the two tabs into the two slots on the left of the t-rex rear.
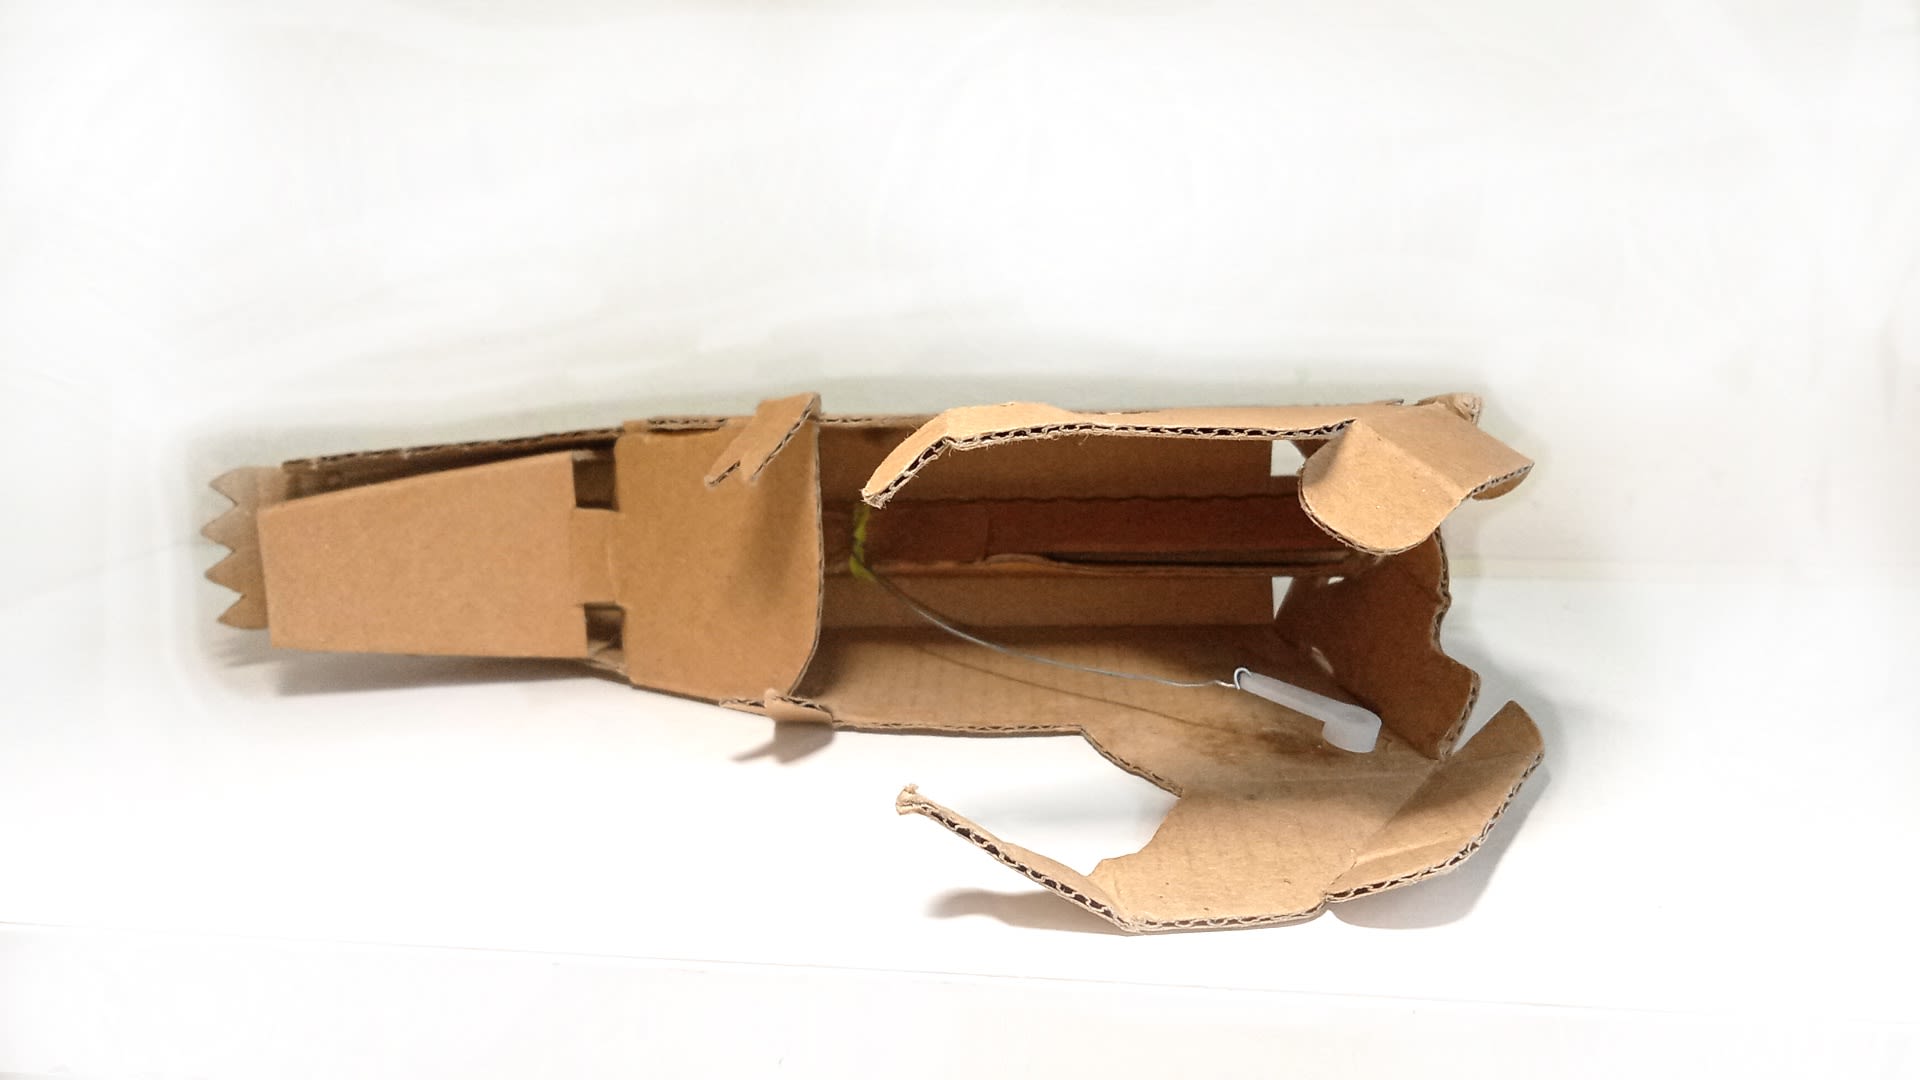
STEP 4
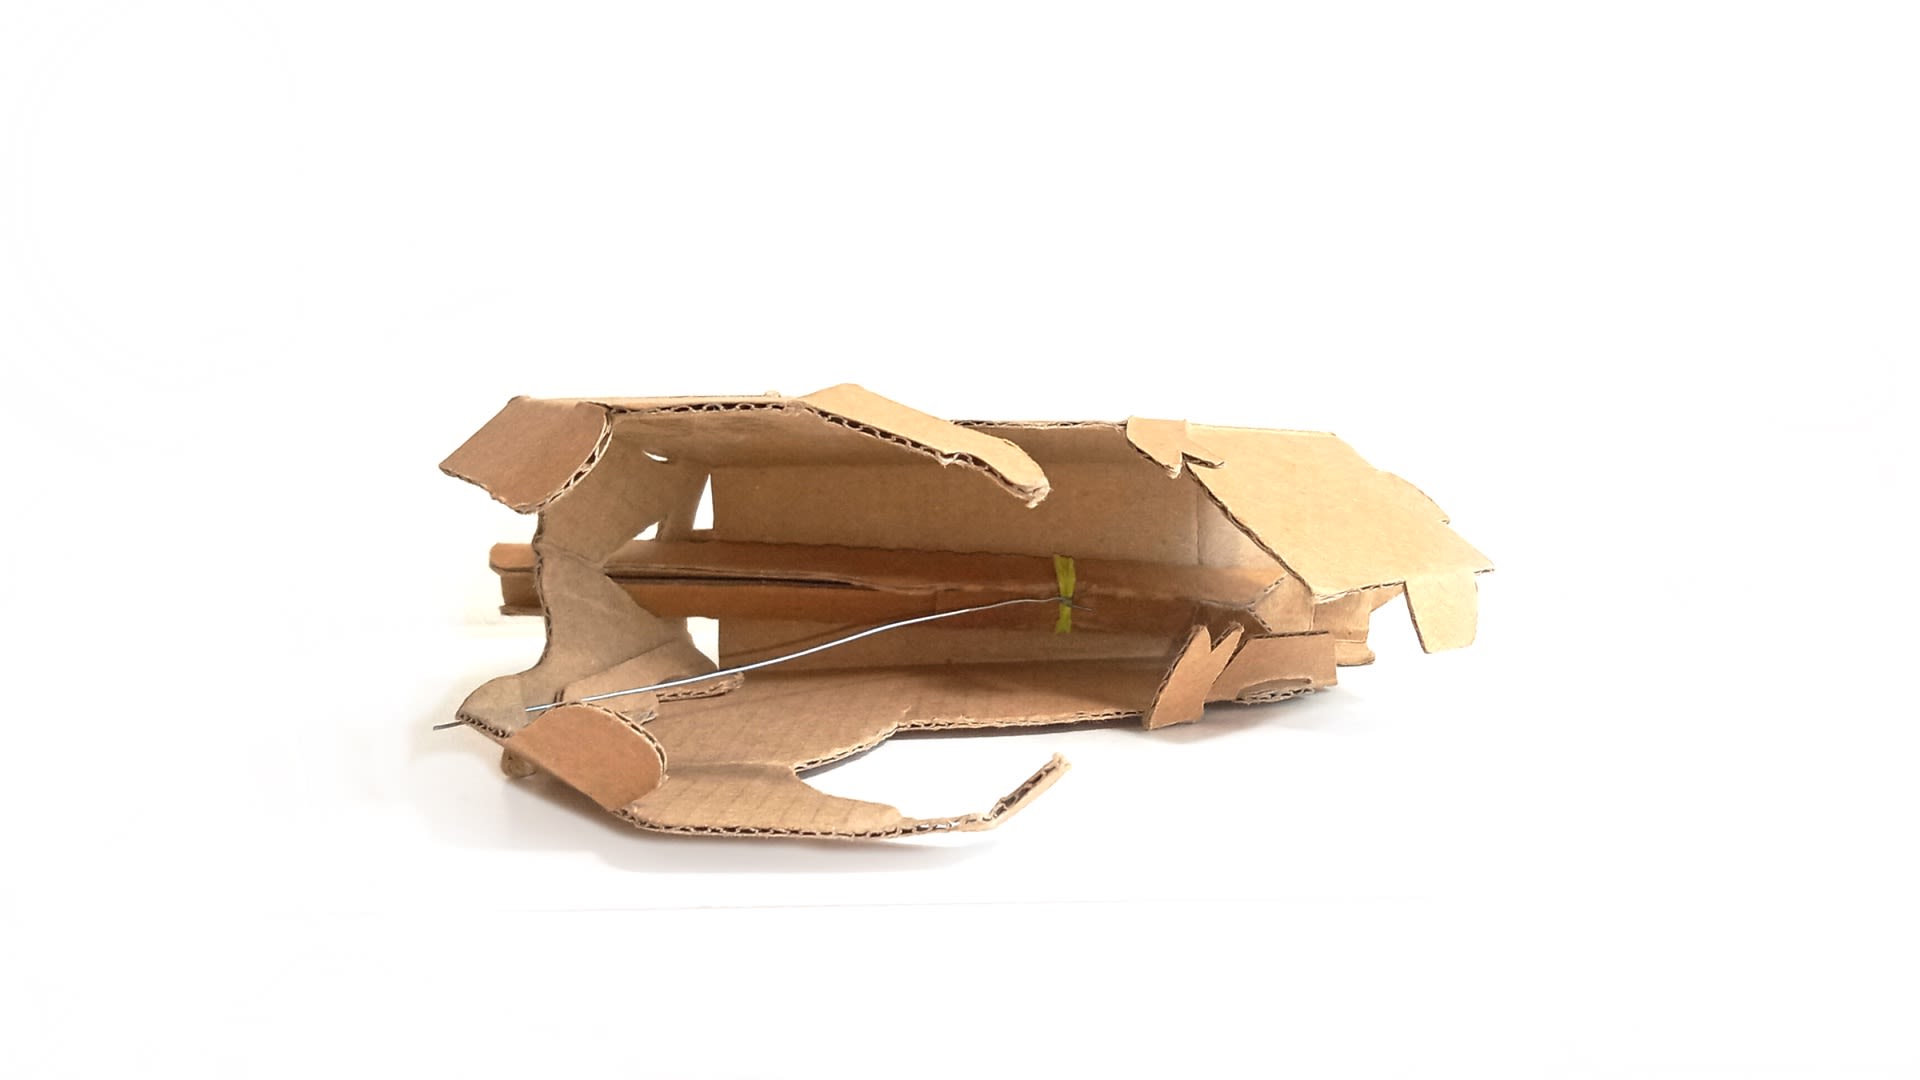
Slotting the lever
(a) Take up the lever from step 2.
(b) From the front of the torso, slot end 2 in, through the triangular opening on the t-rex rear.
(c) Orientate that the lever such that the circular indent faces downwards.
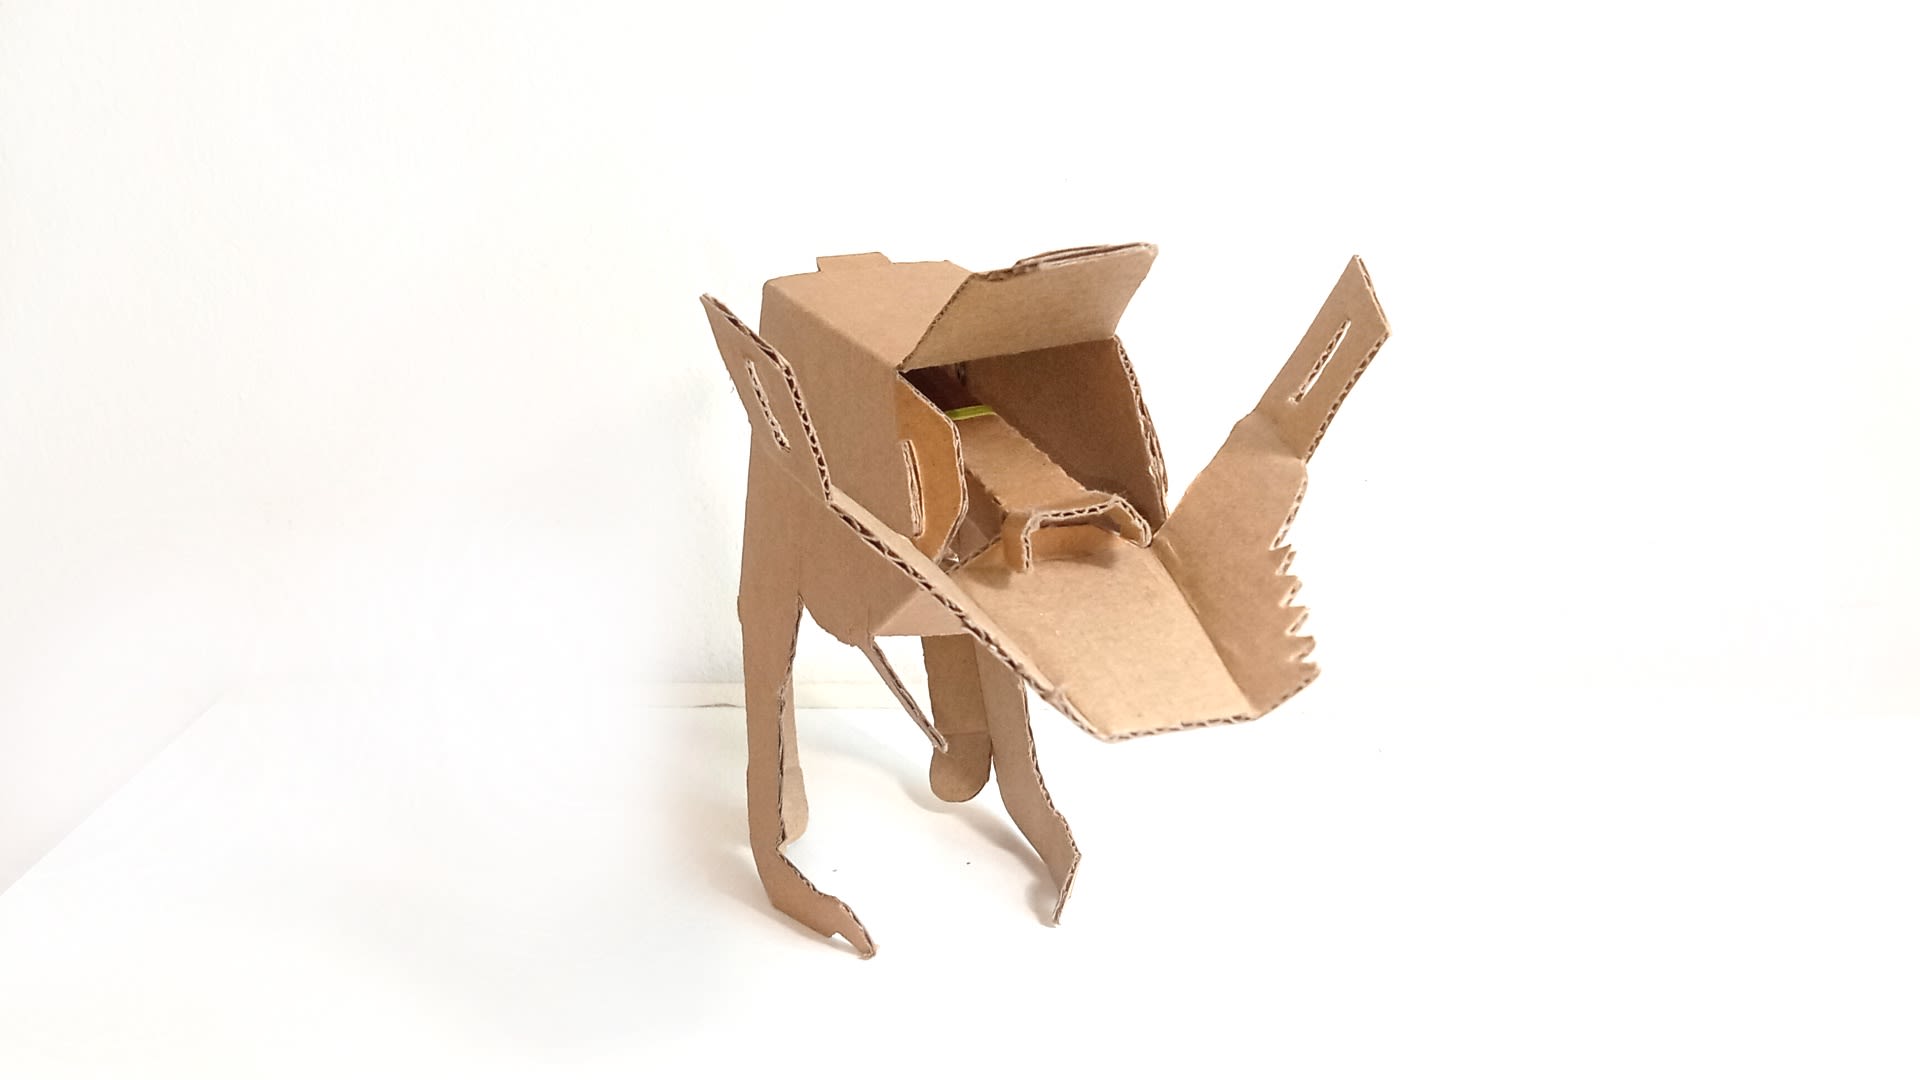
STEP 5
Closing the t-rex
(a) Holding in place the lever inserted in the previous step, fold up the flap from the left, to close the t-rex.
(b) We’ll attach the jaw and head here later.
STEP 6
Attaching the jaw
(a) Insert the tab on the jaw piece through the slot on the front of the torso piece.
(b) Fold up the left and right flaps of the jaw according to the crease. The slots on the flaps should overlap.
(c) Slot end 1 of the lever (the end facing us) through the overlapped slot.
STEP 7
Attaching the head
(a) Fold down the flaps on the sides of the head cardboard piece.
(b) Slot the 3 tabs on the head cardboard piece into the 3 openings on the front of the torso piece, to secure the head to the rest of the t-rex.
STEP 8
Attaching the servo horn
(a) Using the lever from step 2, loop the other end of the metal wire through the furthermost hole of the servo horn, ie. the hole furthest away from the circular connector part of the horn.
(b) Tie a knot with the metal wire around the hole.
(c) Pull the wire so it is straight and taut.
STEP 9
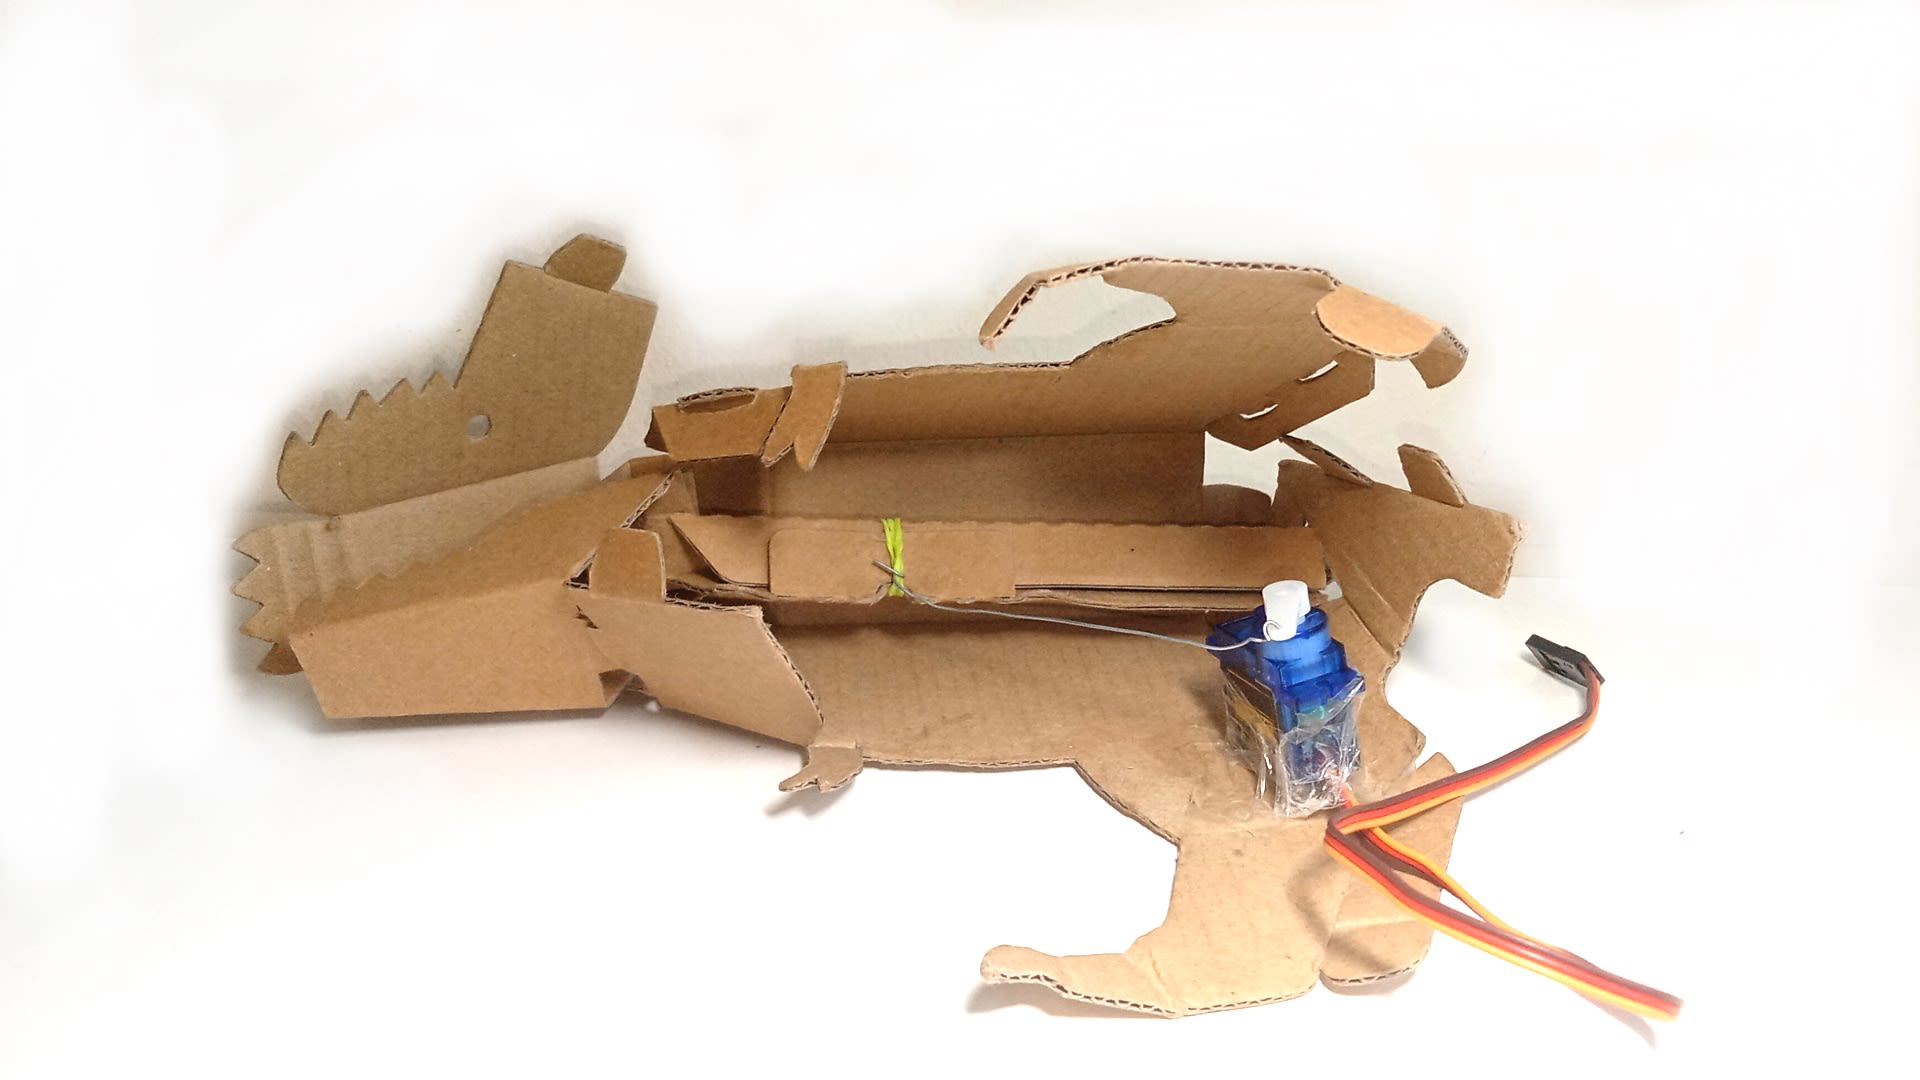
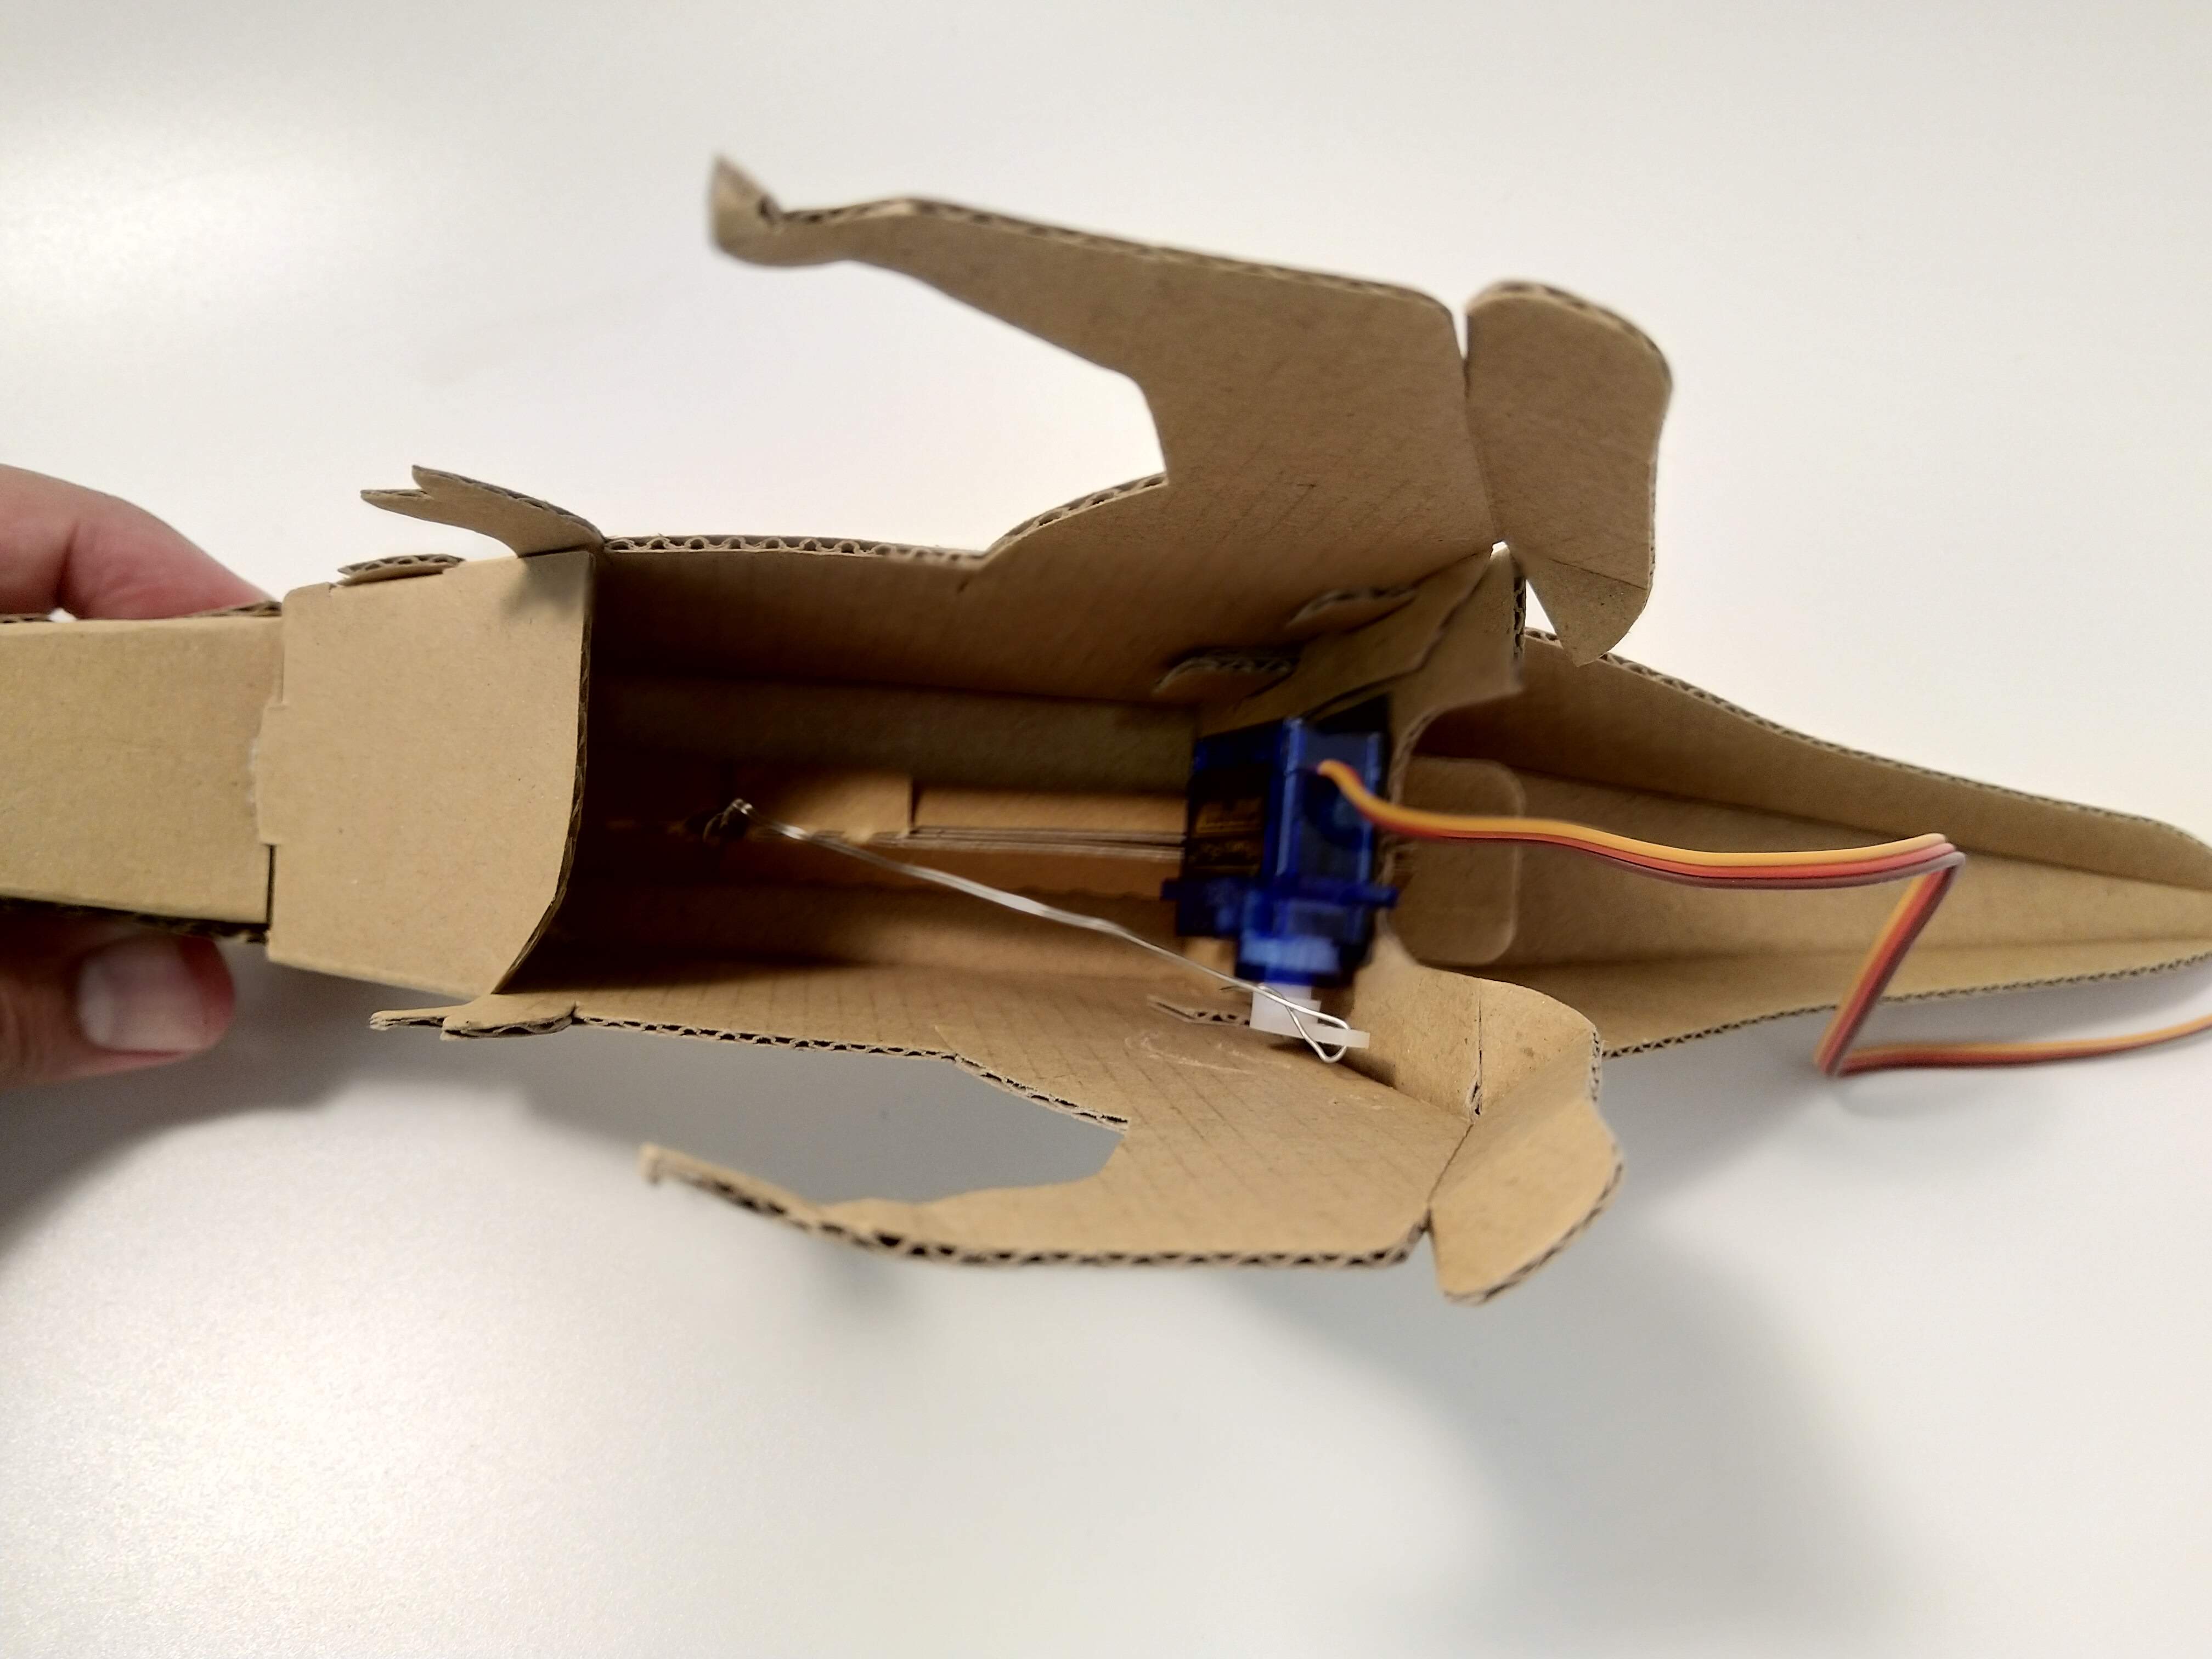
Assembling the servo
(a) Using strong tape, tape down the servo within the t-rex torso. The servo wires should face out of the t-rex.
(b) Attach the servo horn (from step 8) to the top of the servo, pointing in the same direction as the pictures. This is position B.
(c) Press the horn down to secure.
(d) After coding later, the servo horn will move between positions A and B.
• Position A moves the servo horn forwards, pulling the lever forwards, hence opening the mouth.
• Position B moves the servo horn backwards and downwards, pulling the lever backwards, hence closing the mouth.
We are showing two variants of attaching the servo motor here.
STEP 10
Assembling the tail
We’re almost done with assembly!
(a) Following the creases on the tail piece, fold down the sides of the tail.
(b) Slot the 3 tabs through the respective slots on the rear of the t-rex, to secure the tail to the rest of the t-rex.
STEP 11
Balancing
Finally, to help the t-rex balance, fold down the flaps near its feet.
Now the t-rex looks almost like it’s wearing high heels!
STEP 12
Motion Sensor Opening
Congratulations, we’re done with the t-rex folding and assembly! Now, let’s do some cutting and gluing to prepare for circuitry, and to make sure everything we assemble stays in place.
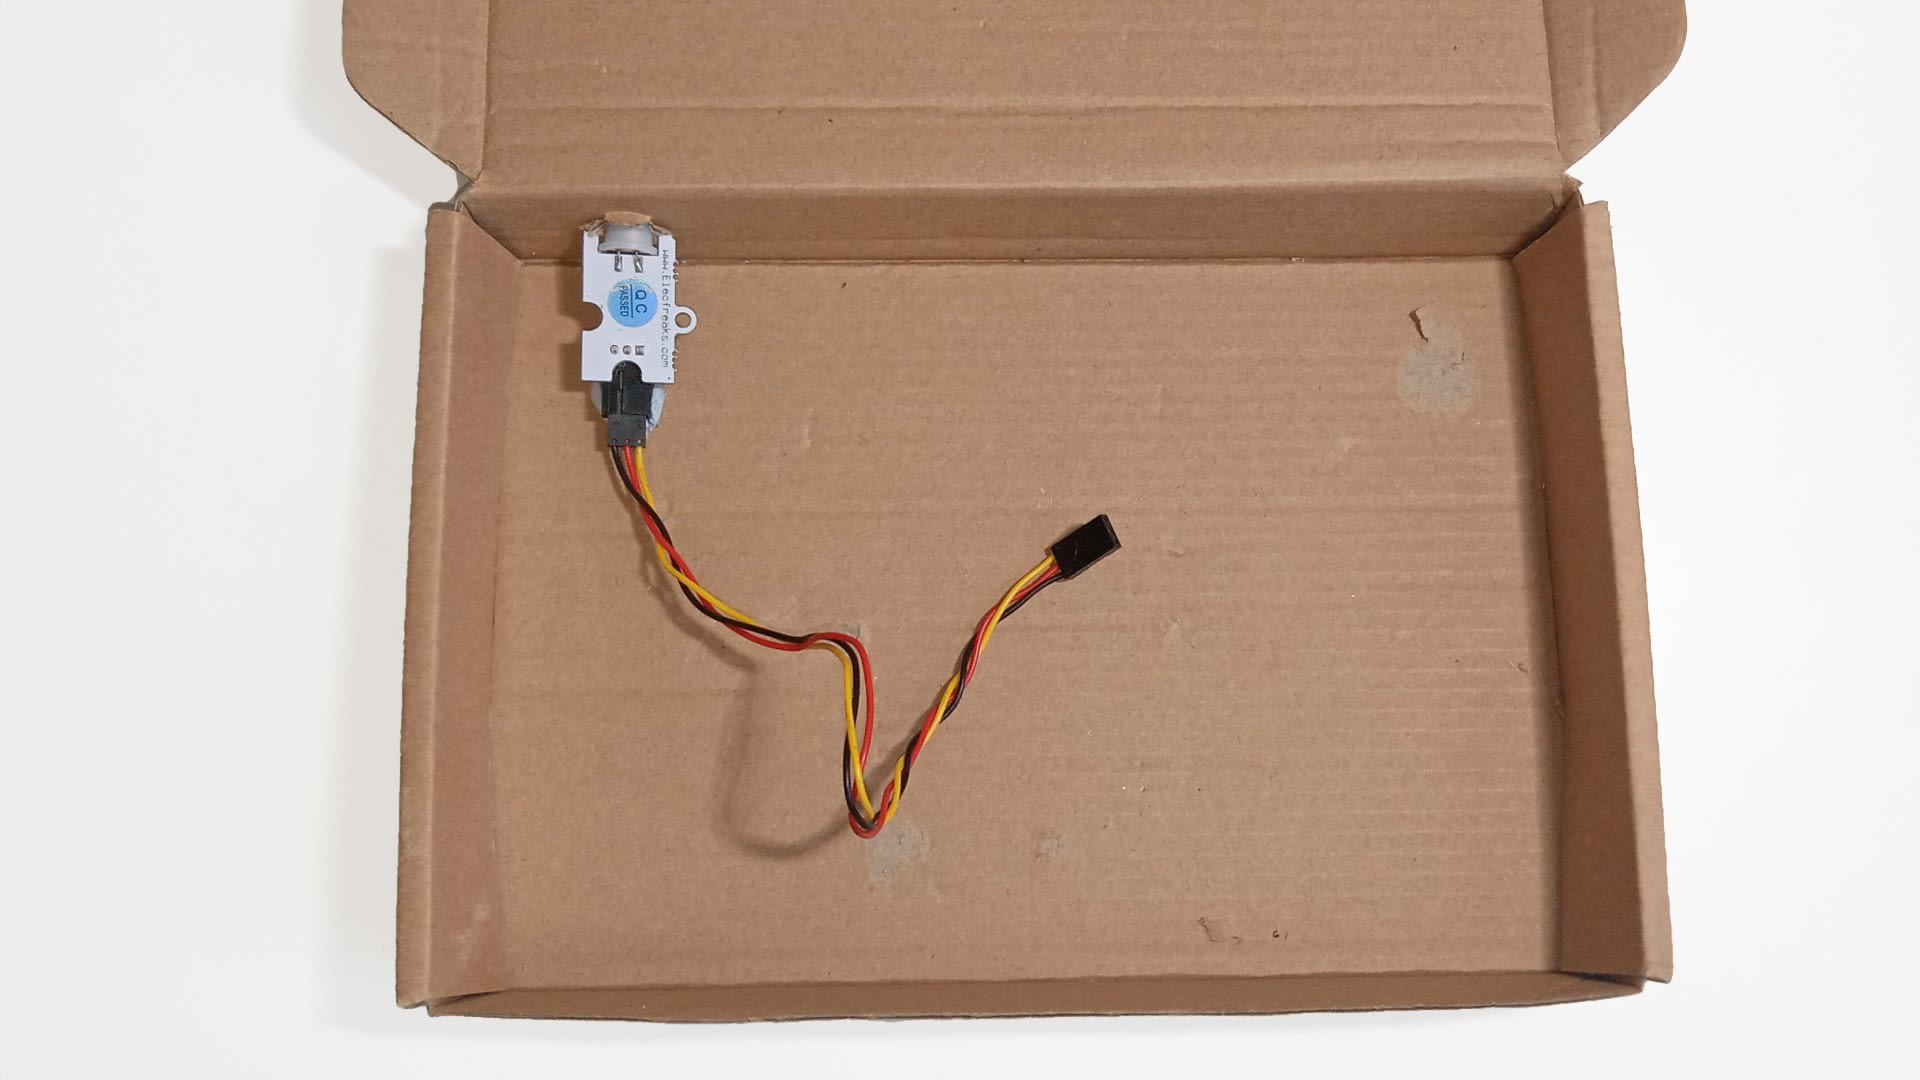
(a) Cut a circular opening on the front flap of the box labelled ‘Tinkercademy Kits’. It should be about the same size as the circular part of the PIR motion sensor.
(b) Open up the box, and place the PIR motion sensor inside the box. Stick out the circular part of the sensor from the opening cut in (a).
(c) Use the strong tape or blu-tack to tape down the PIR motion sensor in this position, inside the box.
STEP 13
Micro Servo Opening
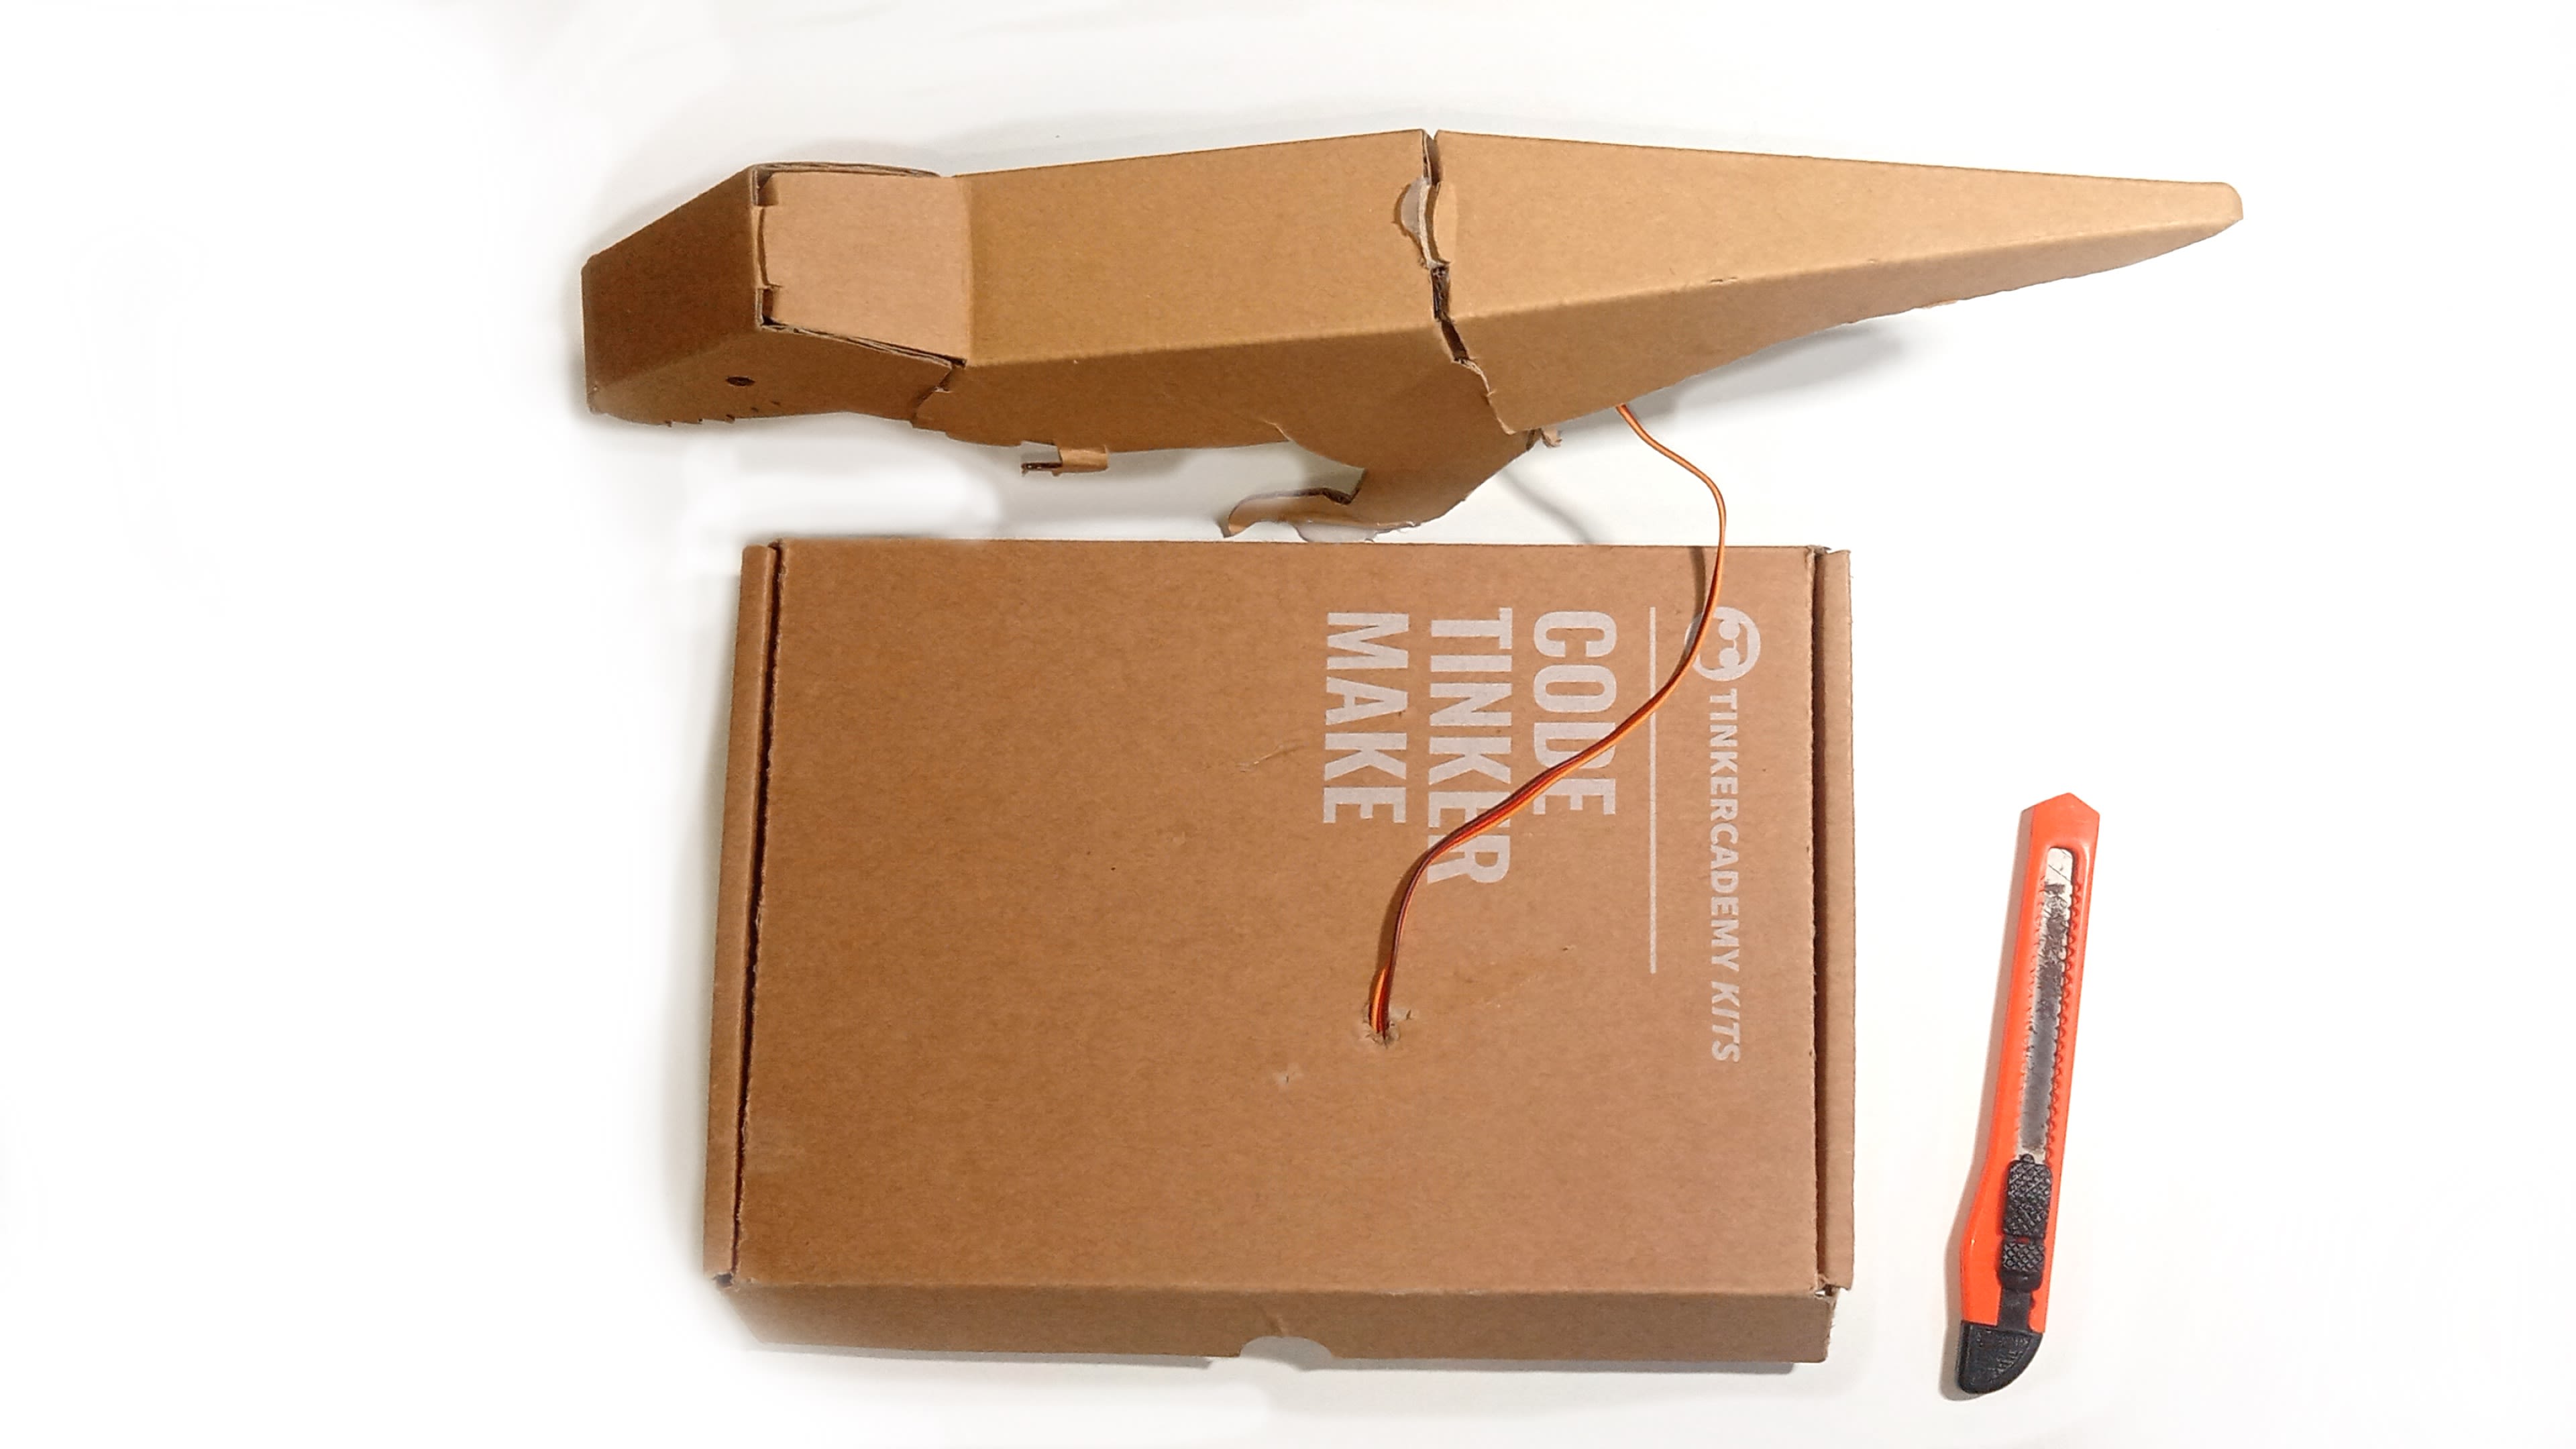
(a) Let the assembled t-rex stand on top of the box lid, somewhere in the centre.
(b) Cut a hole near the feet of the t-rex, large enough to thread the micro servo wire from the t-rex into the box. We’ll connect this wire to the Tinkercademy breakout board later.
(c) For ease of connecting circuitry in the box later, you can now remove the t-rex from the top of the box lid first. We will glue it to the lid later.
STEP 14
microUSB Cable Opening
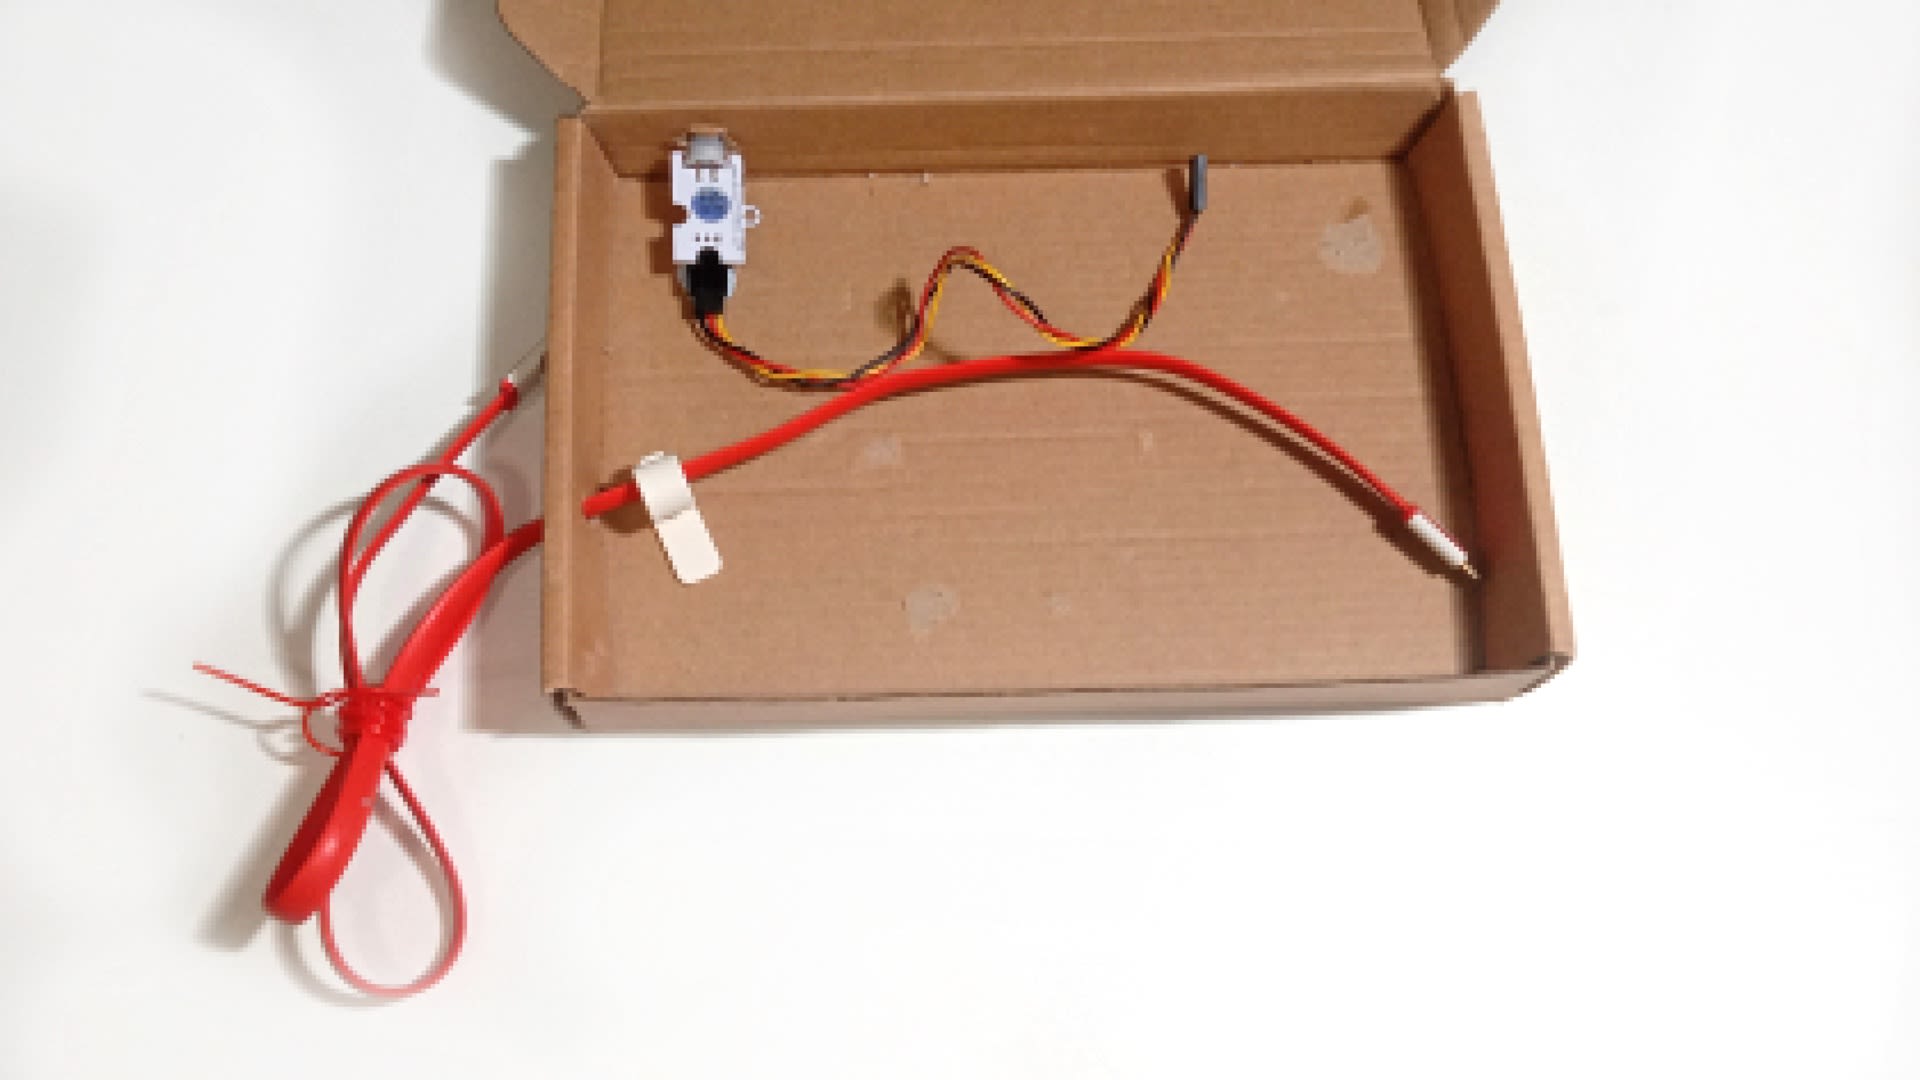
(a) Cut a rectangular opening on one side of the box, on the flap next to the flap where we cut the PIR motion sensor opening (in step 12). It should be large enough to thread the microUSB cable out from the box
(b) Open up the box, and place the microUSB cable inside the box.
(c) Thread the USB end of the cable out of the box, through the rectangular opening that we just cut in (a). Leave the micro USB connector end in the box. We will connect this to the micro:bit later.
STEP 15

Securing Speaker
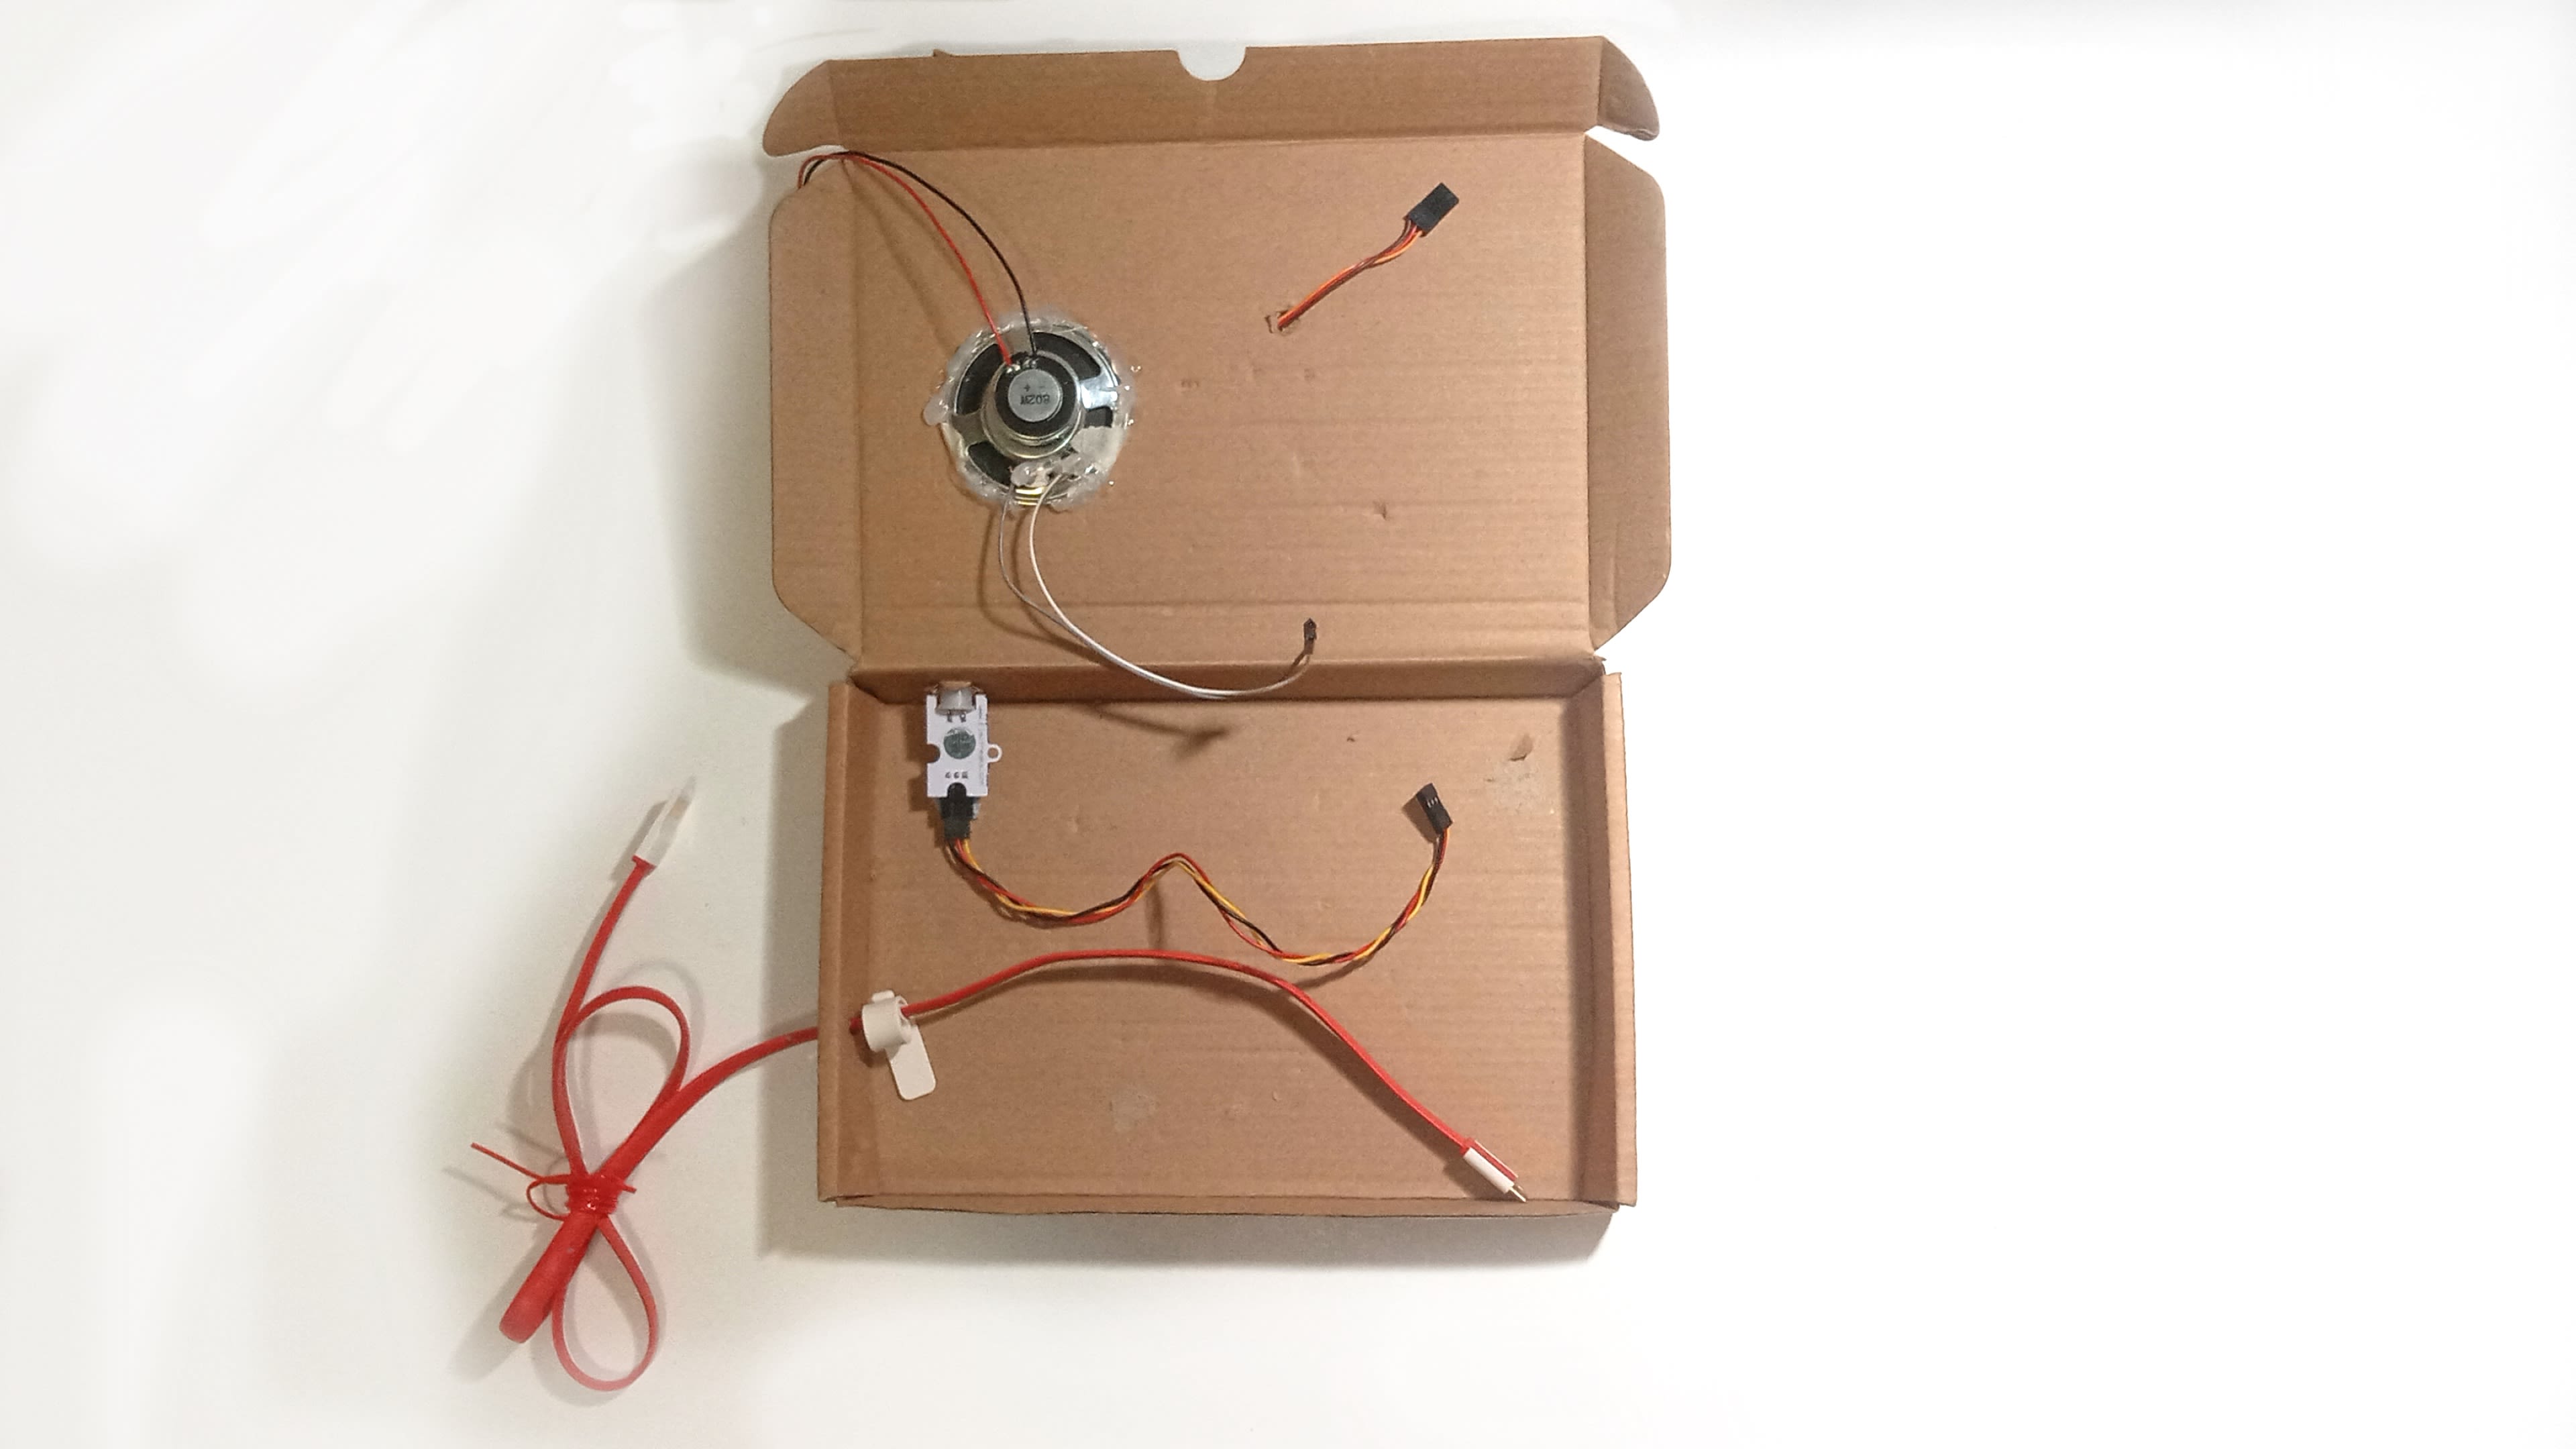
(a) Use the strong tape or some white glue to secure the speaker inside the box, onto the inner side of the lid. It should be somewhere near the micro servo wire opening cut previously (in step 13).
(b) Placing it at the top absorbs the vibrations from the movement of the dinosaur, amplifying the dino roar projected from the speaker.
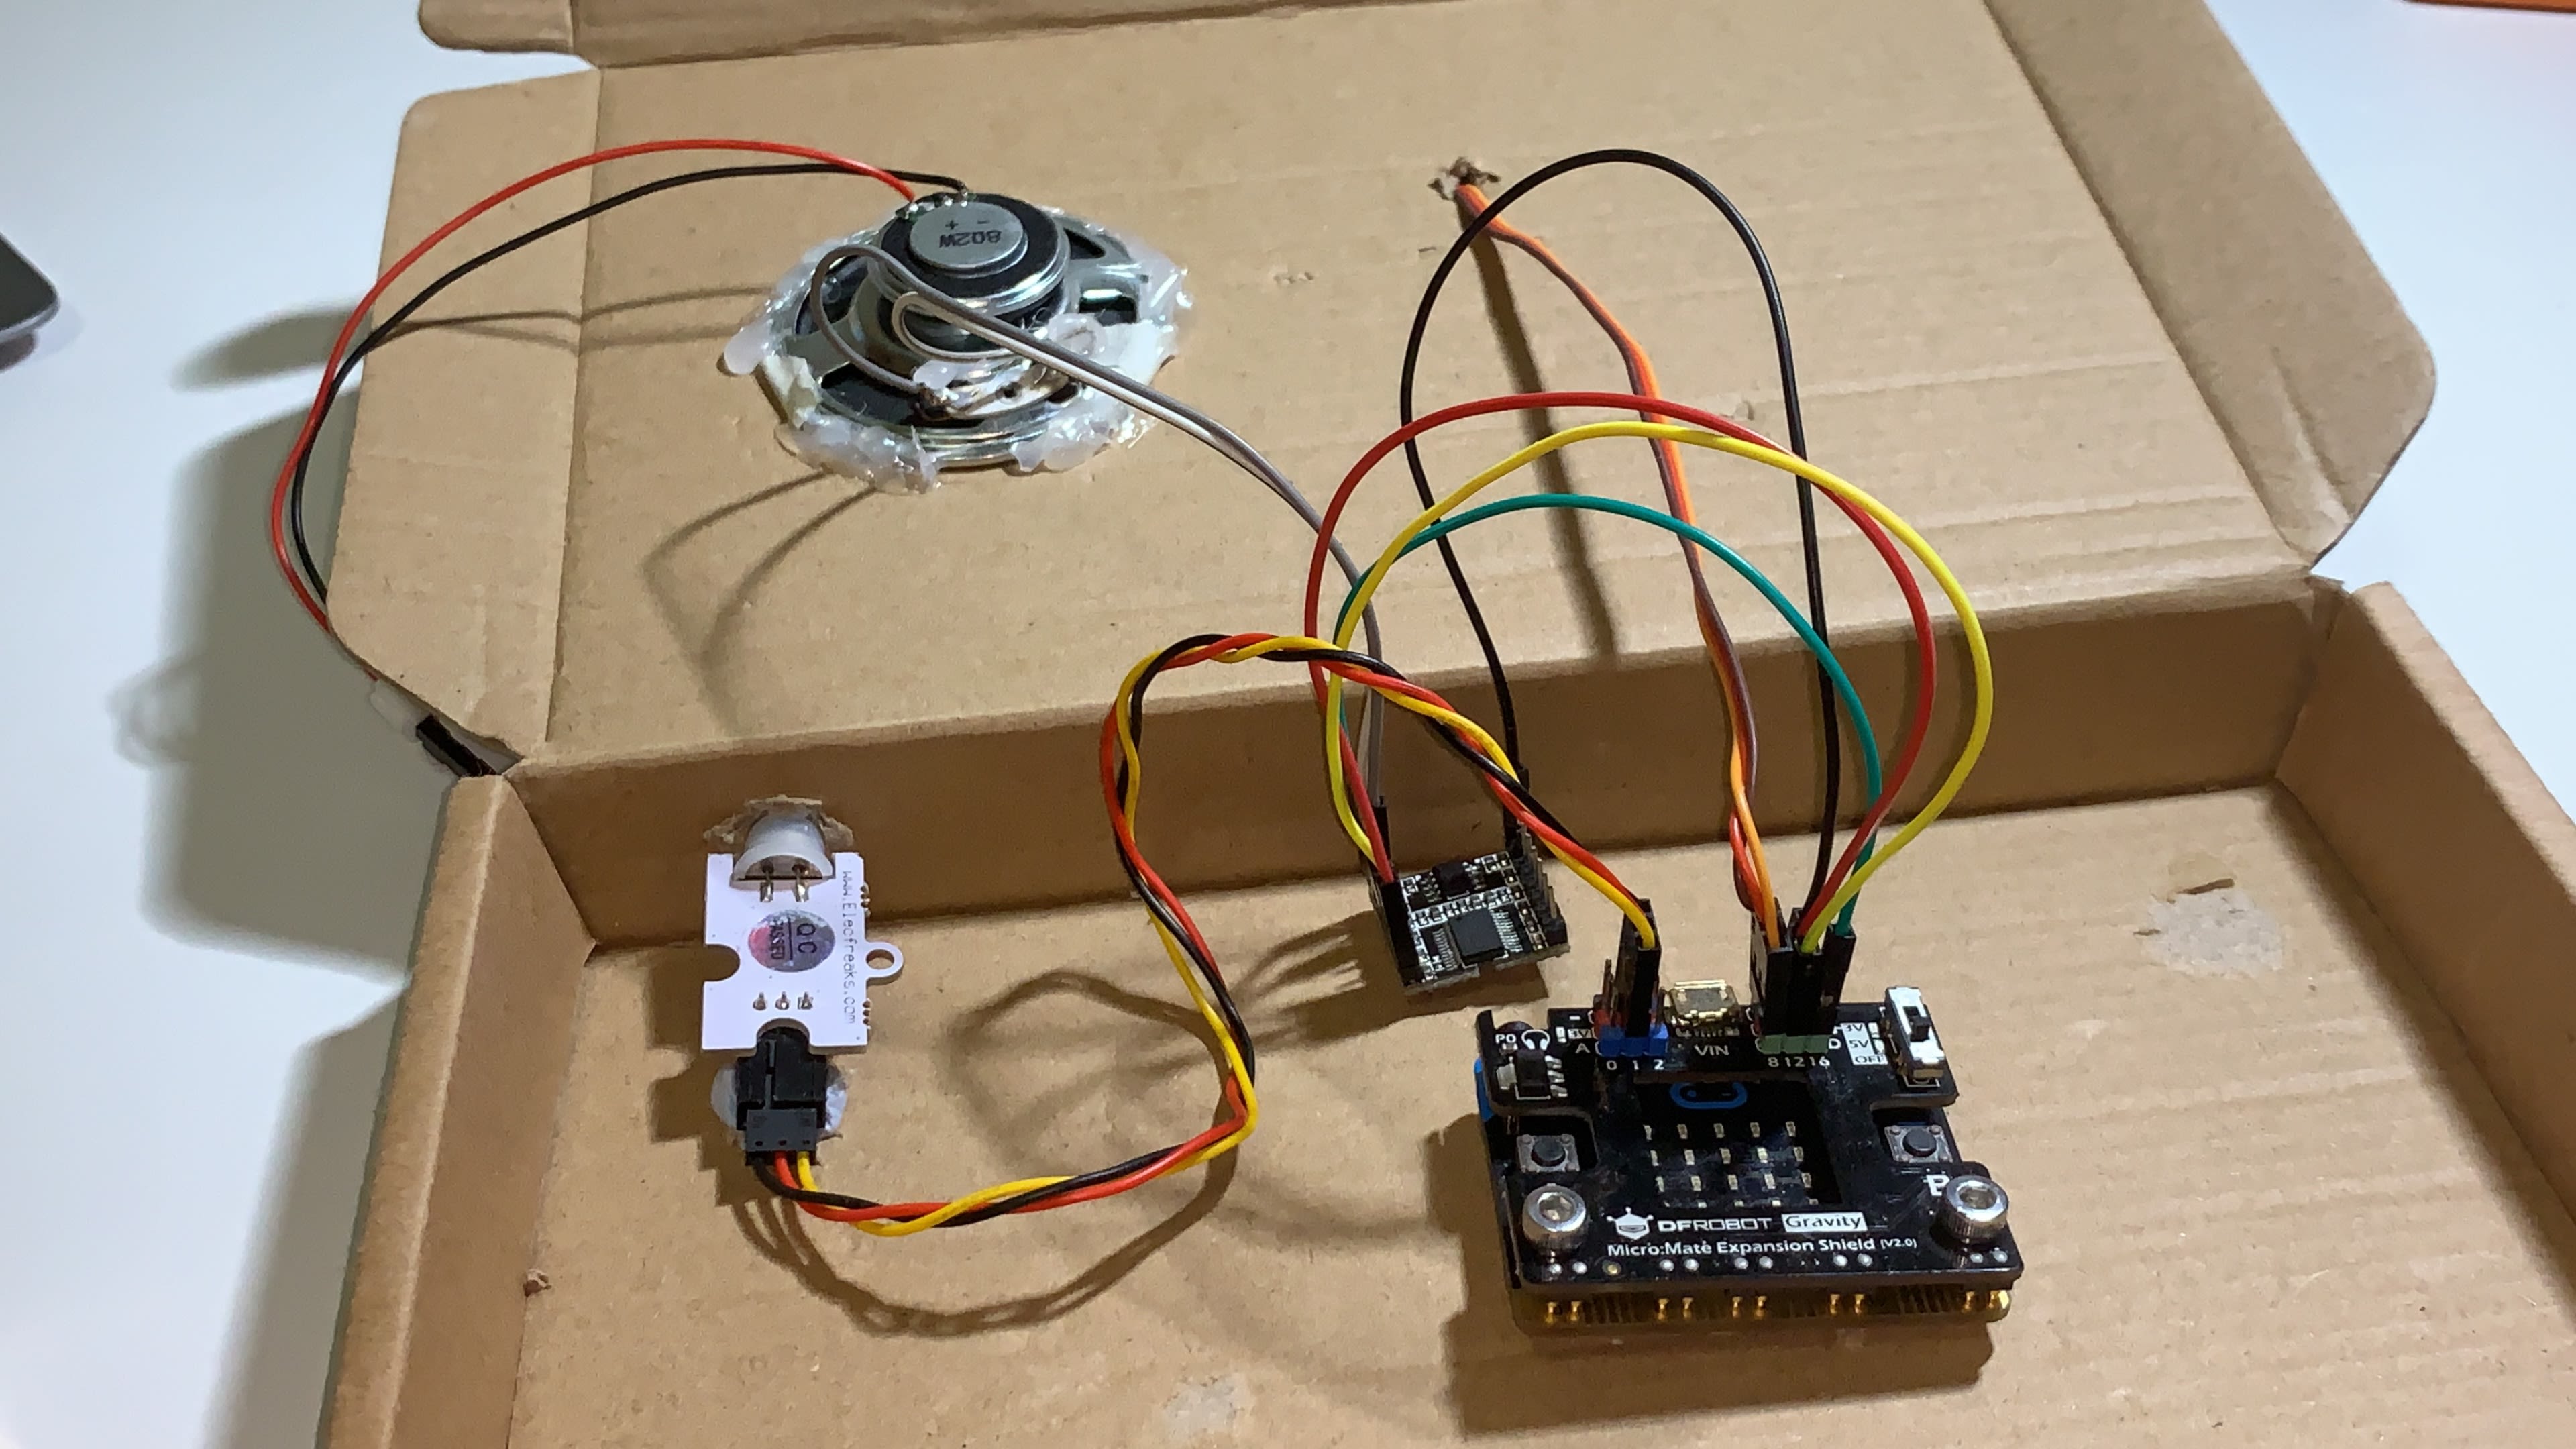
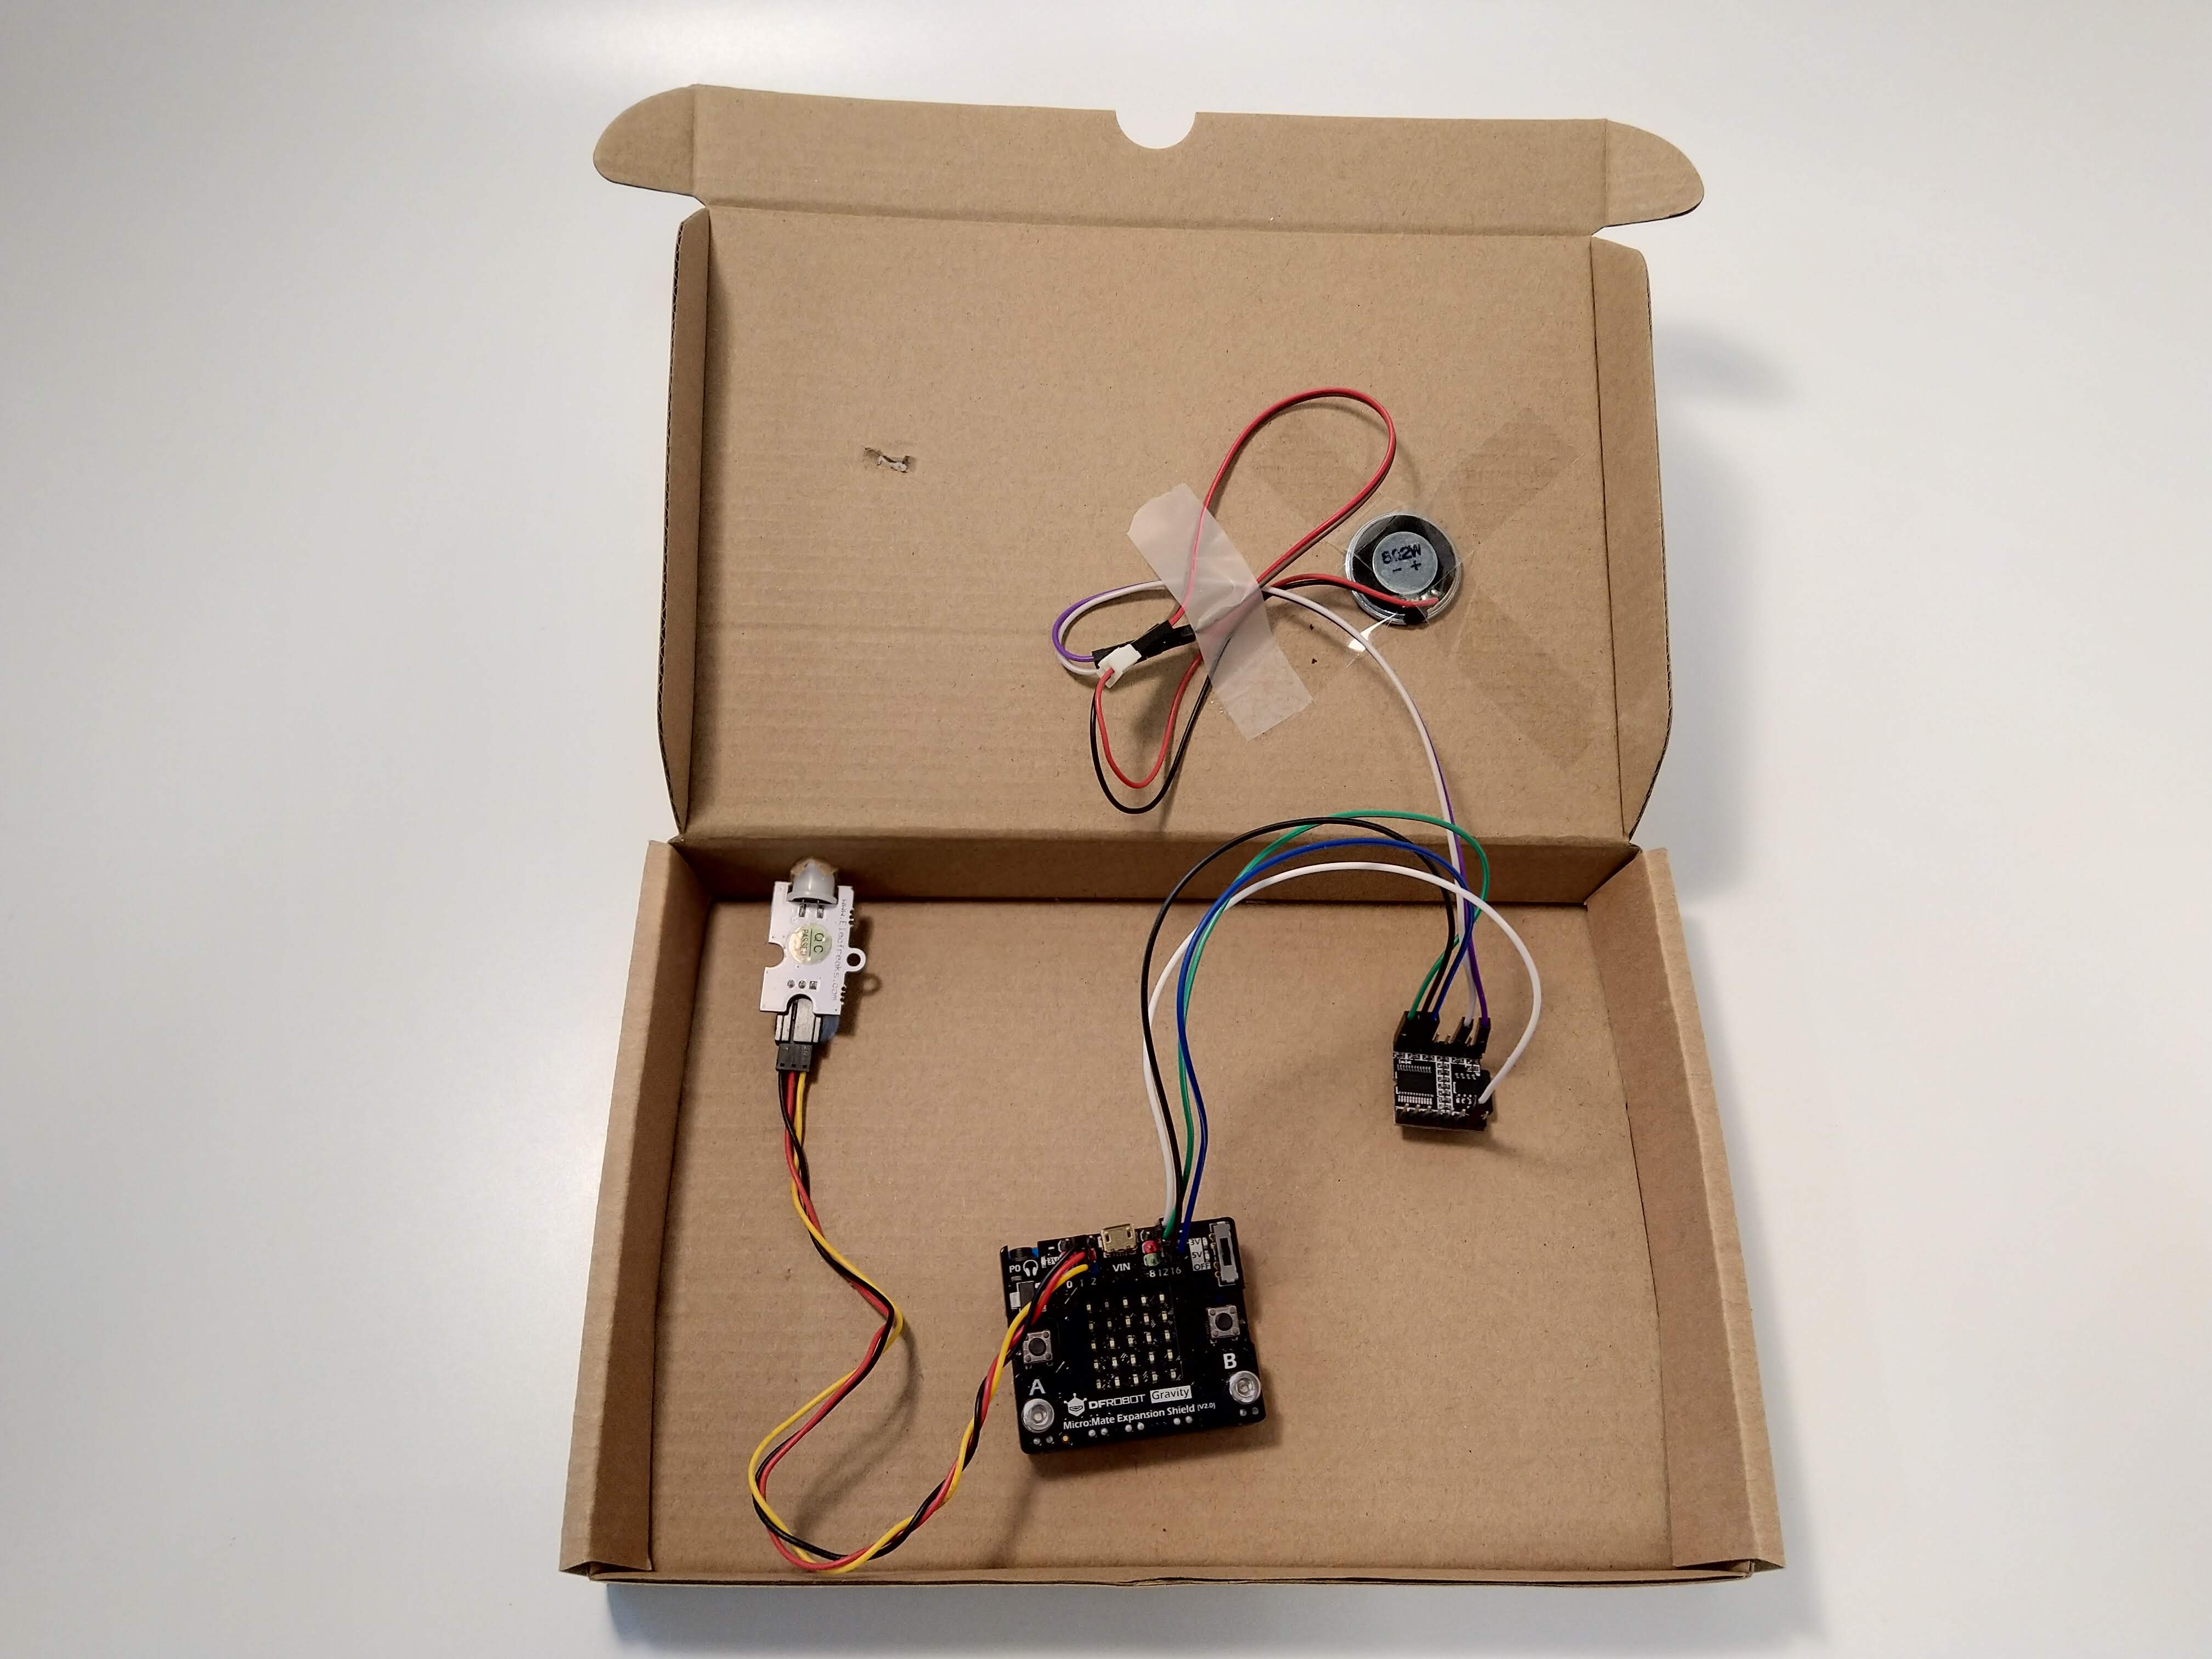
We are showing different speakers here. The official kit comes with the speaker in the second photo.
STEP 16
Attaching the micro:mate board
Now, let’s move on to circuitry!
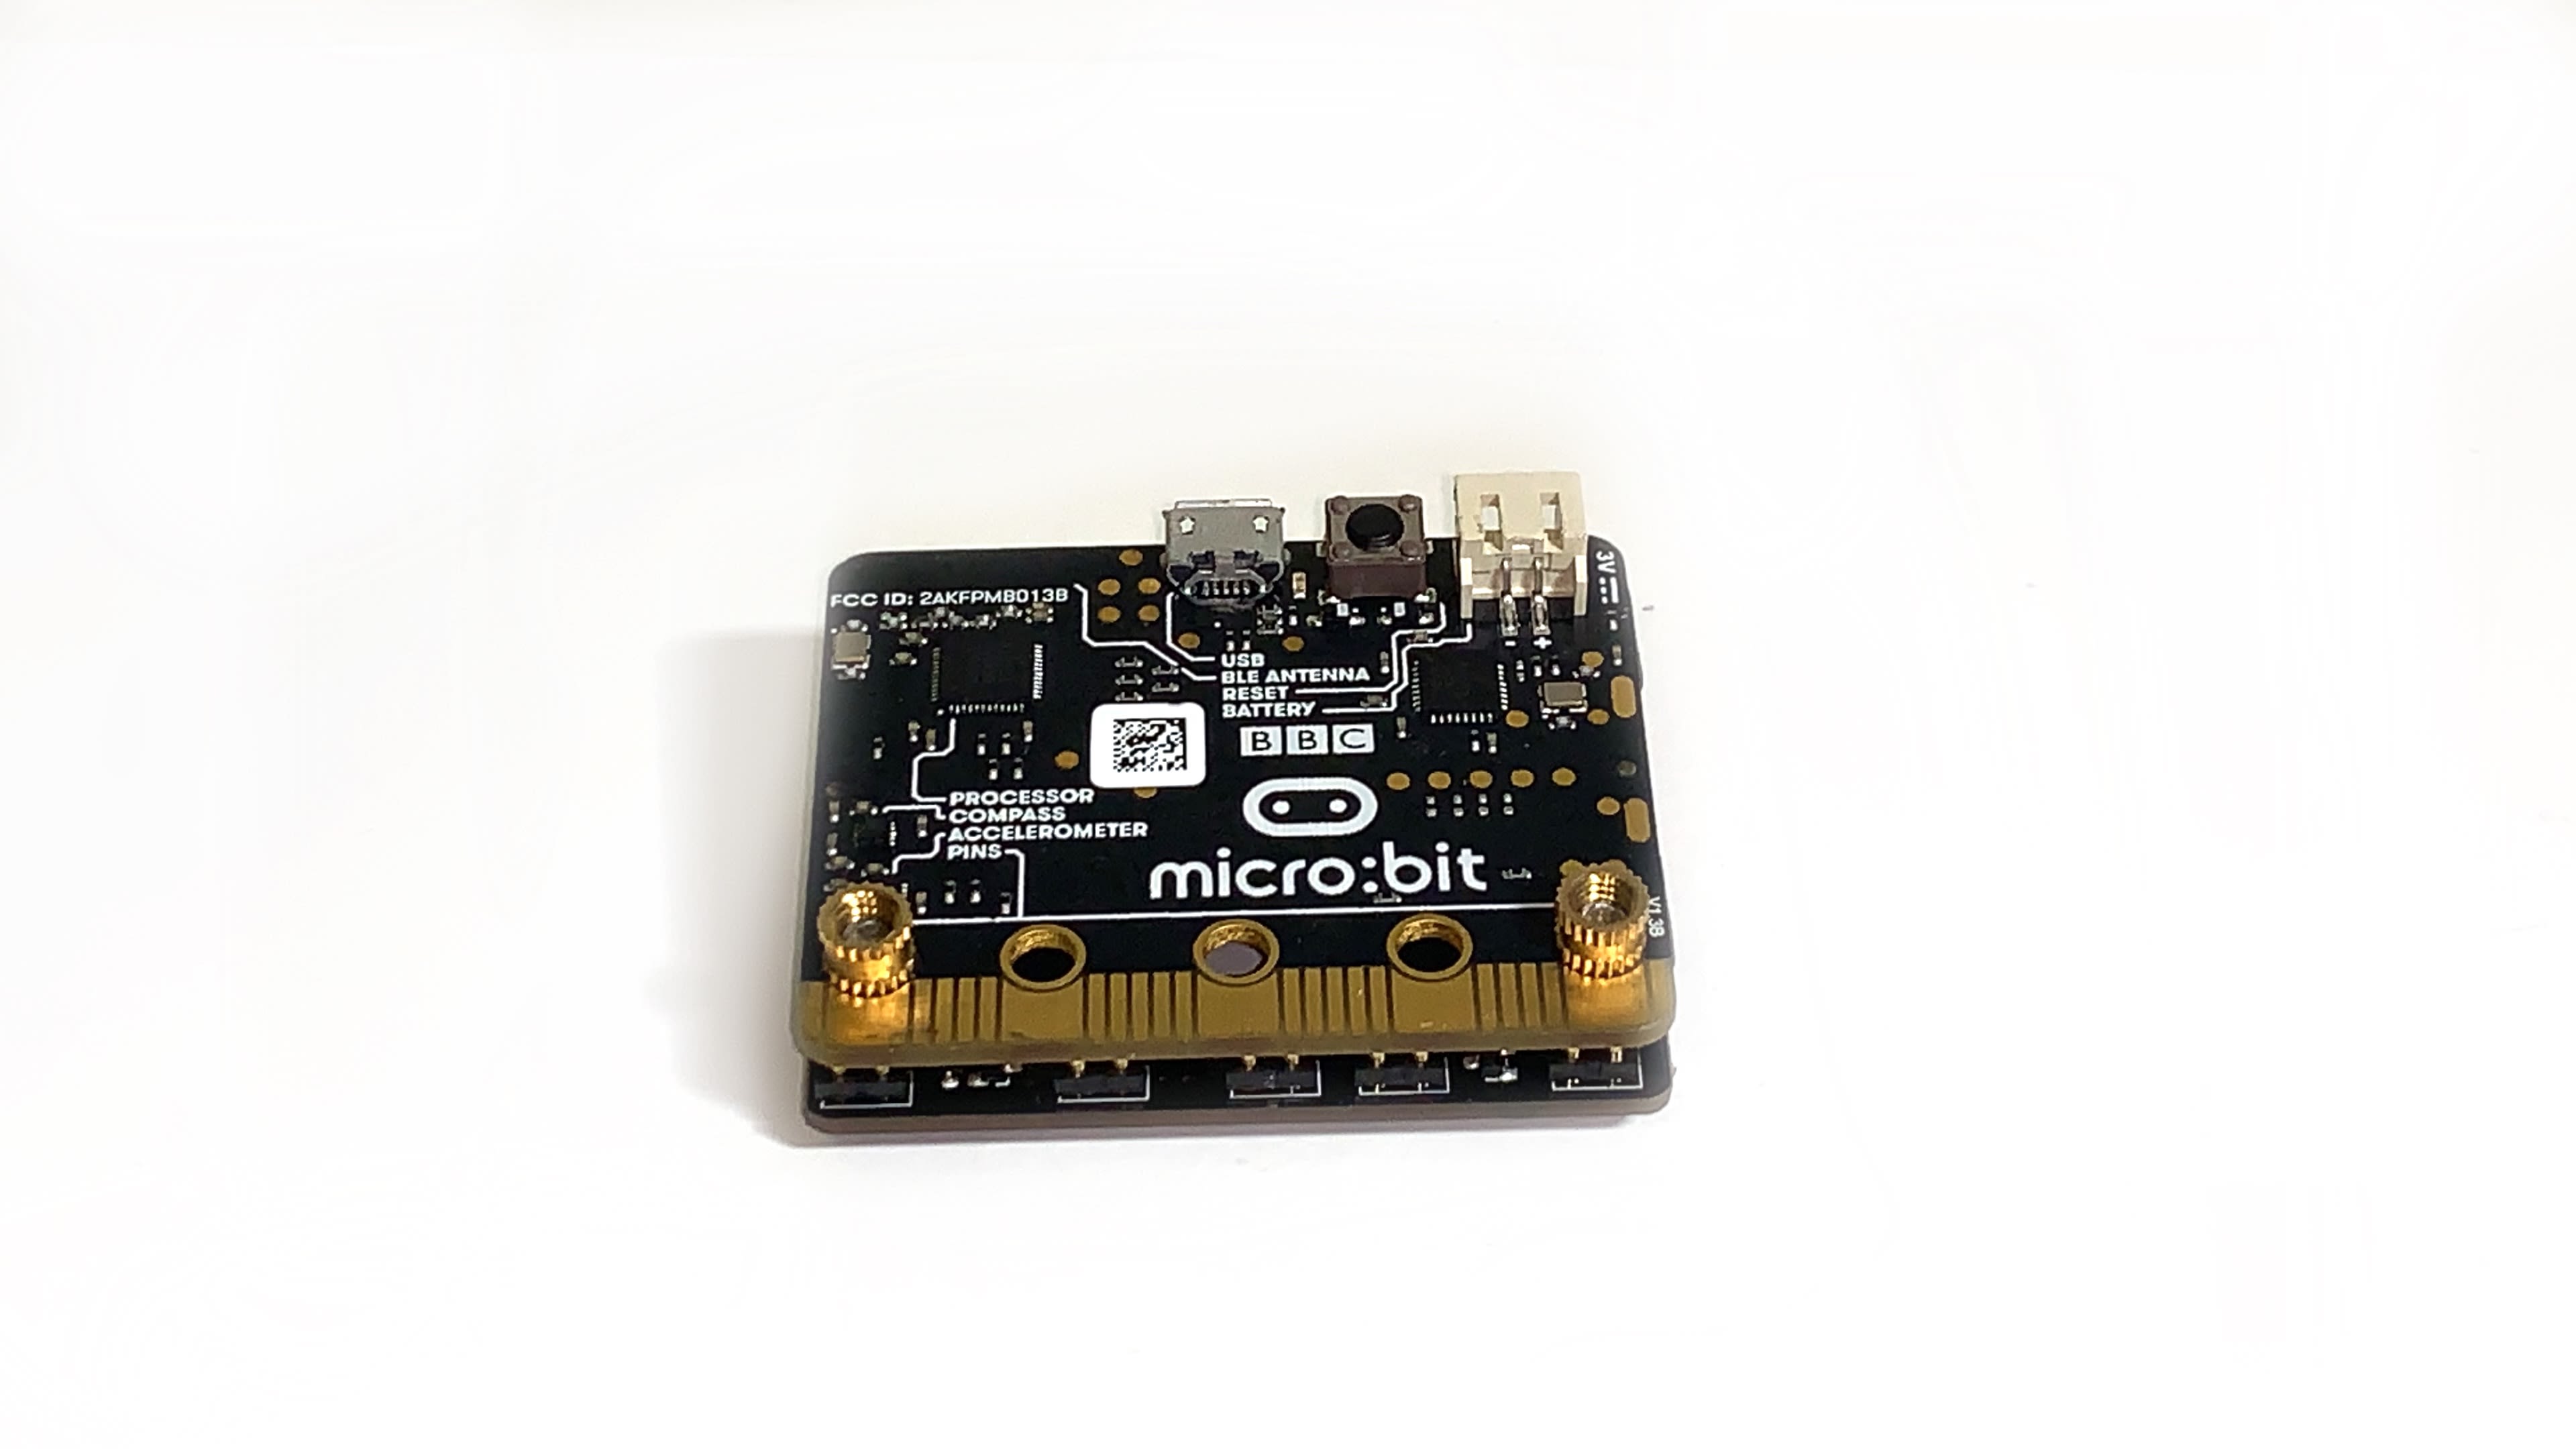
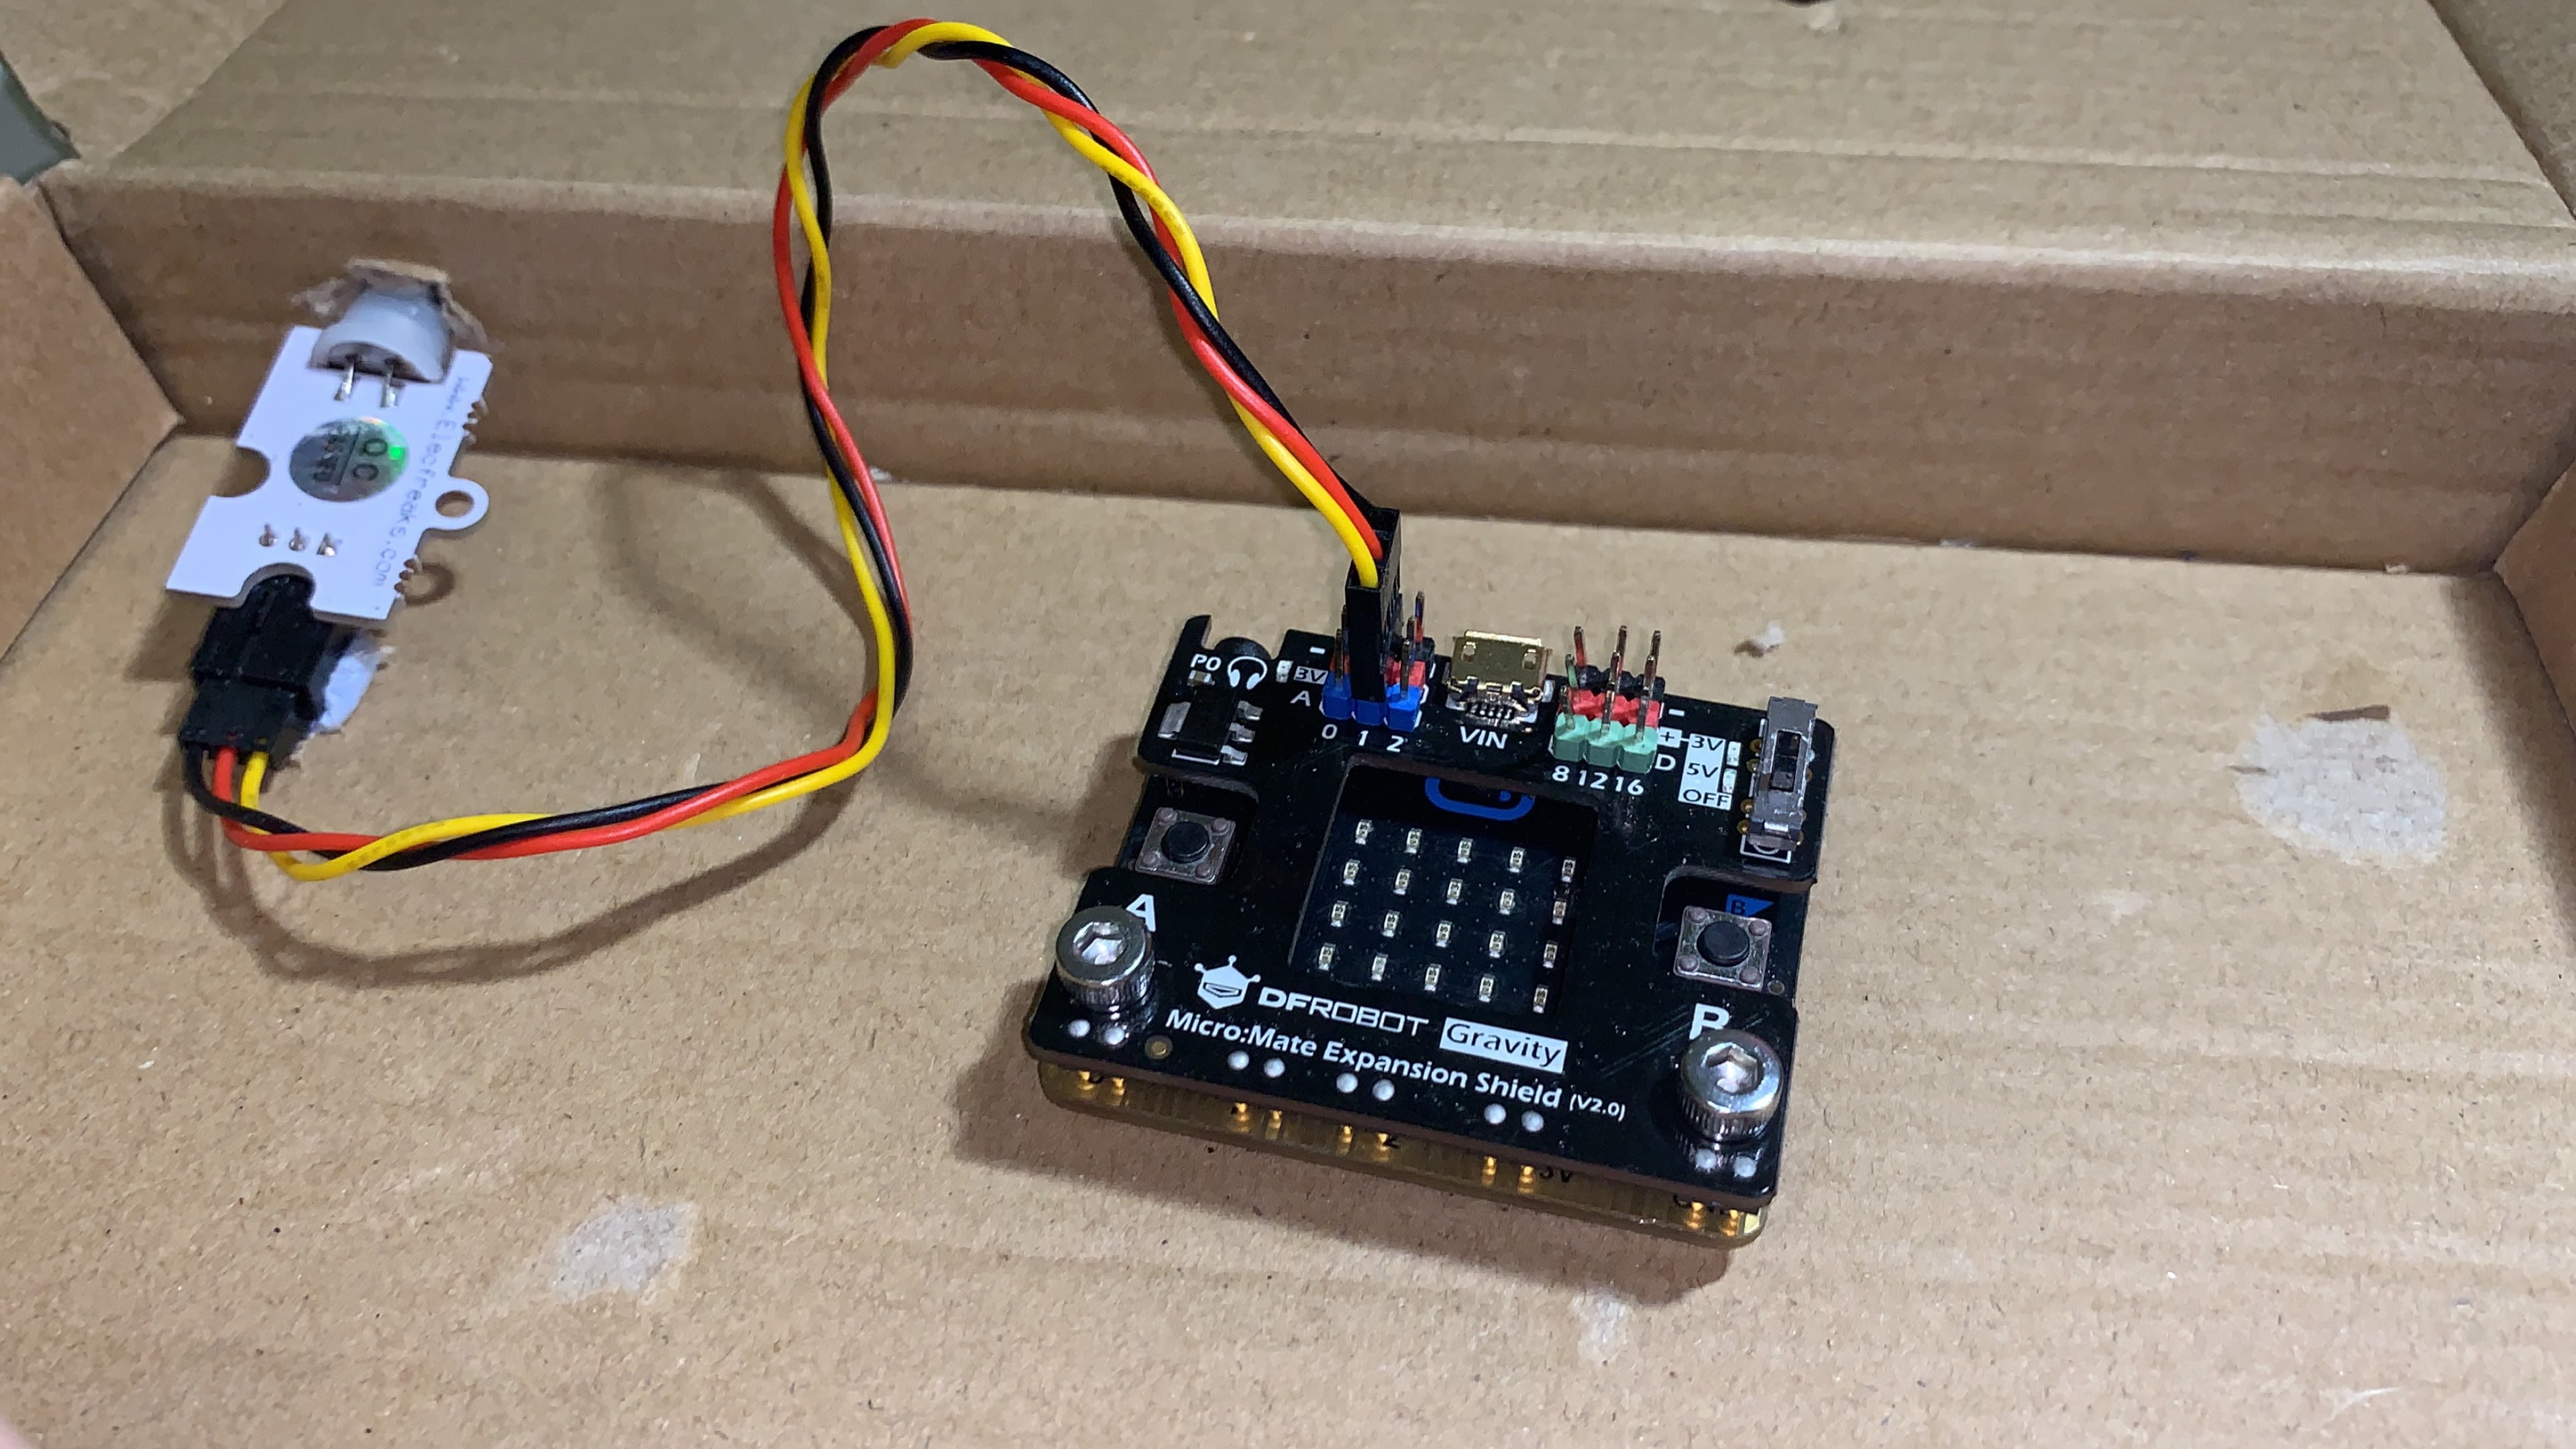
(a) Face both the micro:bit and the DFRobot micro:Mate expansion board down. The ‘micro:bit’ text on the micro:bit, and the ‘A’ and ‘B’ buttons on the micro:Mate expansion board should face you.
(b) Place the micro:bit on top of the expansion board. Align such that the 2 metal screws on the micro:Mate fit through the 2 holes on the bottom of the micro:bit.
(c) Place the 2 screw nuts over, and turn them clockwise to secure the micro:bit to the micro:Mate.
STEP 17
Connecting PIR motion sensor
(a) Open up the box, and place the micro:bit and micro:Mate inside.
(b) Connect the PIR motion sensor to pin P1 on the micro:mate expansion board. Make sure that the colours align (ie. yellow wire connects to blue pin at P1, red wire connects to red pin at P1, black wire connects to black pin at P1).
STEP 18
Connecting speaker
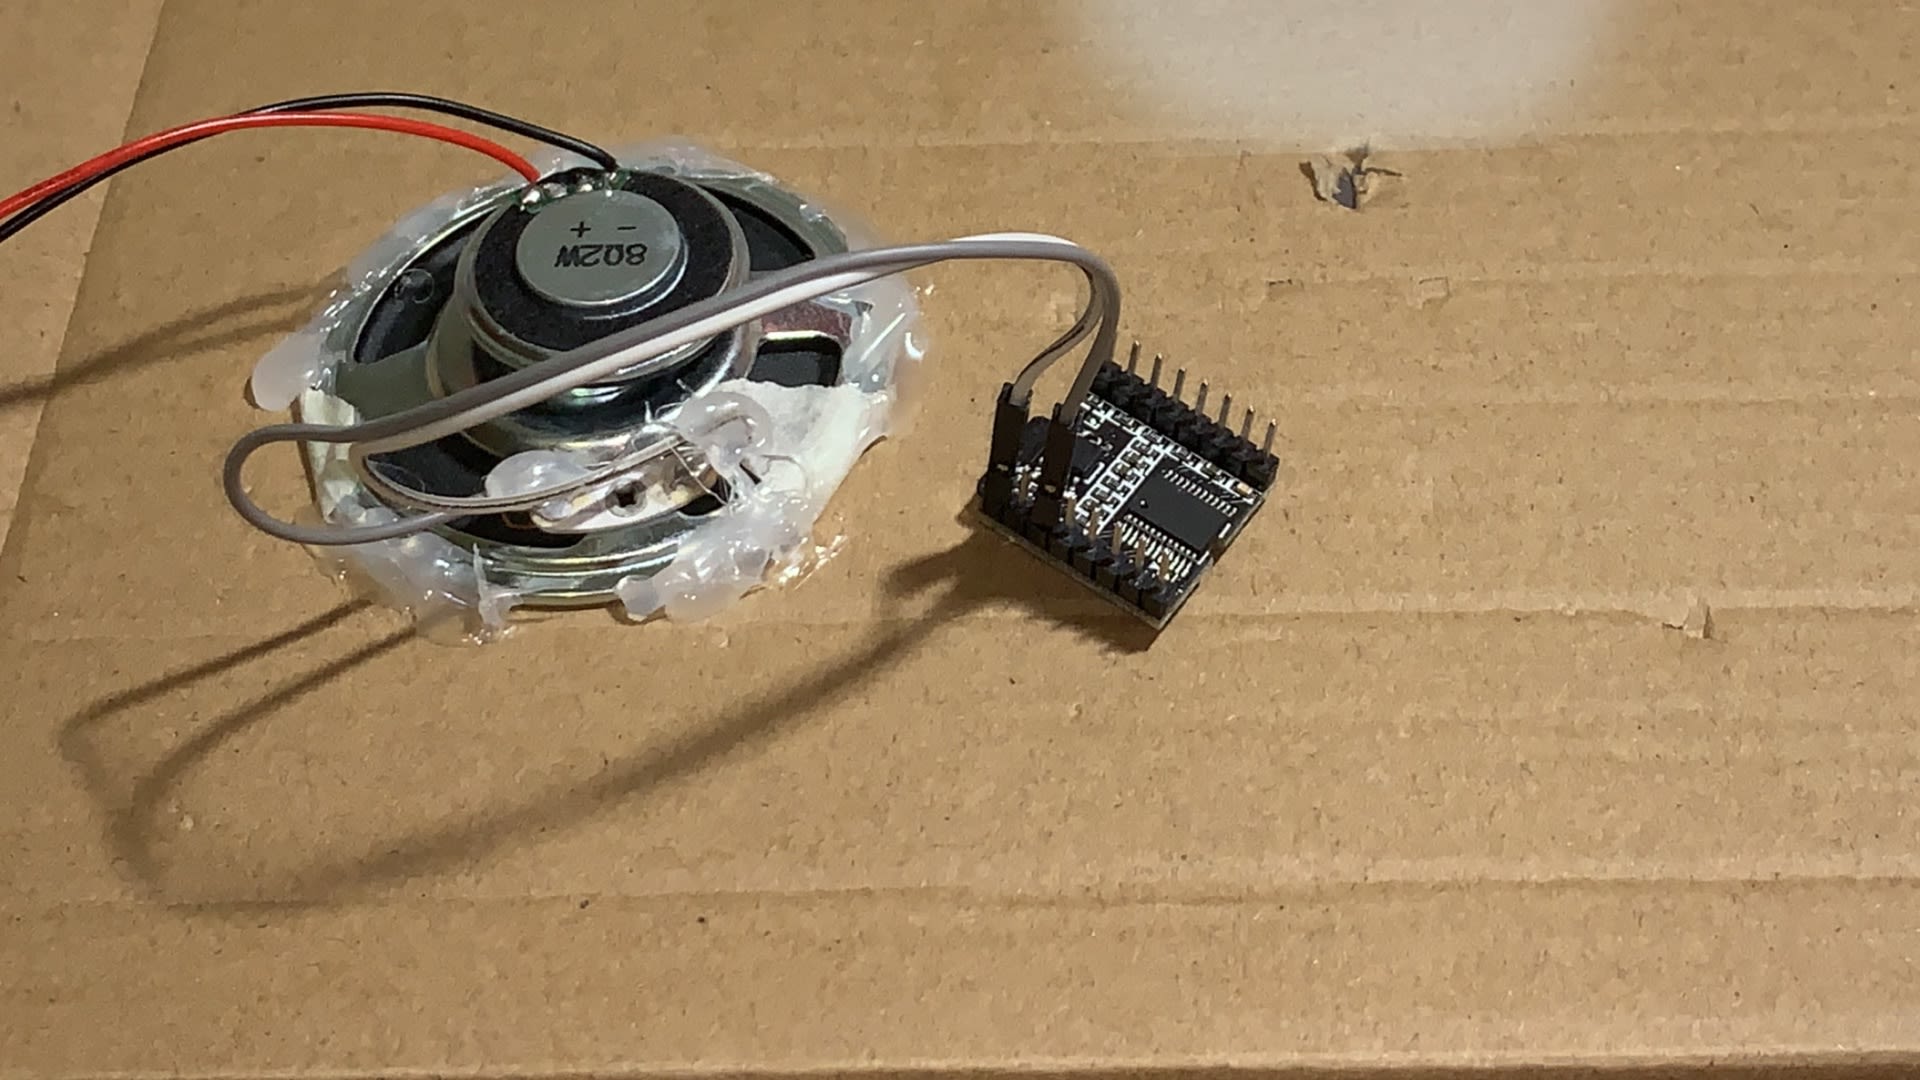
(a) Place the DFPlayer Mini MP3 module into the box.
(b) Face the MP3 module down. The pins should point towards you, and the ‘DFPlayer Mini’ text should face down. The SD card slot should be on top.
Then, connect the speaker to the MP3 module.
(c) Connect the ‘-’ end of the speaker to the 3rd pin from the top, on the left.
(d) Connect the ‘+’ end of the speaker to the 1st pin from the top, on the left.
STEP 19
Connecting mp3 module
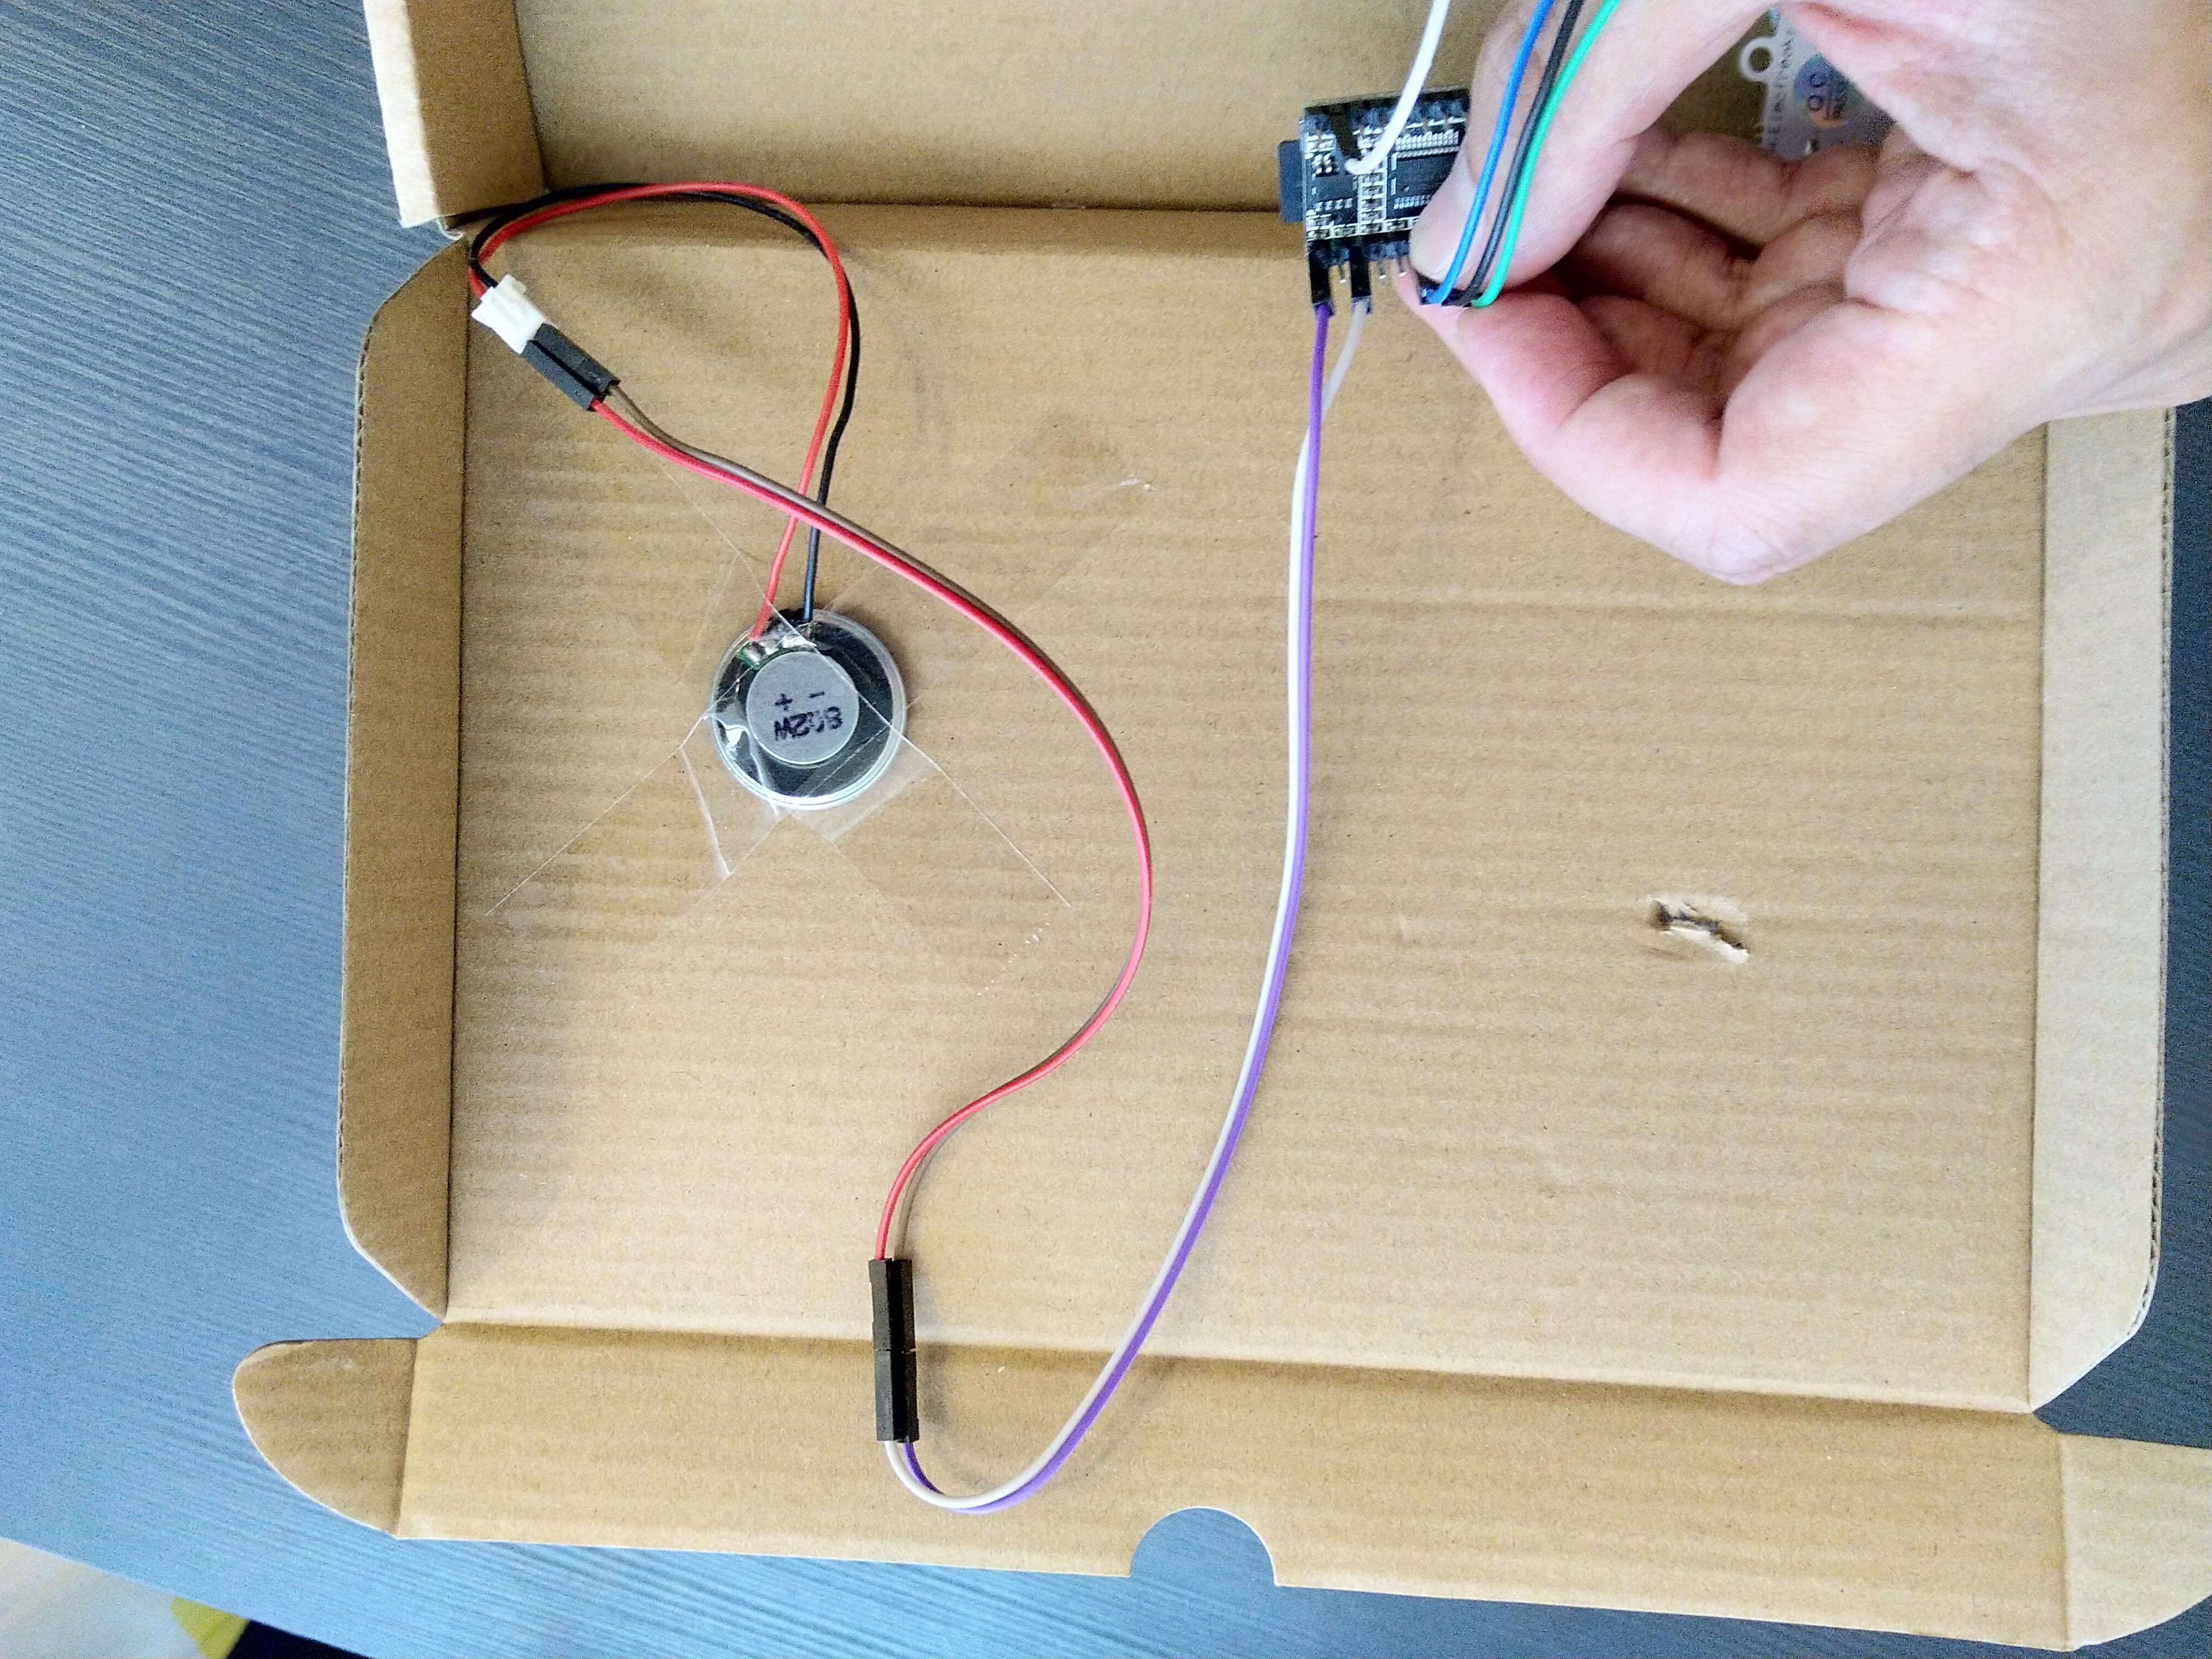
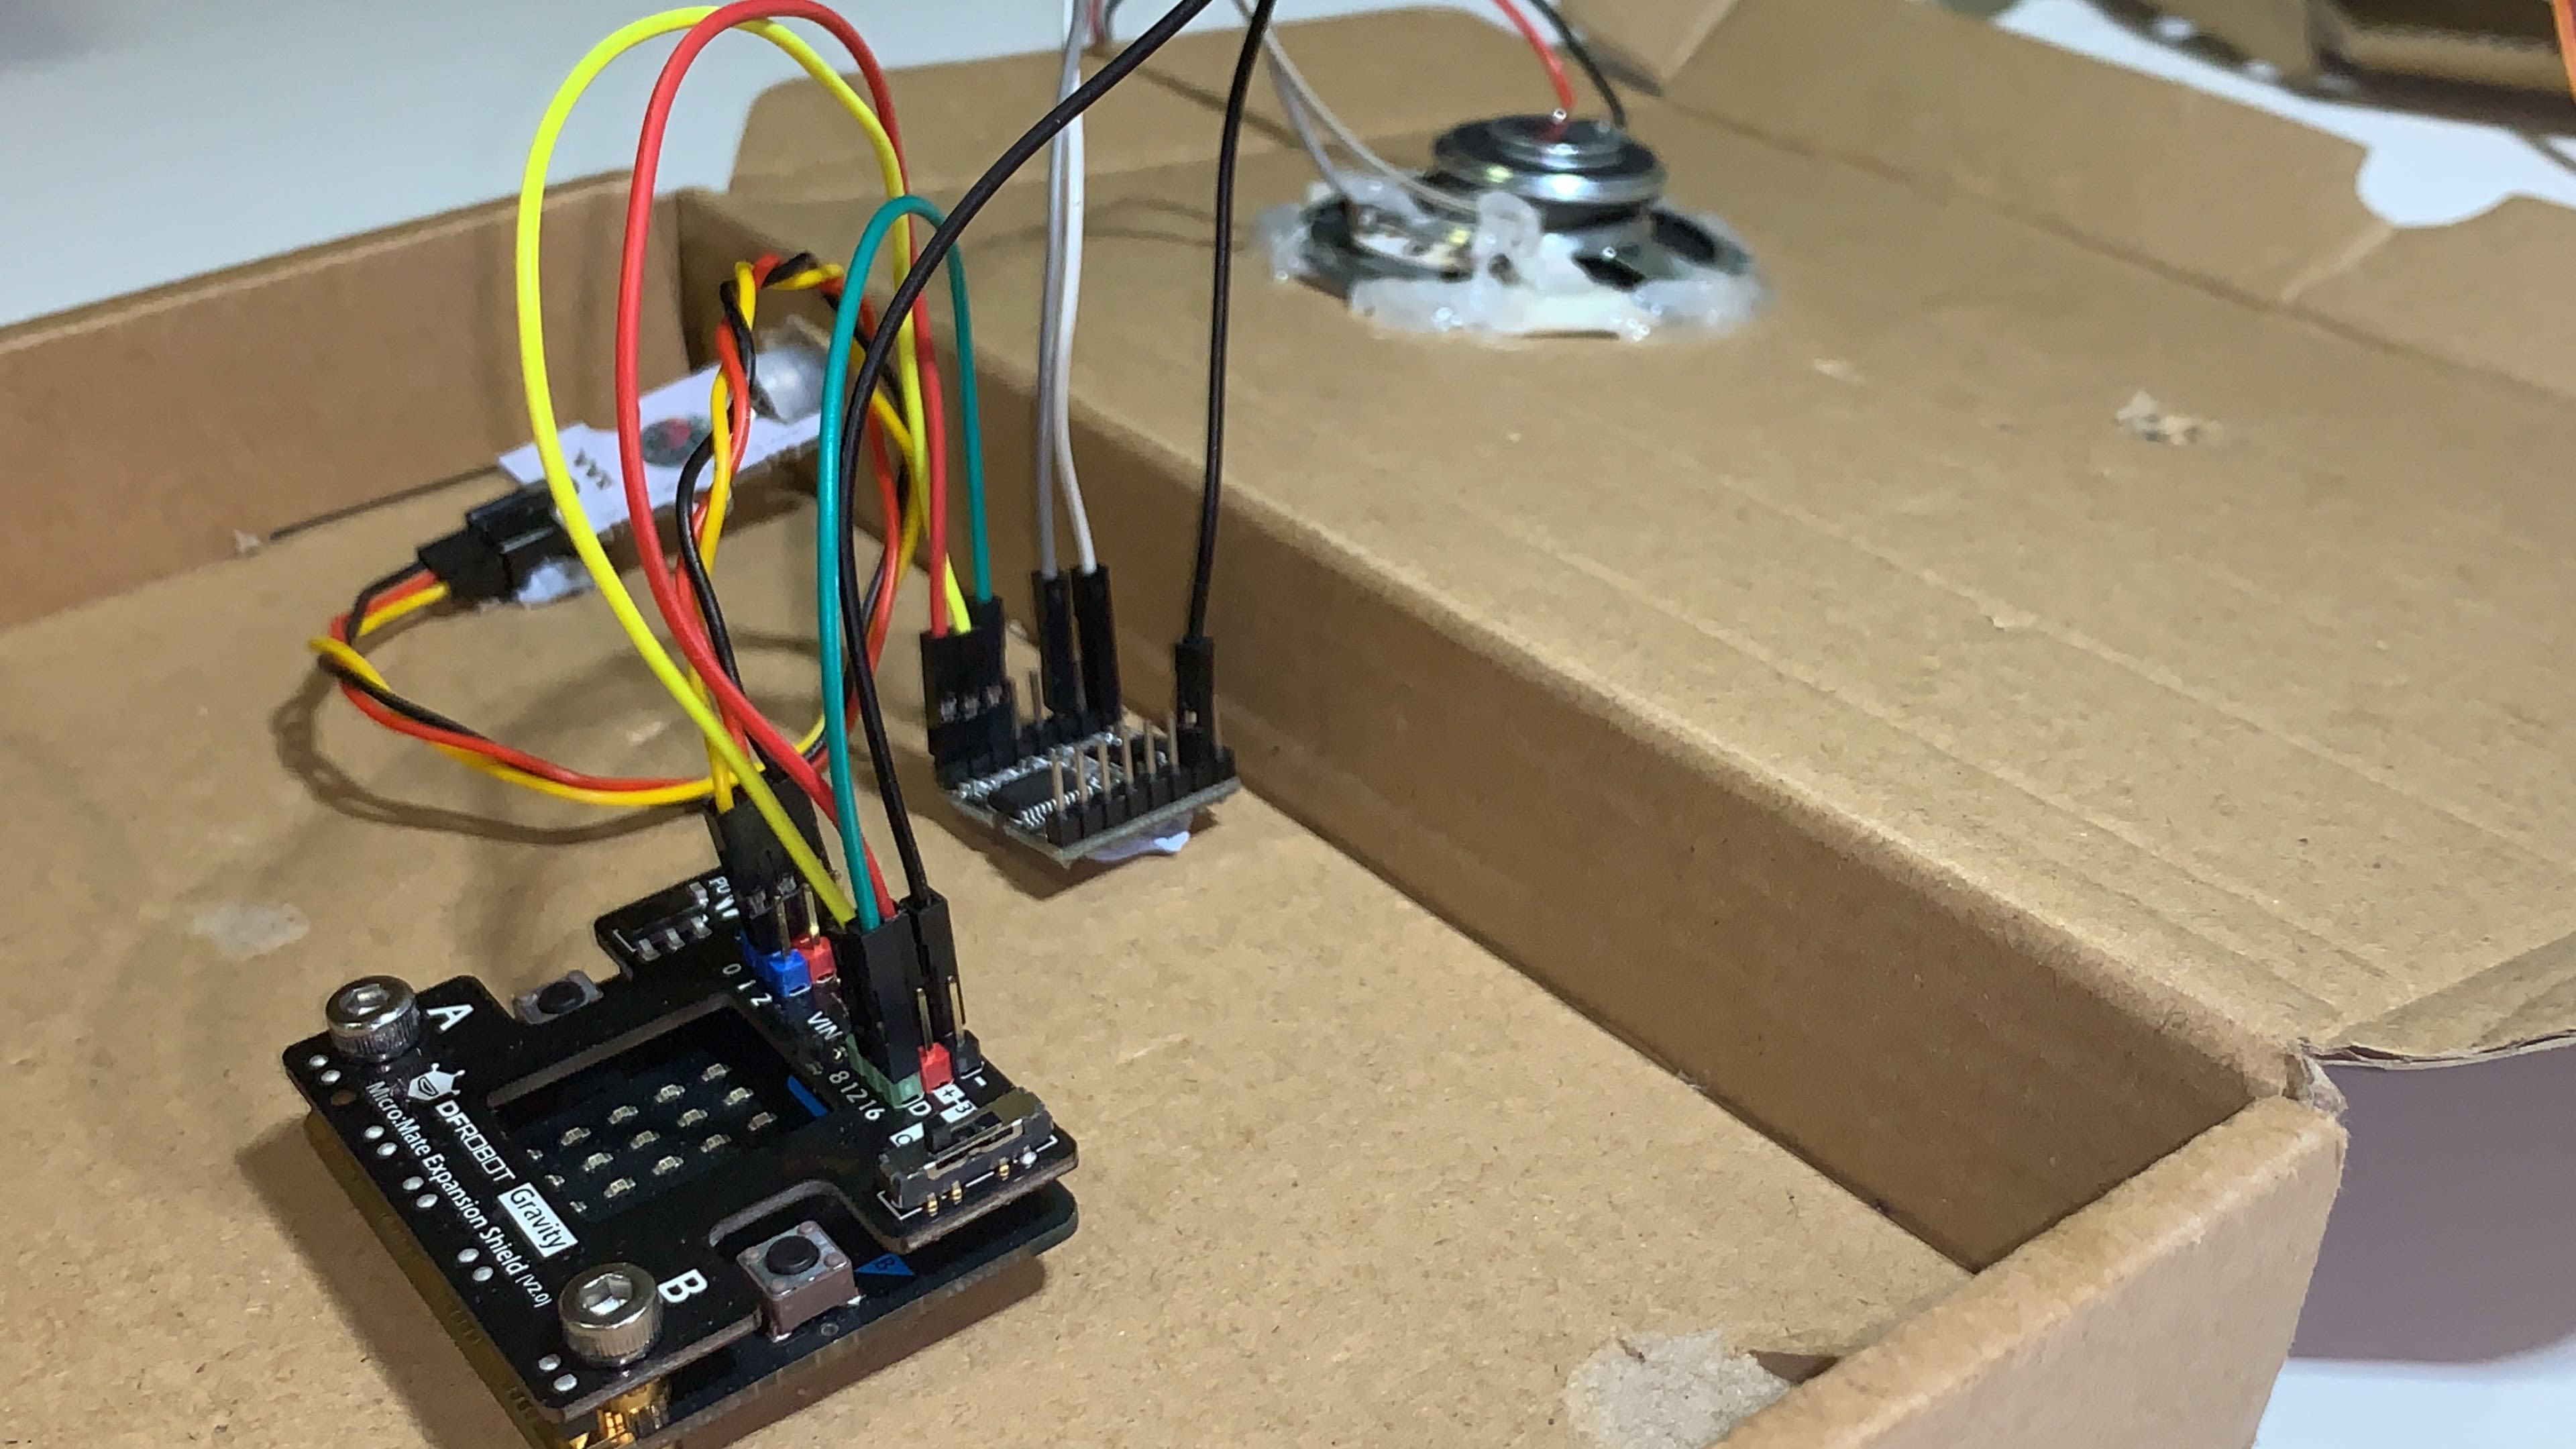
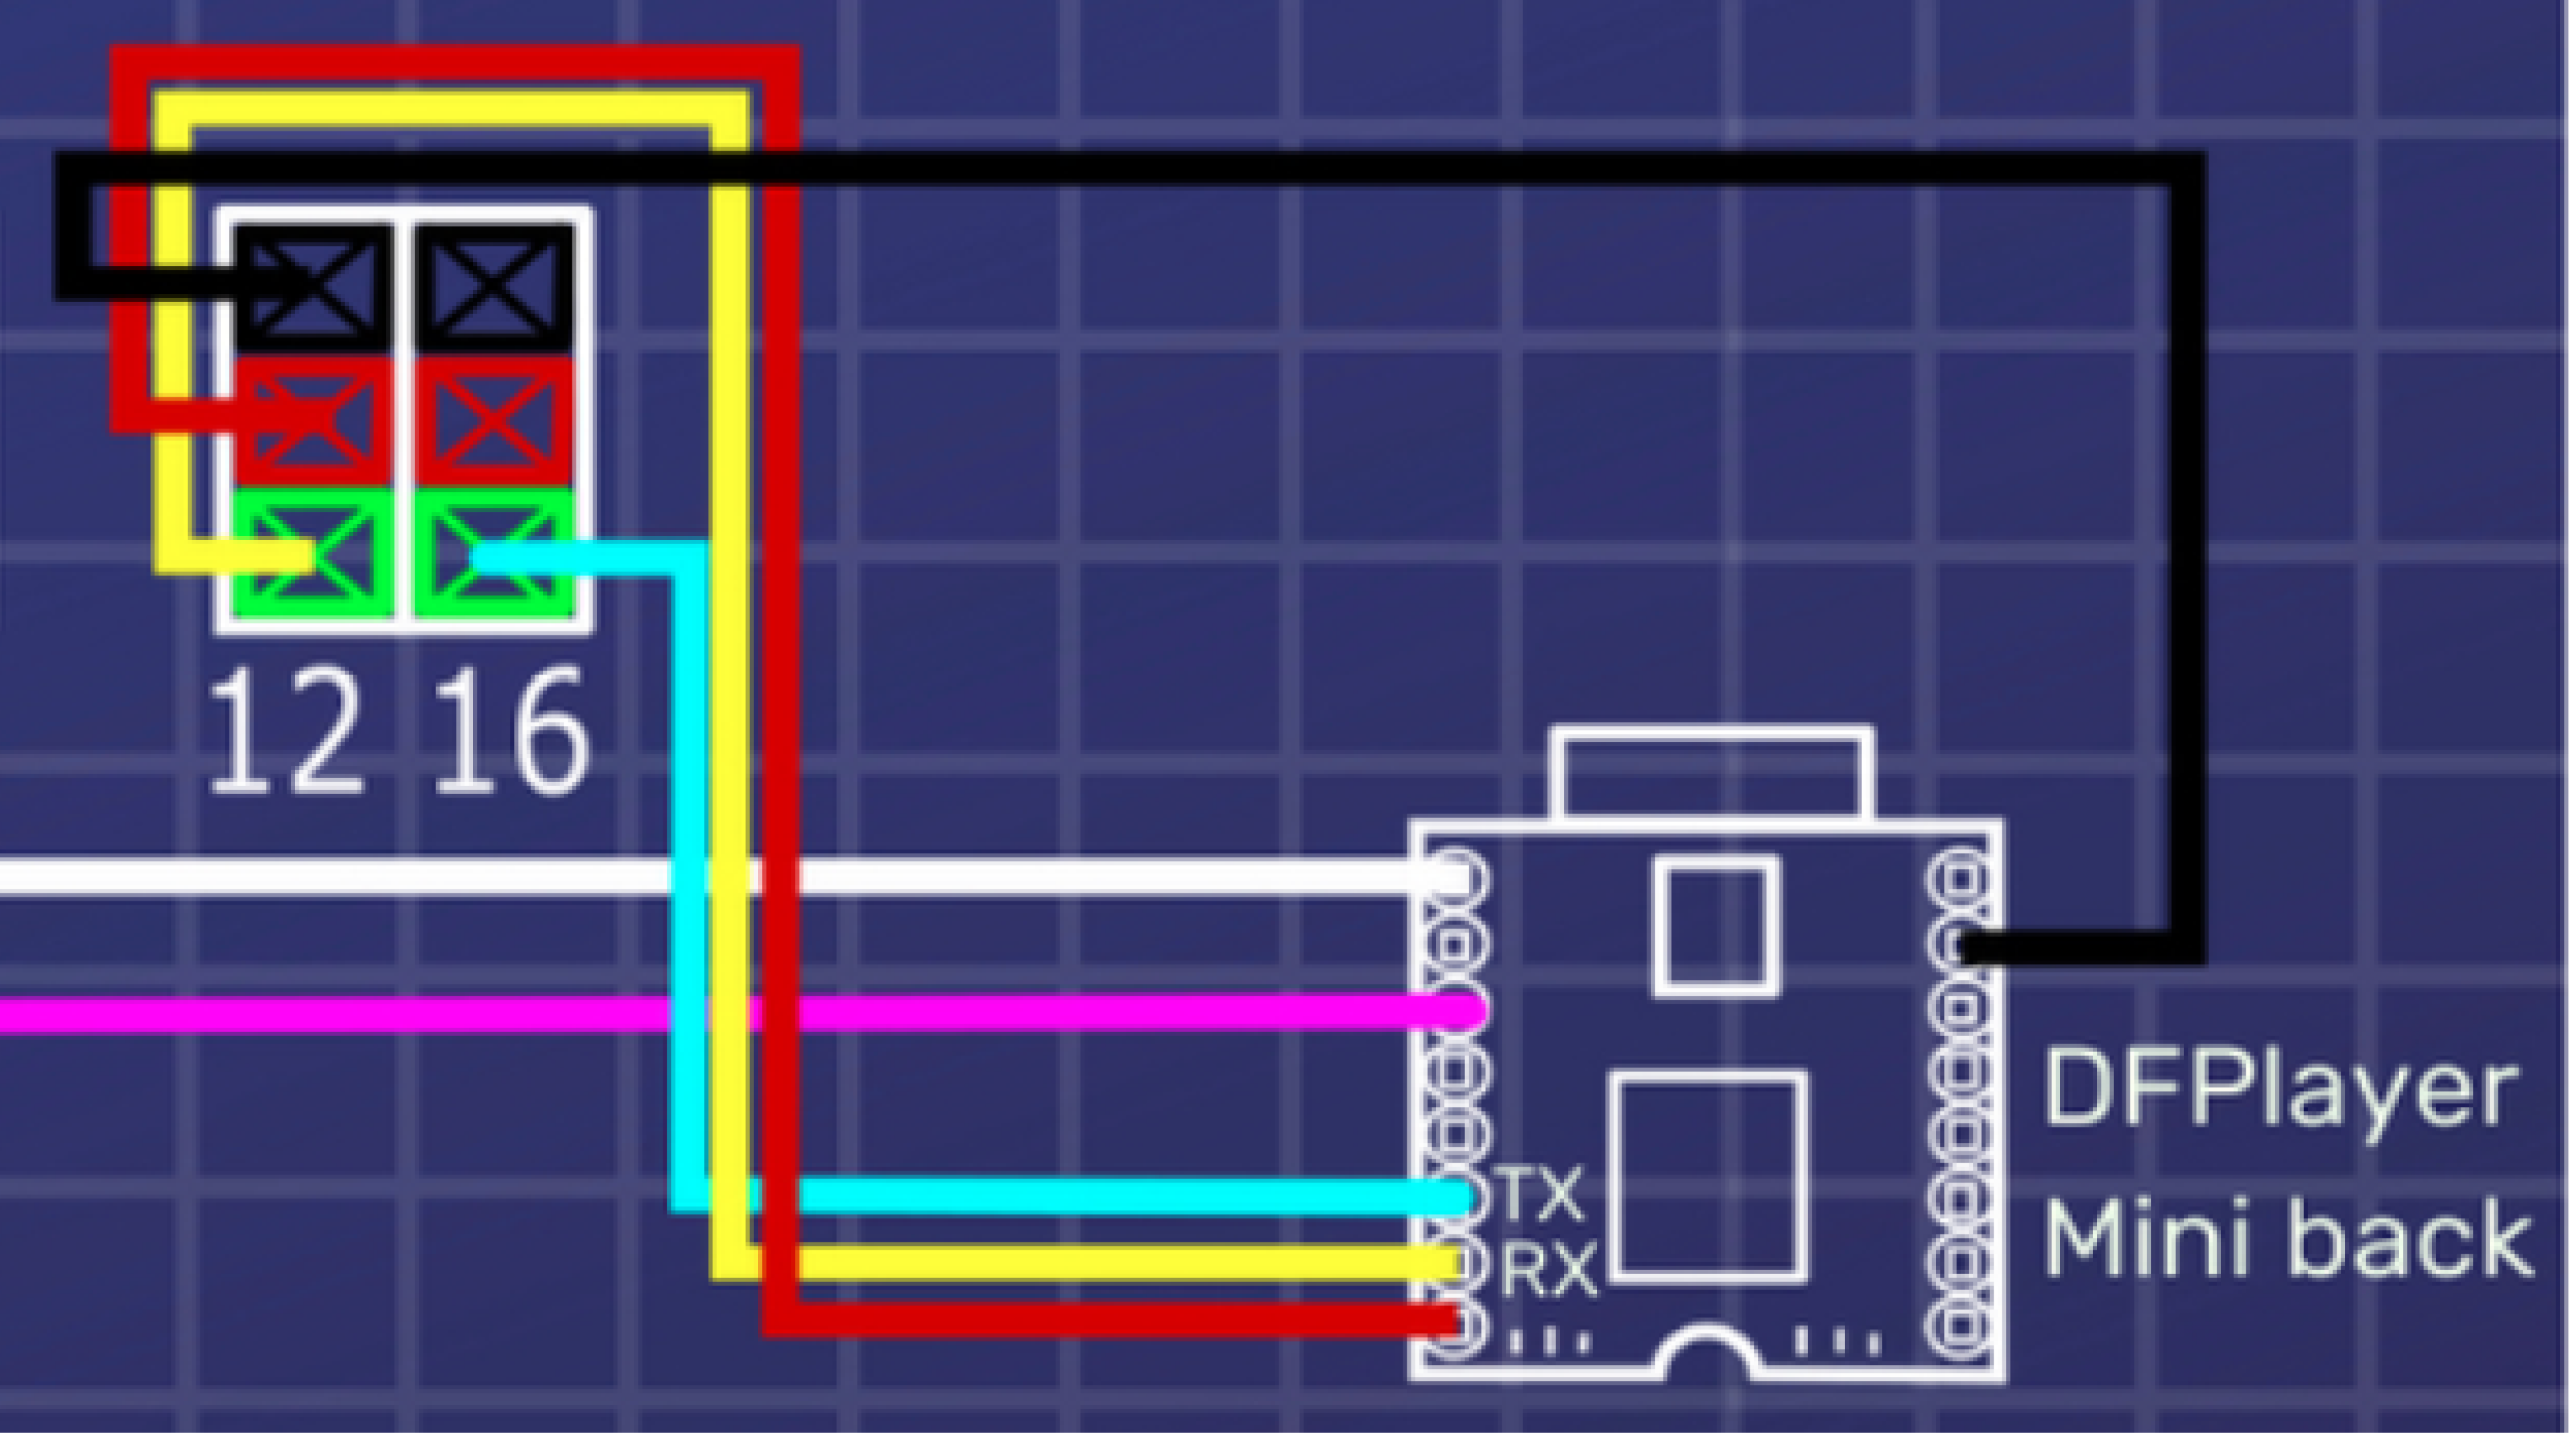
Now, let’s connect the MP3 module to the micro:Mate, with the 4 x F-F jumper wires. Here are the connection points, from the MP3 module to the micro:Mate :
(a) Connect the 2nd pin from the top, on the right, to the black pin on pin P12.
(b) Connect the TX pin (3rd pin from the bottom, on the left) to the green pin on P16.
(c) Connect the RX pin (2nd pin from bottom, on the left) to the green pin on P12.
(d) Connect the 1st pin from the bottom, on the left, to the red pin on P12.
STEP 20
Connecting micro servo motor
(a) Place the t-rex on top of the box.
(b) From the top of the box, thread the micro servo wires from the t-rex into the opening cut on the lid.
(c) Connect the micro servo to pin P8 on the micro:Mate. Align it such that the orange wire connects to the green pin, red wire to red pin, and brown wire to black pin of P8.
STEP 21
Taping feet down
Before we move on to coding the t-rex, you can use white glue to tape down the feet of the t-rex to the box lid.
This will ensure that your t-rex stays firmly in place.
STEP 22
MakeCode Setup
Now, let’s move on to coding, to program the t-rex to open and close its mouth and roar when we wave at the motion sensor. To do so, we will use MakeCode.
(a) Go to http://makecode.microbit.org.
(b) Click on ‘New Project’.
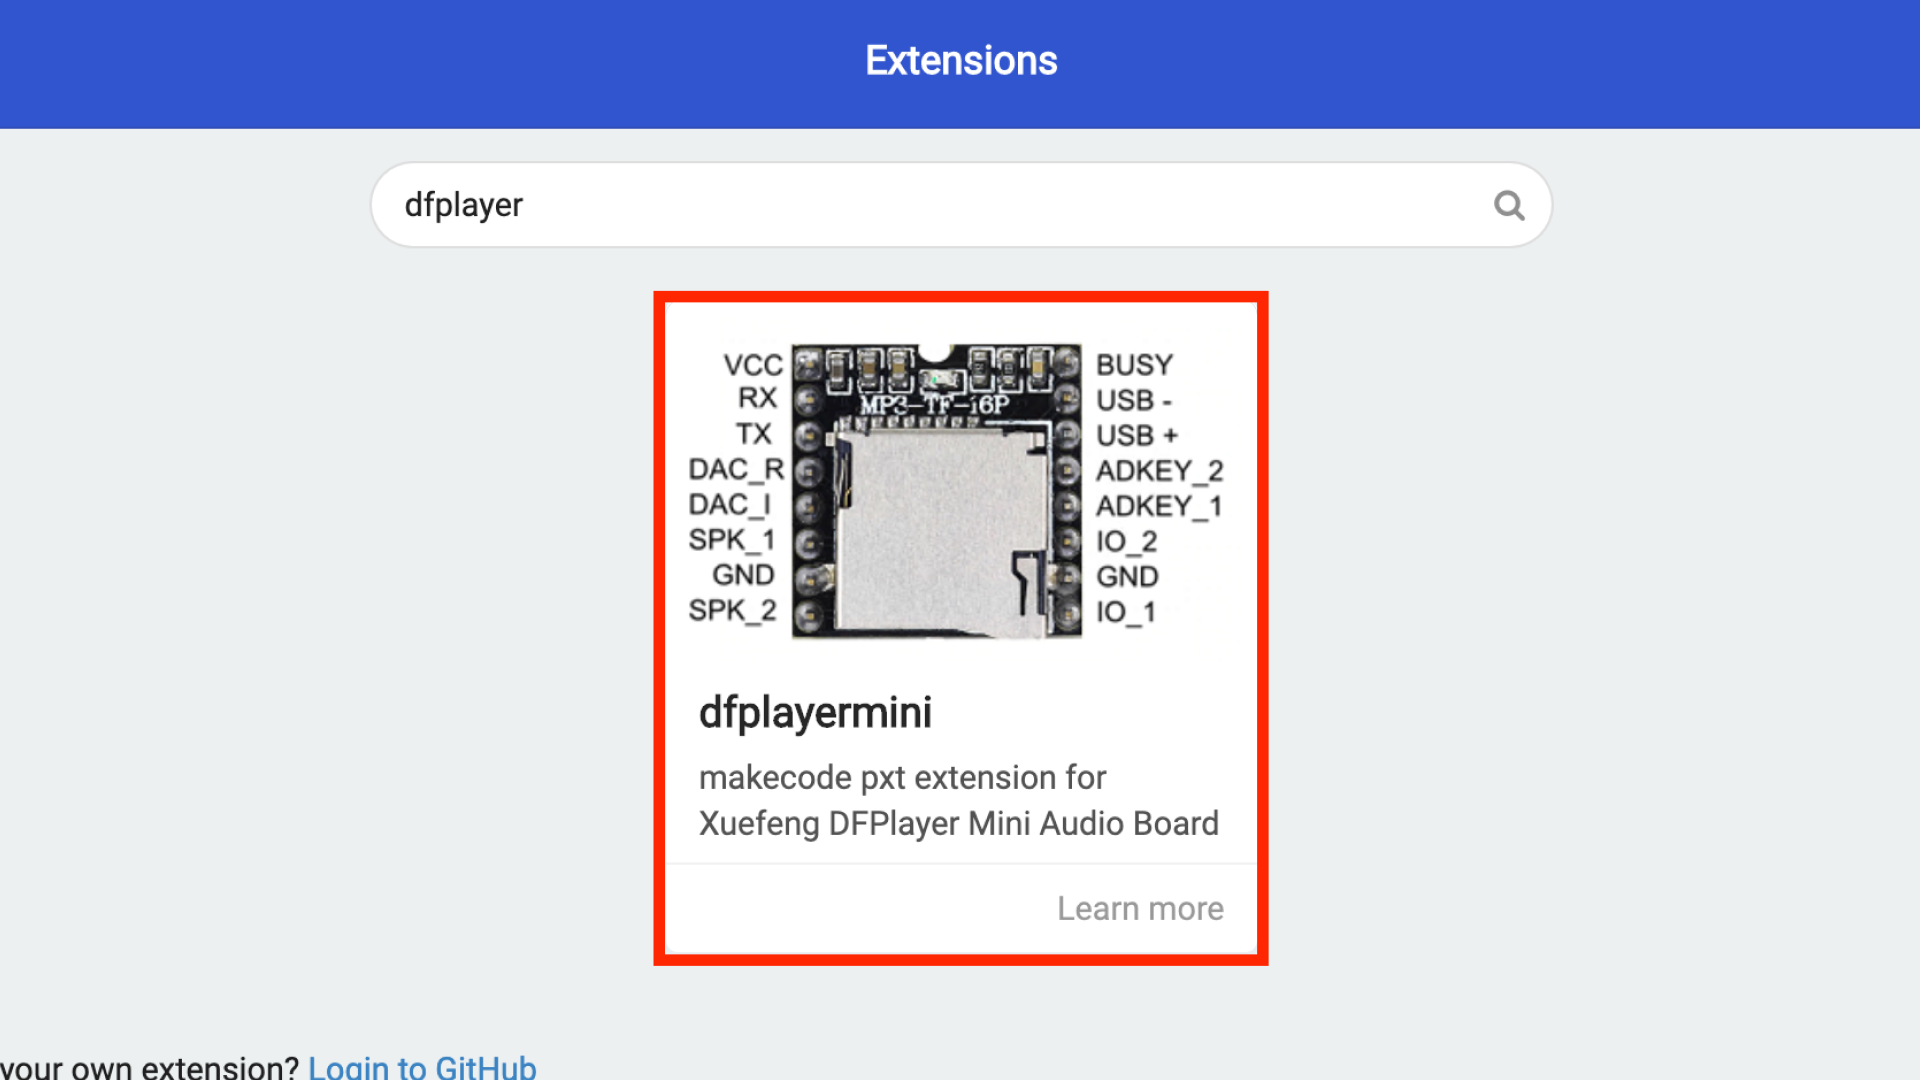
(c) Click on the ‘Advanced’ drawer on the left, select ‘Extensions’ and click on ‘dfplayermini’. This is an extension that will allow us to control and play songs from the mp3 module.
STEP 23
Initialising
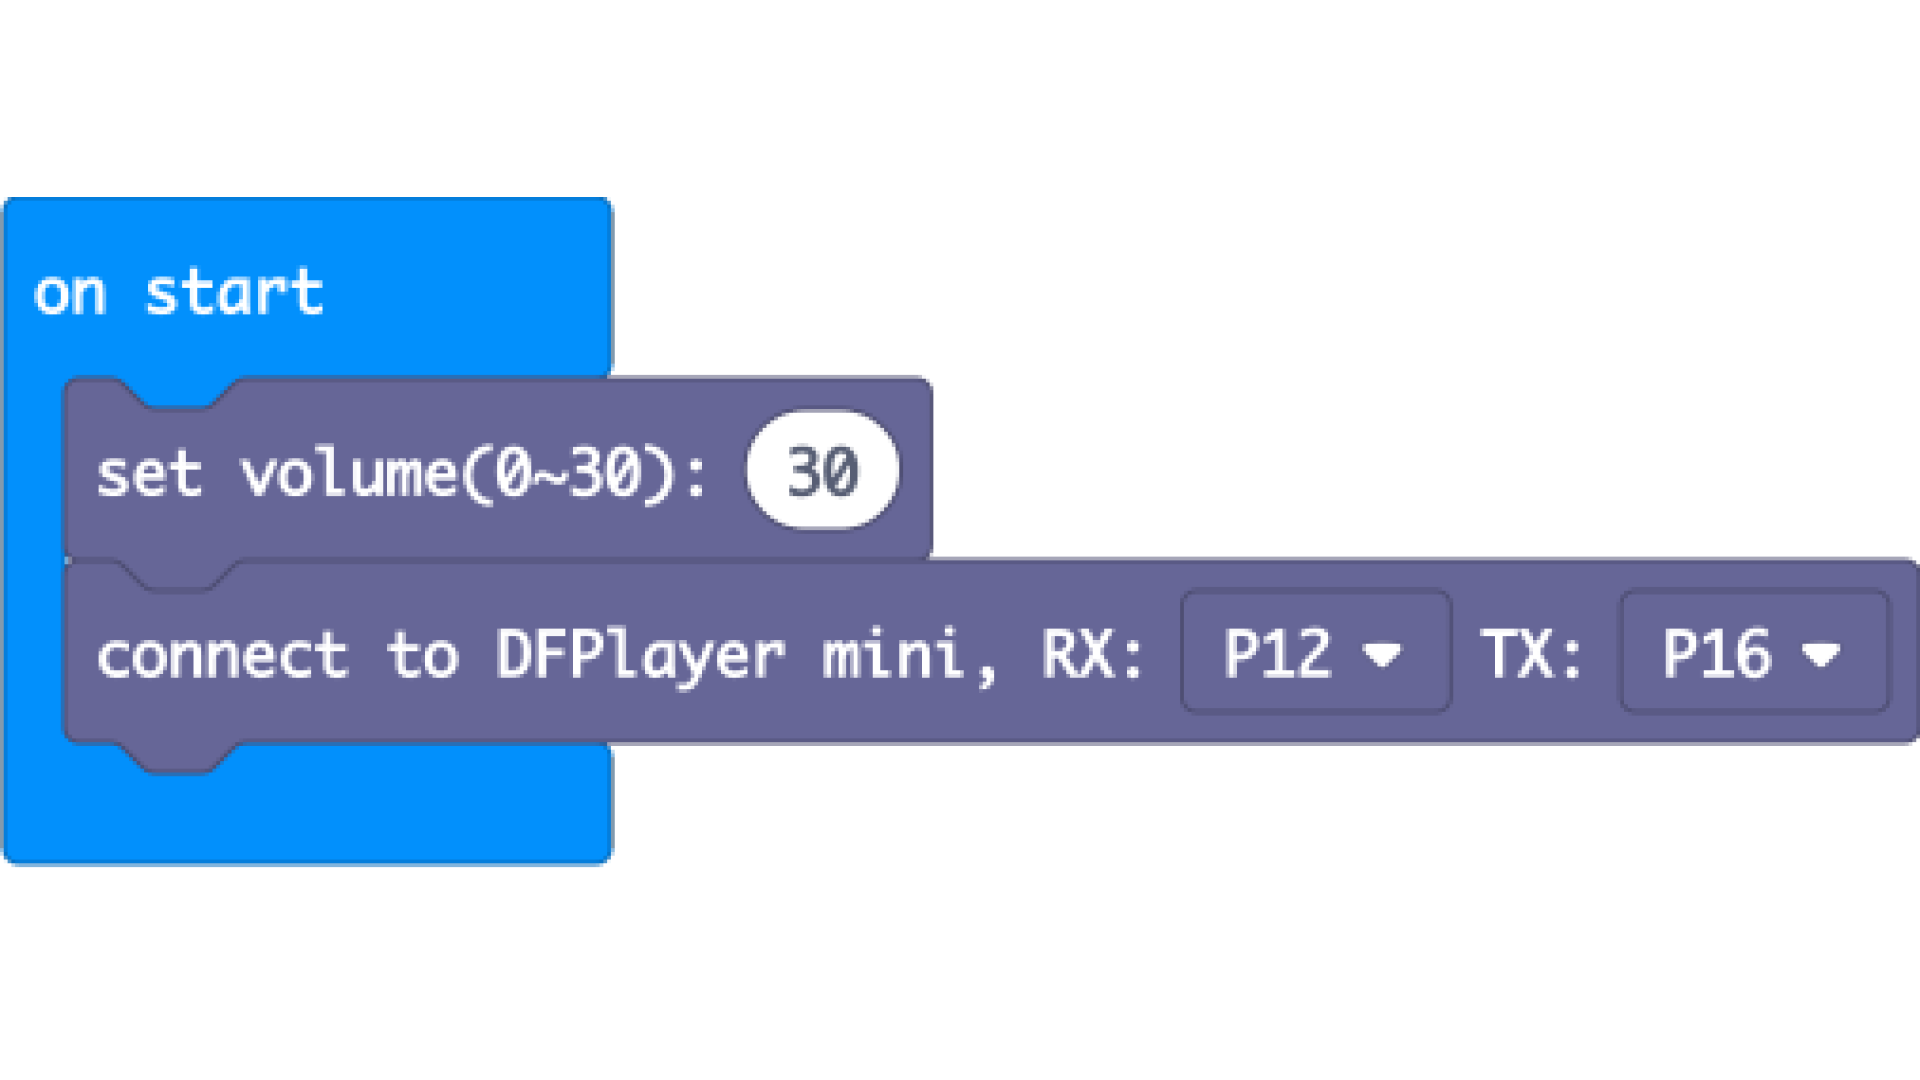
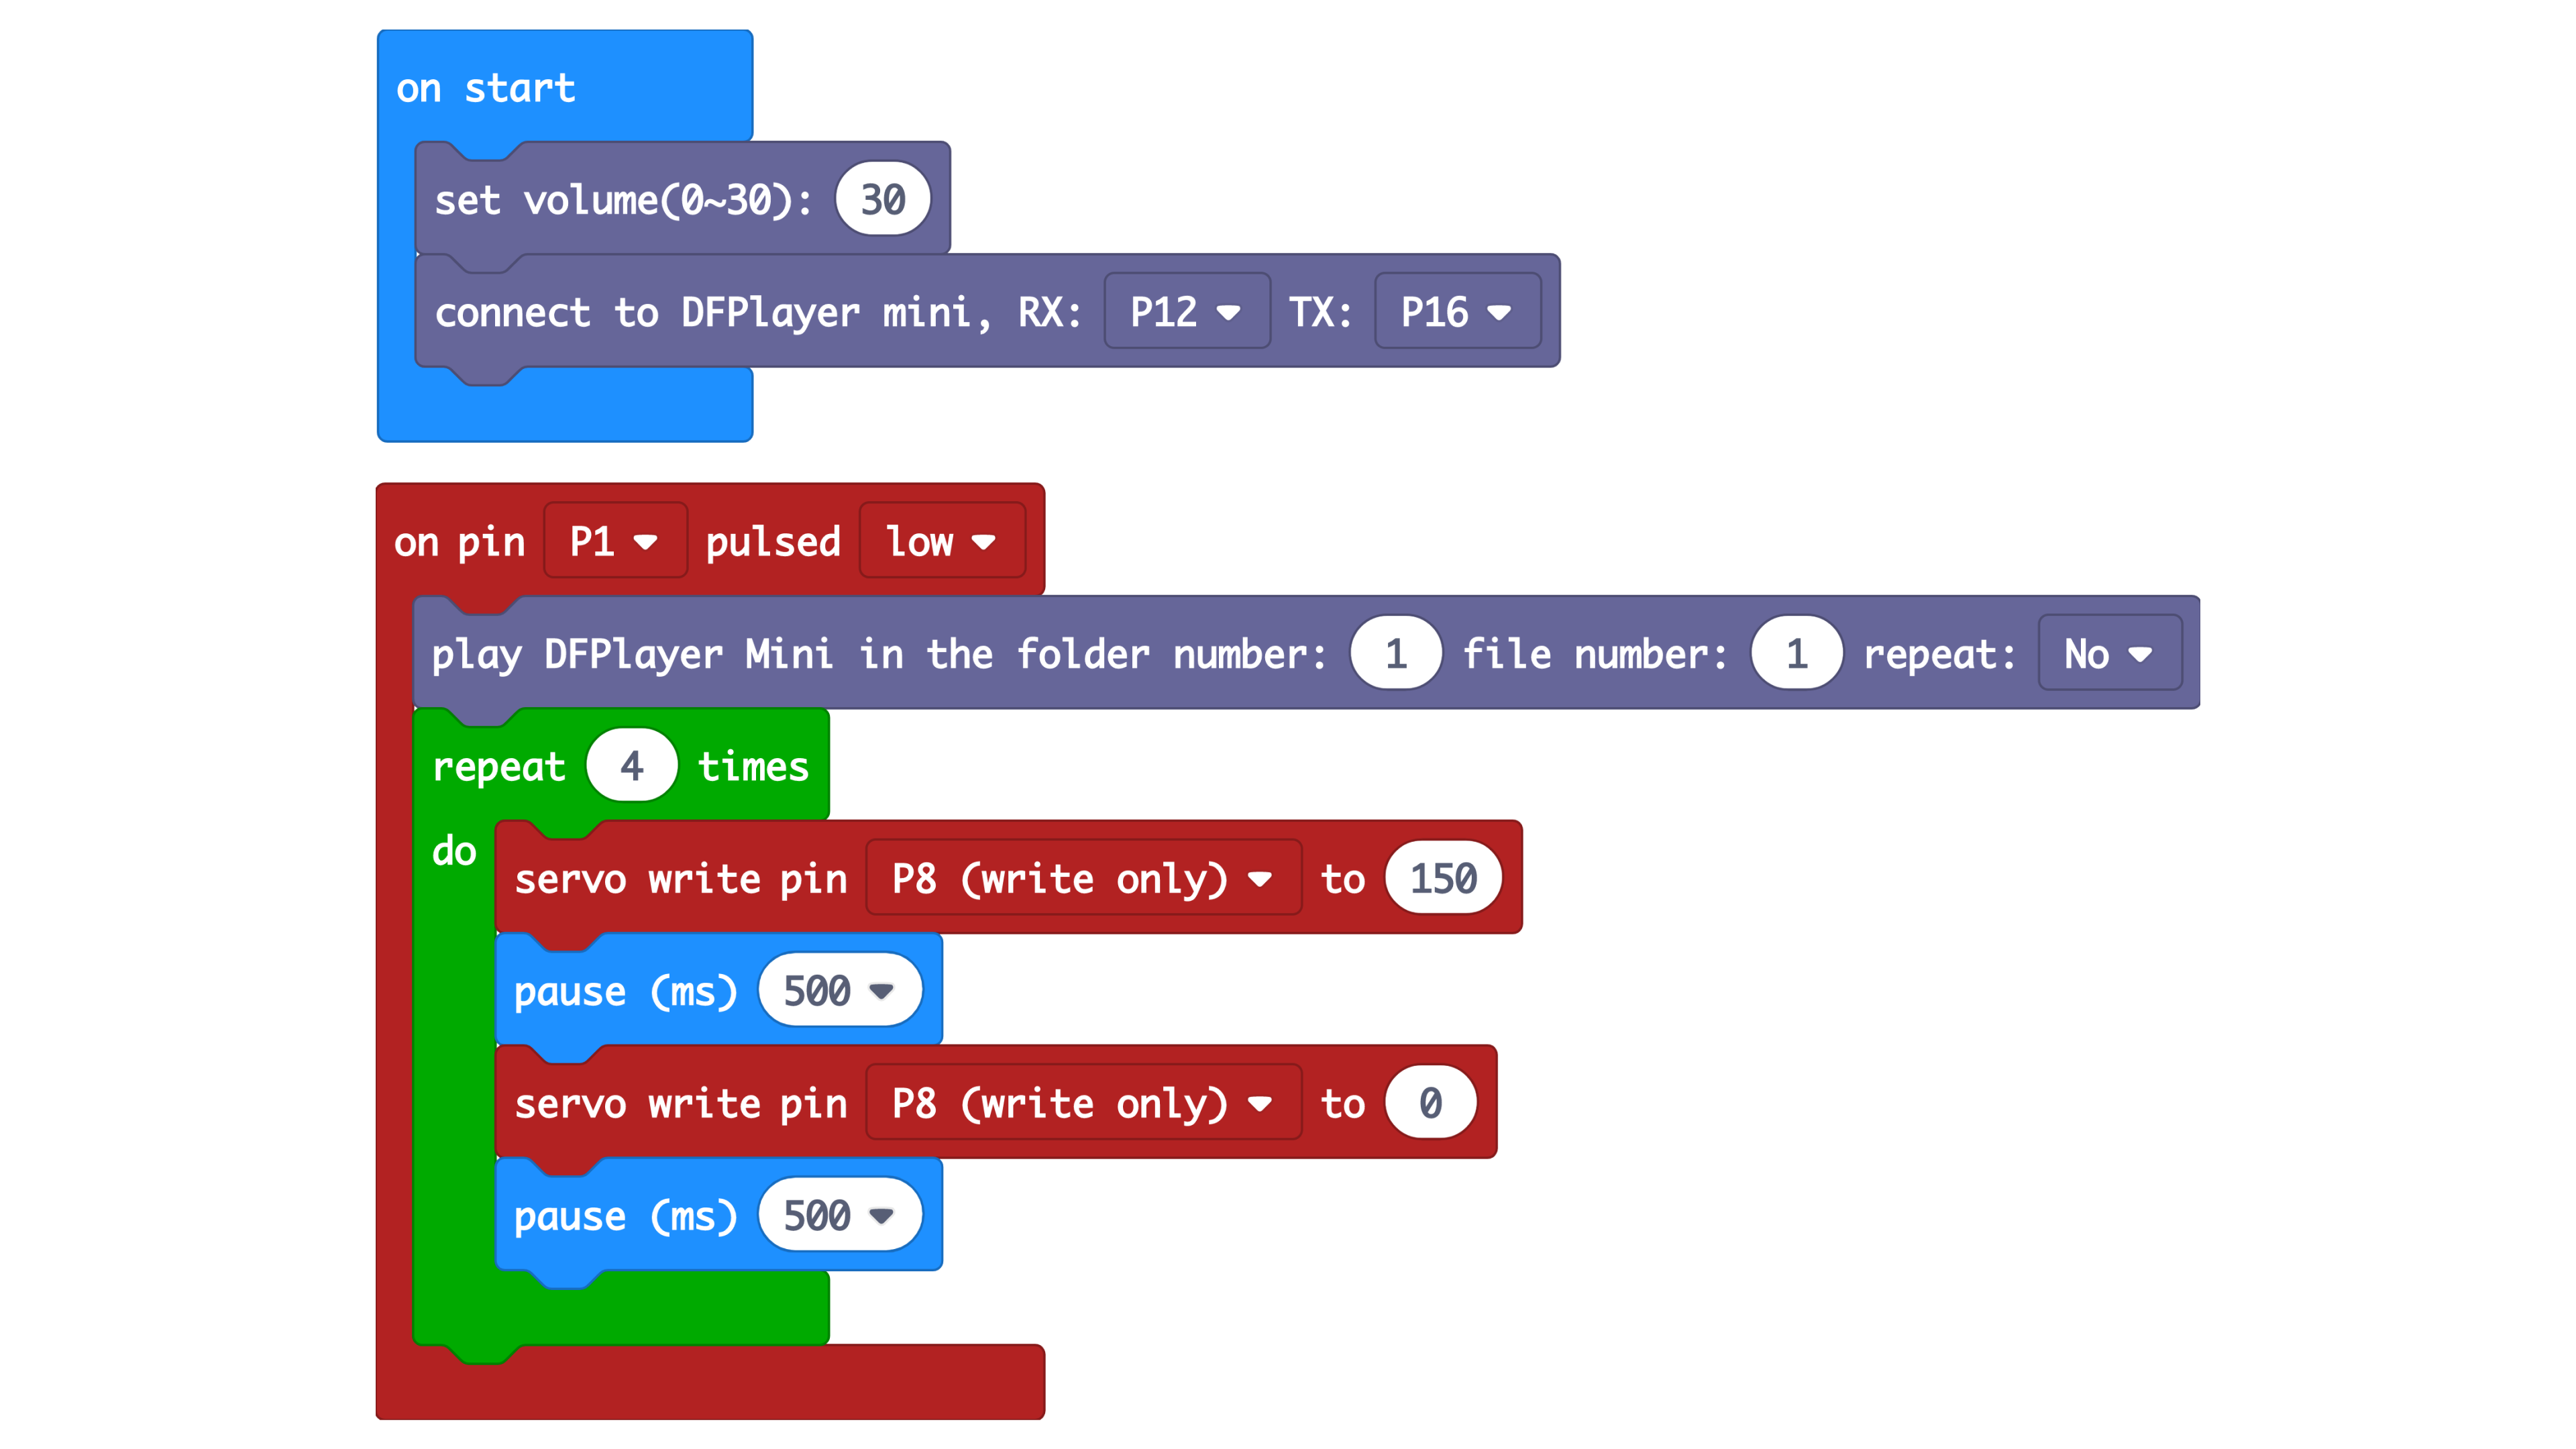
On start (ie when powered), we want to set up the mp3 module.
(a) Click on the ‘DFPlayer Mini’ drawer on the left. Drag out the ‘set volume’ block, and make sure the number is ‘30’. This initialises the mp3 module to play at maximum volume later.
(b) Drag out the ‘connect to DFPlayer mini’ block, and select ‘P12’ for RX, ‘P16’ for TX. This is as we connected RX (yellow wire) and TX (green wire) to pins P12 and P16 on the micro:Mate respectively in step 19. This initialises the mp3 module.
STEP 24
When movement is detected
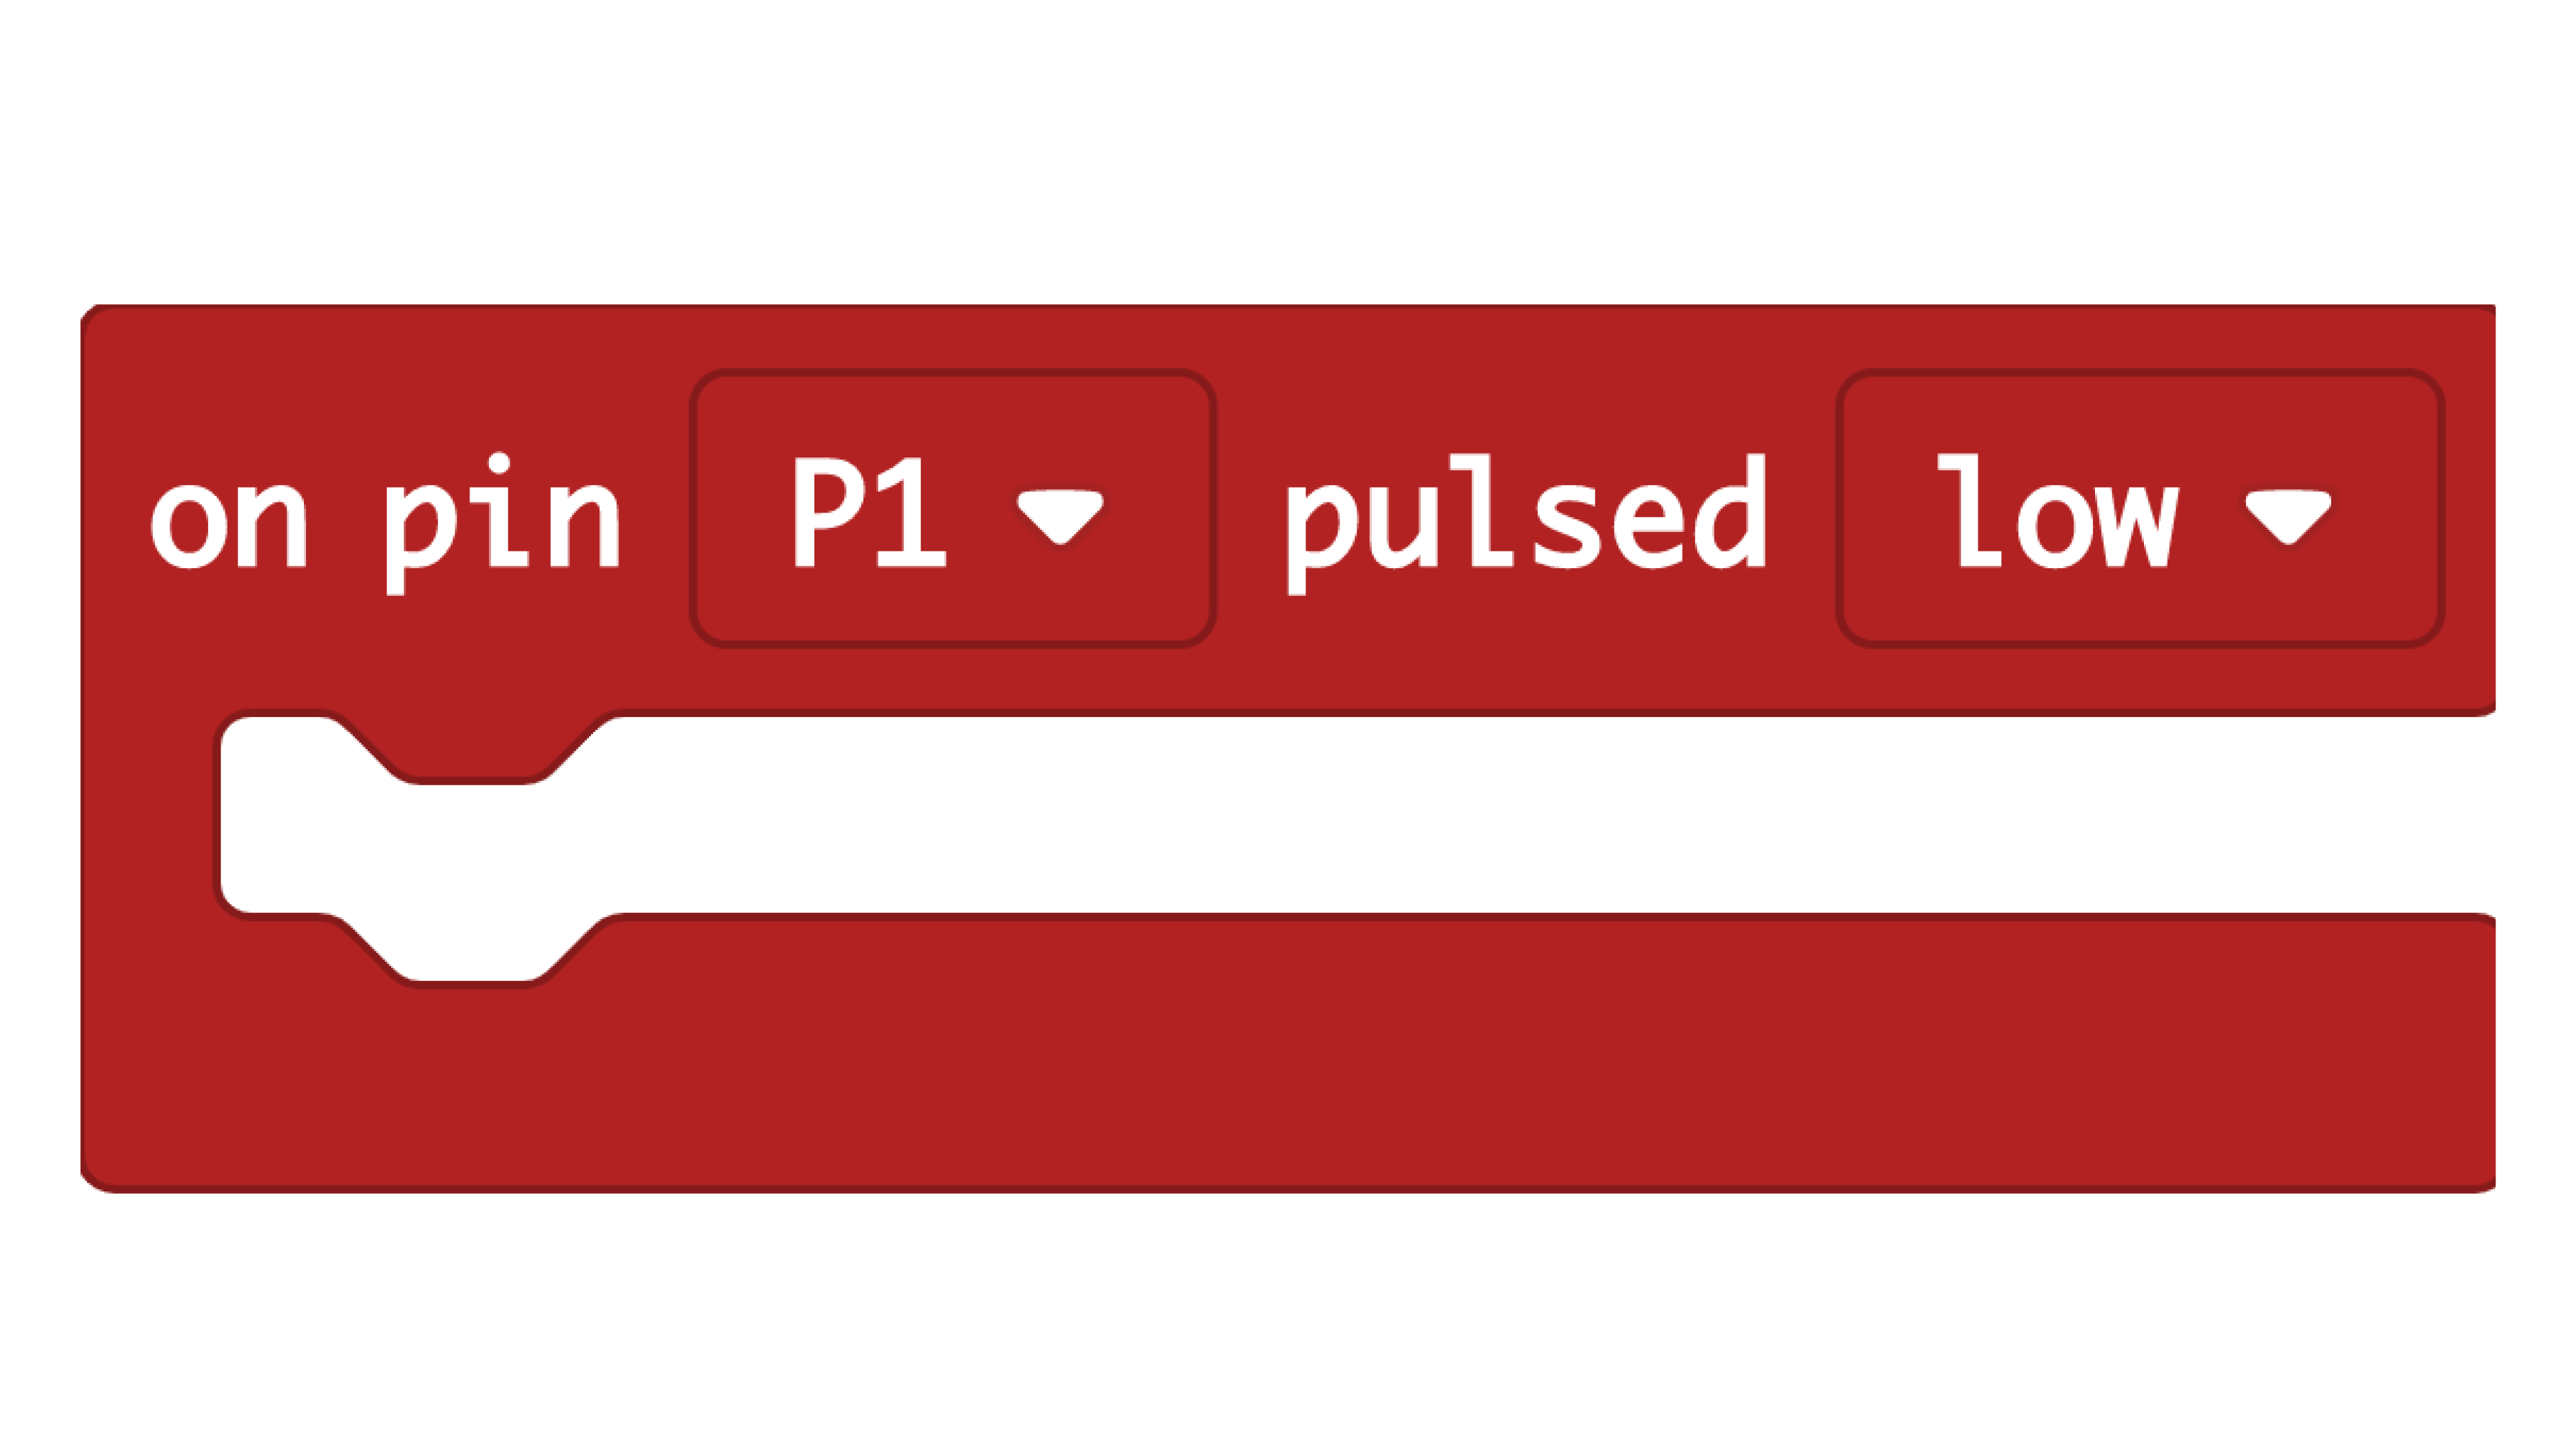
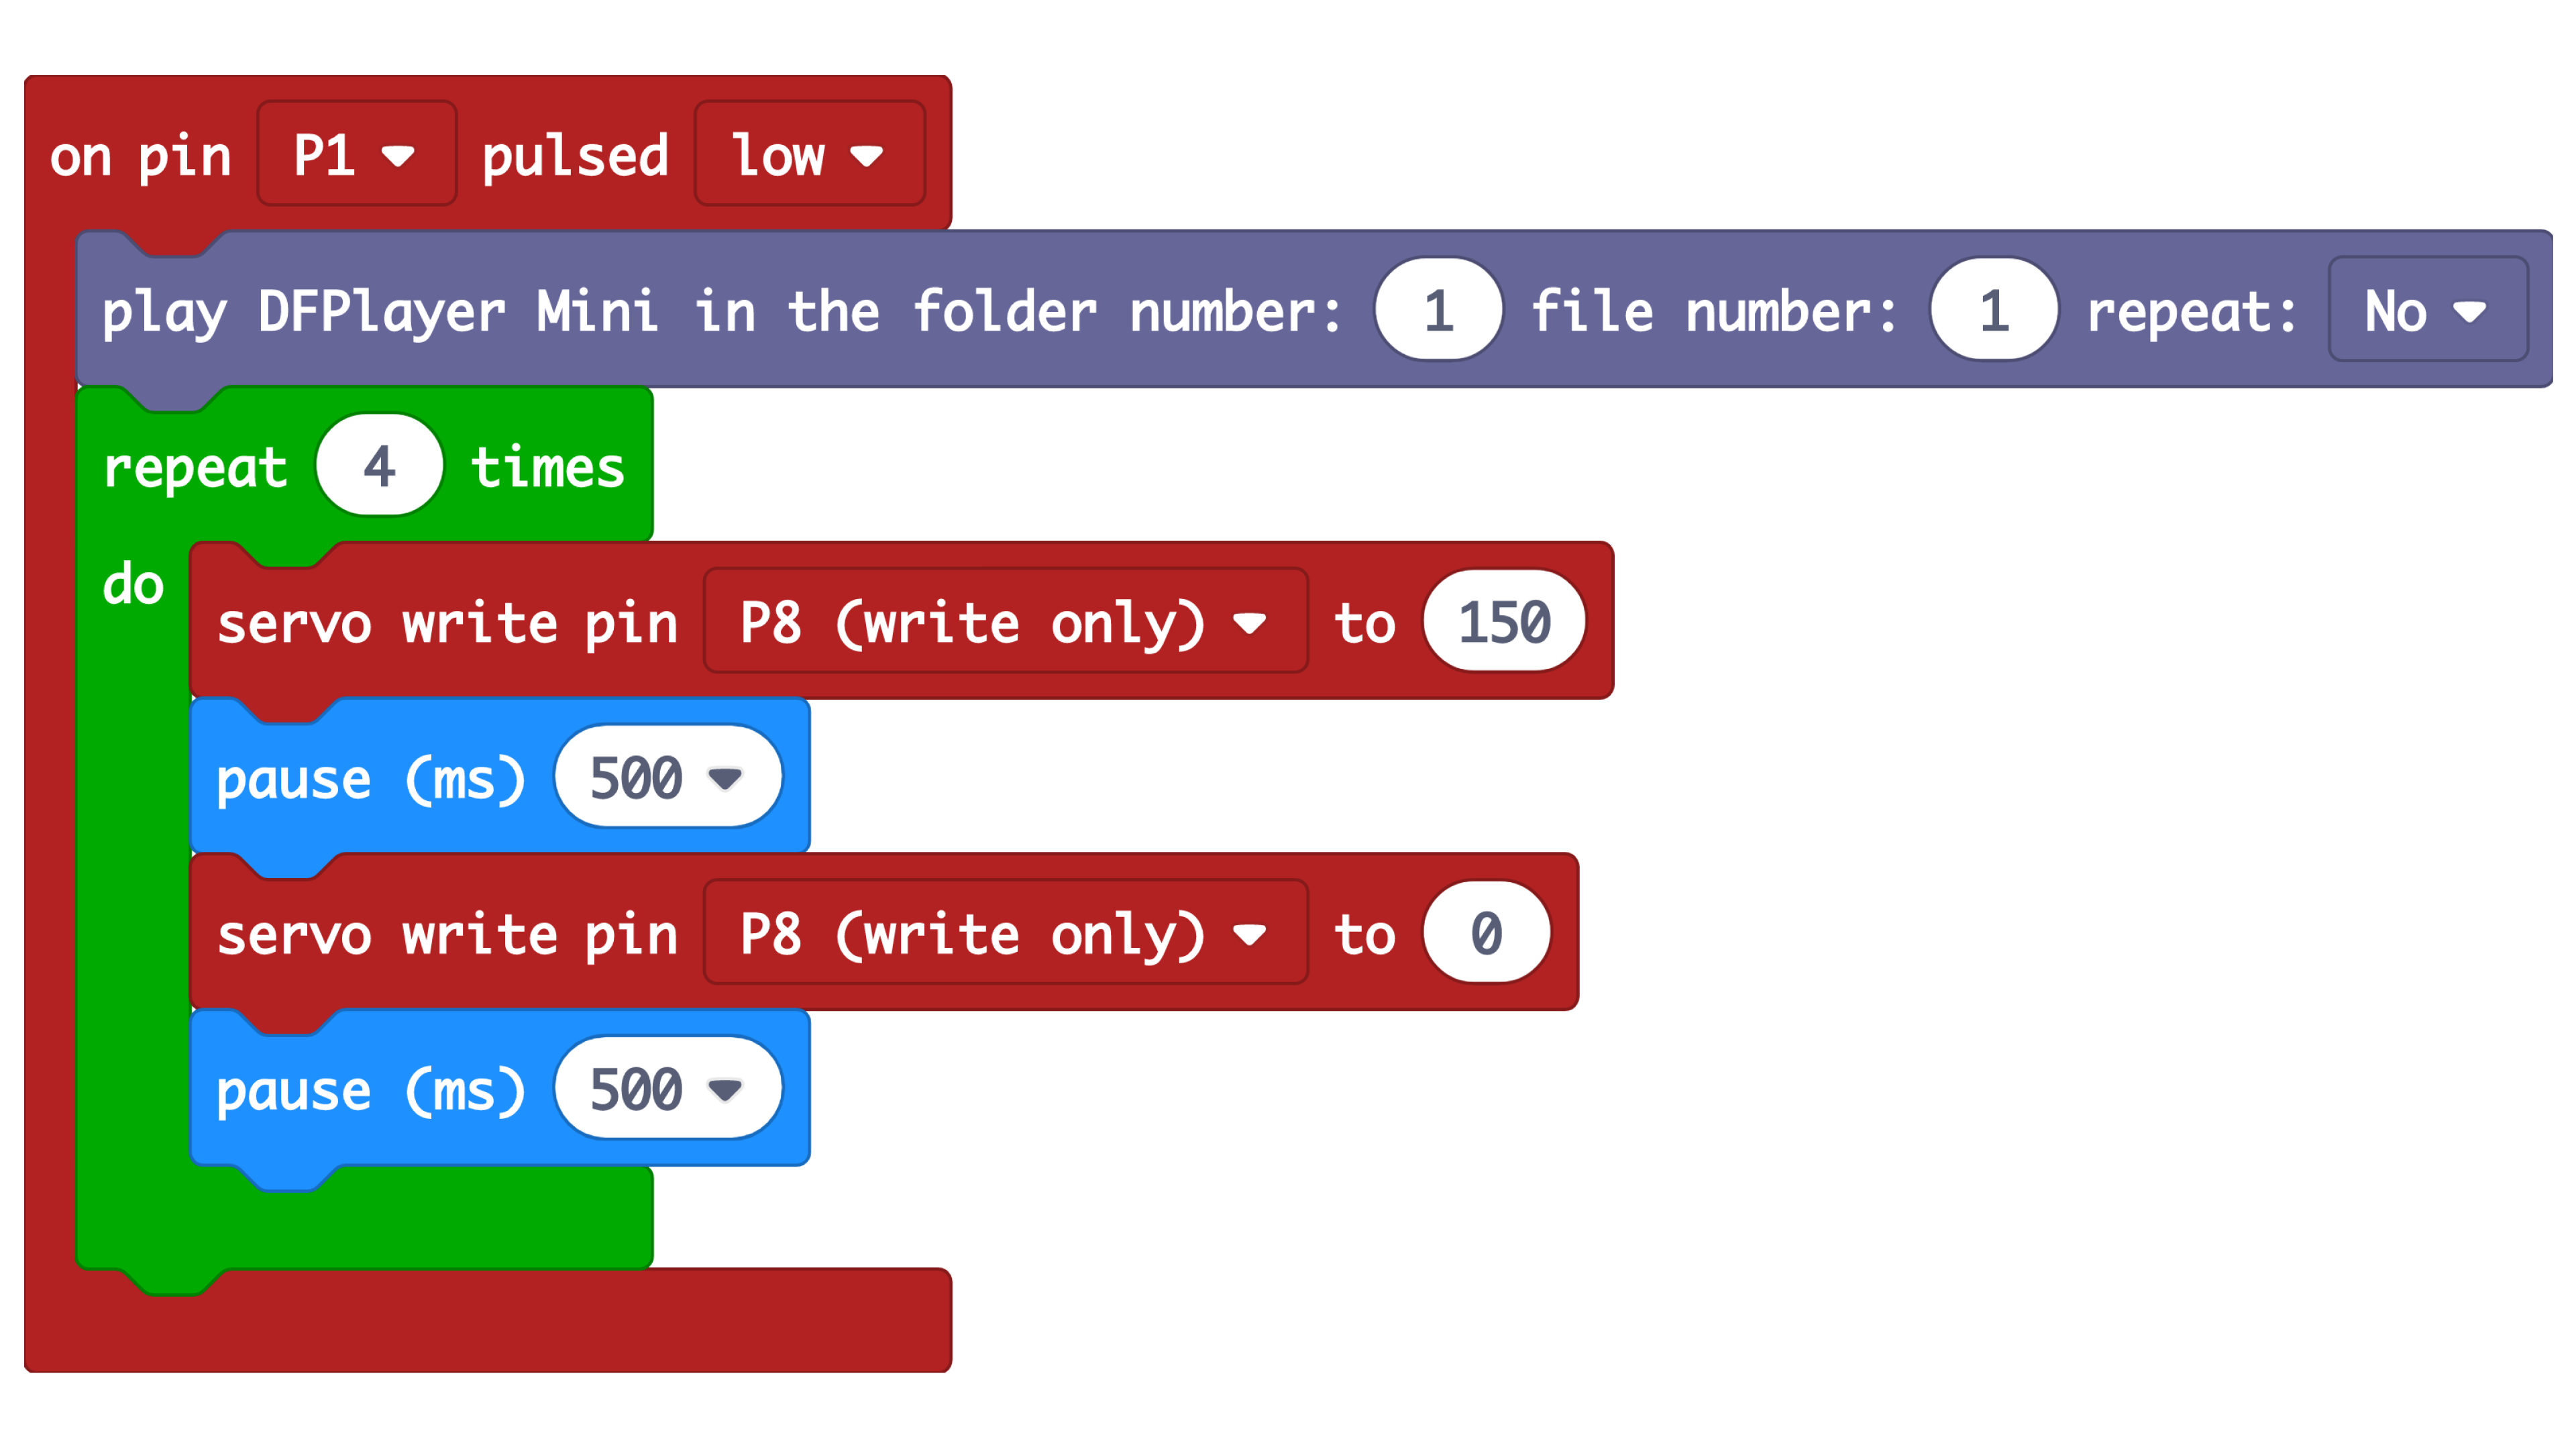
(a) Click on ‘Advanced’ drawer on the left, and scroll down to select the ‘Pins’ drawer. Click ‘more’ and drag out the ‘on pin [P0] pulsed [high]’.
(b) Click ‘P0’ and select 'P1' from the dropdown. This is where we connected the motion sensor.
(c) Click ‘high’ and select 'low' from the dropdown, as the pulse drops to low when the motion sensor detects movement.
This is an event handler block. Everything under it runs only when the sensor at pin P1 detects movement and the pulse at P1 is set to low.
STEP 25
T-Rex Roar
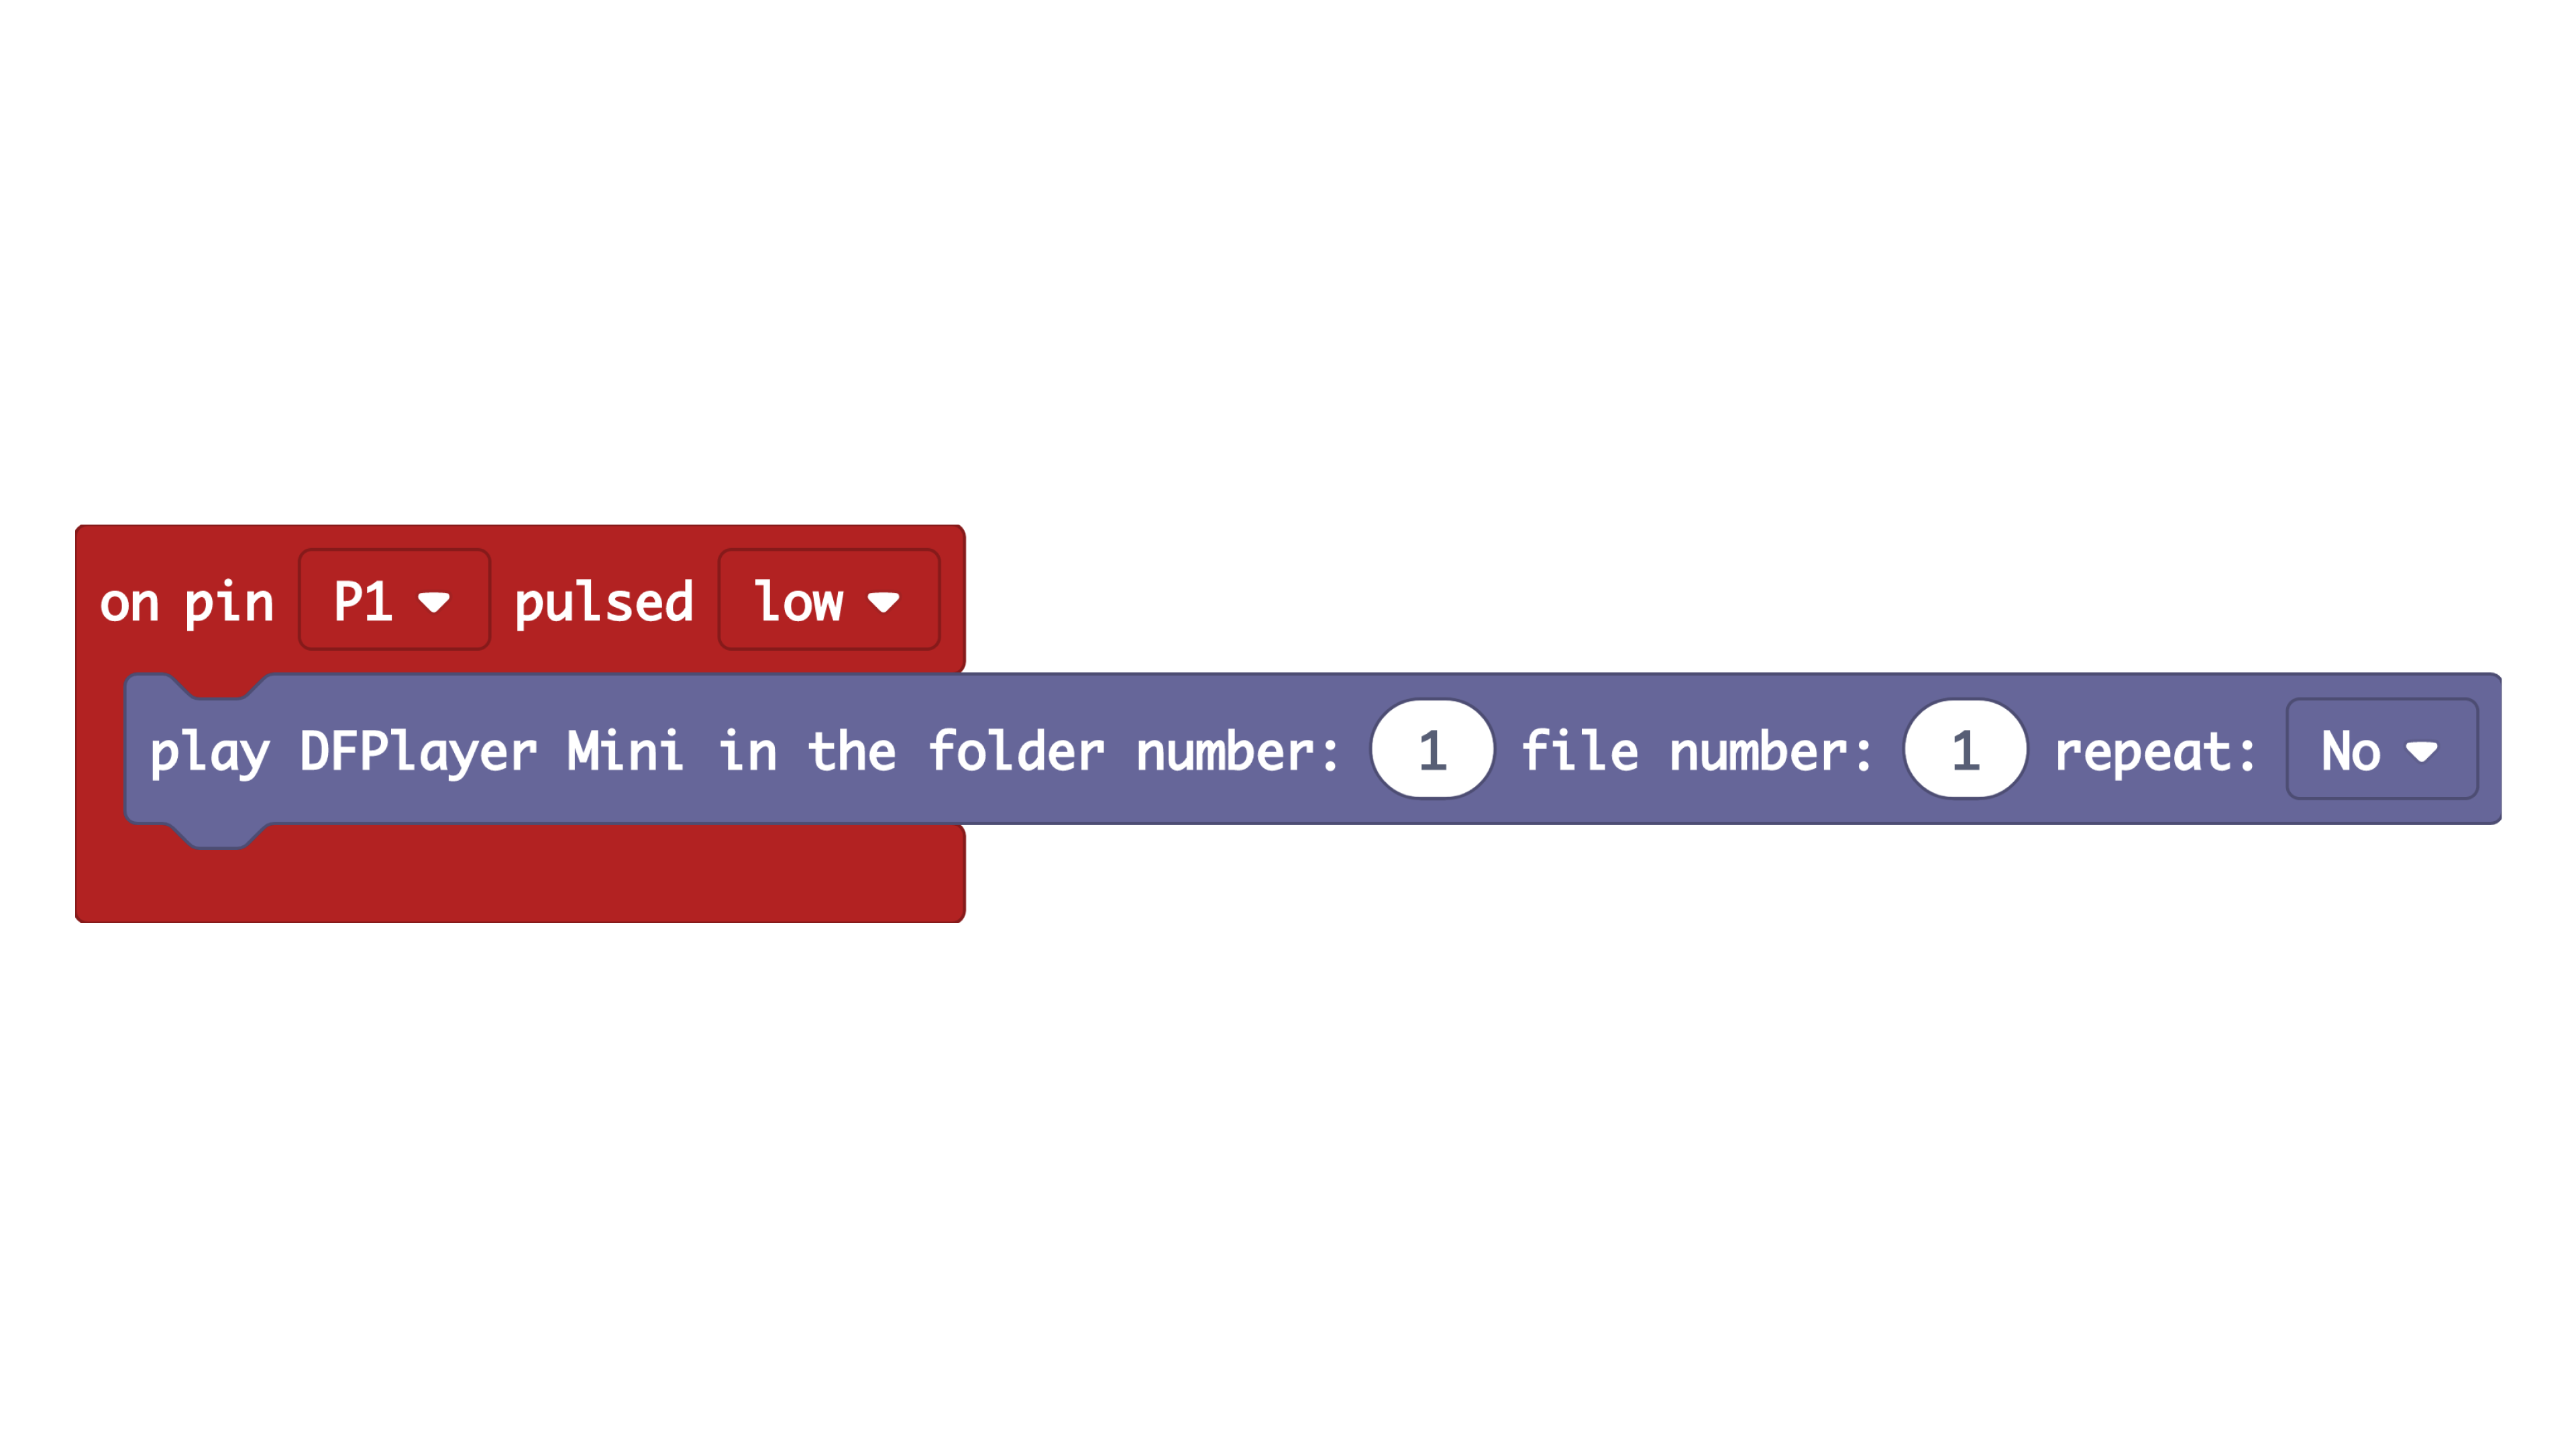
(a) Click on the ‘DFPlayer Mini’ drawer on the left, and drag out the ‘play DFPlayer Mini ...’ block.
(b) Make sure the folder number and file number are both set to ‘1’.
This will play the 1st audio file in the 1st folder of the SD card in the mp3 module, which is the t-rex roar sound.
STEP 26
T-Rex Movement
(a) Click on the ‘Loops’ drawer on the left. Drag out the ‘repeat [4] times do’ block. This is a loop that automatically repeats everything under it 4 times.
(b) Click on ‘Advanced’ drawer, and scroll down to select the ‘Pins’ drawer. Drag out the ‘servo write pin [P0] to [180]’ block, and drop it below the repeat block.
(c) Change ‘P0’ to ‘P8’, where we connected the servo, and change ‘180’ to ‘150’. This moves the servo horn to 150º (position A in step 8), opening the mouth.
(d) Click on the ‘Basic’ drawer, drag out a ‘pause (ms) block’ and change it to ‘500’. This pauses execution for half a second before moving on to the next line of code.
(e) Drag out another ‘servo write pin’ block and change ‘180’ to ‘0’. This moves the servo horn to 150º (position B referred to in step 8), closing the mouth.
STEP 27
Connecting
And we’re done with the code!
(a) Connect the microUSB cable to the top of the micro:bit.
(b) On MakeCode, click on the ‘Download’ button to download the code into your micro:bit. The flashing yellow light on the back of the micro:bit indicates that the code is being downloaded.
Powering
When the code has been downloaded,
(a) Turn the slider switch on the micro:Mate to ‘5V’.
(b) Detach the micro USB cable from the top of the micro:bit, and plug it into the top of the micro:Mate.
(c) You can keep the other end of the micro USB cable connected to your laptop.
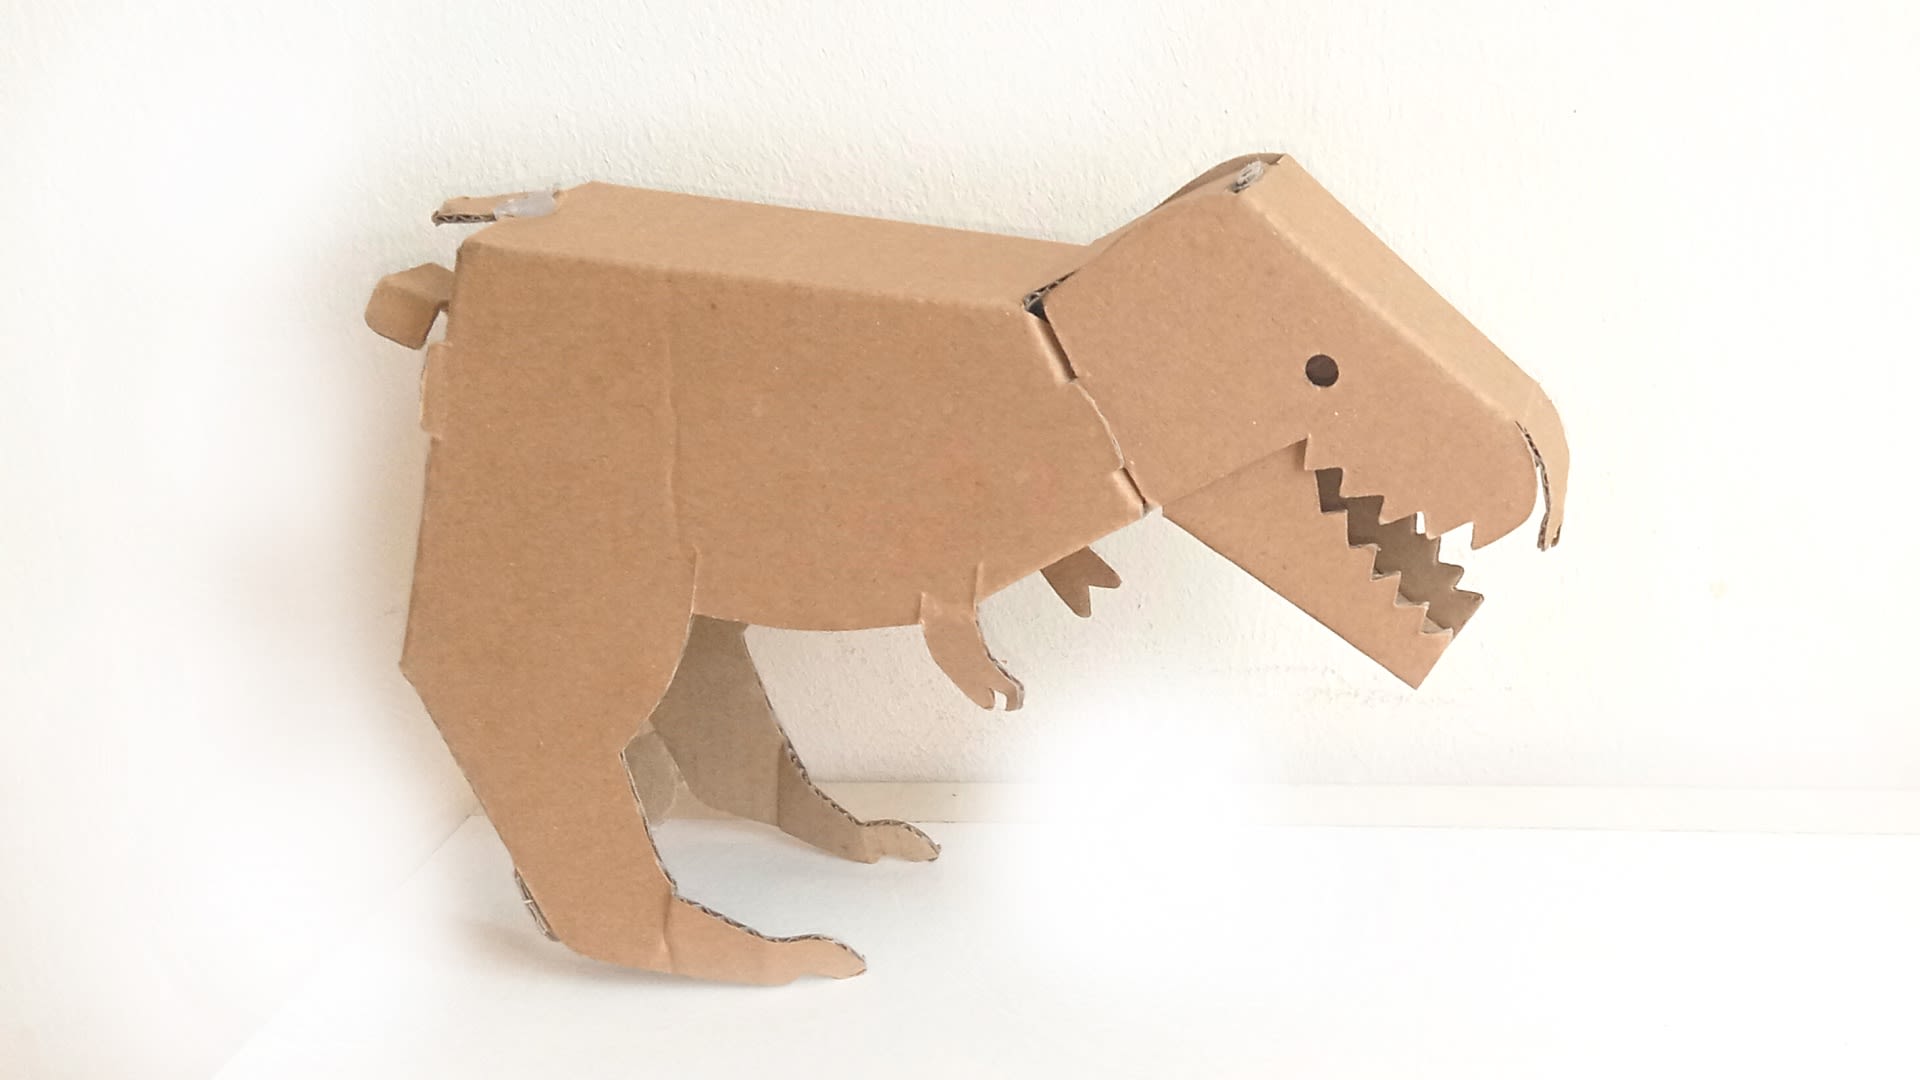
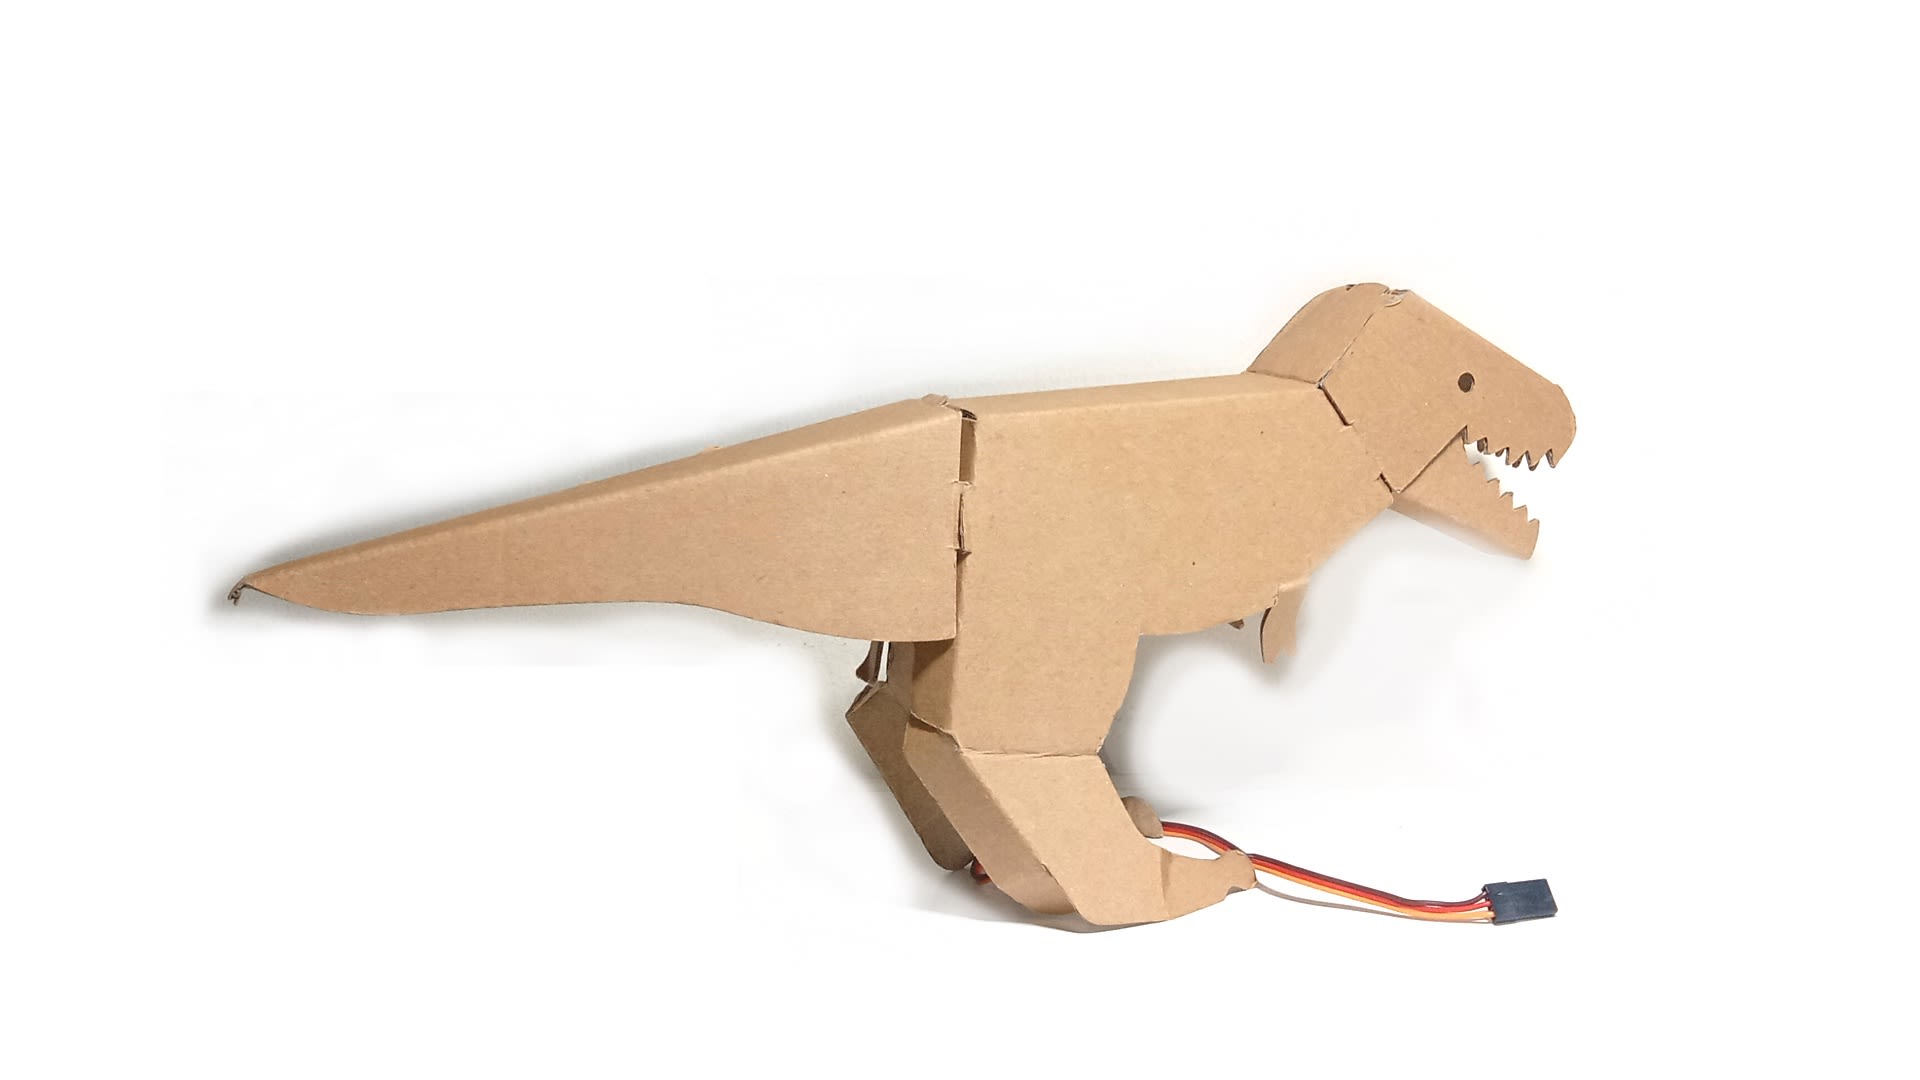
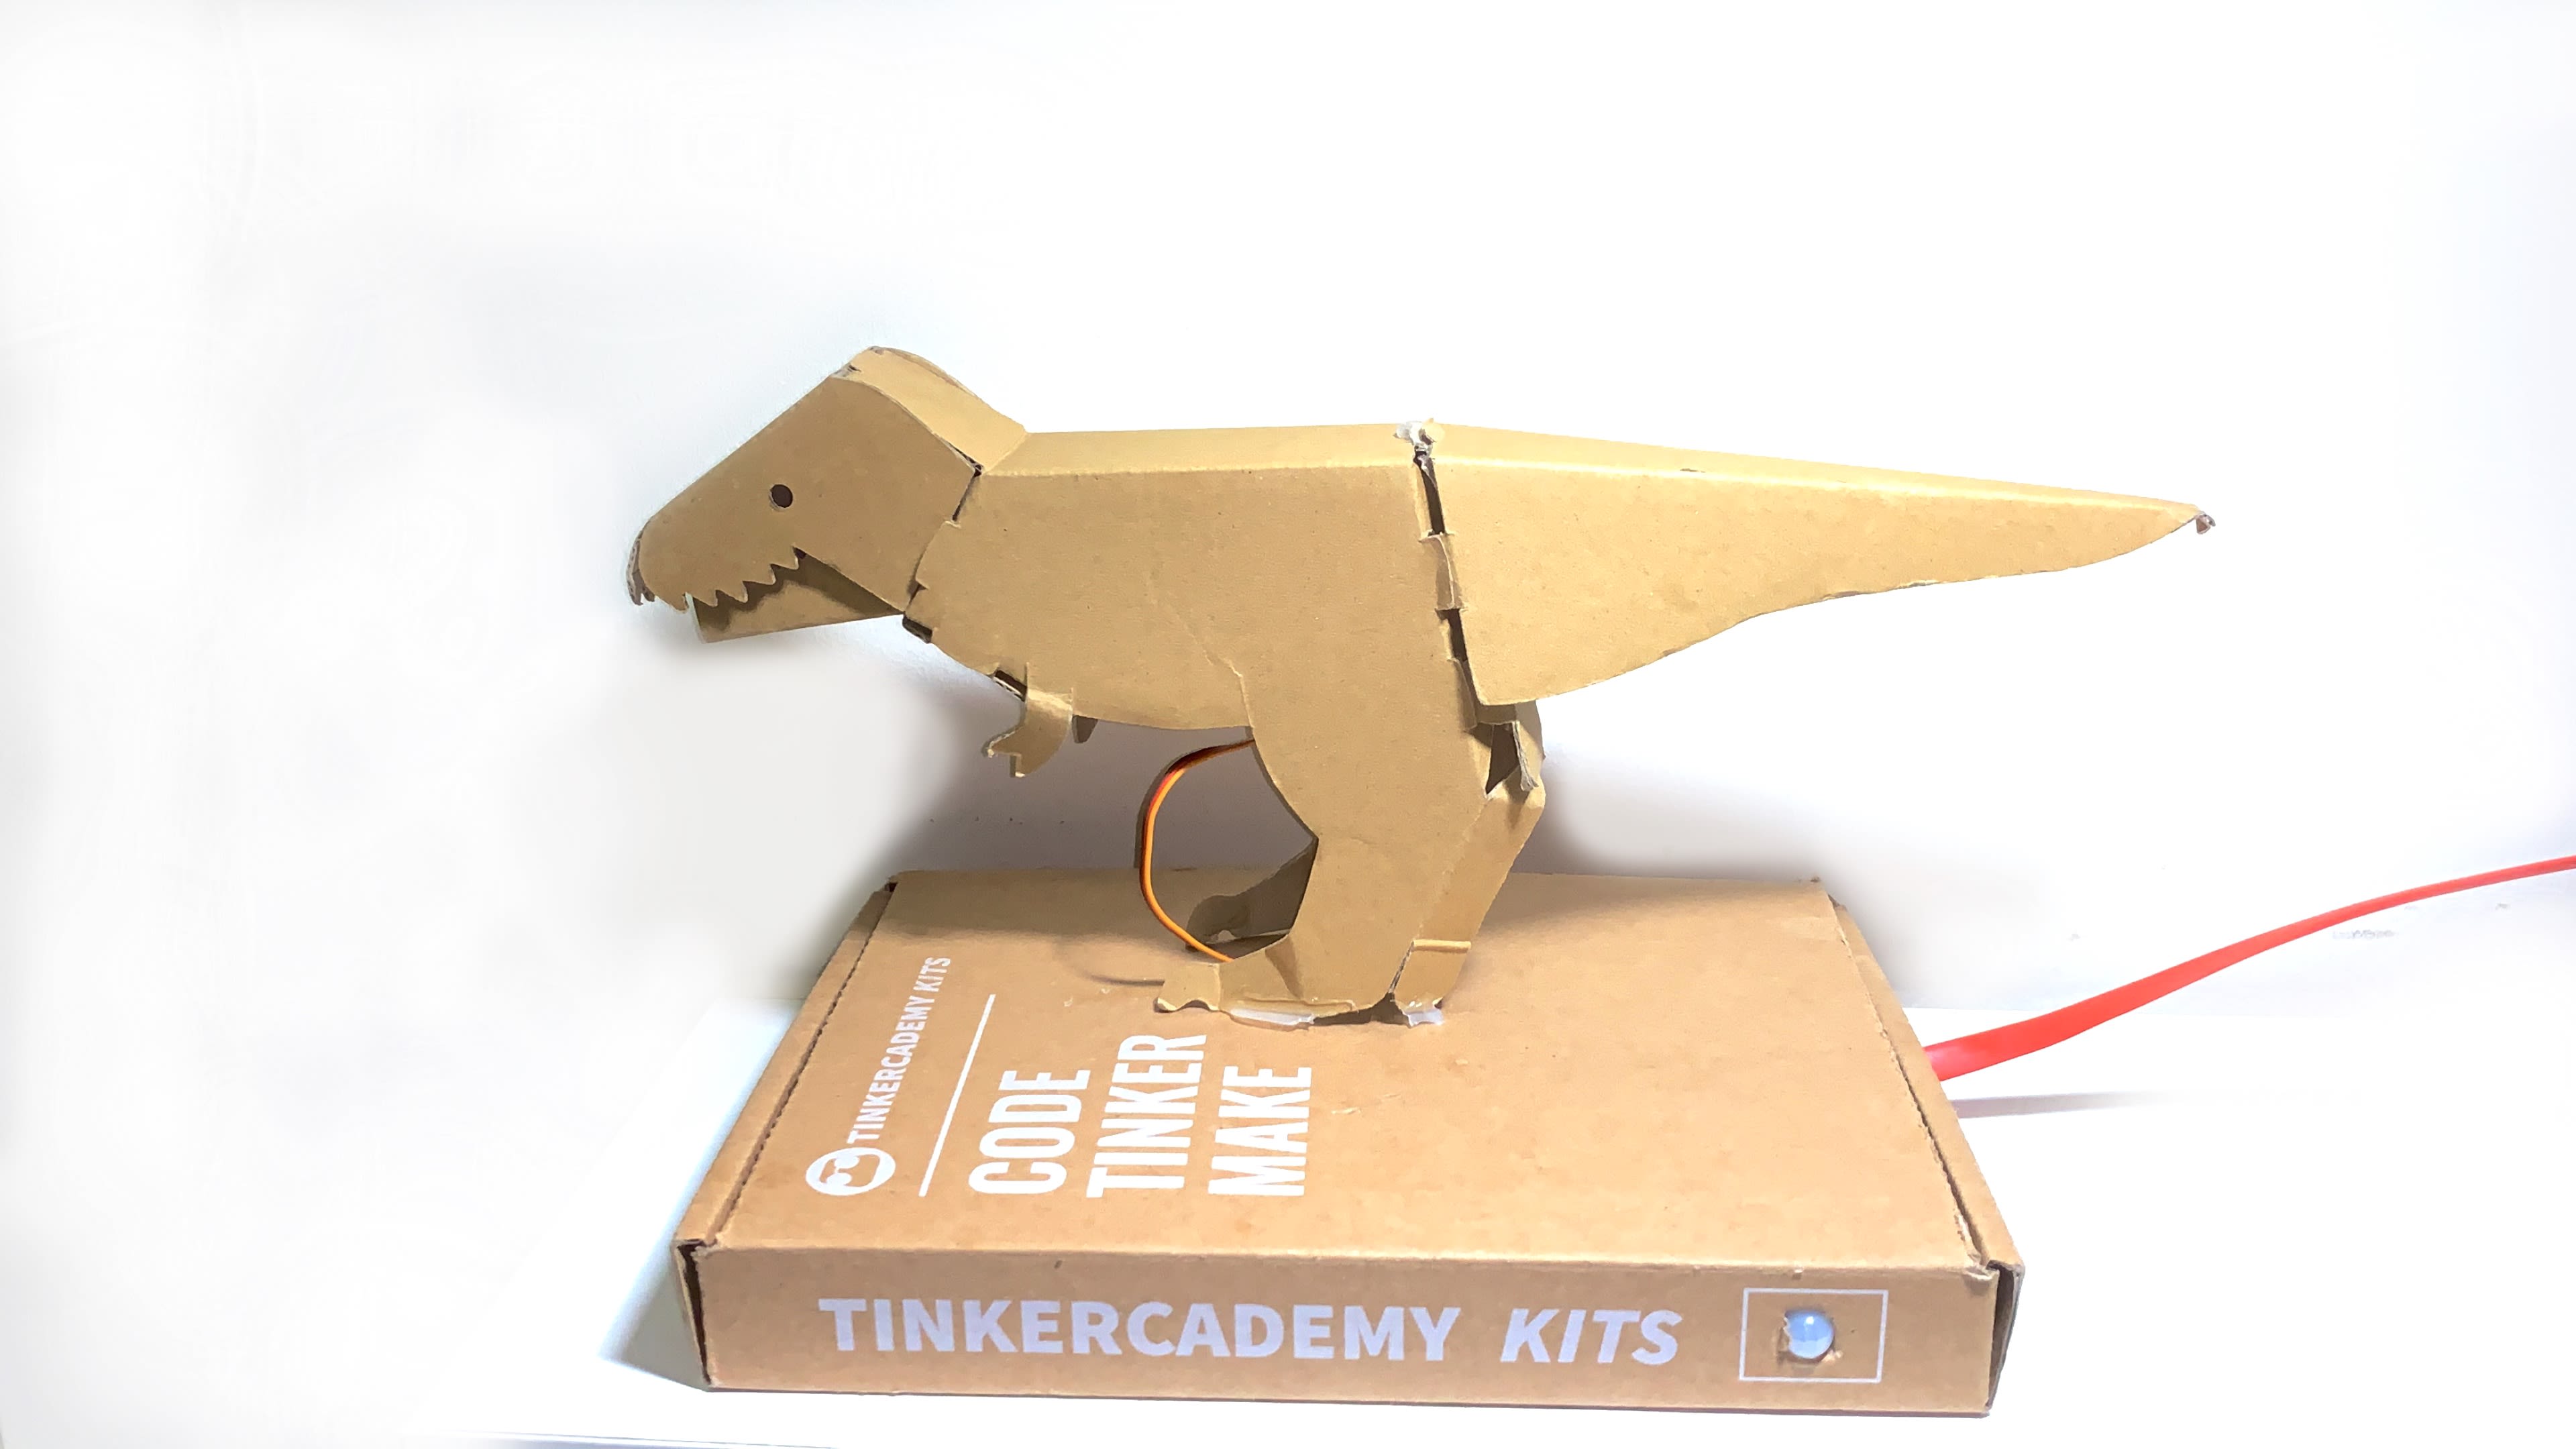
Complete
And your t-rex is good to go, congratulations!
Wave around the motion sensor and watch your t-rex move and roar. But do stay further away from your t-rex as it can be quite sensitive to movement!
Have fun playing!
STEP 28

Place your T-Rex within an artistic scene using green felt and laser-cut pieces (included in the T-Rex Tinkering Kit)
Code and References
Made this activity? Good Job! Now spread the word. Share a photo of your creation on social media with #letsgethacking #TinkeringT-Rex